
[Travelogue] 2024 San’in Wide Area Shimane Izumo Matsue Tottori Himeji Osaka Kobe 7-Day Solo Trip
Starting and ending in Okayama, first visiting San’in Shimane Prefecture (Izumo and Matsue), then Tottori, and finally returning to Himeji, Kansai, and Osaka; 7 days, 100,000 steps, covering over 1,000 kilometers by transport, exploring the San’in and Kansai regions in one trip.
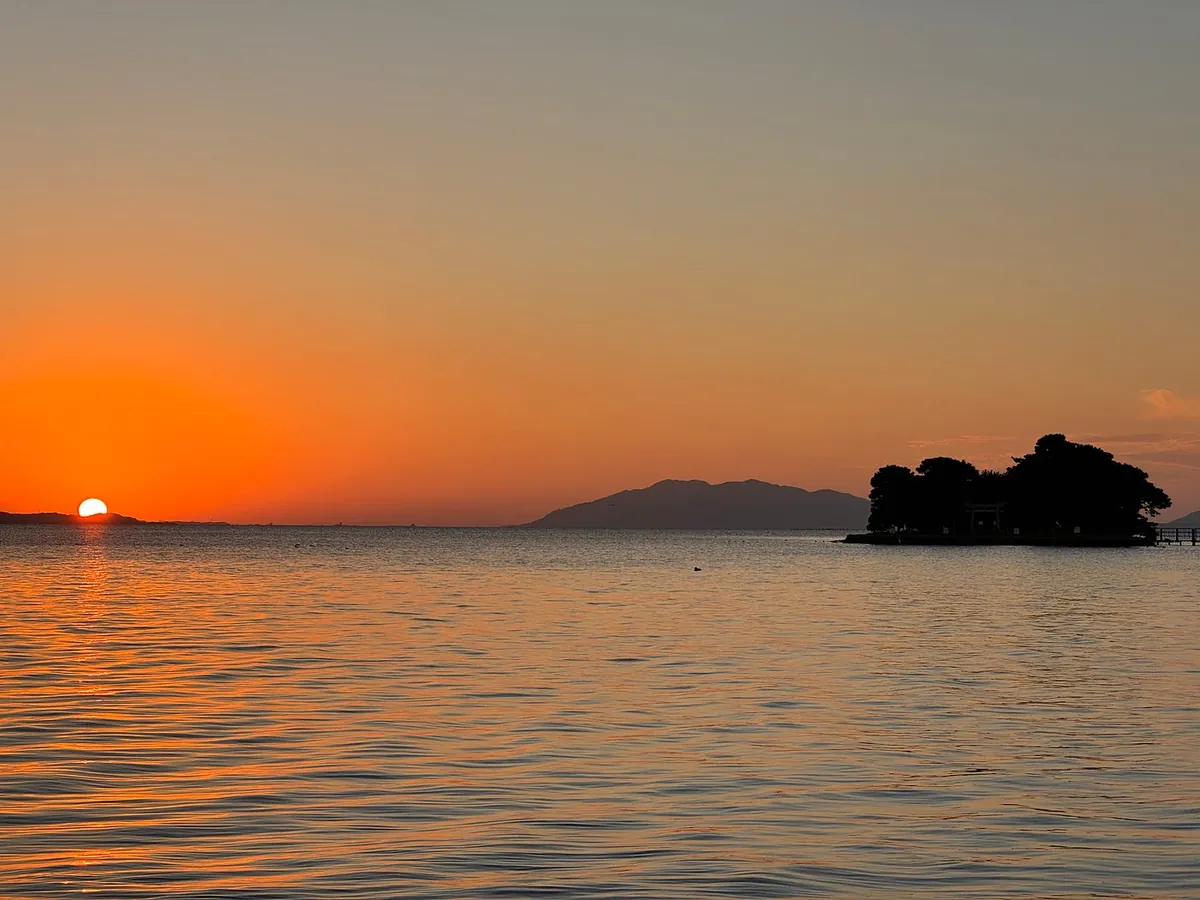
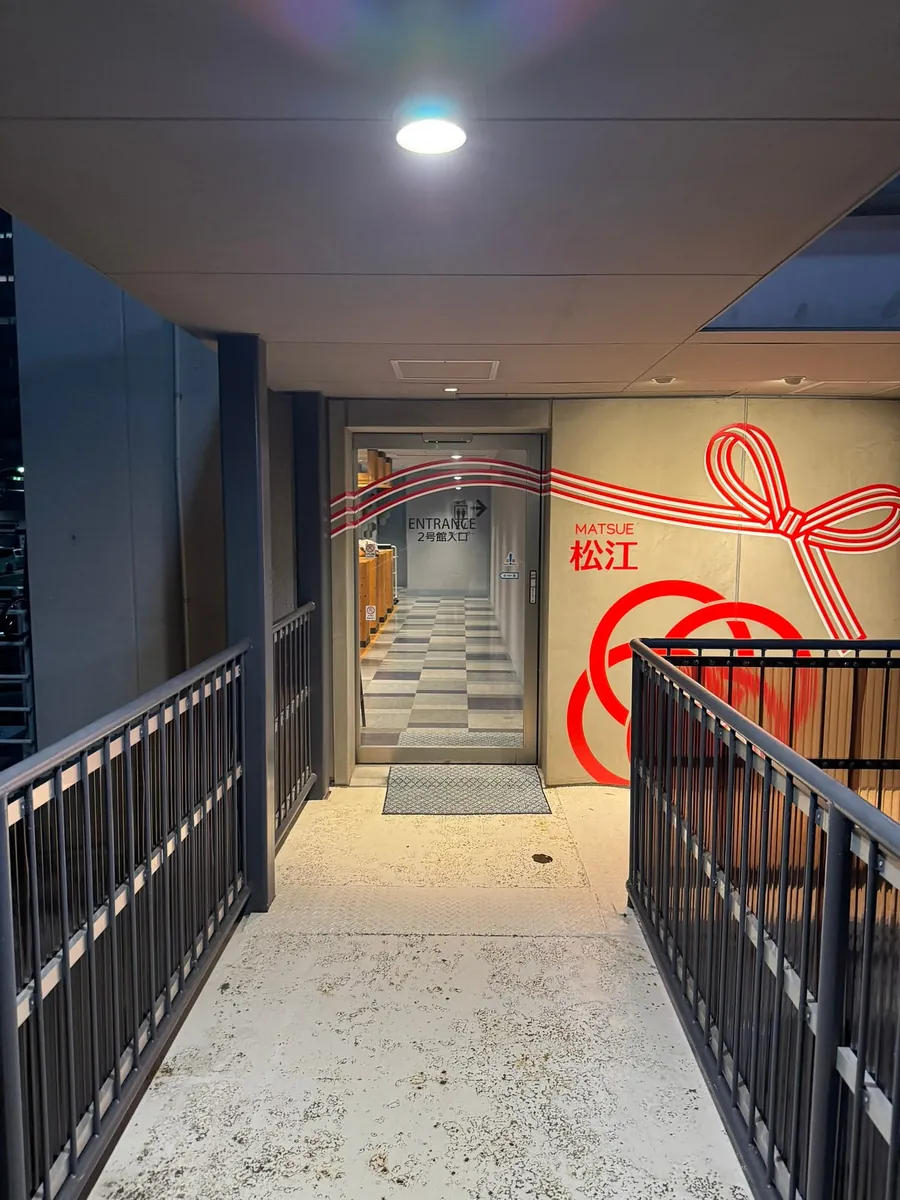
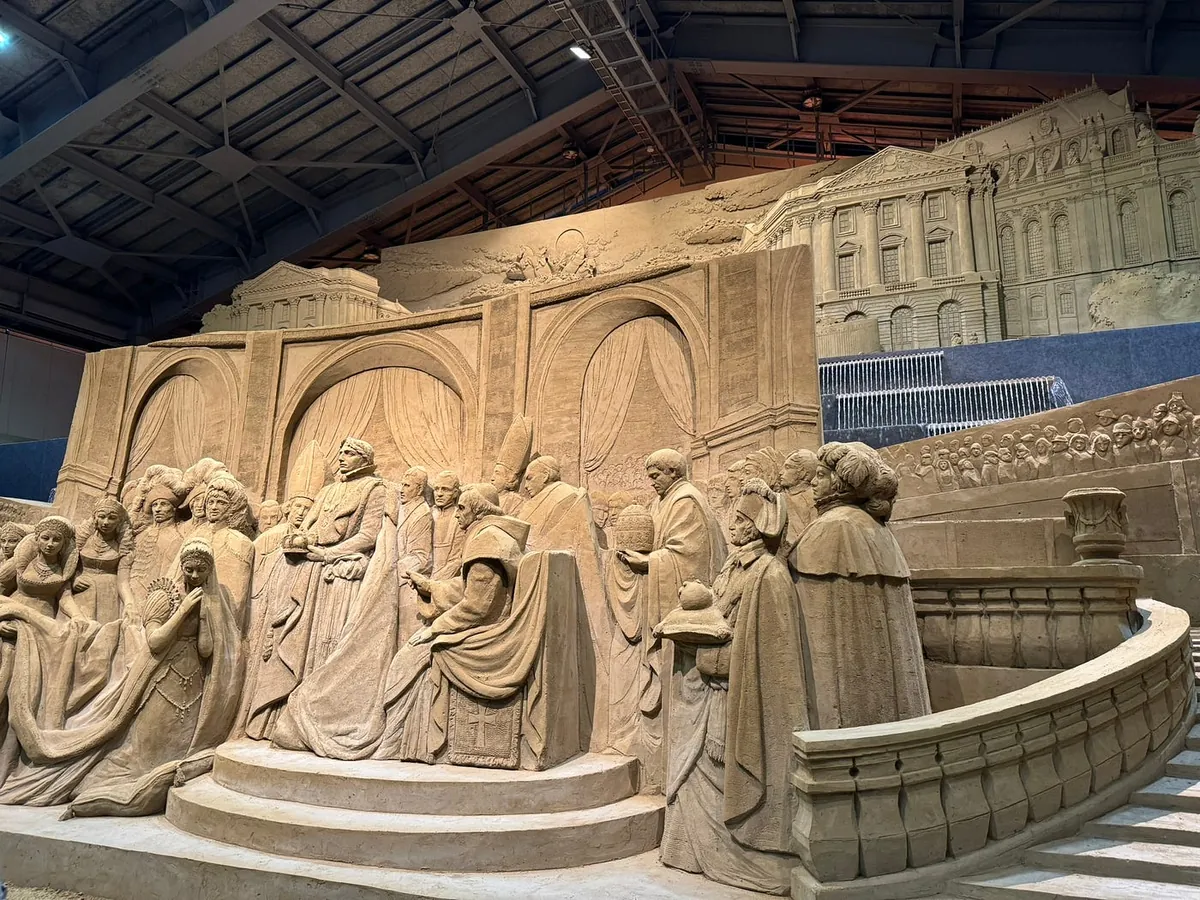
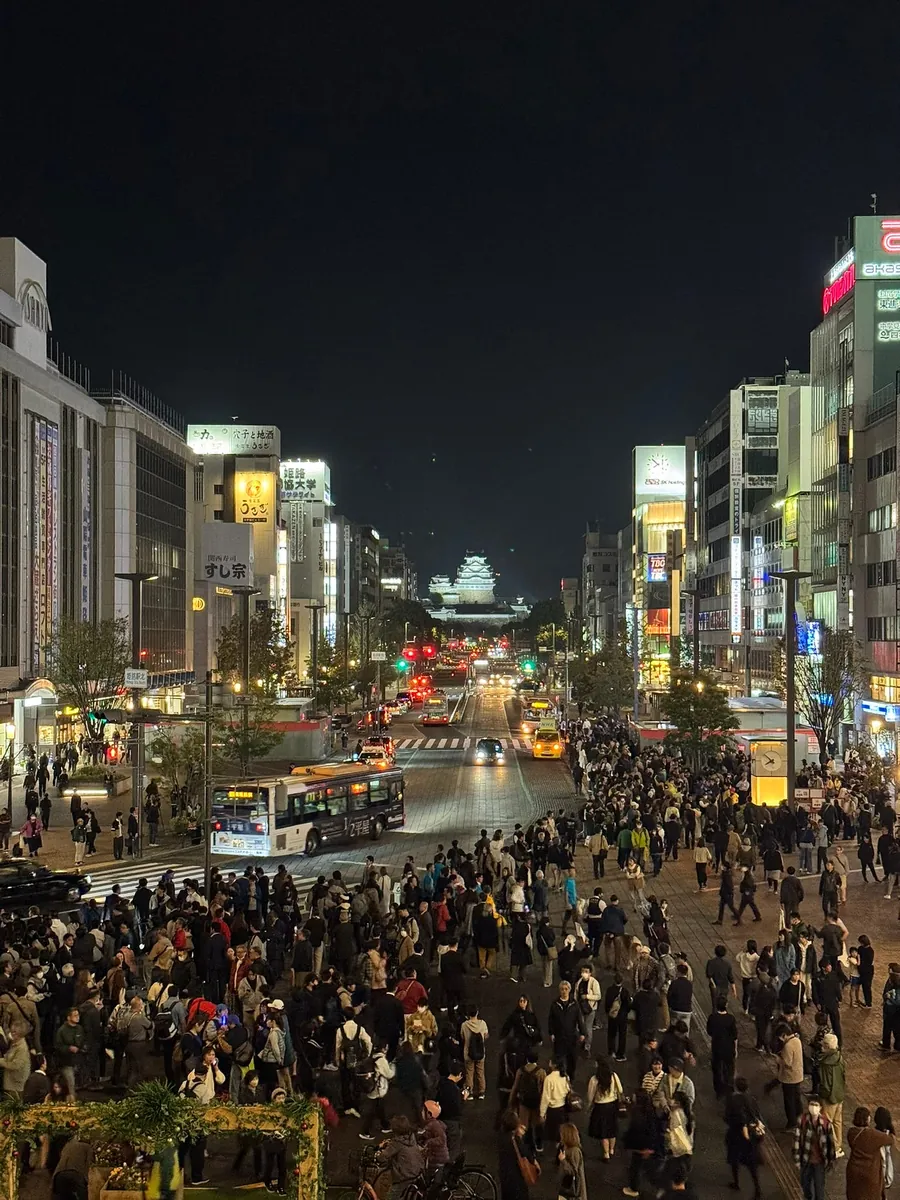
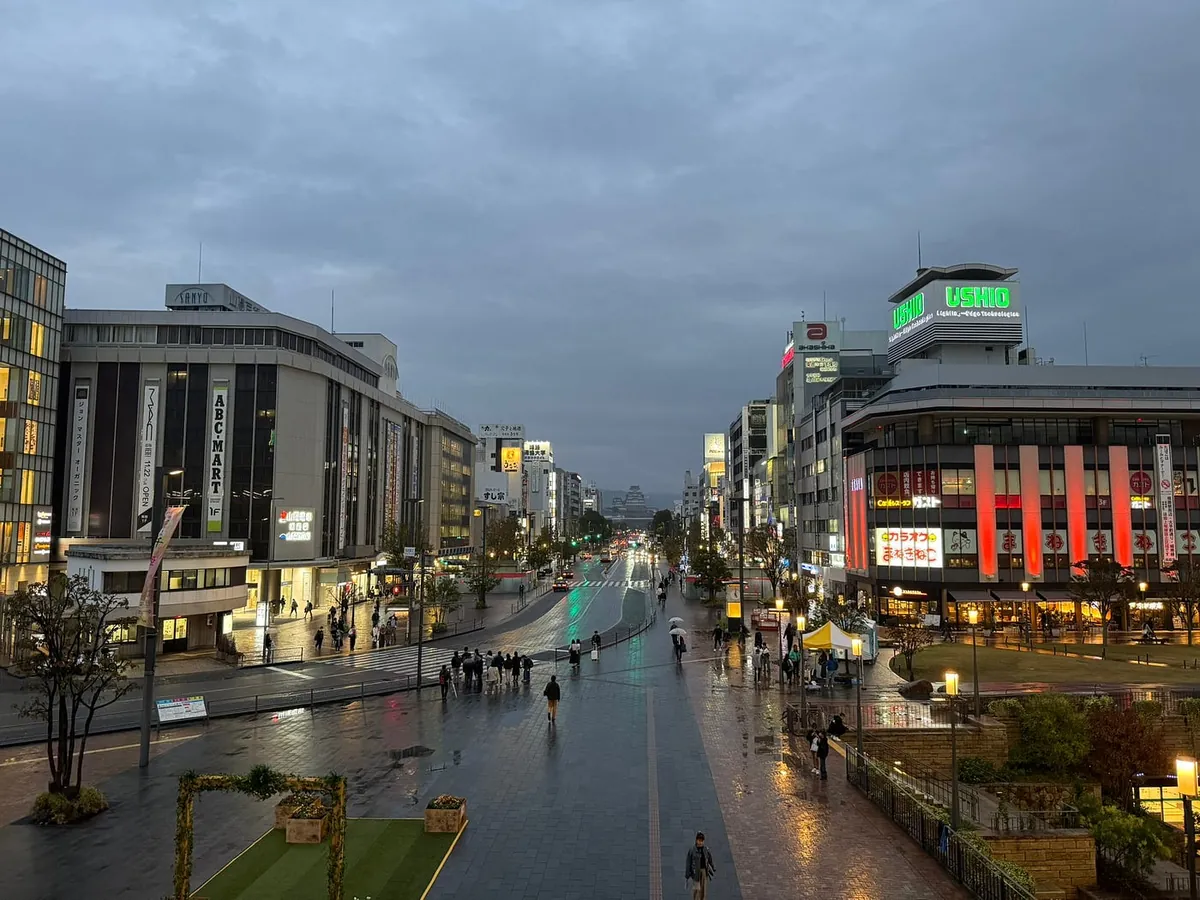
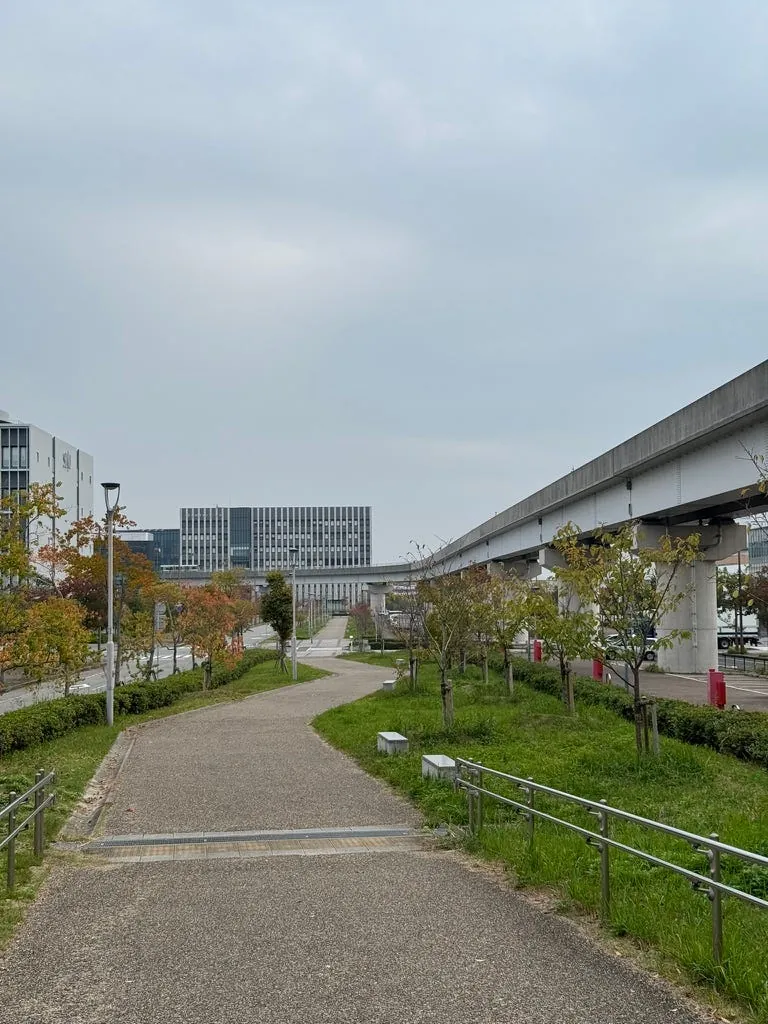
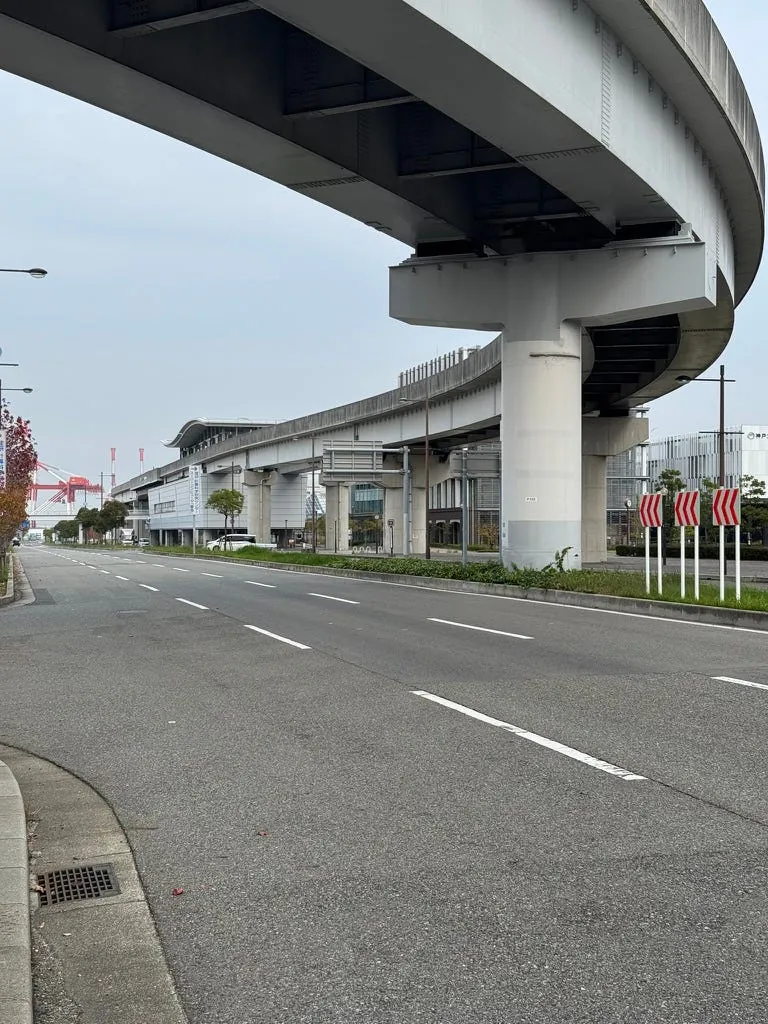
Sunset at Lake Shinji
Preface
At first, I planned to visit Sendai in the second half of 2024. However, after checking the attractions, I wasn’t very interested in going at this time. I recalled that during the same week last year (11/13–18), I took a “Sanyo Region Hiroshima Okayama 6-Day Free Trip“ and had a great impression of the Chugoku region, Sanyo, and Okayama — beautiful scenery, convenient transportation, and fewer tourists. So, I decided to explore the Sanin region (Shimane, Tottori) this time. Luckily, I had some free time from work and needed a break from recent stress, which led to this 7-day, 6-night solo trip covering Sanin and Kansai areas (Himeji, Osaka).
Preparation Work
Date: 11/12–18
This time it was another spontaneous trip. I found a free time slot in mid-October and immediately planned to depart on 11/12 and return on 11/18.
✈️Flight Tickets
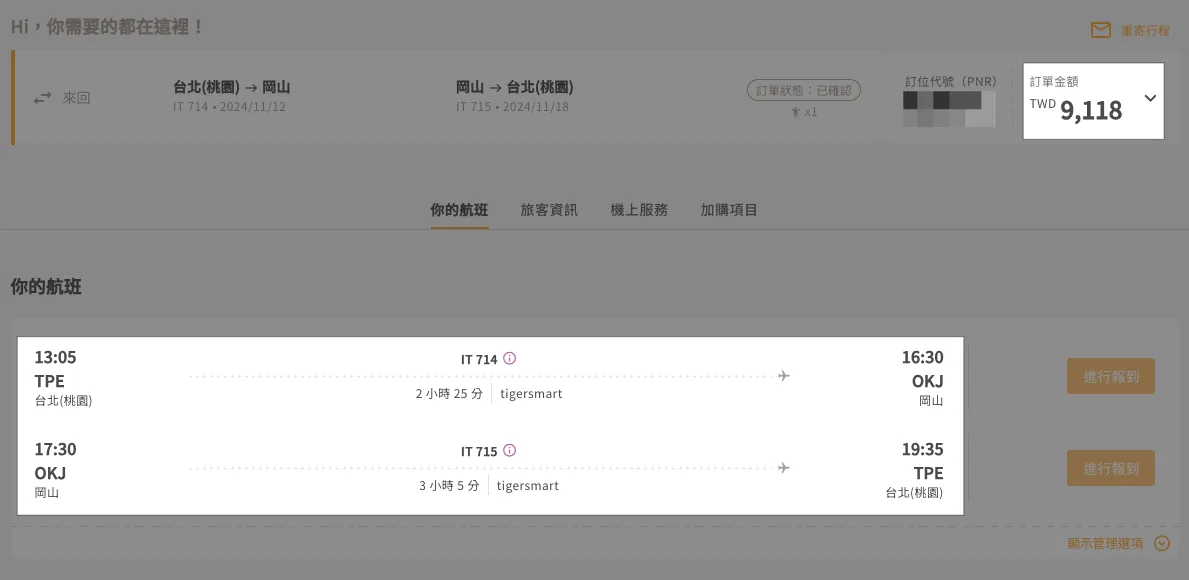
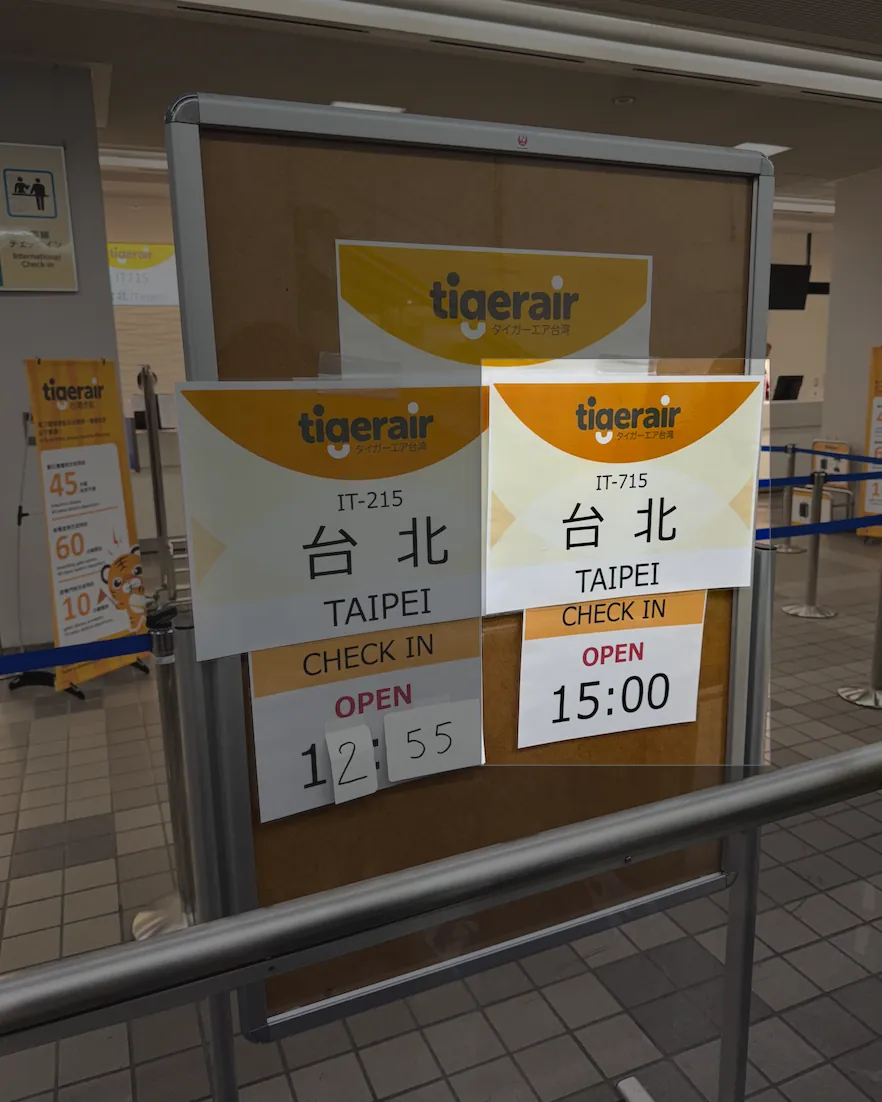
This year, I didn’t specifically rush to buy Tigerair’s autumn promo tickets. Last year, I got discounted tickets with better timing and lower prices ( Last year: Departure (11:10), Return (15:25), including 20KG checked baggage each way + seat selection + fees: NT$ 7,012 ).
-
Departure: 13:05 TPE Taipei Taoyuan International Airport -> 16:30 OKJ Okayama Momotaro Airport
-
Return: 17:30 OKJ Okayama Momotaro Airport -> 19:35 TPE Taipei Taoyuan International Airport
-
Including round-trip 20KG checked baggage + seat selection + miscellaneous fees:
NT$ 9,118
Not particularly cheap, but still acceptable. If you choose the same round-trip dates as last year, it would be even more expensive, around NT$ 12,000.
Tigerair 2025 New Direct Flight Routes
🏝️Plan
I have never been to the San’in region or Himeji, so I focused on these three places.
-
11/12 Arrived in Okayama in the evening, stayed one night to prepare for the trip to Shimane the next morning
-
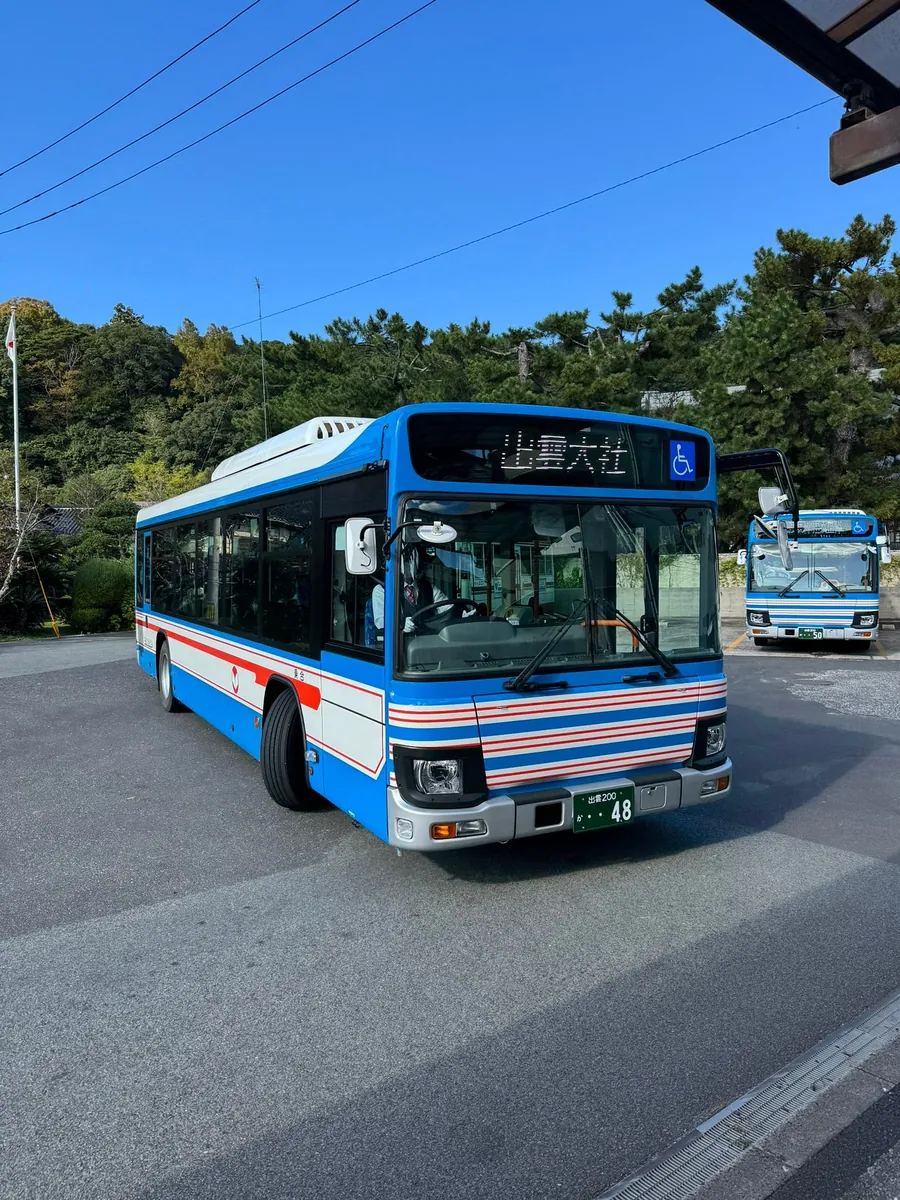
11/13 Early morning, took the JR train to Shimane. First visited Izumo Taisha and Inasa Beach, then headed to Lake Shinji in the late afternoon to watch the sunset.
-
11/14 Morning: Matsue Castle and Matsue Horikawa Boat Tour; Afternoon: Adachi Museum of Art; Evening: Arrived in Tottori
-
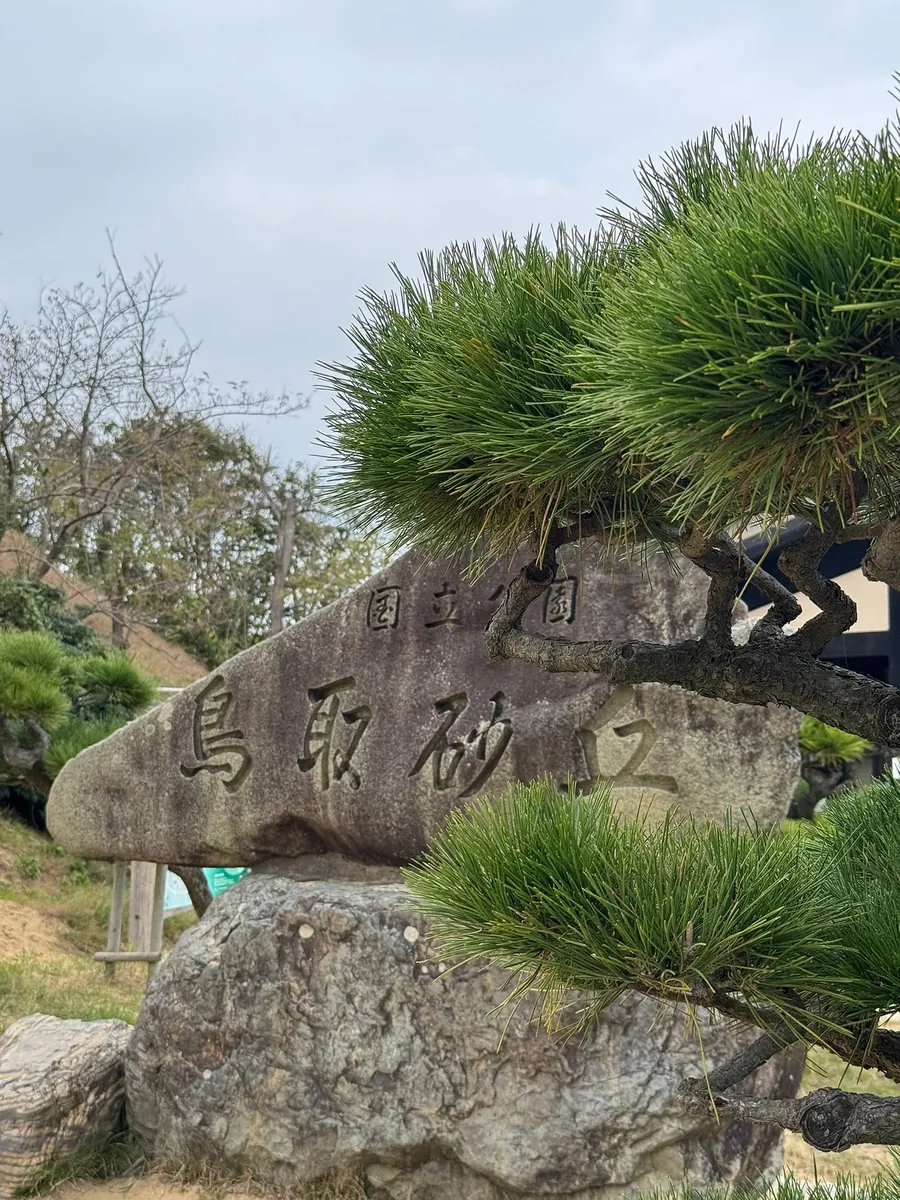
11/15 Morning at Hakuto Shrine, afternoon at Tottori Sand Dunes, evening arrival in Himeji
-
11/16 Himeji Castle and shopping in Himeji City
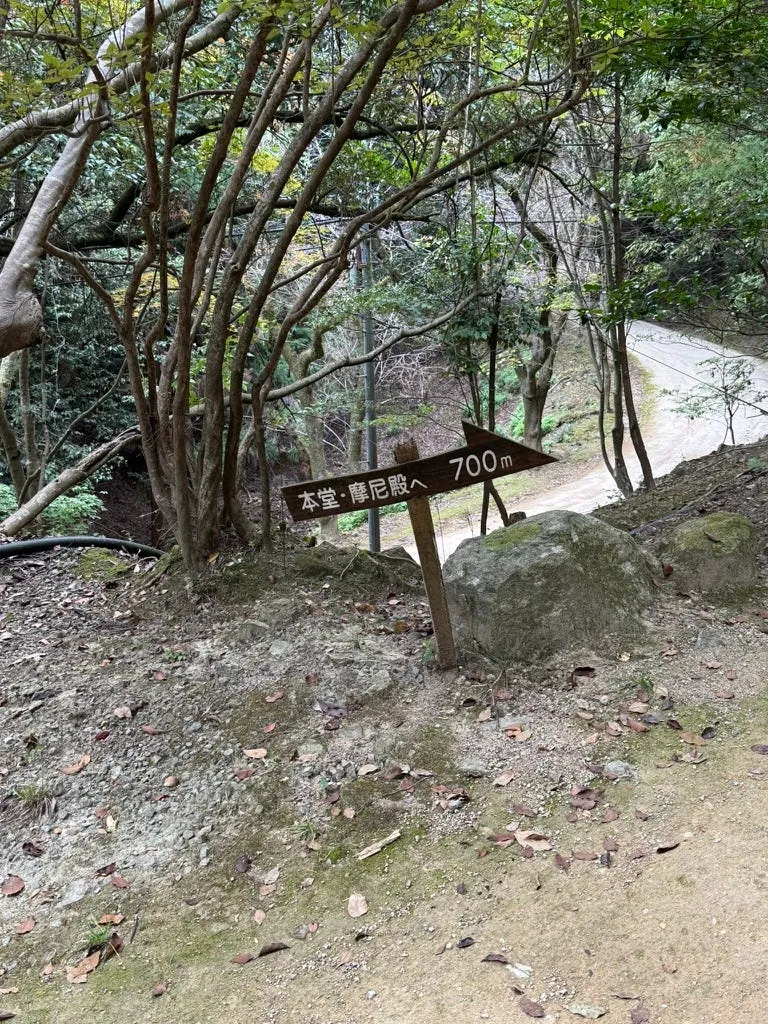
Actually visited more: Shosha-san Engyo-ji Temple -
11/17 Onaruto Bridge Walkway Uzunomichi, Naruto Whirlpools, Akashi Kaikyō Bridge
Due to bad weather, we didn’t go and instead went shopping and eating in Osaka and Kobe. -
11/18 Shopping at Okayama Station and return trip
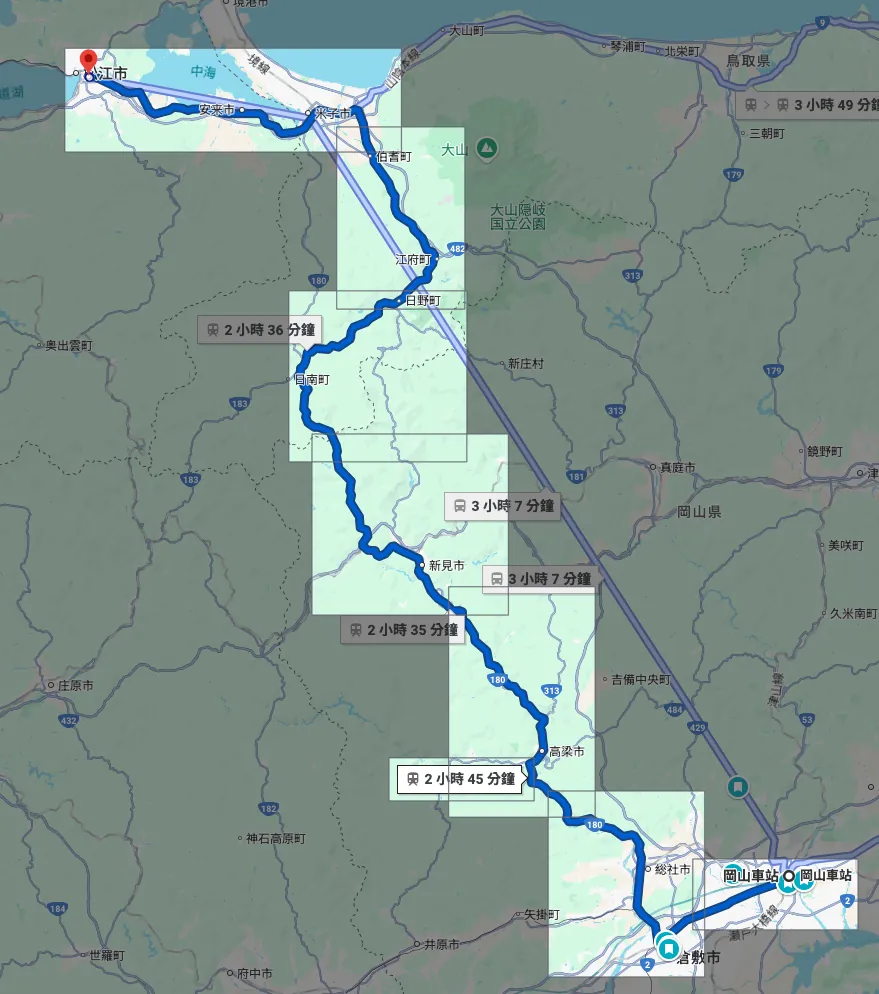
🚅 Transportation - Japan JR PASS|Kansai & Sanin Area Rail Pass|eMCO E-ticket
This trip also involved long-distance travel, so buying a JR Pass was a must. I initially worried there would only be passes for San’in or Sanyo, but JR Japan thoughtfully planned all possible routes. The “Kansai & San’in Area Rail Pass JRPass” was just perfect for me!
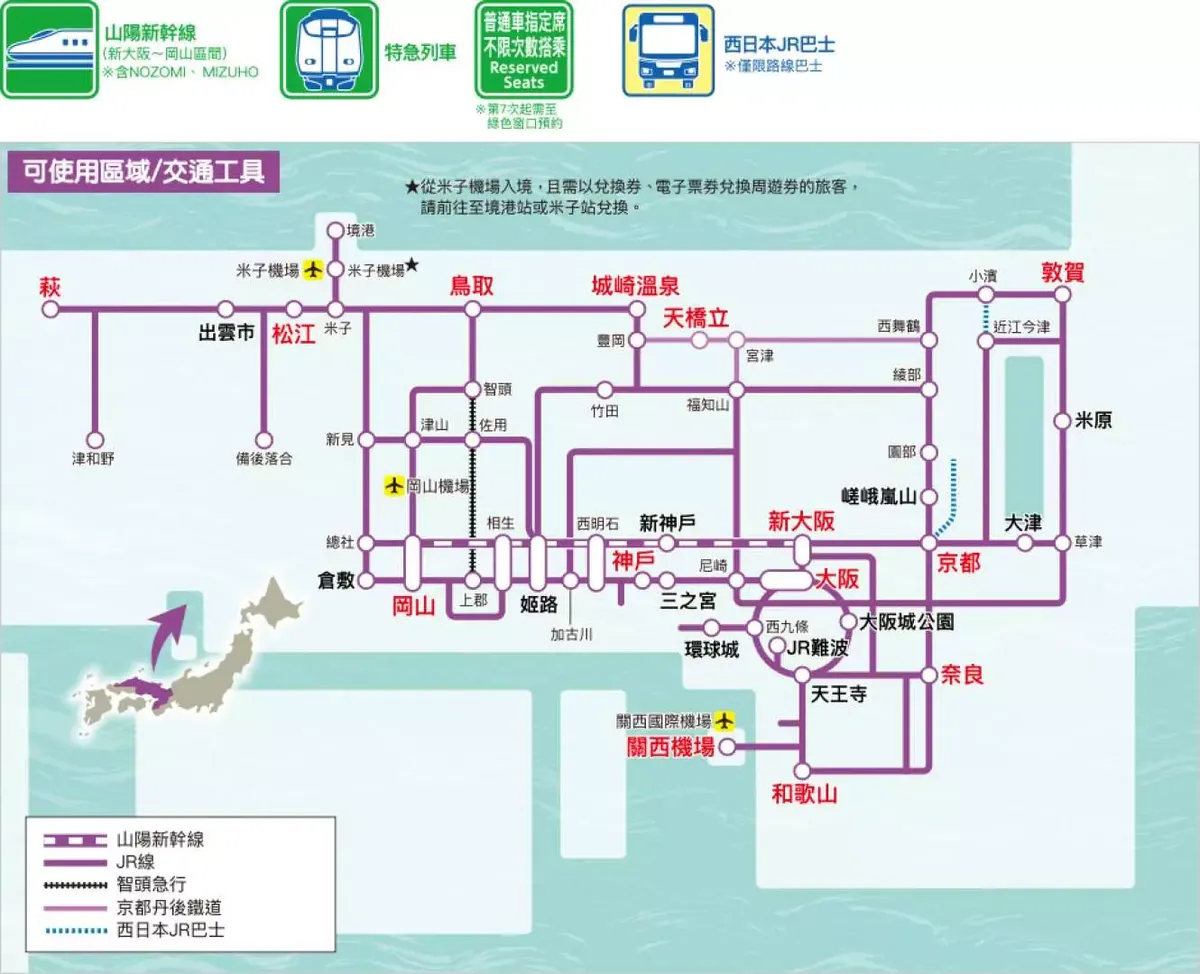
Kansai & Sanin Area Rail Pass JRPass Usage Scope
- Price:
NT$ 3,779Includes an extra San’in-Sanyo Area Pass 3-Day Ticket (Great value when used together)
📱Internet
This time, I also purchased the “Japan eSIM|Daily High-Speed, Total Volume, Unlimited Data Plan|65% Off” from KKday.
-
7-Day Unlimited Data eSIM Plan
-
Price:
NT$ 847
In actual use, it works very well, is stable, and I did not encounter any speed throttling or disconnection issues.
The eSIM activation method and important notes will be included in the article. Please continue reading.
Japanese Yen
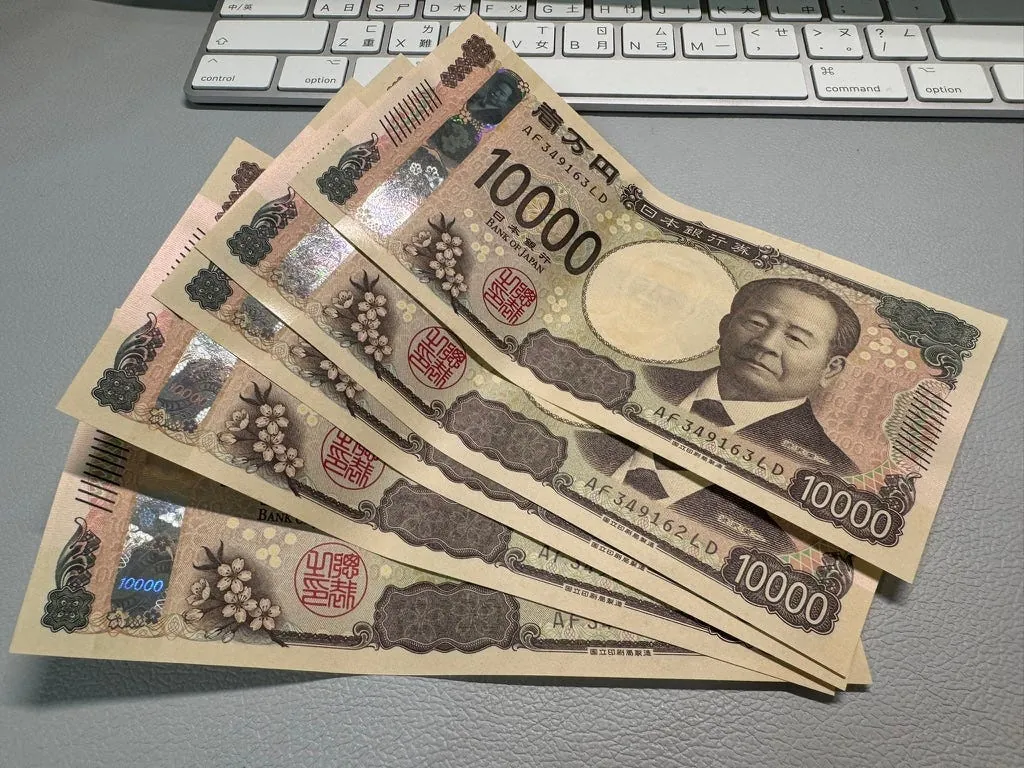
Exchanged for new Japanese yen bills.
It is recommended to bring both new and old bills, as some vending machines do not accept new bills.

Vending machines that accept new bills
🏠 Accommodation
This time, I was lucky to book all accommodations except for one night in Matsue, where I couldn’t get a room at Toyoko Inn.
11/12 Toyoko INN Okayama Station East Exit (One night)
It’s a 4-minute walk from Okayama Station.
-
Non-smoking twin room, occupancy: 1 person
-
Price:
NT$ 1,616
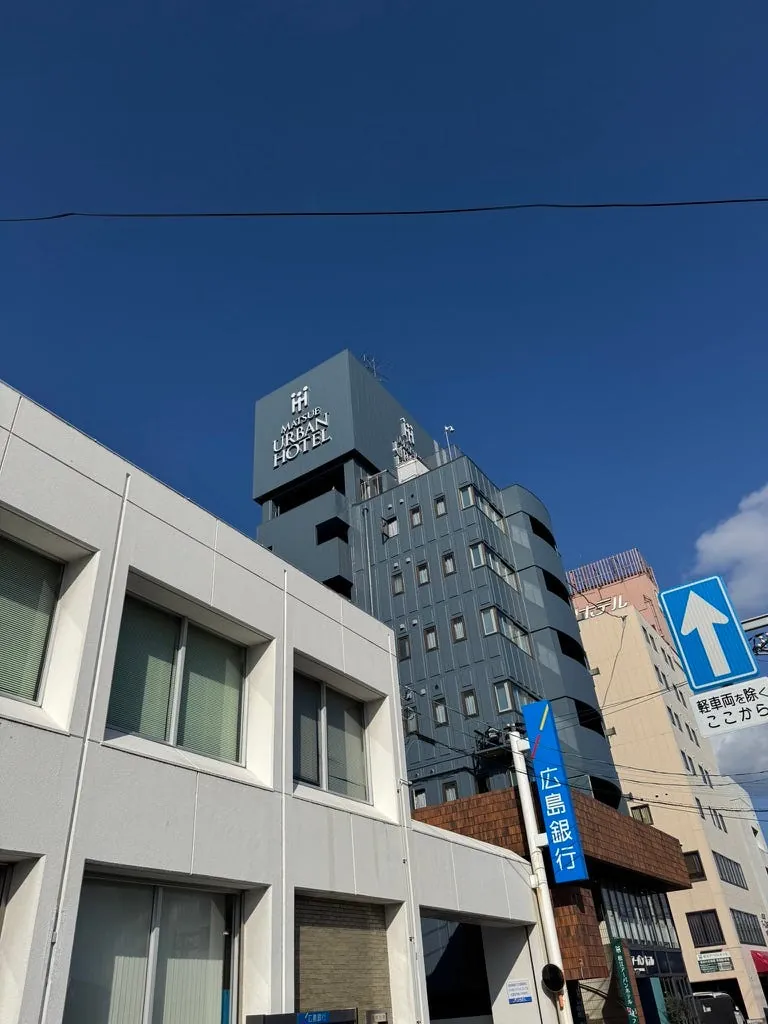
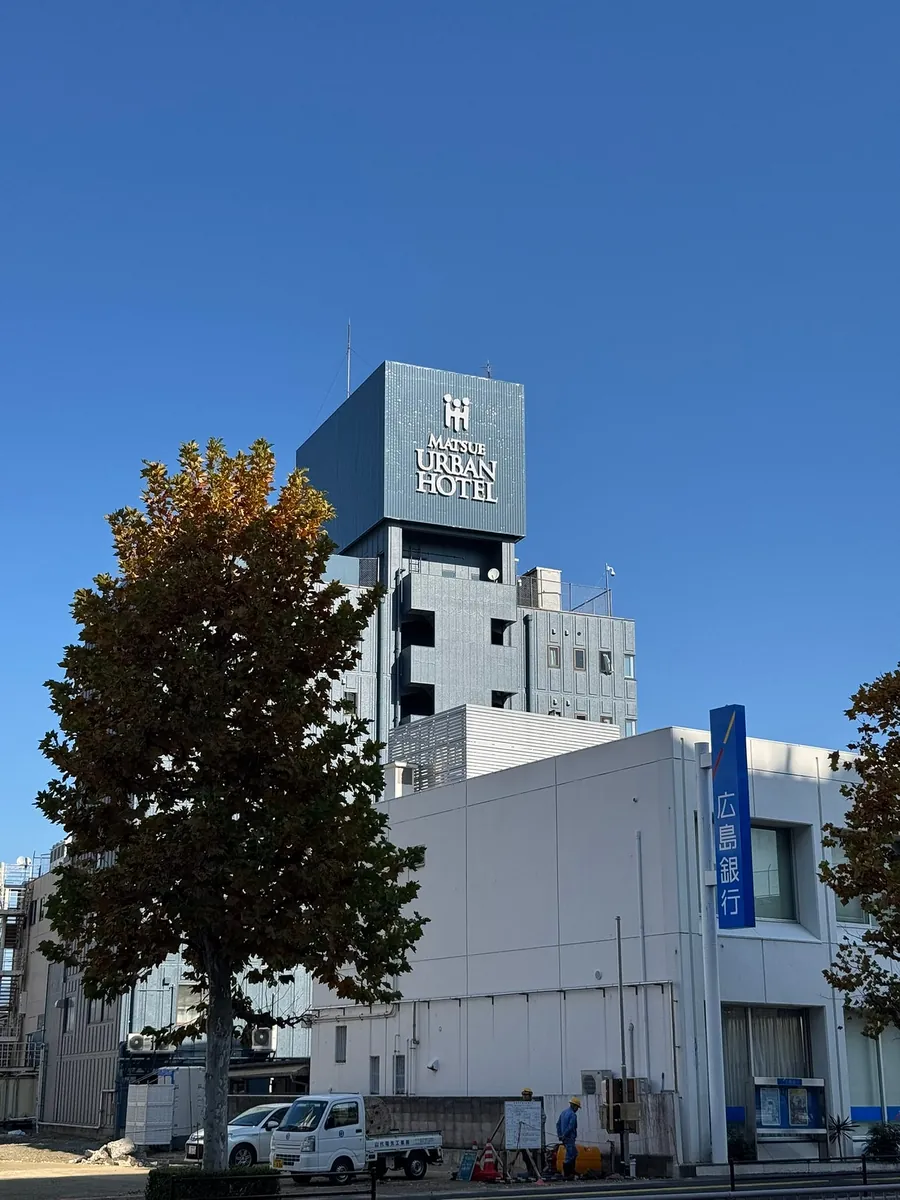
11/13 Matsue Urban Hotel (One night)
It takes only 2 minutes to walk from Matsue Station exit.
-
Double Room with Small Double Bed — Non-Smoking — Building 2
Occupancy: 1 person -
Price:
NT$ 2,431
11/14 Toyoko INN Tottori Station South Exit (One night)
It takes a 4-minute walk from Tottori Station exit.
-
Non-smoking double room, occupancy: 1 person
-
Price:
NT$ 1,595
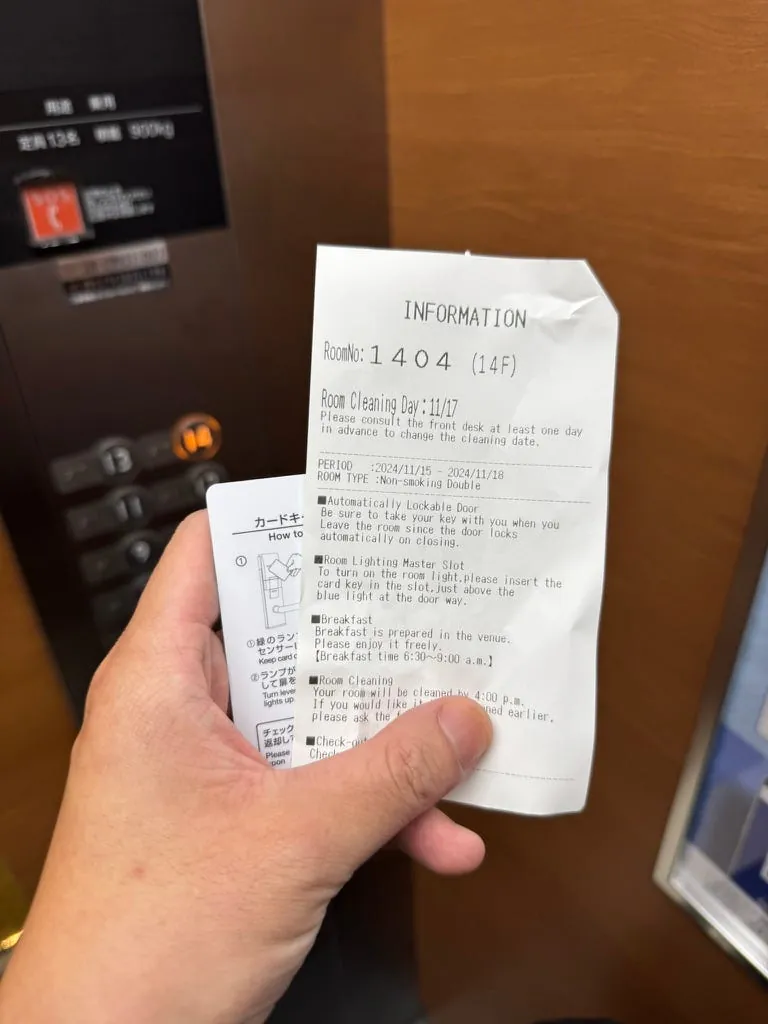
11/15 Toyoko INN Himeji Station Shinkansen North Exit (3 nights)
It takes a 5-minute walk from Himeji Station exit.
-
Non-smoking double room, occupancy: 1 person
-
Price:
NT$ 6,055,NT$ 2,018/ night
Although I managed to book Toyoko Inn for almost all nights, some nights only had double rooms left due to late booking, so the price was higher. If I had booked a single room, the price could have been kept under NT$1,500 per night. However, based on past experience, even double rooms tend to sell out near the date, possibly because the location is less visited?
The room unboxing video will be included in the article; please continue reading.
—
Visit Japan The only change from before is that the “Immigration Inspection” and “Customs Declaration” QR codes have been combined into a single “Immigration and Customs Declaration QR Code,” with no distinction between blue or yellow codes.
Tigerair Online Self Check-in
You will receive a trip notification email from Tigerair 1 to 3 days before departure. Be sure! Be sure! Be sure! to complete the online “self check-in” before departure:
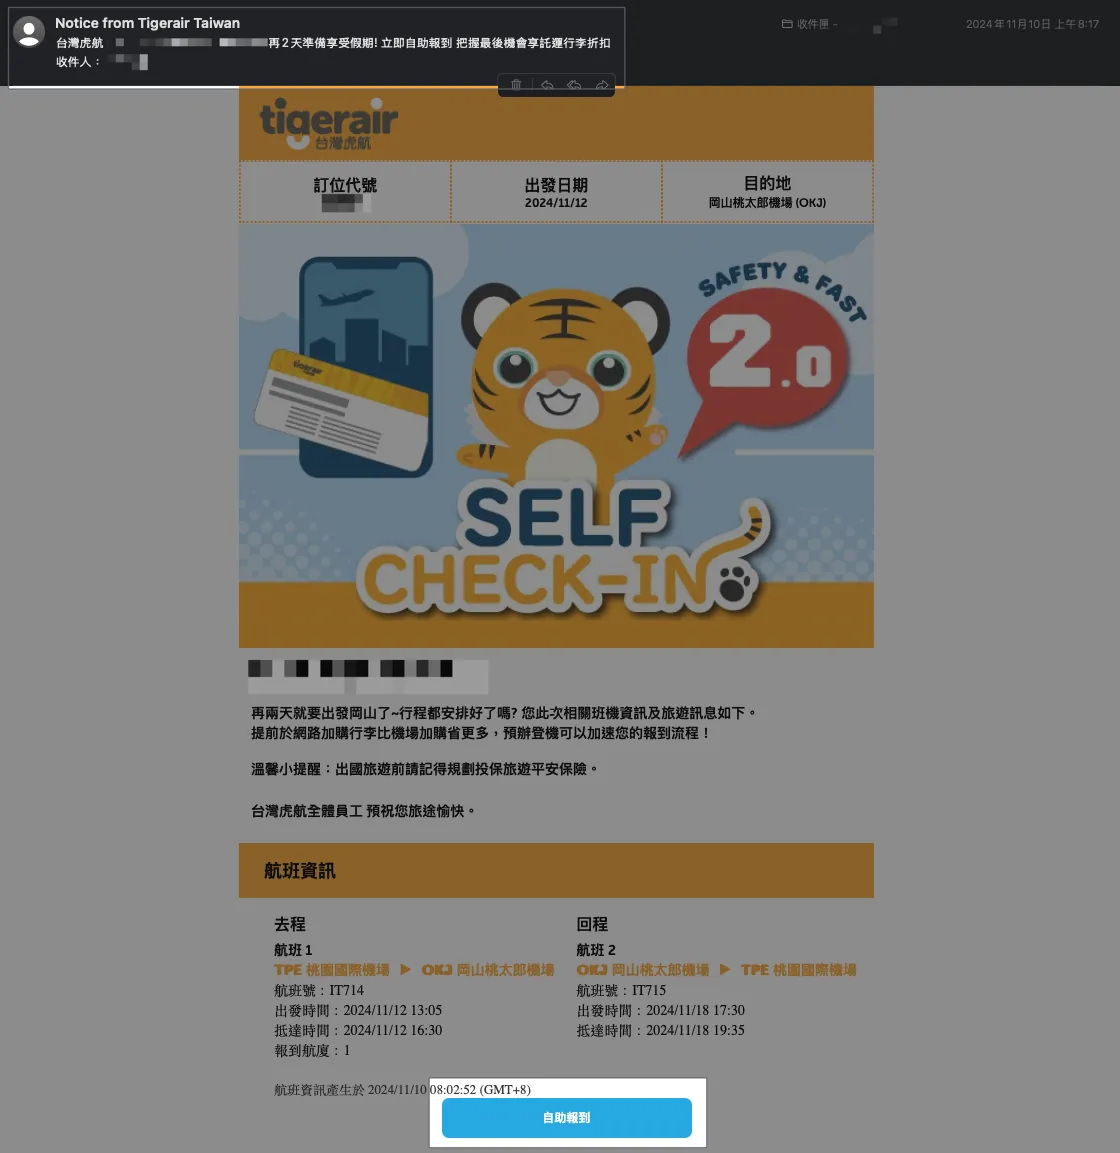
Clicking self check-in will redirect you to the Tigerair website to confirm passenger details and baggage safety, then the boarding pass will be generated and sent.
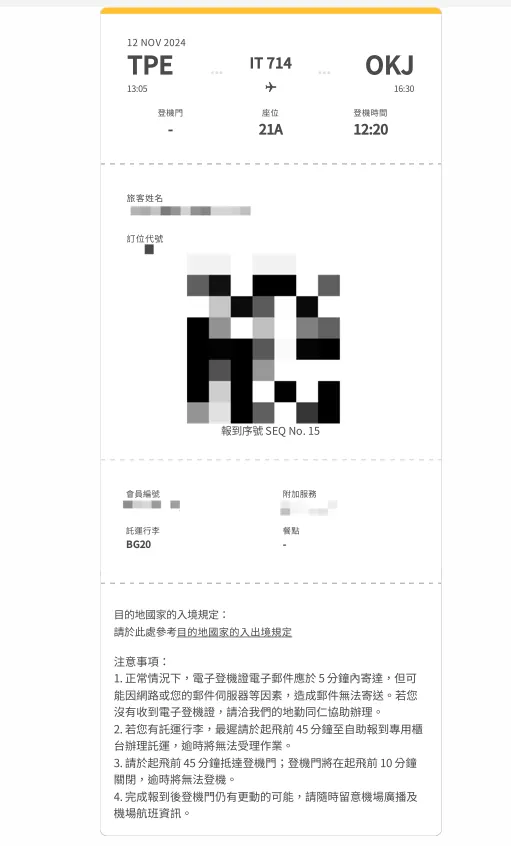
Keep your boarding pass safe. With it, you can go straight to the “Self-Service Baggage Drop” at the airport to check in your luggage without waiting in the long “Regular Check-in” lines.
Let’s go! Departure!
KKday Promotion 🛒
-
Japan JR PASS \| Tottori & Matsue Area Pass \| eMCO e-ticket (Consider this if you only visit Matsue and Tottori-Matsue areas)
-
Kansai & San’in Area Rail Pass JRPass (The best choice for arriving and departing from Okayama Airport)
-
Japan eSIM Card|Daily High-Speed, Total Data, Unlimited Data Plans
-
Japan JR PASS|Sanyo & Sanin Area Rail Pass|eMCO e-Ticket (Explore the entire Sanyo and Sanin regions in one go)
-
Tottori Sand Dunes \| Japan’s Only Thrilling Sandboarding Experience
-
Tour Tottori Sand Dunes and the Famous Izumo Taisha 2-Day Bus Trip (From Osaka)
-
New Year Visit! 3-Hour Stop at Izumo Taisha Shrine 【Departing from Hiroshima】
Day 1 (11/12 Tuesday) Departure
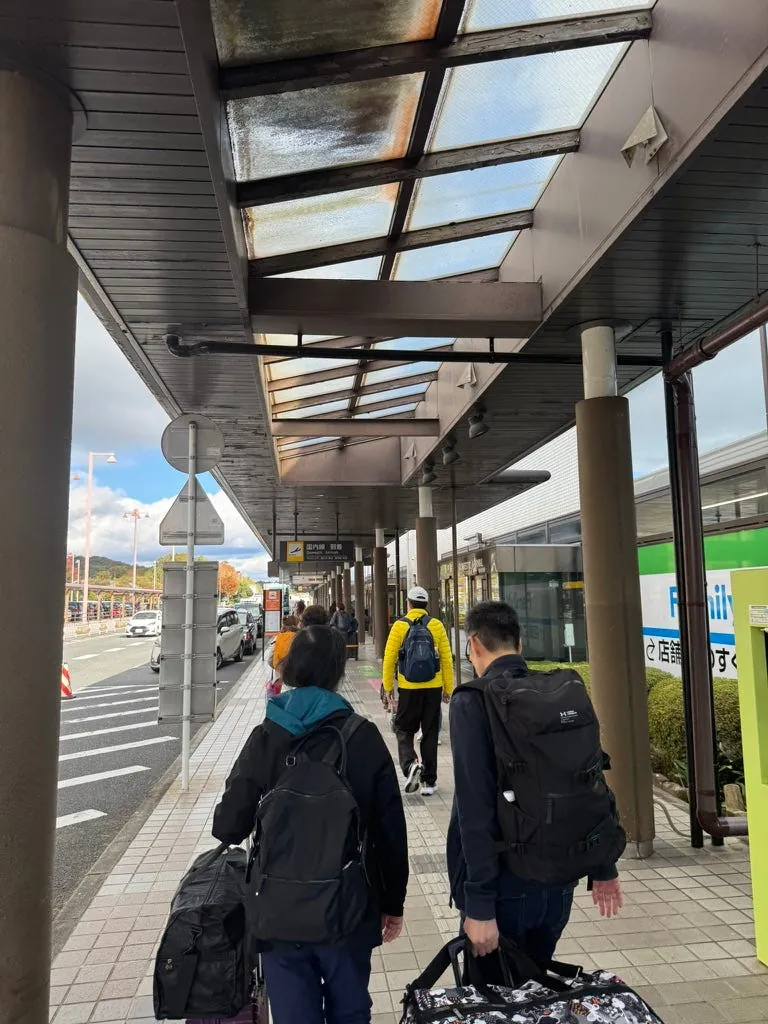
The flight is at 13:05. Woke up at 8 AM and left around 9 AM, plenty of time.
2024/11 Screenshot from the Online Check-in Website
Tigerair’s Online Check-in Service (Check-in and drop luggage at the Airport MRT, then go straight to departure at the airport) is only available at Airport MRT A3 New Taipei Industrial Park Station; not available at Taipei Main Station, so I took the direct Airport MRT train straight to Terminal 1.
~= 10:00 Arrive at the airport
Arrived at the airport around 10:00, but the counter opens at 10:20.
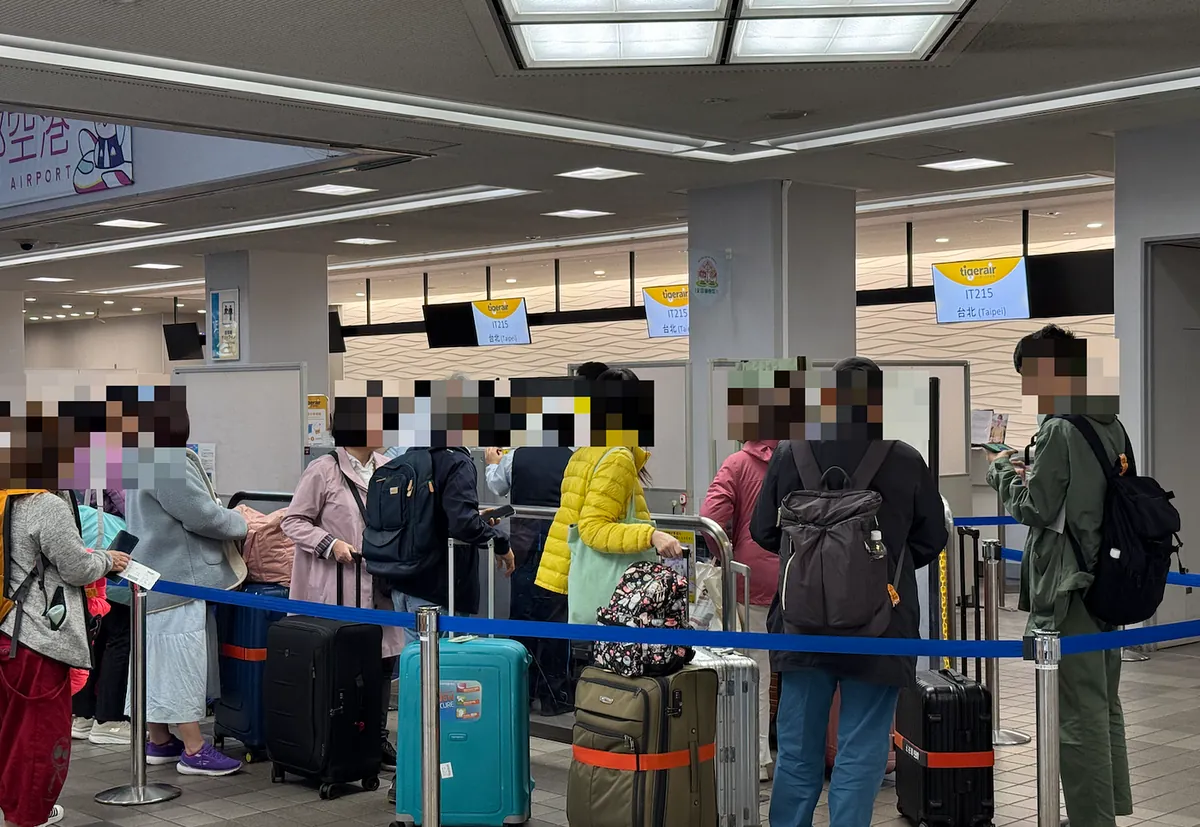
~= 10:20 Queuing for “Self-service Baggage Check-in” to drop off luggage
Outbound: 9 KG
This is when the advantage of using online check-in on the Tigerair website comes in. On that day, the “regular check-in” counters were visibly crowded, already full by 10:20 AM, with an estimated wait time of 45 minutes to 1 hour. The “self-service baggage drop” took less than 15 minutes to complete, saving a lot of waiting time.
Completing online check-in on site, then going to the “self-service baggage drop” is much faster than queuing for “regular check-in.”
~= 10:50 Completed departure procedures

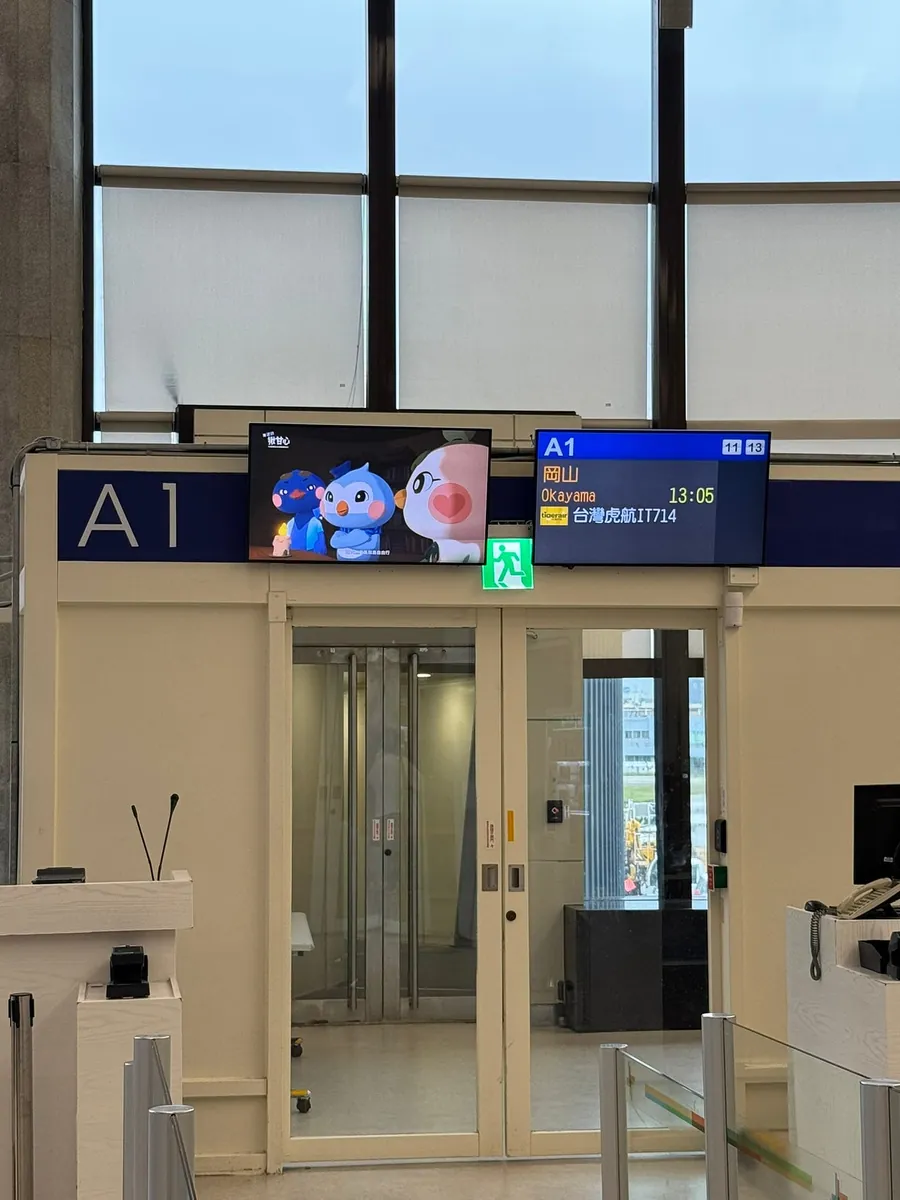
This time at Terminal 1, Gate A1. (Finally no more shuttle buses)
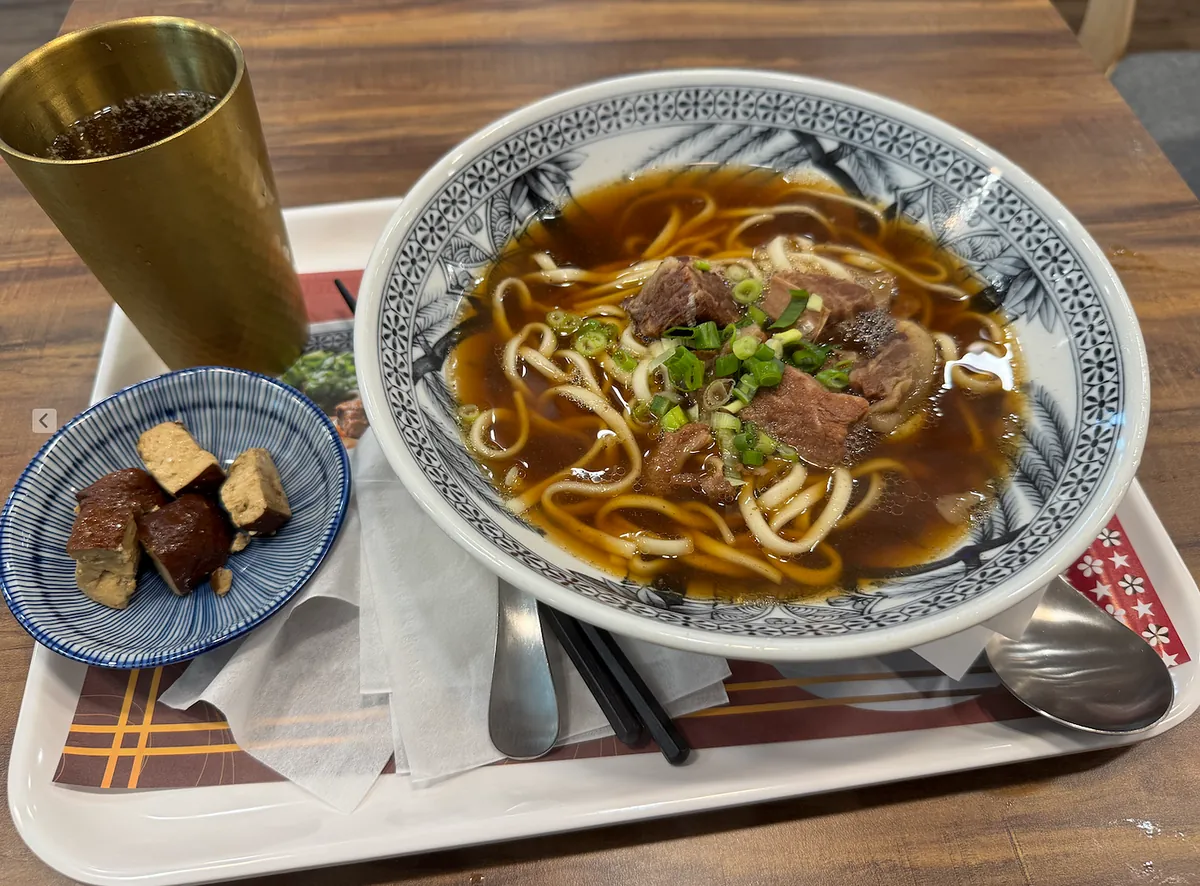
Every time I came to Terminal 1 before, I always ate at Ding Gua Gua. This time, I switched to Lao Dong Beef Noodles, which is conveniently located near Gate A1.
~= 11:30 Waiting at the airport
After eating, I wandered around a bit until about 11:30. The downside of gate A1 is that it’s far from the Terminal 1 Free Lounge, so I skipped walking back and forth and went straight to the waiting area.
Without resolving two network issues first, the first is that my Chunghwa Telecom roaming function is turned off, so I can’t directly buy a roaming plan if needed; therefore, I called Chunghwa Telecom to unlock the roaming function just in case.
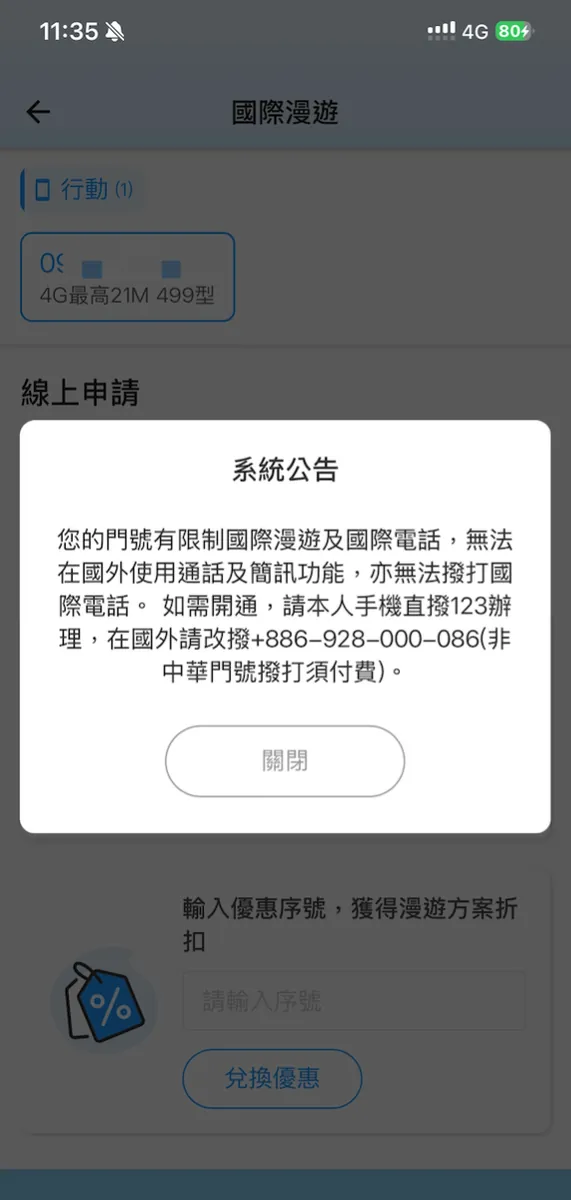
You need to call Chunghwa Telecom and confirm your personal information with customer service to unlock the account.
Pre-activate eSIM (Using iPhone as an example)
The second internet issue was activating the eSIM at the airport. Since activating the eSIM requires an internet connection, and the WiFi at Okayama Airport might be unstable, I activated the Japan eSIM in Taiwan where the network was stable beforehand.
If you’re still worried about network issues causing problems at immigration, you can also take a screenshot of the entry QR Code or fill out a paper entry card as a backup.
Previously, the eSIM bought in Thailand could be added automatically by long-pressing the QR Code in the purchase confirmation email, PDF, or screenshot and tapping “Add eSIM”, but this time the Japanese eSIM did not show this option:
Found a method provided by a user that successfully shows the “Add eSIM” option. (Seems like an iOS bug, broken since iOS 17.4):
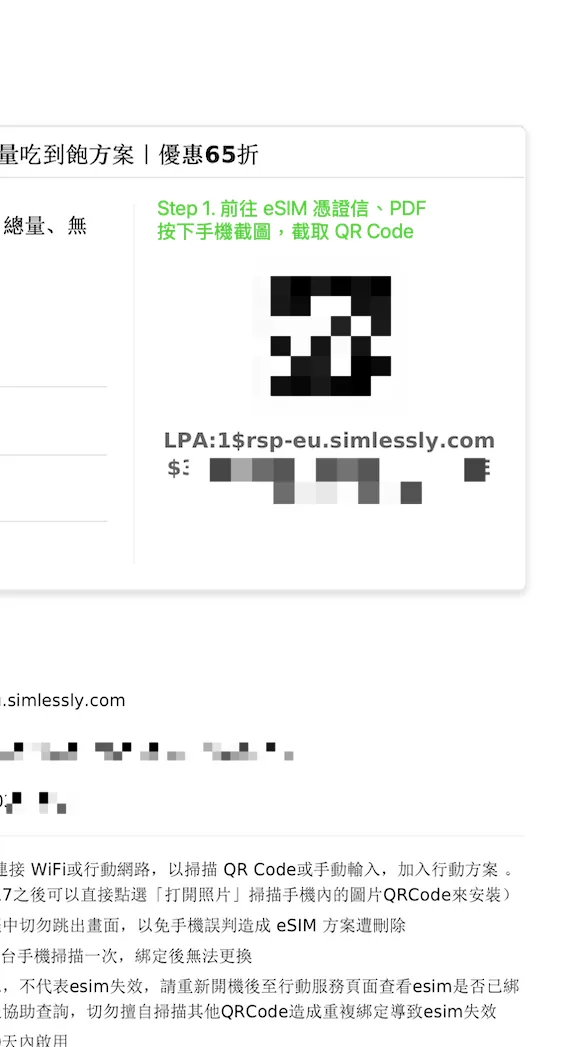
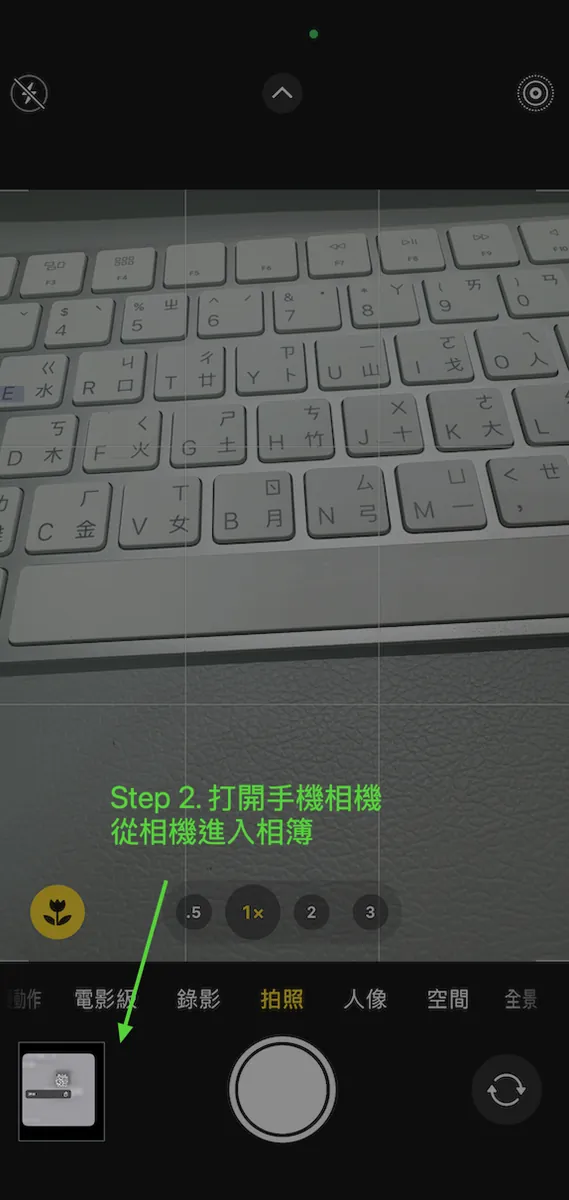

-
Go to the eSIM voucher email or PDF, take a screenshot on your phone, and save the screenshot in your photo album.
-
Open the phone camera, tap the bottom left corner to enter the photo album.
-
Find the eSIM photo in the album, long press the QR code, and the “Add eSIM” option will appear.
-
Click “Add eSIM” to directly load the activation information and activate the eSIM.
Manually Activate eSIM on iPhone
Go to “Settings” -> “Cellular” -> “Add eSIM” -> “Use Cellular QR Code”:
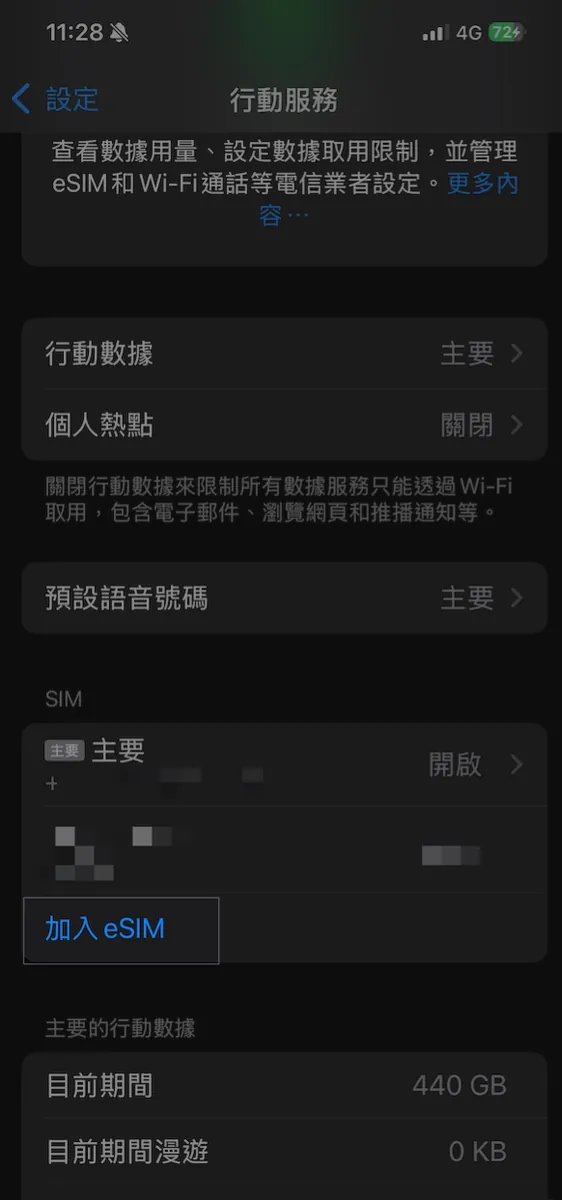
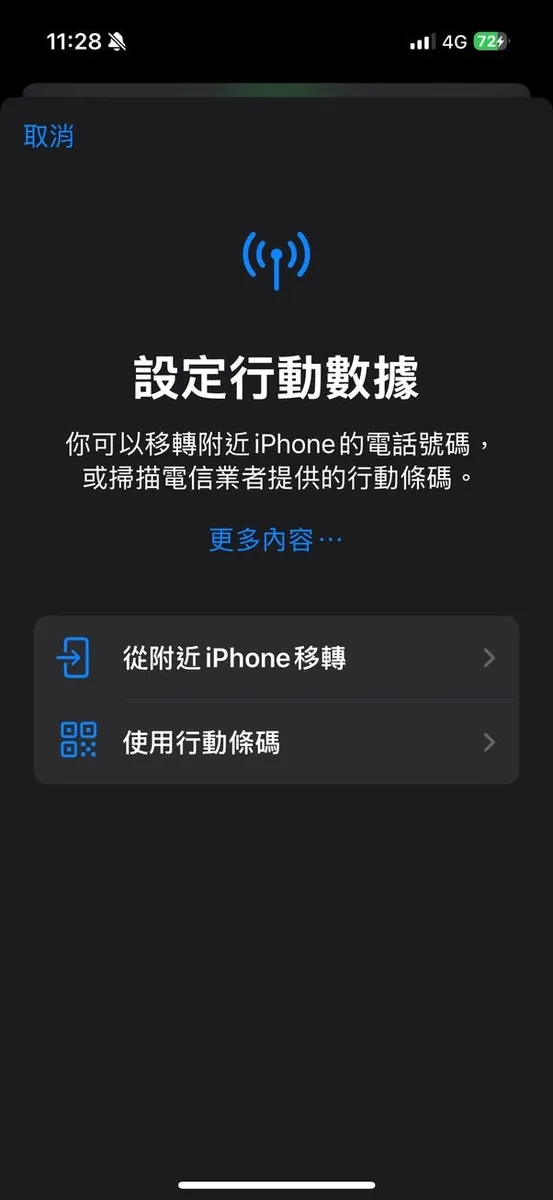
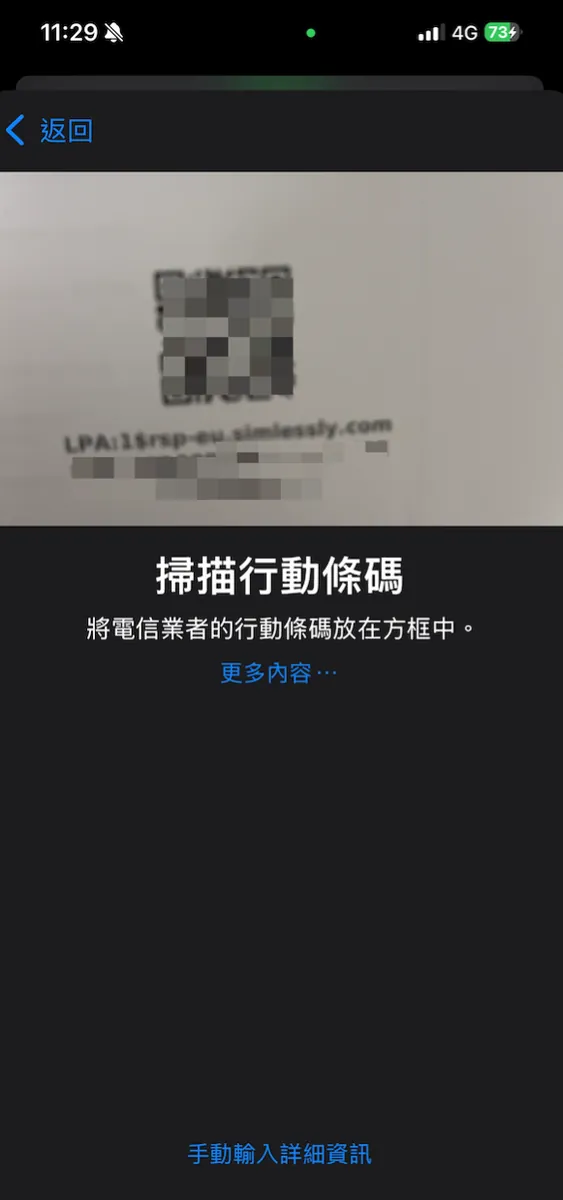
I printed out the eSIM QR code, so I activated it by scanning directly from there.
If you have nothing else, you can click “Enter Details Manually” to copy and paste the eSIM voucher information for manual activation:
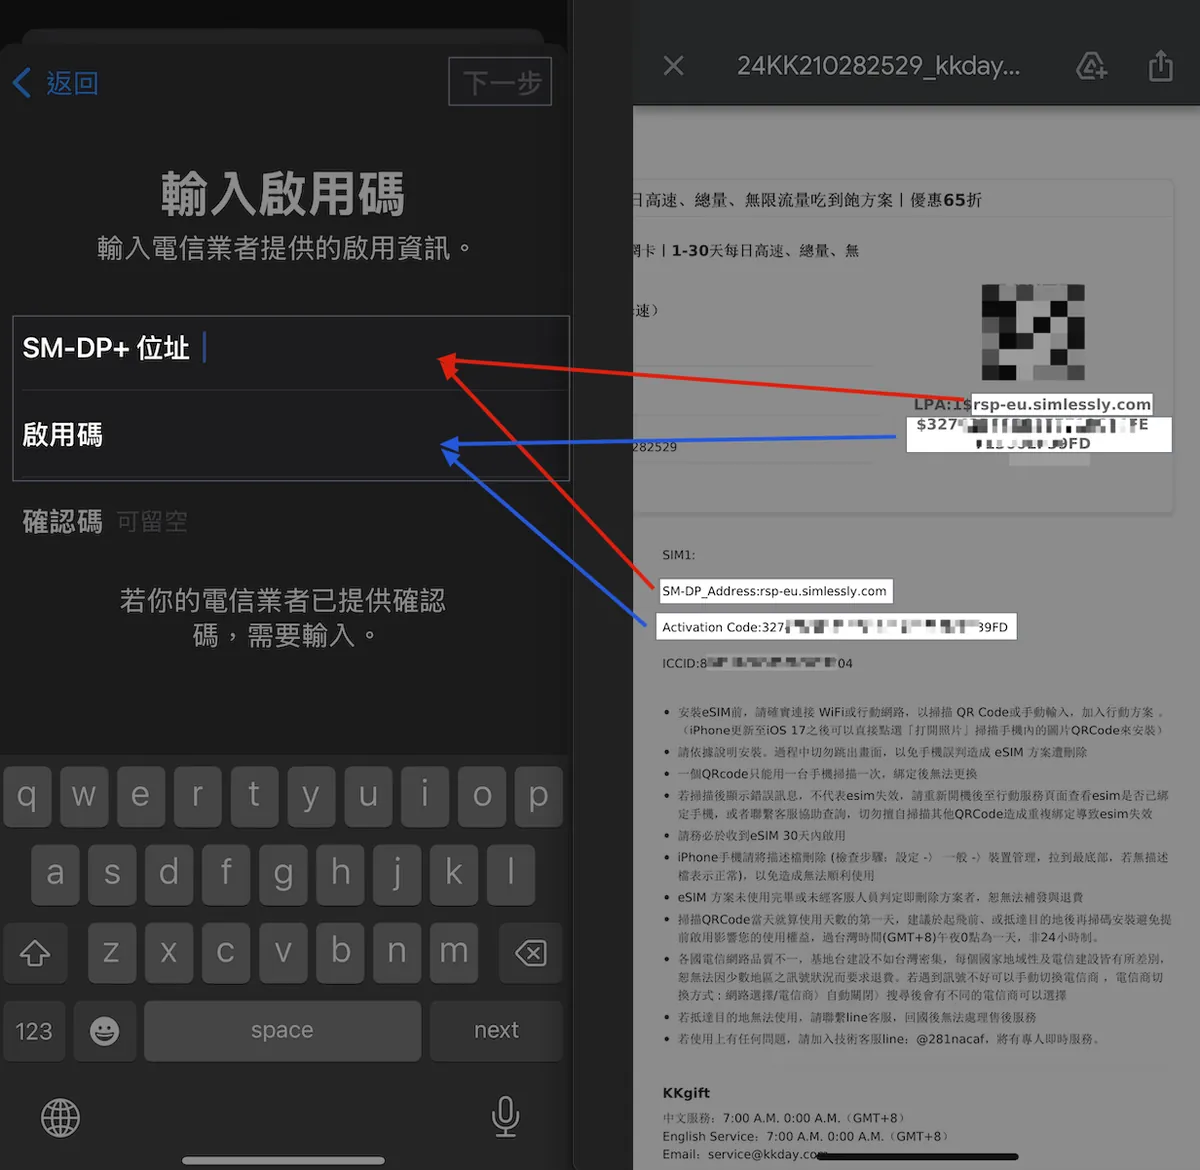
Fill in the SM-DP+ Address, Activation Code, and Confirmation Code (none this time) as per the email, then click Next to complete activation.
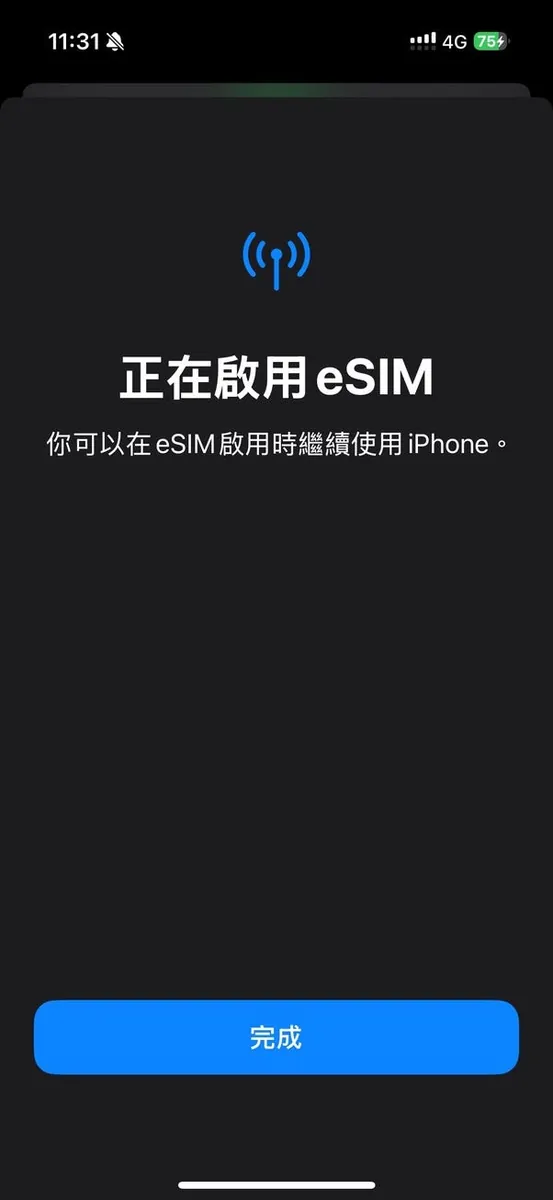
After inputting, it takes some time to activate. It may get stuck at “Activating…” for a while or show an activation failed message asking you to try again later; just wait a bit longer. Once activated successfully, “Settings” -> “Cellular” will show “On,” and the signal bars will appear at the top right, displaying signal status.
- The action plan tag can be set to “Travel”
We are still in Taiwan and cannot connect to the eSIM Japan network yet. Just make sure the activation is successful.
~= 12:20 Boarding begins, no delays
~= 13:05 Departed on time
At this time, heavy rain started in Taiwan, but there was little wind, so it did not significantly affect the takeoff.
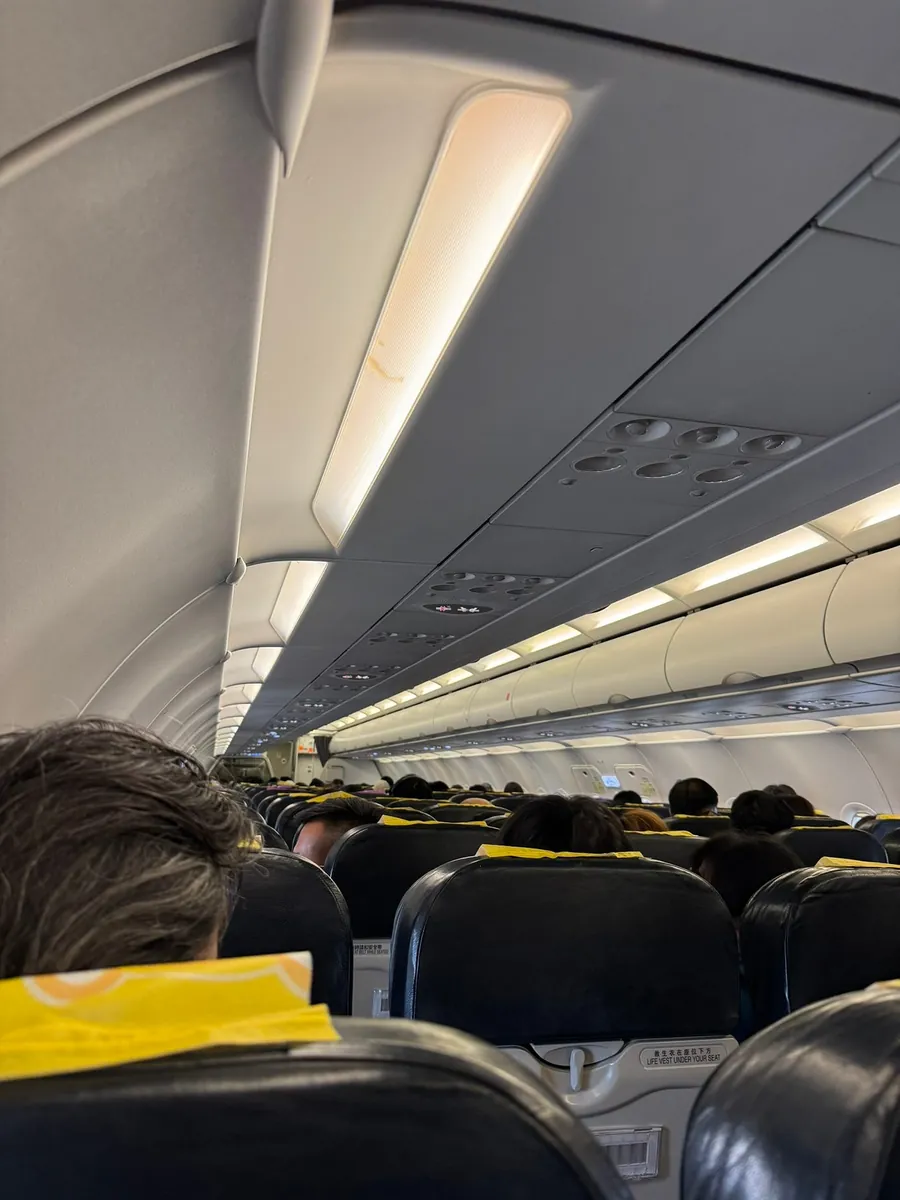
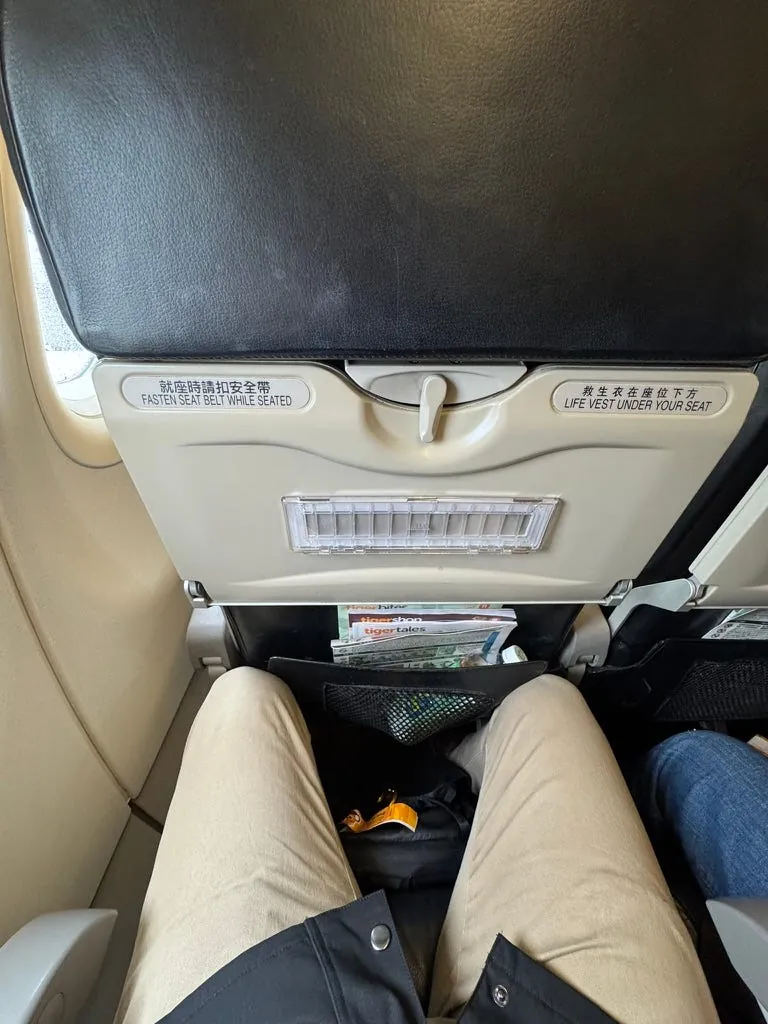
I find Tigerair’s seat comfort to be excellent among budget airlines (compared to Peach’s seats being too small and Vietjet’s seats being uncomfortable). However, a downside of Tigerair is that bringing your own food is prohibited, so it’s best to board just after a meal!
No WiFi on the plane, so just listen to music and play offline games.
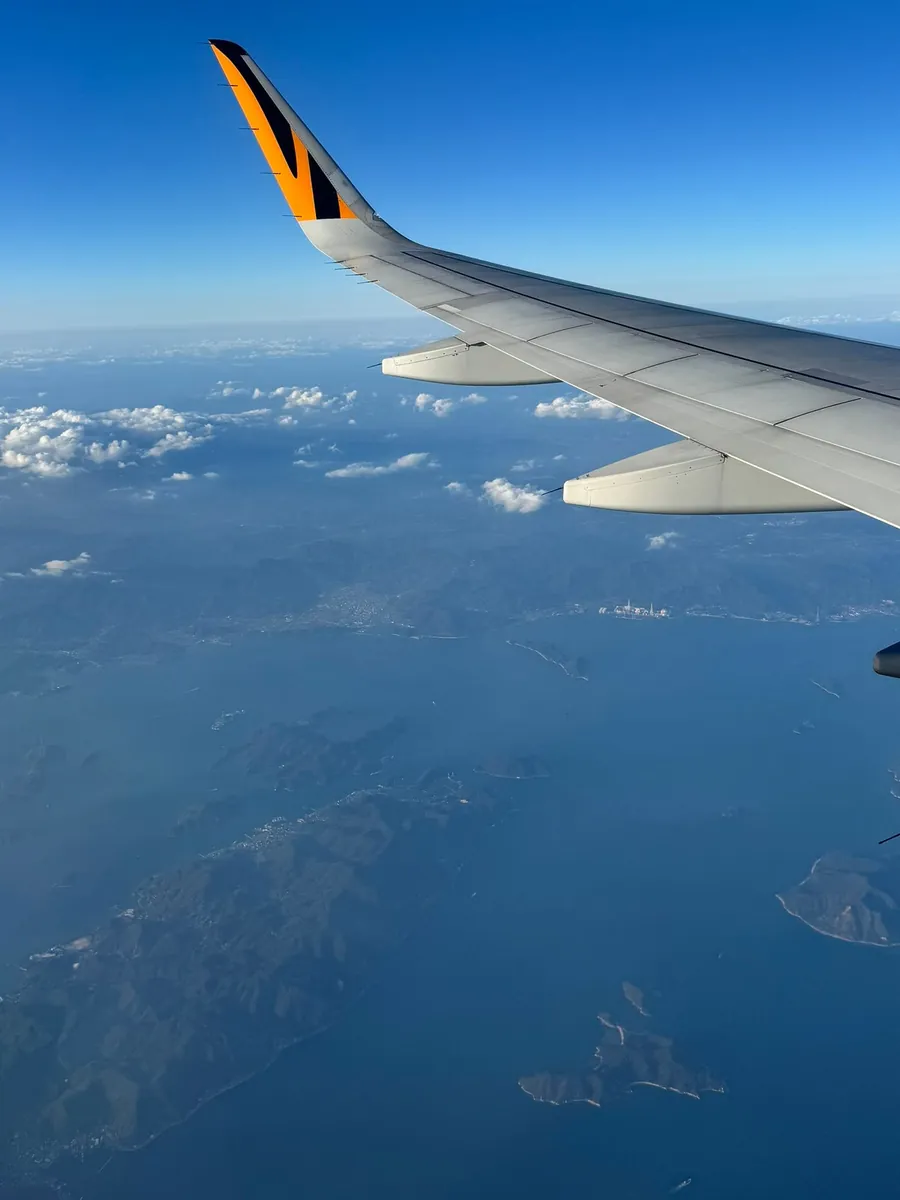
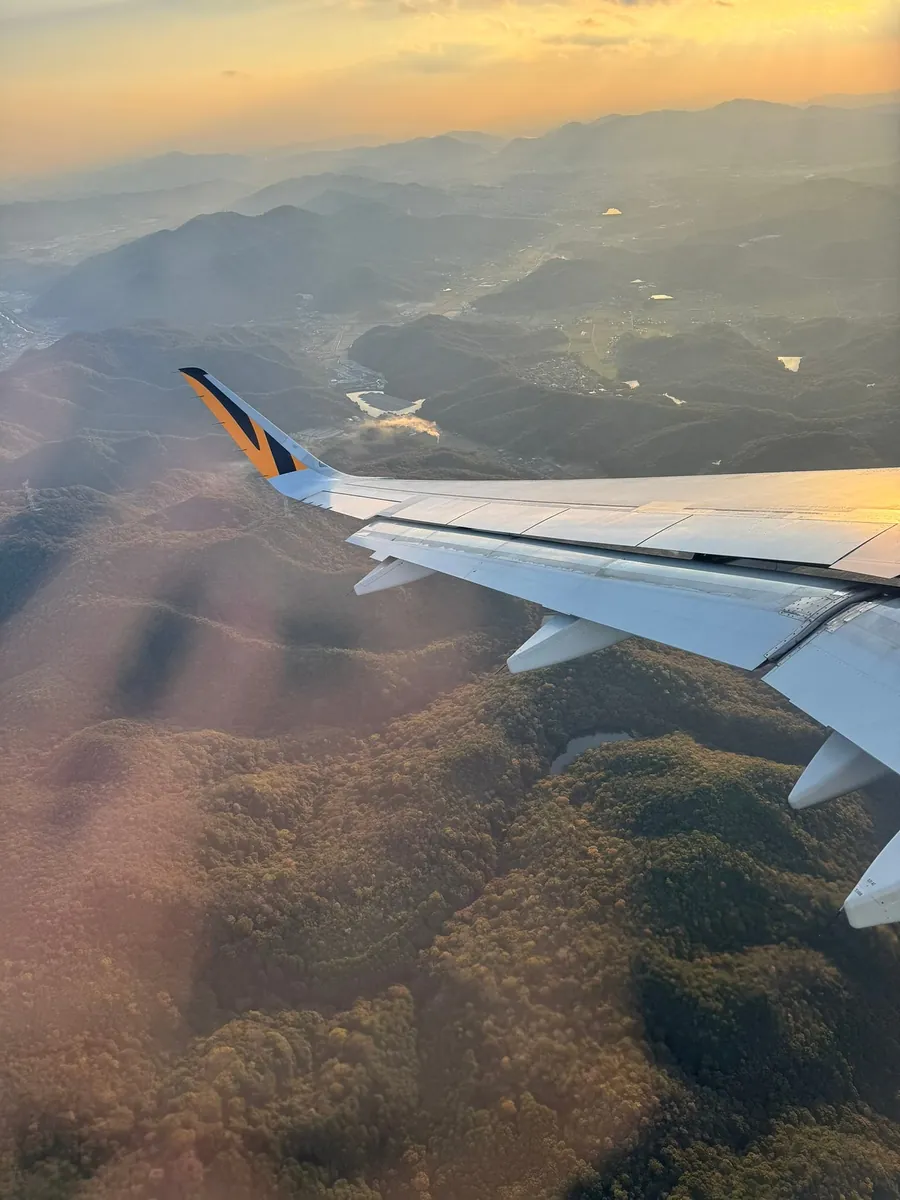
You can see the great weather in Japan from the window. 👍👍👍
16:30 (Taiwan Time 15:30) On-time Landing

After landing in Japan, our Japan eSIM should be able to receive a signal.
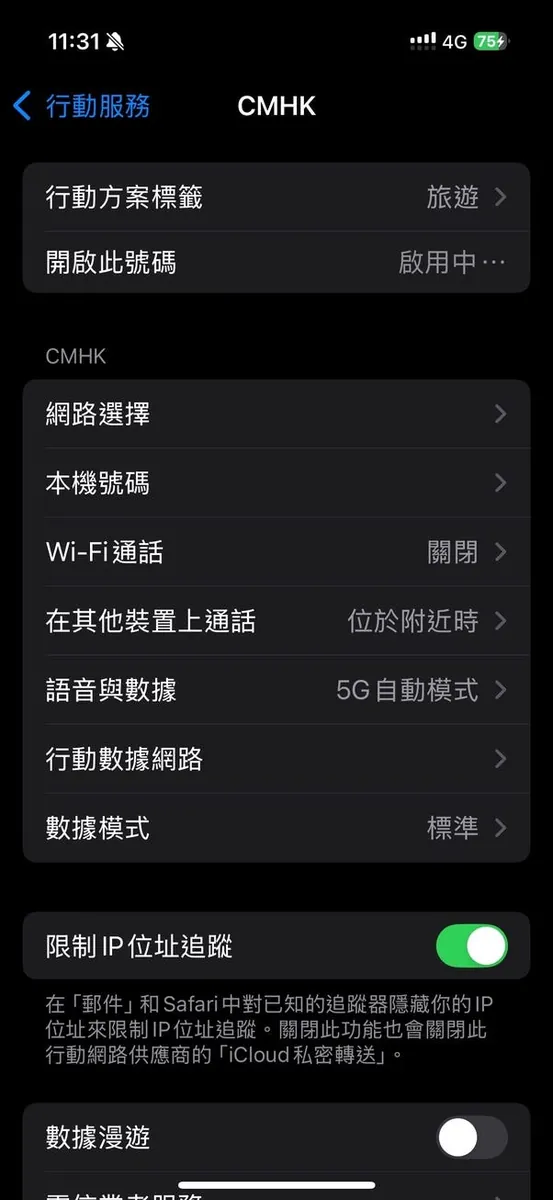
There is signal but no internet access yet. You need to go to “Settings” -> “Cellular” -> select Travel Japan eSIM -> make sure “Enable this line” is on and turn on “Data Roaming” to have internet! ⚠️⚠️⚠️
You can also enter the main Chunghwa Telecom number. If you haven’t purchased Chunghwa Telecom’s roaming plan, please remember to turn off “Data Roaming” here, and keep “Enable this line” on to continue receiving SMS from Taiwan!
Please note: Do not answer calls randomly; receiving calls from abroad to a domestic number will also incur charges! ⚠️⚠️⚠️ (Only receiving SMS is free)
~= 17:00 Complete immigration and collect luggage
-
Okayama Momotaro Airport is a very small airport, with only one international flight at a time (yours). You go through immigration and collect your luggage quickly along with other passengers.
(This flight seemed nearly full, and it took about 30 minutes to get out.) -
Unexpectedly, the airport staff all speak Chinese.
-
It might be because smaller airports are stricter. Almost every solo traveler like me was asked how many days they would stay and which places they planned to visit. Some were even required to show hotel reservations.
(So if you’re traveling alone, prepare these in advance.)
Airport WiFi

After connecting to Okayama Airport’s free WiFi, you need to enter your email, then check your inbox to click the activation link to continue using it; if you only need Visit Japan, you can open a webpage within 10 minutes of connecting to display the entry QR Code.
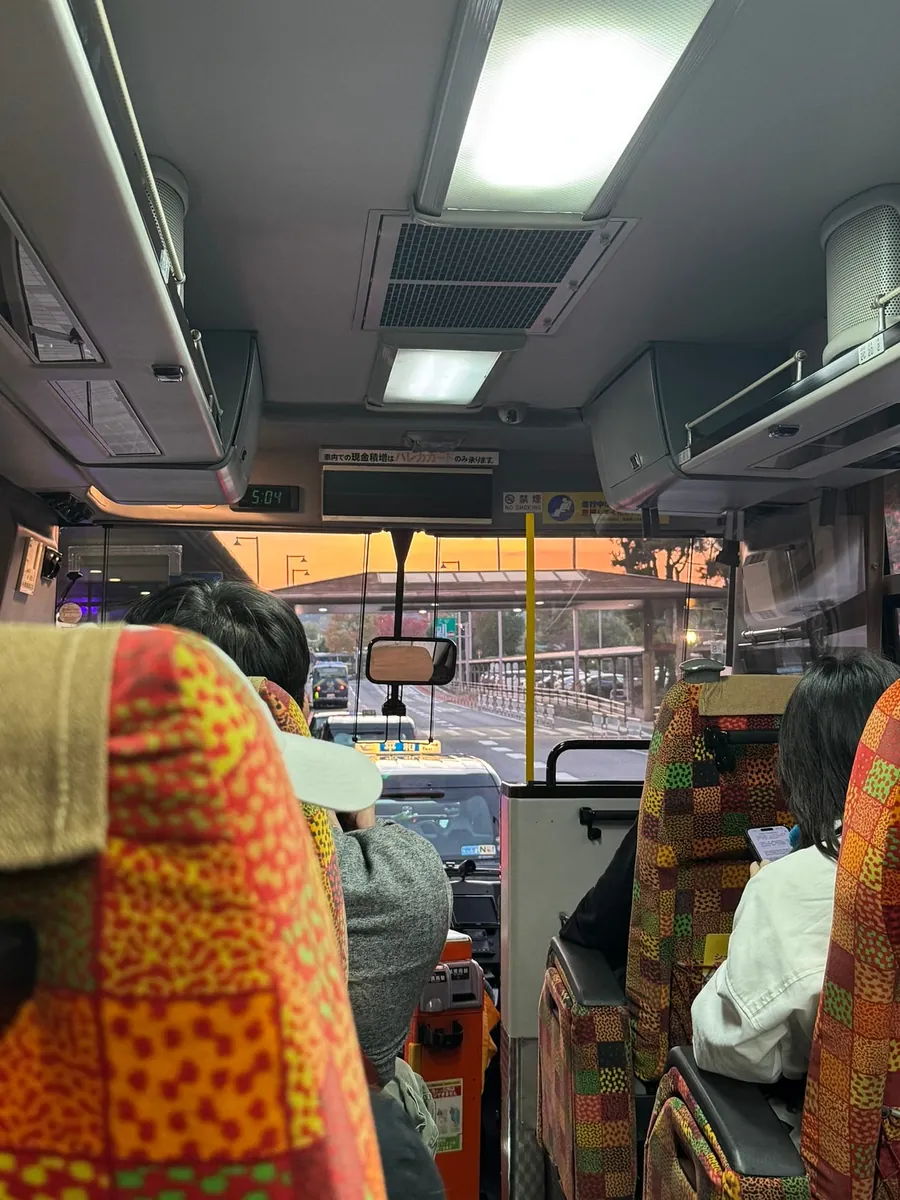
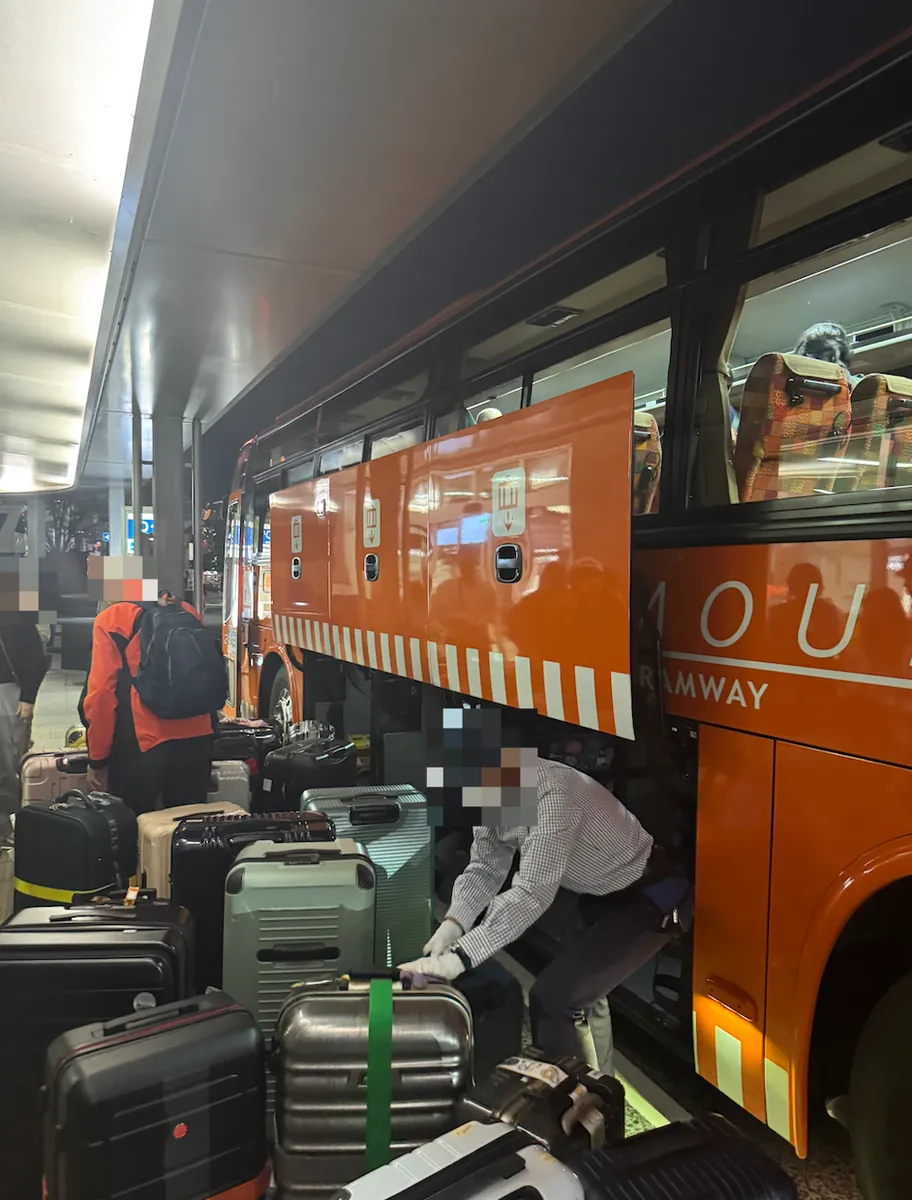
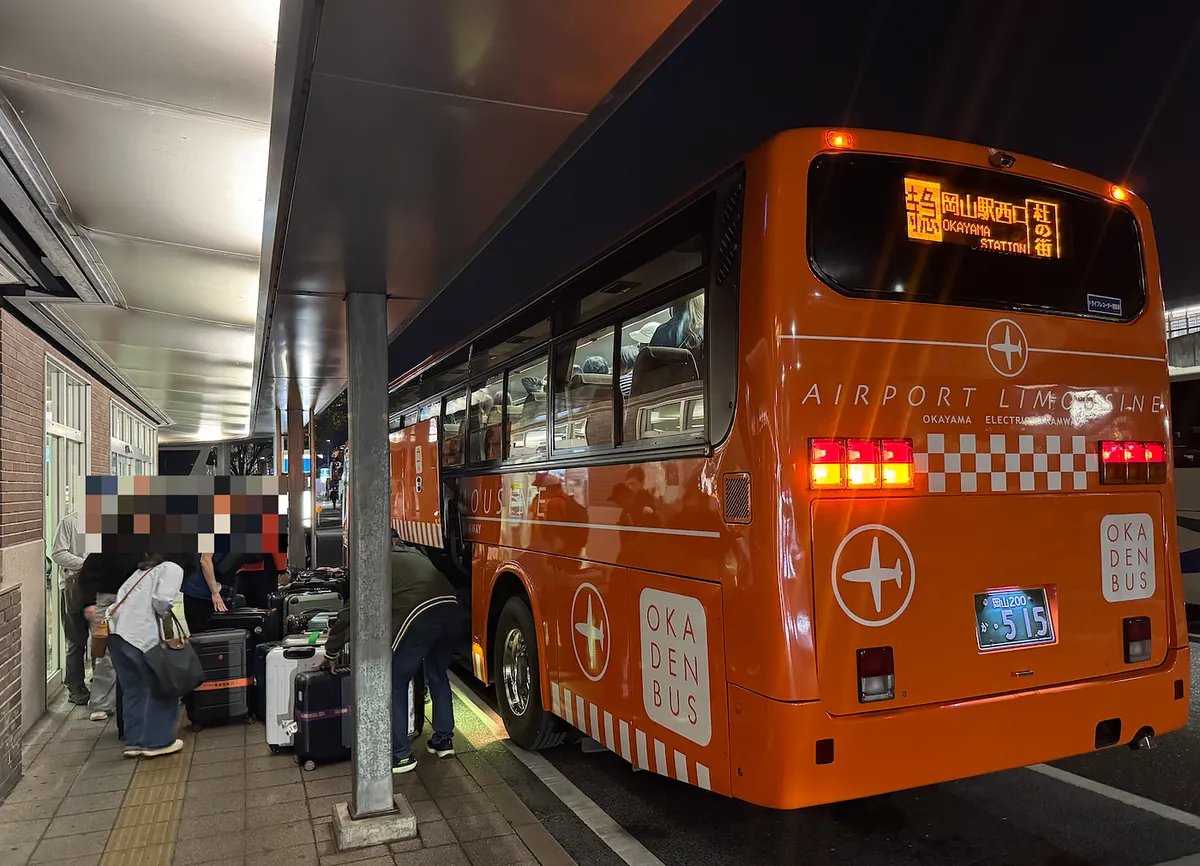
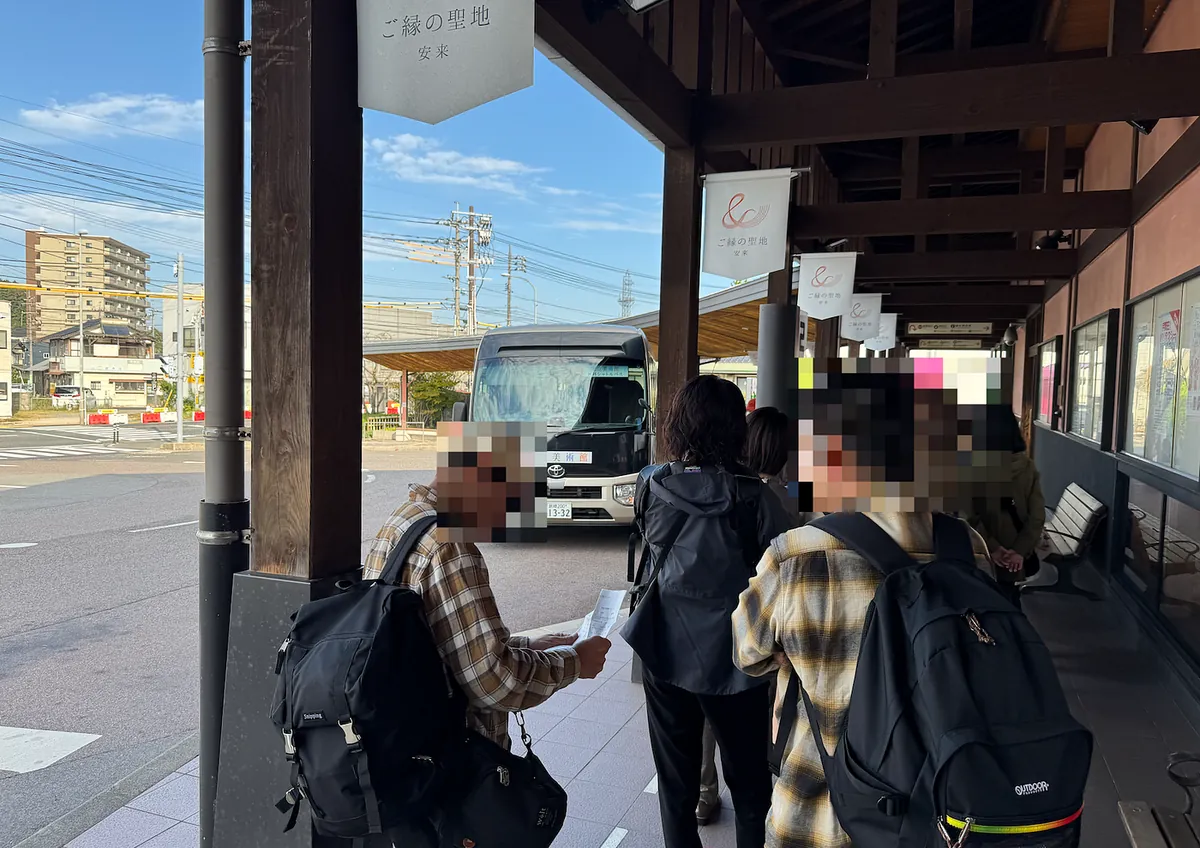
~= 17:04 Took the bus from Okayama Airport to JR Okayama Station
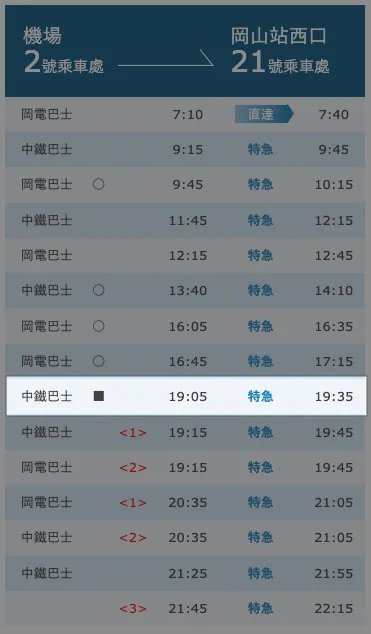
For the latest schedule, please refer to the official website
-
The airport is small, just follow the signs to find the bus to Okayama Station. Staff will guide you, so don’t worry about getting lost—just get on the bus.
-
There are very few flights, so besides the scheduled bus times, extra buses are added based on flight arrivals; don’t worry about full buses, as more will be dispatched if needed.
(According to the schedule, you’d have to wait until 19:05 for a bus, but extra buses are actually available.) -
Show your passport before 2024/11/30 to ride free; free shuttle service runs irregularly, it was not available last year.
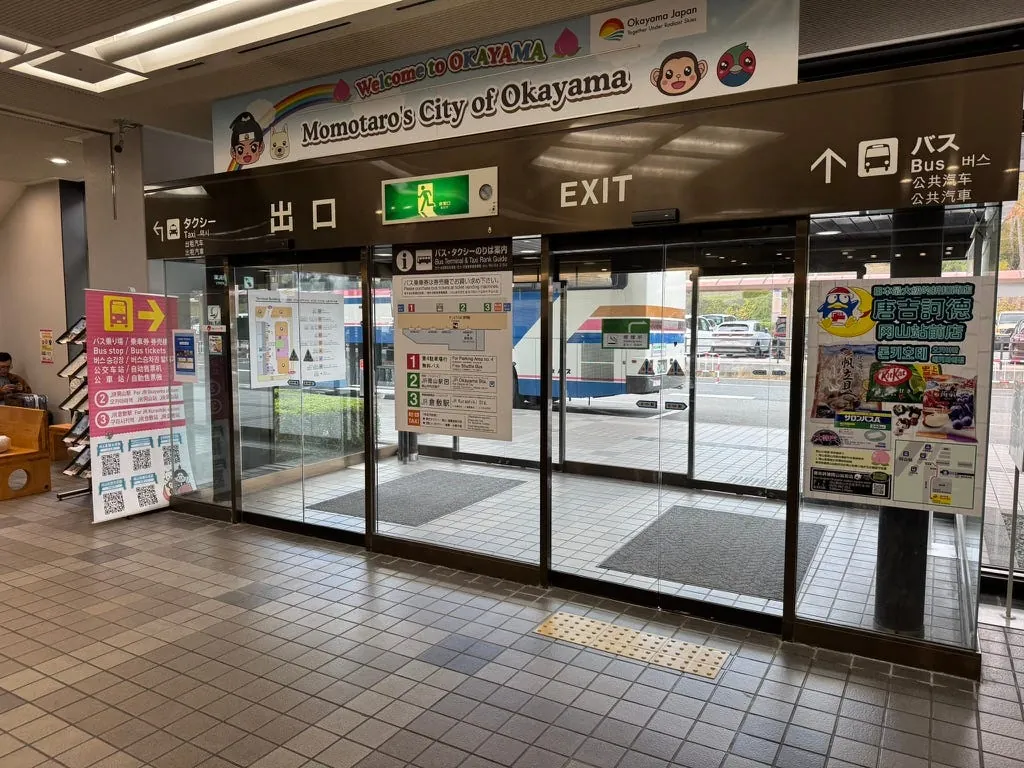
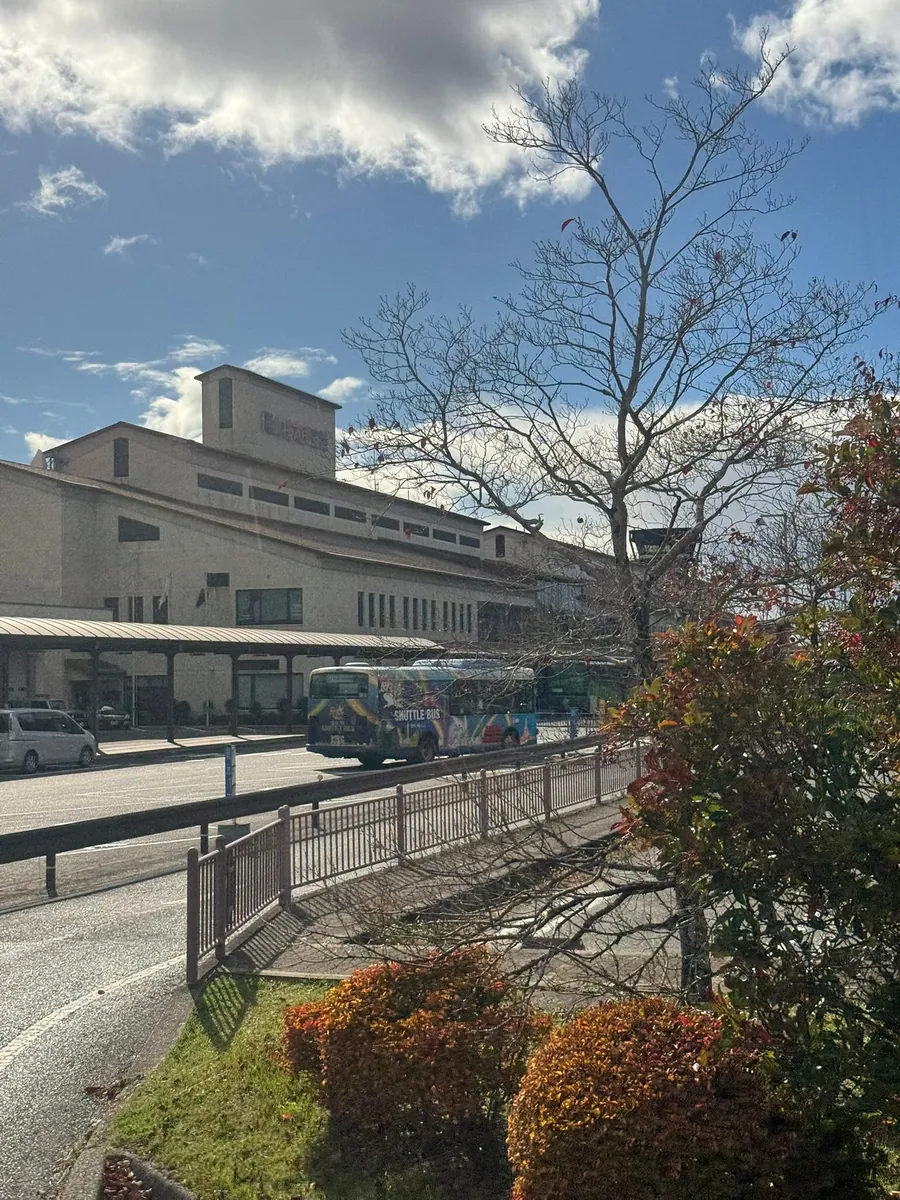
~= 18:00 Arrive at JR Okayama Station
There was some traffic congestion during rush hour, so I arrived at Okayama Station around 18:00. (30 minutes later than expected)
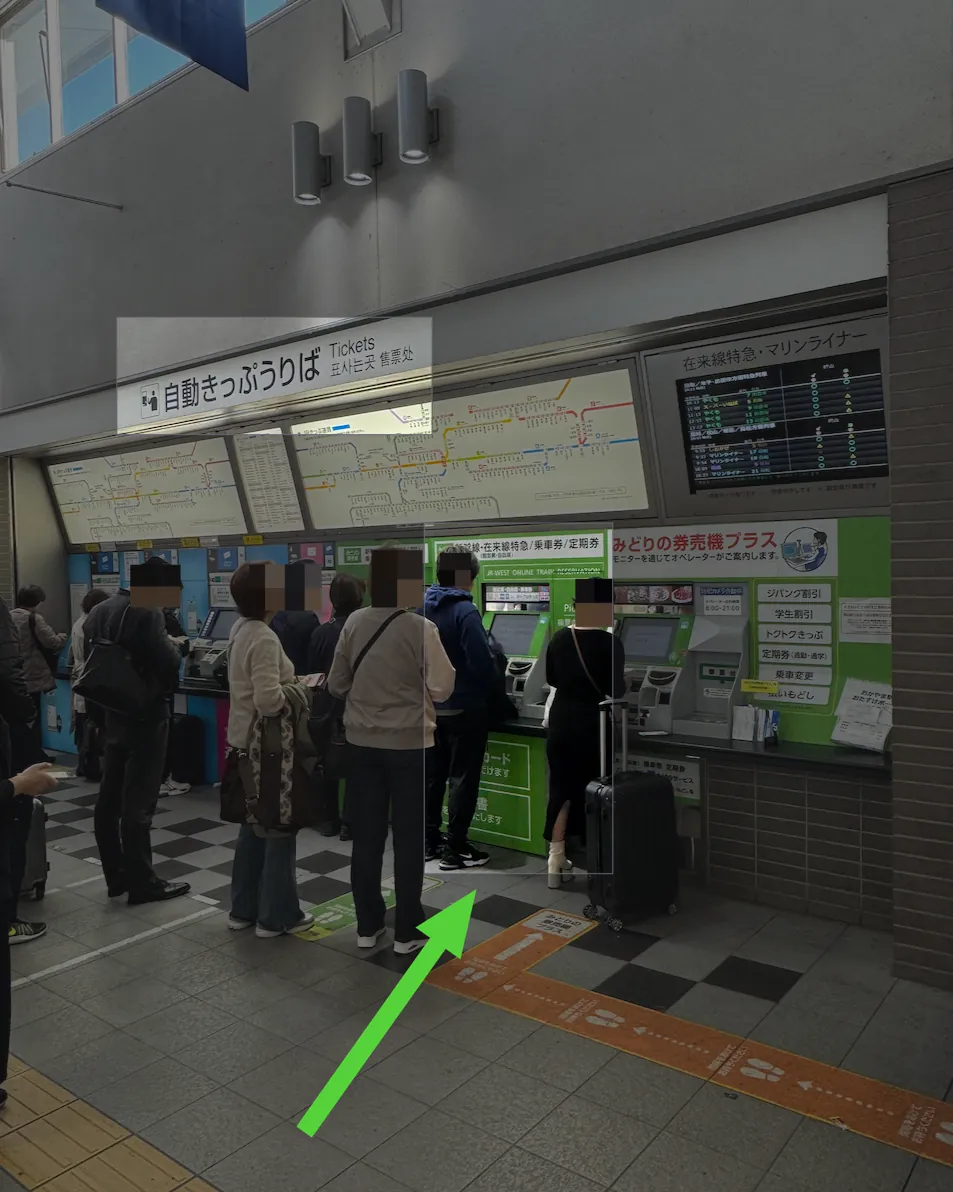
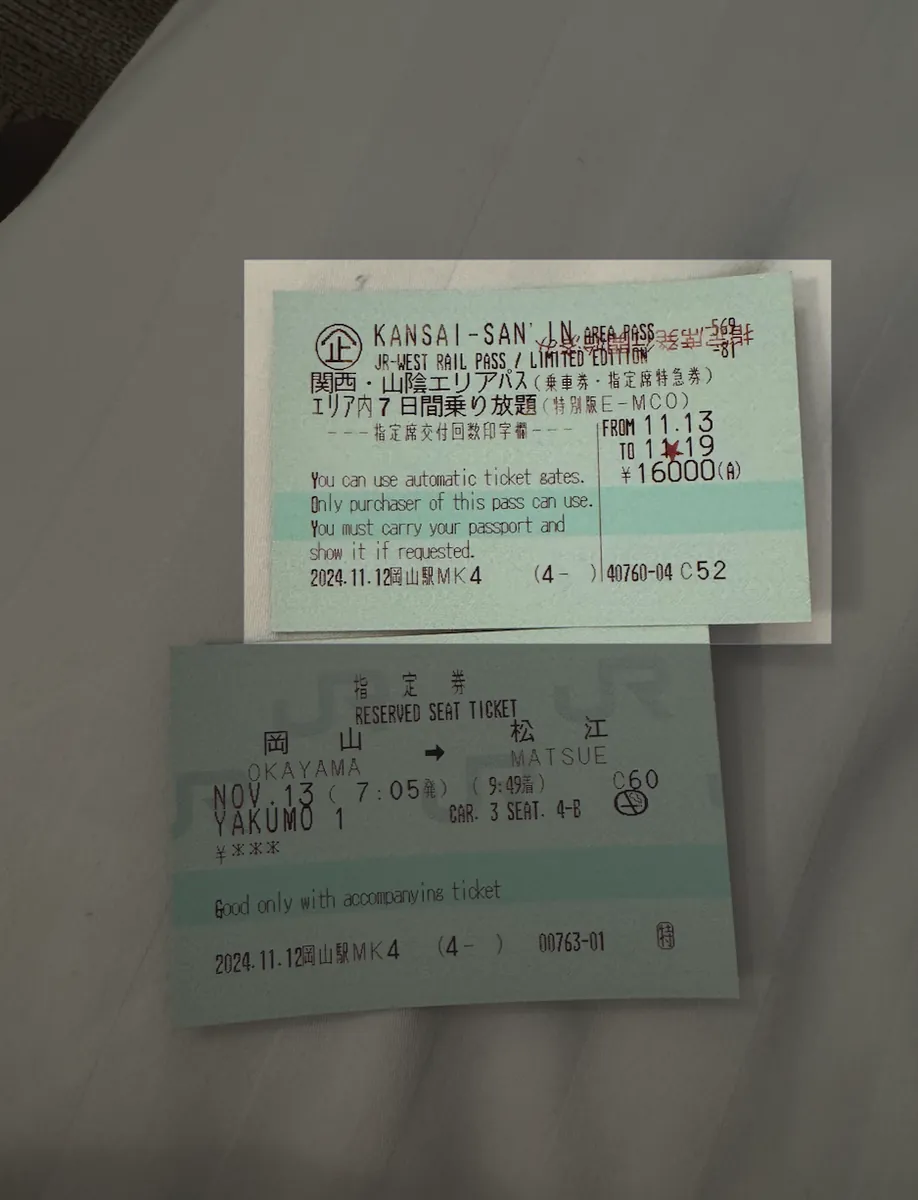
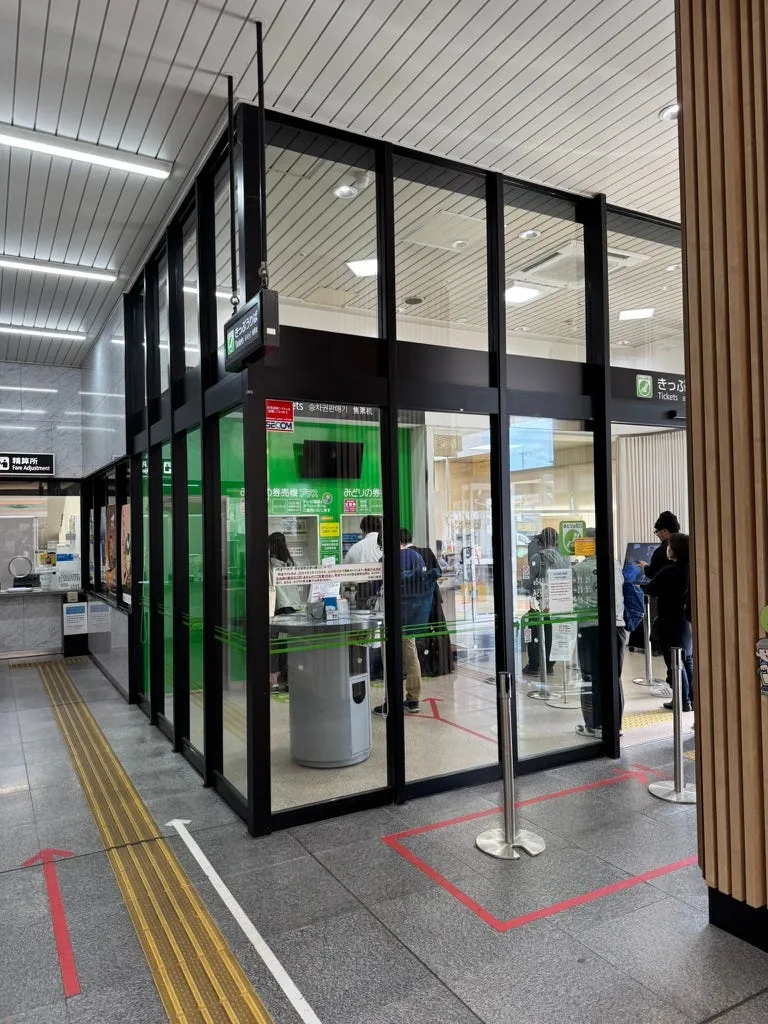
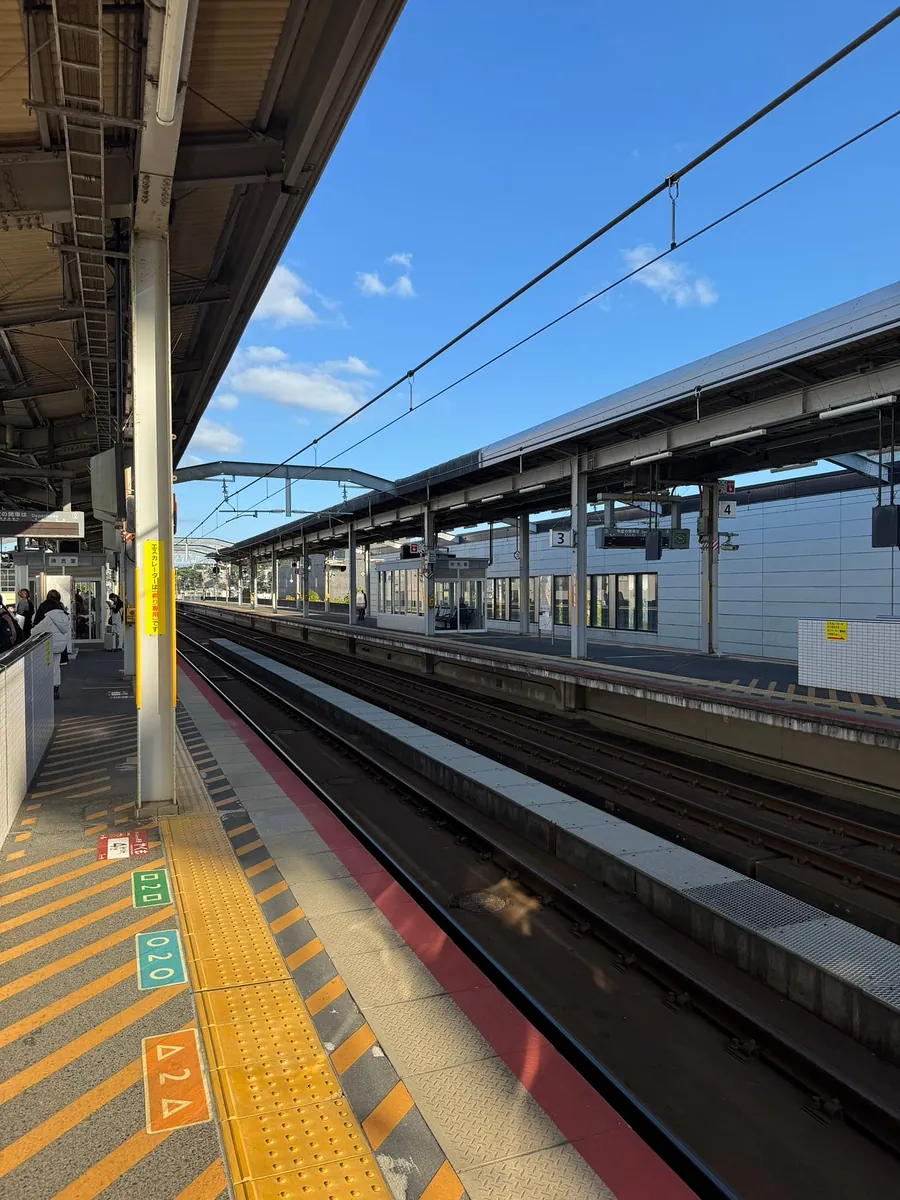
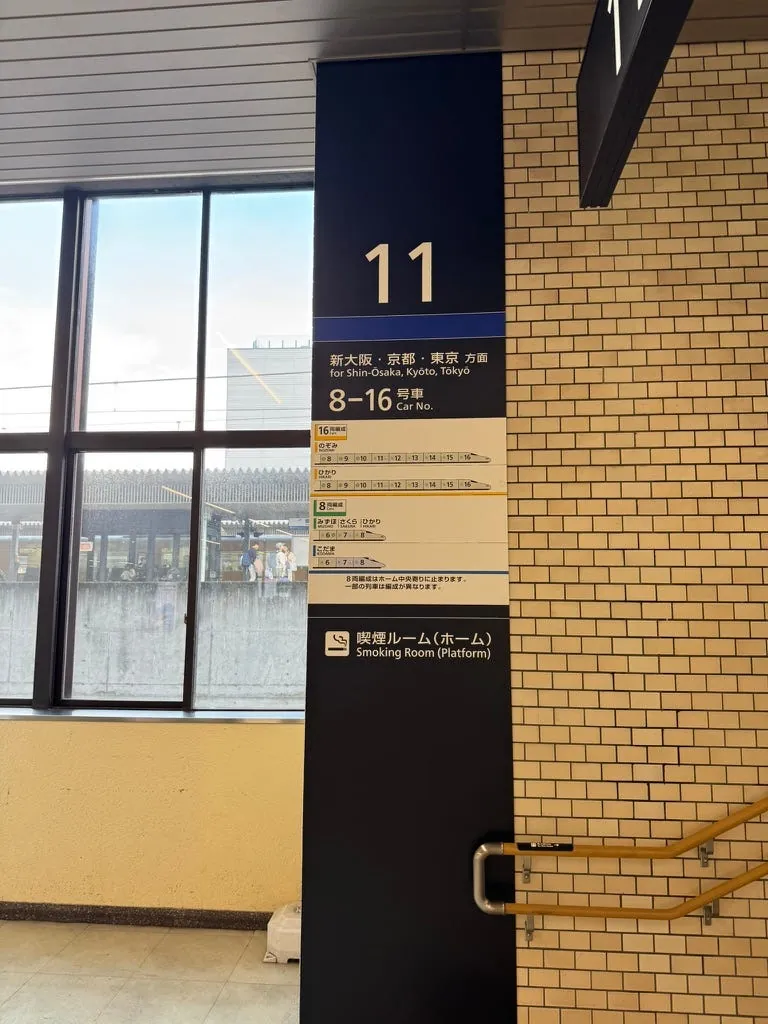
JR Okayama Station: Exchange JR Pass & Reserve Train Tickets to Matsue for Tomorrow

-
You can check the official website for stations where you can exchange the JR Pass. Not every station offers exchanges!
(JR Okayama Station is available) -
At Okayama Station, find the ticket vending machines and line up at the green machine in the middle. It’s the only one that can exchange JR Pass.
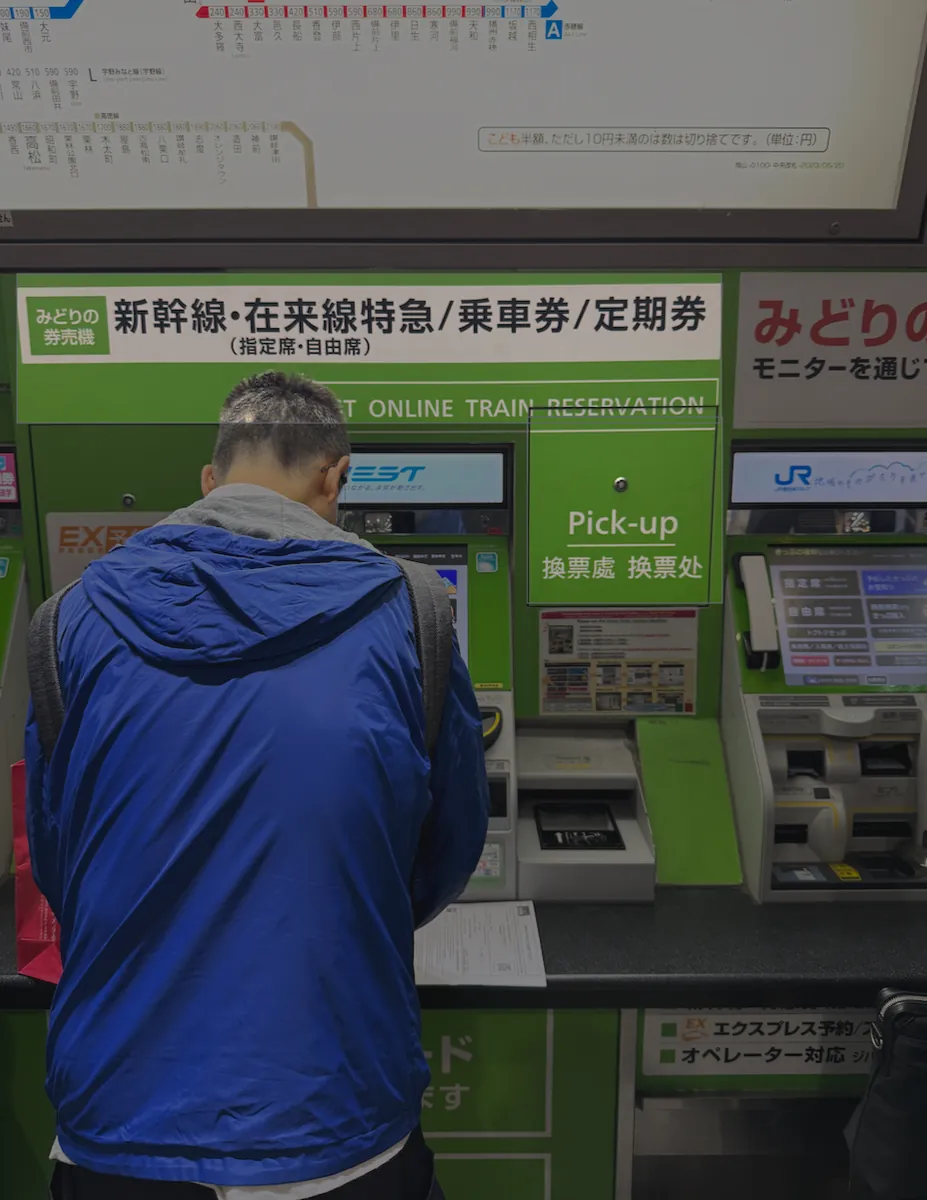
Redemption Process:
Have your passport and purchased JR Pass QR code ready. You can first select Traditional Chinese in the top right corner, then directly click the yellow button at the bottom left labeled “QRコードの読取り (Scan QR Code)” to redeem.
You can choose the start date The reservation time for reserved seats is also counted from the start date. ⚠️
(Like I chose to start tomorrow)
Follow the steps to scan the JR Pass QR Code and your passport to complete the exchange.
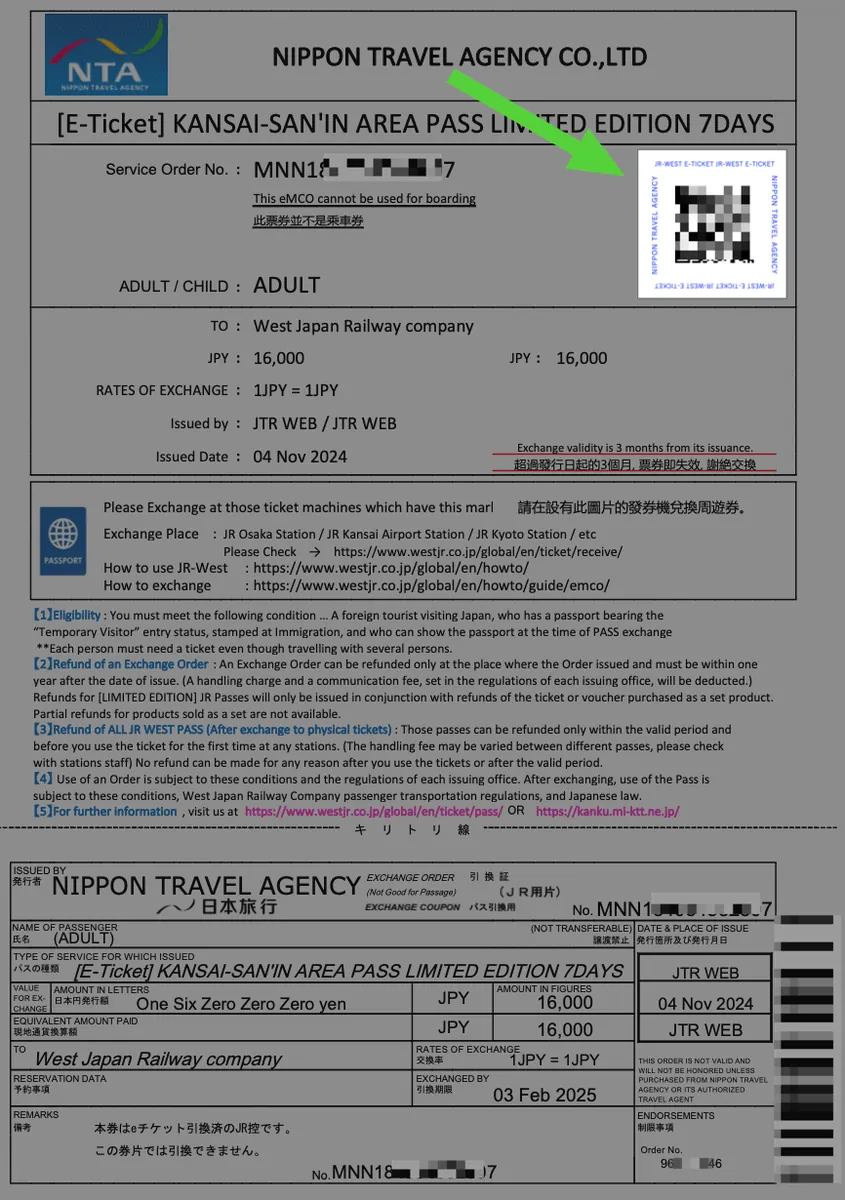
JR Pass QR Code
Exchange Result:
The above image uses last year’s JR Pass redemption as an example.
After redemption, you will receive three vouchers. The other two rectangular ones are instruction sheets and are not useful; the one printed with PASS is the most important. You need this for entering and exiting stations, so keep it safe!
Booking JR Reserved Seats
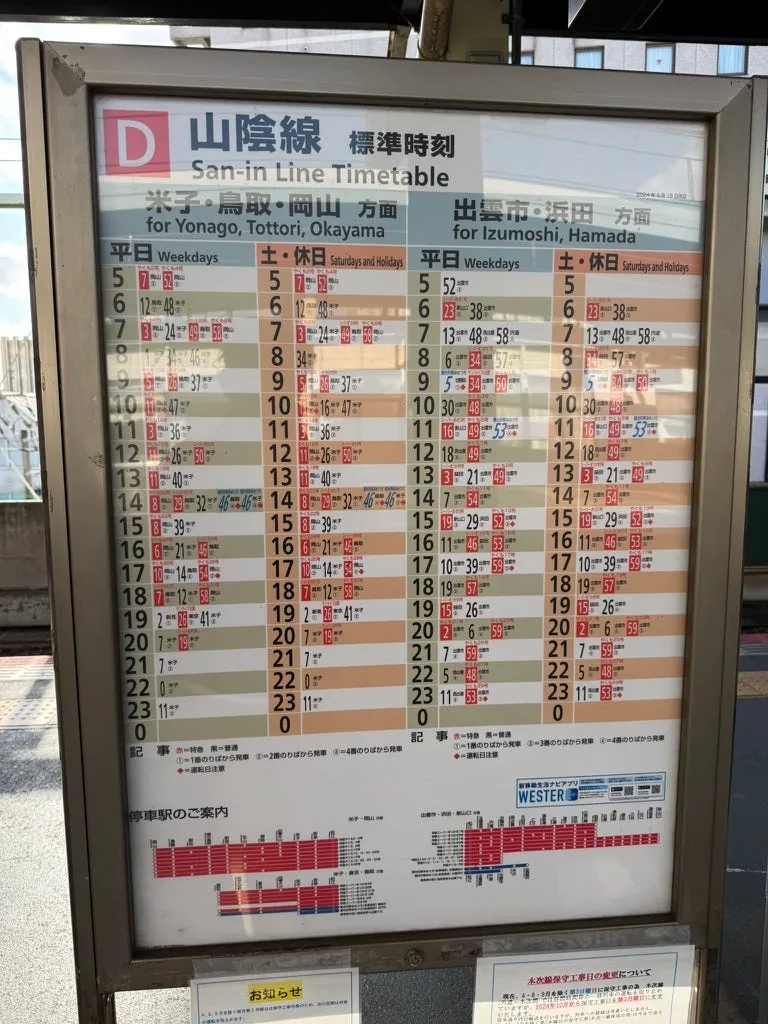
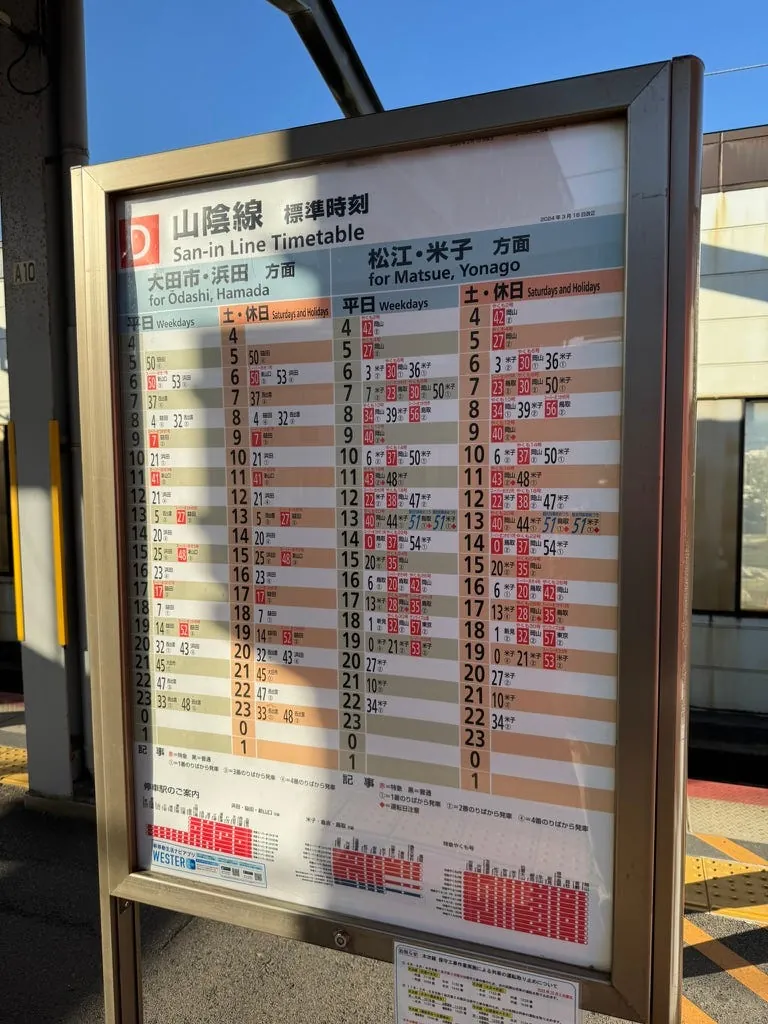
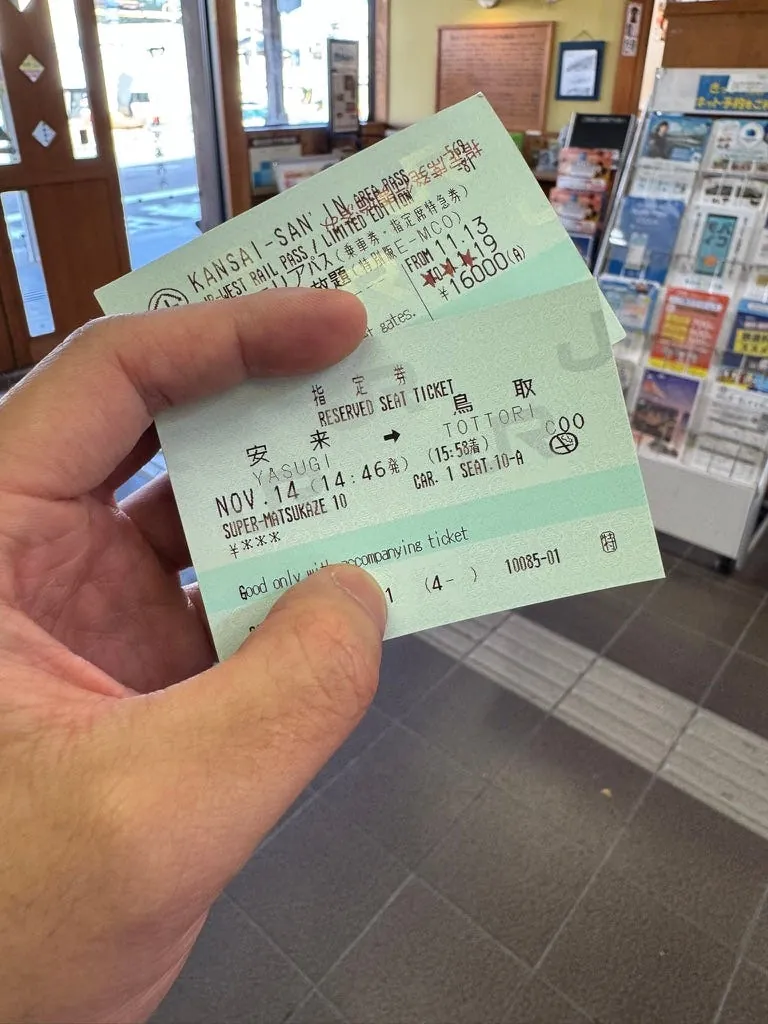
This is very important. According to the information provided by the JR Pass Kansai & Sanin Area Pass official website, the JR YAKUMO train to the Sanin region is all reserved seating with no non-reserved seats ⚠️⚠️⚠️ (starting from March 16, 2024), so all seats must be reserved in advance.
You should also be able to book online in advance. Previously, I booked the JR from Hakata to Yufuin online , but you need to check it.
The traffic information on Google Maps is incomplete. Detailed schedules and train names can be found on the JR official website. ⚠️⚠️⚠️
JR Pass Reserved Seat Booking Process:
-
JR Pass Kansai & Sanin Area Pass allows 6 machine reservations for reserved seats; beyond that, you must book at a staffed counter. The number and limits vary by region, so please check the official website for details.
-
First, check the English names of your departure point and destination JR station names, for example: OKAYAMA (岡山) -> MATSUE (松江)
-
Please note the JR station English names, so to go to Fukuoka, type Hakata XD
-
Step 1: Select “Traditional Chinese”
-
Step 2: Directly insert a “JR Pass ticket”
(If traveling with others who need seat reservations together, you will be asked to continue inserting them in Step 4.) -
Complete the reservation by following the steps shown in the video below:
The video shows the entire process of my reservation from Yasugi Station to Tottori Station as an example.
(There was no one waiting at the ticket vending machines, so I dared to take out my phone and record the whole process)
Reservation Completed:
-
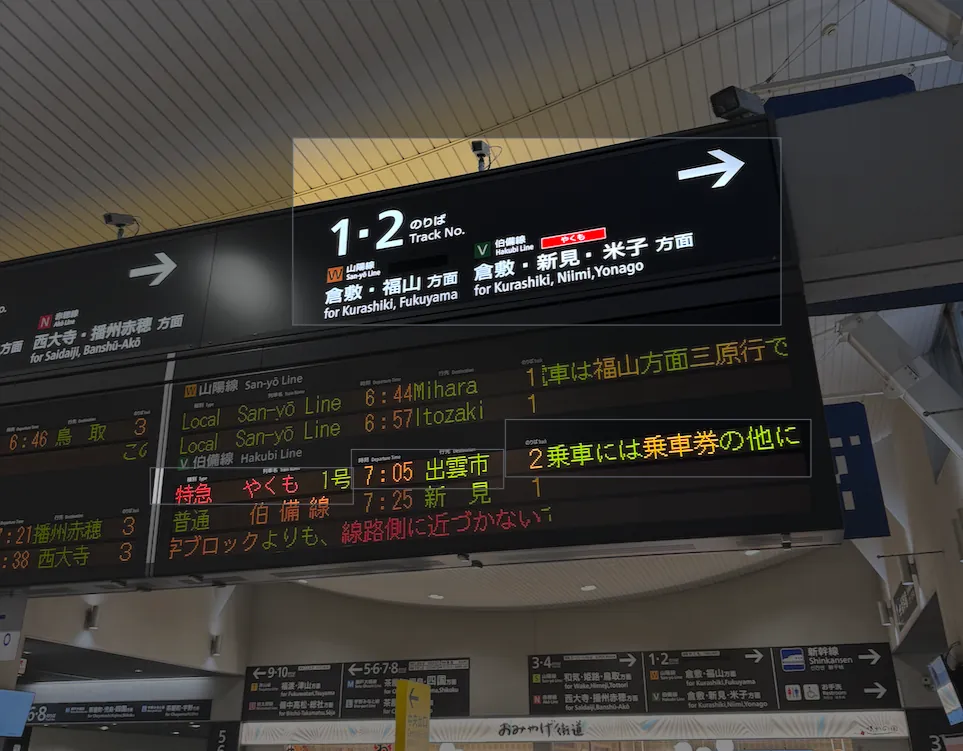
Due to the schedule and tomorrow’s itinerary, I booked the early 07:05 train to Matsue to drop off my luggage at the hotel.
-
Actual station entry and exit still use the JR Pass (the one shown above) ⚠️⚠️⚠️, the reserved seat ticket only shows your car and seat number.
-
No window seats left, can only take the aisle seat QQ
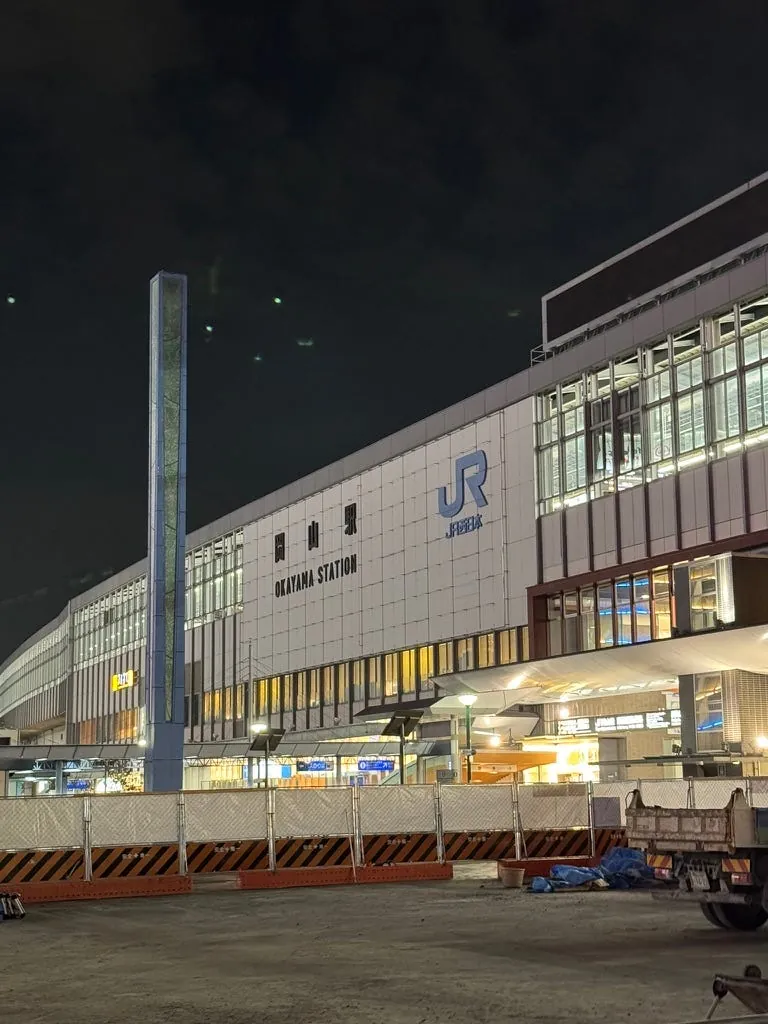
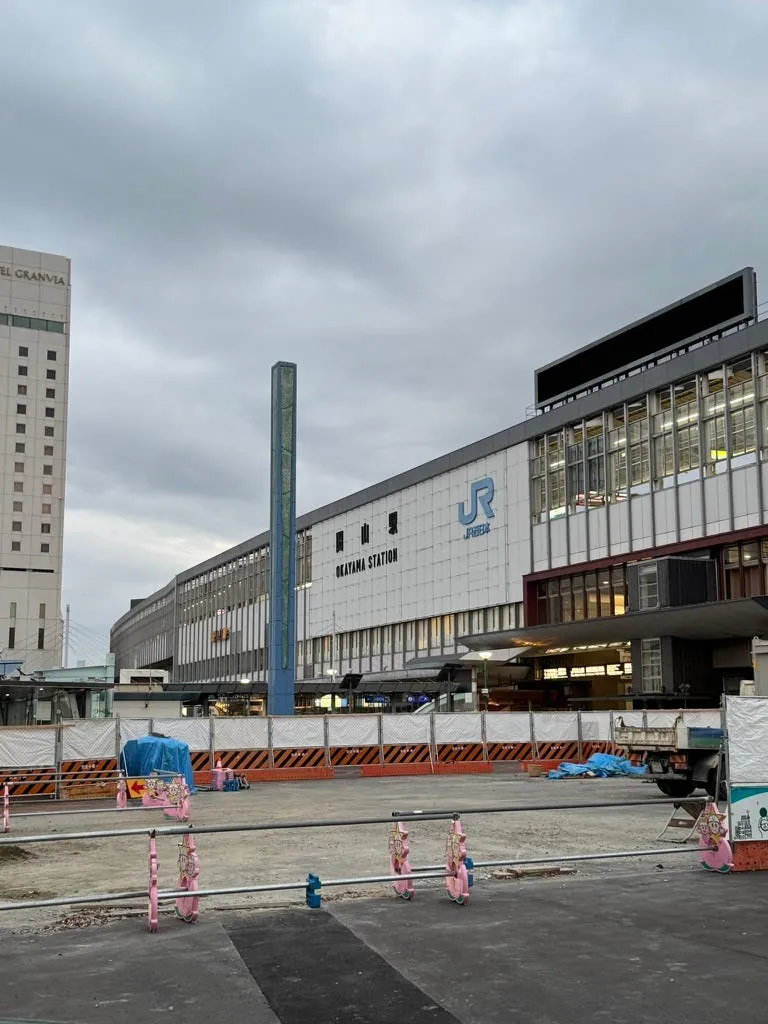
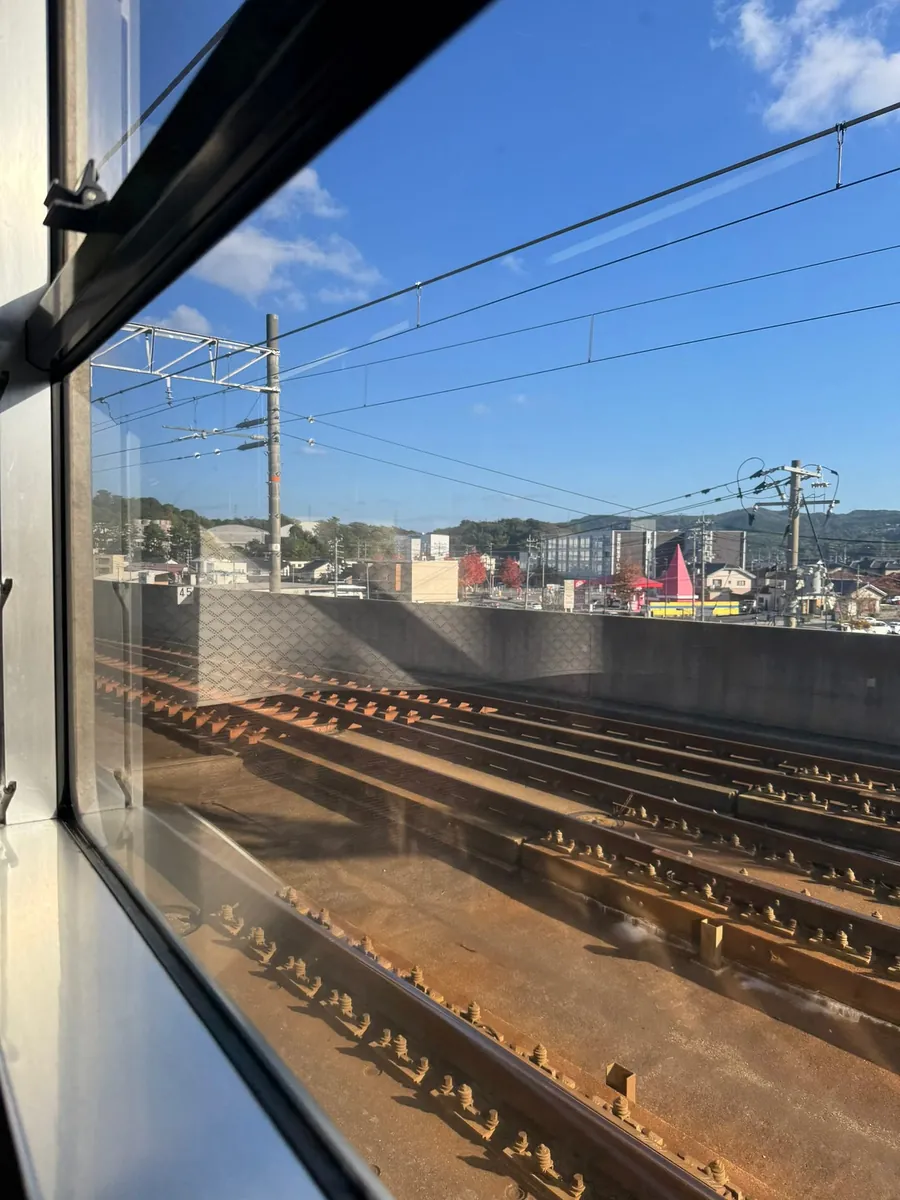
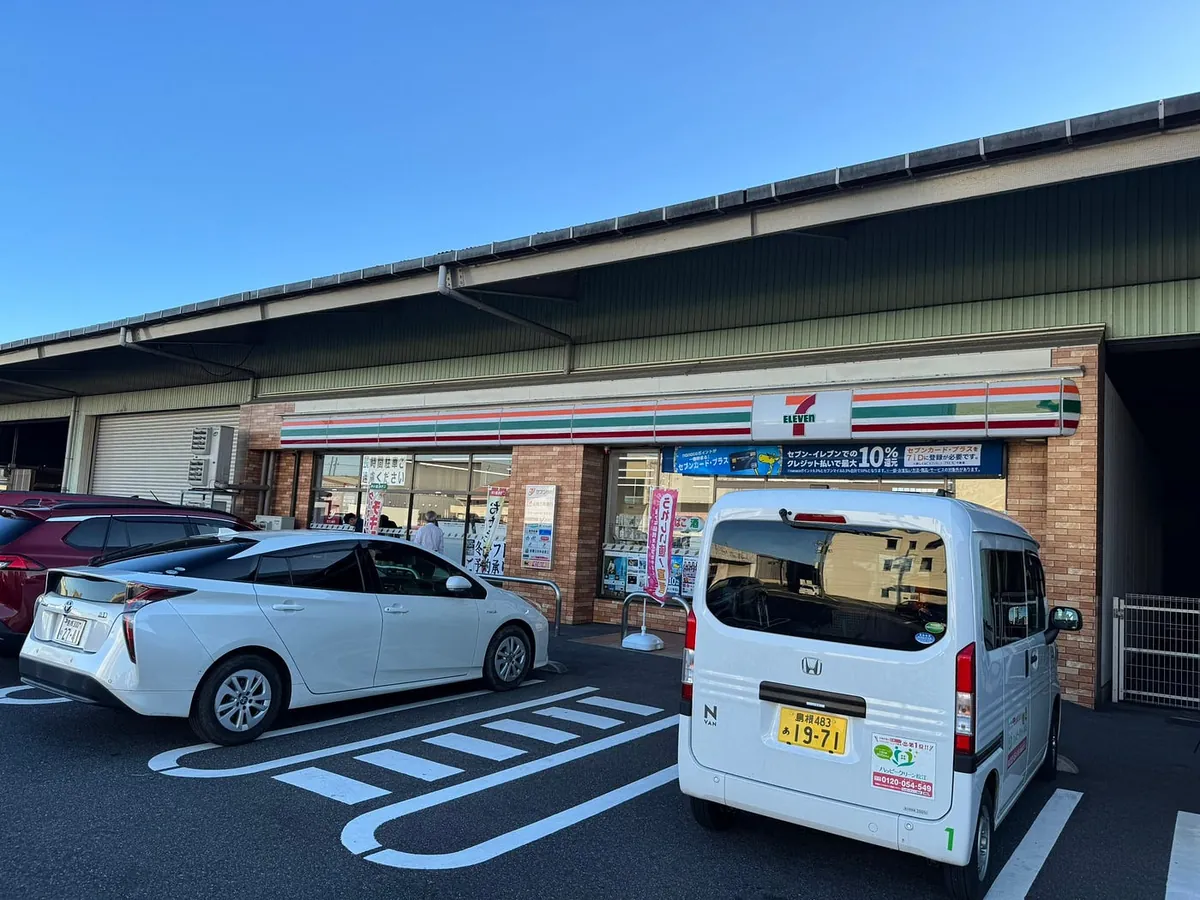
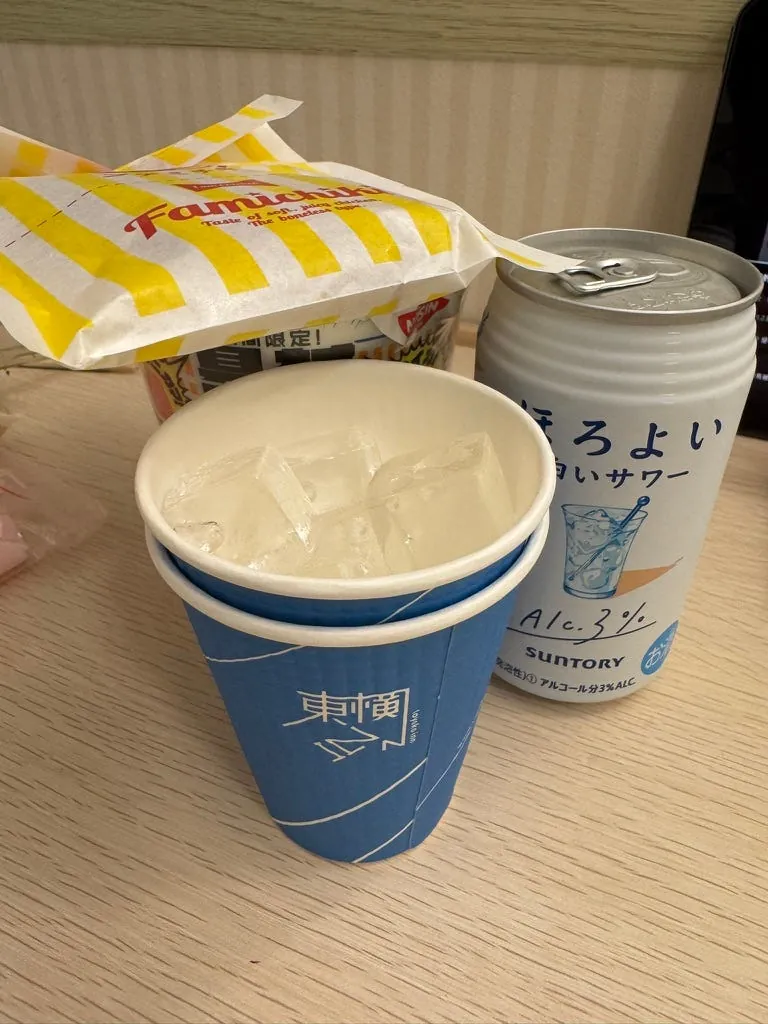
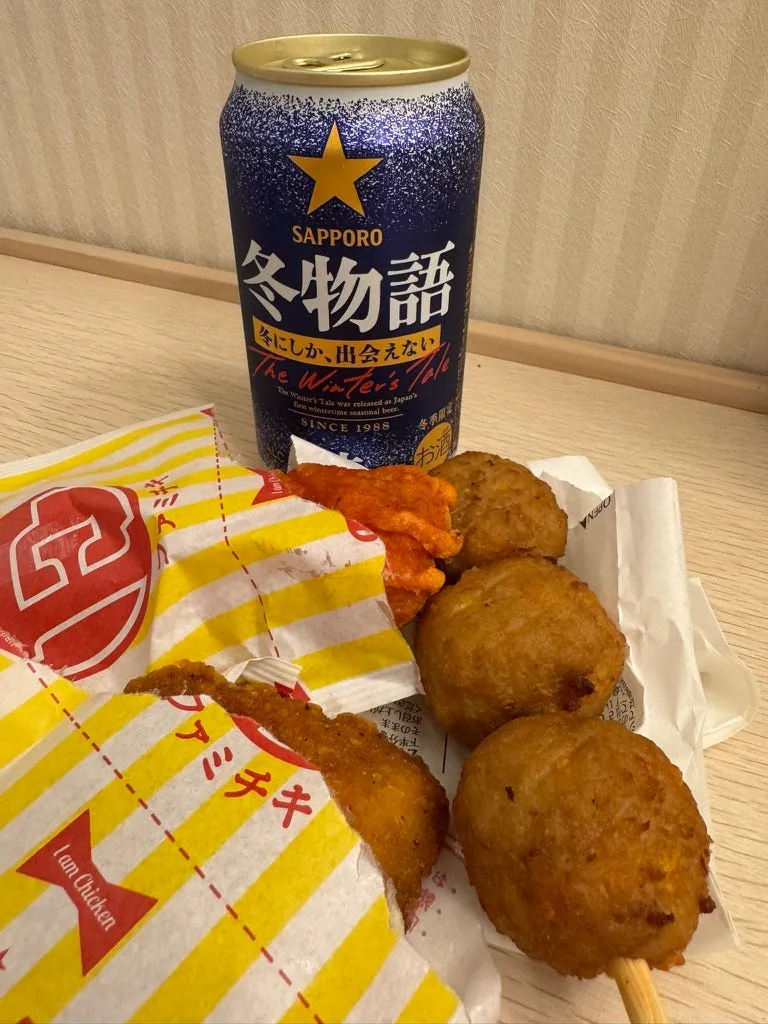
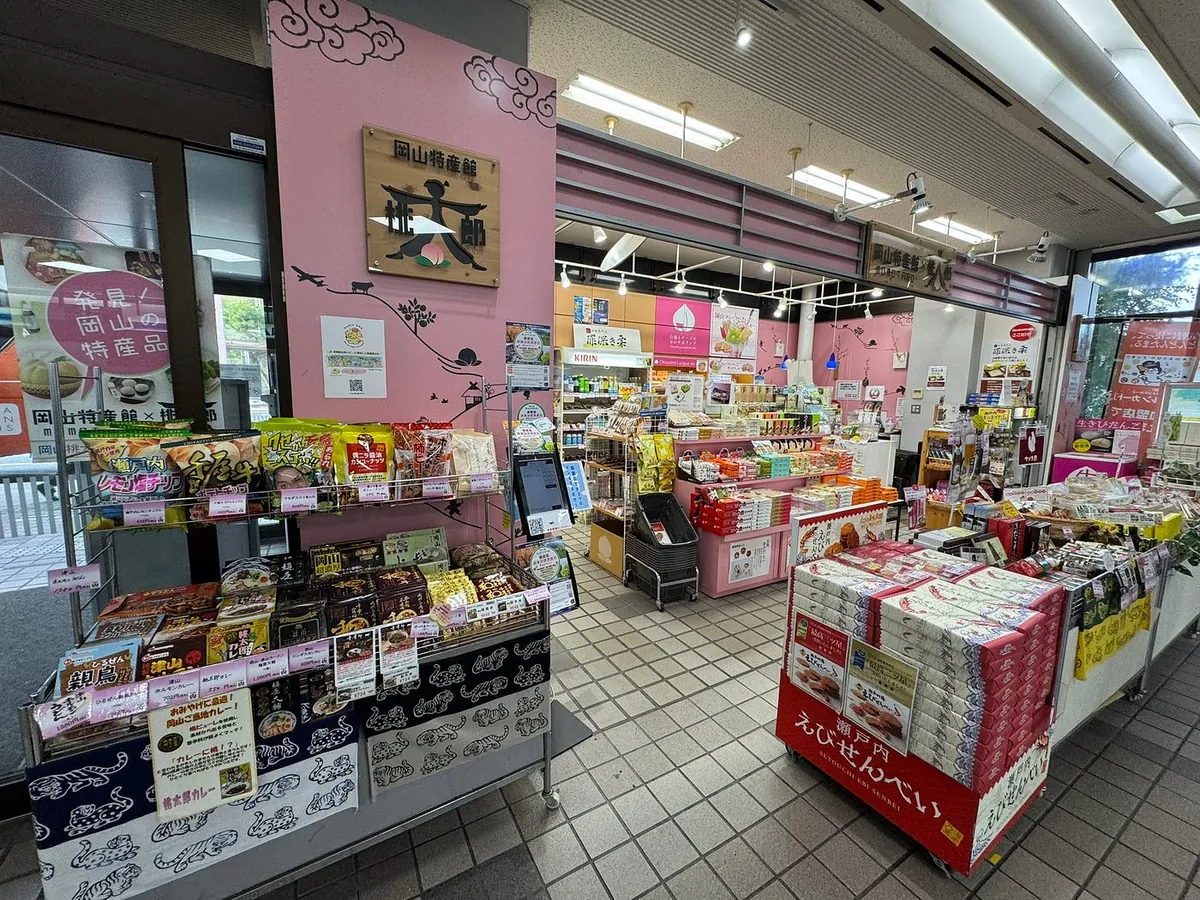
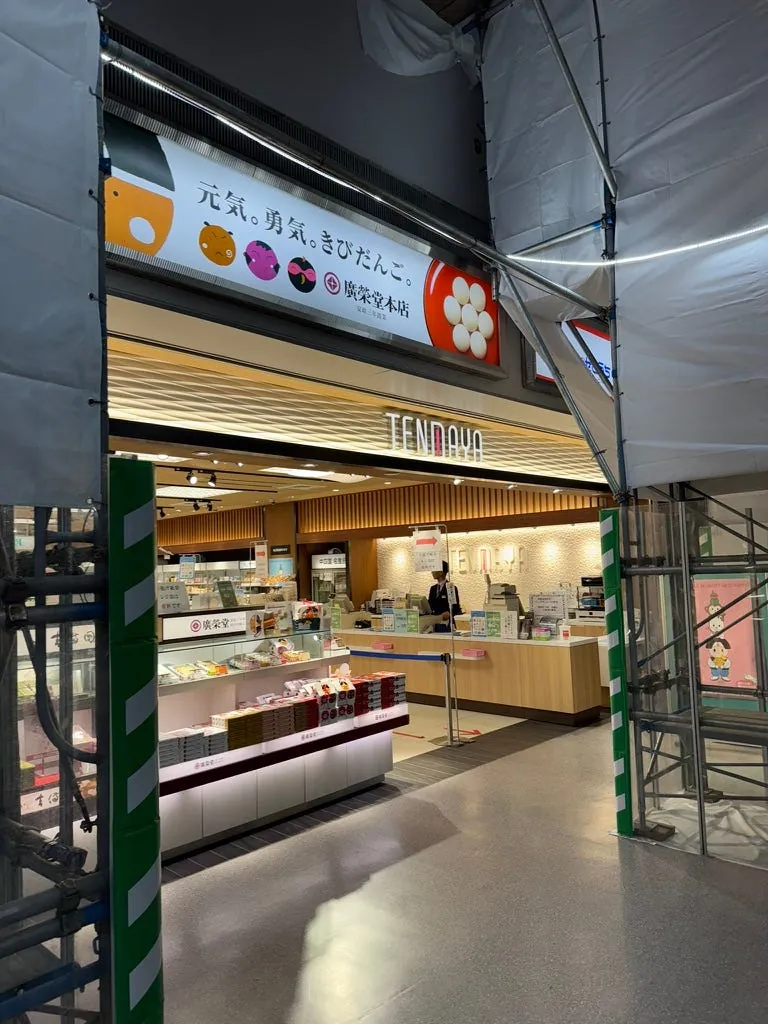
At Okayama Station, I casually bought a fried beef cutlet bento and some snacks and drinks from a convenience store, then went to the hotel to rest. Okayama Station is under renovation, and I will return here on the last day for the trip back.

It takes five minutes to walk from Momotaro Shopping Street to the hotel.
~= 19:00 Return to the hotel to eat and rest
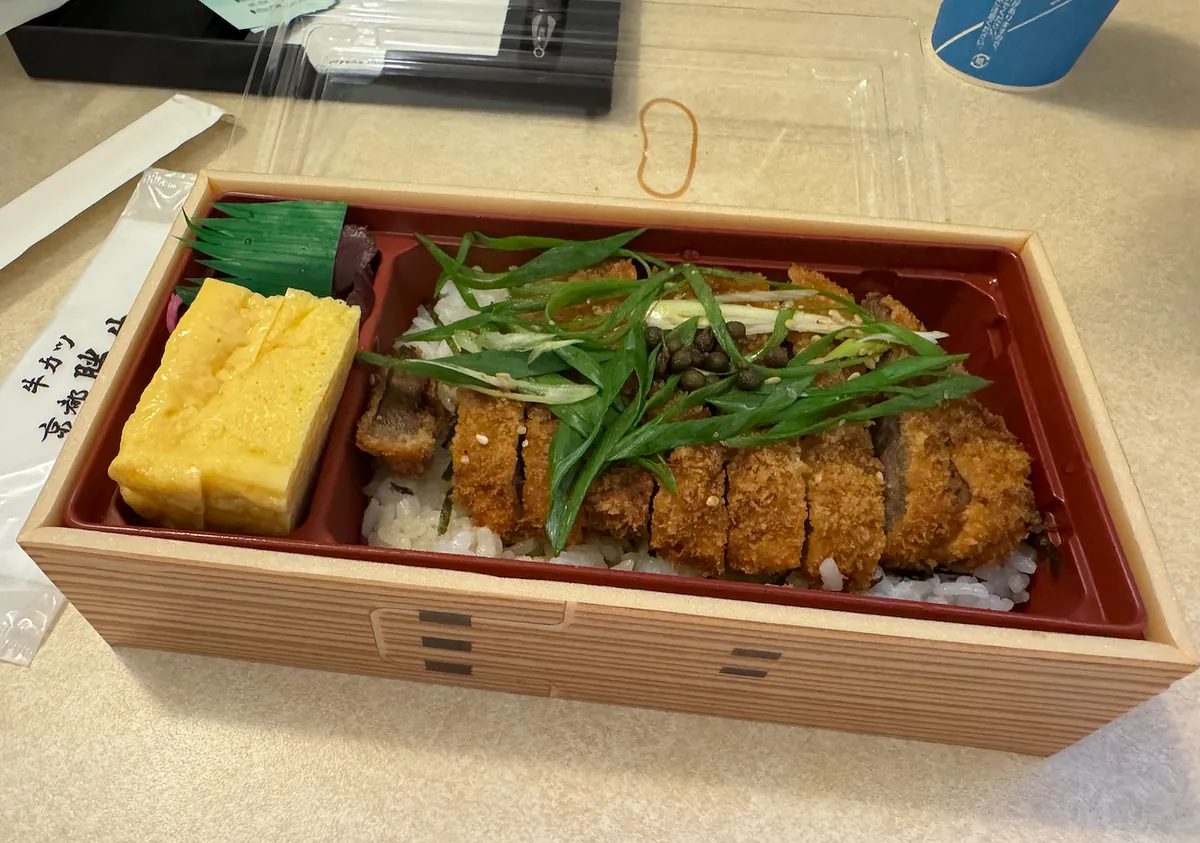
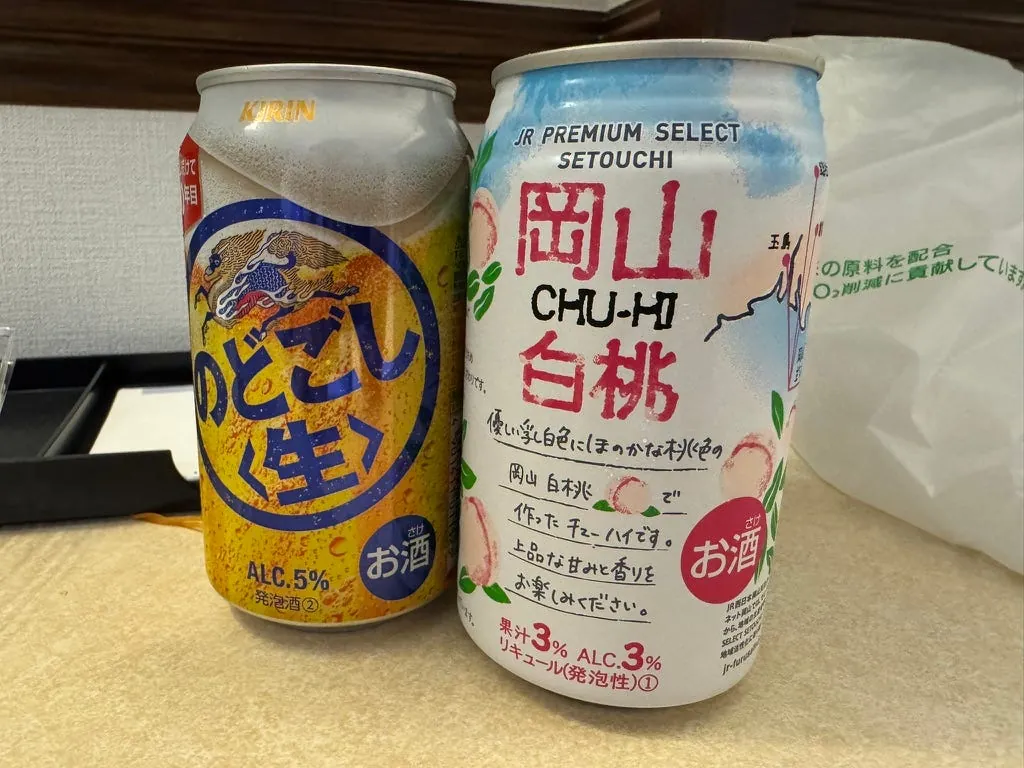
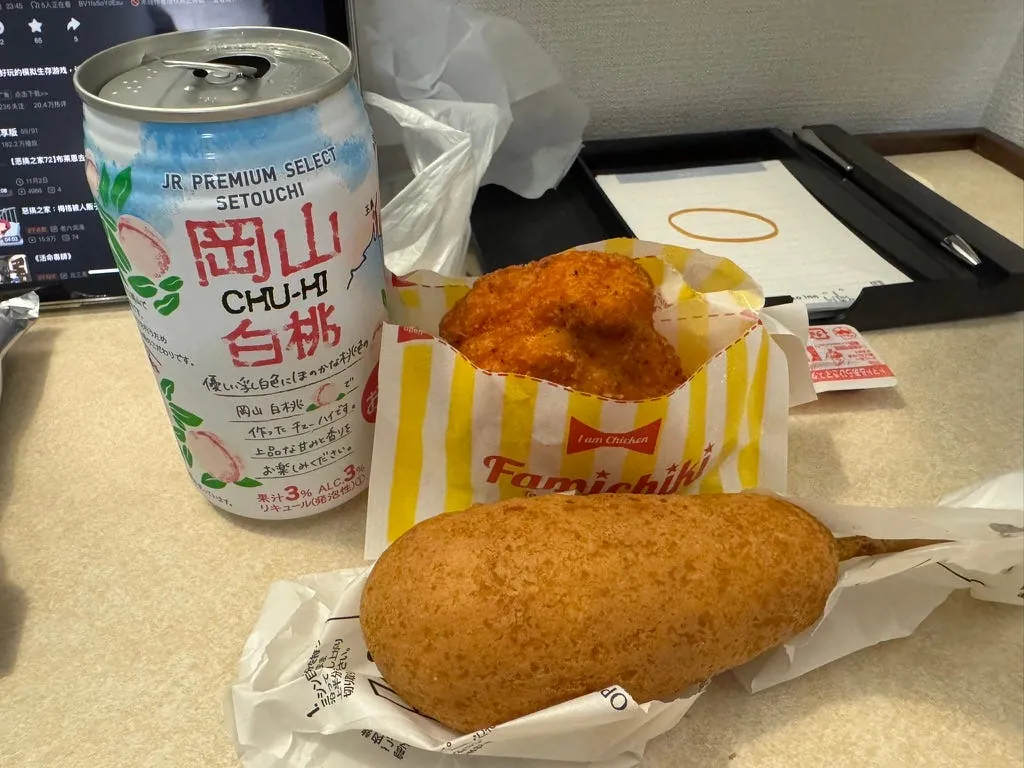
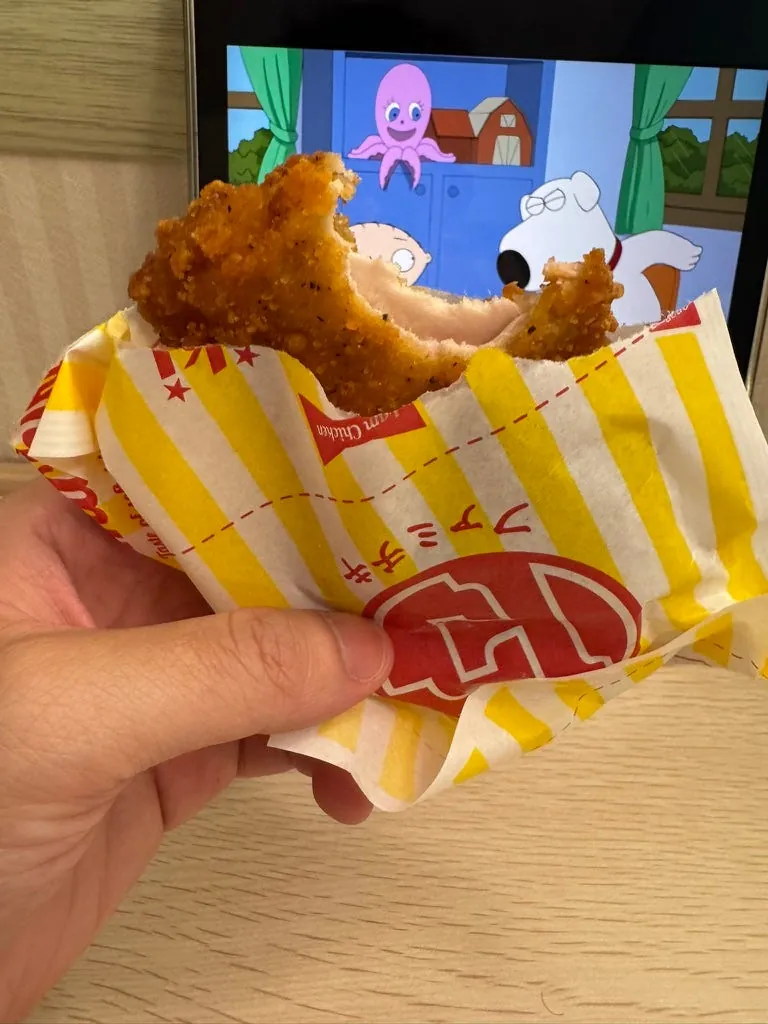
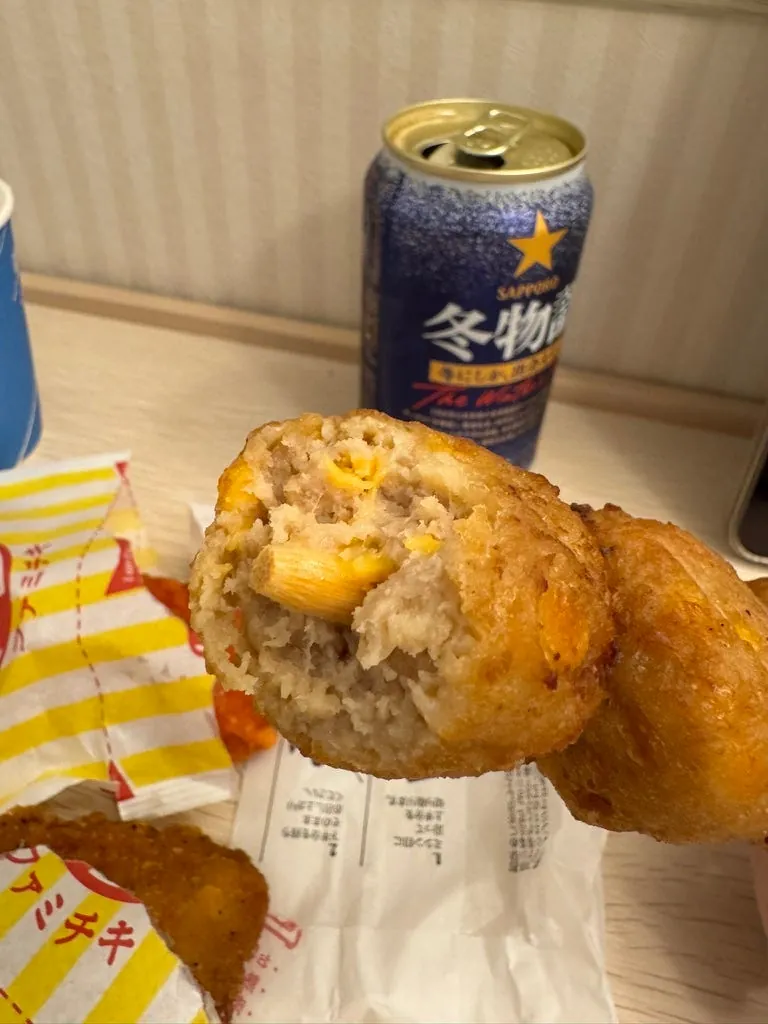
The bento portion was a bit small, but the Okayama white peach peach wine was very tasty! Along with the nostalgic Japanese convenience store (FamilyMart) hot dog and fried chicken, tonight was very satisfying. Good night, Okayama! Fully prepared to wake up early tomorrow and start the Japan trip.
Okayama Korakuen Illumination
The 2024 illumination at Okayama Korakuen Garden is from November 15th (Fri) to November 24th (Sun). It wasn’t on yet when I visited, but if it’s lit, it’s worth seeing as it’s very beautiful.
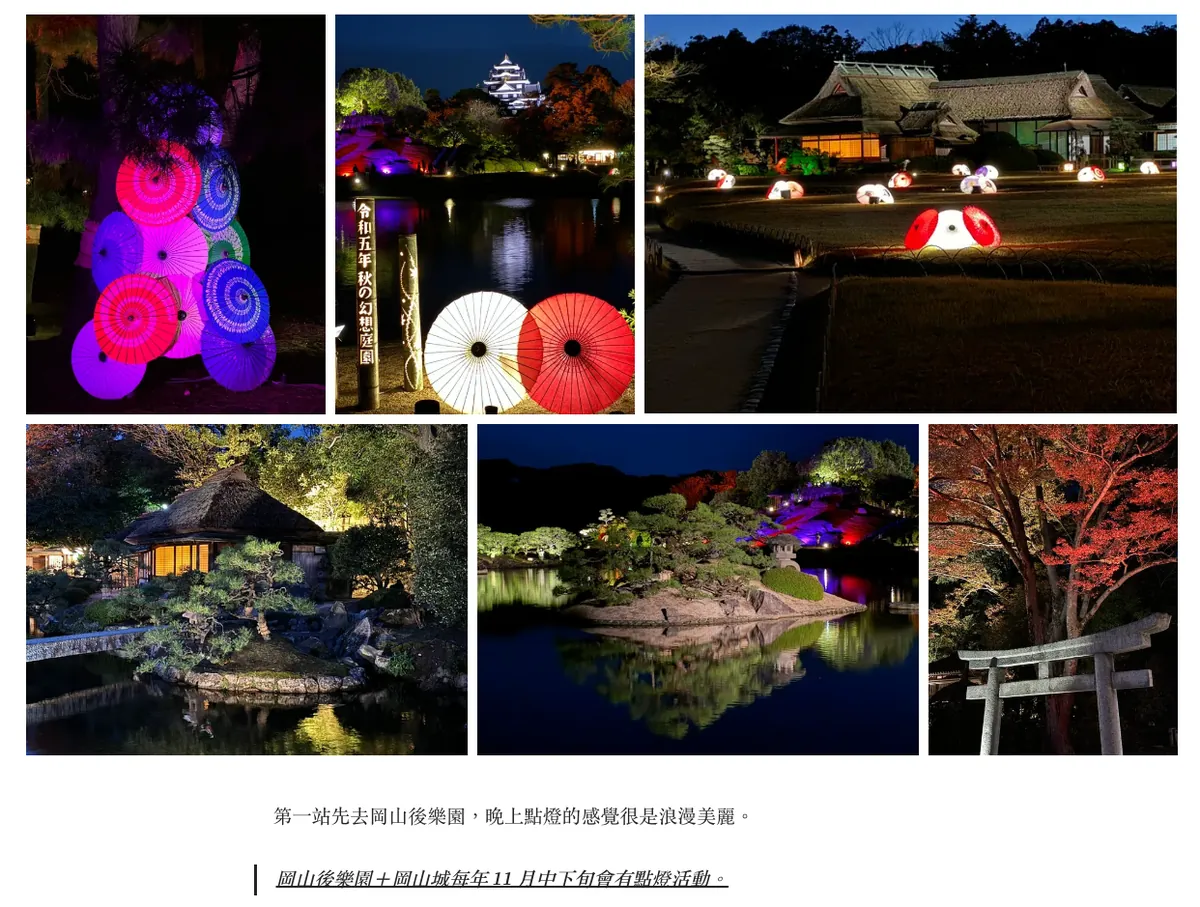
Photos I took at the Sanyo Lantern Festival in 2023 last year
Day 2 (11/13 Wednesday) Shimane — Izumo Taisha, Sunset at Lake Shinji
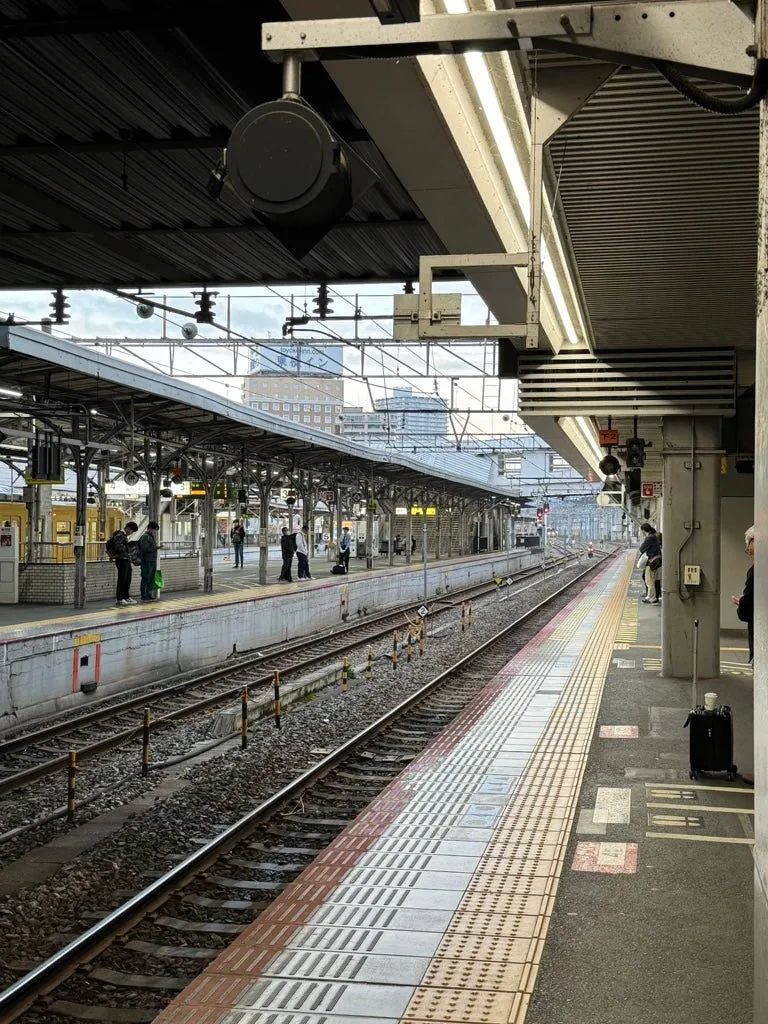
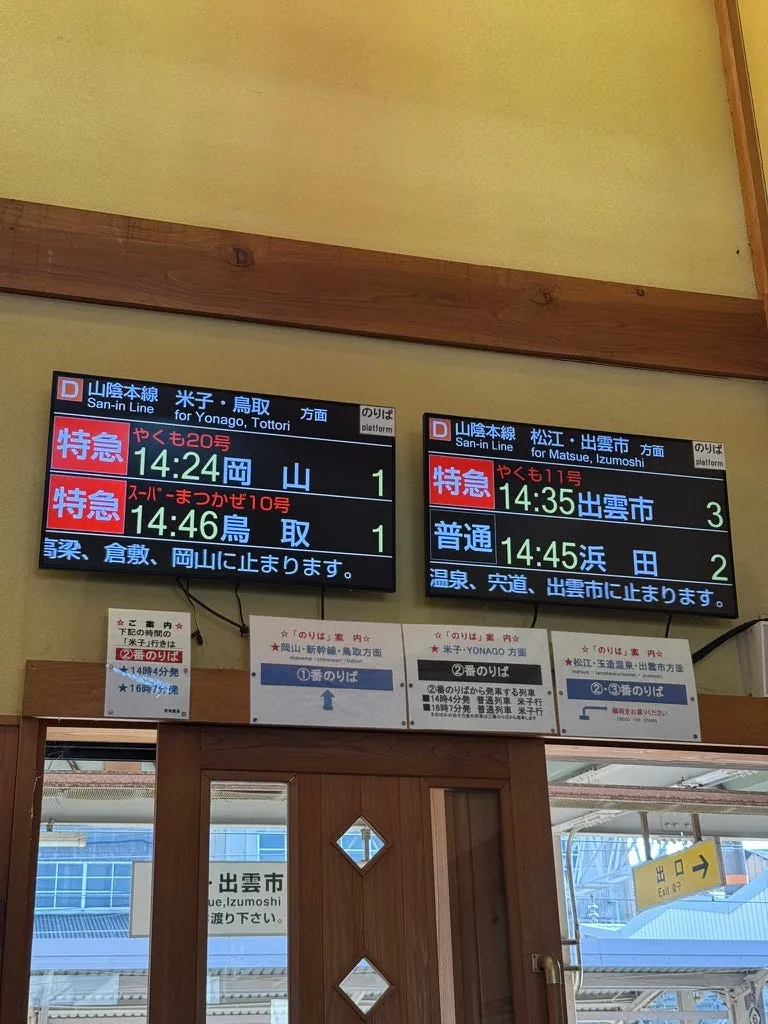
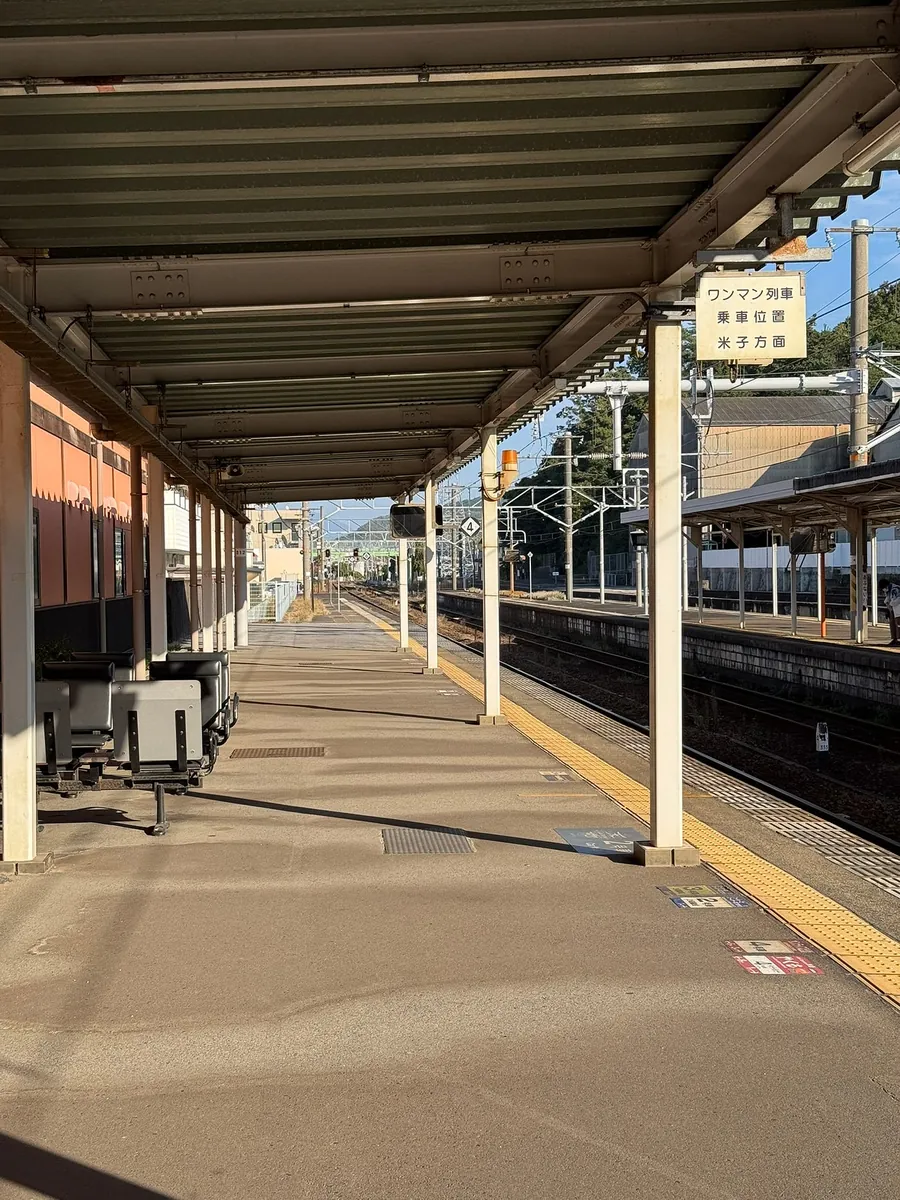
07:05 Take the Yakumo やくも No.1 train to Matsue
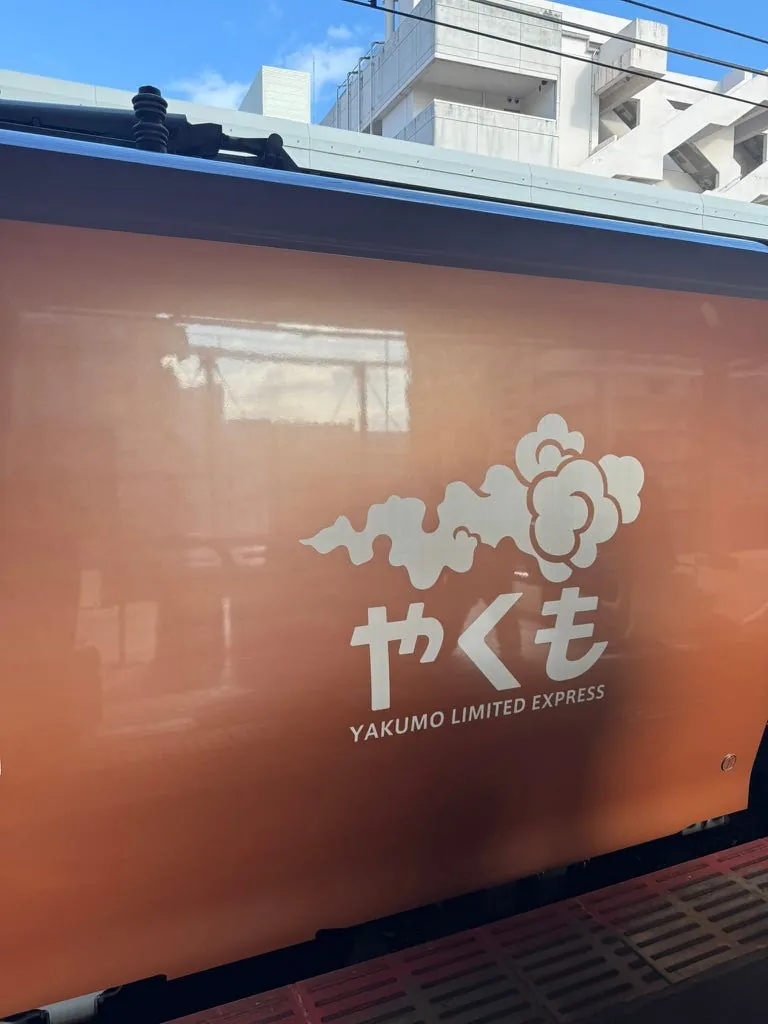
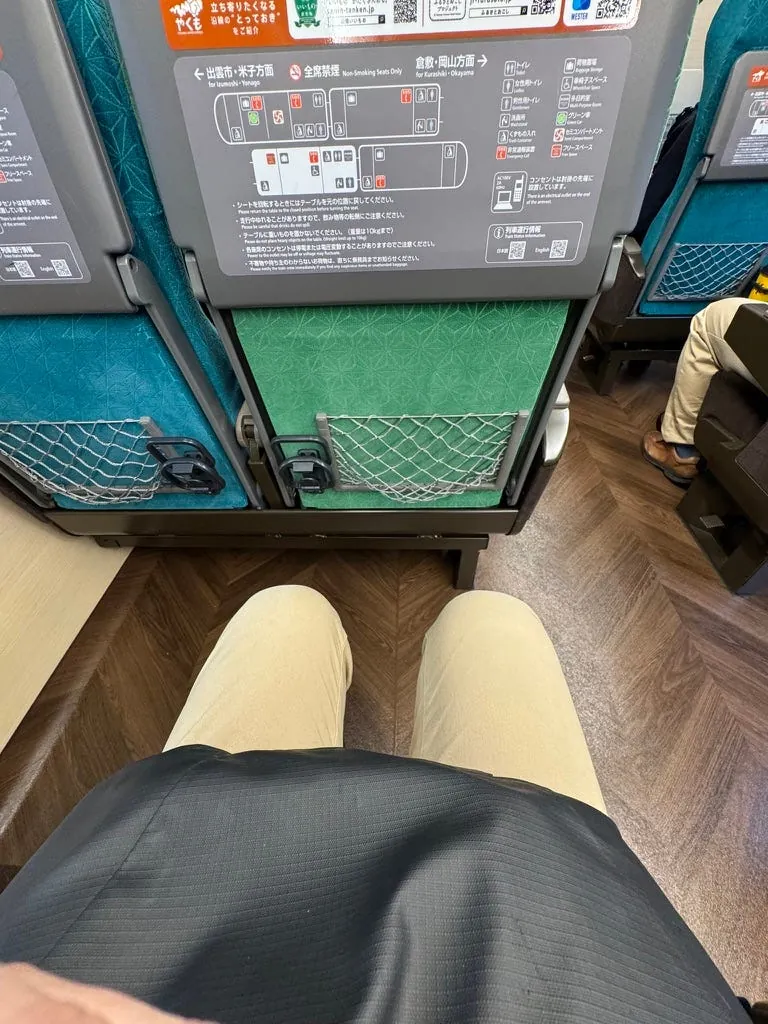
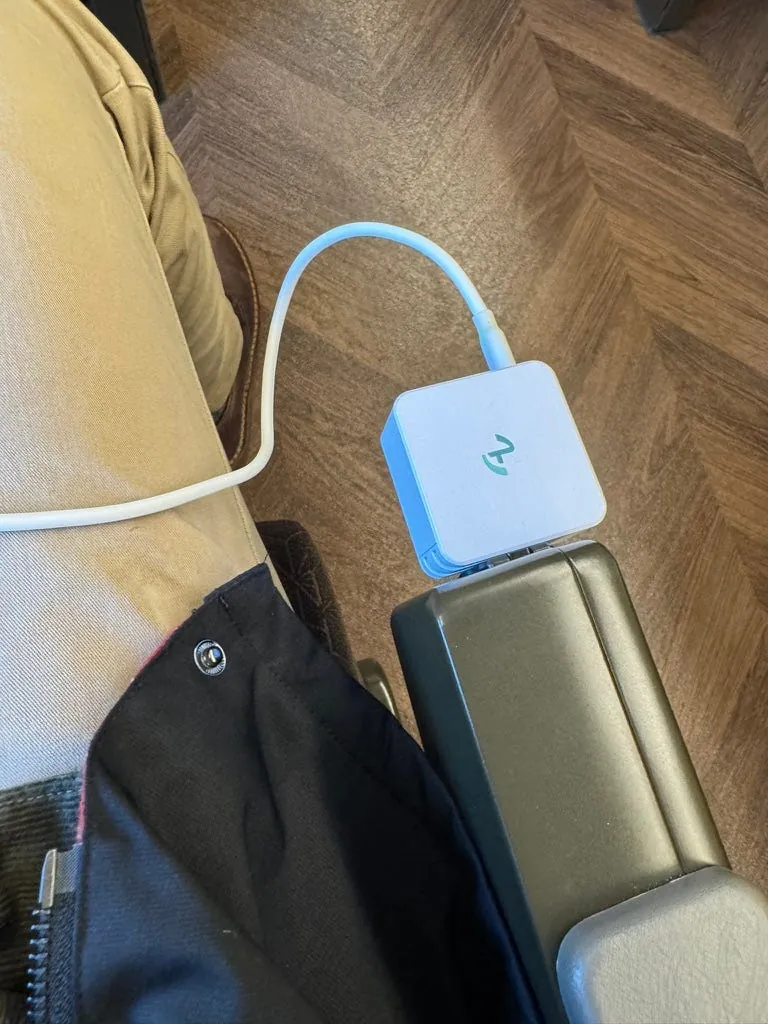
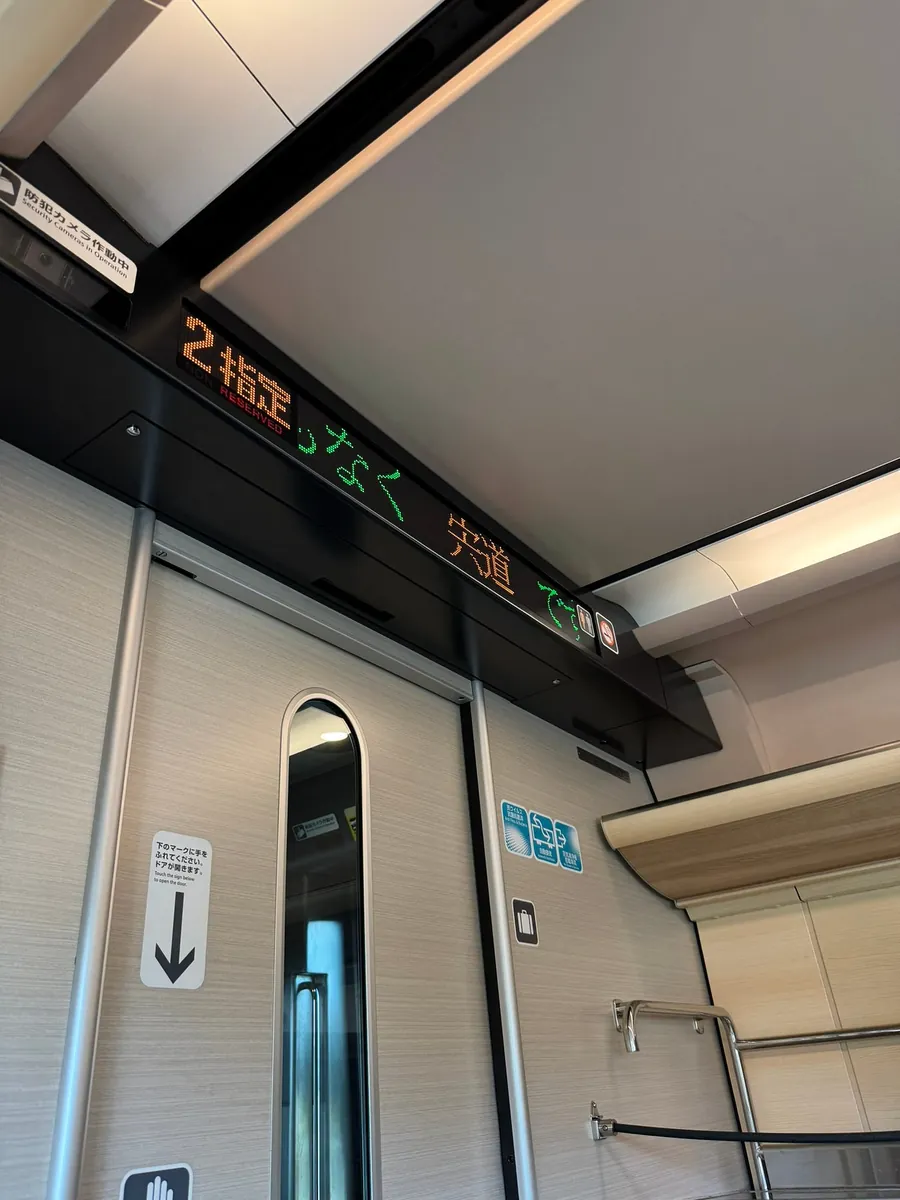
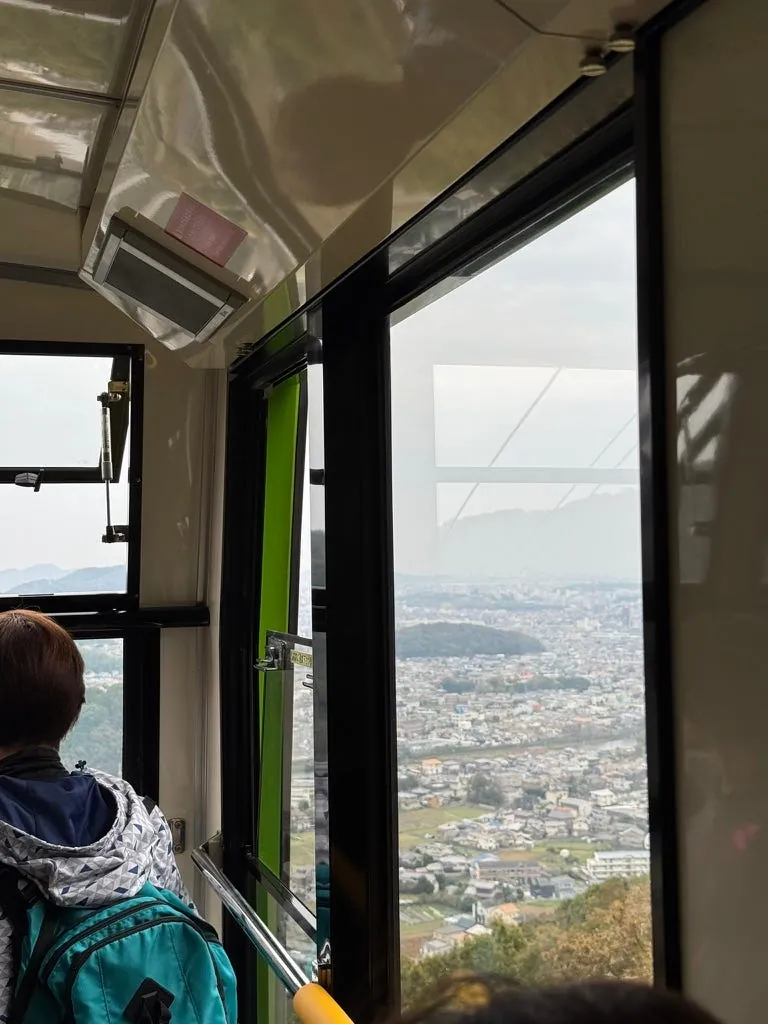
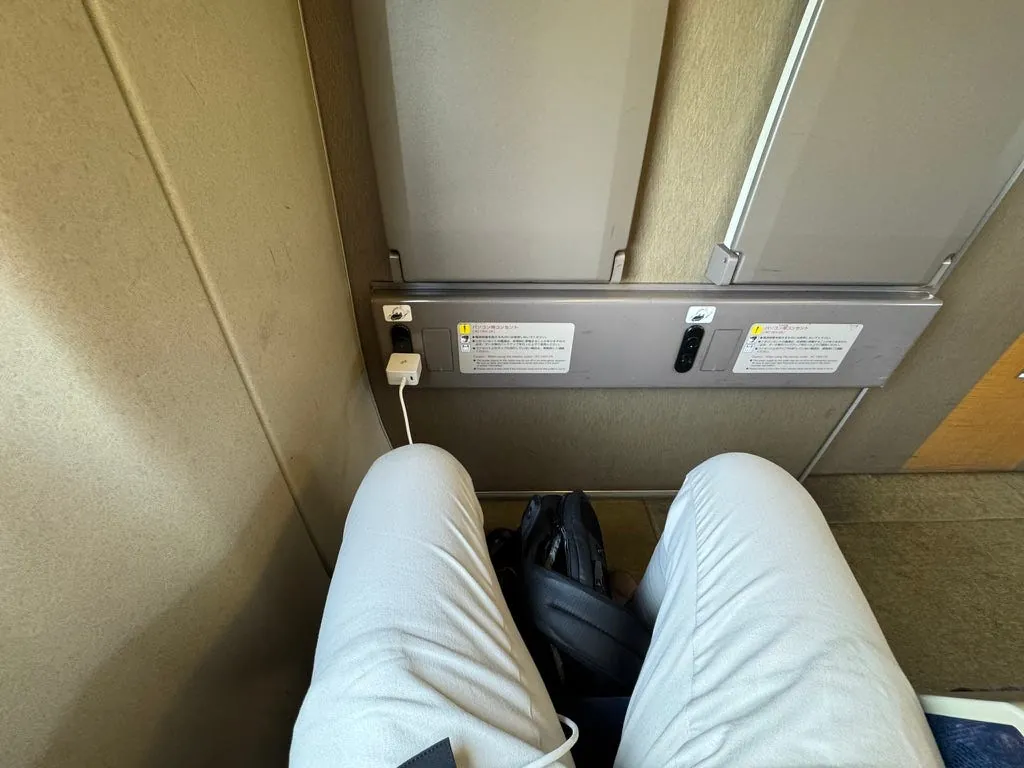
The interior is quite comfortable, with luggage areas at the front and back for easy storage. The seats also have charging ports.
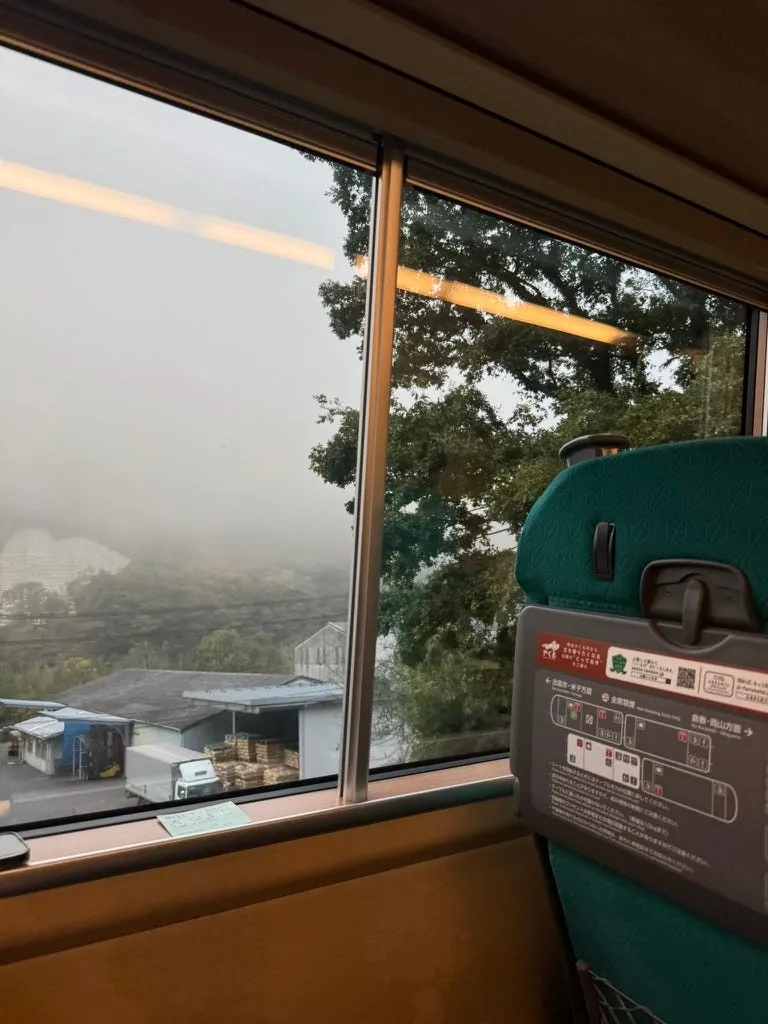
The total journey takes about 2 hours and 45 minutes. You can feel the route winding through mountains and ridges. Early in the morning, many areas are still covered in mist, giving a sense of passing through tunnels into a hidden paradise. Unfortunately, I didn’t get a window seat, so I could only enjoy the view from afar.
09:49 Arrive at Matsue
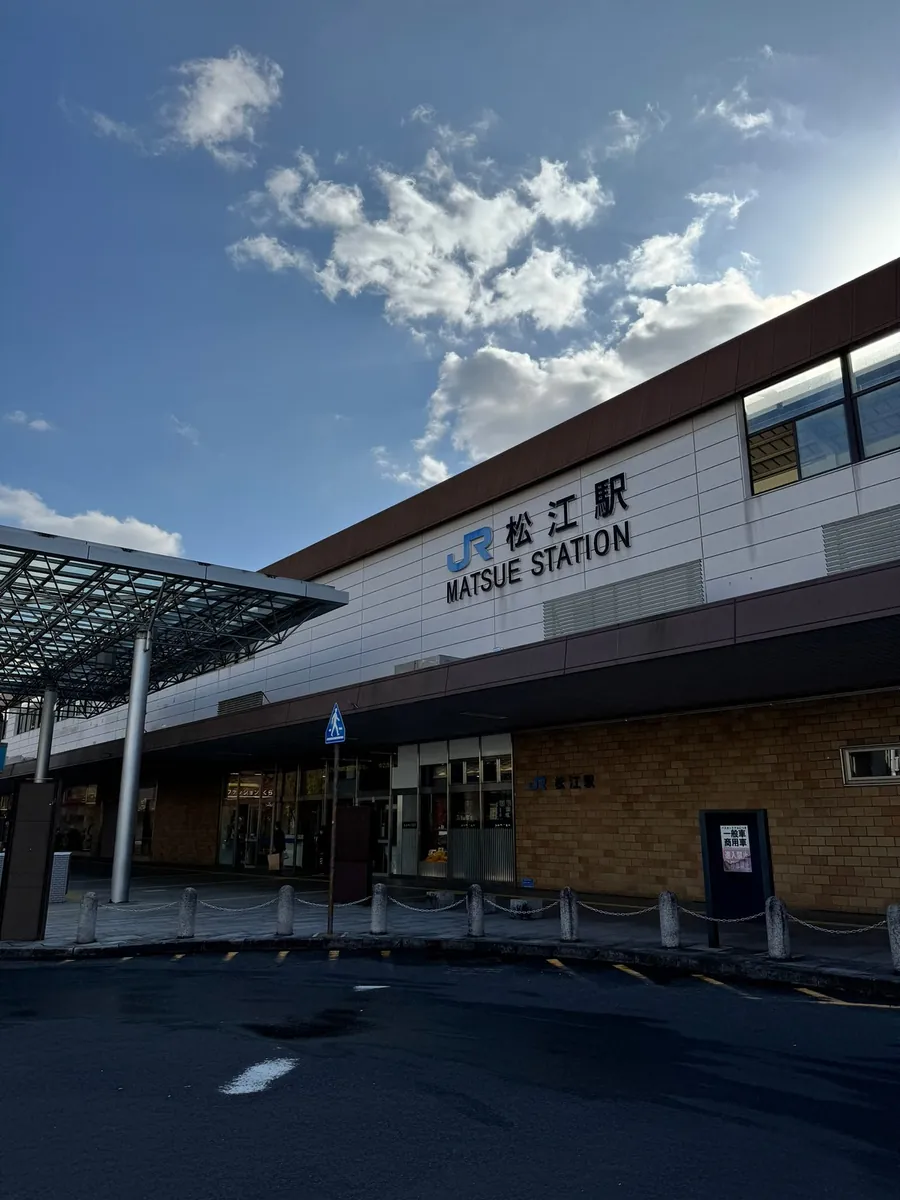
The weather in Matsue was perfect ☀️. After arriving at Matsue Station, I went straight to tonight’s hotel, Matsue Urban Hotel, to drop off my luggage.
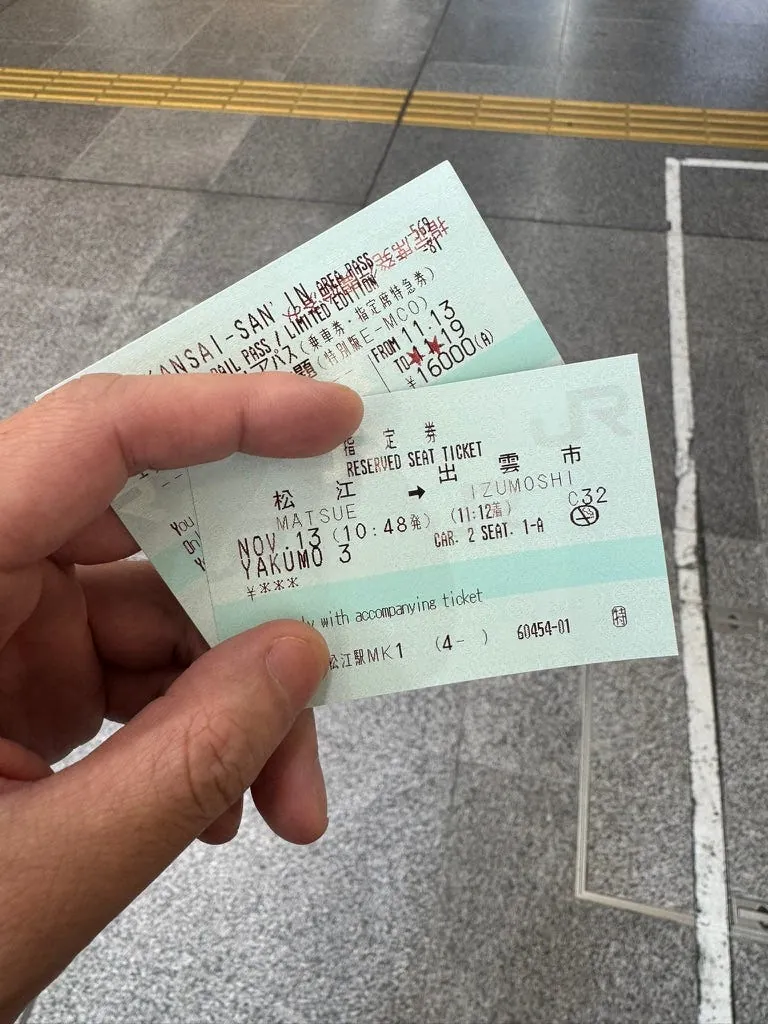
After dropping off the luggage, return to Matsue Station around 10:00 and rebook the seat for Yakumo No. 3 departing from Matsue to Izumoshi at 10:48.
I probably should have reserved a seat yesterday for Okayama to Matsue and also for Matsue to Izumo-shi because I wanted to see the sunset in the afternoon, so I first left my luggage in Matsue. Otherwise, I would have gone straight to Izumo-shi without wasting time changing trains midway.
You can also take the Ichibata Electric Railway Taisha Line to Izumo Taisha, which takes about the same time.
There was still some time, so I went to the convenience store to buy two rice balls, coffee, and fried chicken to take as lunch.

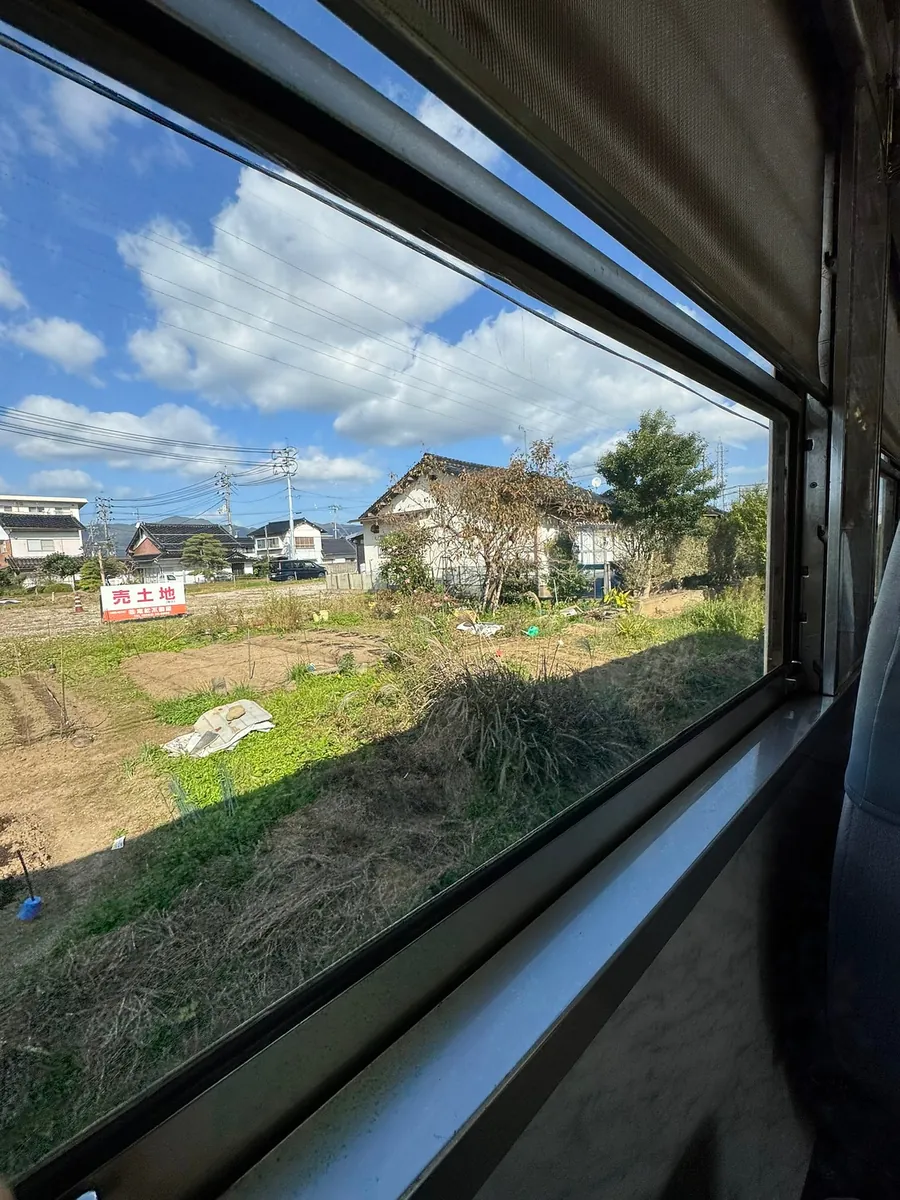
Along the way, we passed by Lake Shinji, which is so large that I initially thought it was the sea, but it’s actually a lake.
You need to reserve a D seat by the window to directly see Lake Shinji; I reserved an A side seat facing the mountain, so no view QQ.
11:12 Arrive at Izumo City
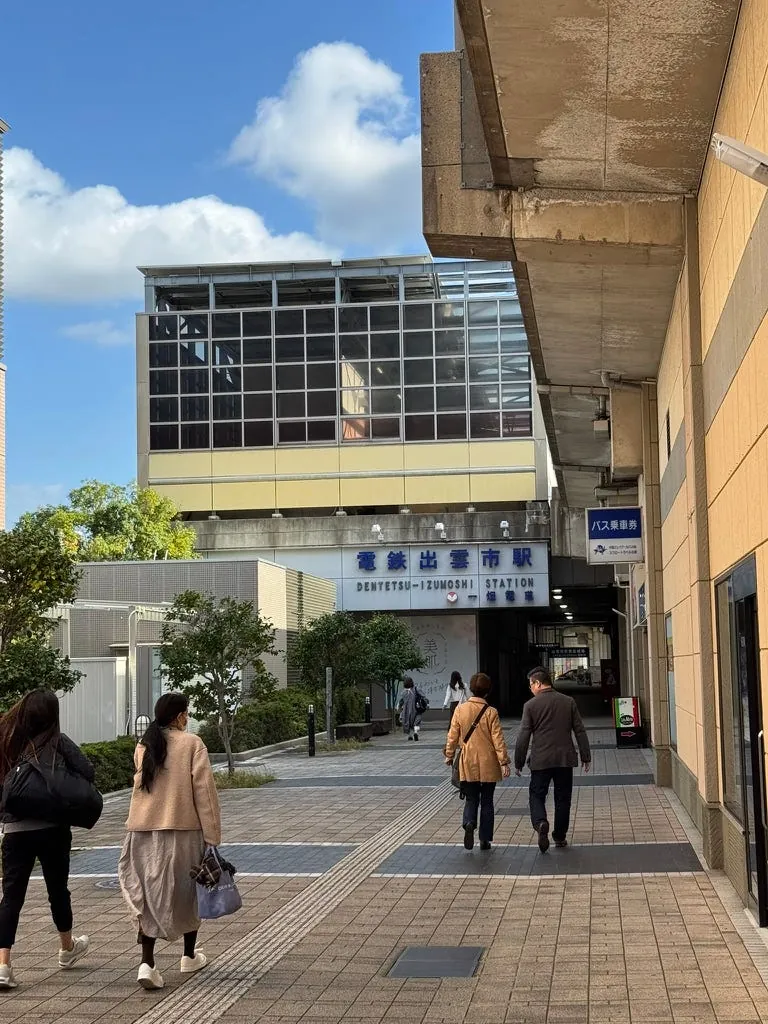

After arriving at Matsue Station, I ran all the way to catch the 11:25 Ichibata Electric Railway Kitamatsue Line heading to Kawato Station.
Ichibata Electric Railway does not accept transit cards for entry. You must first buy a ticket at the automatic ticket machine at the entrance (electronic payments accepted). If you’re unsure how to buy, just tell the staff you want to go to
Izumo Taisha.
At Kawato Station, you need to transfer trains (follow everyone to the opposite platform) to take the Ichibata Electric Railway Taisha Line heading to Izumo Taisha-mae Station.
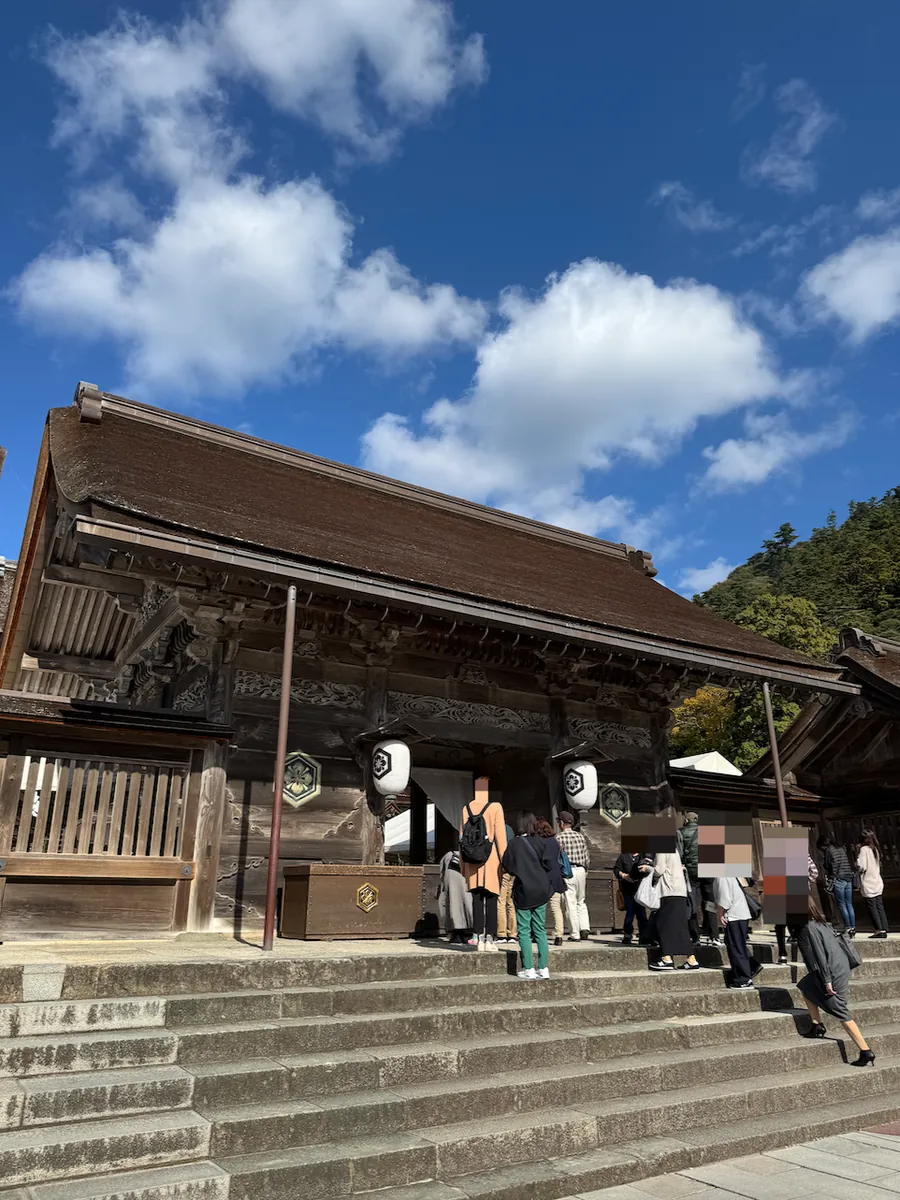
Arrive at Izumo Taisha around 12 PM
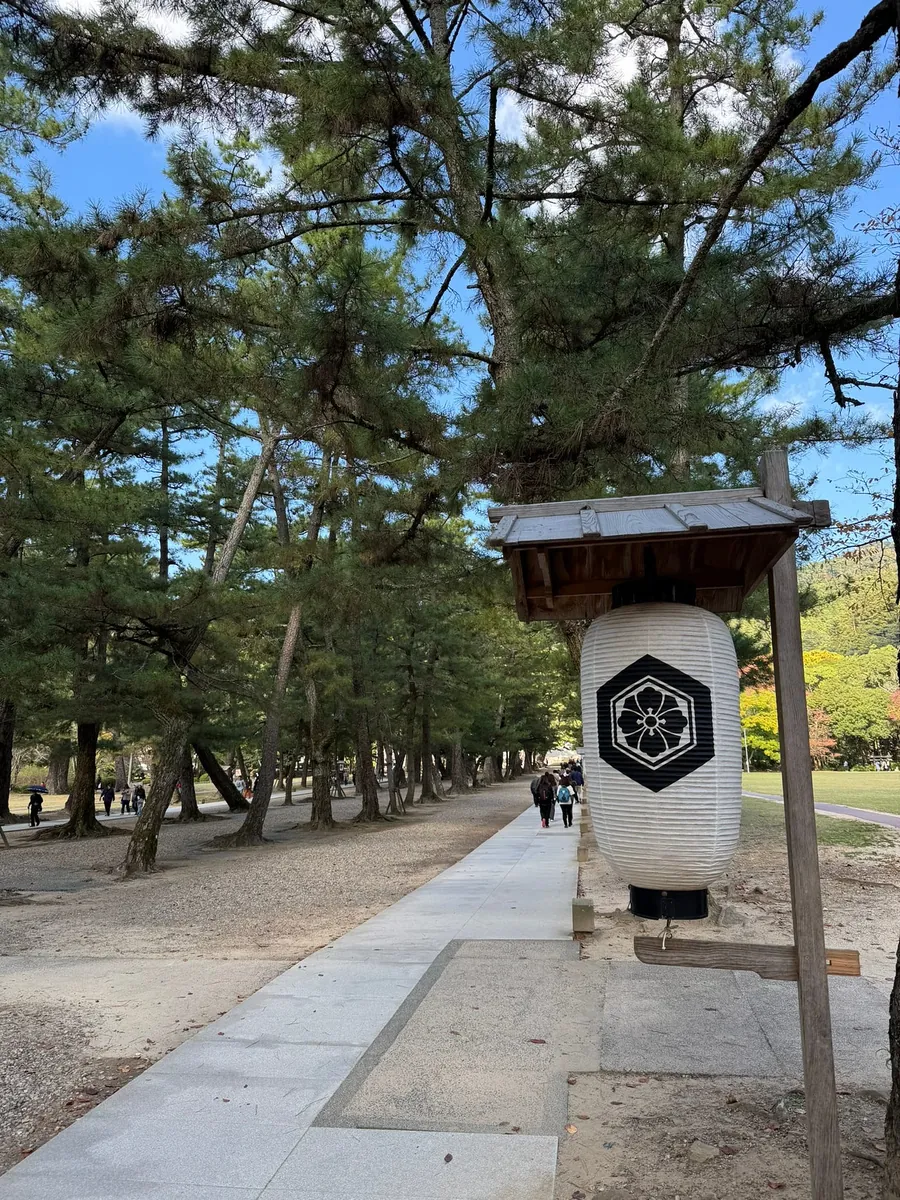
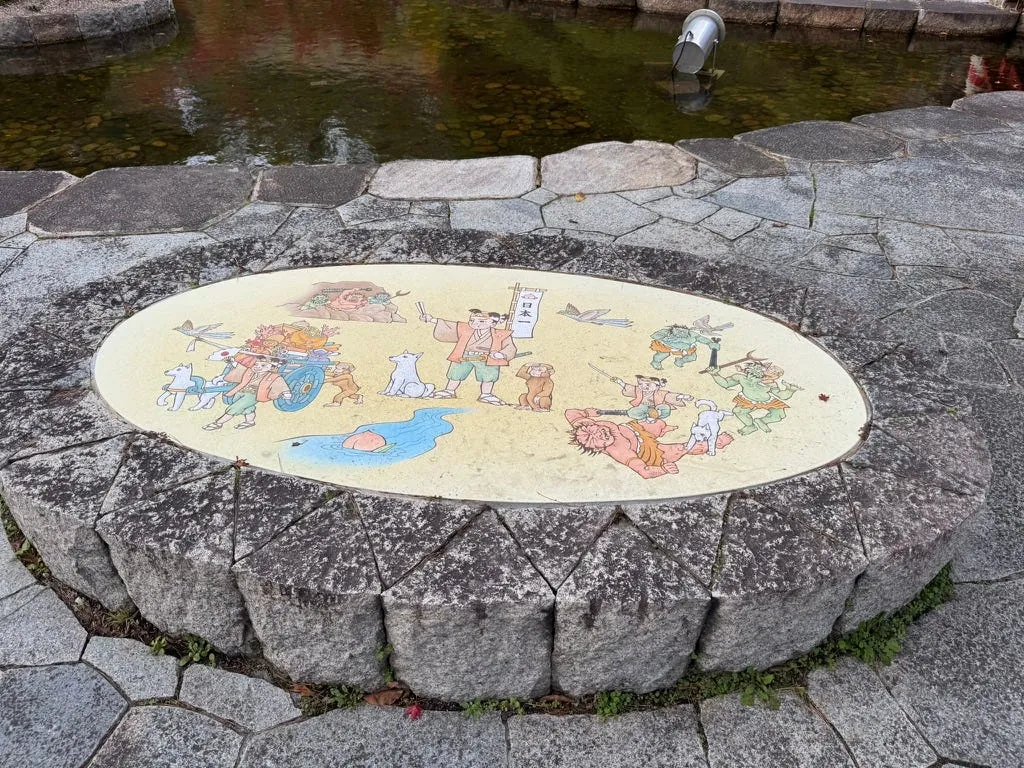
The approach to Ōkami Shrine is quiet and beautiful. If you have time, there are many small shops and delicious food to explore here.
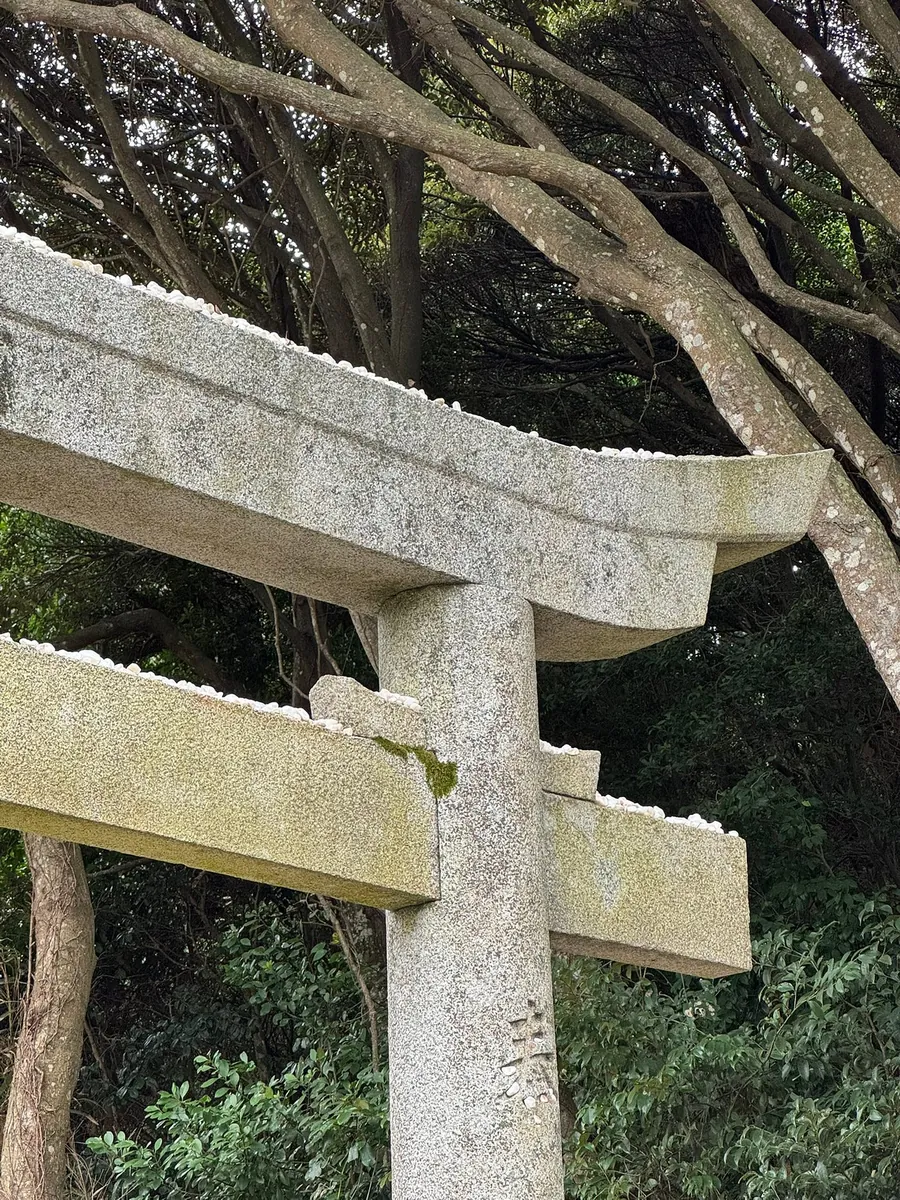
Later, I learned that the four torii gates of Izumo are also famous. One of the large white torii gates can be found at the entrance by walking from Izumo Station’s Omotesando in the opposite direction of the shrine:
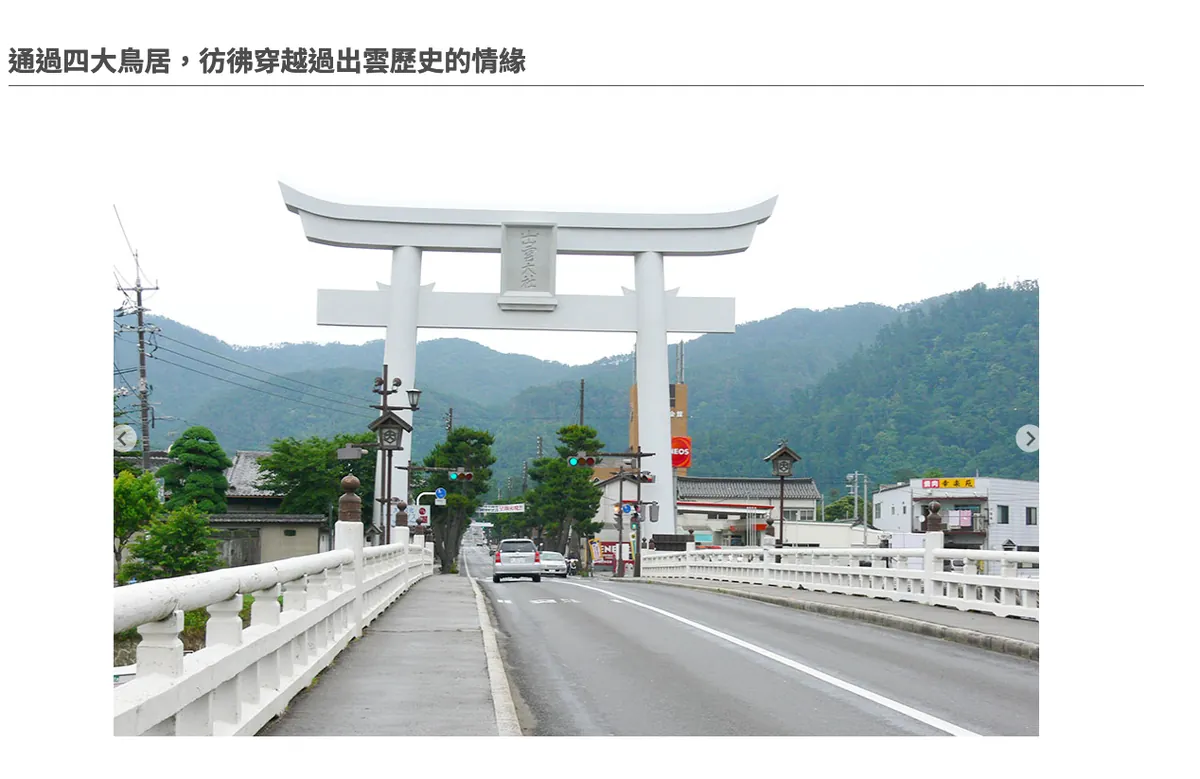
Source: Shimane Tourism Official Website
For more details, please refer to the Shimane Tourism Official Website
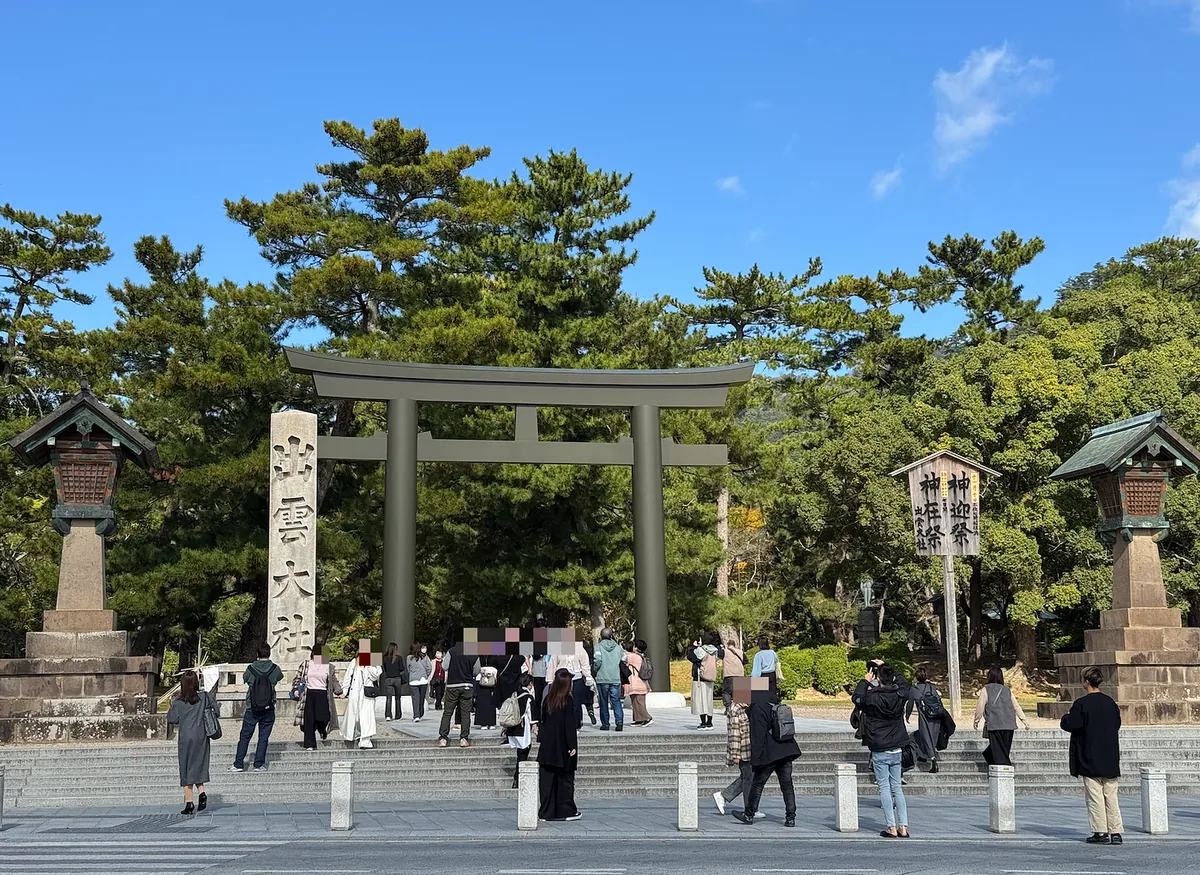
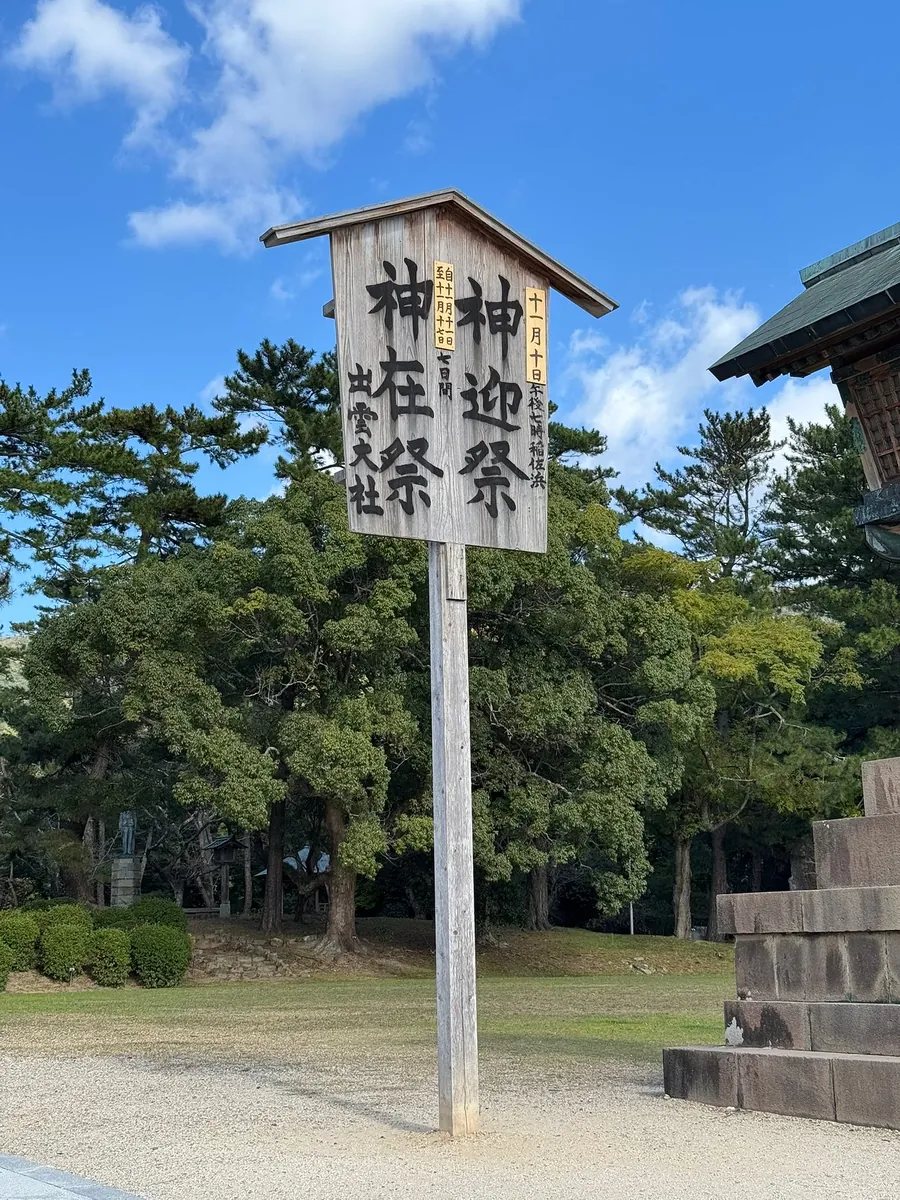
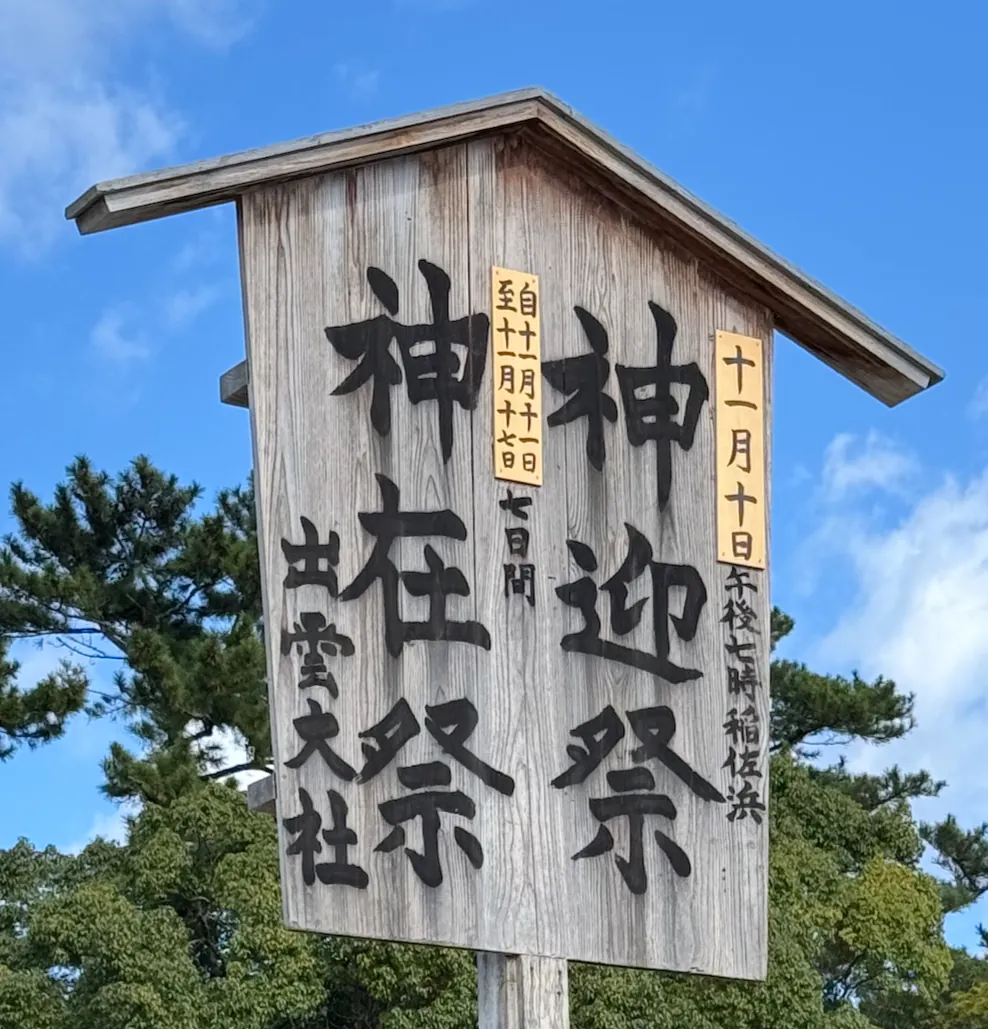
Walk uphill to the entrance of Izumo Taisha. The visit on 2024/11/13 happened to be during the Kamiari Festival ( 2024 Reiwa 6 Nov 11~Nov 17 ), so there were many Japanese visitors coming to pray.
Every year in Japan’s lunar October (Gregorian November), eight million gods gather at Izumo for the “Divine Council” to discuss human affairs, such as fate arrangements and harmony with nature.
Therefore, this month is called “Kannazuki” (the month without gods) in other regions of Japan, and there are usually no festivals.
Only in Izumo is this called the “Month of the Gods,” meaning that only the Izumo region has gods present.
The festival includes the “Kami Mukae Festival” to welcome the gods, the “Enmusubi Grand Festival” to pray for good relationships, and the “Kami Okuri Festival” to send off the gods.
Izumo Taisha’s main deity: Ōkuninushi no Mikoto
What a coincidence! When I was planning the schedule, I didn’t intentionally choose this time. I only found out while checking the attraction information.
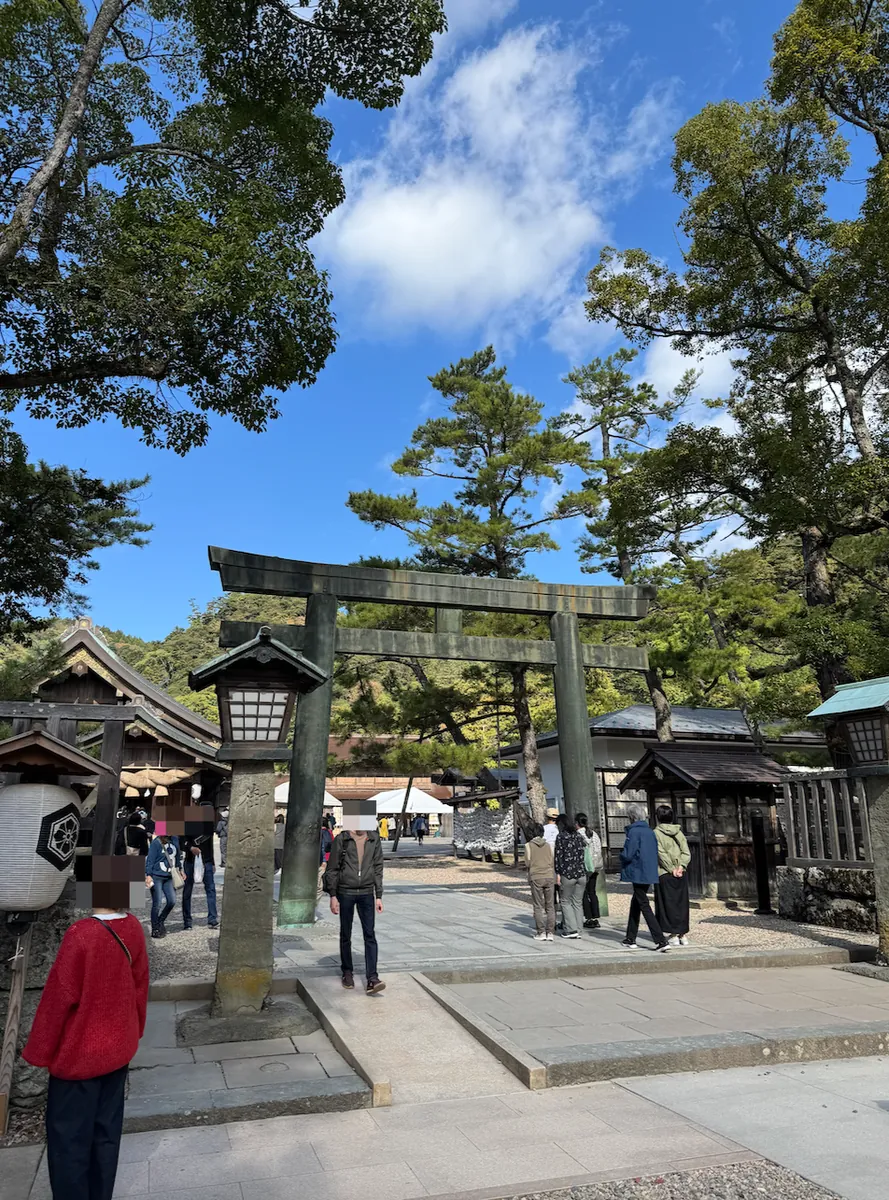
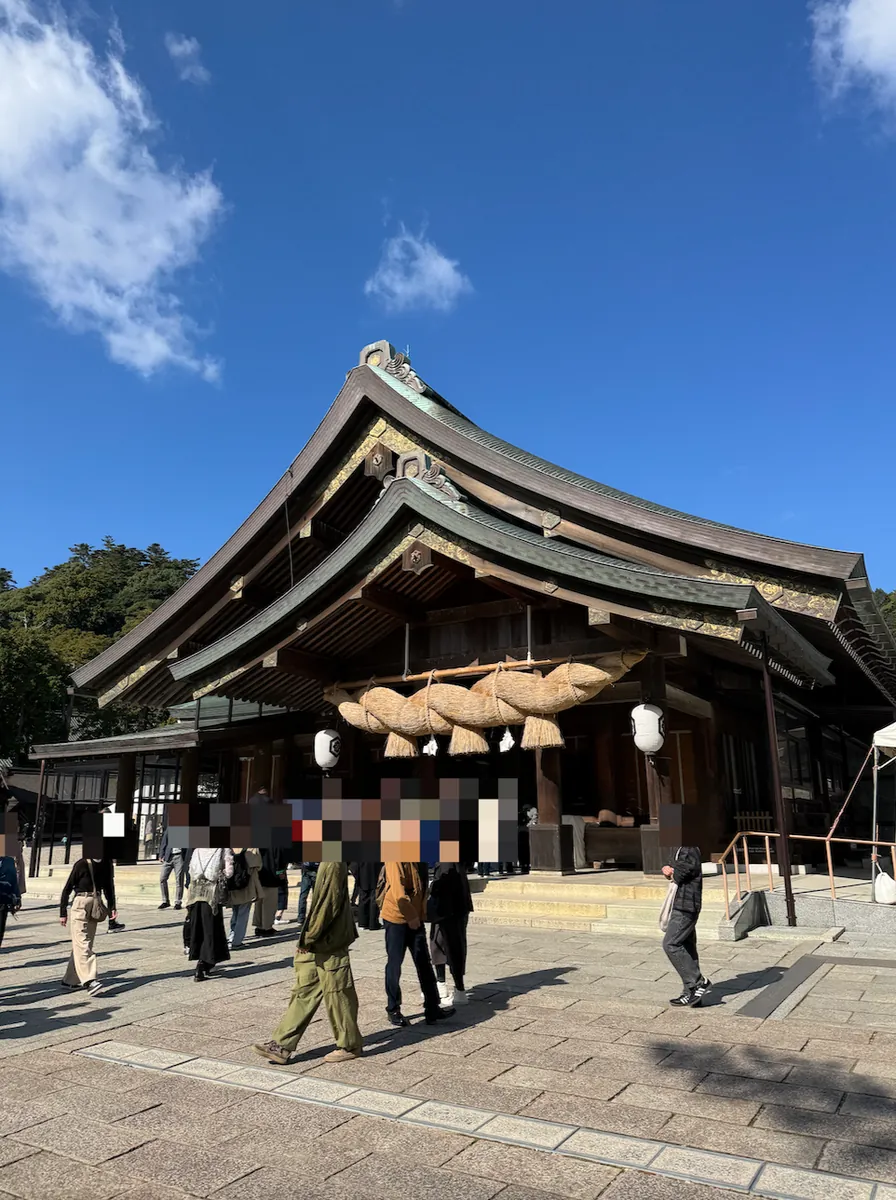
After passing through the entrance torii gate, it takes about another 5 minutes to reach the shrine.
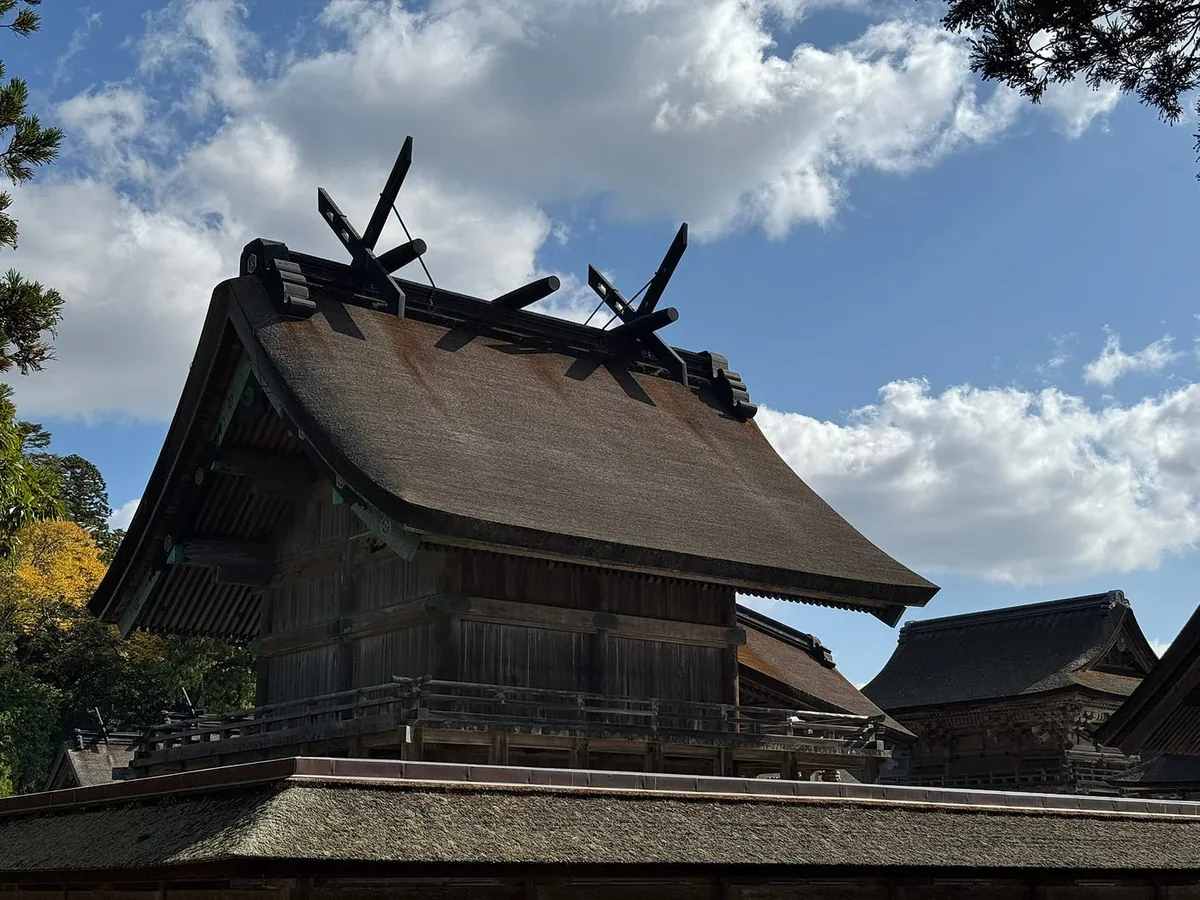
Japan’s Largest “Hinomaru” National Flag
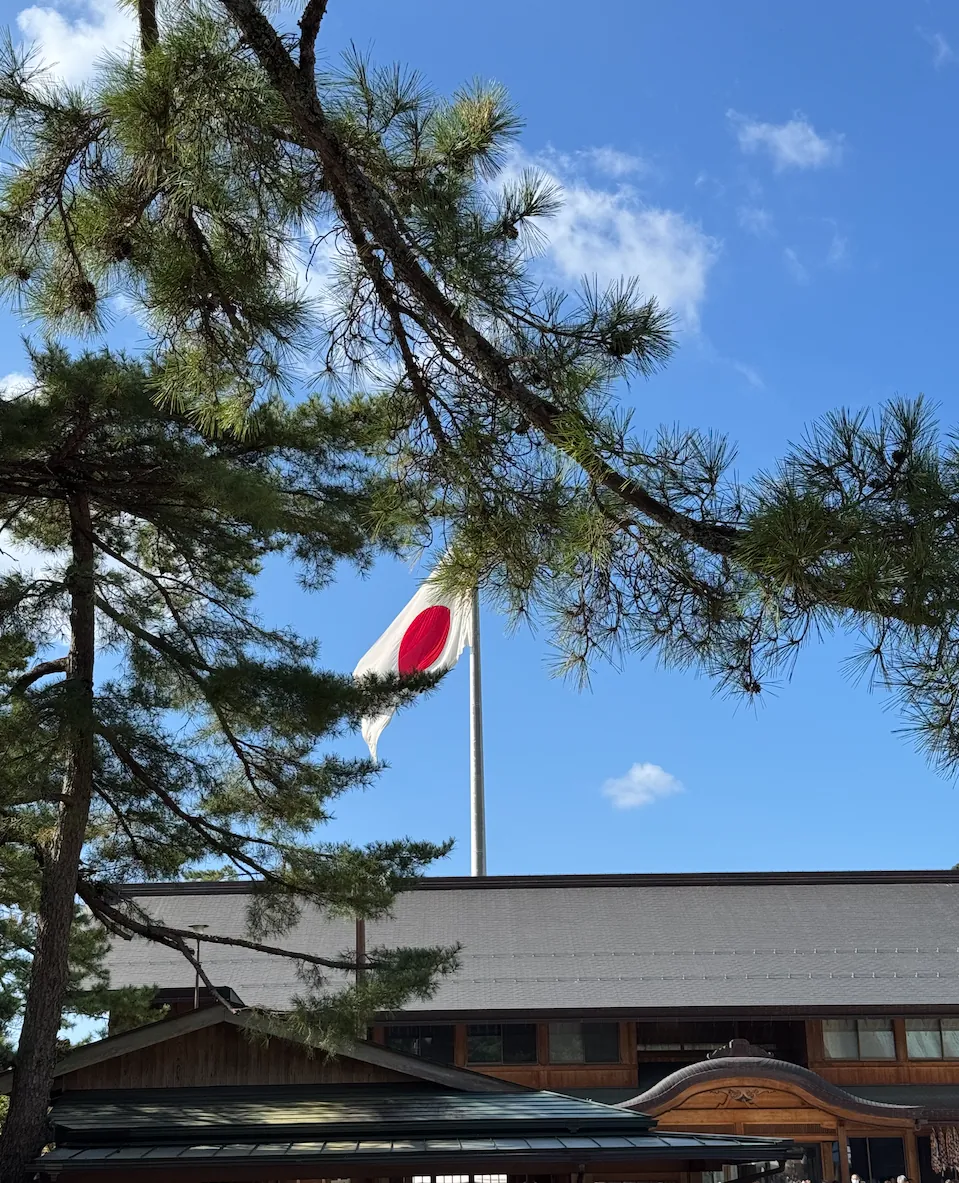
After entering the shrine, look to the left to see a tall flagpole with Japan’s largest Hinomaru flag (about 75 tatami mats, 137 square meters).
Walk towards this flagpole to reach the “Kaguraden,” where you can find Japan’s largest Shimenawa.
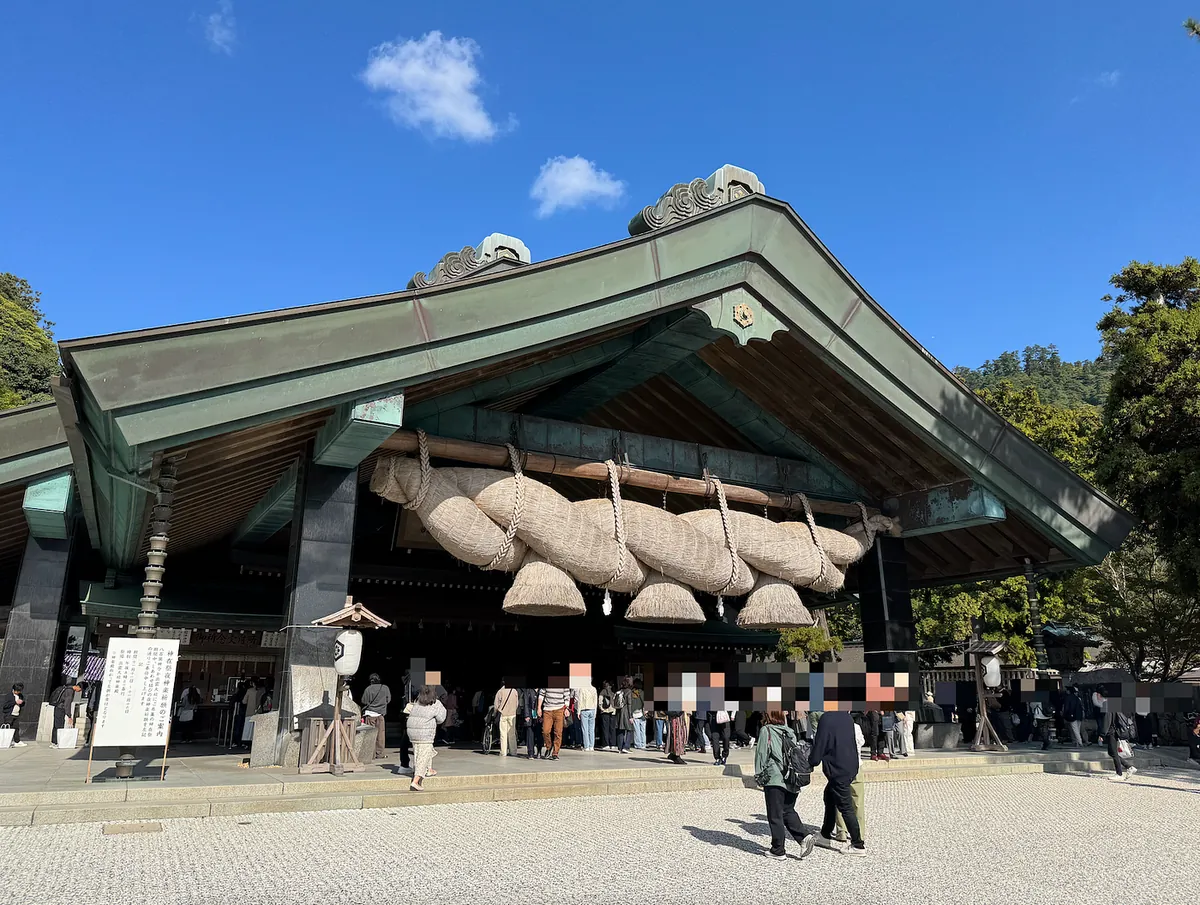
Up close, it’s really huge, especially compared to the regular shimenawa ropes at other shrines—about 10 times bigger. (Length is 14 meters, weight is 5 tons, replaced every few years, and handmade)
Please remember that the largest one is at the “Kaguraden,” not at the main hall like I initially thought.
I walked around the area; there were quite a few people, and some spots required waiting in long lines to pray.
The way to worship at Izumo Taisha is different from other shrines: ⚠️⚠️⚠️
It is to bow twice, clap four times, and bow once more at the end.
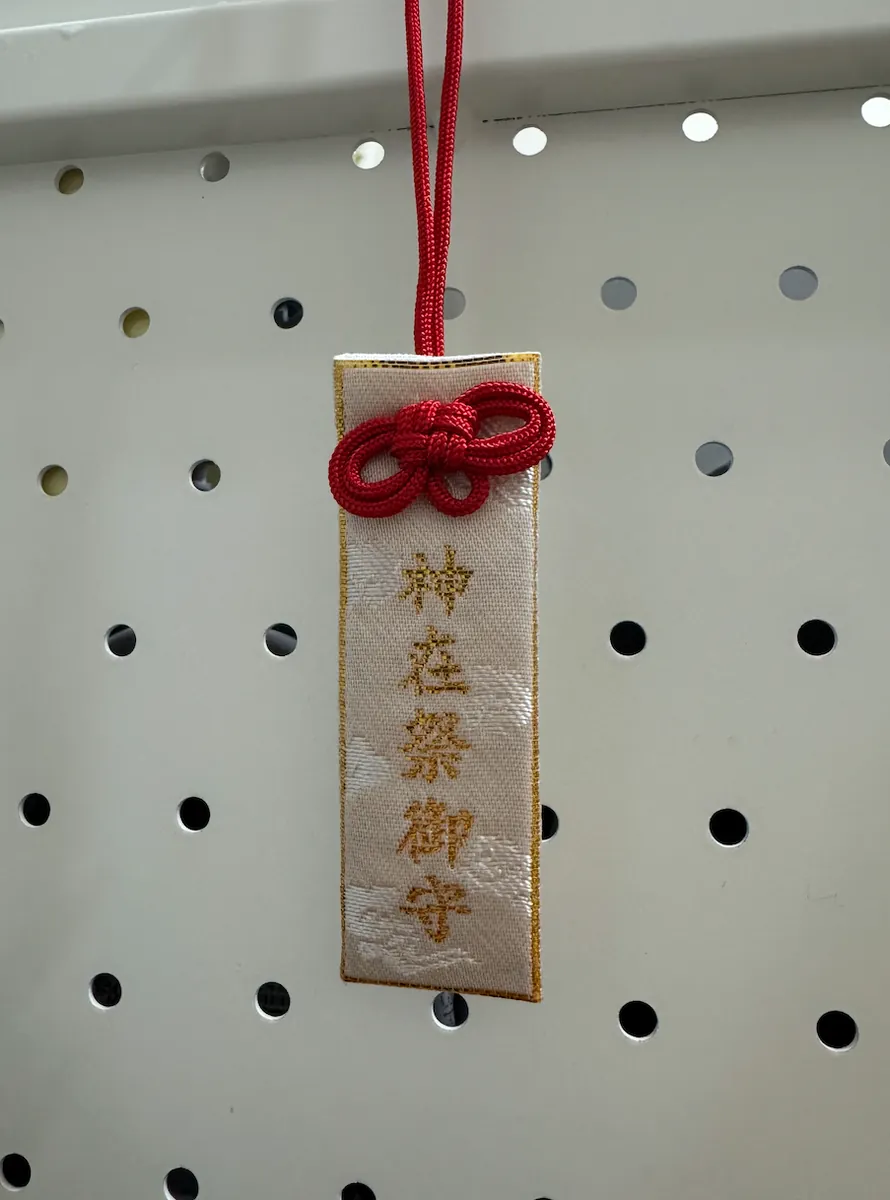
Bought a limited edition amulet for the Kamiari Festival. (Sold only during this week)
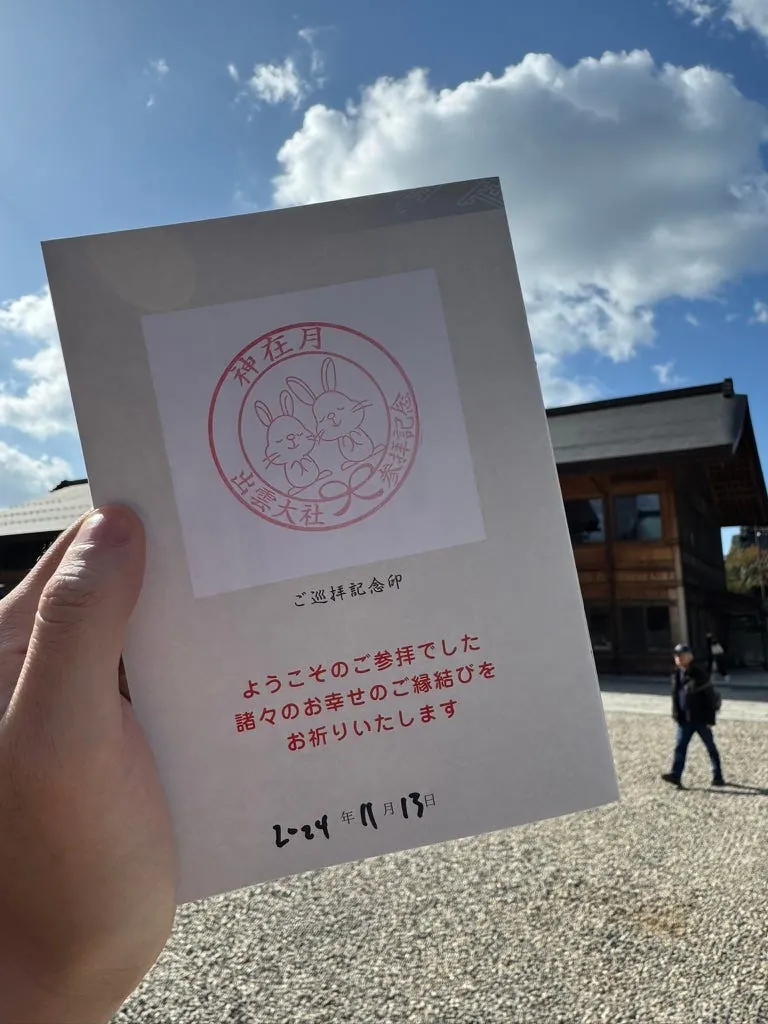
After the visit, I got a stamp collection book and stamped the Izumo Taisha commemorative seal.

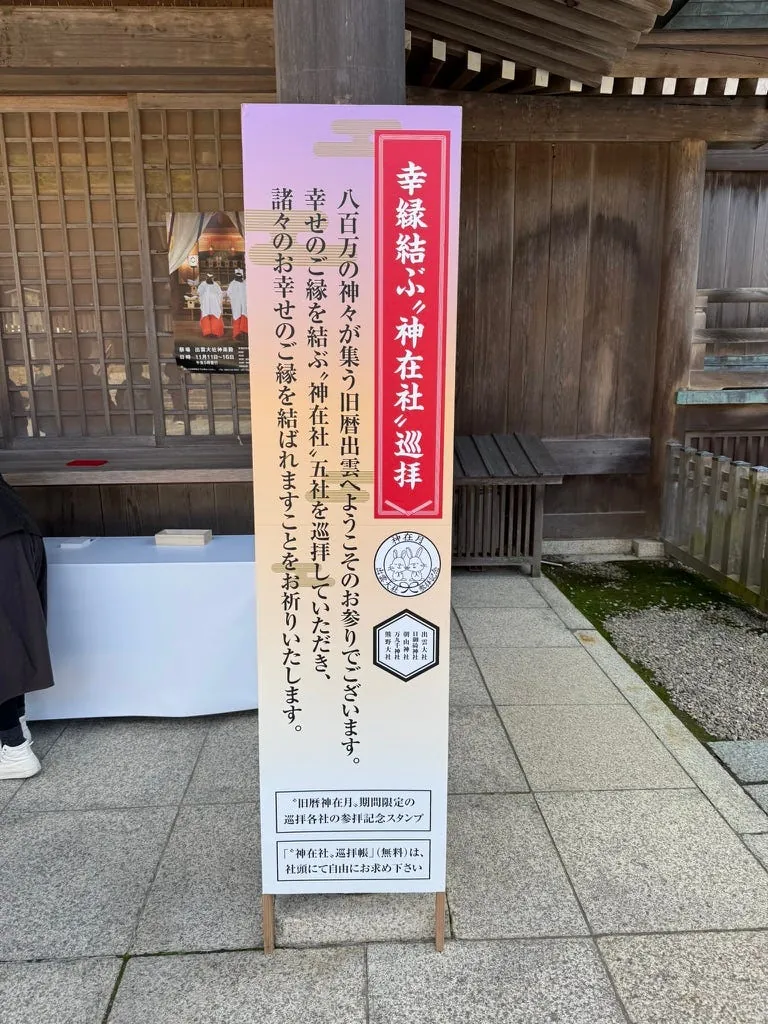
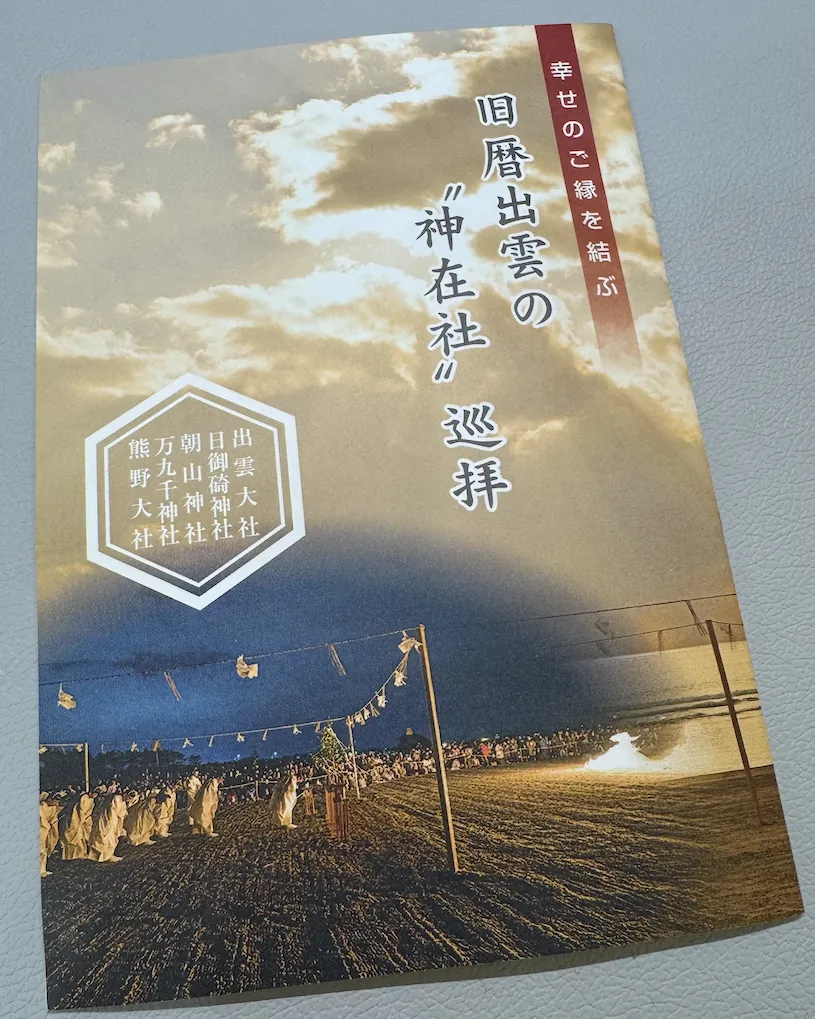
Locations of the Five Major Shrines for the Izumo Kamiari Festival Pilgrimage.
Due to limited time, I didn’t visit other shrines in Izumo. Without driving, it felt difficult to explore them all.
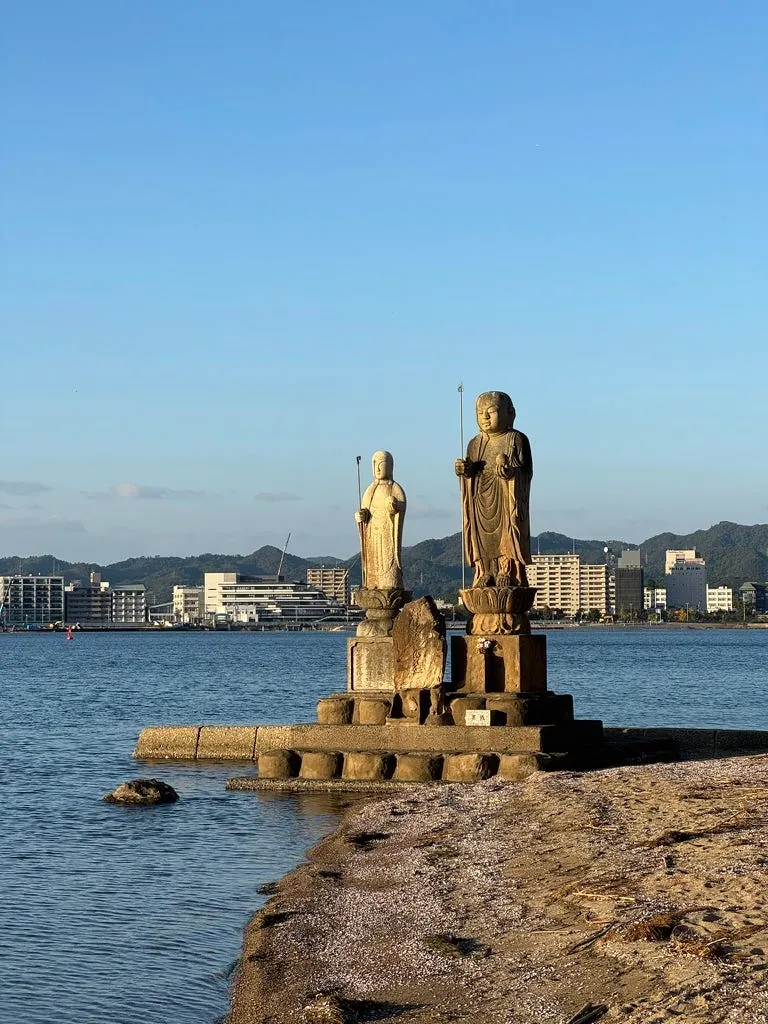
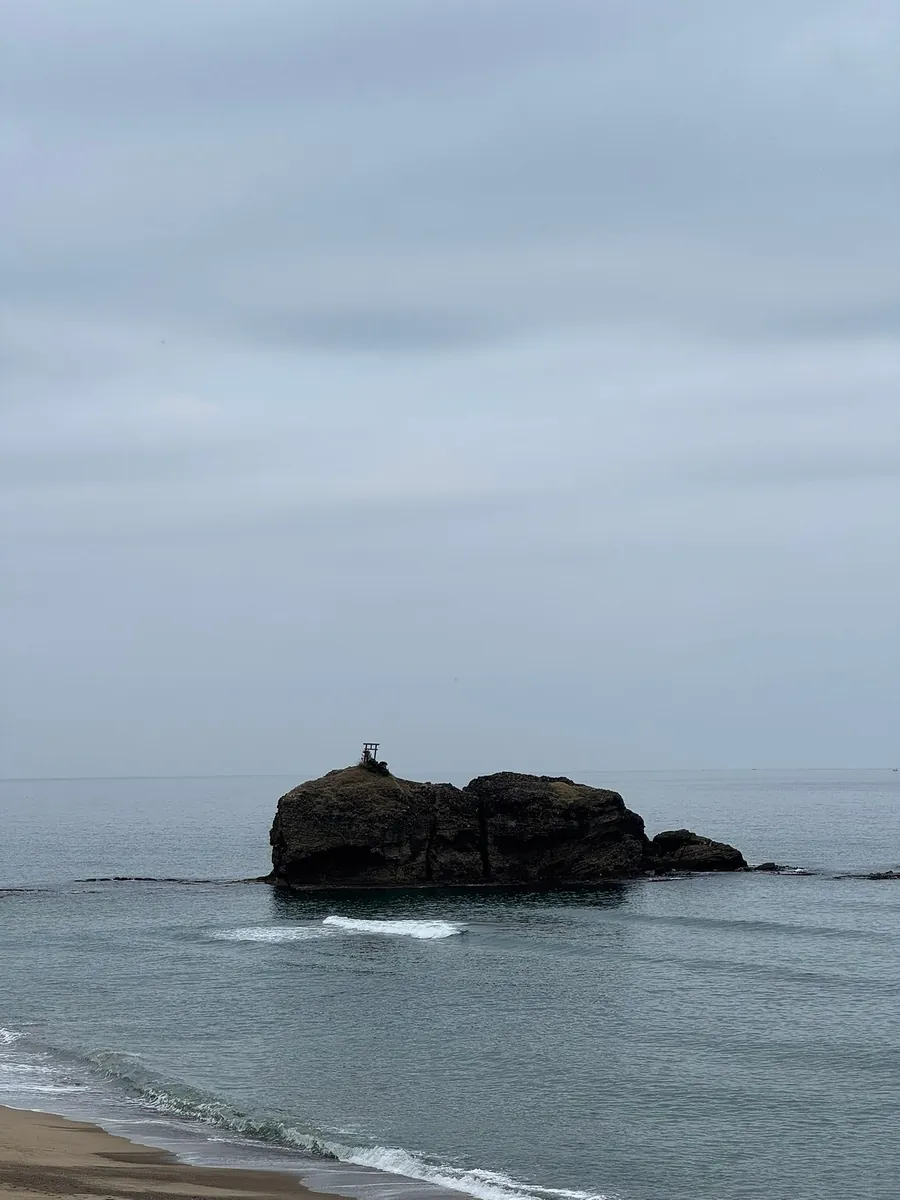
~= 12:45 Walk to Inasa Beach Inasa no Hama
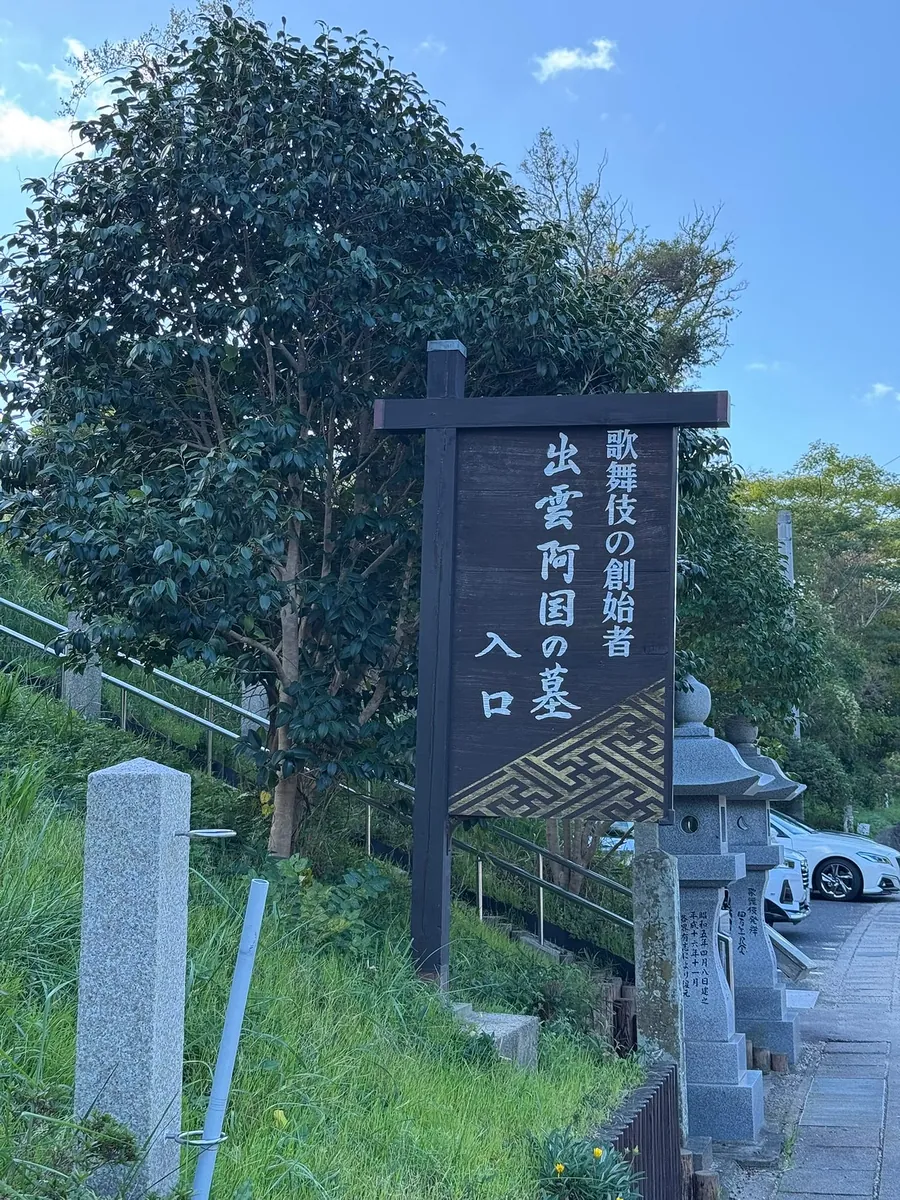
The bus service is infrequent, so walking is the only option. It takes about 15 minutes, passing by Izumo Okuni’s grave along the way. Walking all the way leads to Inasa Beach.
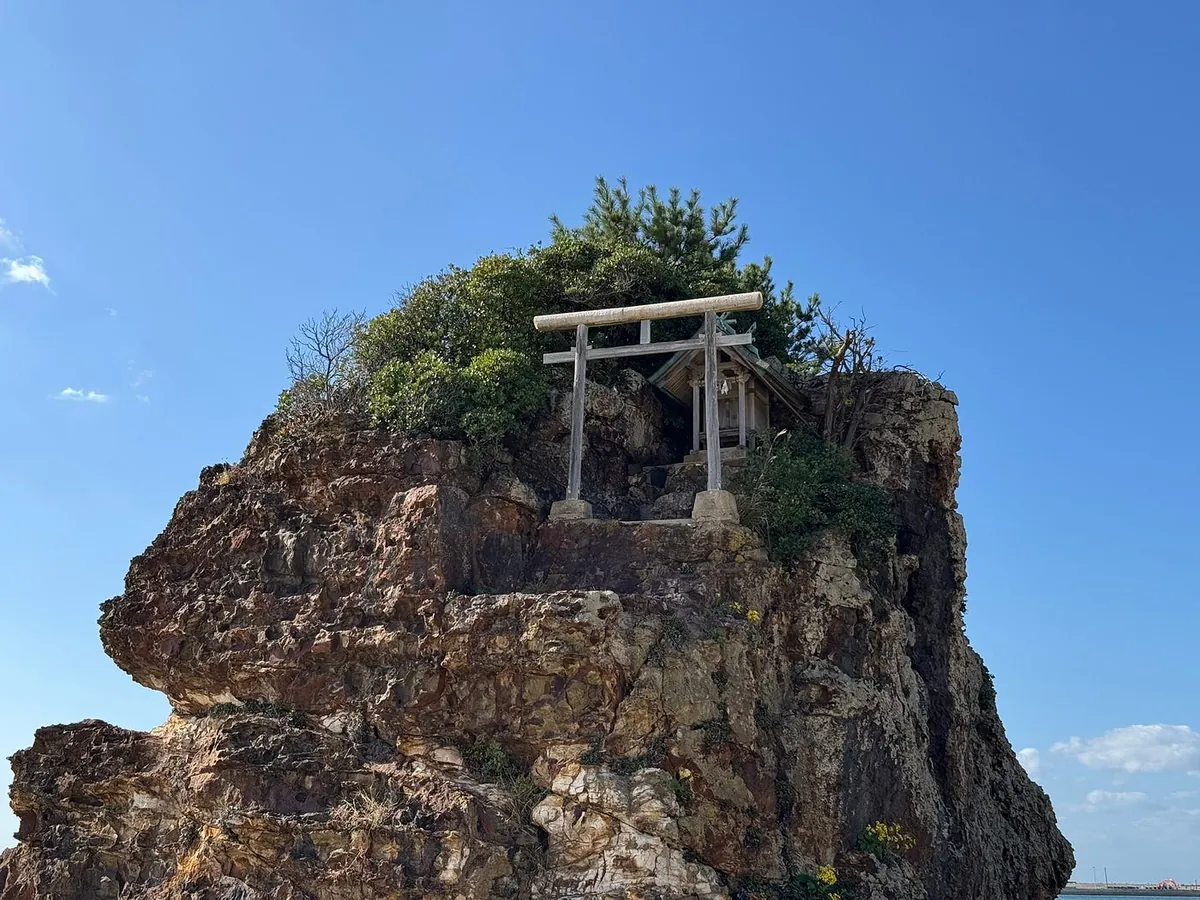
Inasahama Beach:
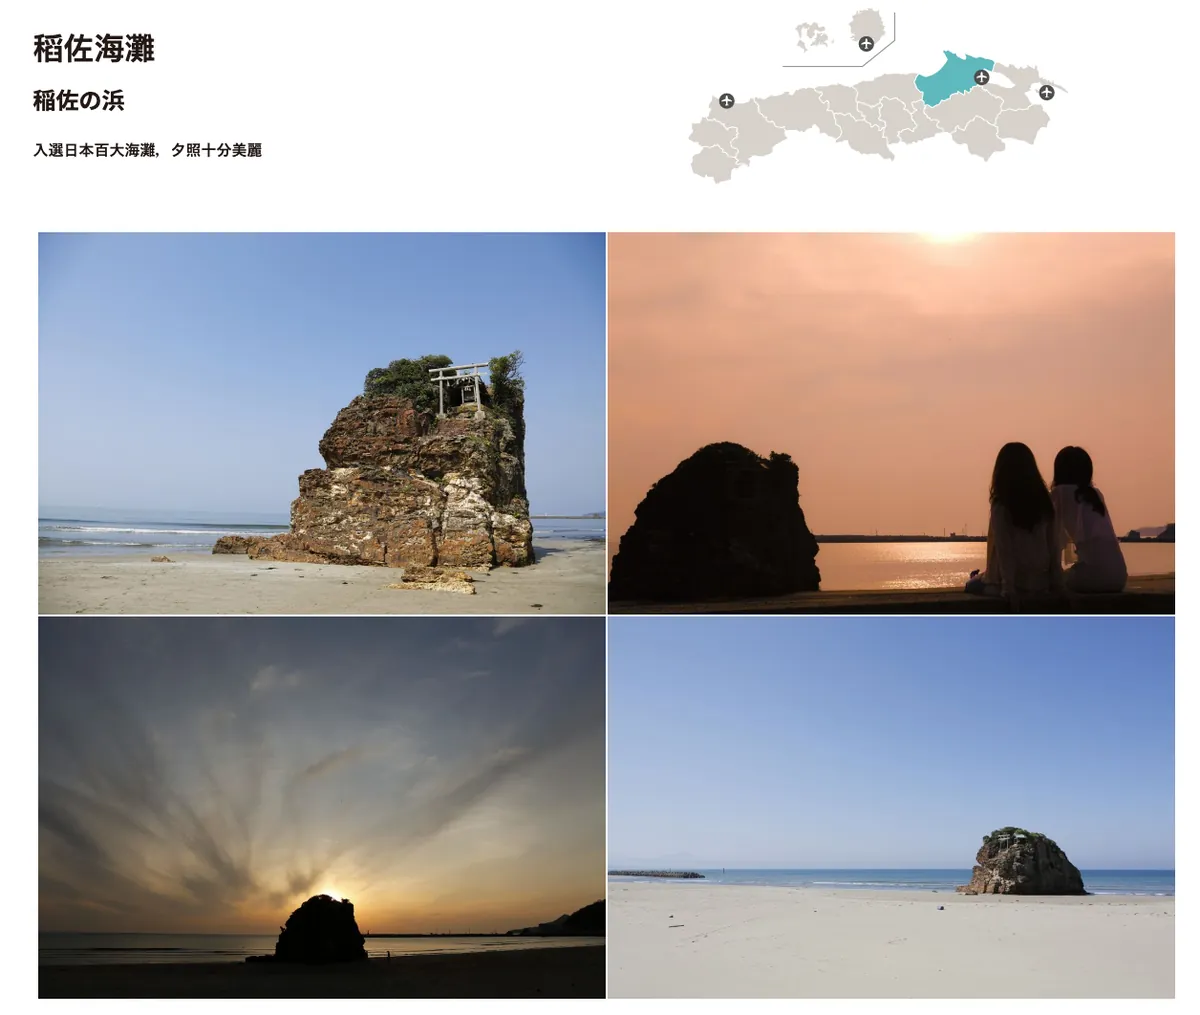
Source: Shimane Tourism Official Website
A site deeply rooted in Japanese mythology. The small island in the picture is called Bentenjima, which has a small shrine on it.
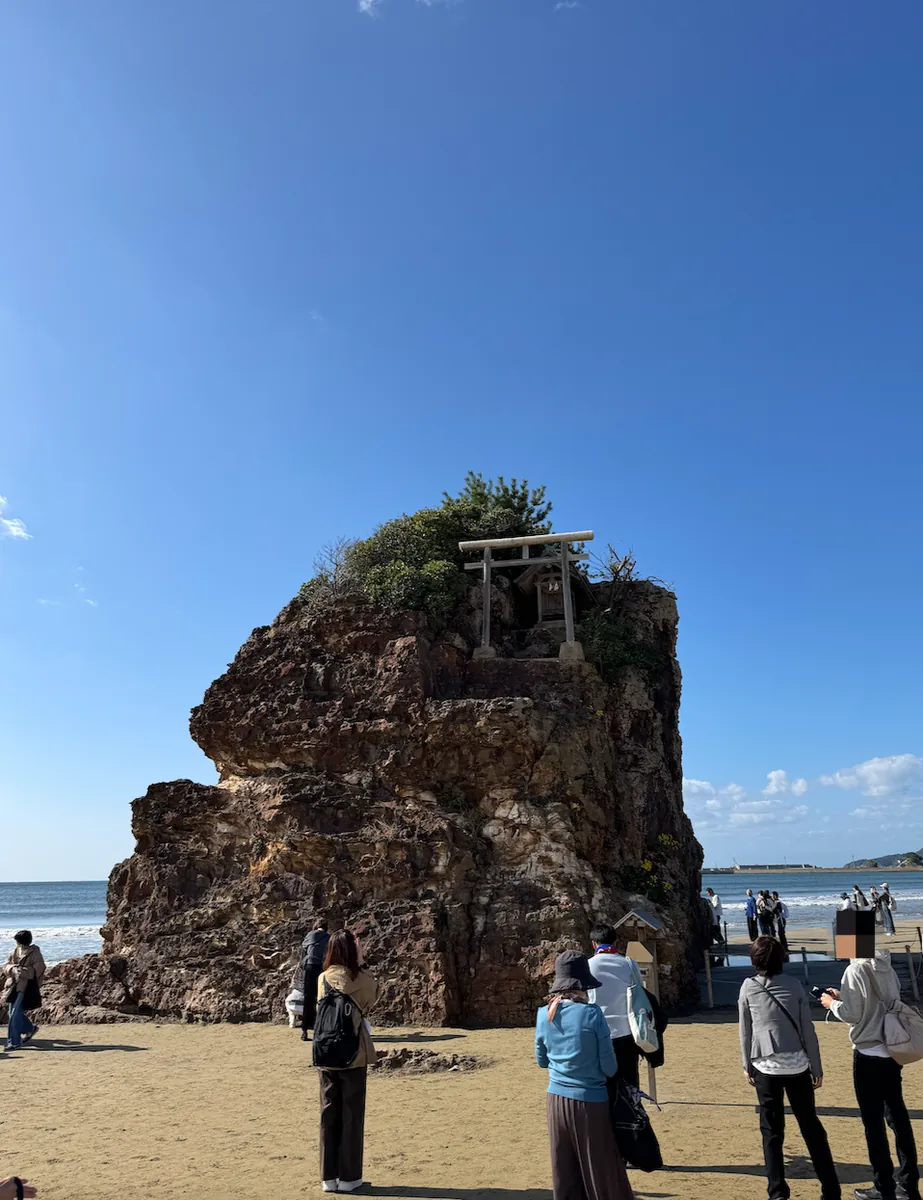
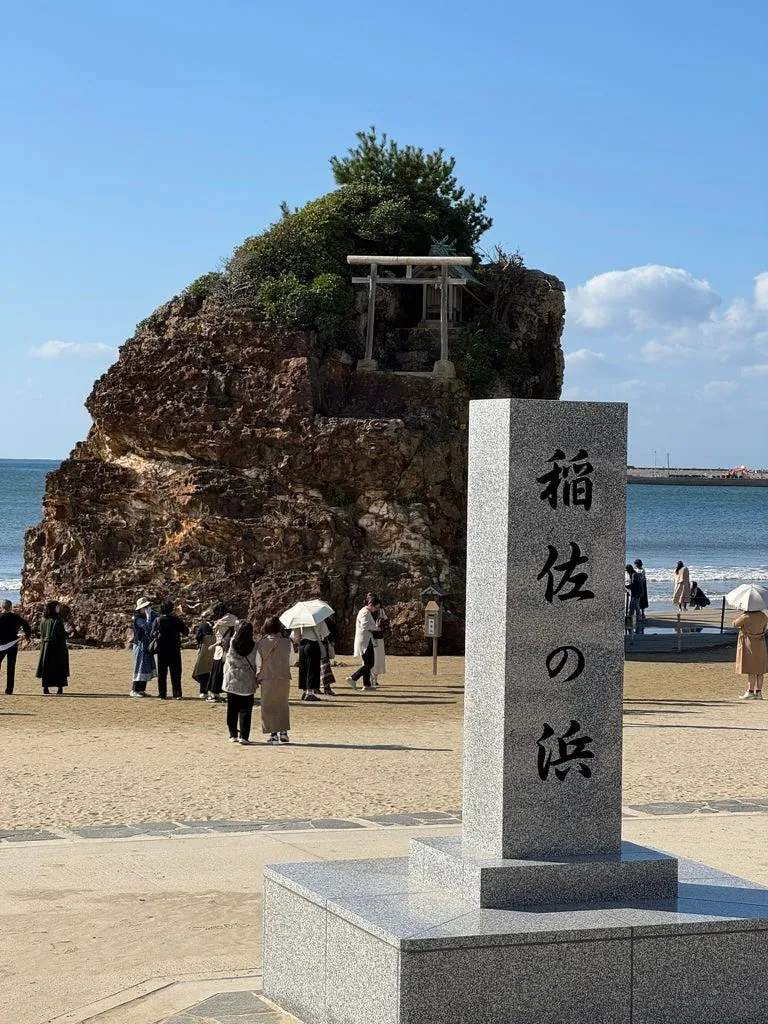
Due to limited time, I couldn’t stay until sunset and left after a brief visit.
After returning to Taiwan and browsing Instagram, I found out you can get the Sand Amulet here :
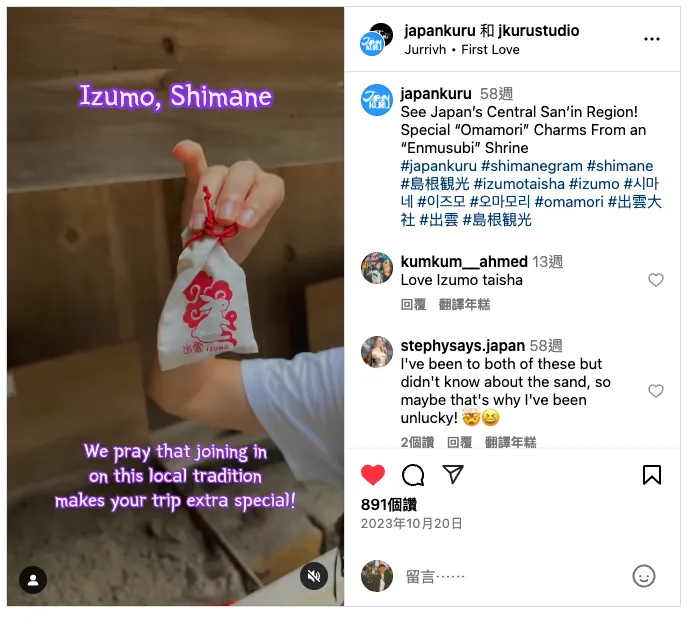
https://www.instagram.com/reel/CynStXPyZAX/
Walk back to the Izumo Taisha bus stop to catch the bus back to JR Izumo Station.
You can see a continuous line of vehicles waiting to enter the parking lot for visiting Izumo Taisha.
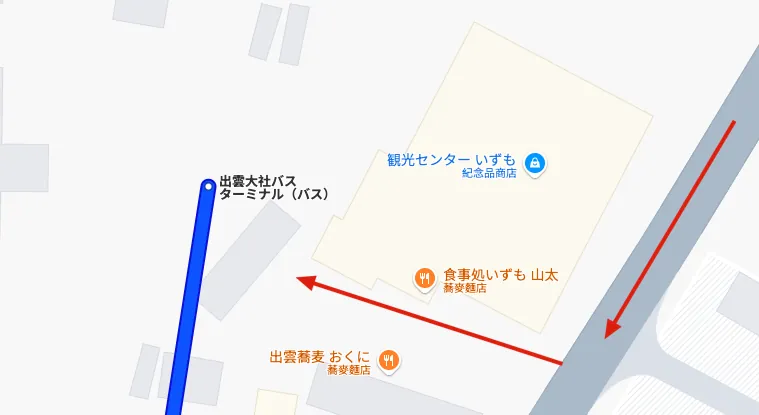
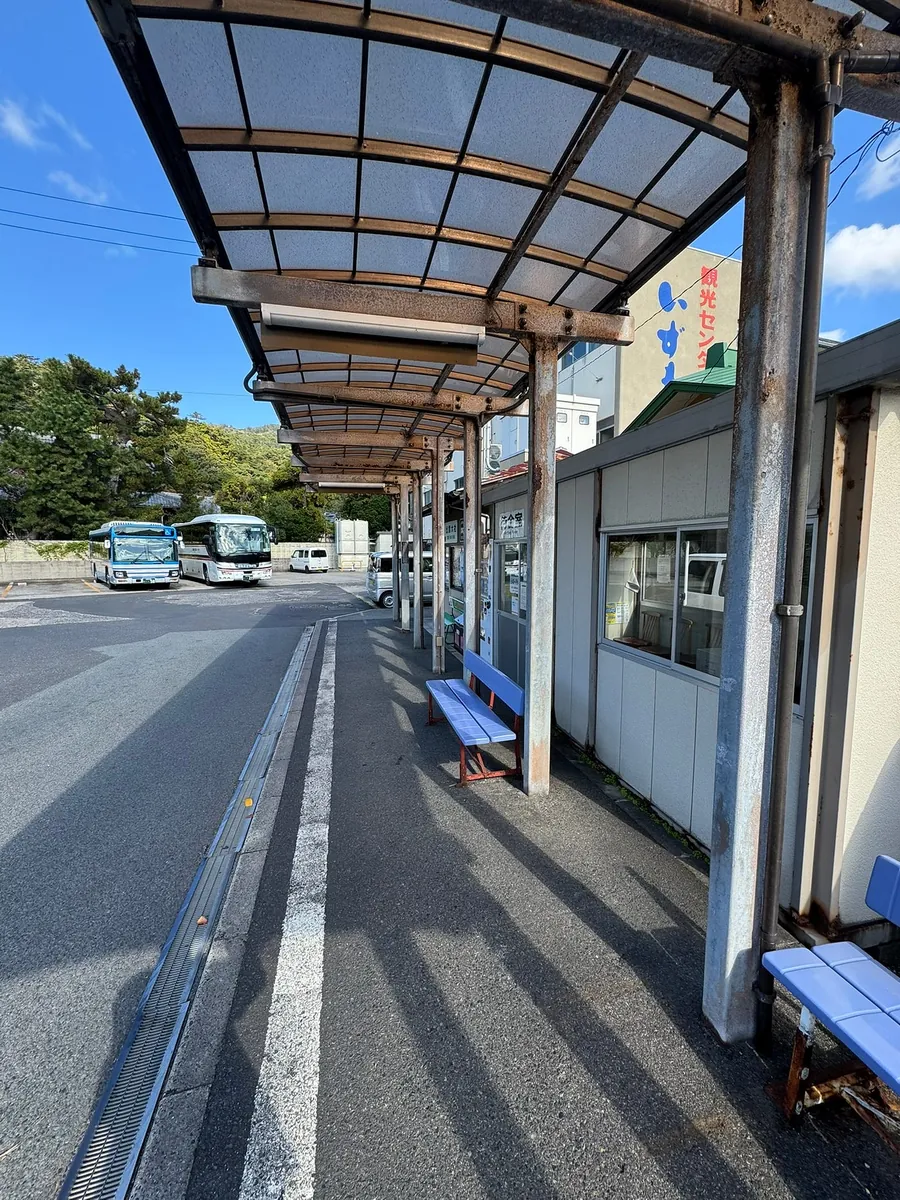
The Izumo Taisha bus stop is located behind the restrooms, past the souvenir shop. It’s small, so at first I was worried about waiting at the wrong spot.
Around 13:15, I had to wait for the 13:40 bus back to JR Izumo Station. Feeling very hungry, I went to the souvenir shop ahead and bought some snacks to eat by hand.
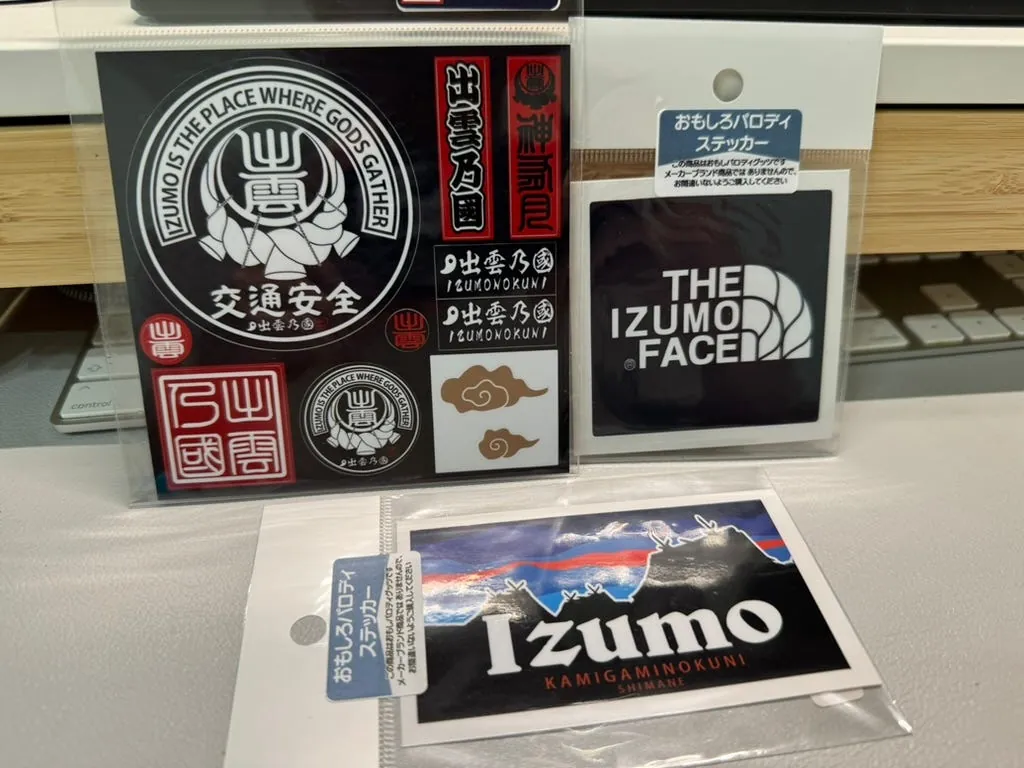
Bought a few chūnibyō stickers at the souvenir shop.
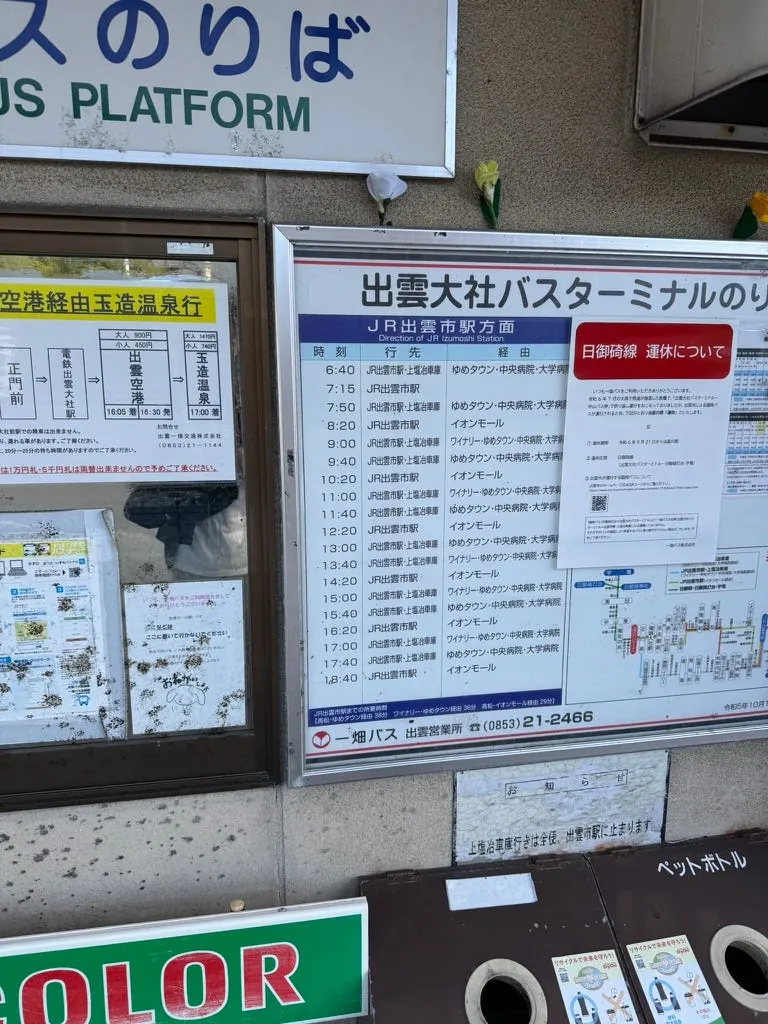
13:40 Take the bus back to JR Izumo Station
On the way back to Izumo, a Japanese person asked to borrow my power bank because his phone was completely dead. I took the chance to confirm by asking (and practicing the few Japanese phrases I remember), “このバスは JR 出雲市駅へ行きますか” (Does this bus go to JR Izumo Station?). He replied “はい” (yes), which is the only word I understood.
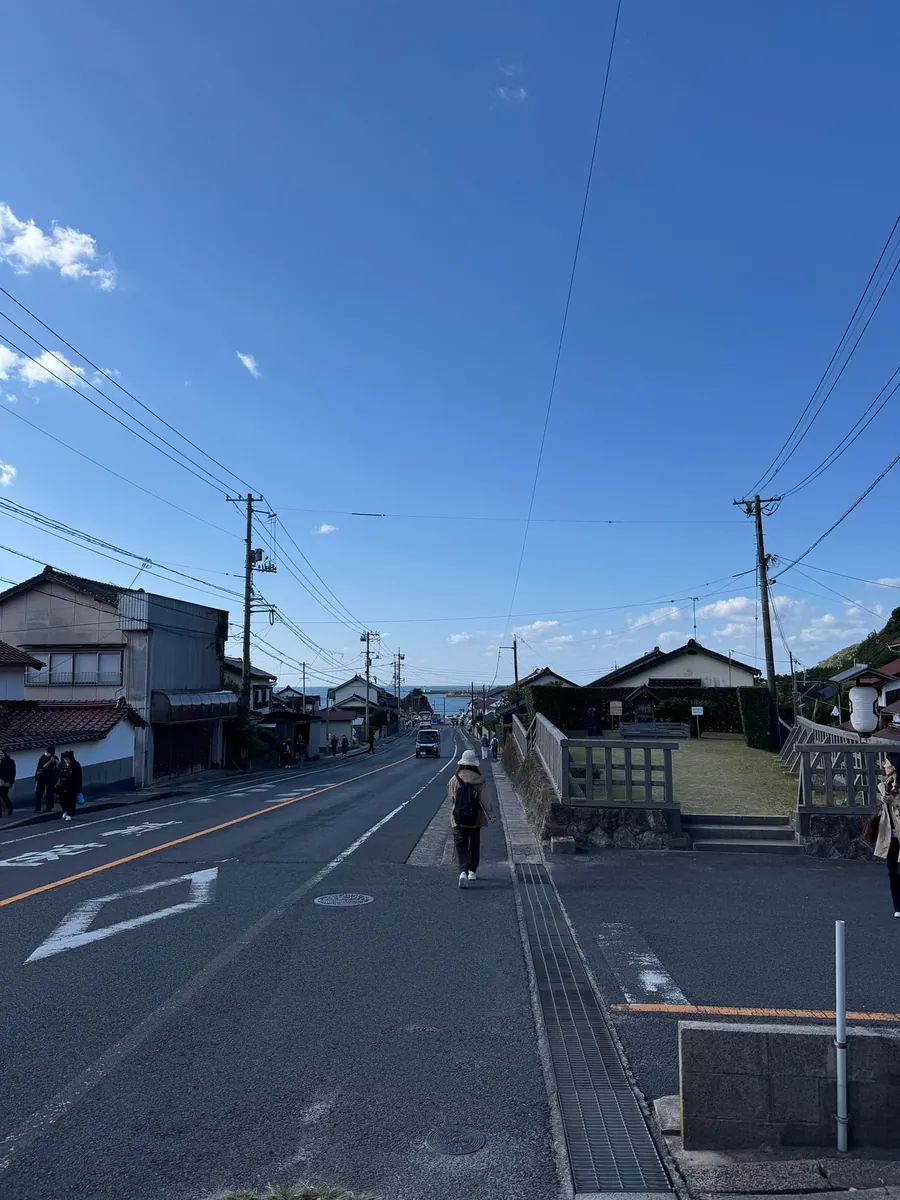
~= 14:15 Return to JR Izumoshi Station
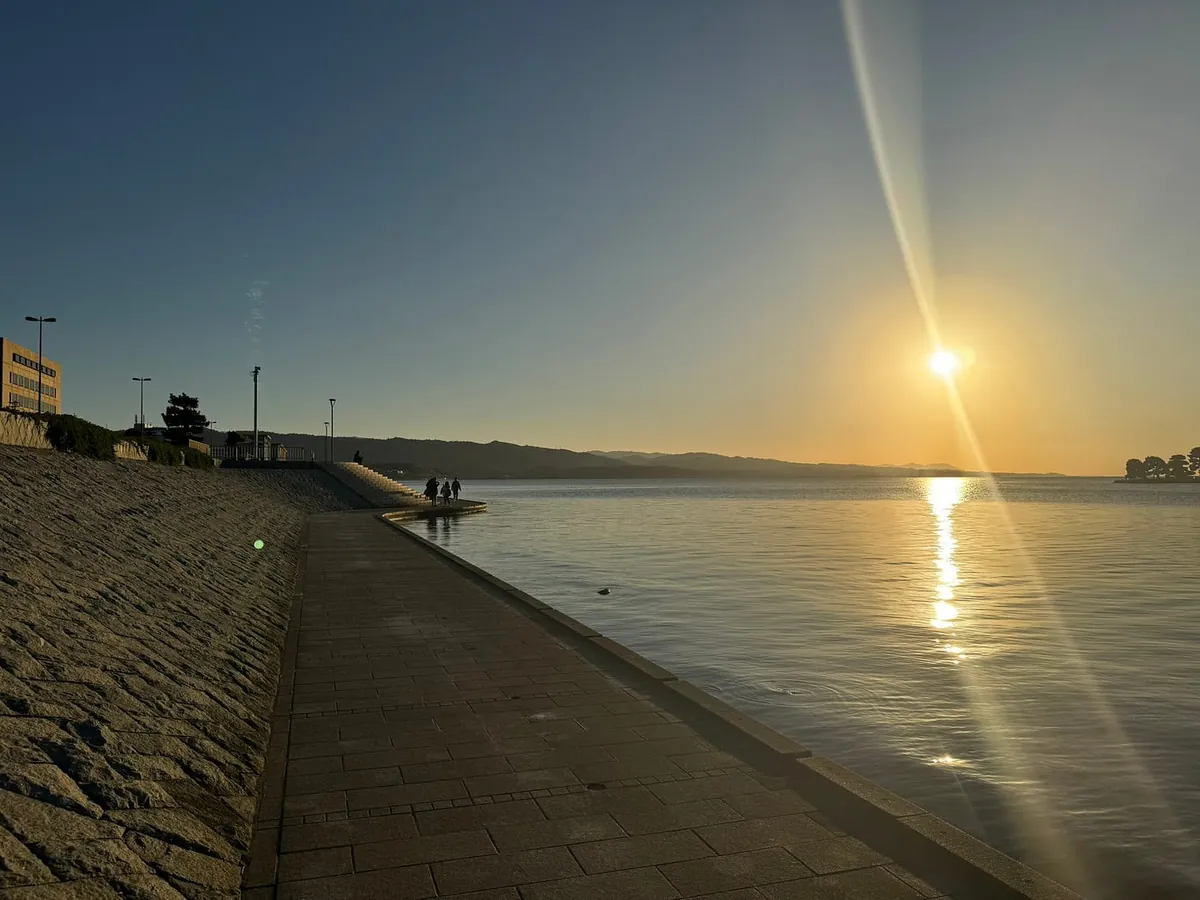
(Rushed to see the sunset at Lake Shinji before it set. According to the information, the sun sets at 17:05 on that day.)
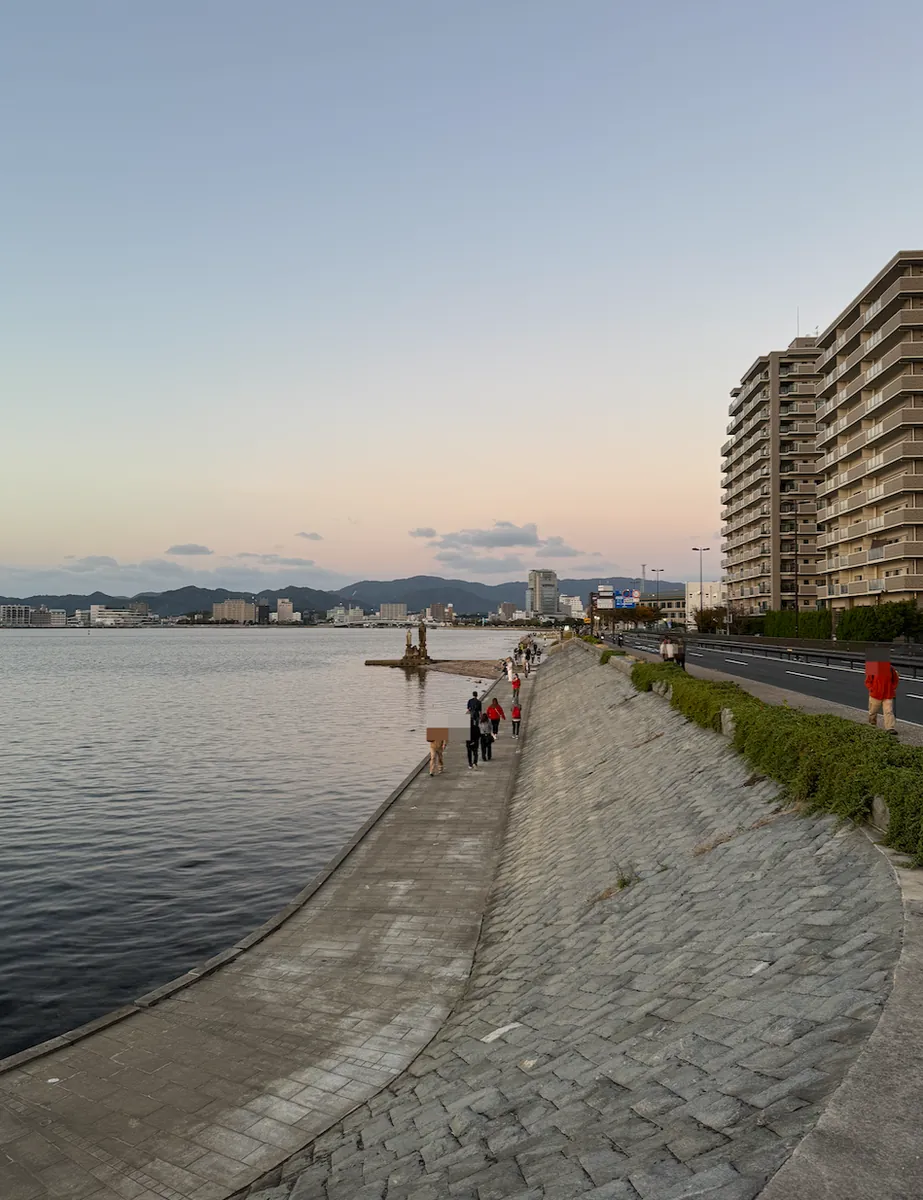
This time, I didn’t take the Yakumo train. I took the 14:54 local train to Yonago and followed Google Maps’ suggestion to get off at Nogi Station, then walked to the Shinjiko Sunset Viewing Spot.

If you take the left side (A) towards Matsue, you can see the lake view passing by Lake Shinji. Yes, I sat on the wrong side again, on the mountain side.
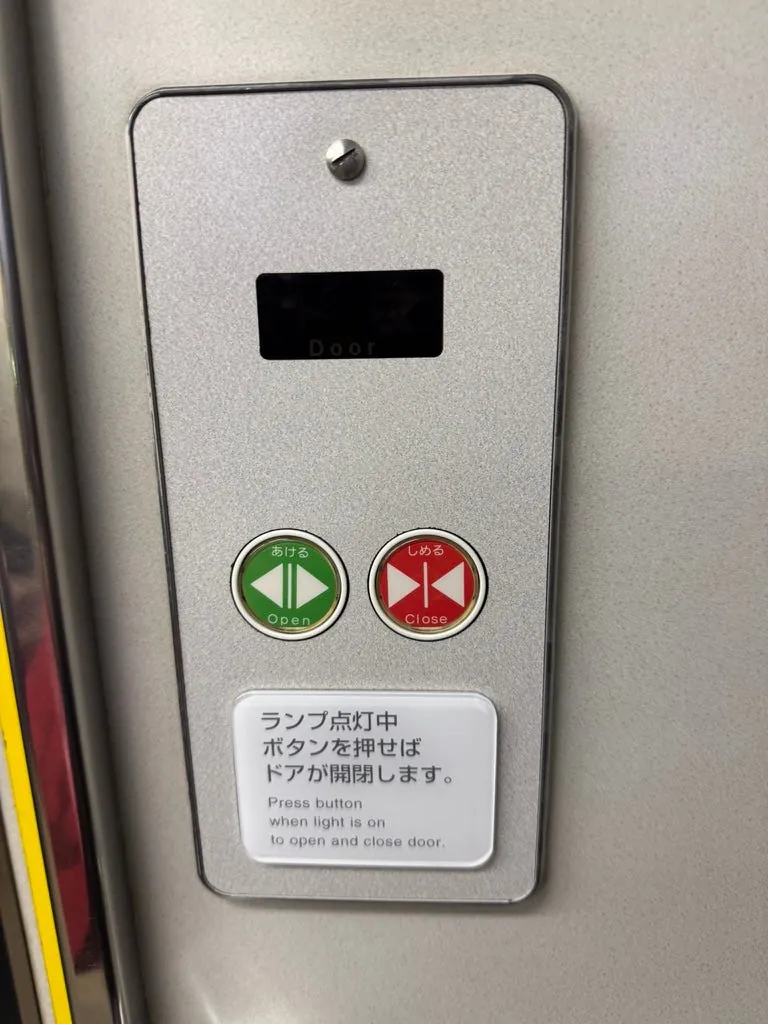
At this small station, you need to press a button to open the train door. It’s my first time encountering this. ⚠️
~=15:35 Arrive at Nogi Station
Nogi Station is very small, with no staff or ticket gates. If you have a JR Pass, just exit directly without leaving your JR Pass in the ticket box. ⚠️⚠️⚠️
Walking from Nogi Station was a bit of a mistake; this area is quite deserted with few people around…
Fortunately, there was a 7–11 along the way where I bought a hot dog, fried chicken, and drinks to enjoy while waiting for the sunset.
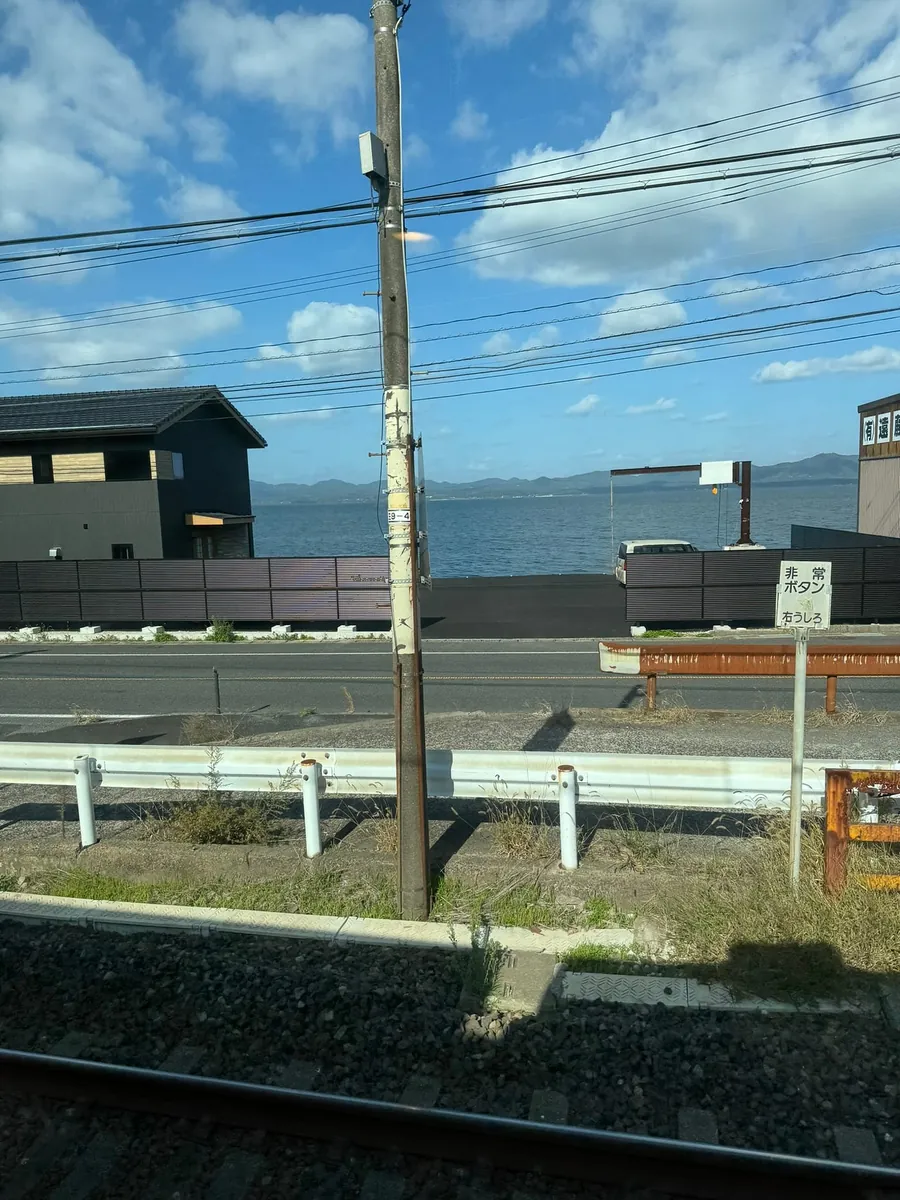
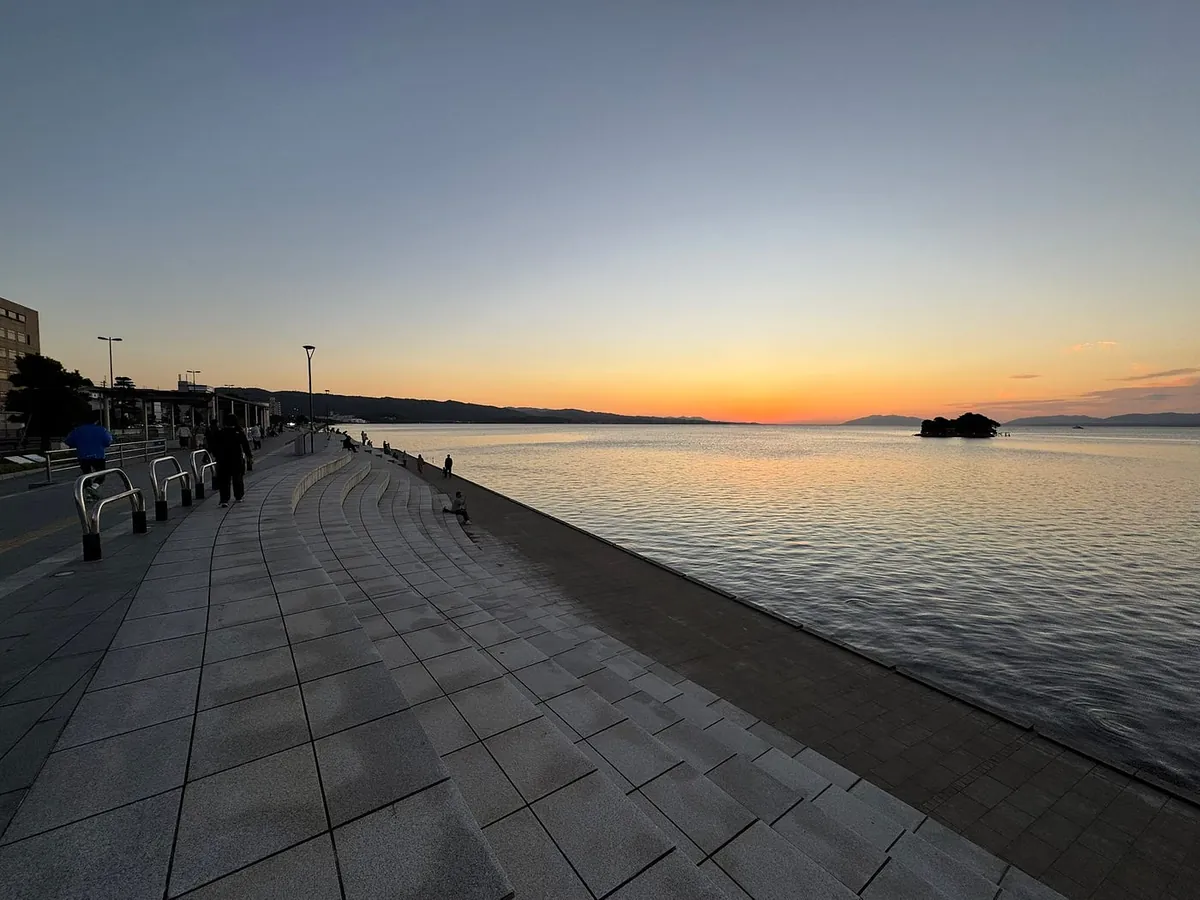
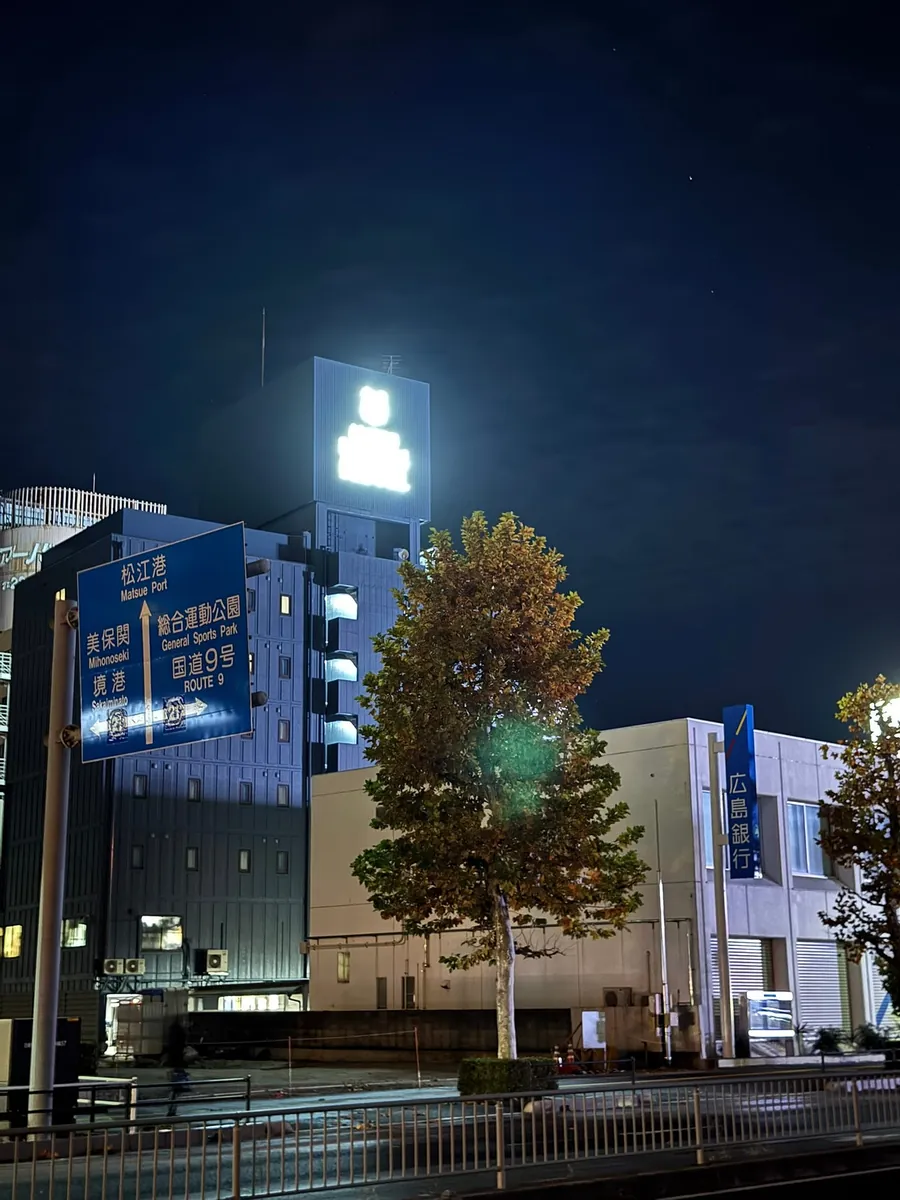
16:00 Sunset at Lake Shinji
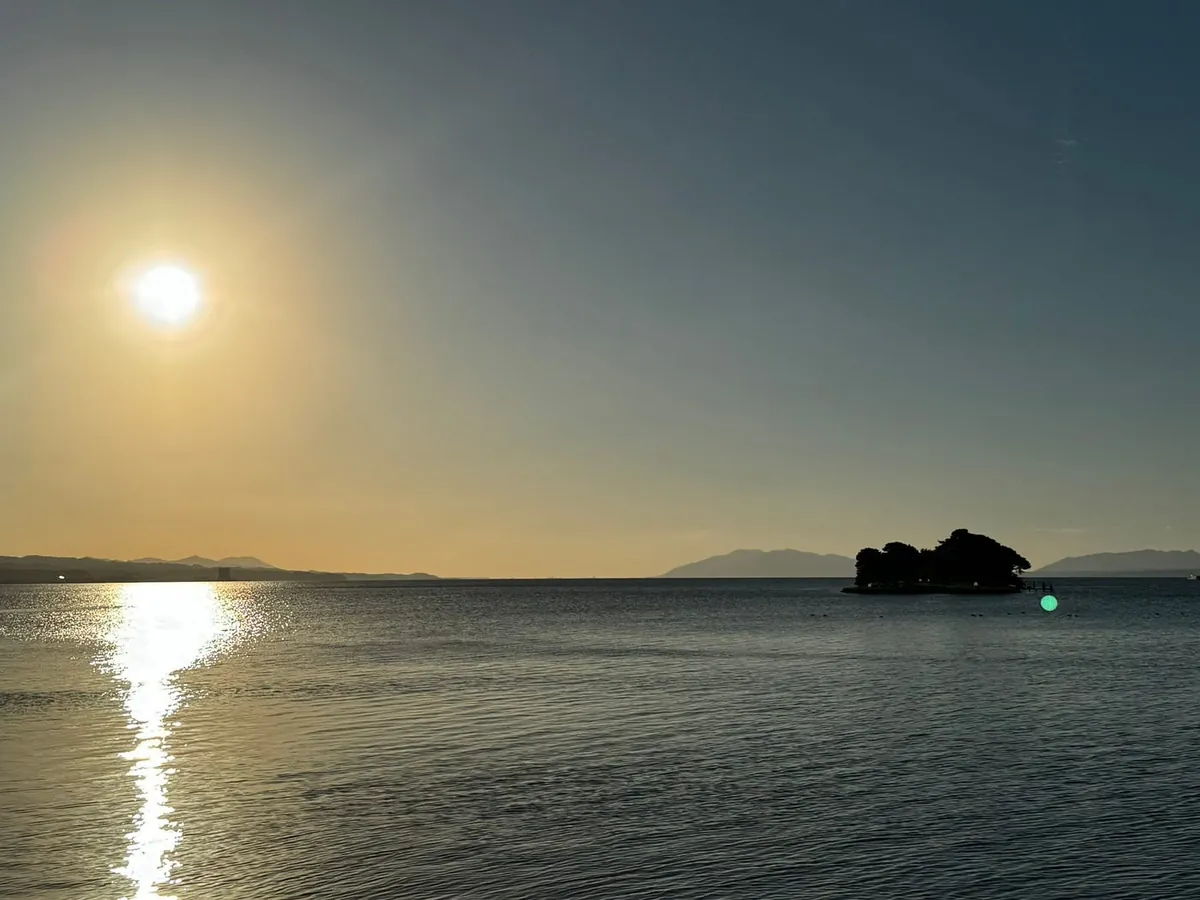

Shinji Lake, Japan’s seventh largest lake, Shinji Lake sunset, Japan’s top sunset.
In the photo, the small island Yomejima Shrine has a small white torii gate.
Previously mistyped as “穴道湖”.
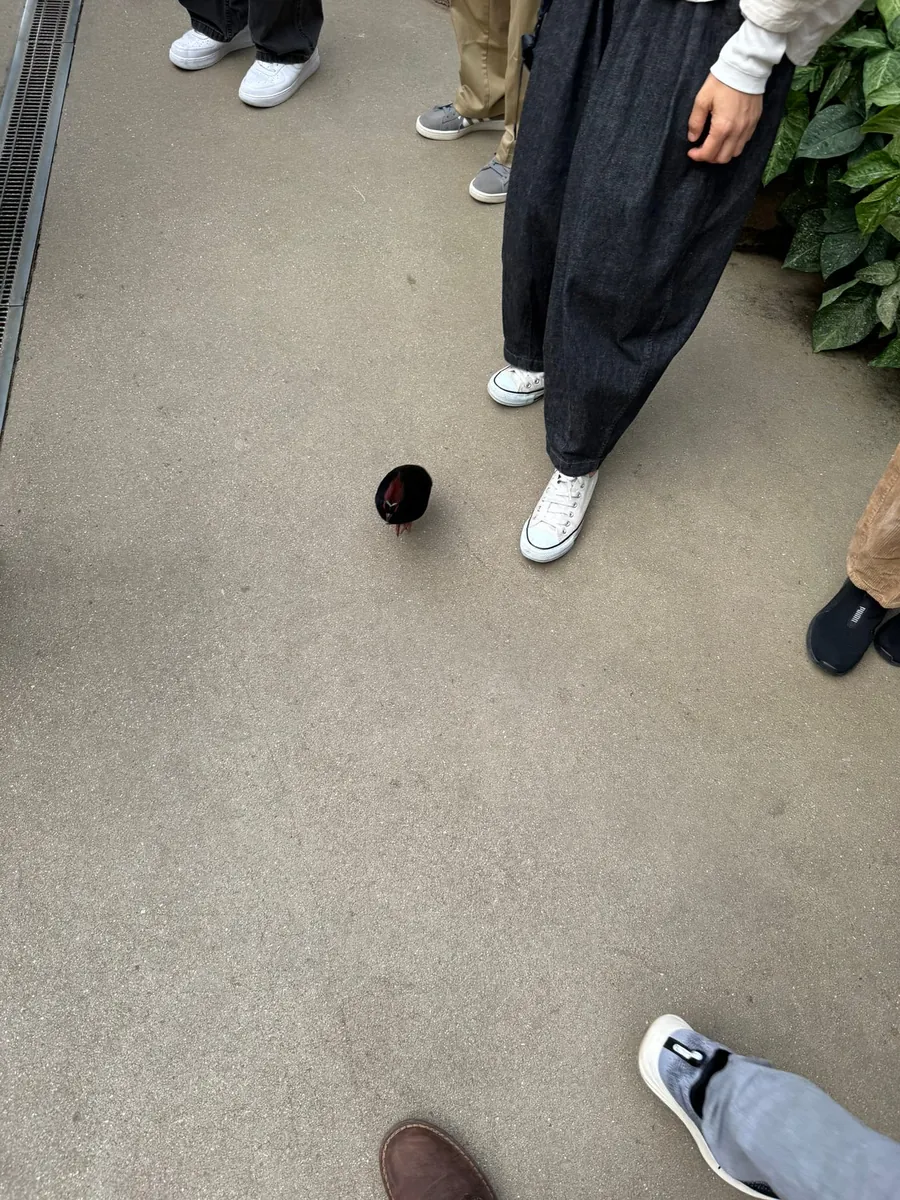
There is a heron.
Going up leads to the Shimane Art Museum, which is livelier and has cafes; however, the viewpoint on the stair platform offers a better angle for the scenery.
16:45 Sunset in the West
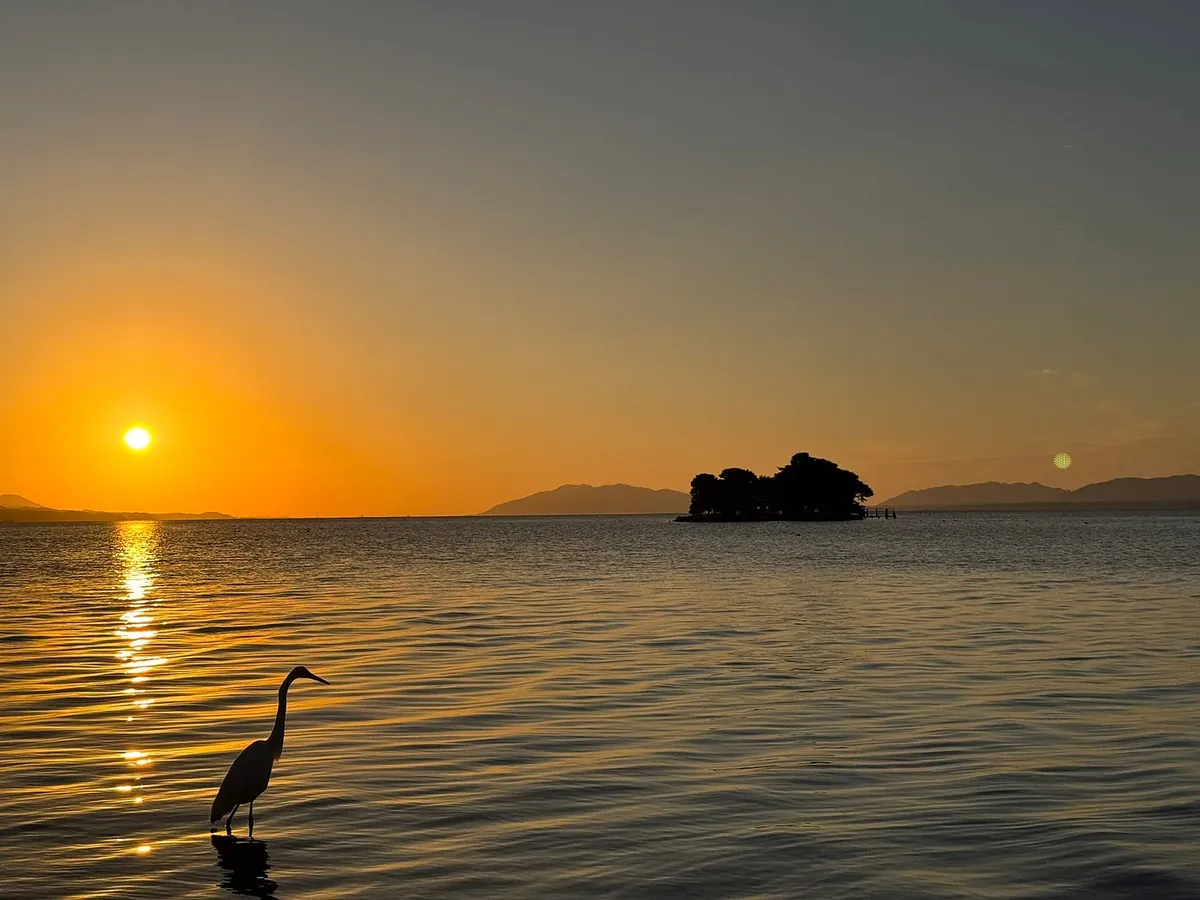
At first, I didn’t feel much, but as the sunset approached, I began to appreciate the charm of the first sunset. The heron earlier also blended perfectly with the scenery.
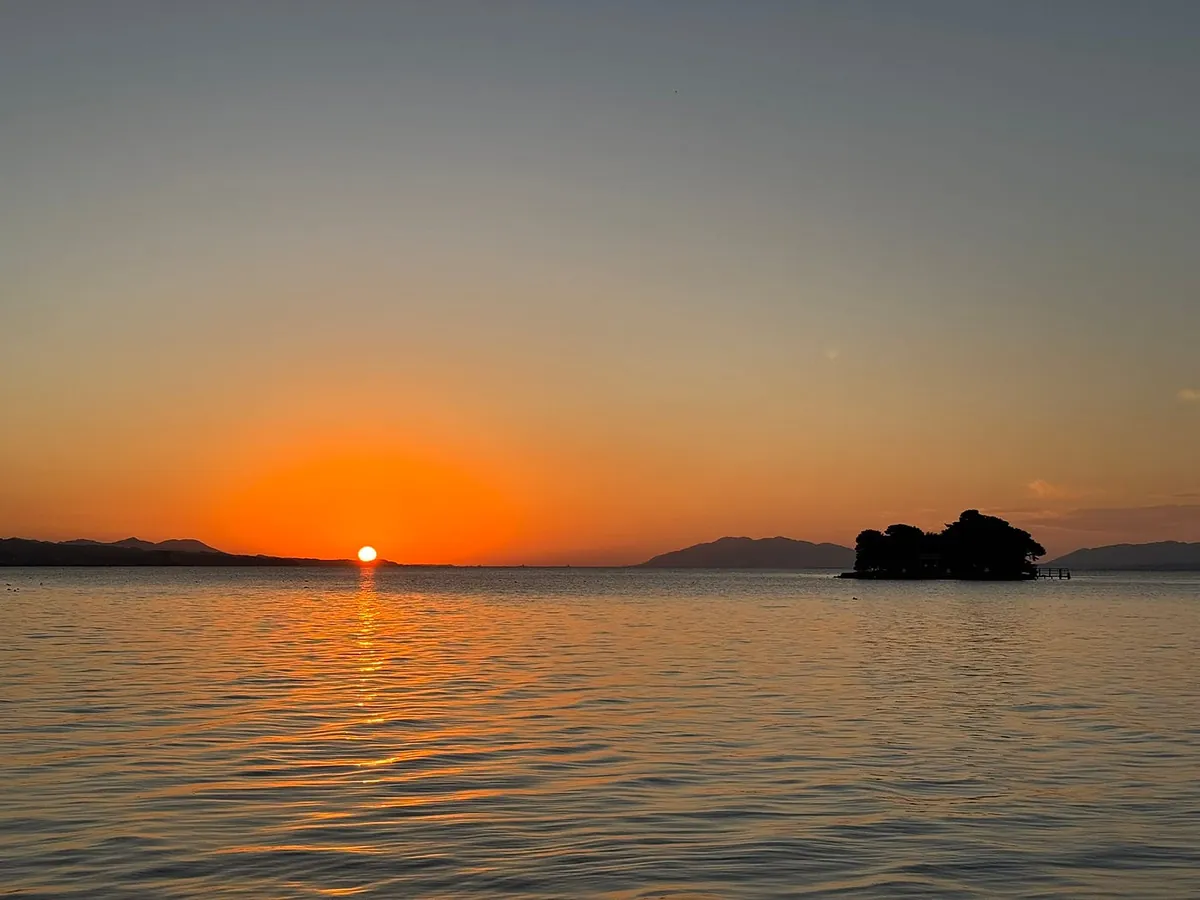
After the sunset approaches the horizon, time visibly slips away with the naked eye; every minute and every second, the sun keeps descending.
Quickly, by 17:01, the sun was already gone.
Truly beautiful and healing.
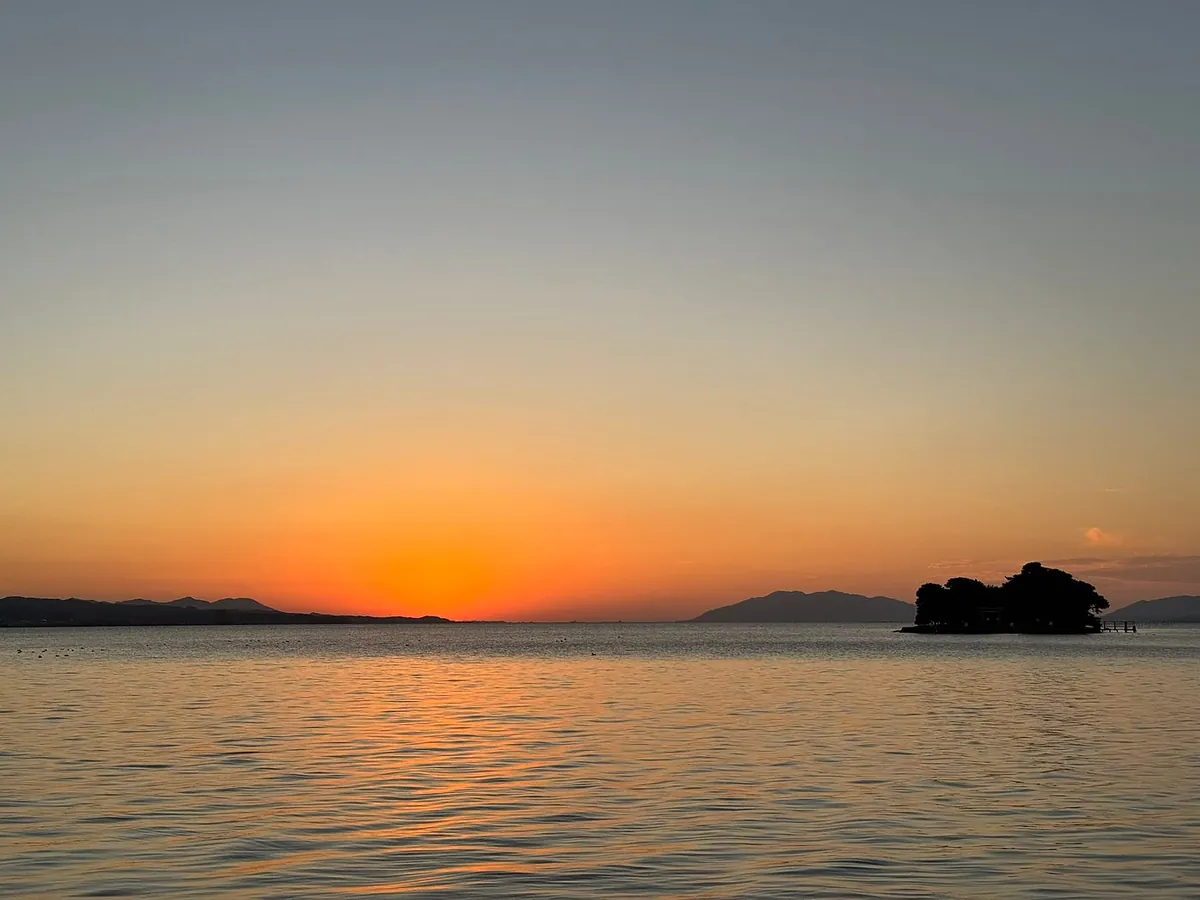
Finally, take another look around the Sunset Viewing Staircase Platform and the people watching the sunset together.
After sunset, I turned around and waited for the bus to head back to Matsue.
Sunset Index
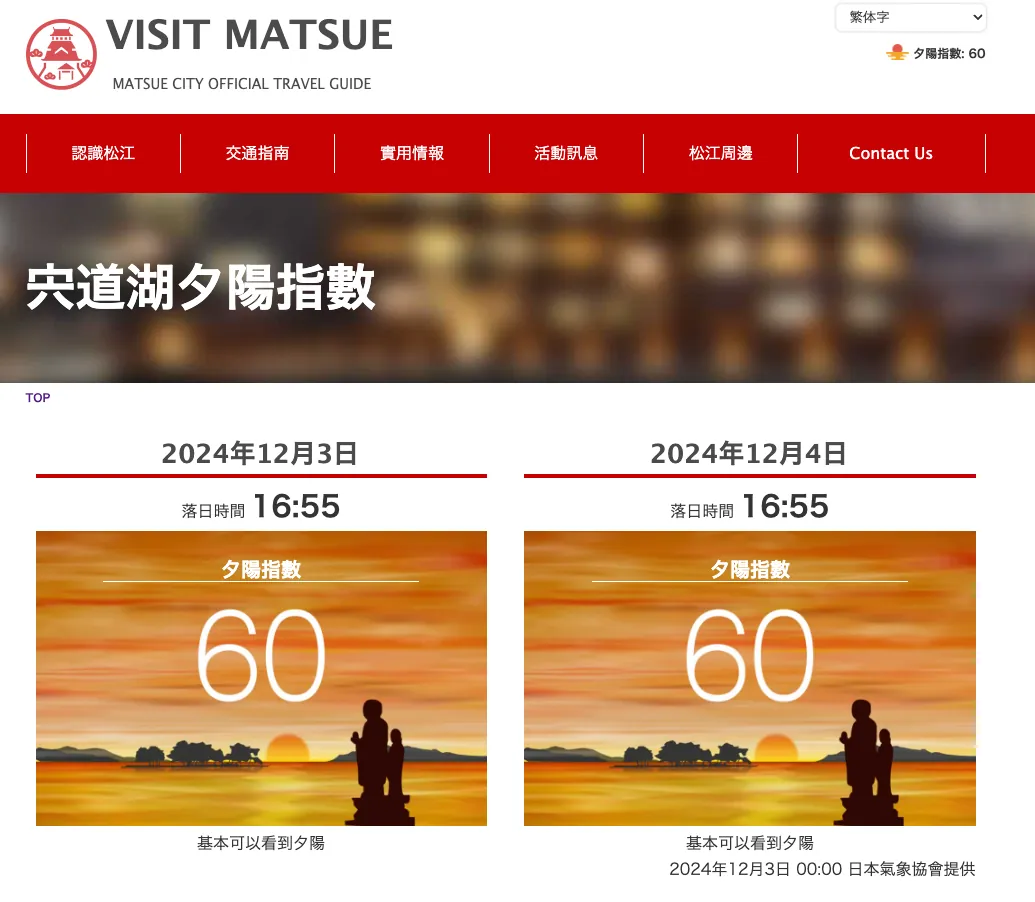
Sunset index can be referenced on the Shimane Tourism website
Shinjiko Lake Sightseeing Boat
https://hakuchougo.jp/timetable/
There are sightseeing boats on Lake Shinji, which you can take near sunset to enjoy the view from the boat. I would like to try it next time.
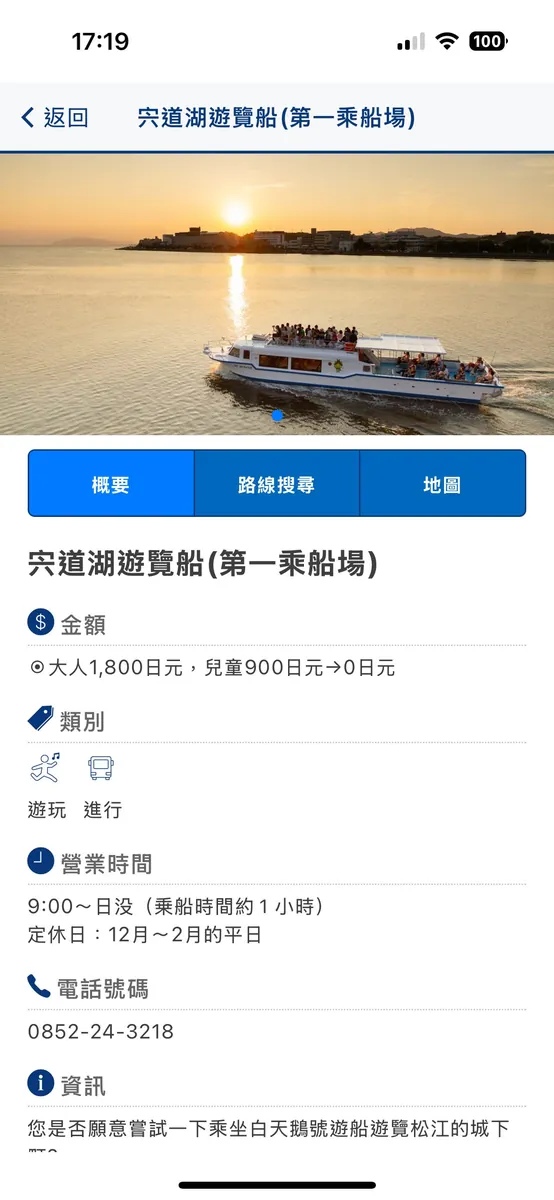
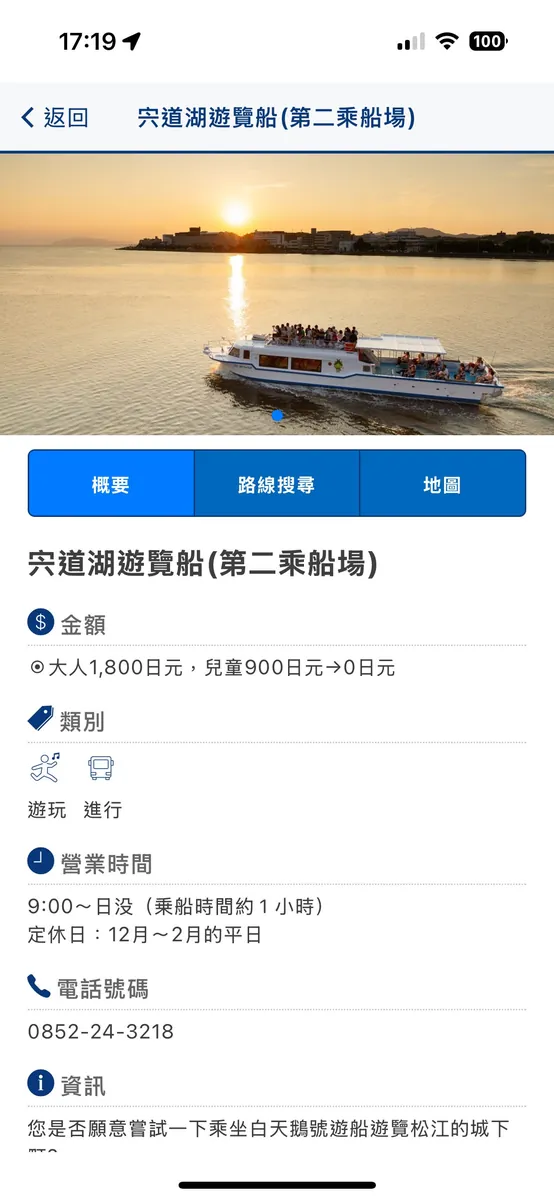
You can directly use the JR Pass included San’in-Sanyo Area Pass 3-Day Ticket for free rides, saving 1,800 yen.
18:00 Return to Matsue Station and Hotel
Buy some souvenirs at the gift shop on the first floor of Matsue Station
I thought since San’in is quite unique, I’ll buy souvenirs here.
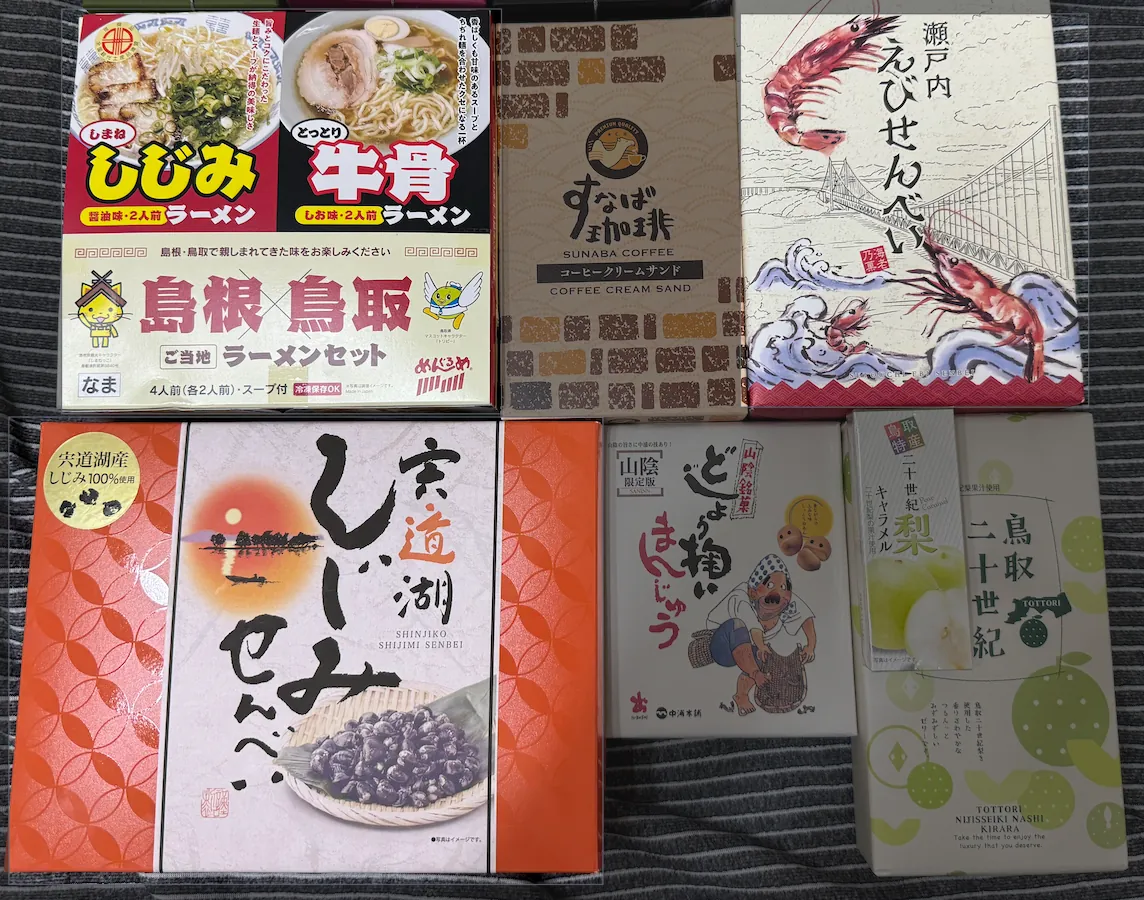
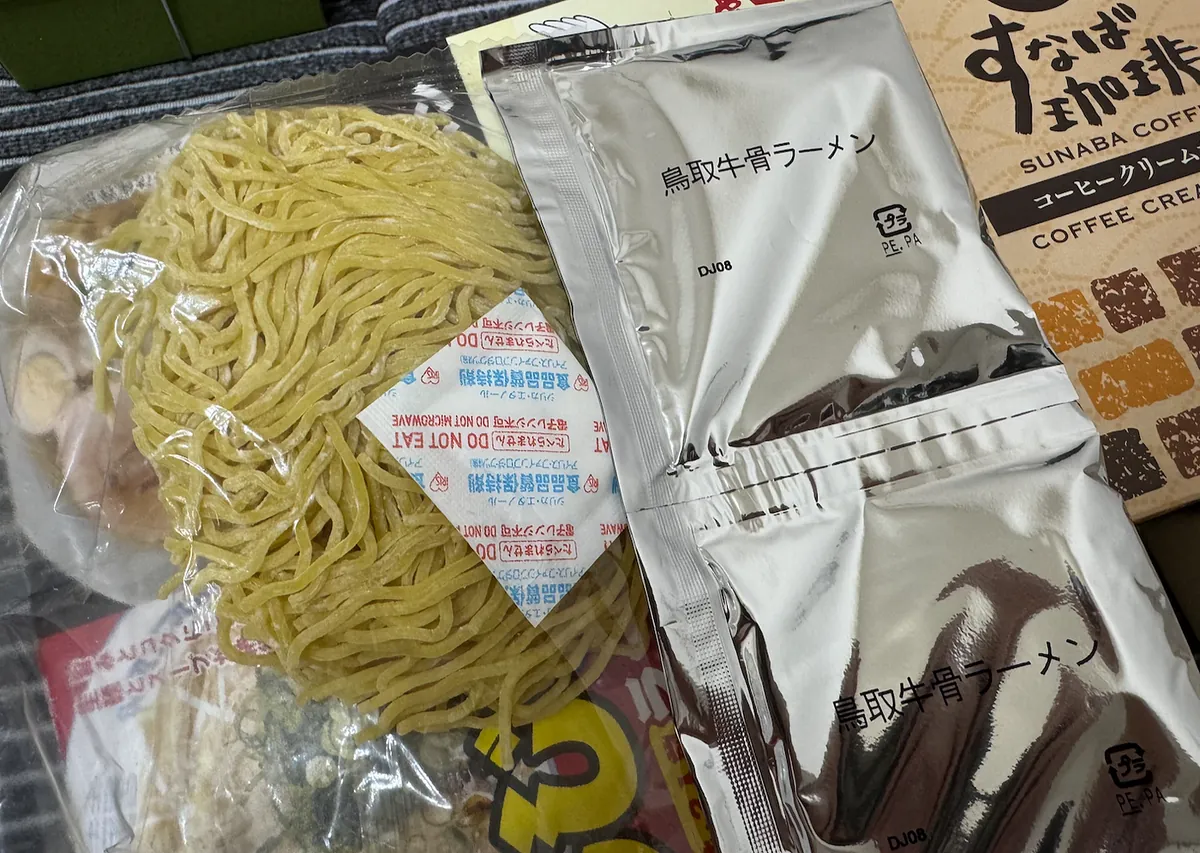
What’s special is the beef bone broth ramen, usually it’s pork bone. I bought a box to try back in Taiwan.

Bought two large boxes of cookies (good for sharing with colleagues) to distribute. The sweet ones are ordinary but serve as a souvenir from visiting Izumo Taisha. The savory seafood pancake cookies, I think, are very tasty!
Return to the hotel
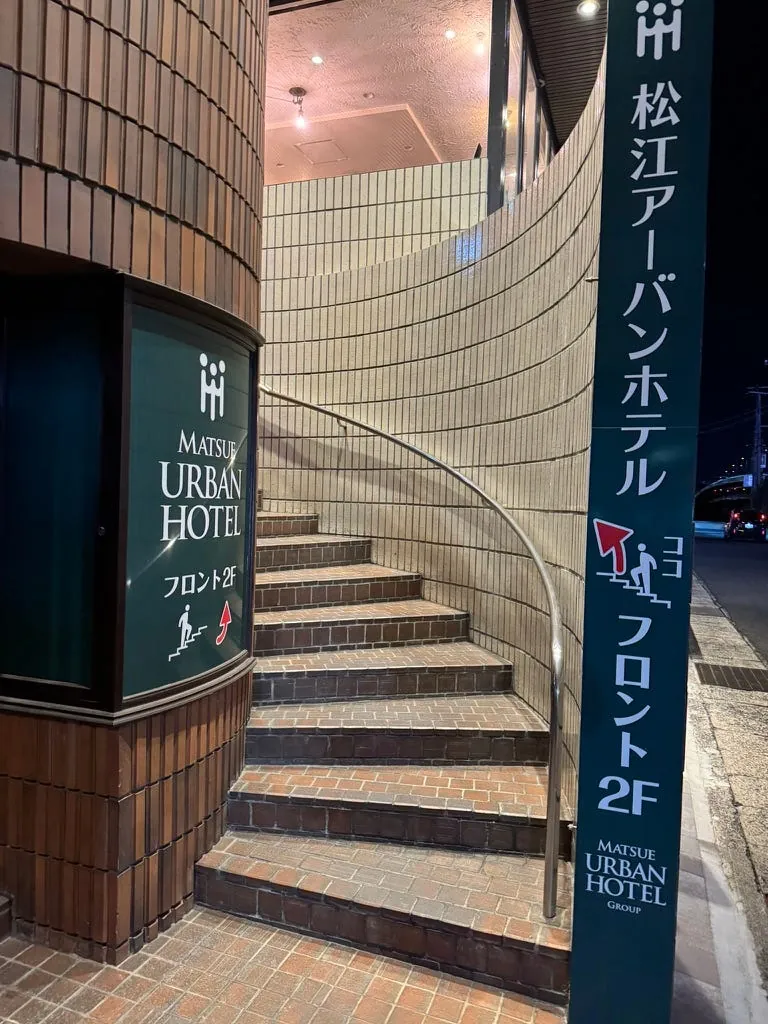
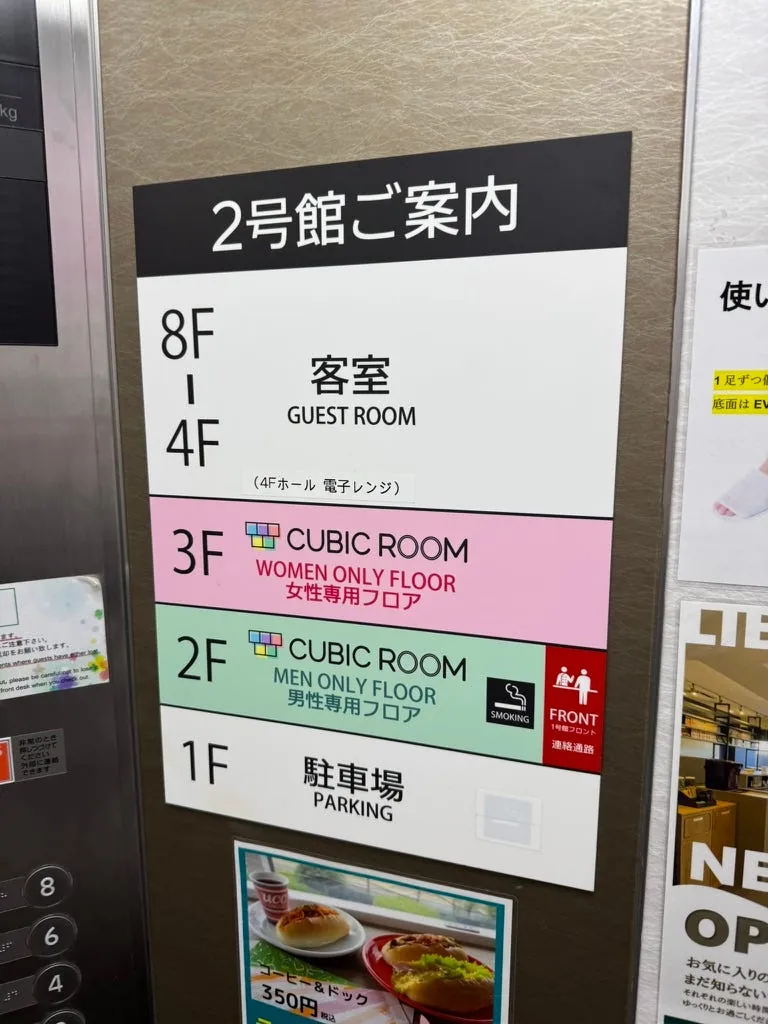
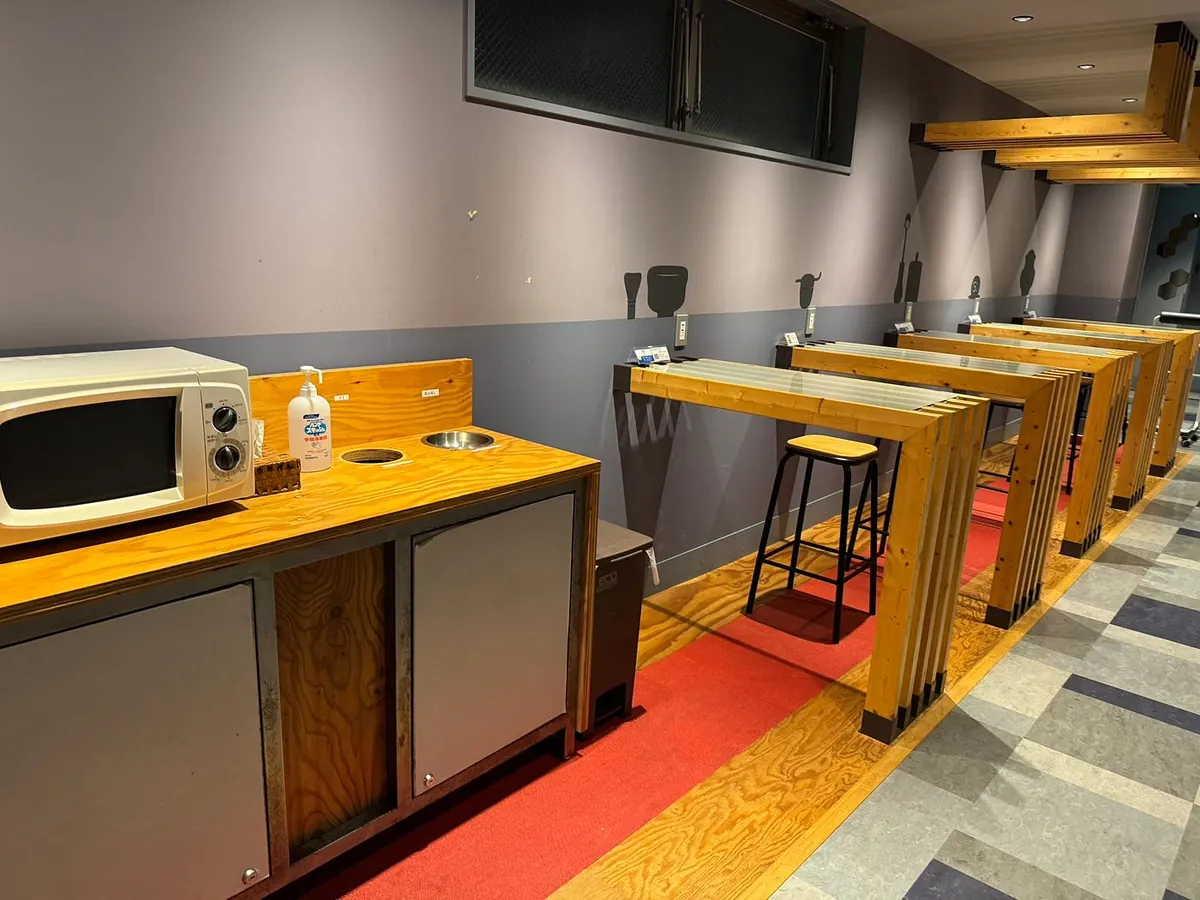
There is no elevator in this building. The booking is for Building 2, which can be reached by crossing the skybridge from the main building lobby. On the 2nd floor of Building 2, there is a lounge with a microwave, laundry room, and vending machines.
The experience at Building 2 didn’t feel very safe. The elevator has no access control, and the 1st and 2nd floors are capsule hotels, making entry and exit more complicated. It’s also quite far from the main building lobby, so after checking in, I used my suitcase to block the door, fearing someone strange might break in.
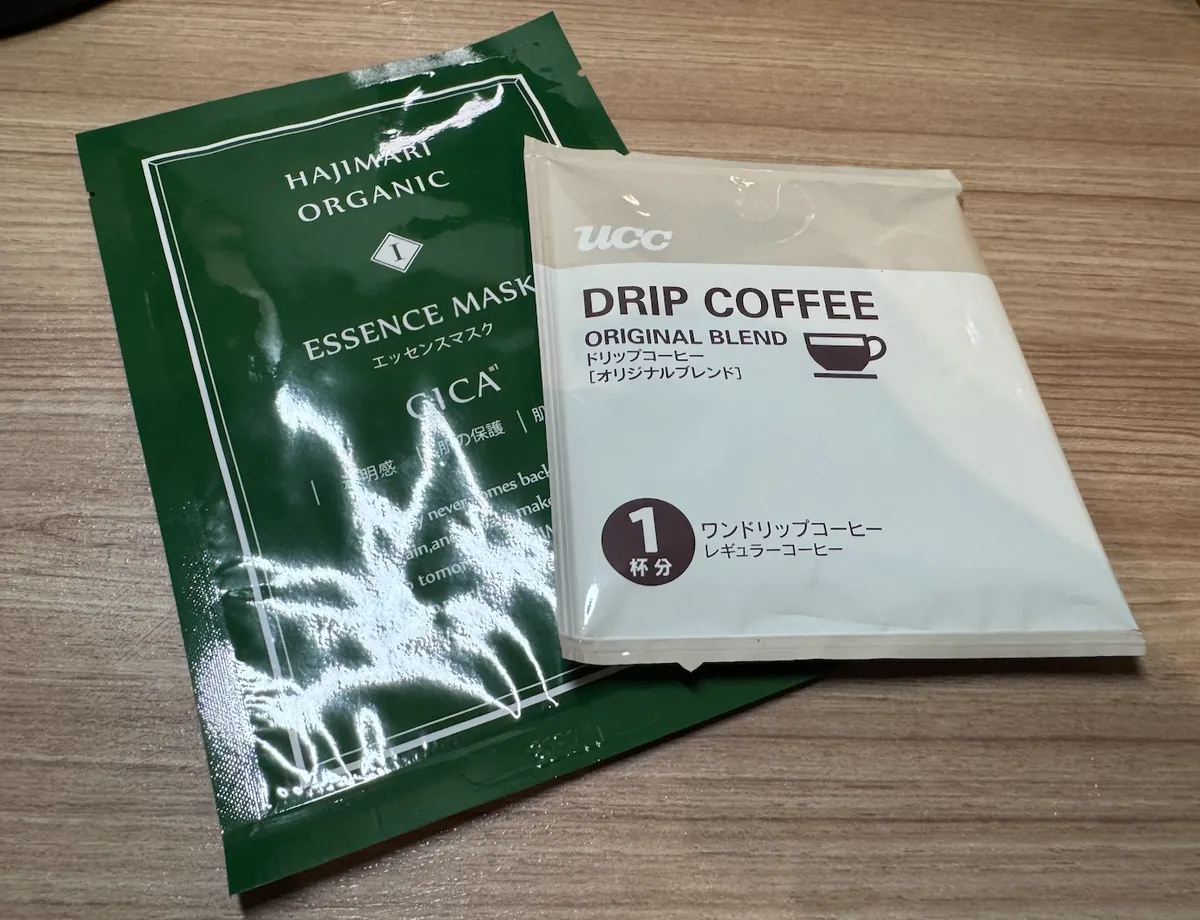
In the lobby, you can get free face masks, coffee, and tea bags.
Finding Food
After checking in, I went outside to find food. It was quite cold, dark, and quiet outside, so I quickly grabbed a bento from a restaurant near the station and bought some snacks and drinks at a convenience store before heading back to the hotel.
The beef tongue bento was delicious, and the peach sparkling wine bought at the convenience store was also tasty.
Good night, Matsue.
Also bought almost the same next-day breakfast combo every day…
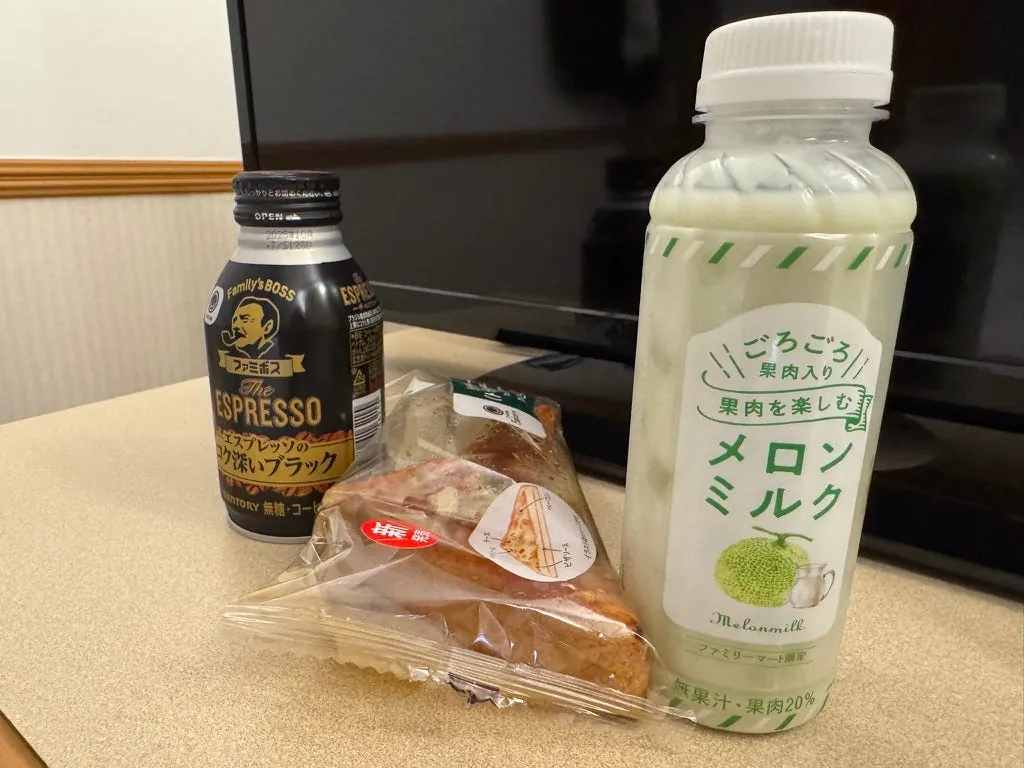
This pulp juice from FamilyMart is a must-drink every time I visit Japan!
Matsue Shinjiko 24-Hour Live Stream:
A YouTube channel I found by chance where you can see the weather and scenery of Lake Shinji.
Day 3 (11/14 Thursday) Matsue Horikawa Sightseeing Boat, Matsue Castle, Adachi Museum of Art
In the morning, first leave the luggage at the hotel, then take the bus from Matsue Bus Station to the Matsue Castle boat tour.
Google Maps doesn’t show the platforms; you have to check on-site. Trains at platform 2 go to Matsue Castle.
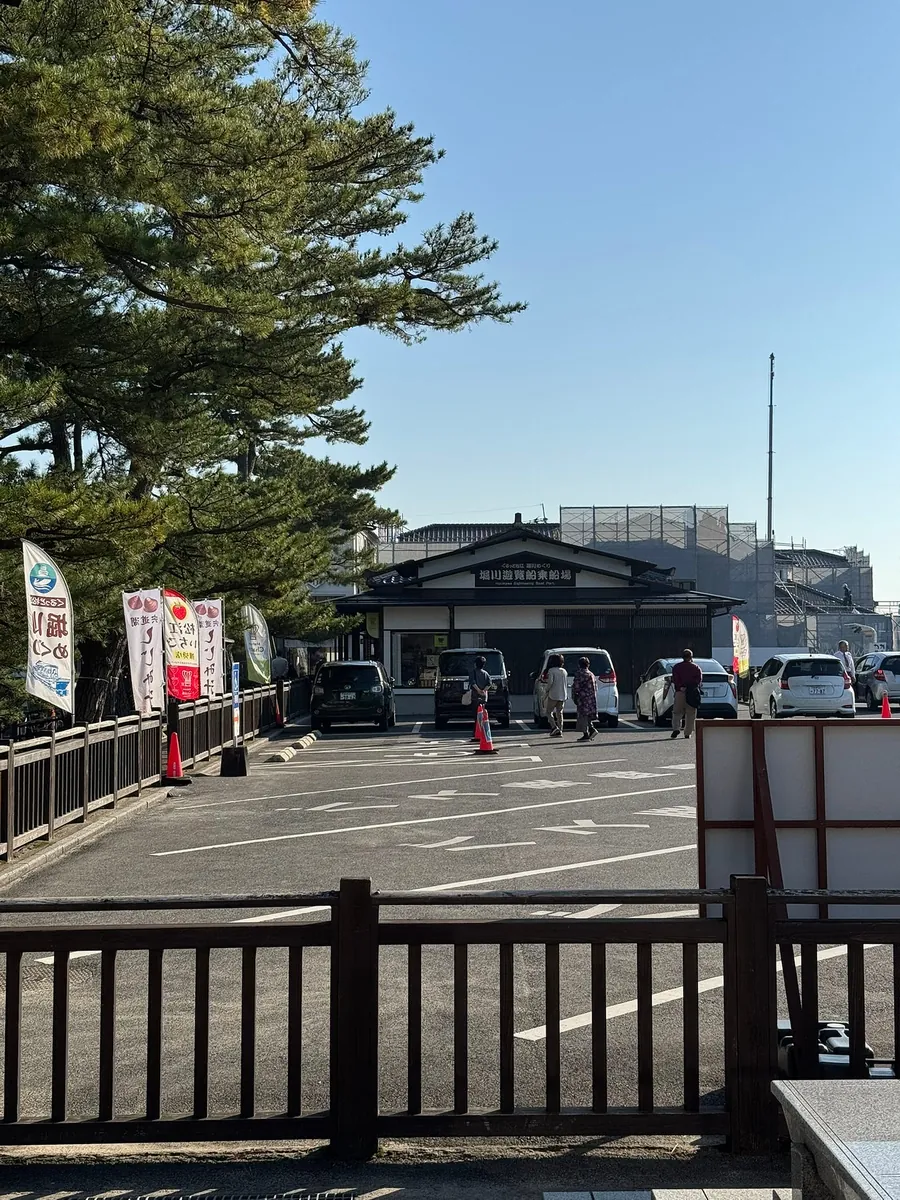
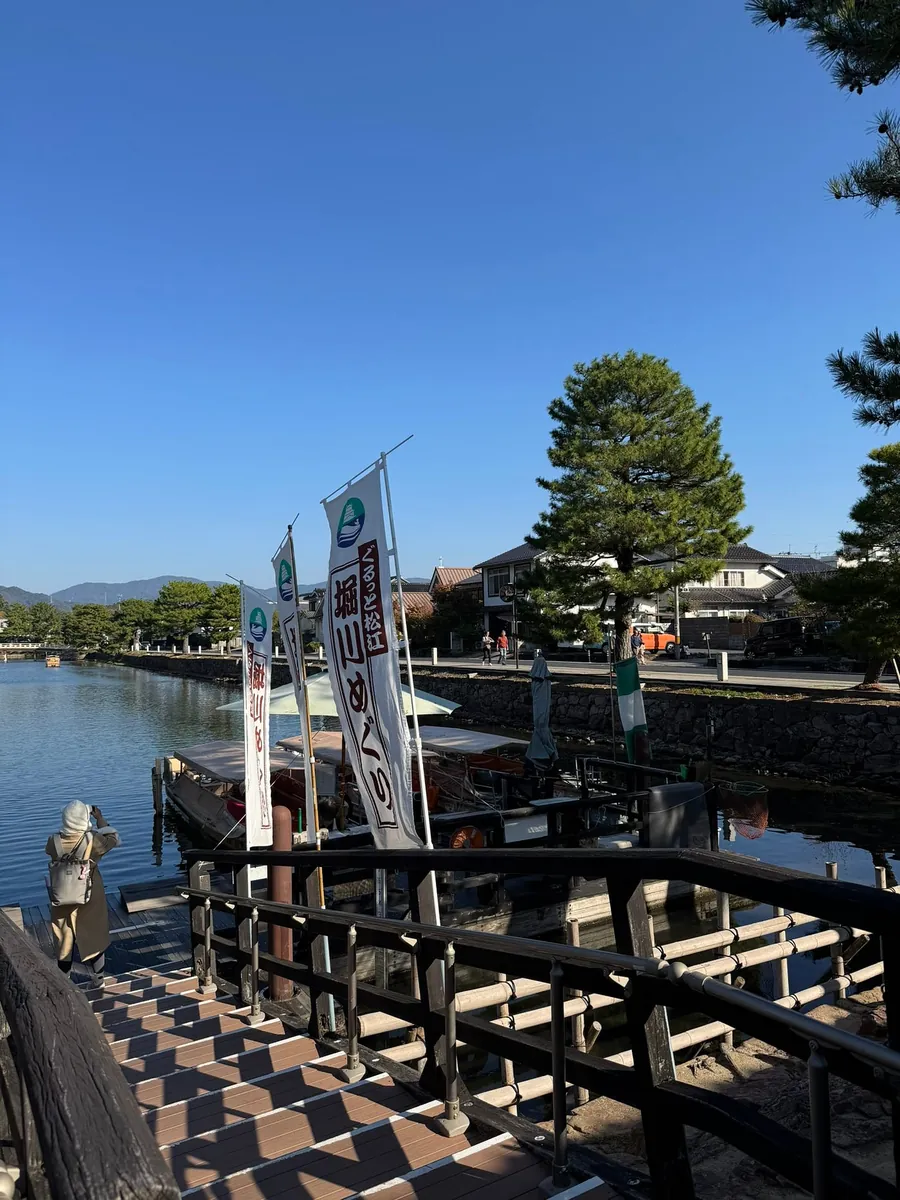
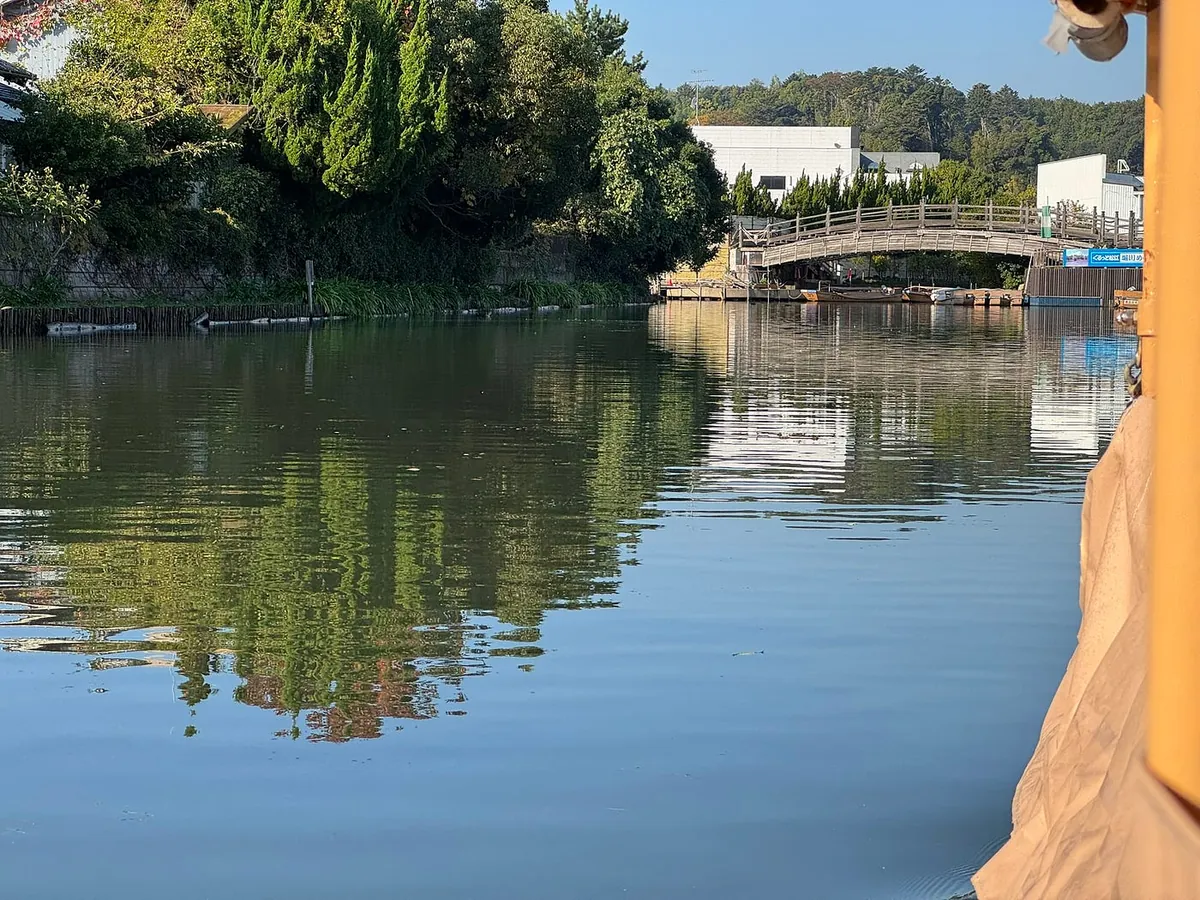
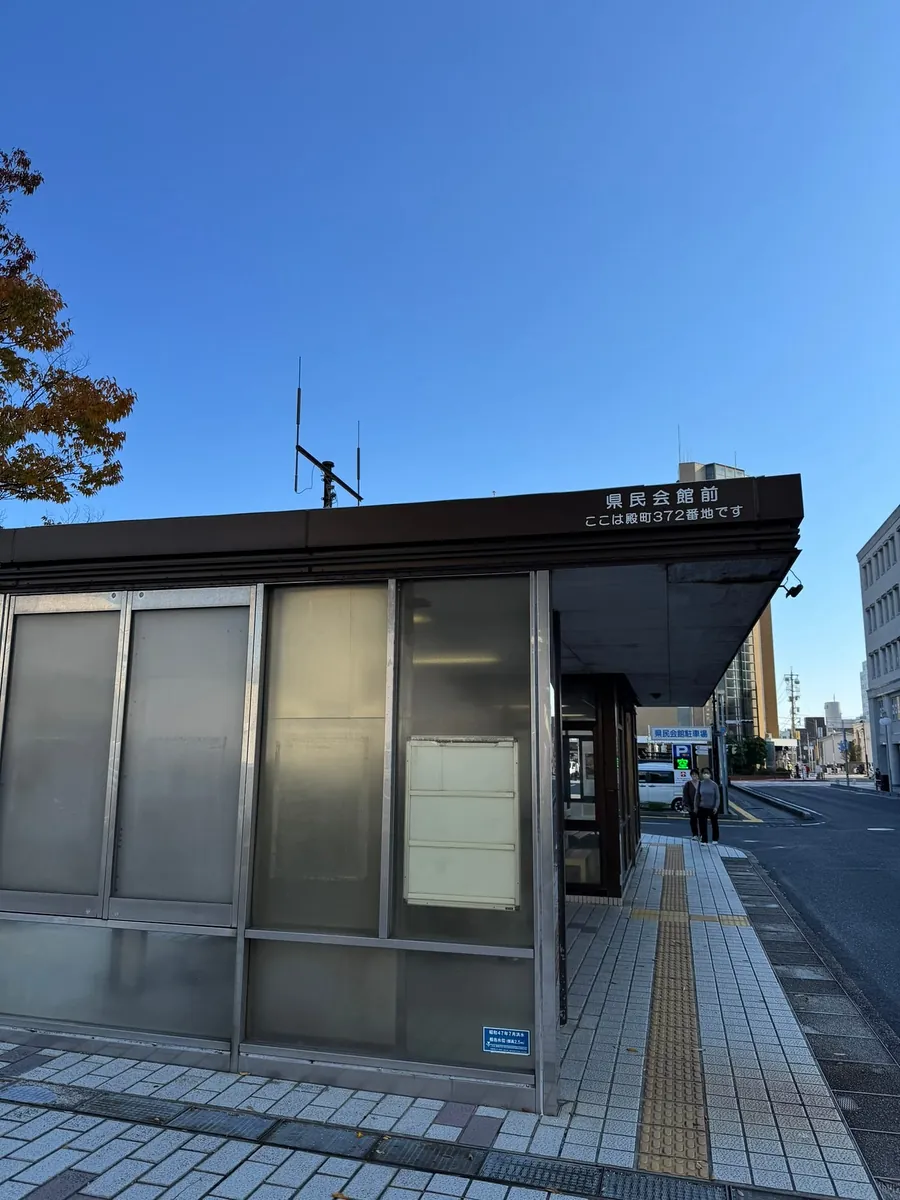
Get off in front of the Prefectural Civic Hall and walk towards Matsue Castle. You can see the “Horikawa Sightseeing Boat” dock near the parking lot.
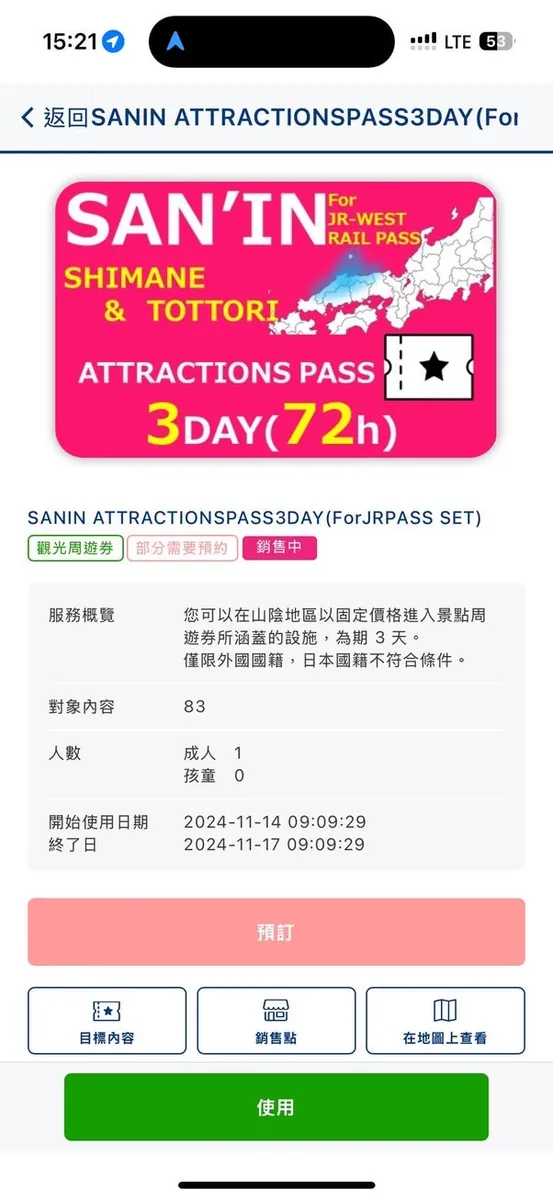
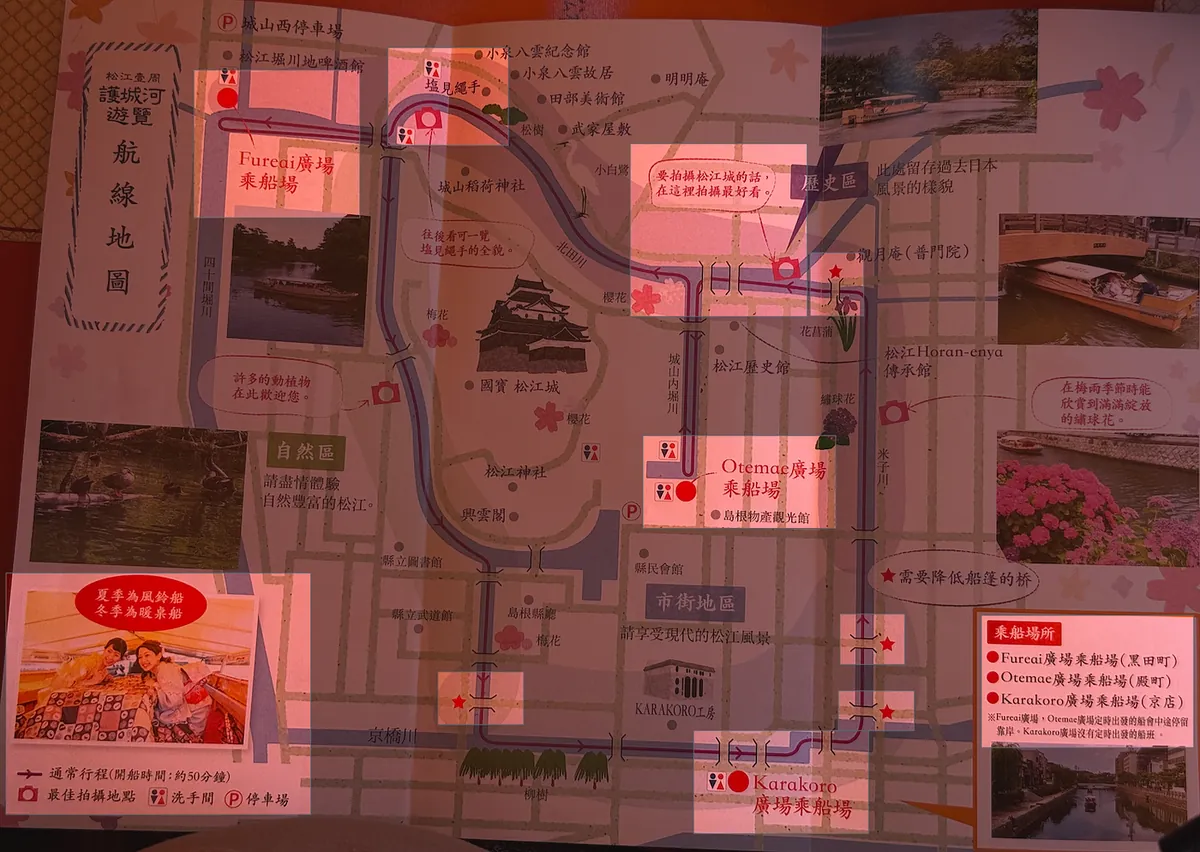
Activate the JR Pass San’in-Sanyo Area 3-Day Pass Free ride on Horikawa sightseeing boat
-
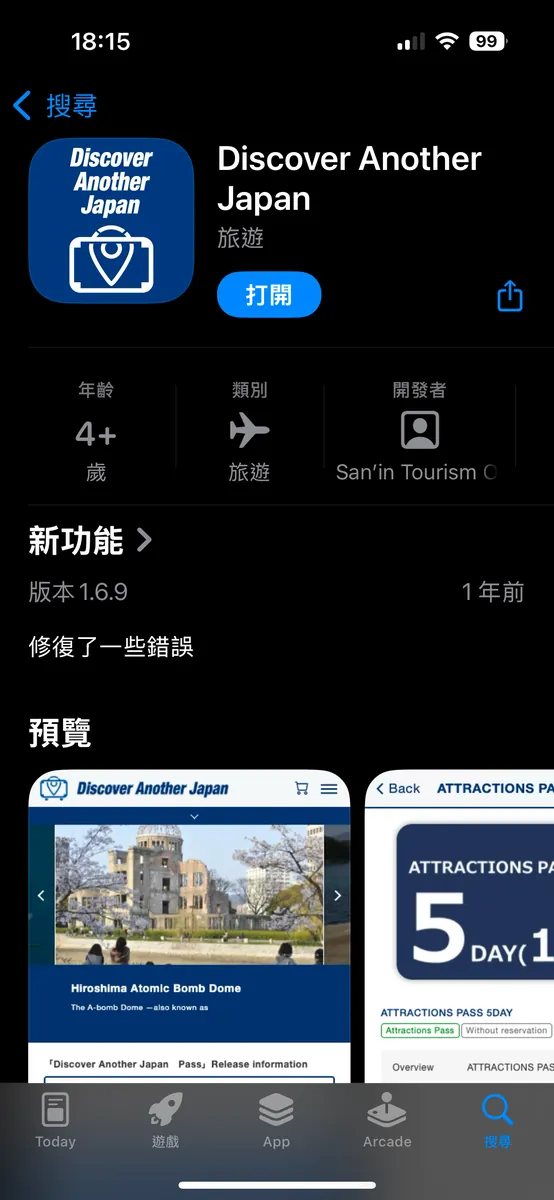
Download Discover Another Japan App
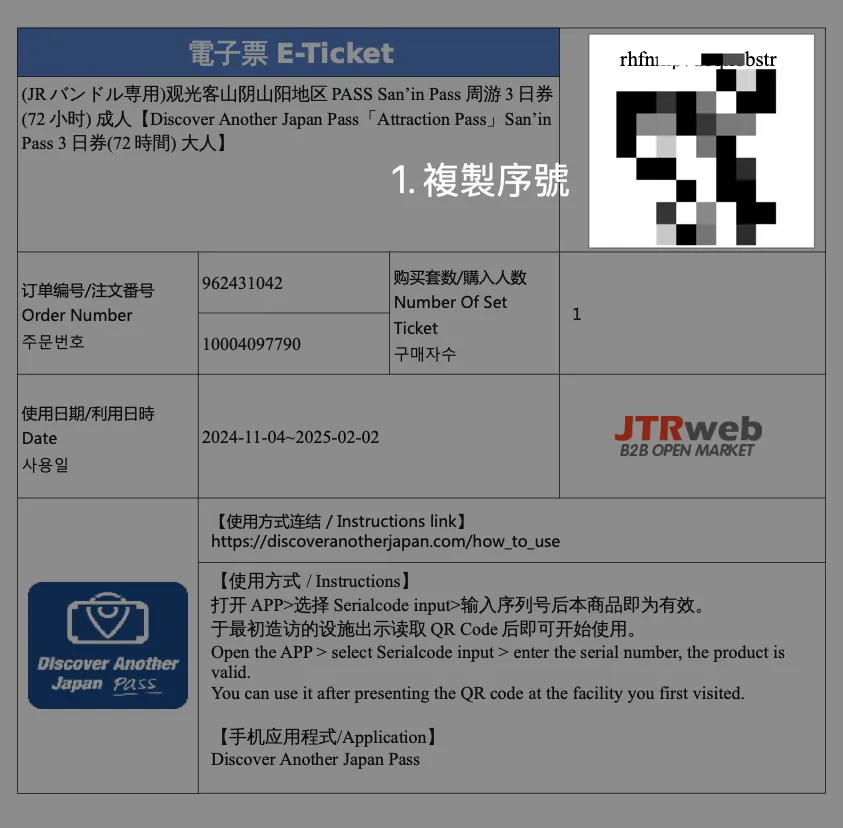
-
Copy the serial number from the certificate email.
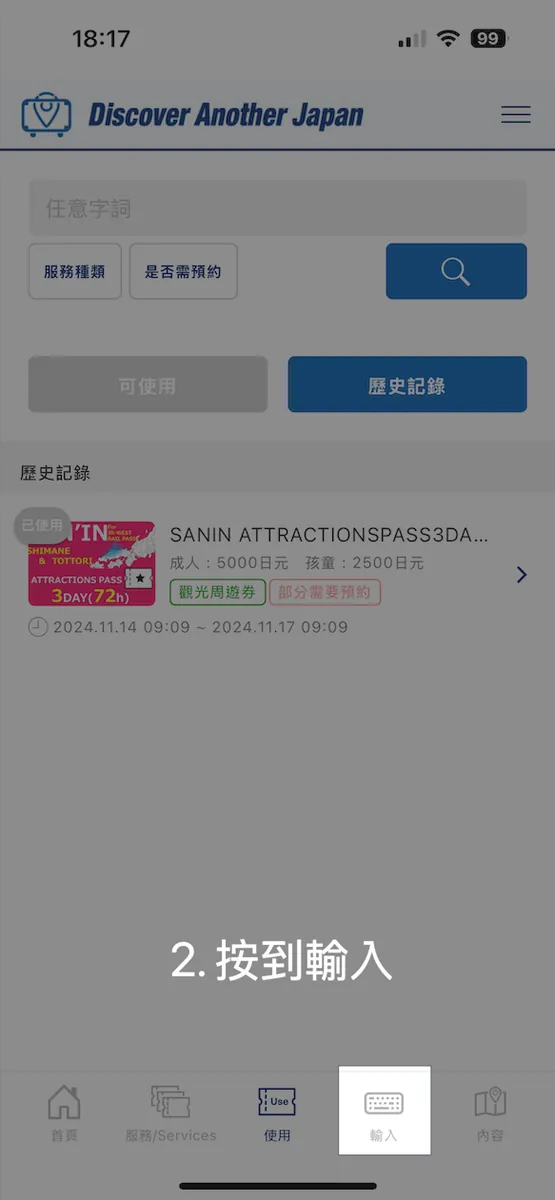
-
Open the app, select “Input,” paste the code, and tap “Activate.”
Switch to “Use” to fill out the health questionnaire. After completing it, a QR Code camera will appear; scan the QR Code provided by the store and show them the result to complete the redemption.
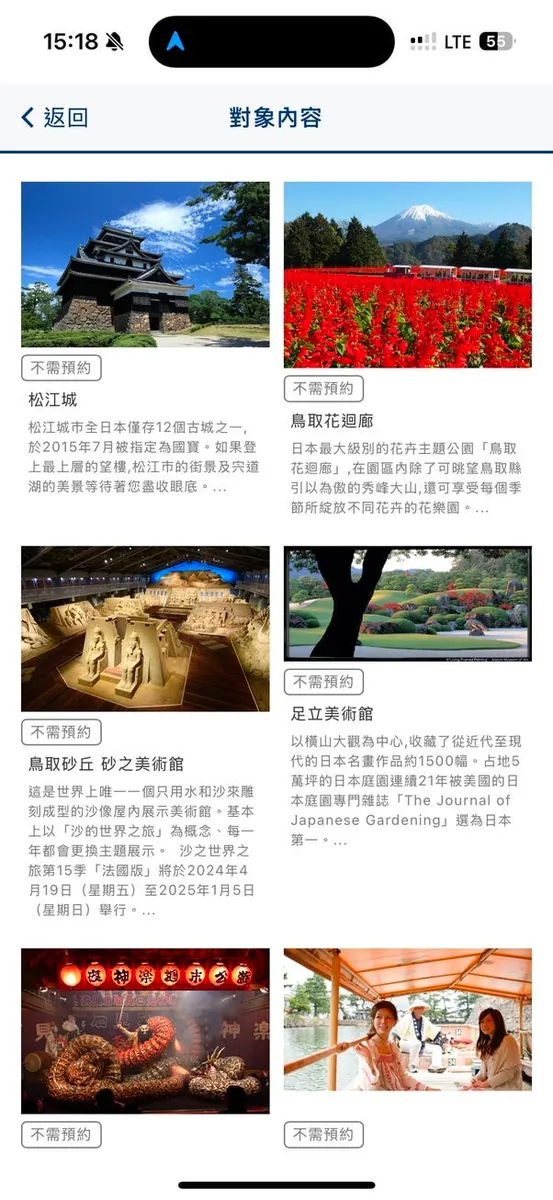
You can also click “Target Content” to view redeemable items.
The actual calculation time starts from the first time the target is redeemed , not from when the code is activated (I entered it on 11/13).
Here are some popular locations for your reference:
-
Shinji Lake sightseeing boat, original price 1,800 yen
-
Matsue Castle boat tour, original price 1,600 yen
-
Adachi Museum of Art, original price 2,300 yen
-
Matsue Castle, original price 680 yen
-
Tottori Sand Dunes Museum, original price 800 yen
-
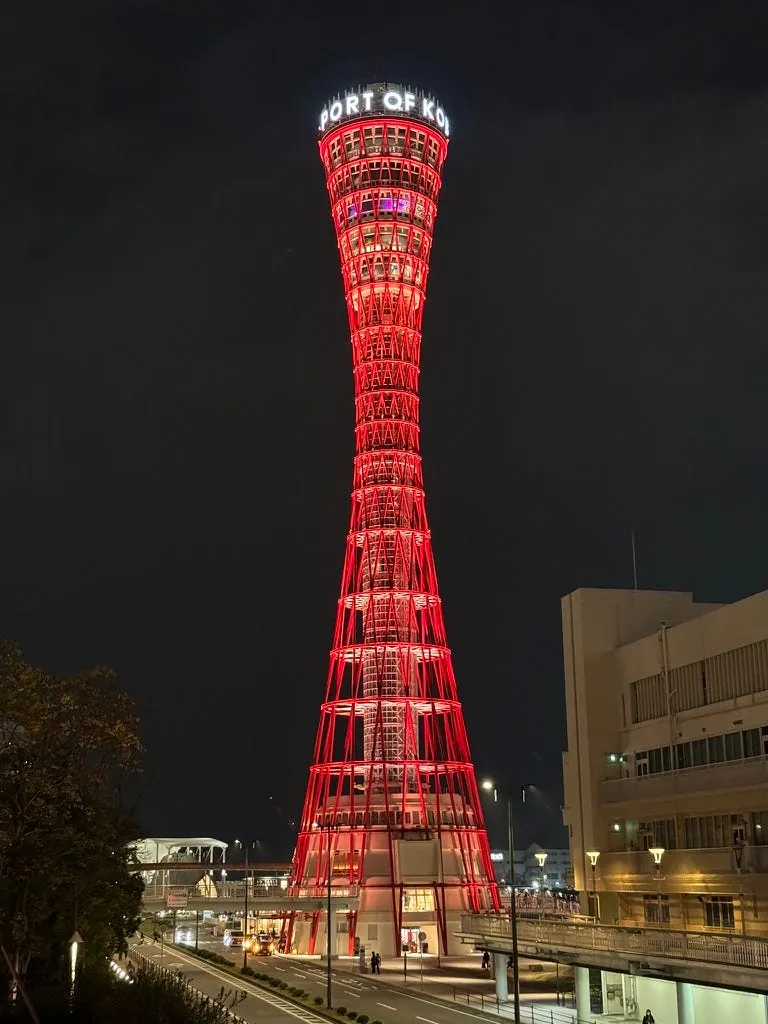
Tsutenkaku Tower, original price 800 yen
-
Okayama Korakuen, original price 410 yen
It’s really a great deal. Just adding up the above savings amounts to 8,390 yen, which is already half the price of the entire JR Pass.
09:15 Take the Matsue Sightseeing Boat
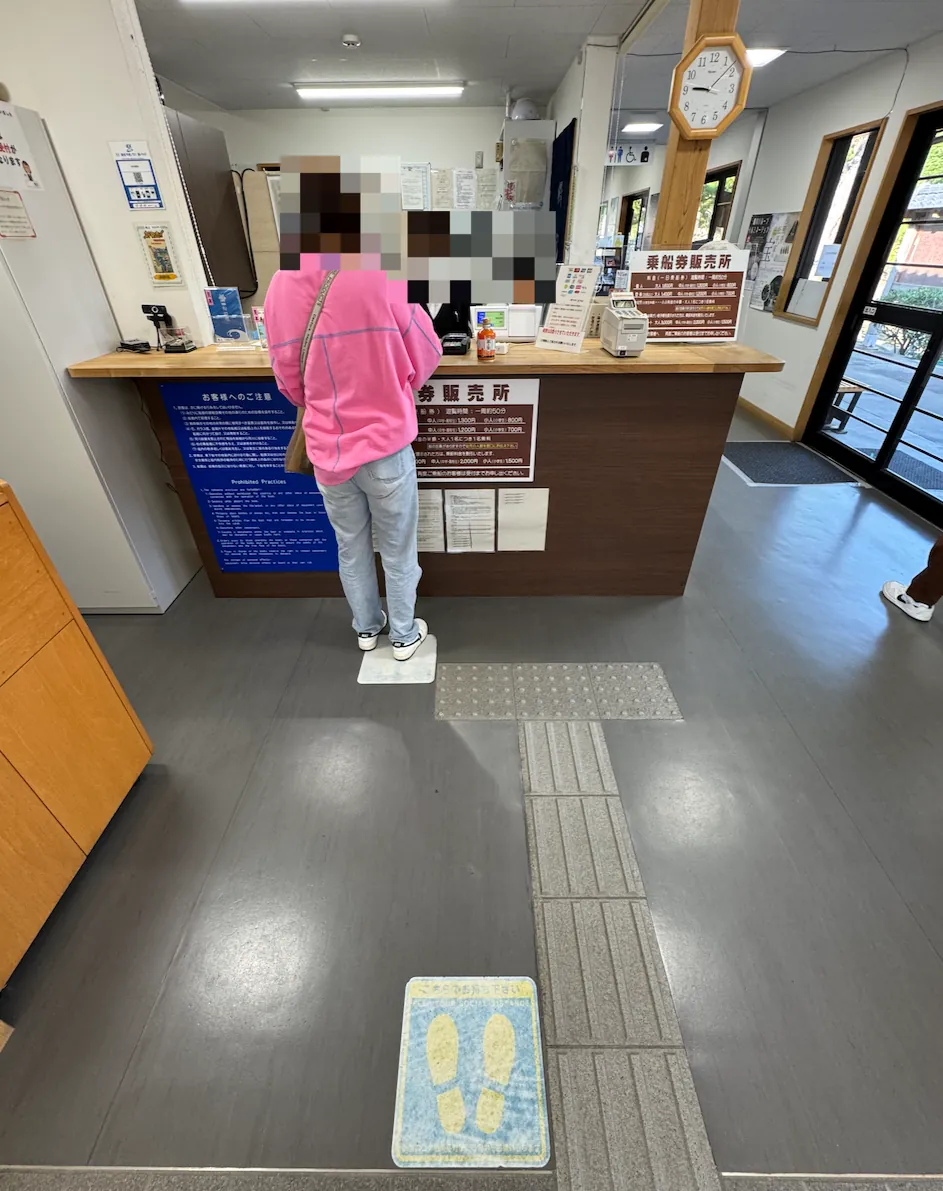
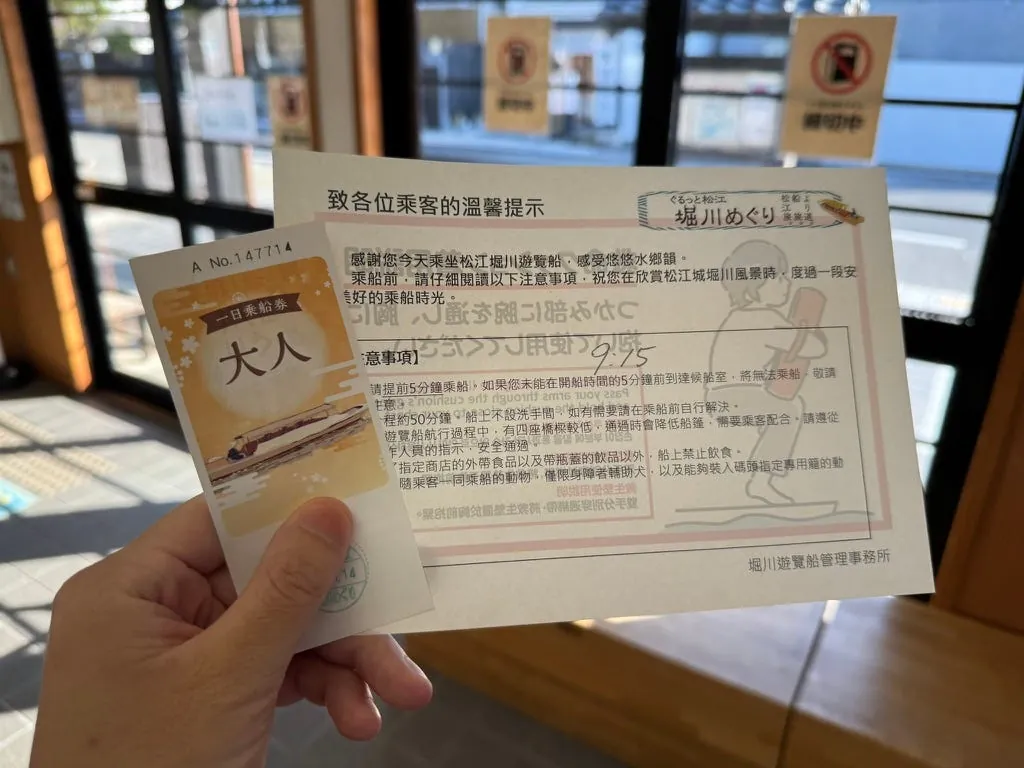
Use the 3-Day Pass for free rides.
-
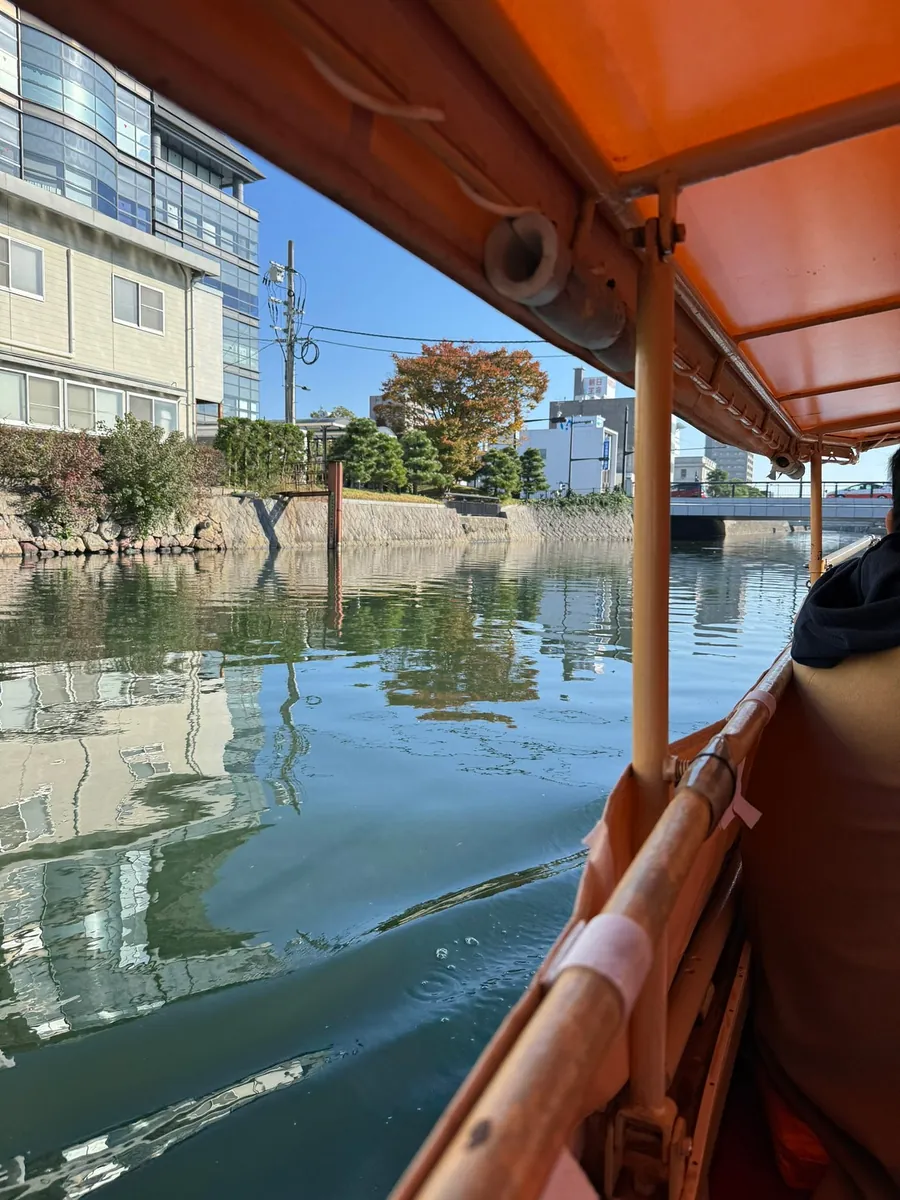
This year is warmer, so the heated kotatsu boat has not been set up yet.
-
There are four bridge points where the boat deck needs to be lowered, so be careful not to pinch your hands.
-
The entire trip takes about 50 minutes.
-
Remove Shoes Before Boarding ⚠️
-
Only the row on the right side facing the boatman can directly capture the view near Matsue Castle. The farther from the boatman, the closer to the bow (= the first row right after boarding) ⚠️ As shown in the picture below

Boarding the ship.
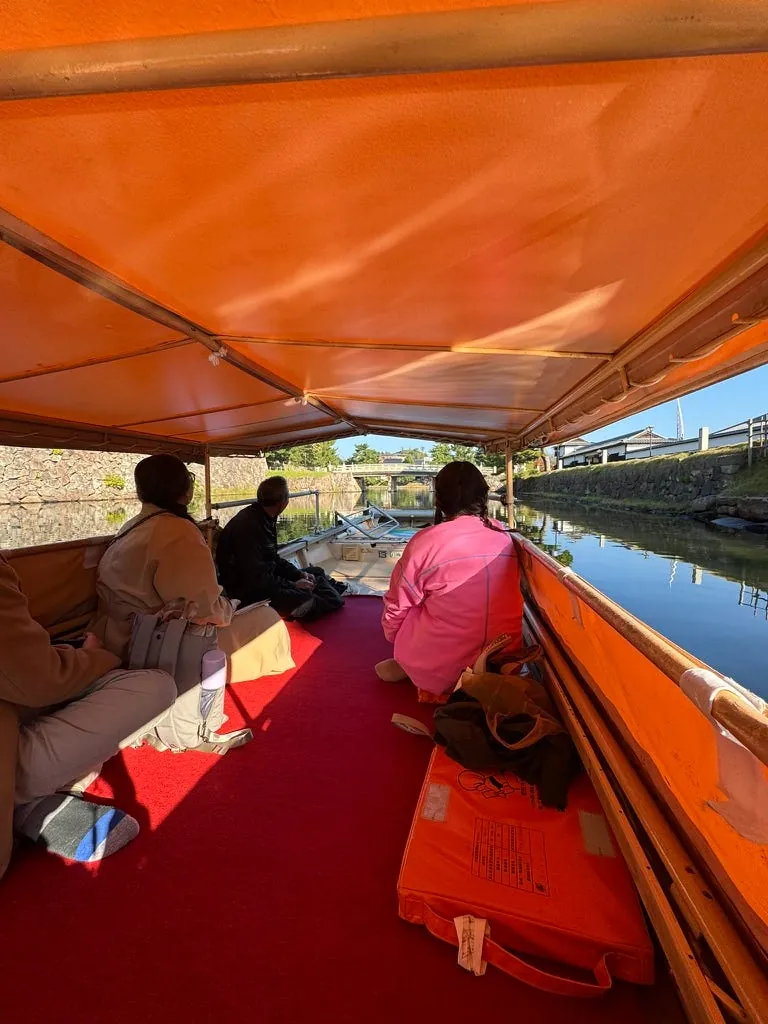
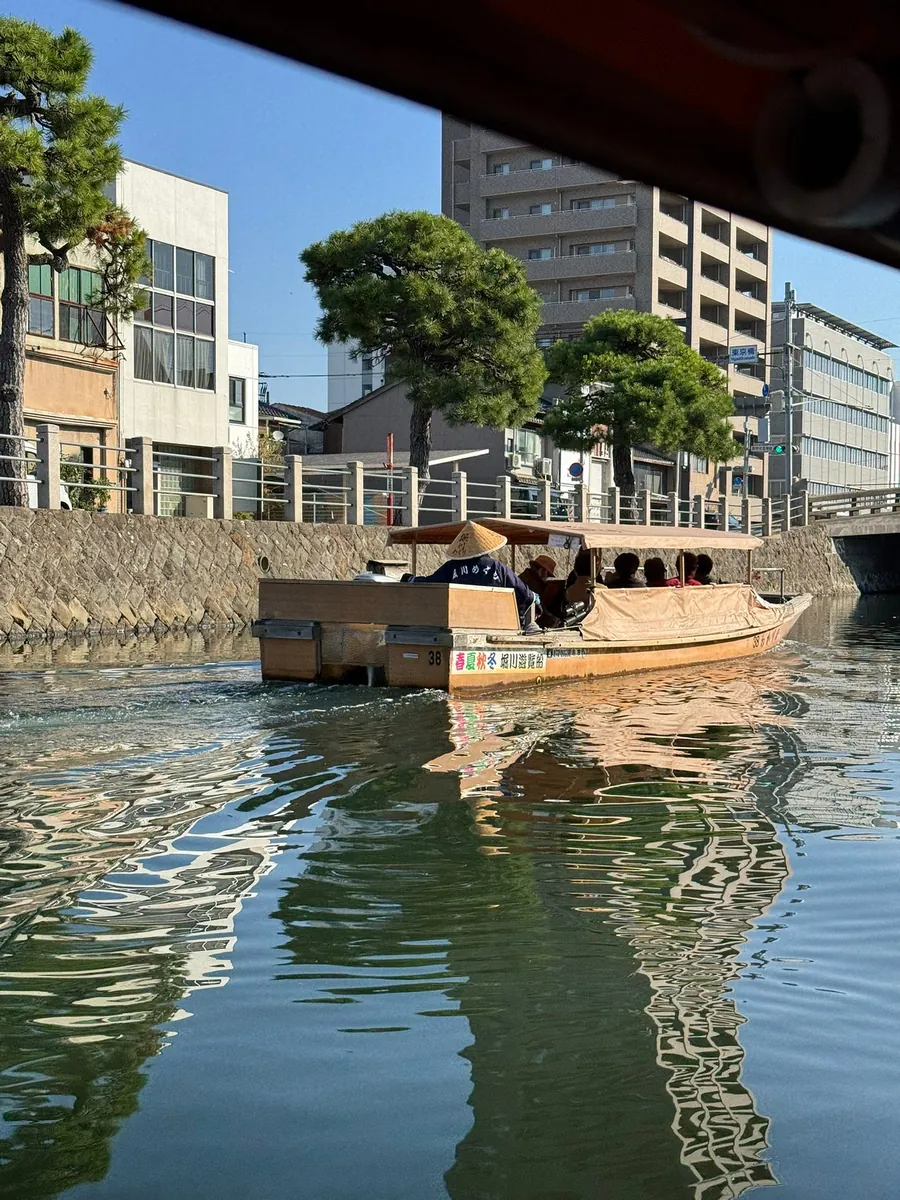

Maybe it’s because the maple leaf season hasn’t started yet, so there were few people. There were only four passengers on the boat, making it very spacious.
There are four bridges where the boat lowers its height, so you need to bend down slightly to pass through.
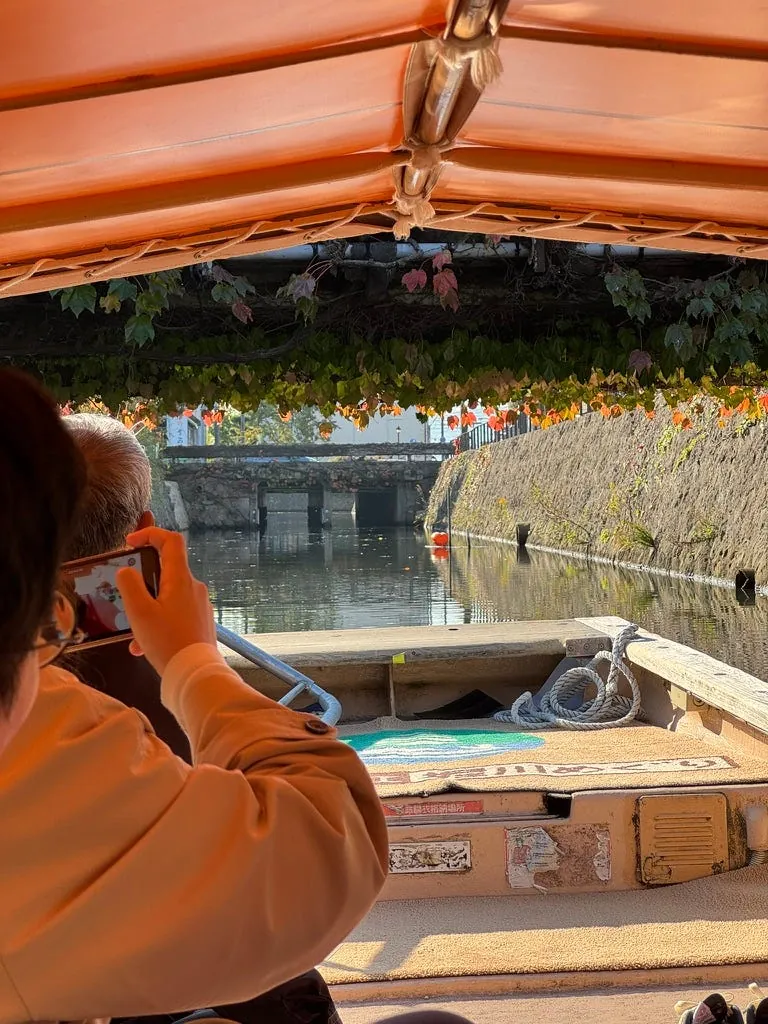
Cruising along the river with the breeze was very relaxing. The boatman also introduced the history of the surrounding sights along the way (although I only understood “hidari” for left and “migi” for right…).
https://youtube.com/shorts/KA9xKZV16bk
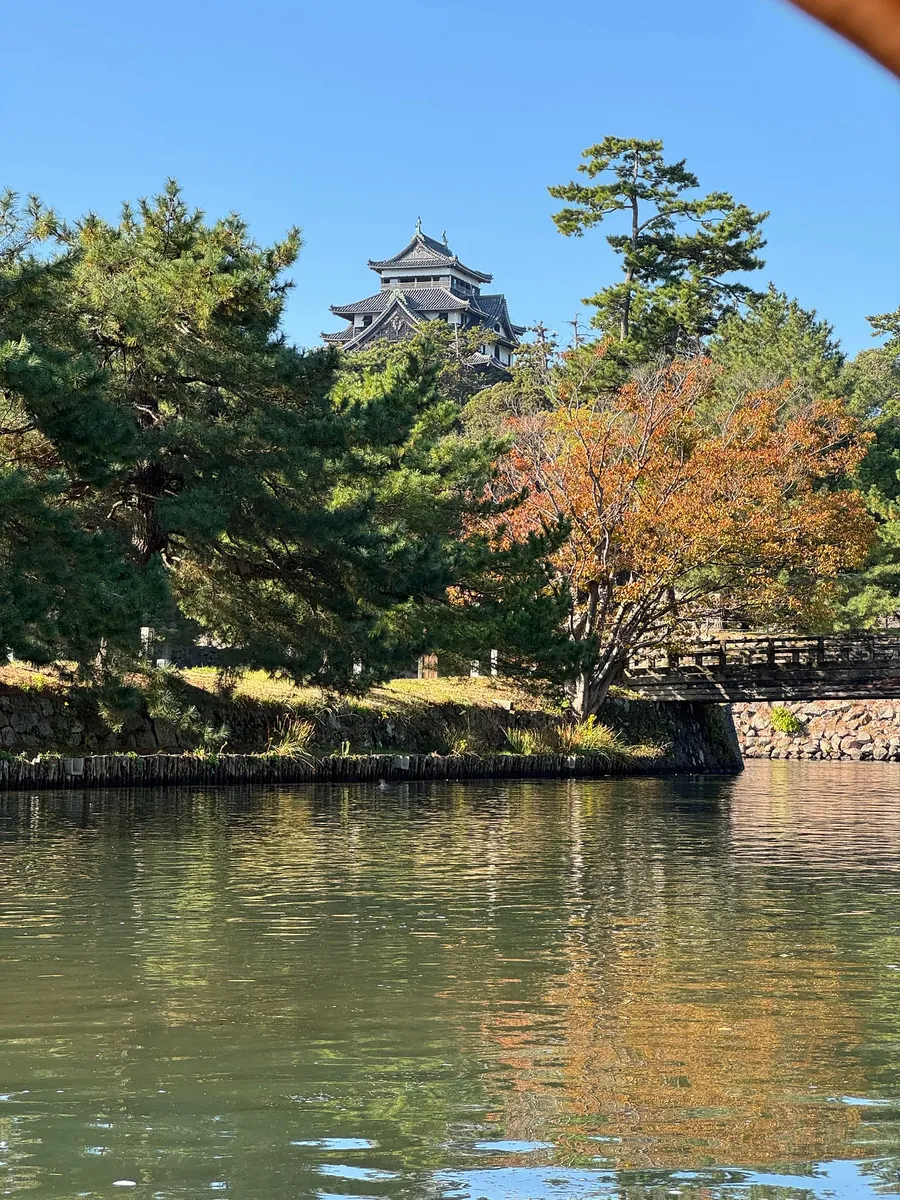
Near the end, close to the return point, there is a photo spot for Matsue Castle where you can capture a distant view of the castle.
The boat tour ended around 10:00.
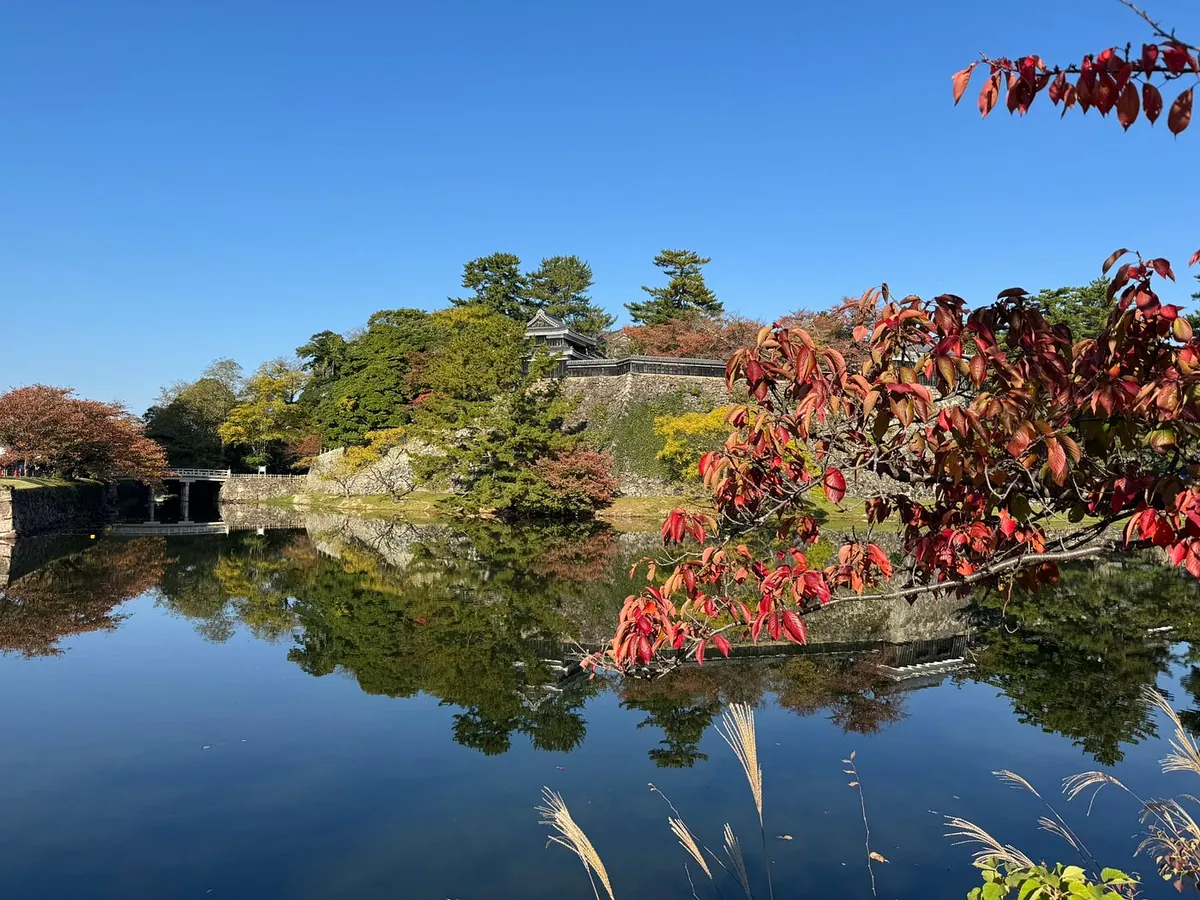
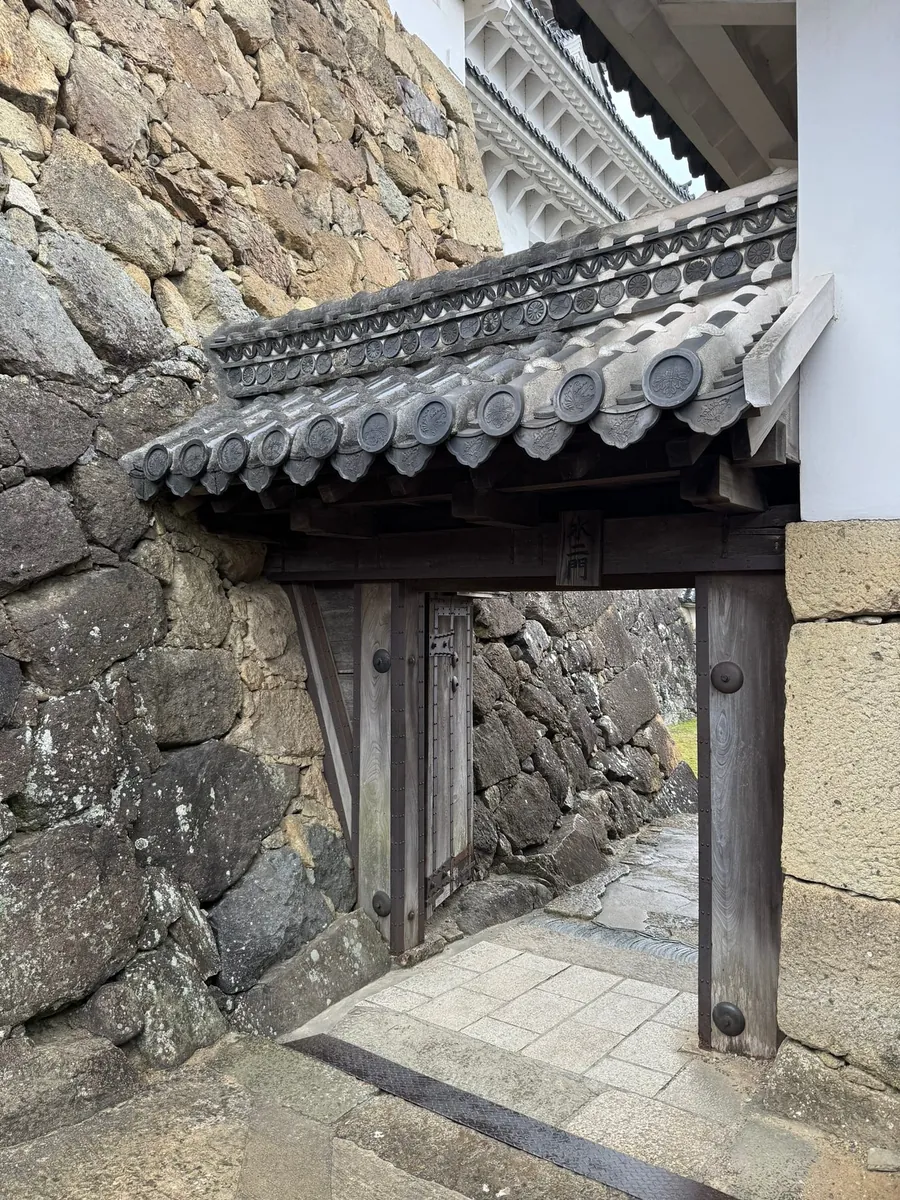
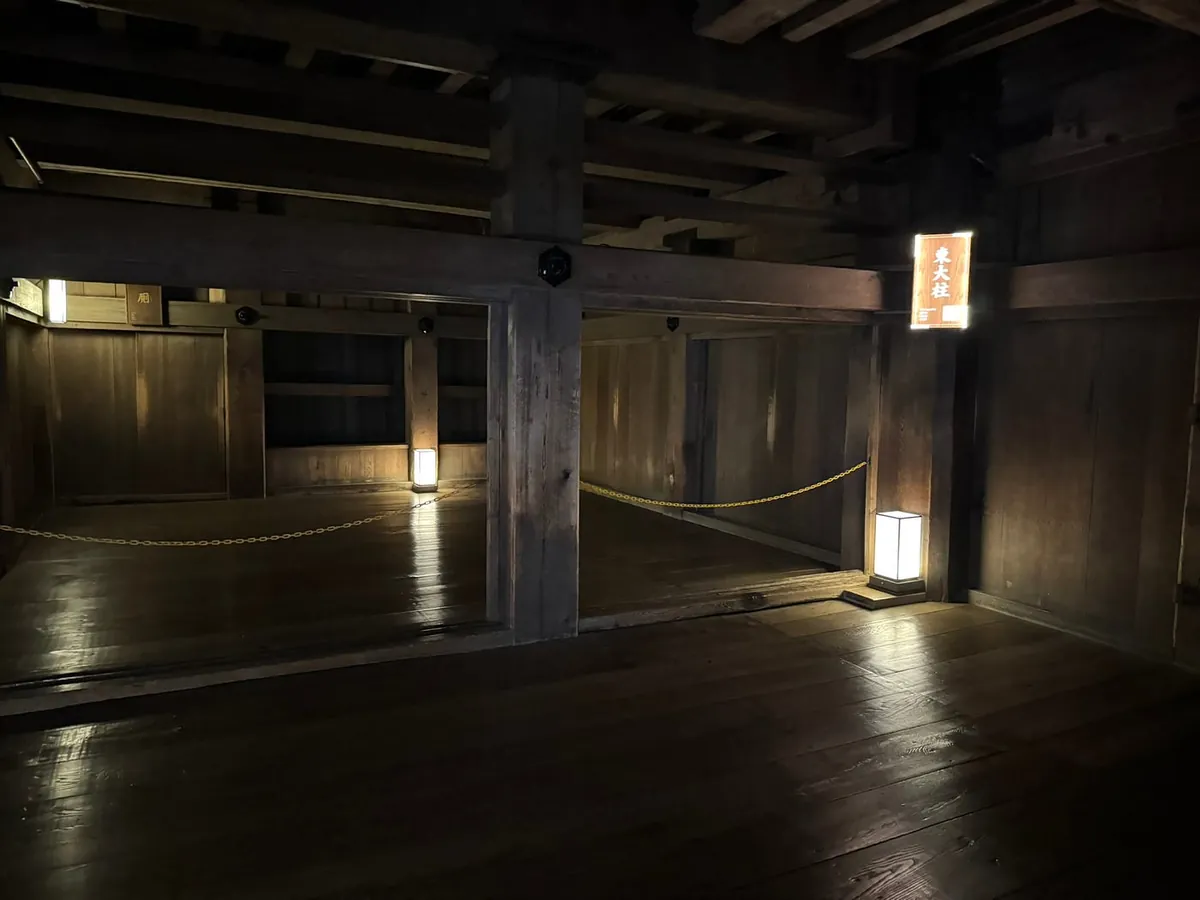
10:15 Matsue Castle
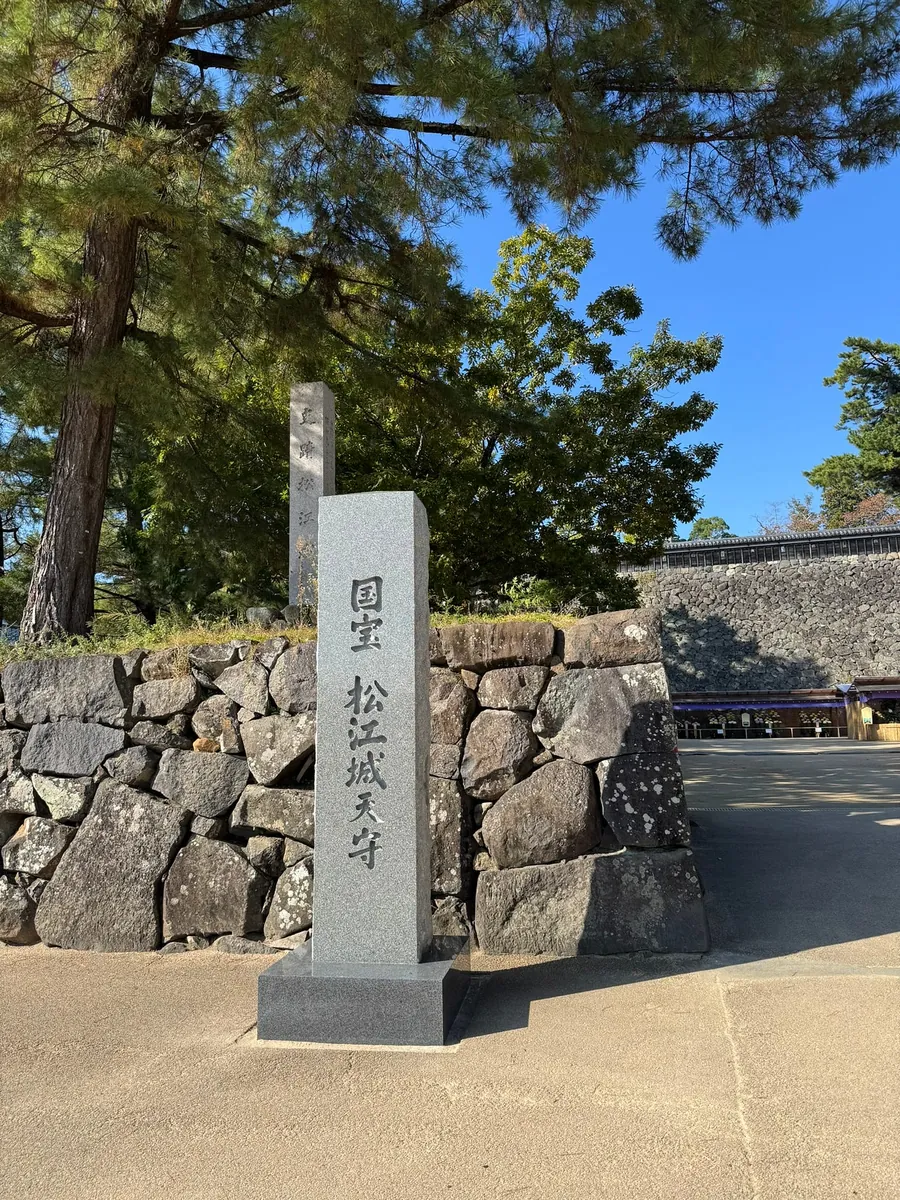
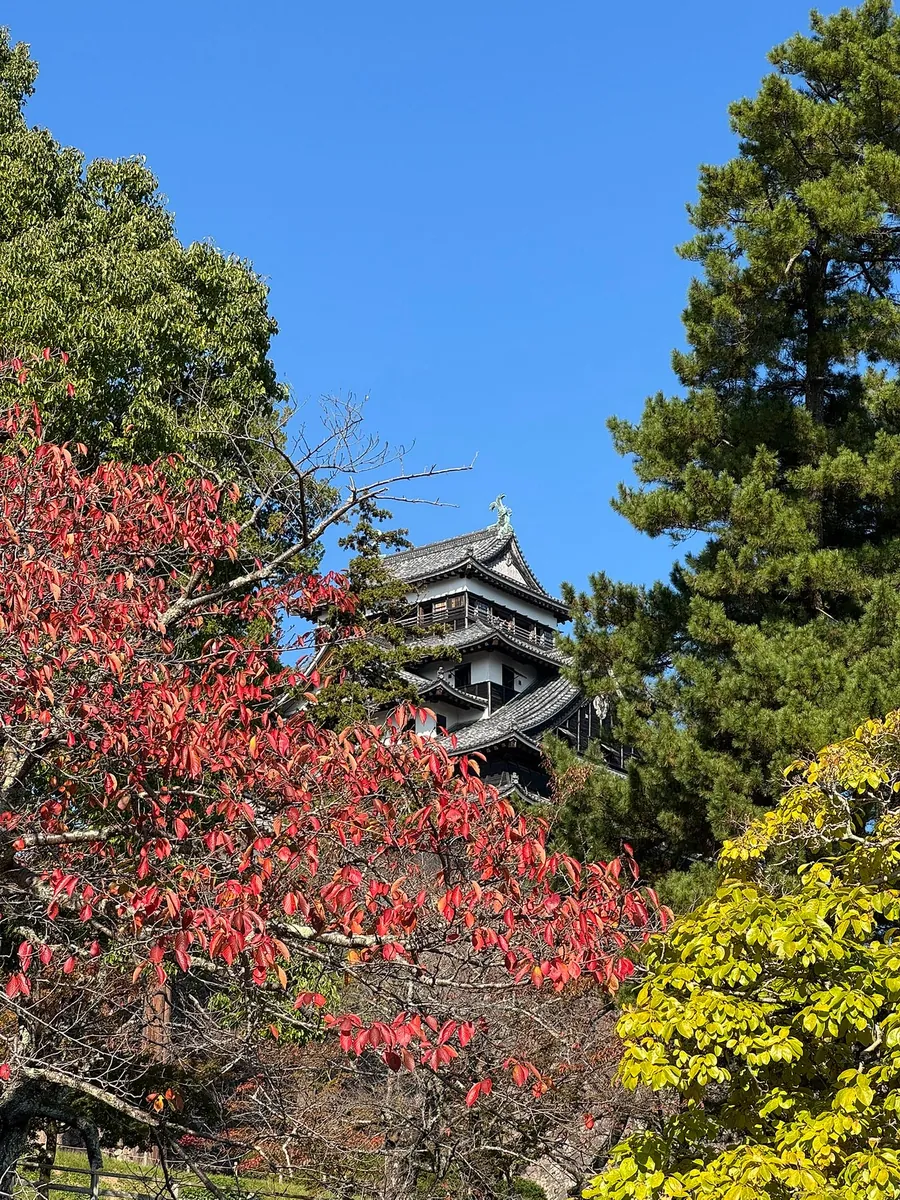
After returning by boat and walking back, the entrance to Matsue Castle is on the other side. Walking uphill will lead you to Matsue Castle.
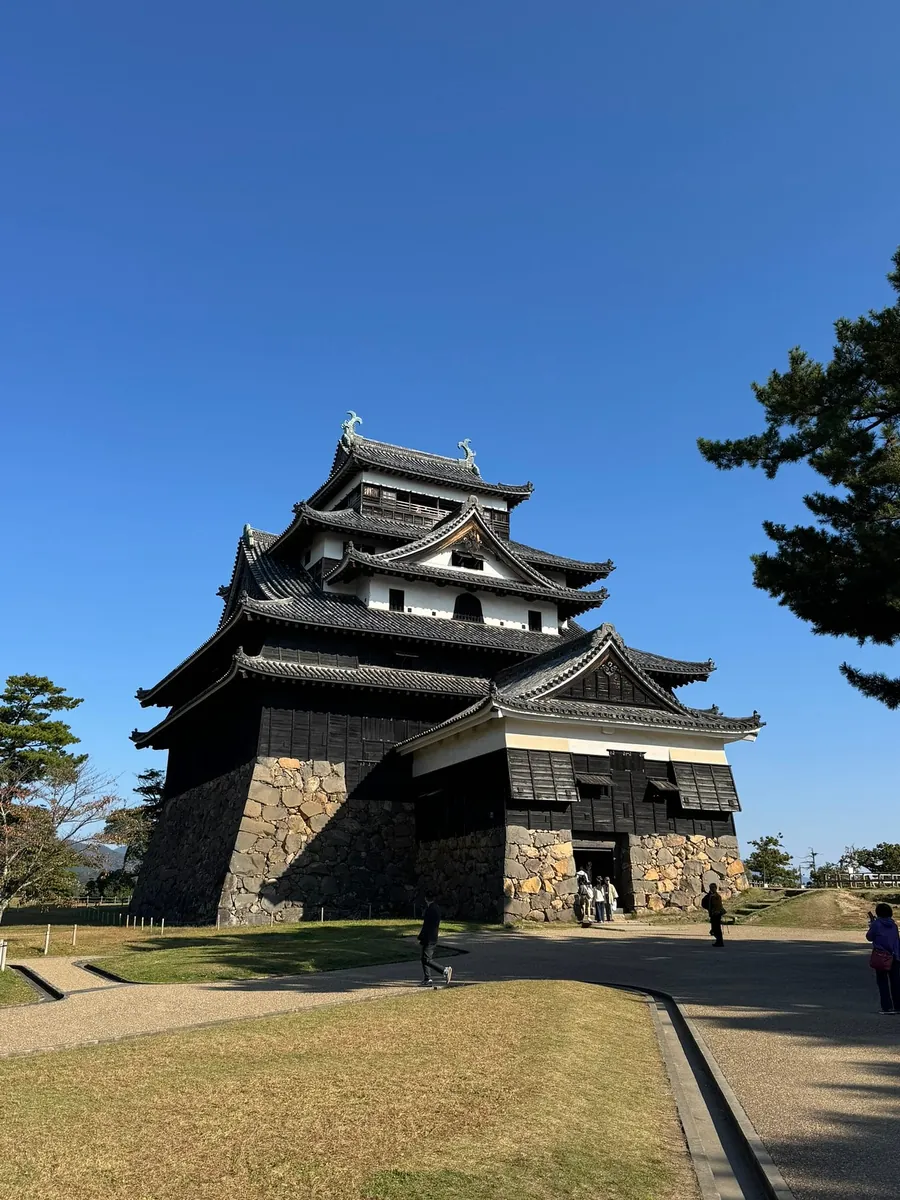
Passing by Matsue Shrine, we arrived at Matsue Castle.
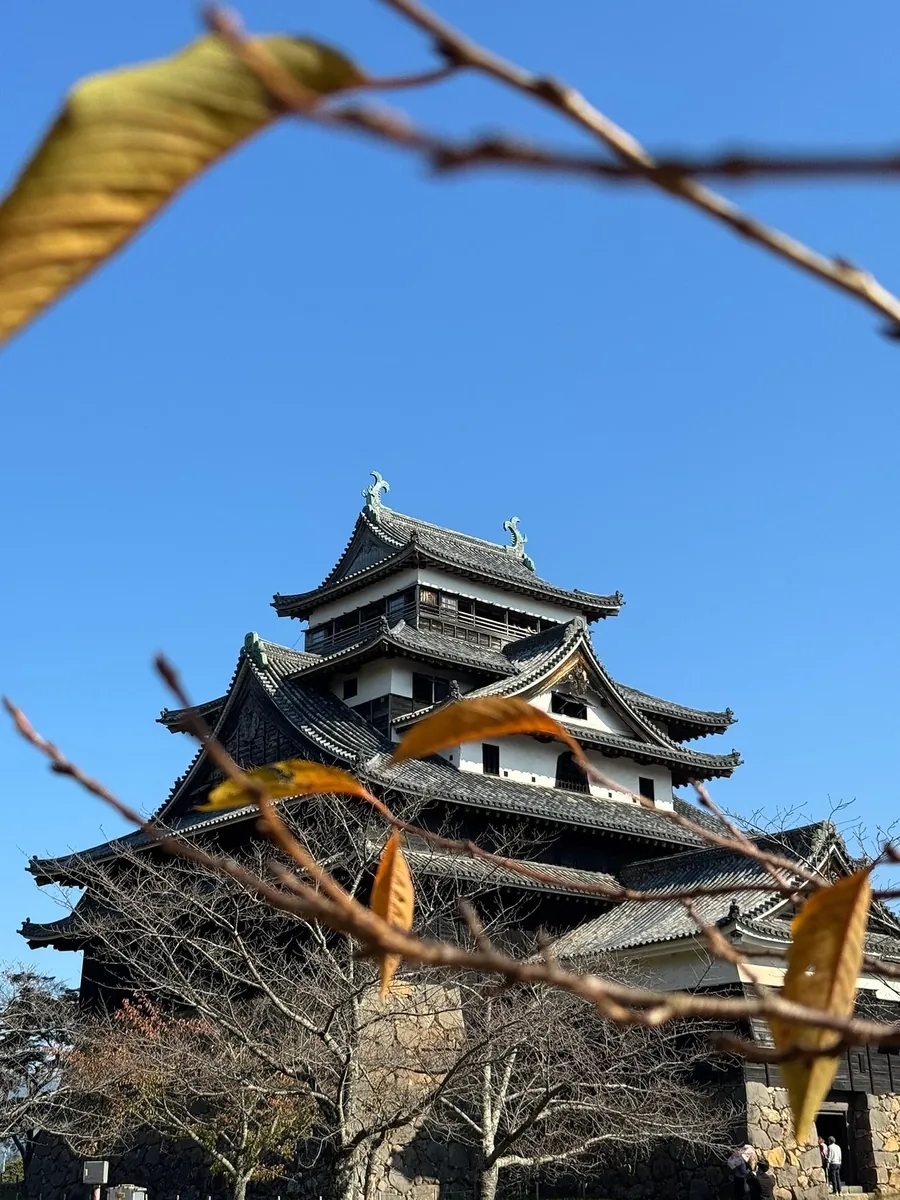
Due to limited time, I decided to skip going up and continued on to Adachi Museum of Art.
Return by waiting for the bus at the Kenmin Hall bus stop in the opposite direction from when you arrived.
~=10:30 Return to the hotel to pick up luggage
Around 10:30, return to Matsue Station and pick up luggage at the hotel.
While waiting at the traffic light here, I was almost hit by a bike with brake failure. Luckily, I was standing further back and wasn’t hit. Always stay cautious when you’re out and about. ⚠️⚠️⚠️
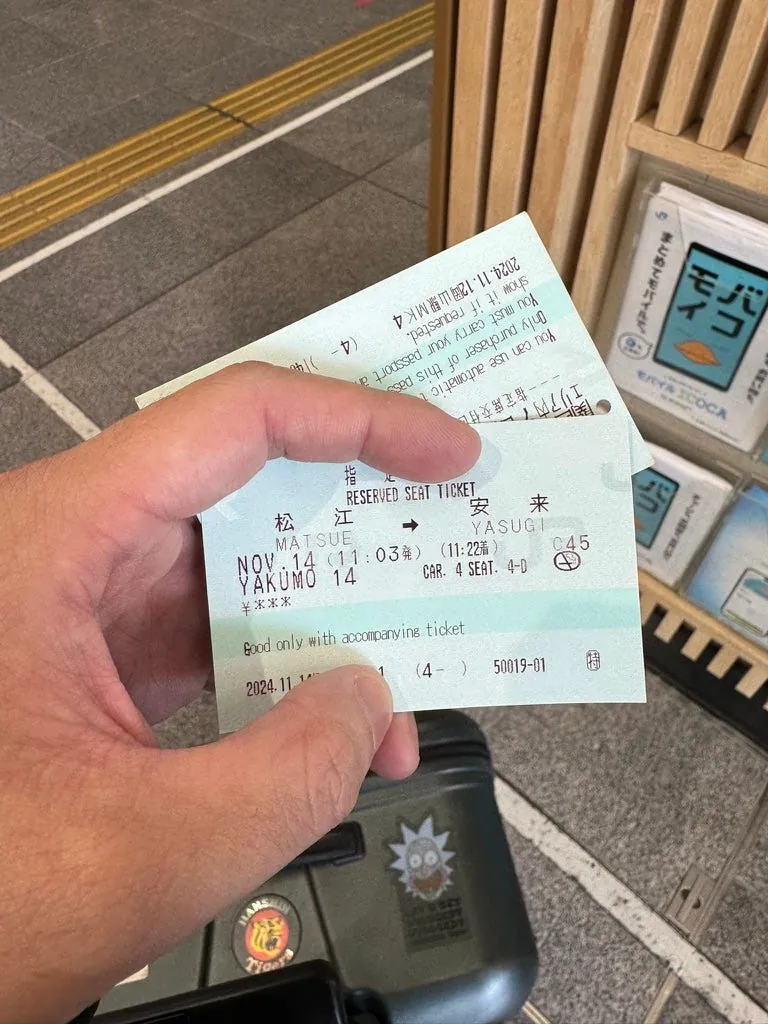
After arriving at the station, also reserve a seat on Yakumo 14 reserved seat bound for Yasugi (Adachi Museum of Art).
11:03 Head to Yasugi

The train departs at 11:03, so I bought some food near the station to eat on the train.
Goodbye Matsue.
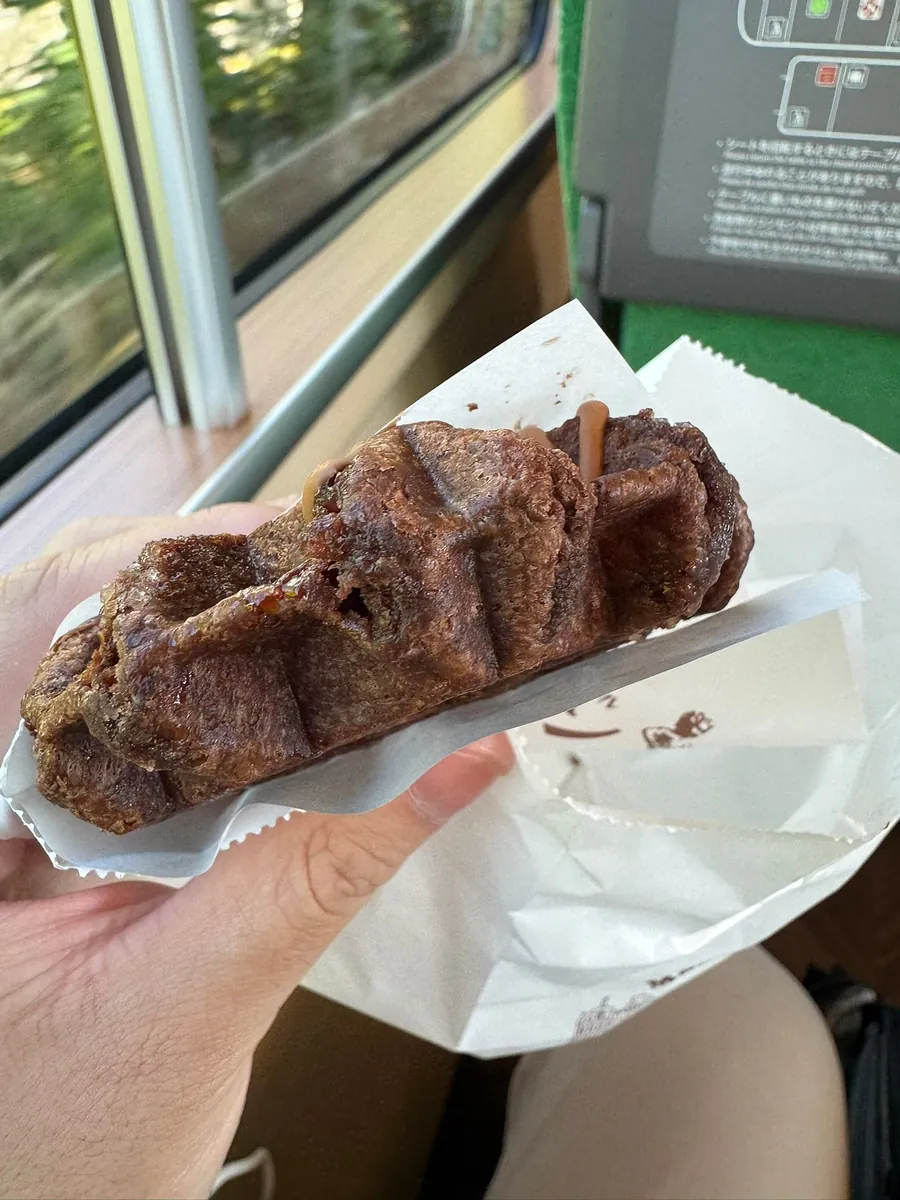
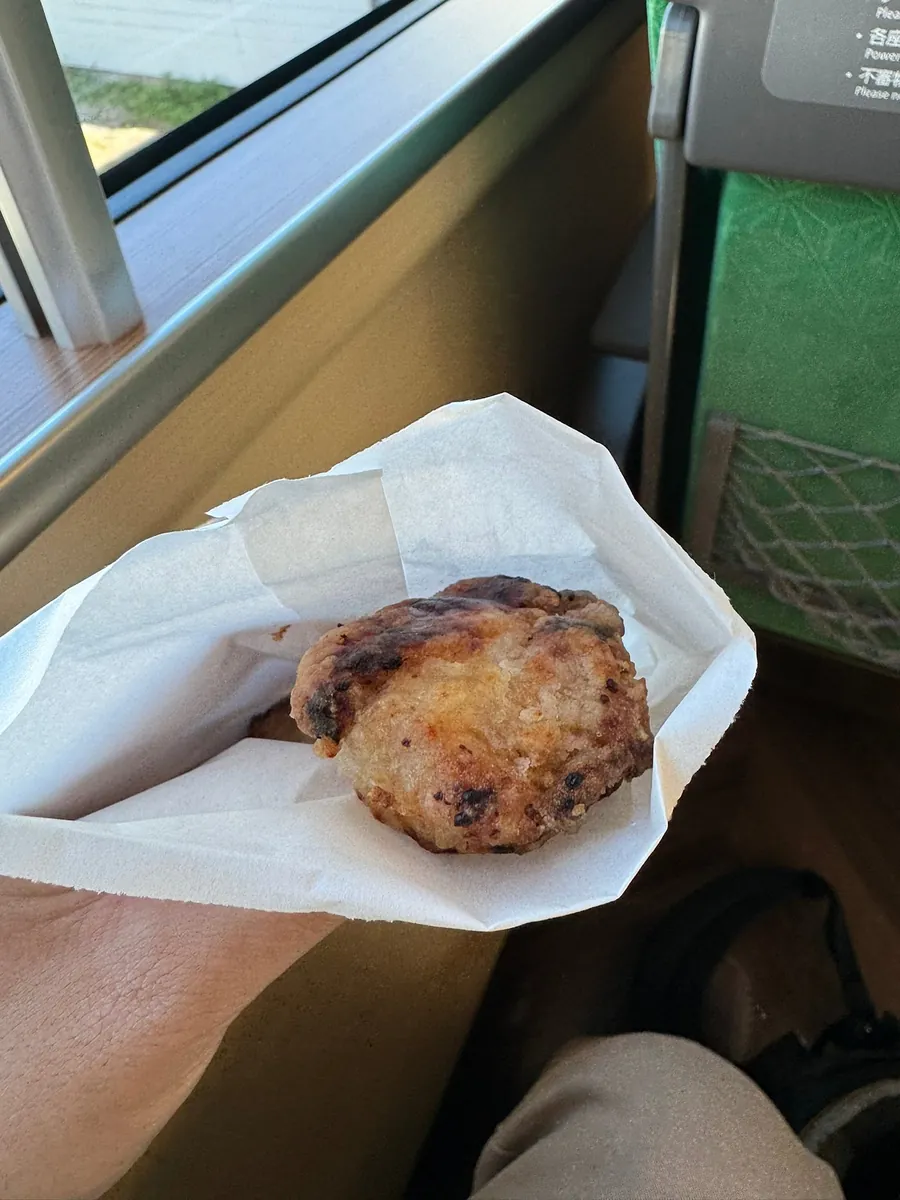
The pancakes and the savory grilled chicken were both very delicious.
11:12 Arrived at Yasugi Station
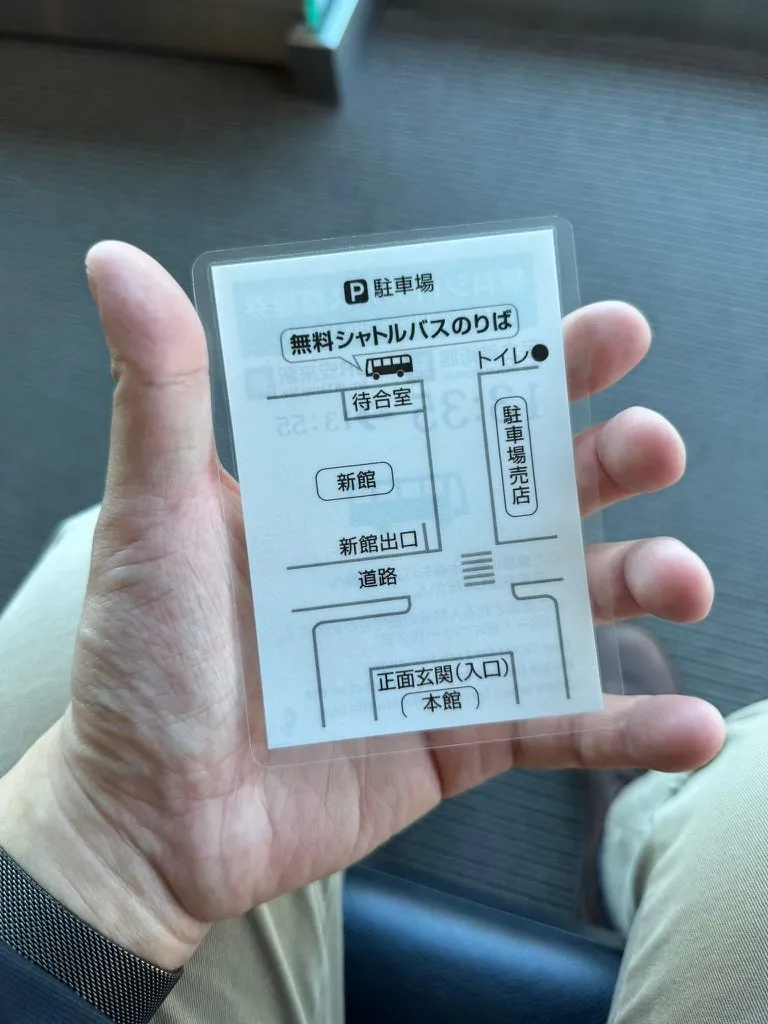
Don’t rush to exit at Yasugi Station. Find the tourist information center to store large luggage.
(There are coin lockers outside the station, but they are mostly full.)
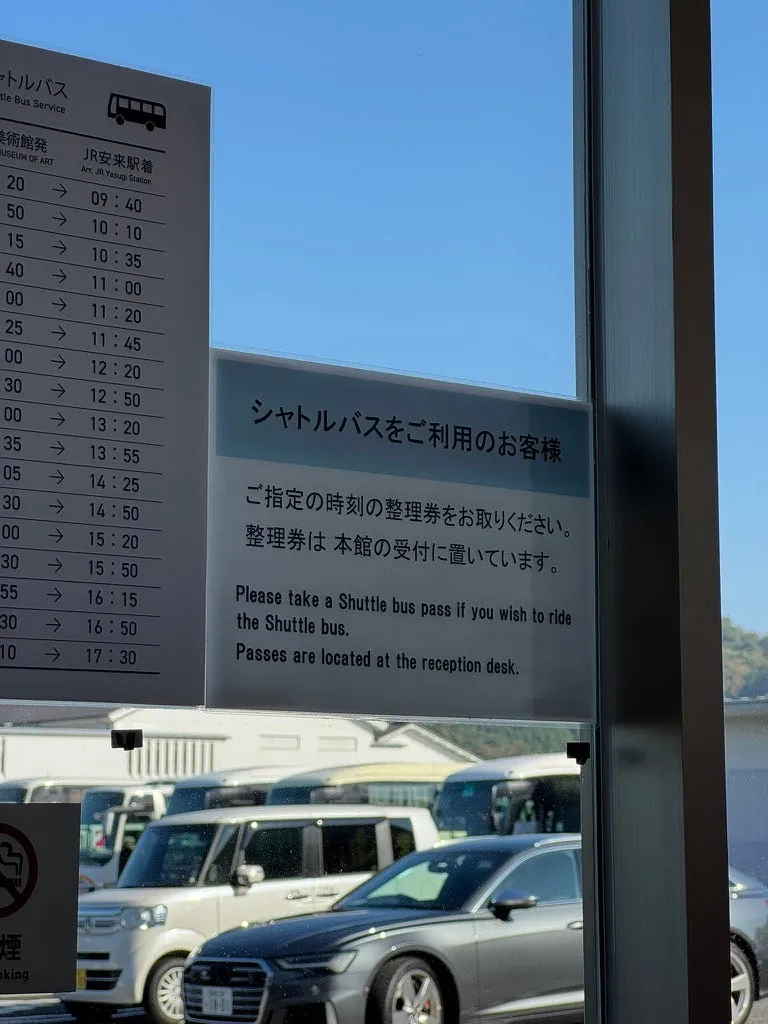
11:30 Take the shuttle bus to Adachi Museum of Art

For the latest timetable, please refer to the official website
After placing the luggage, I took the shuttle bus to Adachi Museum of Art (free, board in order while queuing). There were not many people in the morning.
Walk through the rural alleys for about 20 minutes to reach the Adachi Museum of Art.
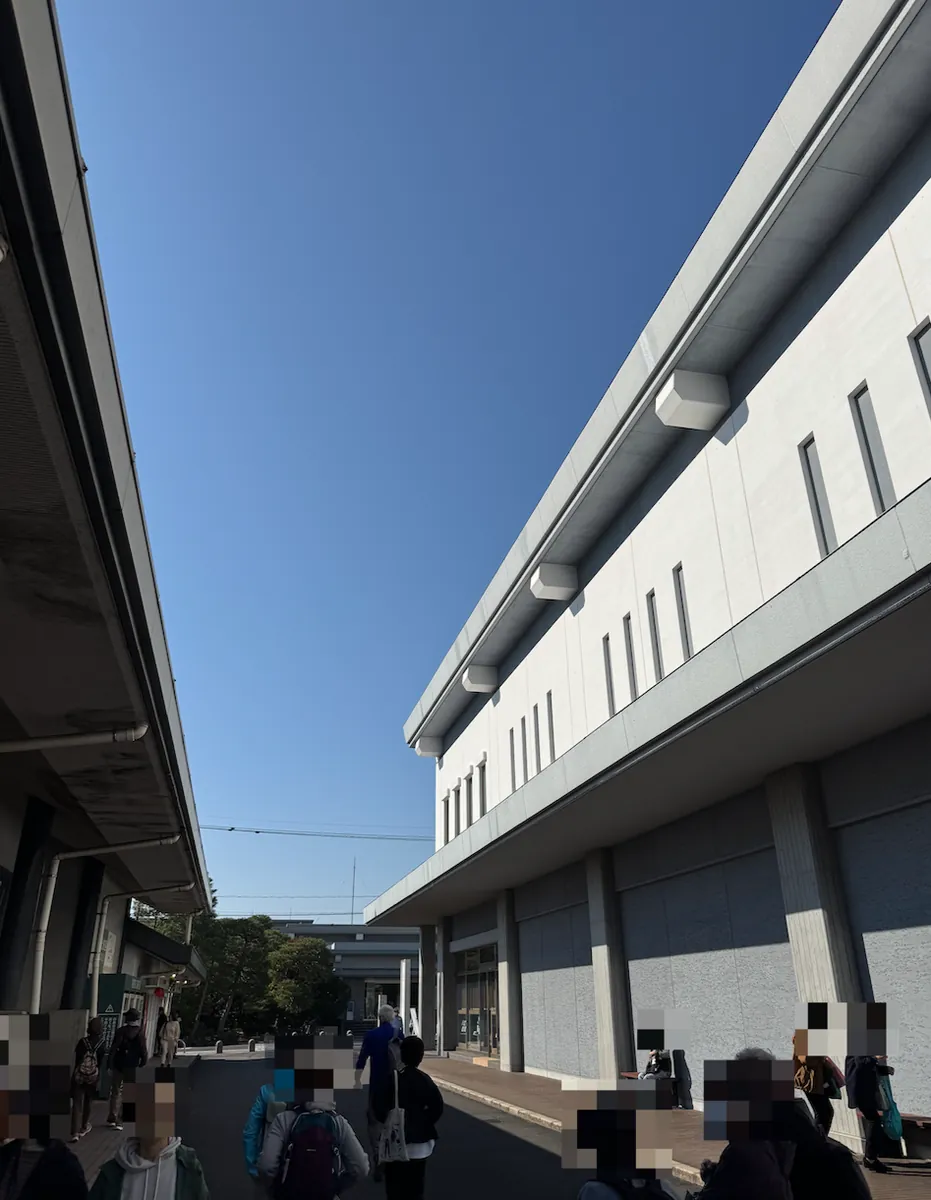
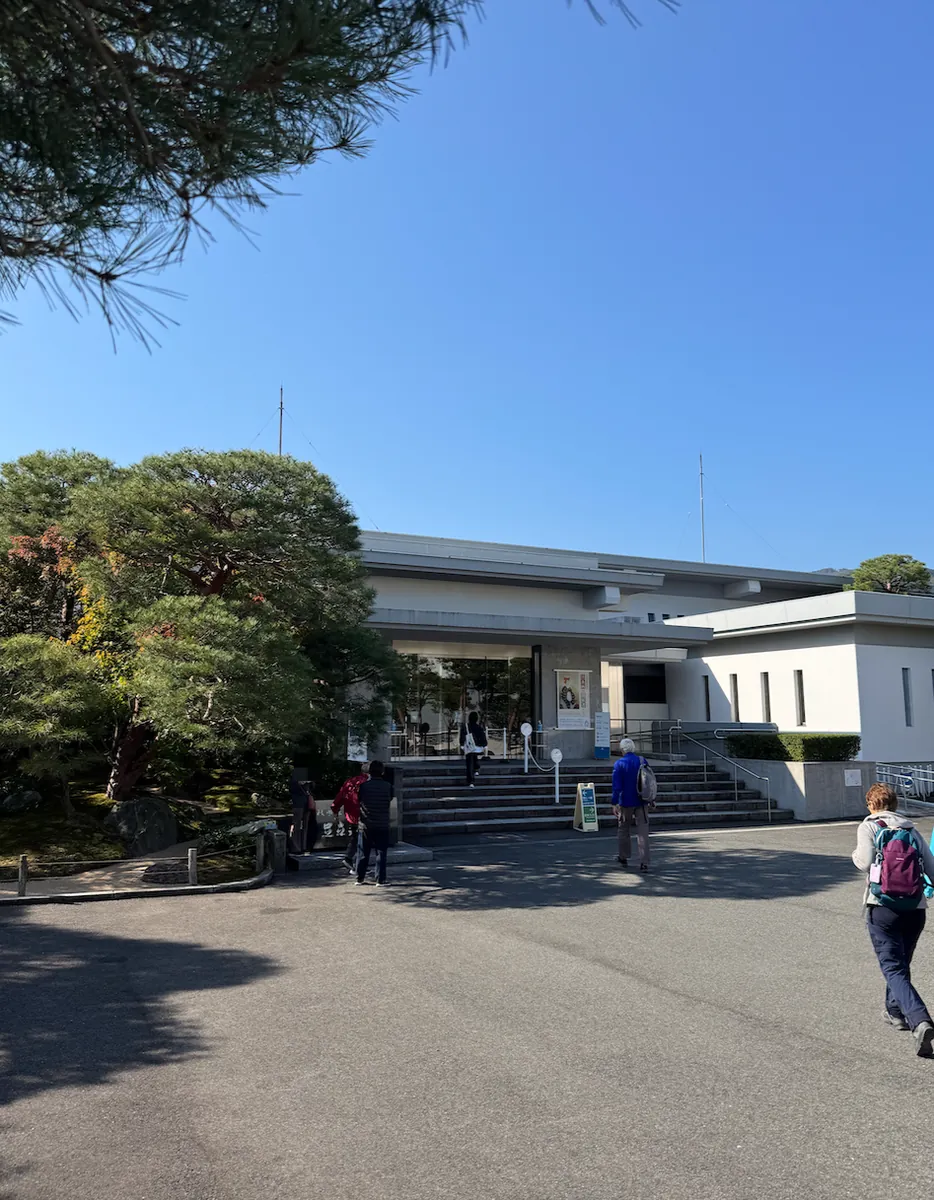
After getting off, walk straight ahead to reach the entrance of Adachi Museum of Art.
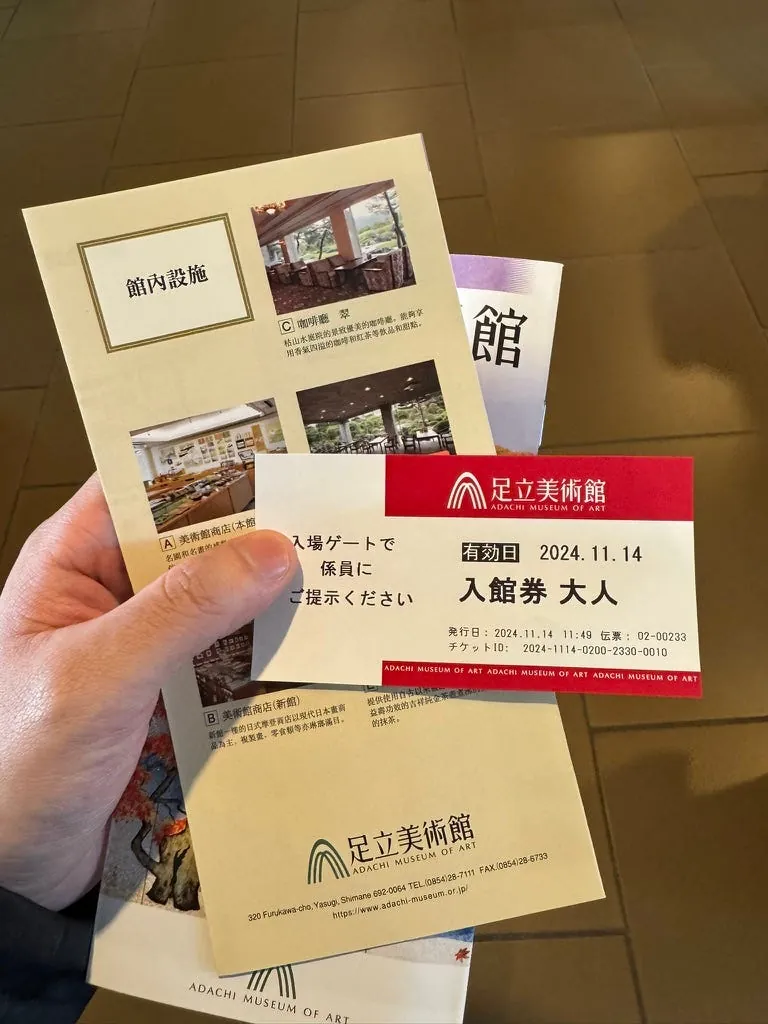
Use the 3-day pass for free admission.
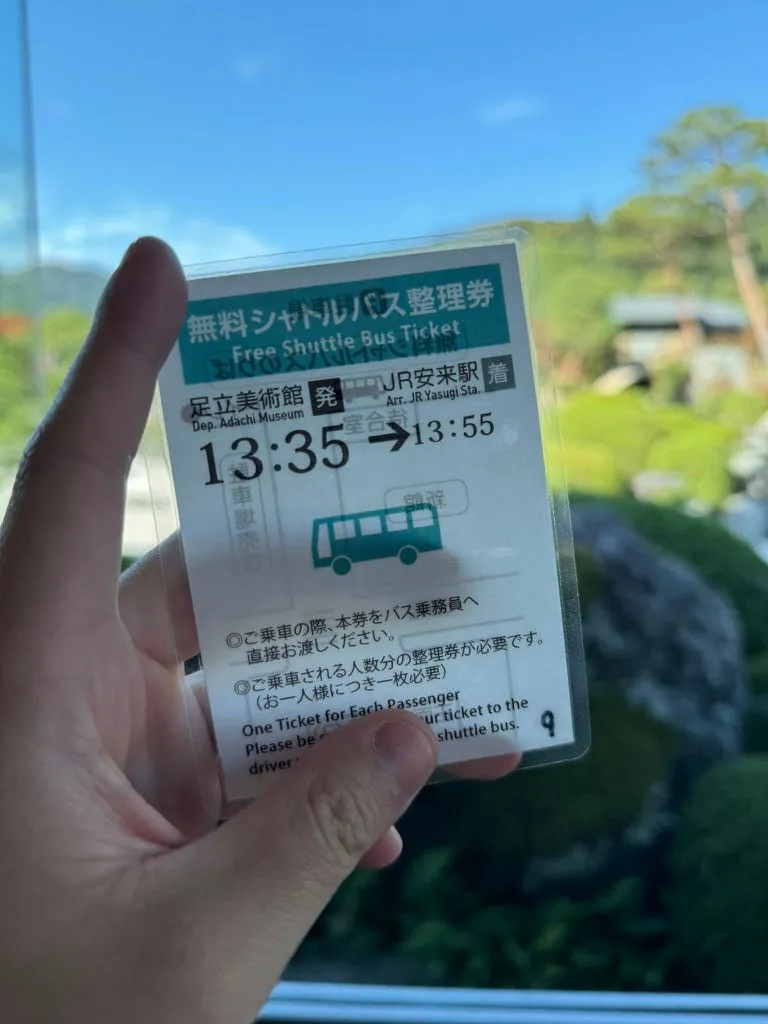
The first step is to get a “shuttle bus ticket” matching your schedule at the front desk near the entrance, one ticket per person. When the time comes, return to the drop-off spot and use the ticket to take the shuttle back to Yasurai Station.
My itinerary plans to take the JR departing from Yasugi to Tottori at 14:46. Please note there are not many trains heading to Tottori⚠️.
Very important! Very important! Very important! You must get this, or we can’t guarantee you will have a seat on the bus. ⚠️⚠️⚠️
I was the one who didn’t know I needed to get the ticket. I originally planned to take the 13:00 train but realized I had to get the ticket first, so I went back to get it and took the 13:35 train to Anlai instead.
Luckily, I planned my time quite flexibly.
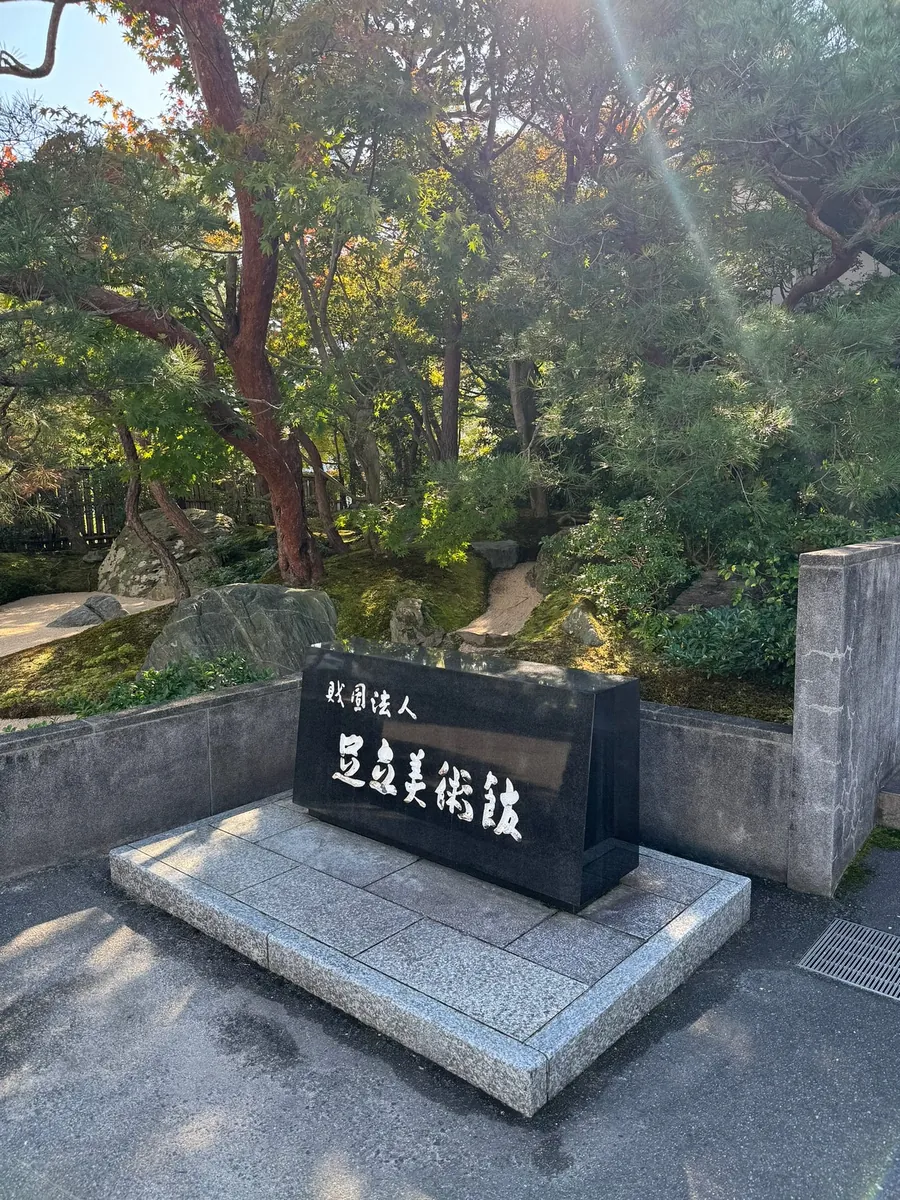
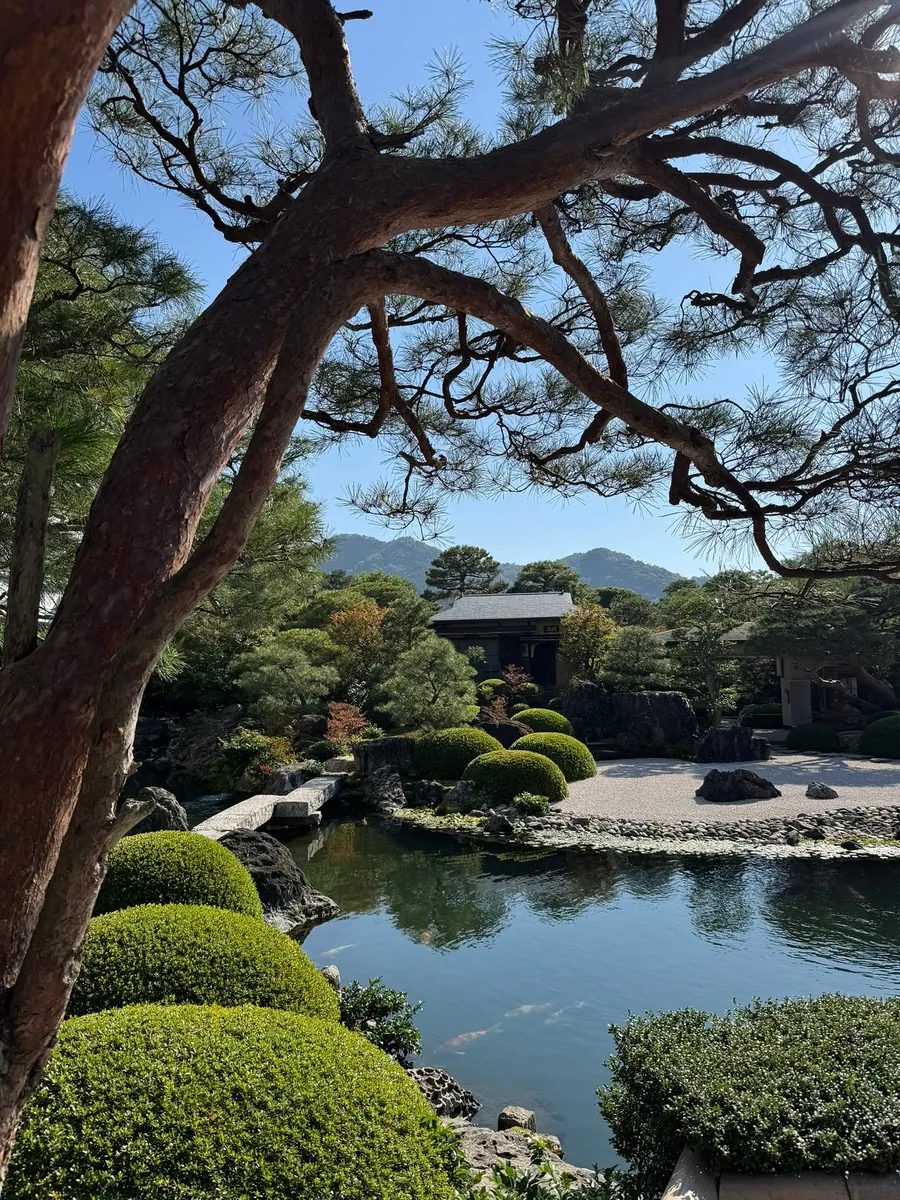
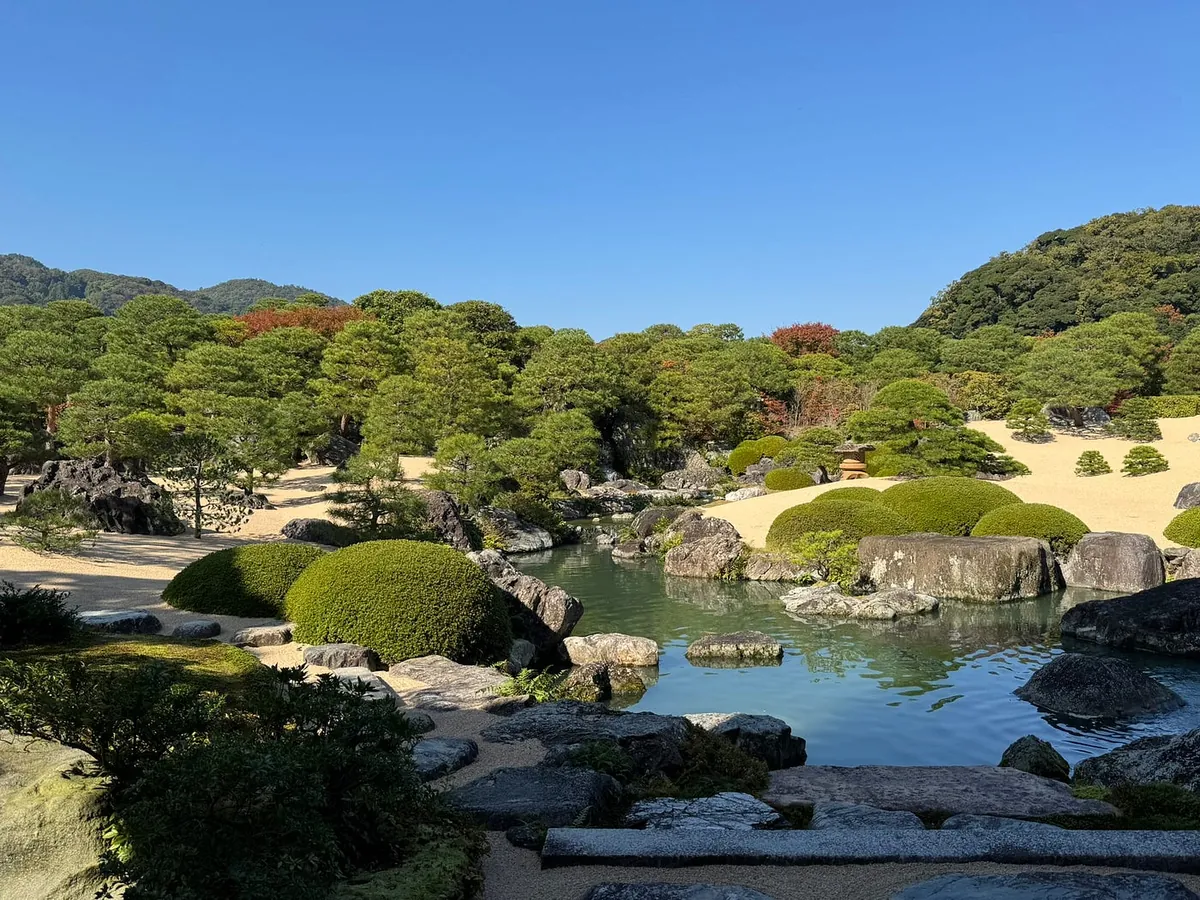
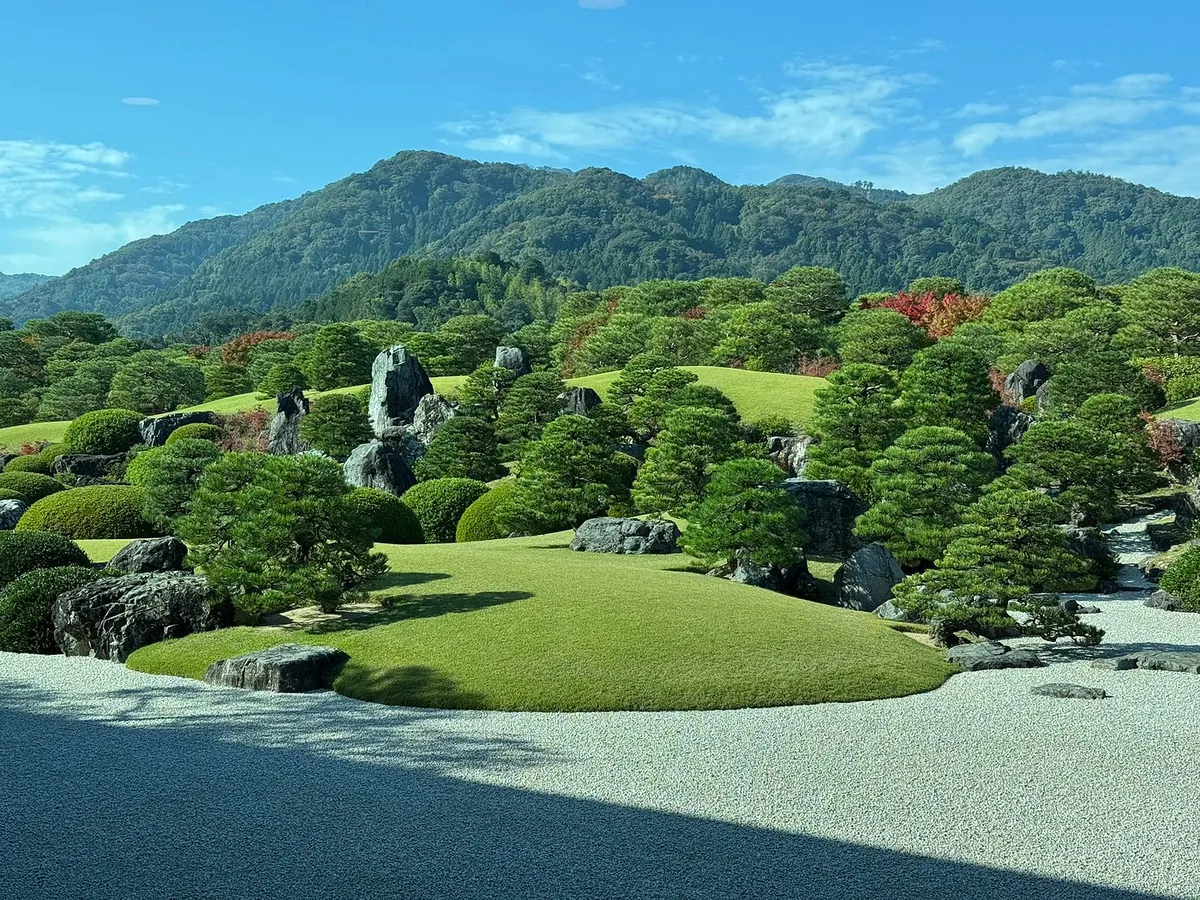
Adachi Museum of Art — Japan’s Top Garden
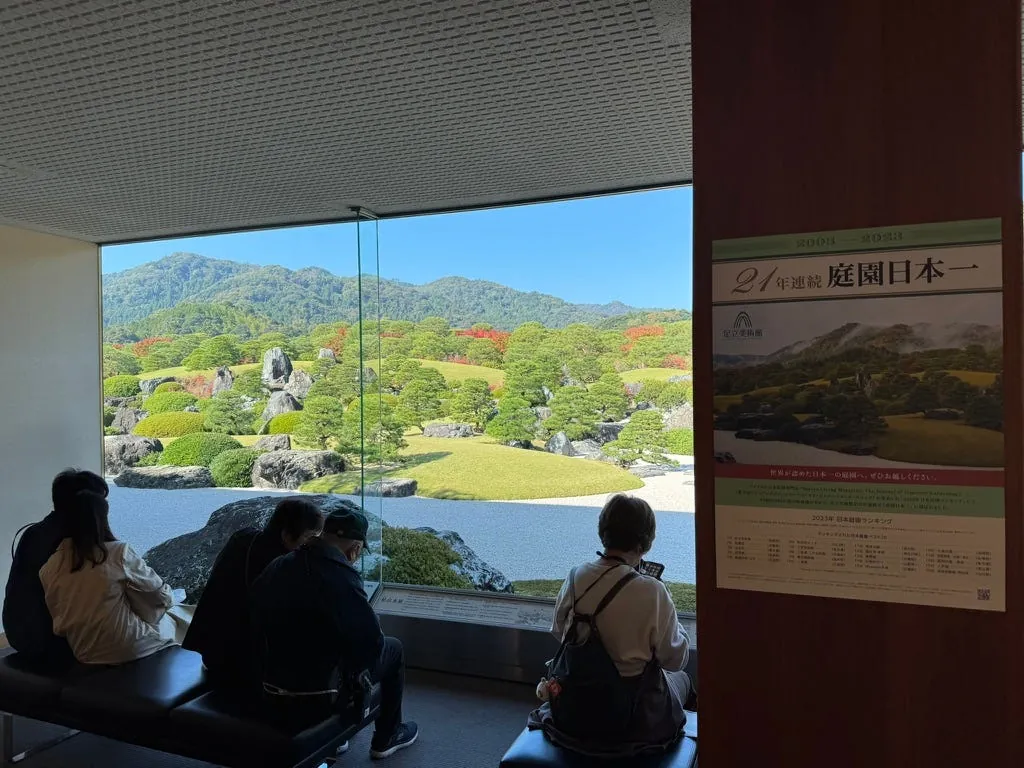
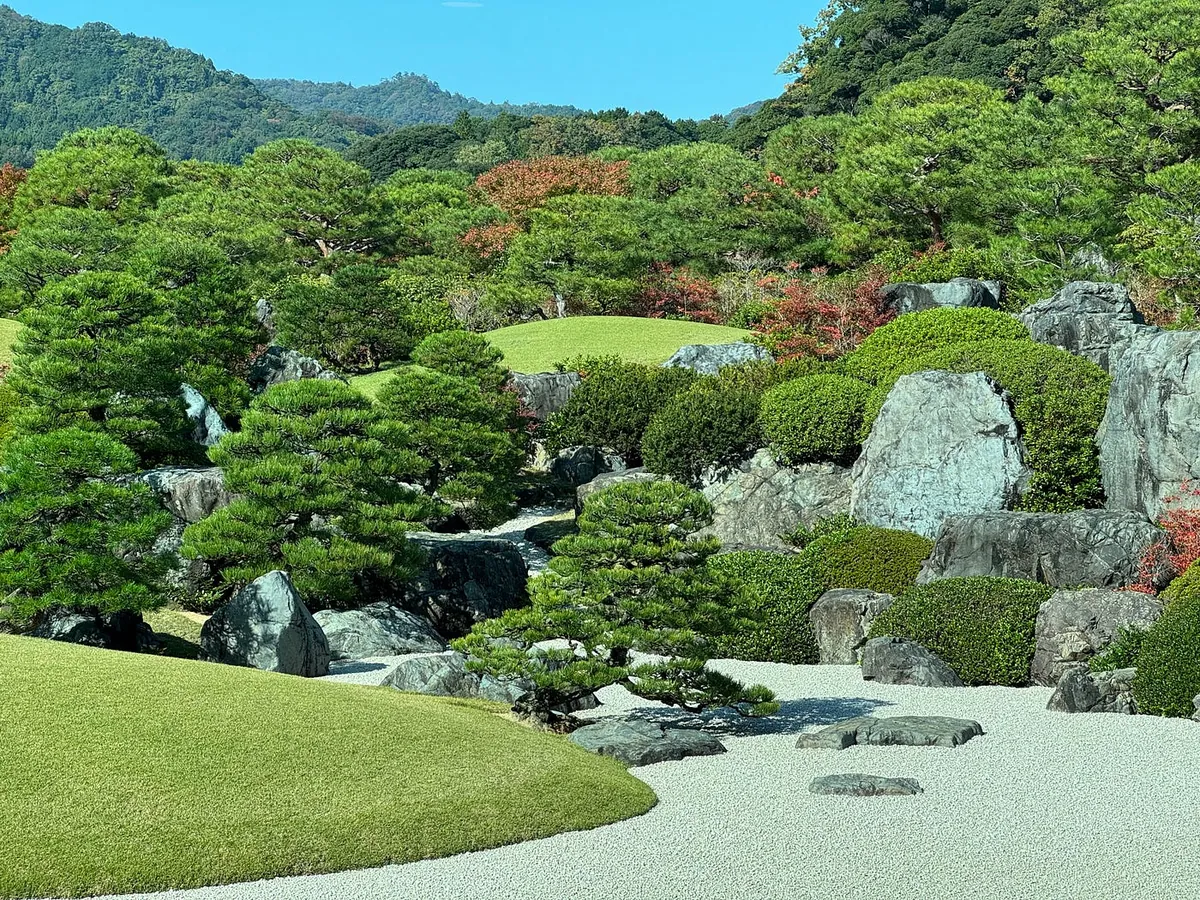
You can quietly sit here and enjoy the garden view.
Besides the gardens, the core of Adachi Museum of Art lies in its extensive art collection, where photography is prohibited. Follow the designated path to view the artworks along with the gardens.
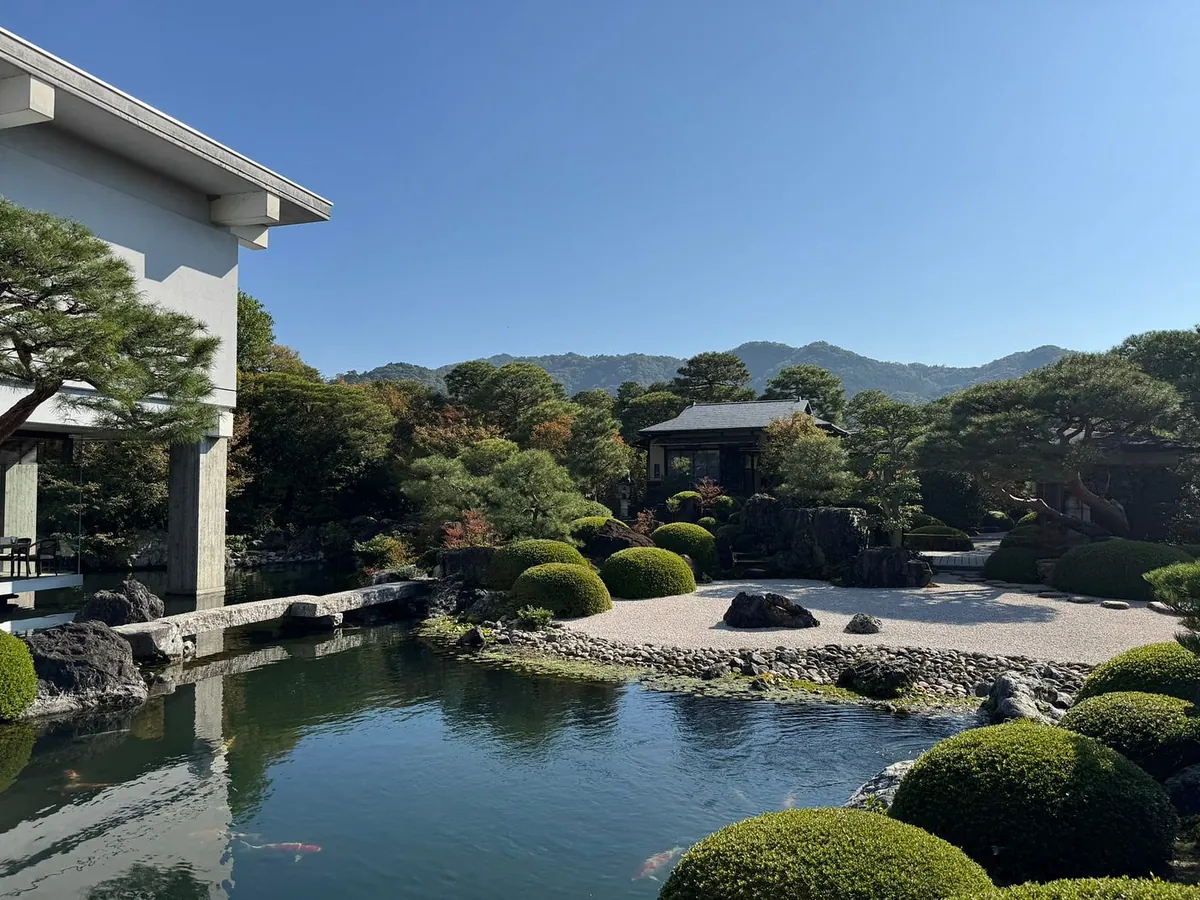
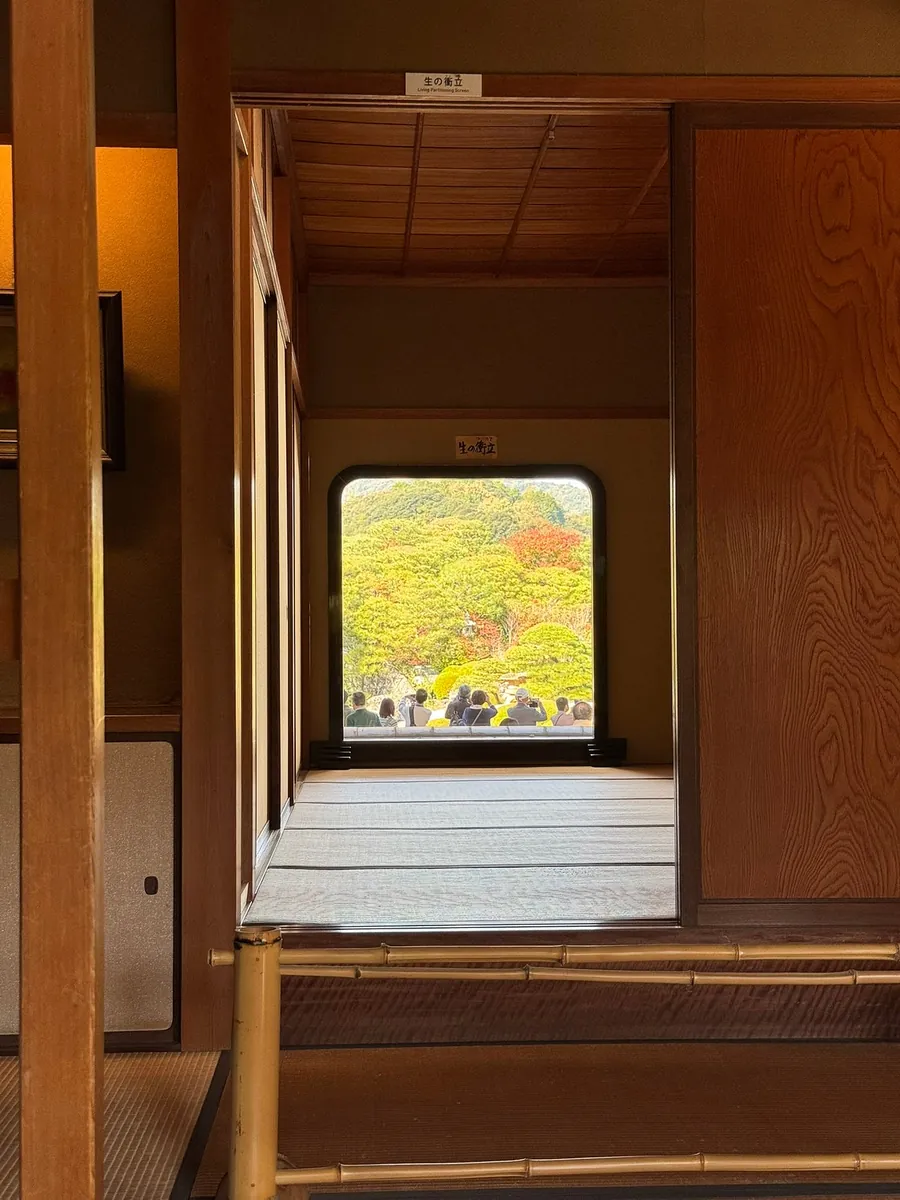
You can see part of the courtyard view outside, which shows that a lot of time and effort have been spent maintaining this landscaping.
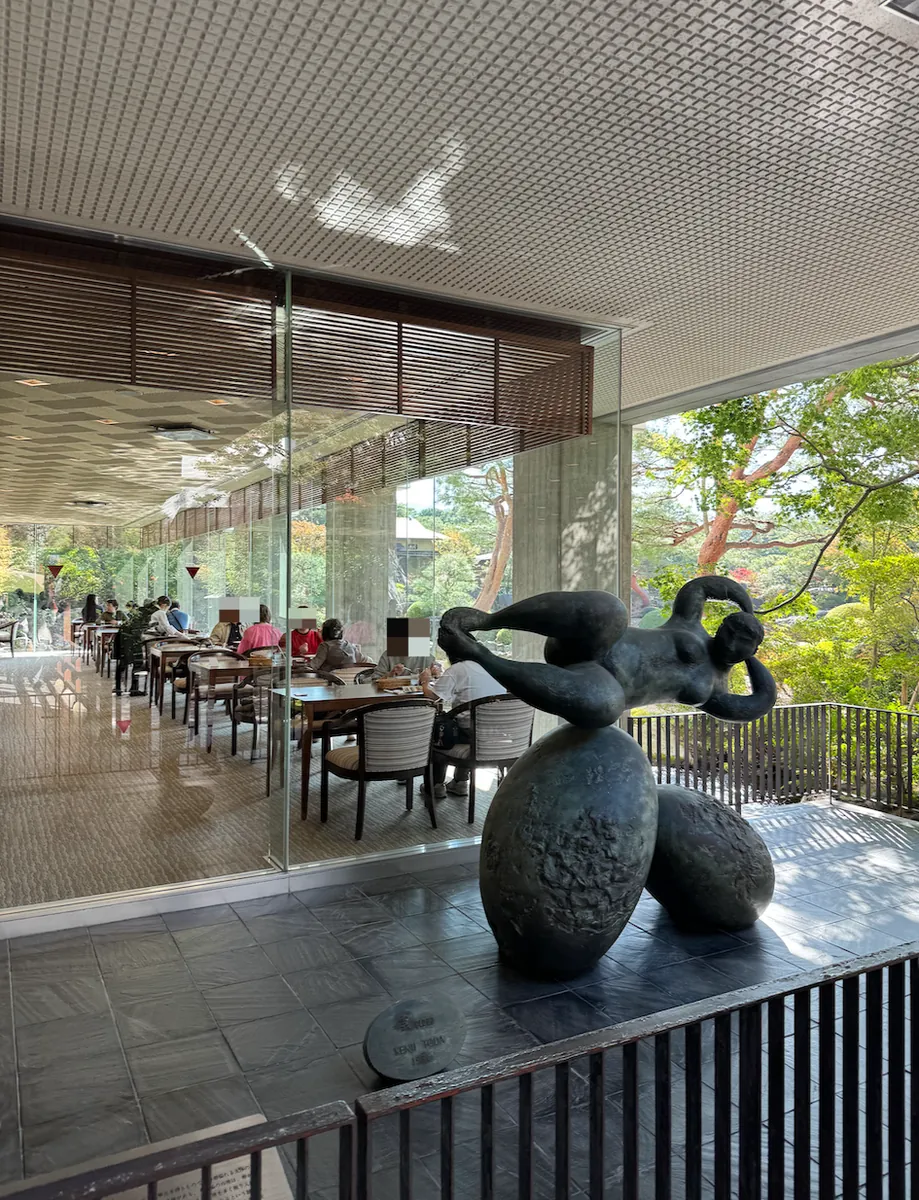
There are two cafes inside, offering not only desserts and coffee but also savory dishes. Feel free to stop by, rest, have a bite, and enjoy the view.
Since I was traveling alone, I didn’t make specific stops for meals.
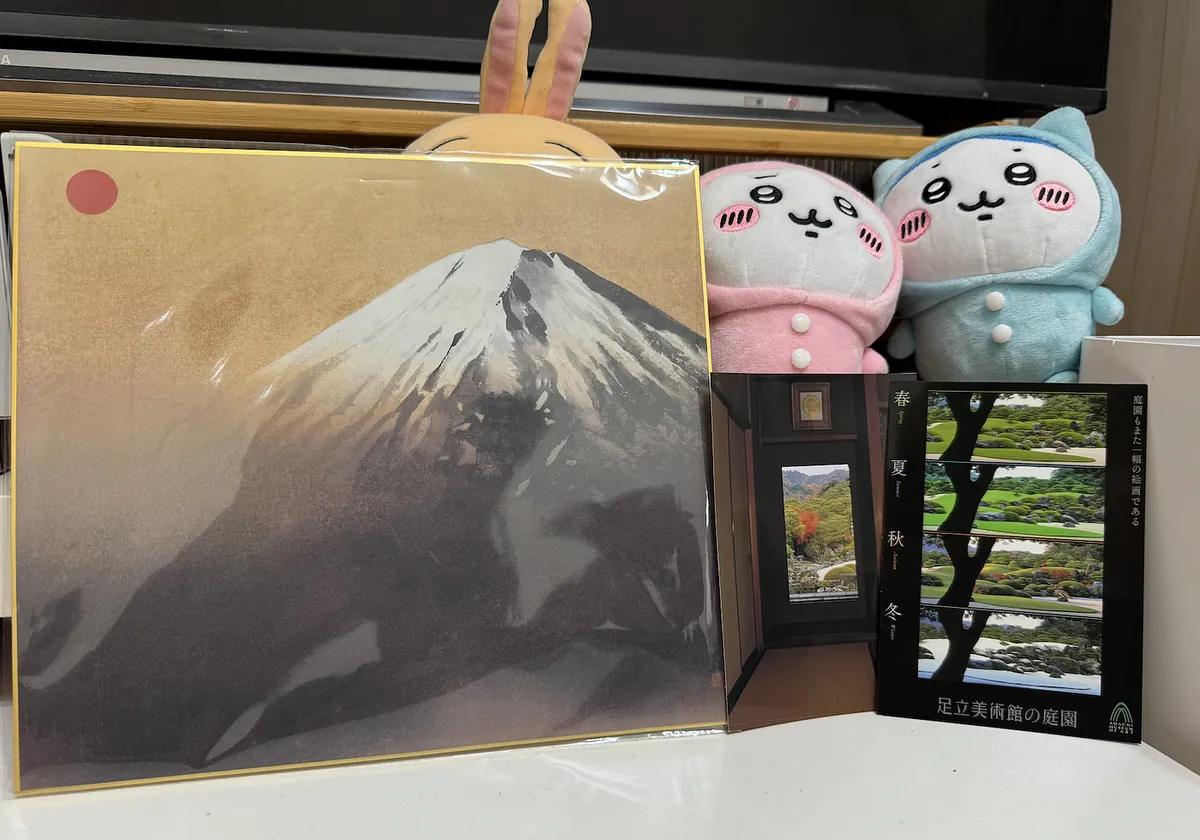
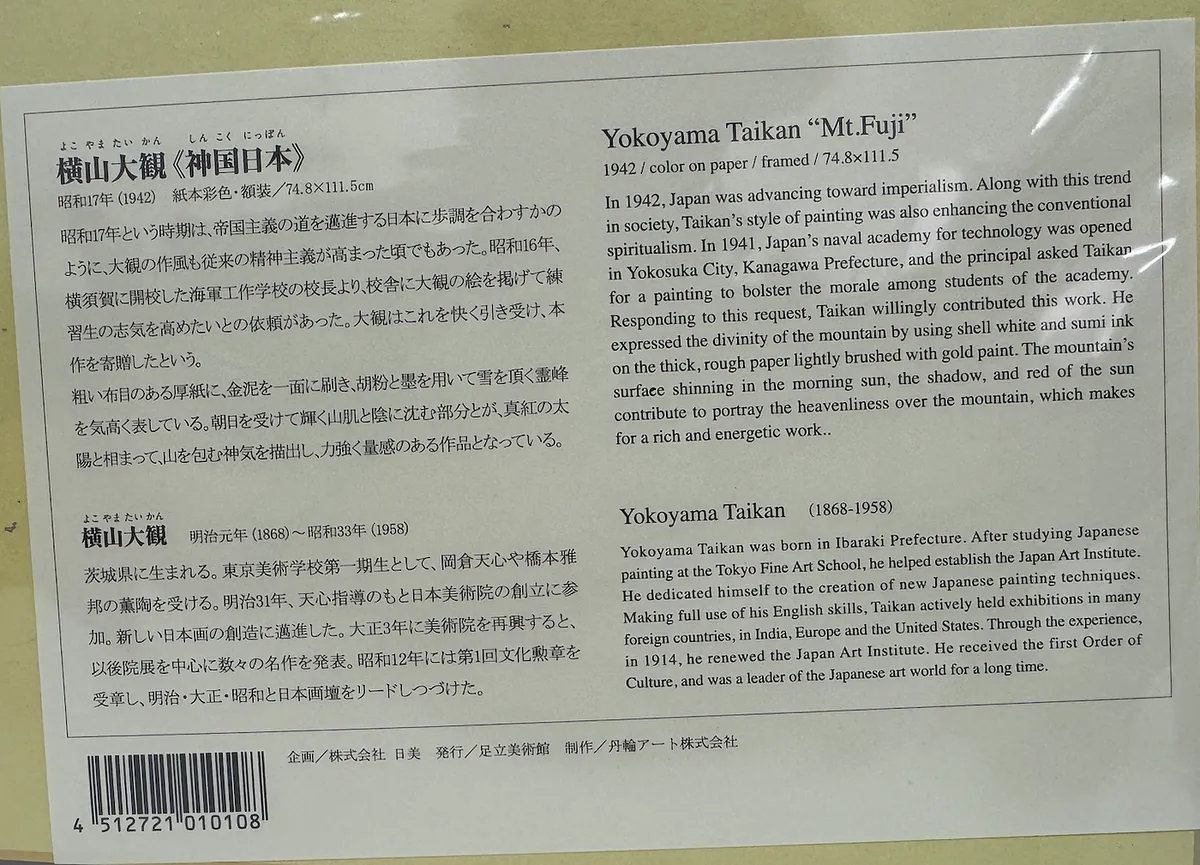
Bought a cardboard replica of the artwork Yokoyama Taikan “Mt.Fuji” seen in the collection as a souvenir at the gift shop.
12:30 Strolling around the shopping arcade outside
There is a small shopping street outside. Since it was still early, I wandered around here first.
This Shimane wagyu rice burger was quite bad. The microwaved rice burger was sticky, and the wagyu in the middle I ate was still cold and not fully heated…
As mentioned earlier, I didn’t know I needed to get a numbered ticket at first, so I just waited for the bus. It wasn’t until 1:00 PM that I realized I couldn’t board and then went to get a numbered ticket for the 1:35 PM bus.
Get the full ticket and re-enter (re-entry allowed), then sit in the initial indoor viewing area to relax and watch the scenery while waiting for the bus.
13:55 Return to Yasugi Station
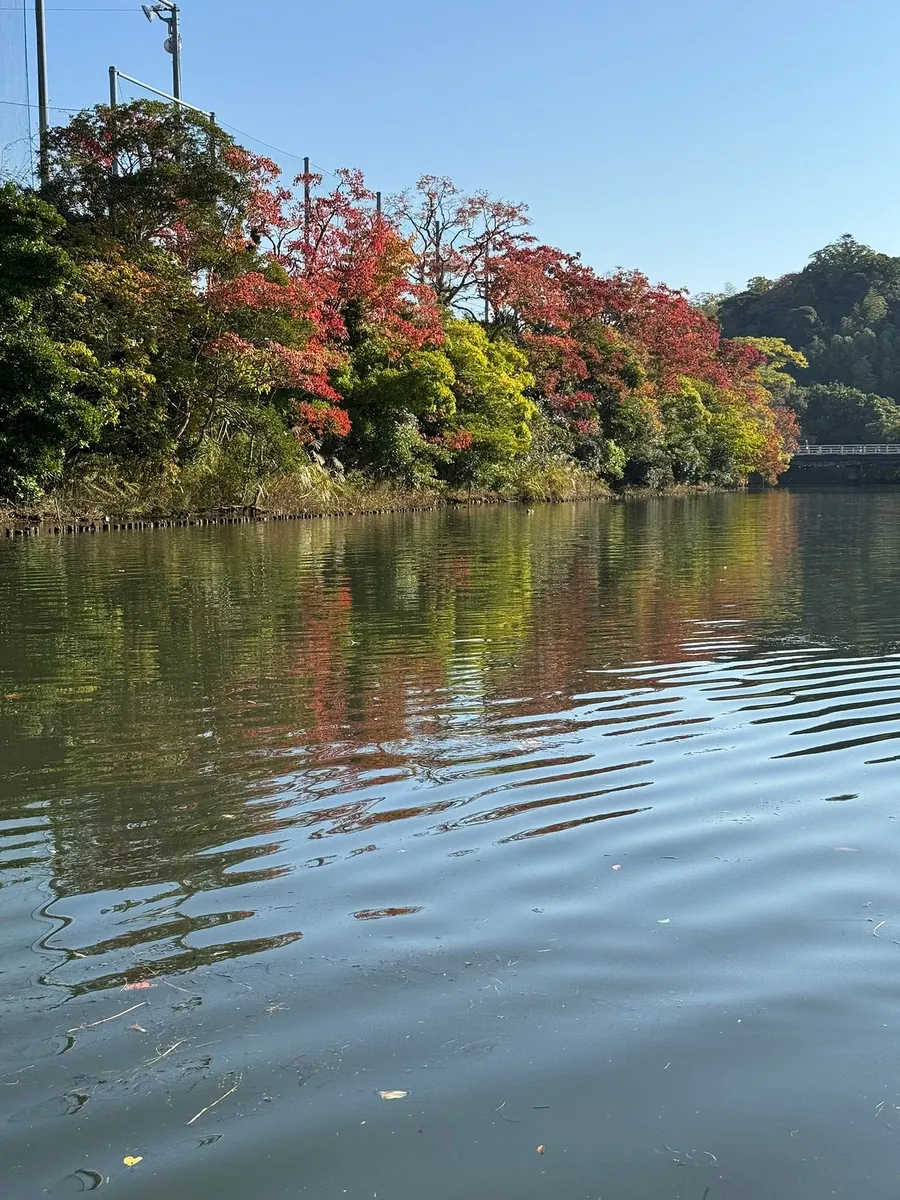
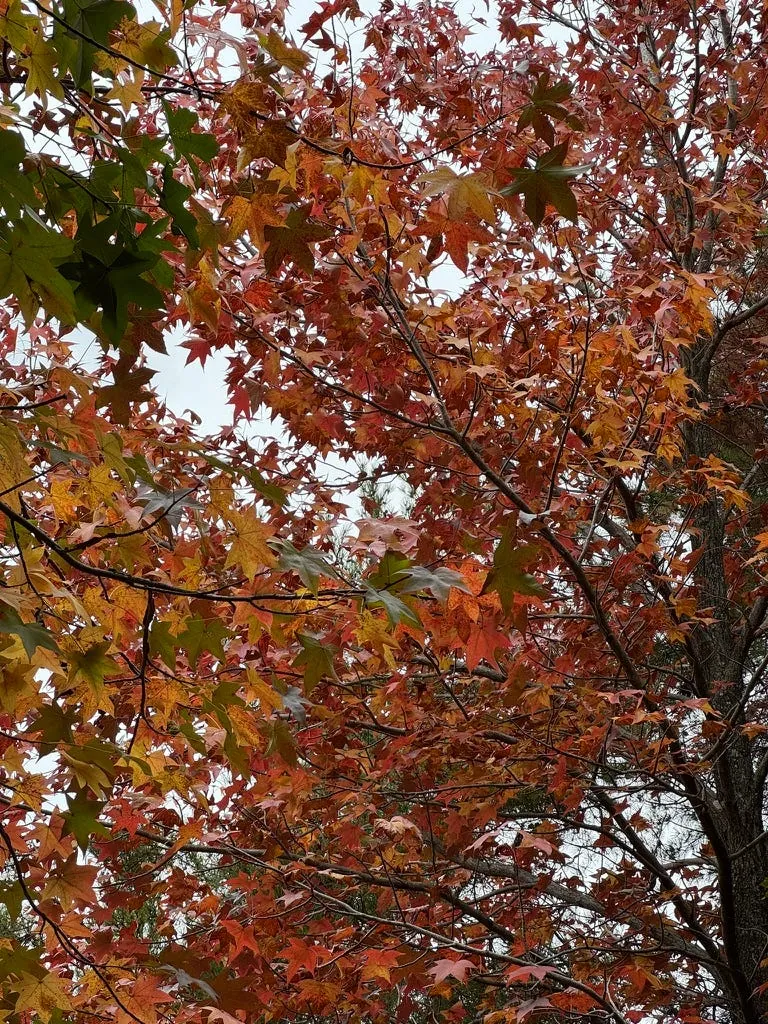
On the way back to Anlai Station, I saw very vibrant red maple leaves.
At this time, there are actually more people visiting the Adachi Museum of Art.

This station was not crowded and it was still early, so I took the opportunity to record a short video demonstrating how to reserve a seat with the JR Pass. Watch here.
Wandering around the tourist information center to pass the time.
The Kiyomizu Temple in Yasugi also feels like a hidden spot for autumn leaves viewing.
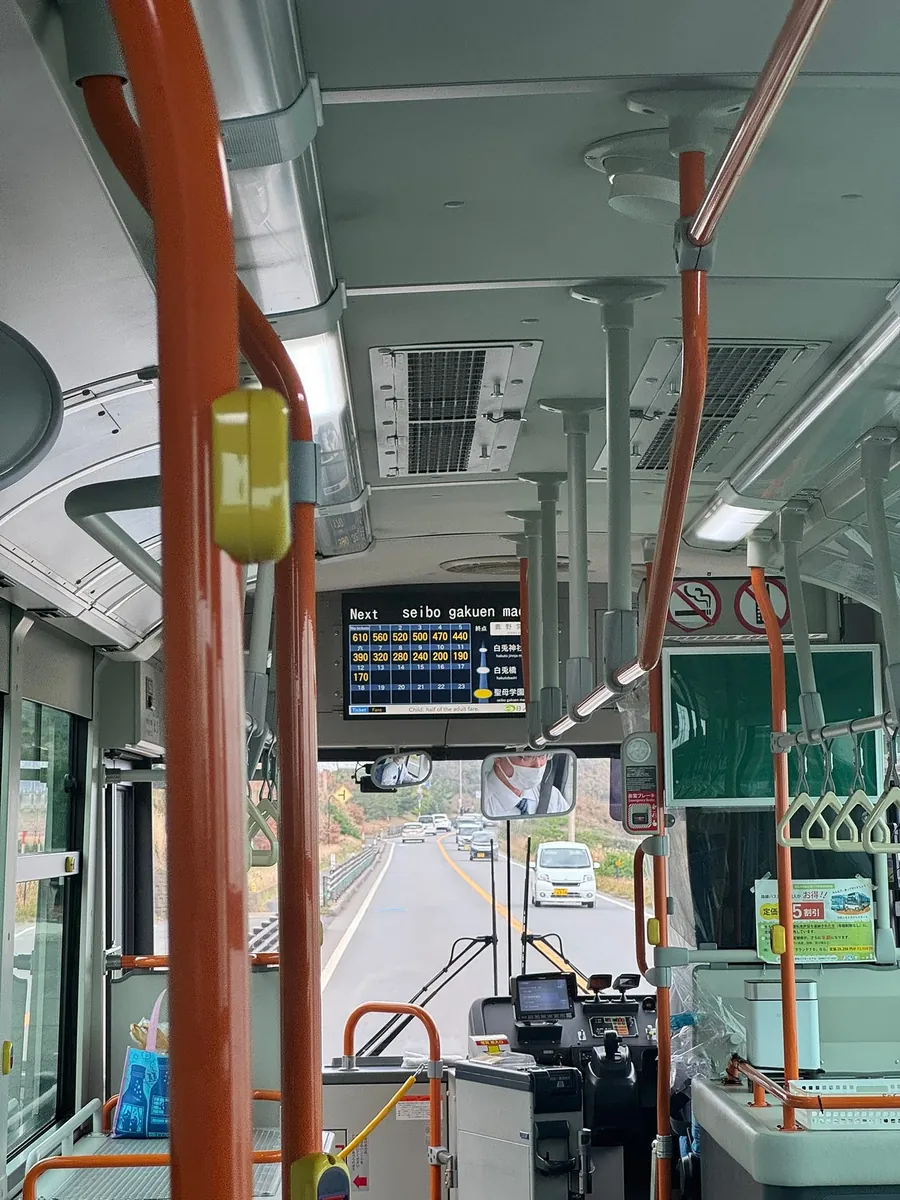
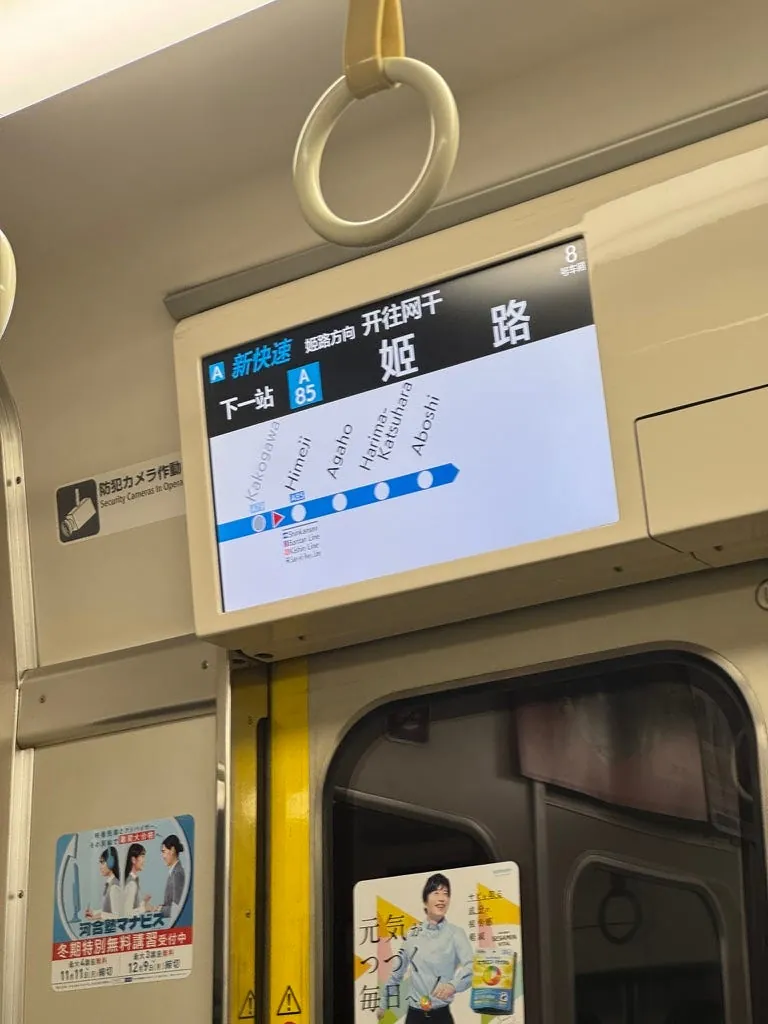
14:46 Take the Limited Express Train to Tottori
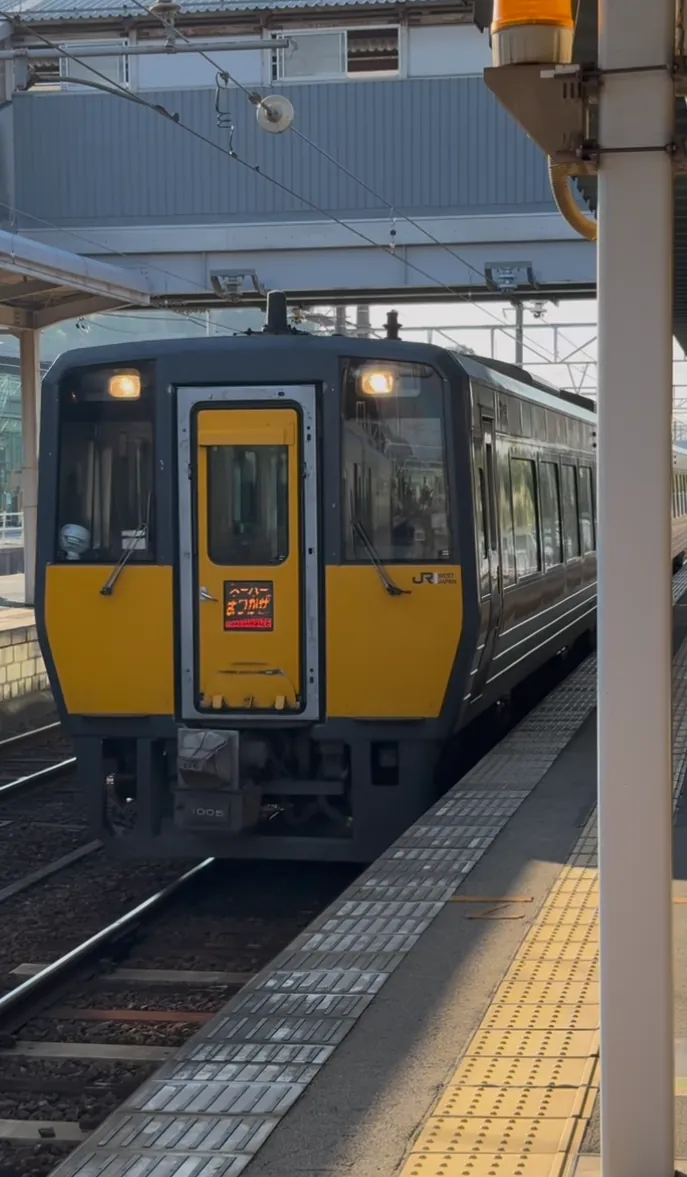

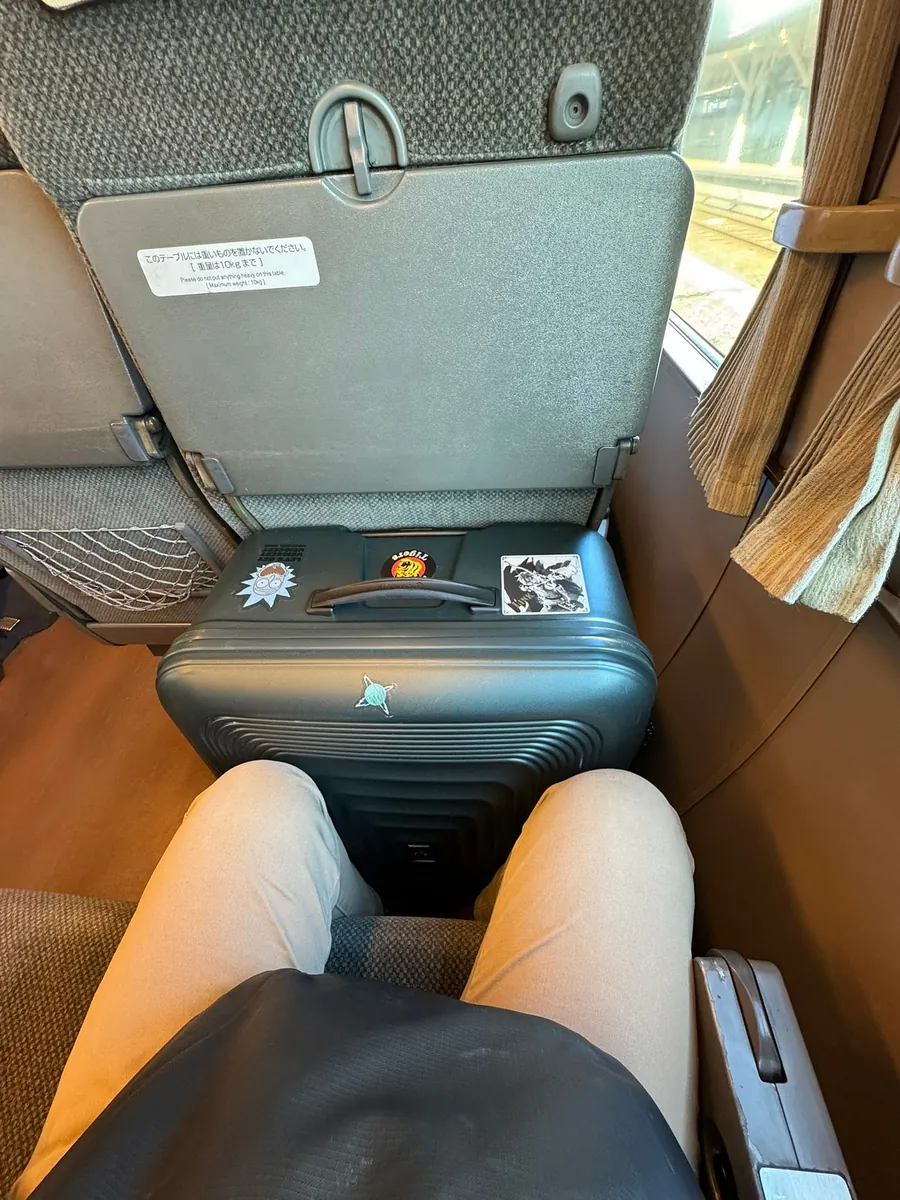
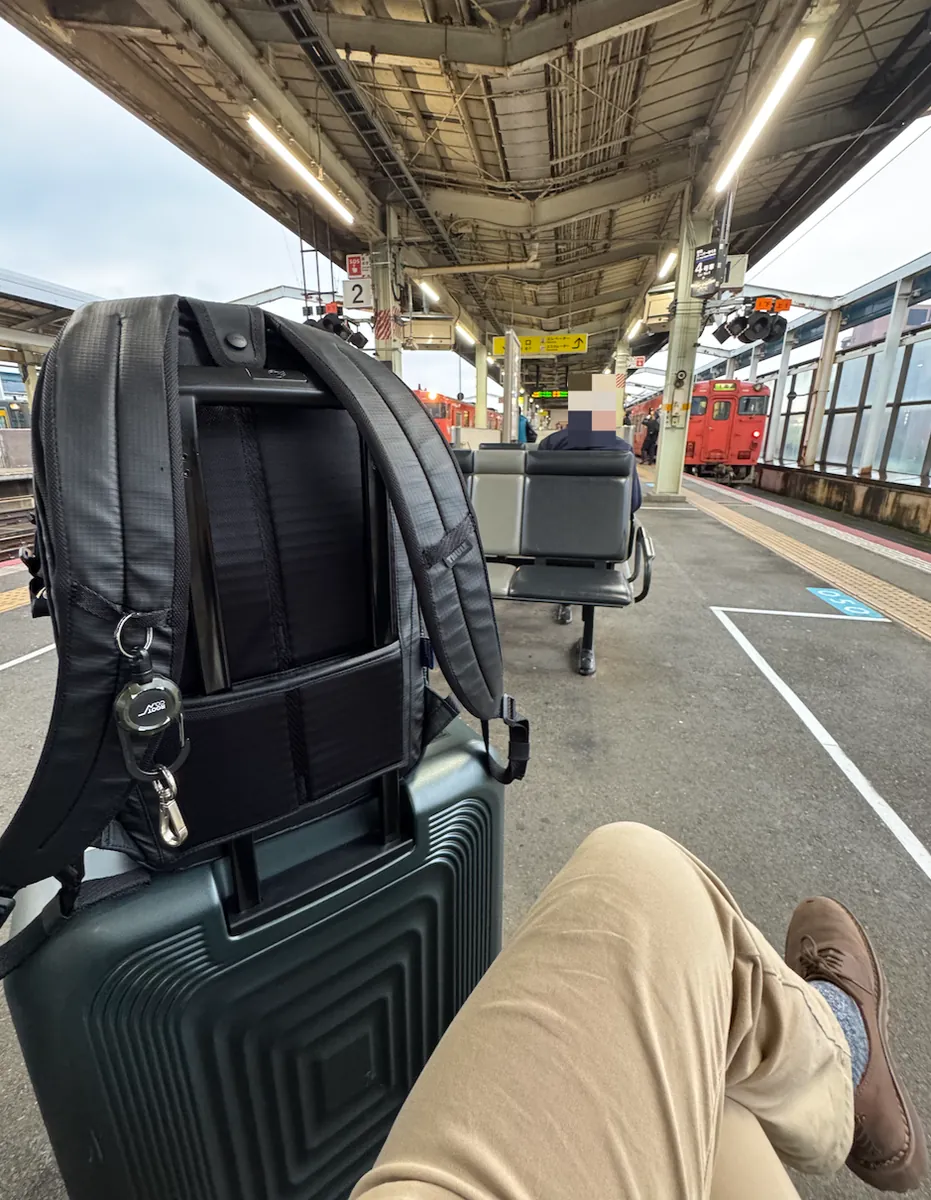
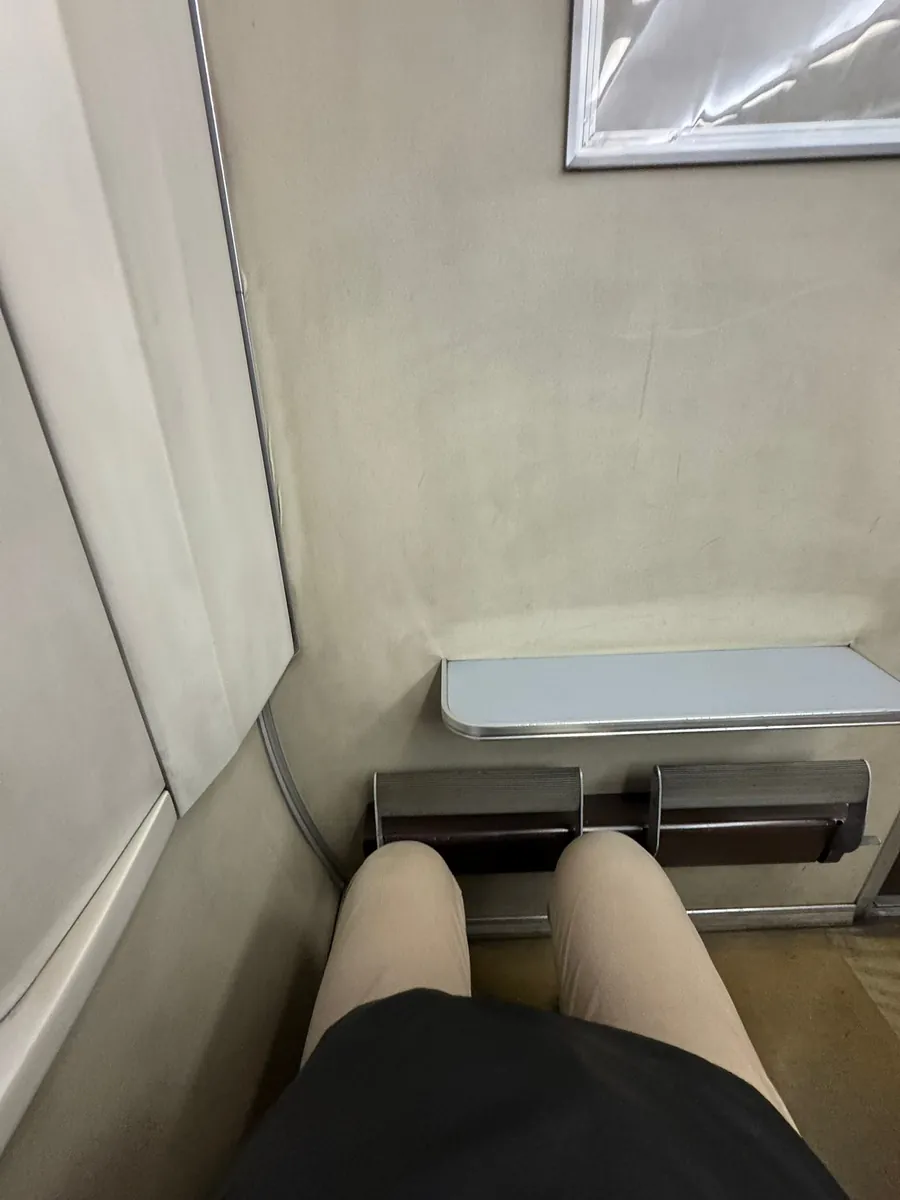
The train model is very old and has only two cars (one non-reserved seat car and one reserved seat car). My 26-inch suitcase couldn’t fit in the overhead luggage rack (newer JR trains can, but this model’s rack is too small). I forgot that I could walk to the last row and place it behind the last seat, so I had to squeeze it into my own seat area.
Luckily, there was no one sitting next to me the whole way. The non-reserved cars looked more crowded, while the reserved seats were only about 60% full.
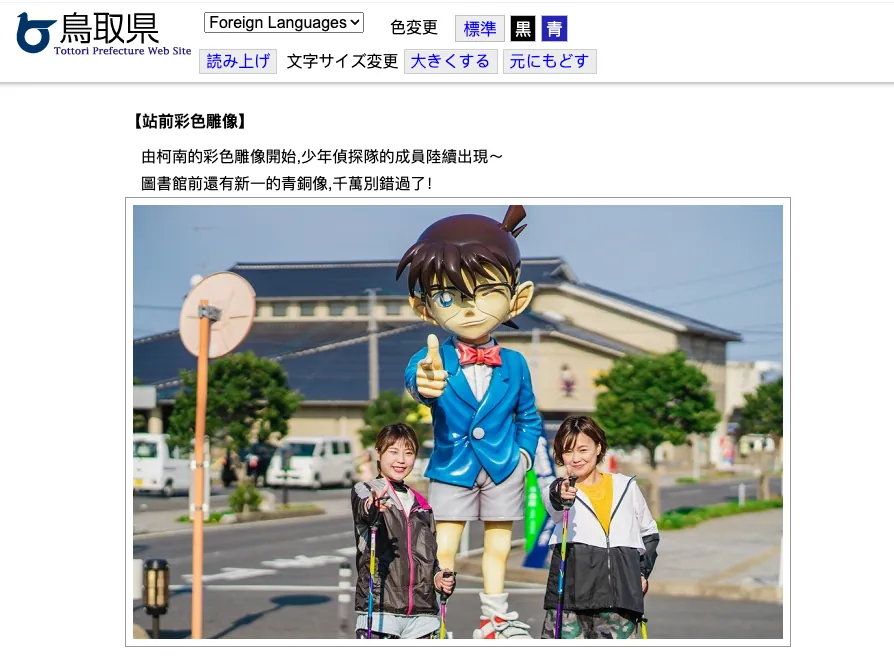
Due to the itinerary, I didn’t specifically visit GeGeGe no Kitaro Station (Sakaiminato Station) and Conan Station (Yura Station).
Interested friends can plan to visit more.
15:58 Arrive at JR Tottori Station
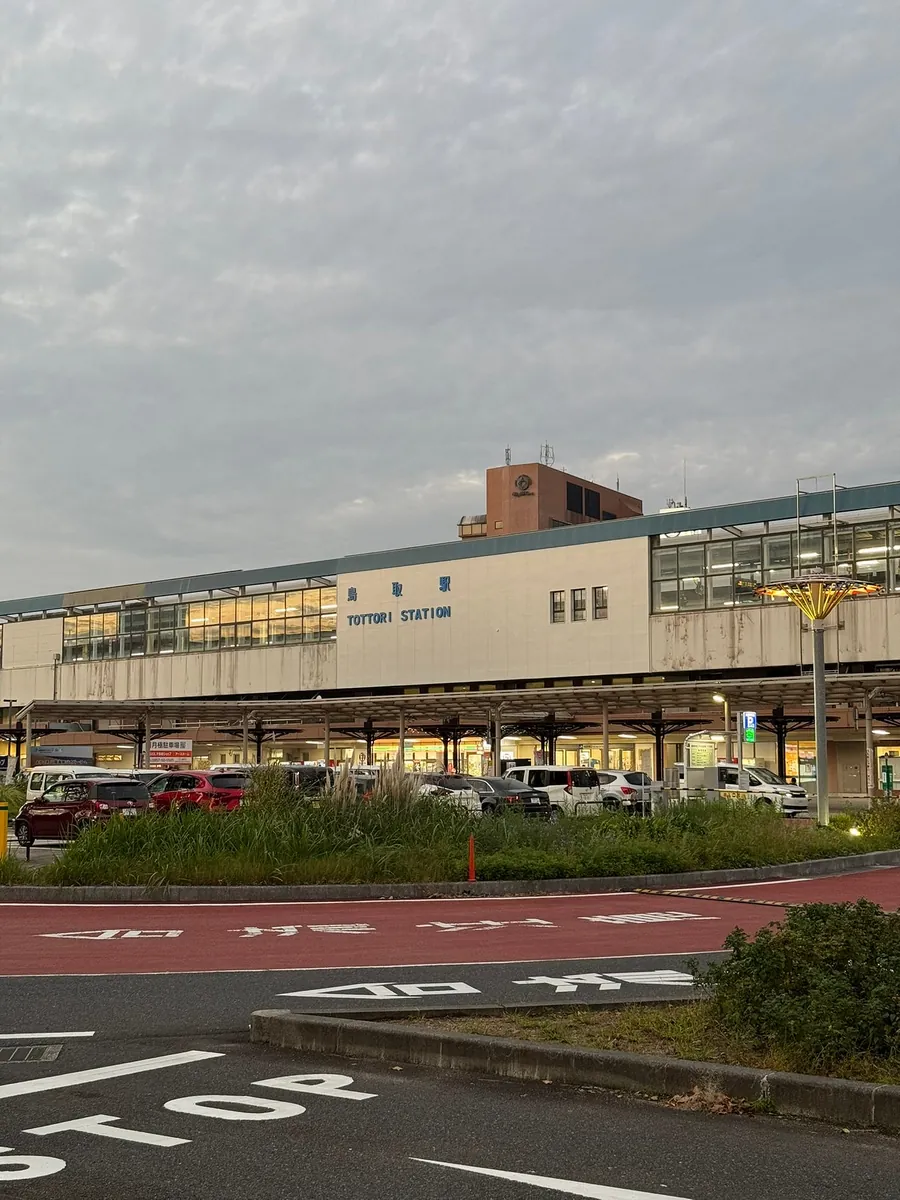
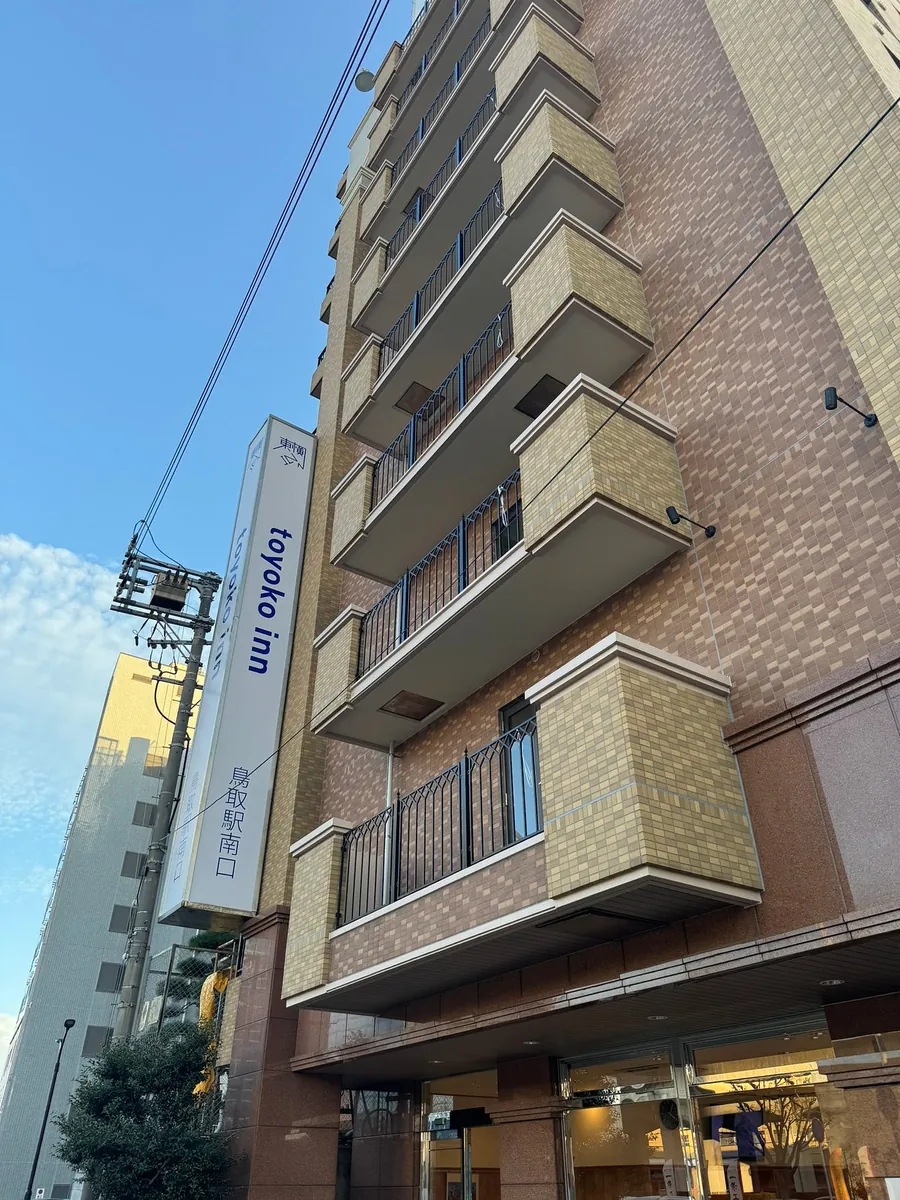
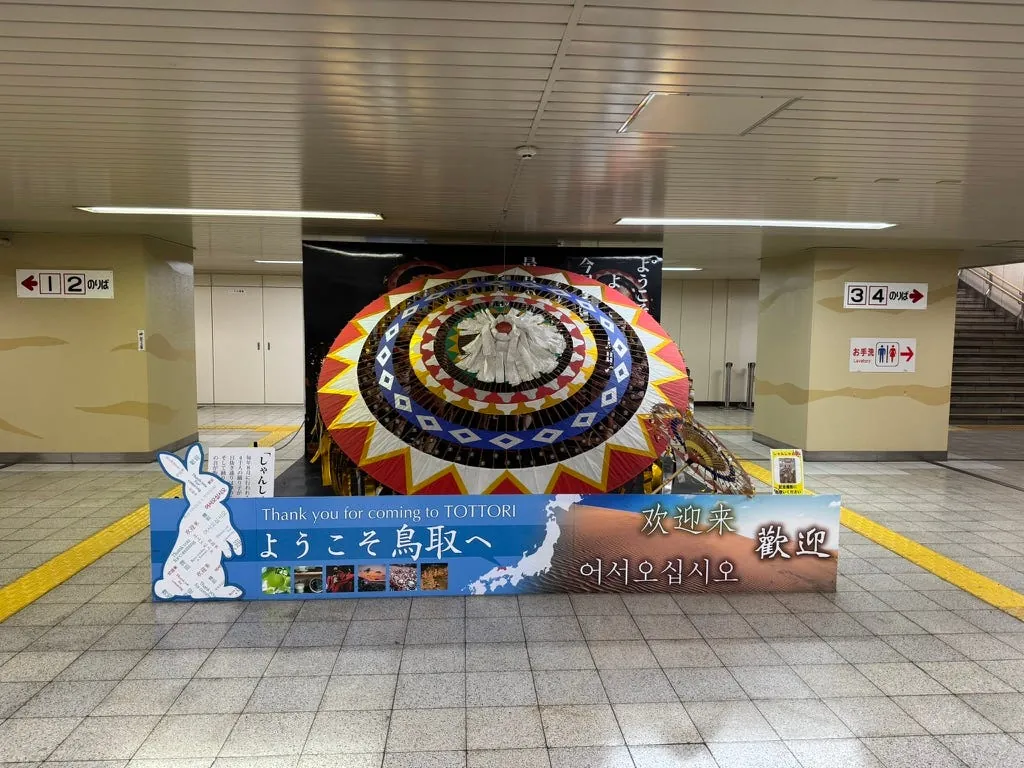
Head to tonight’s hotel Toyoko INN Tottori Station South Exit. There is also a Toyoko INN at the North Exit, but I couldn’t book there. The North Exit area has a livelier shopping street.
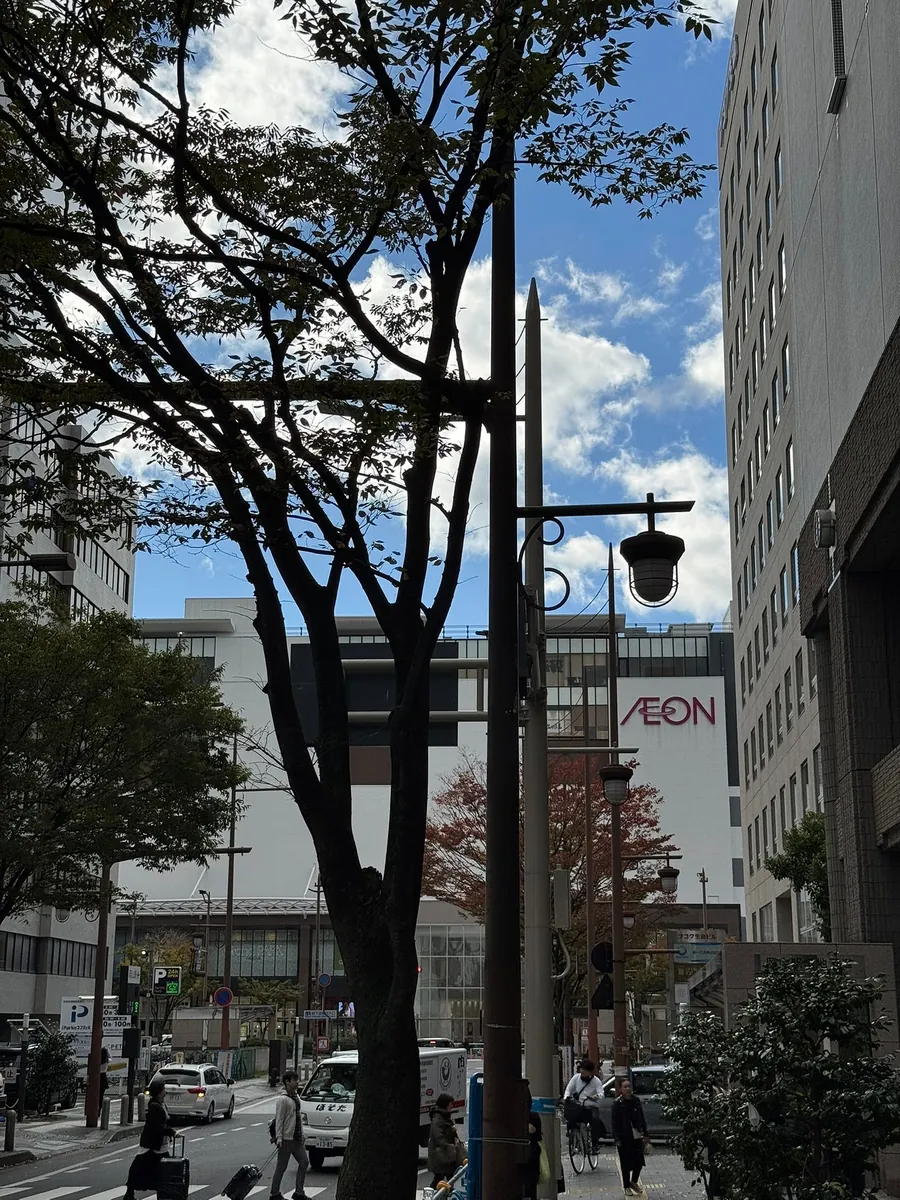
17:00 鳥取亂逛
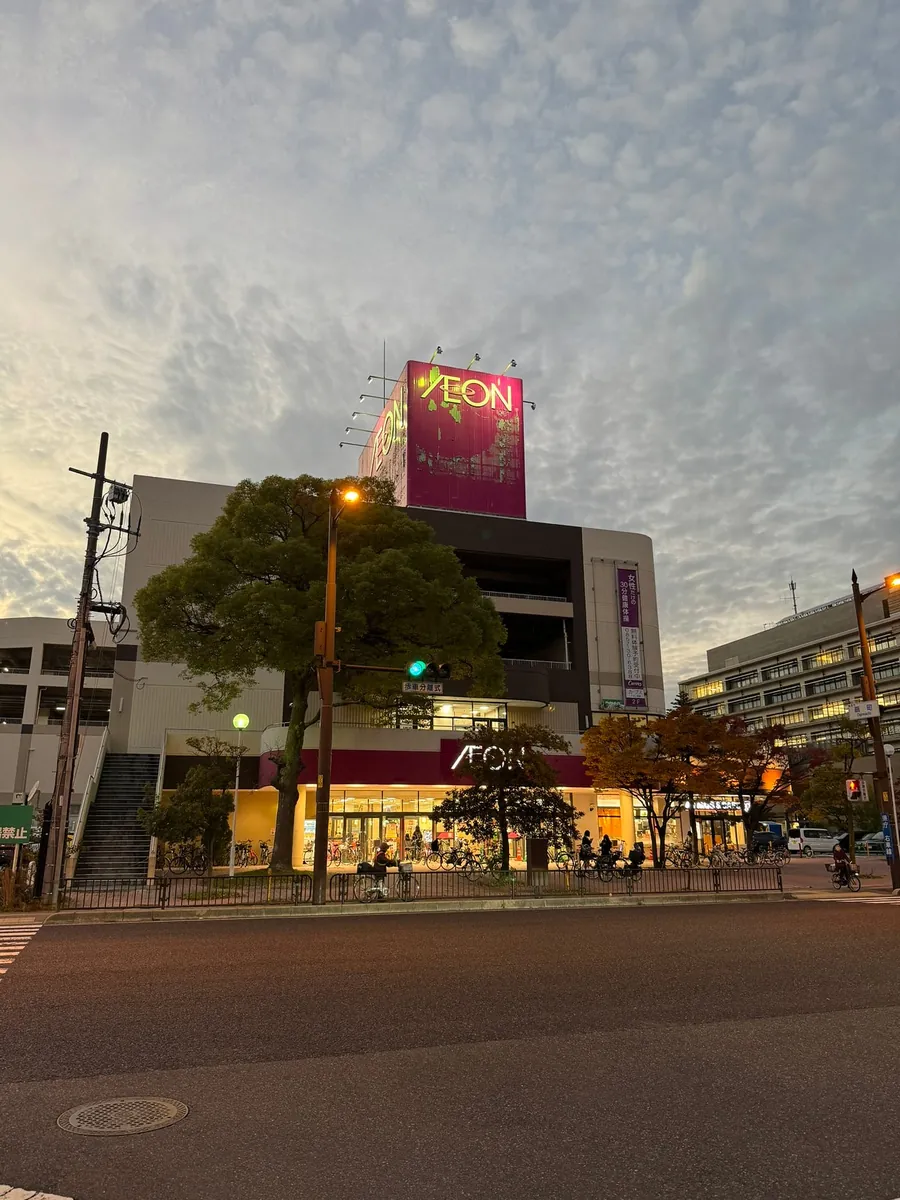
There is still an hour before mealtime, so I went to the nearby AEON for a walk.

Around 18:00, I walked to the area near Tottori North Exit Shopping Street to find a place to eat. After eating randomly the past few days, I wanted to find a better restaurant today.
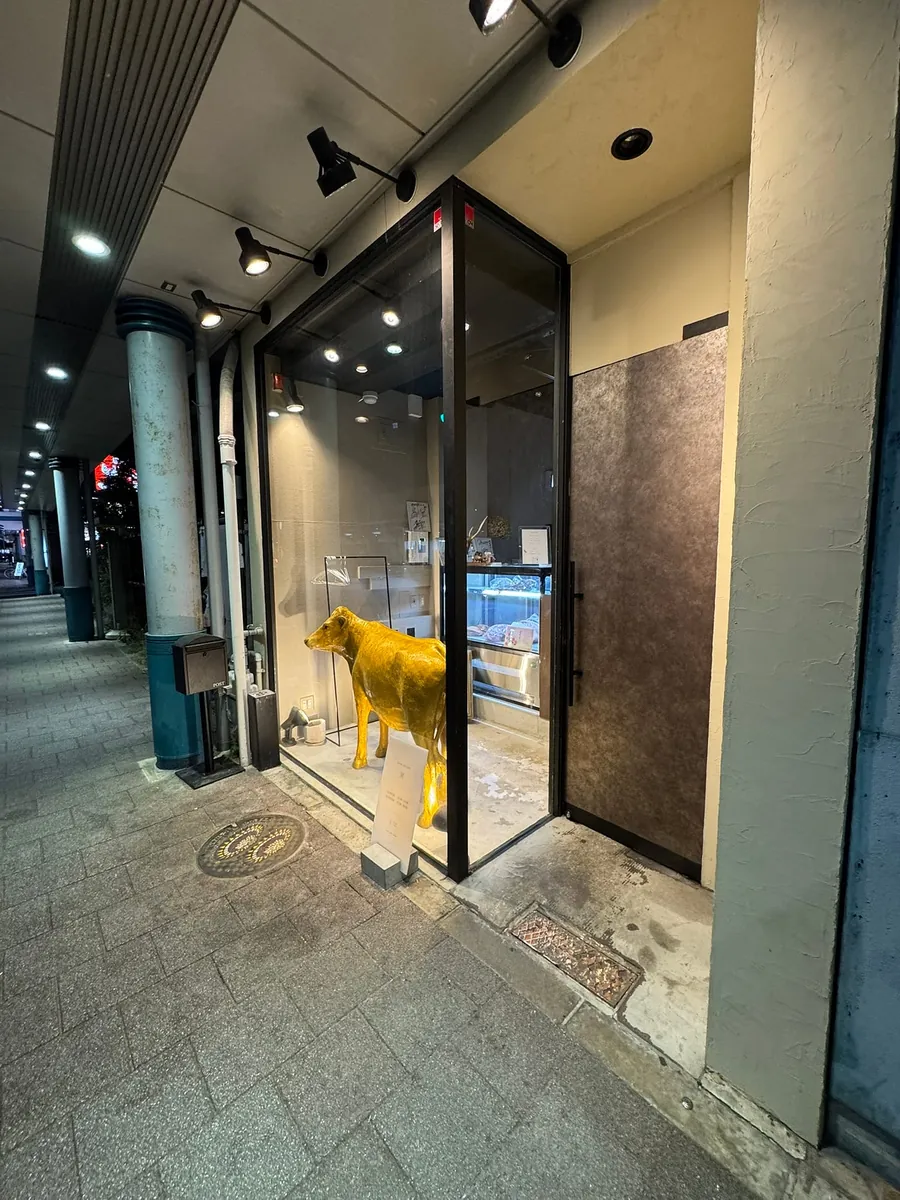
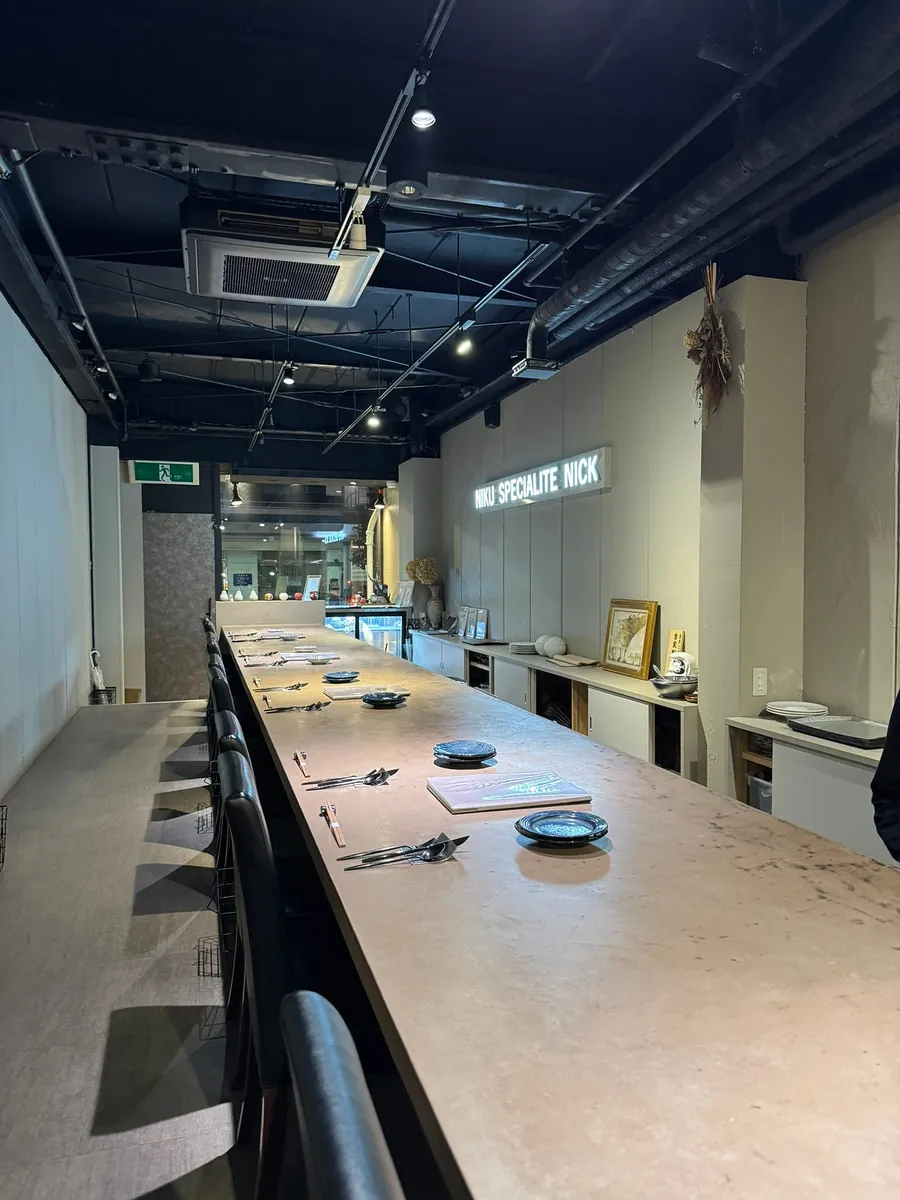
Found a Tottori Wagyu restaurant with good reviews on the main street — “Niku Ryori Nick” to try Tottori Wagyu. Not sure if it was a weekday, but I was the only customer.
Tottori wagyu is not as famous as Kobe or Omi beef, but Tottori is the birthplace of Japan’s wagyu culture.
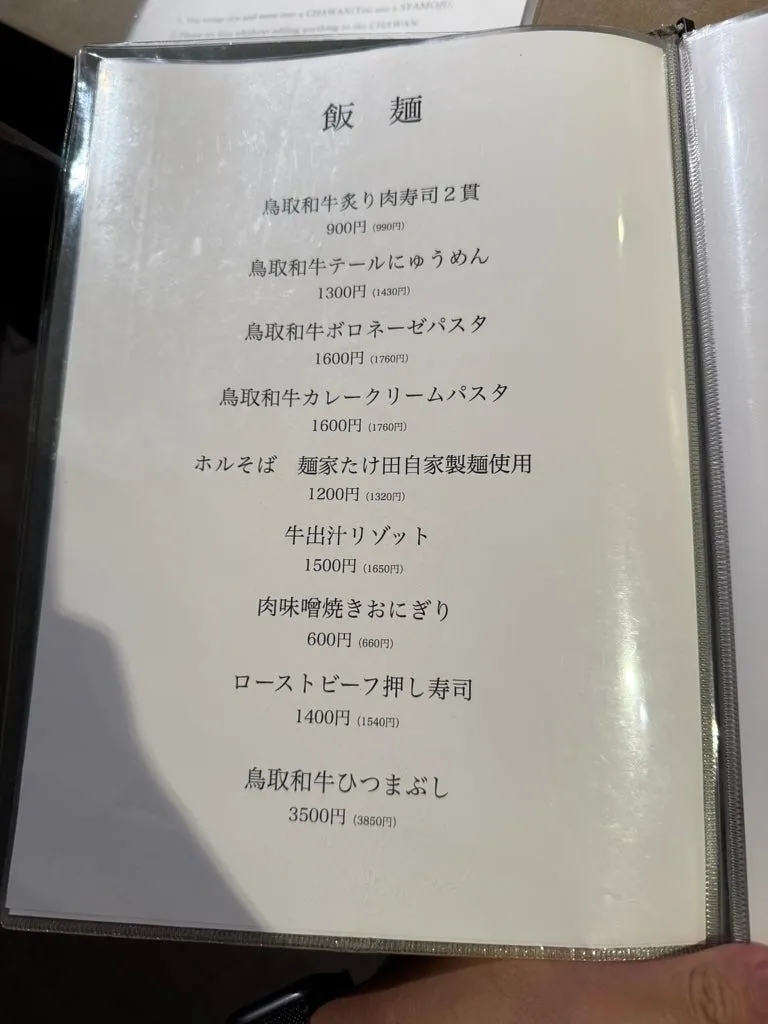
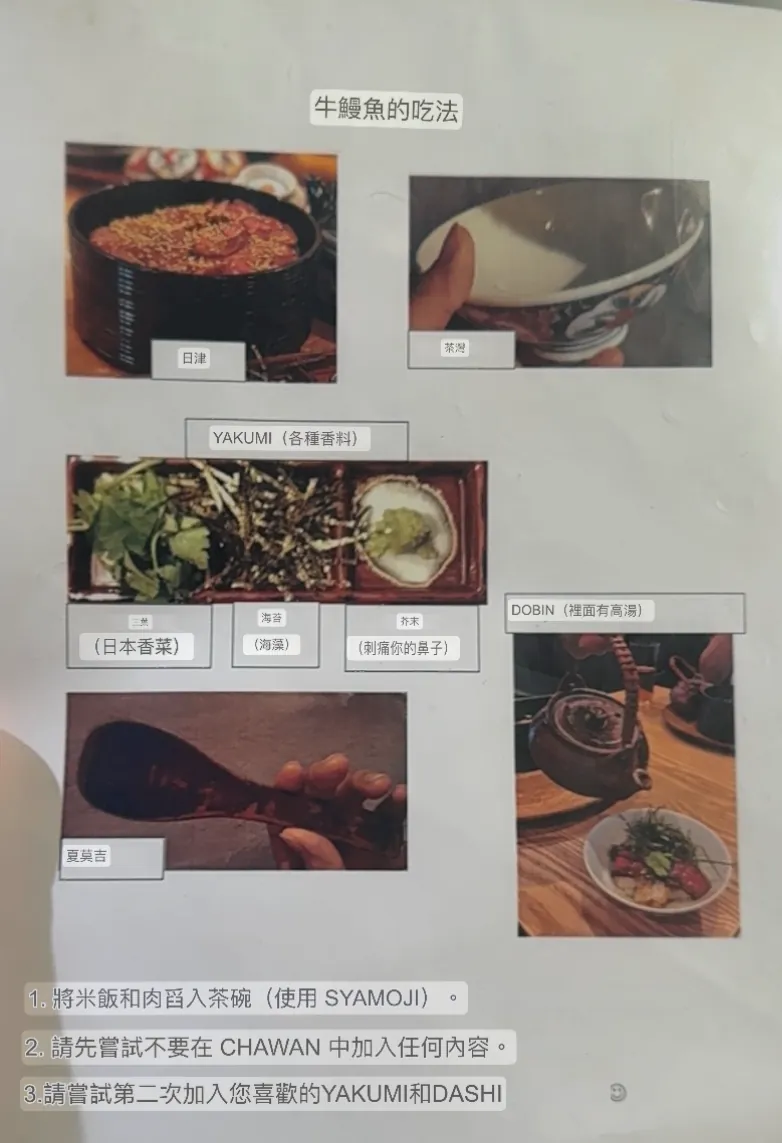
I ordered the “Tottori Wagyu Hitsumabushi,” a three-way Tottori Wagyu beef rice dish for 3,500 yen, which is much cheaper than Kobe beef.
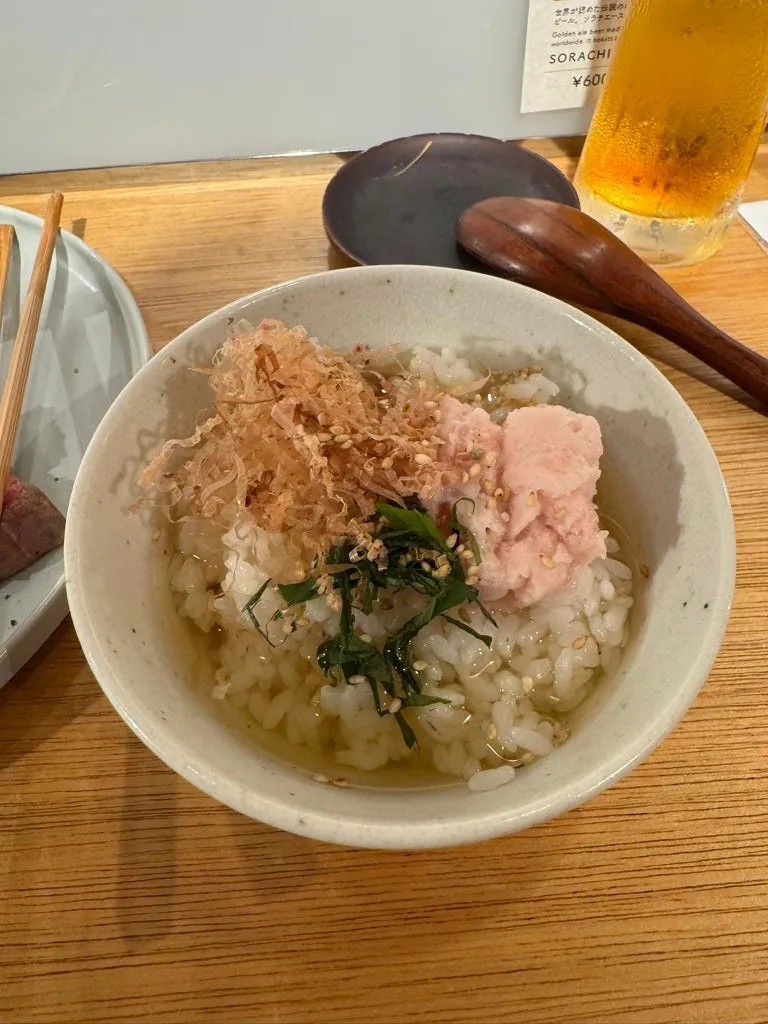
Tottori wagyu is very tender, but has a milder beef flavor. The first bite, eating pure wagyu, has little taste.
The second and third bites, combined with the soup it comes with, make for a delicious chazuke (tea poured over rice).
18:30 Return to the station and hotel after dinner
On the way, I first bought the train ticket for the next day to Himeji.
Stopped by on the way to buy late-night snacks to eat back at the hotel. Also got a Y1000 Yakult 1000. This time, I didn’t really drink it much but still slept well…
Good night, Tottori.
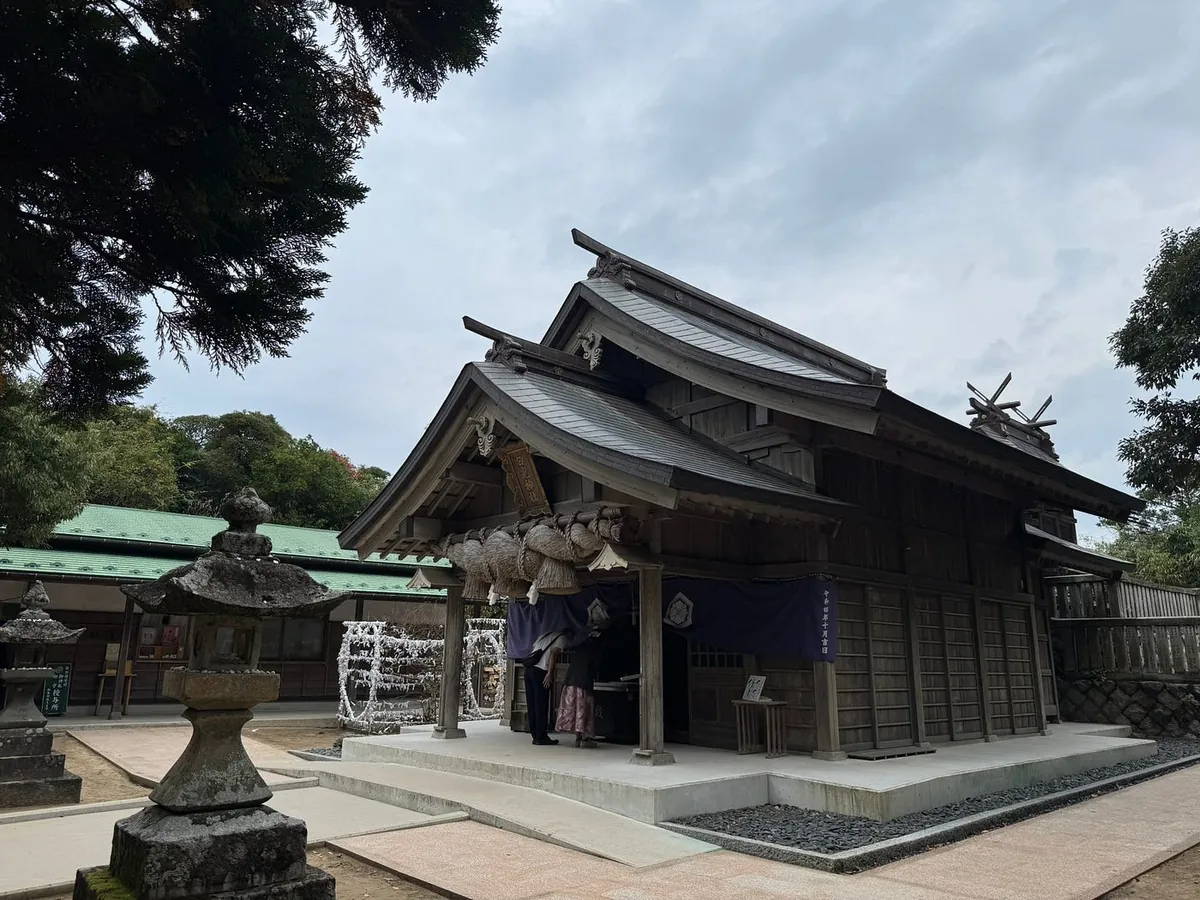
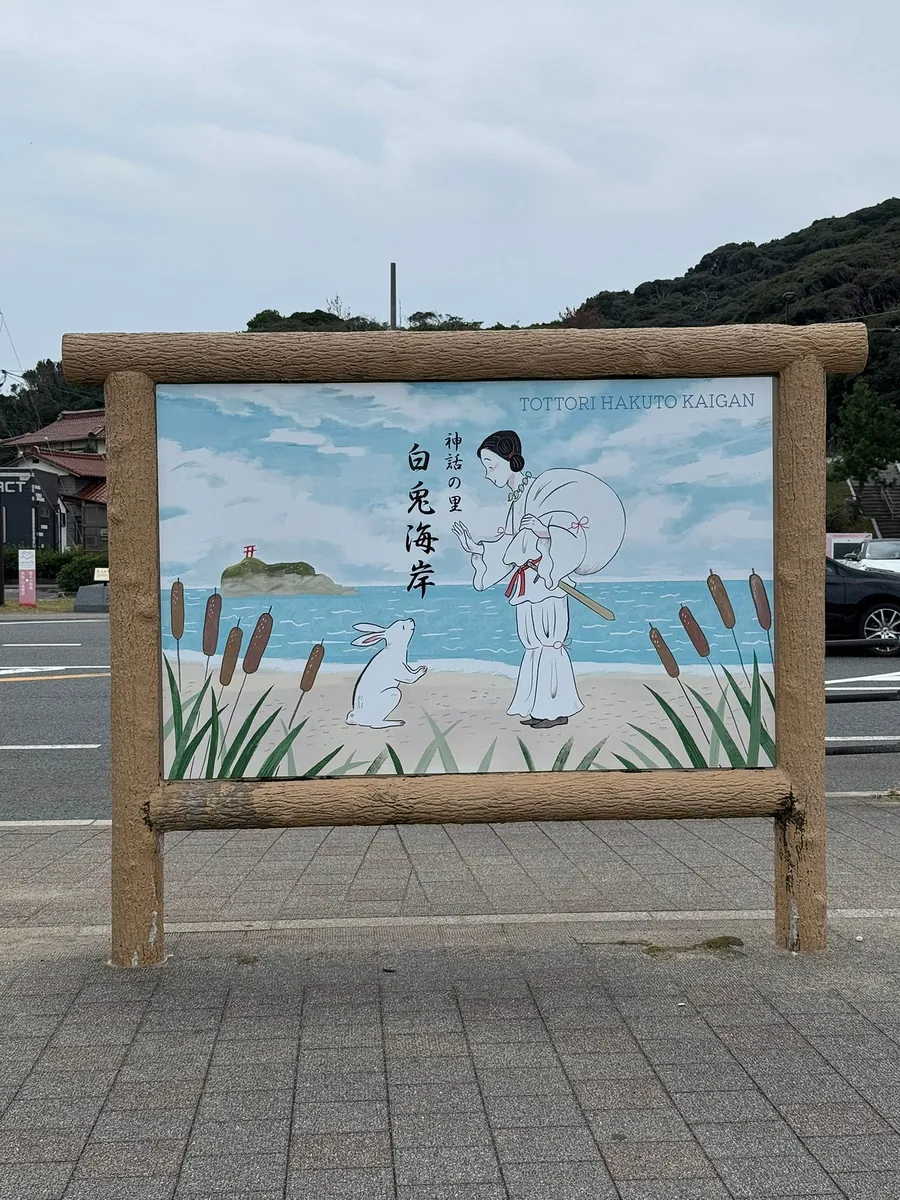
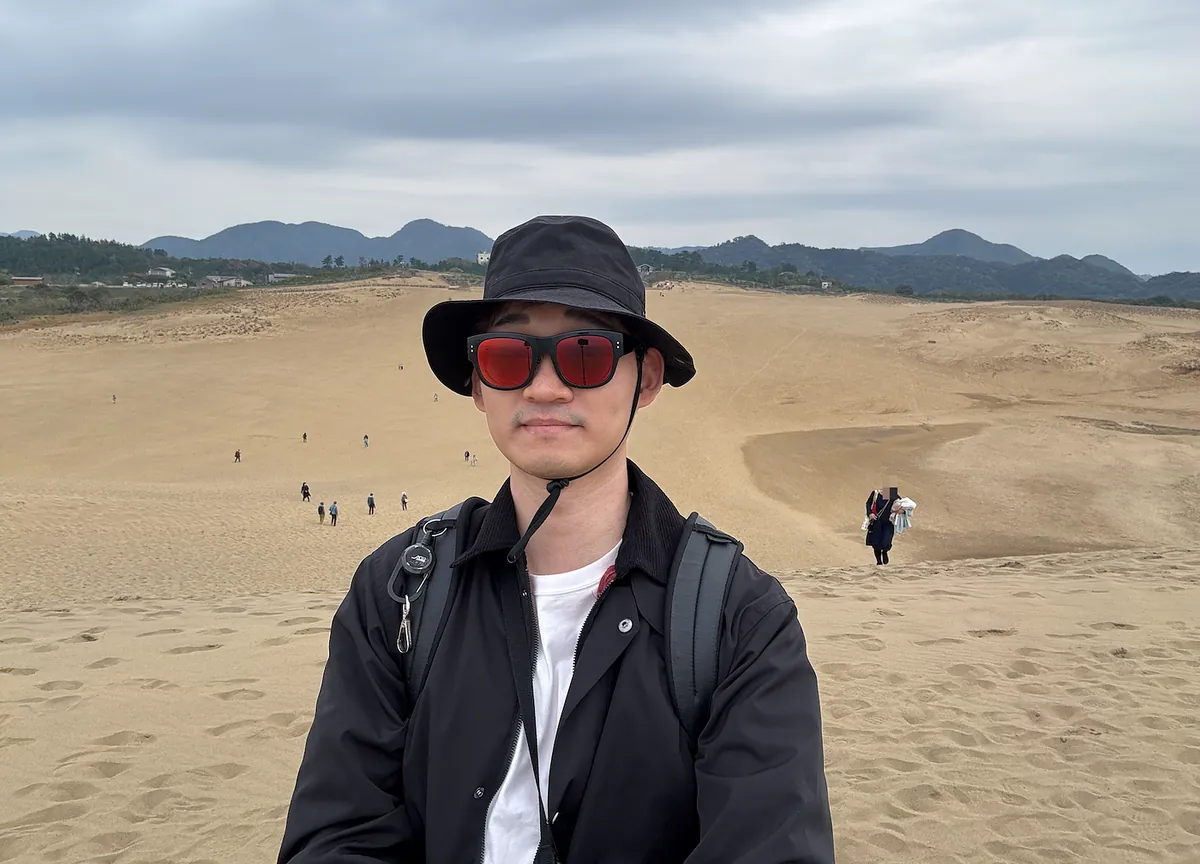
Day 4 (11/15 Friday) White Rabbit Shrine, Tottori Sand Dunes, Himeji
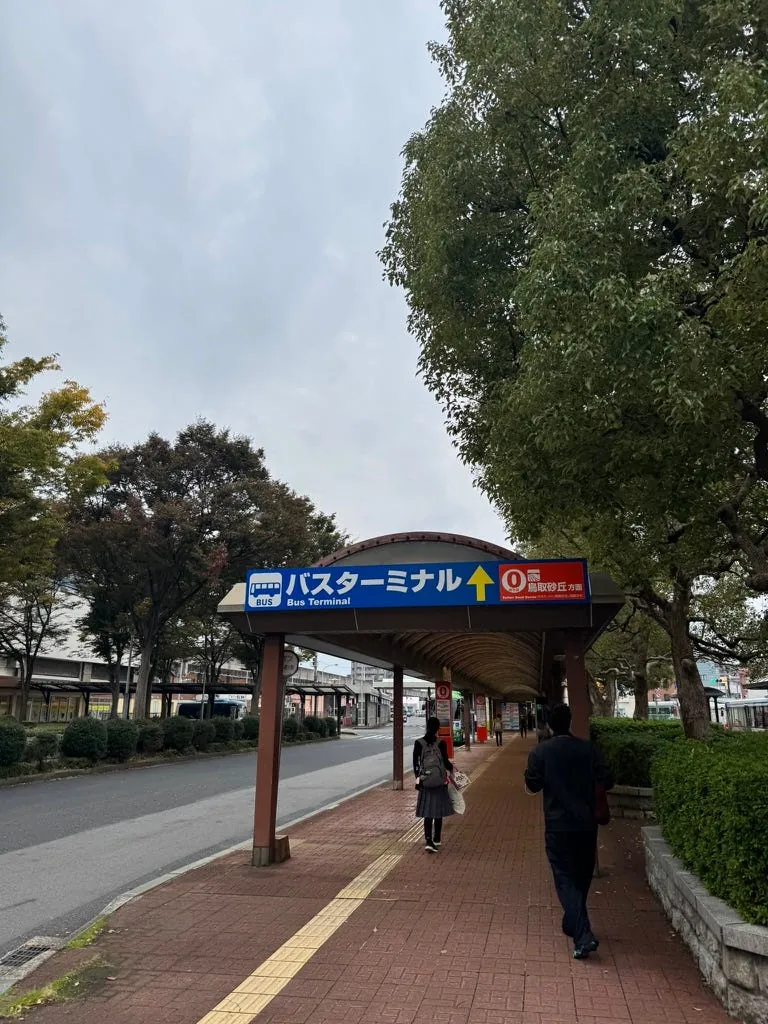
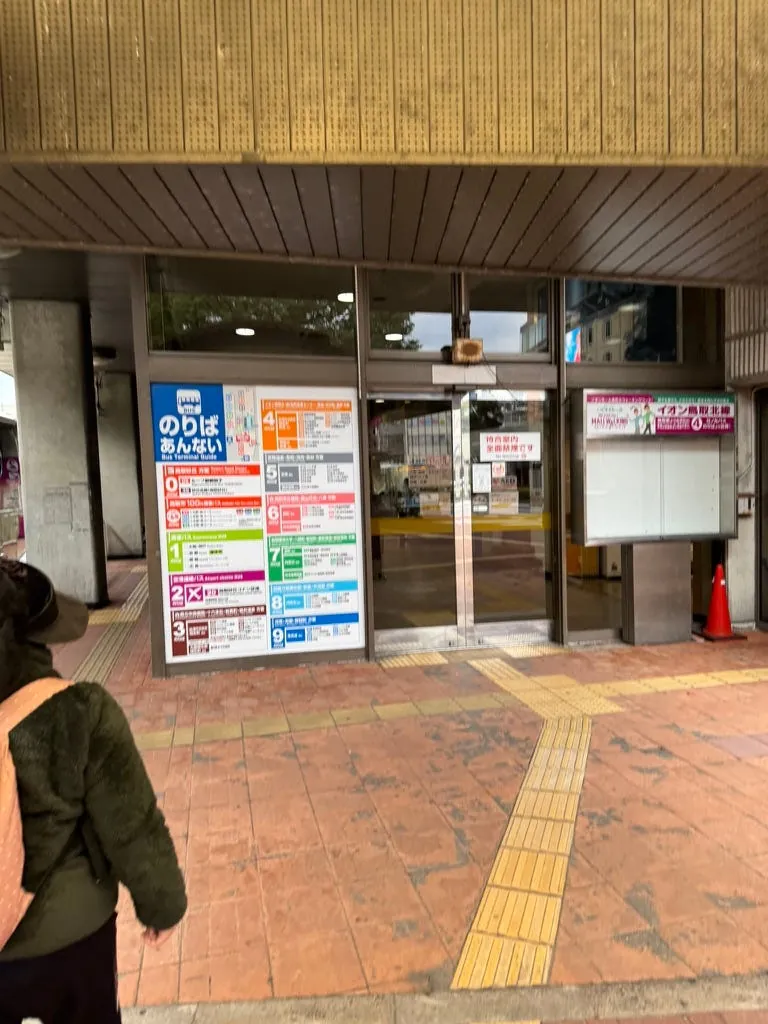
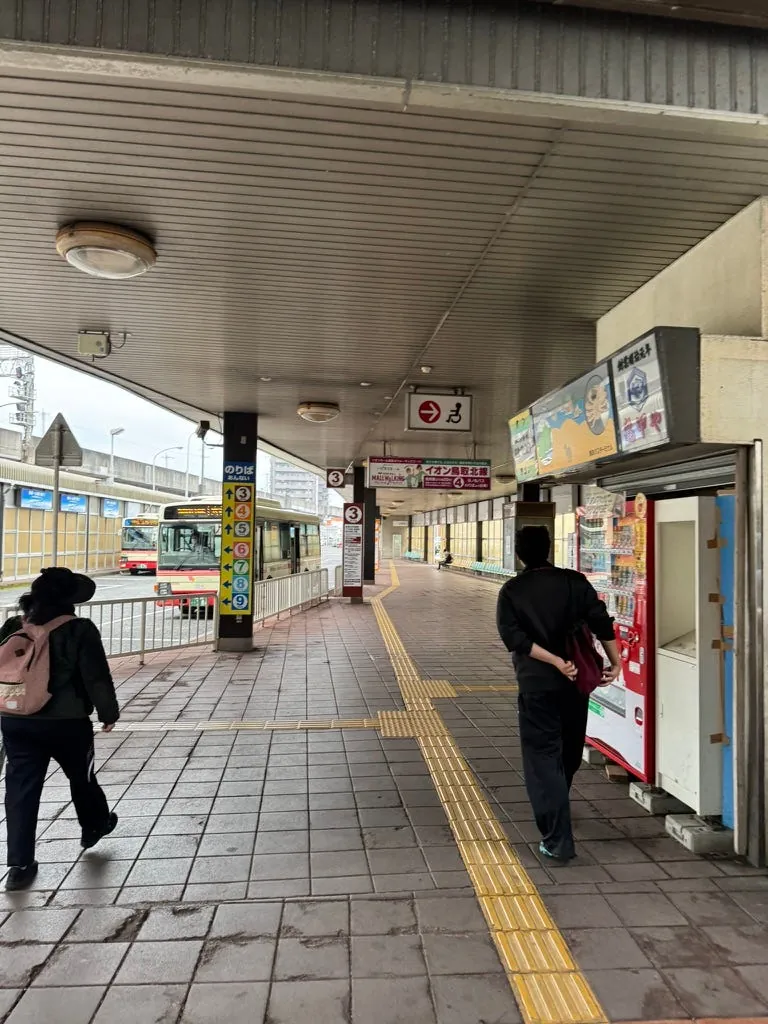
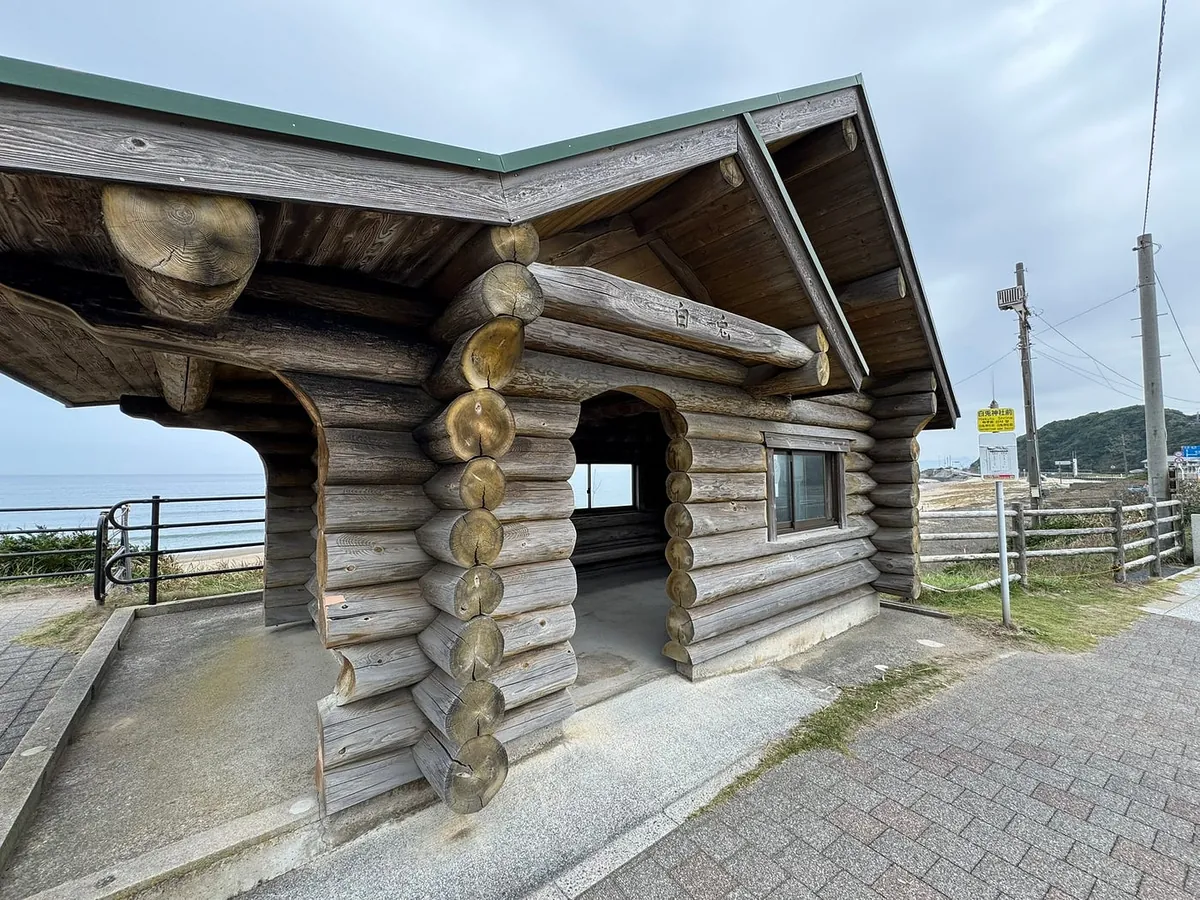
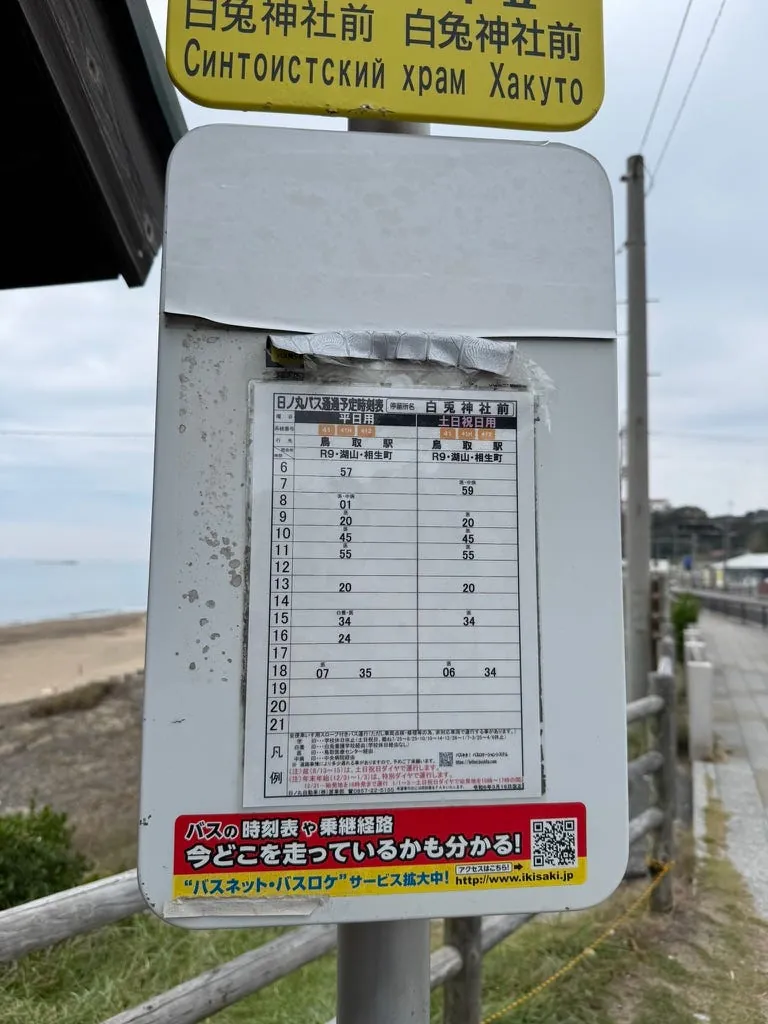
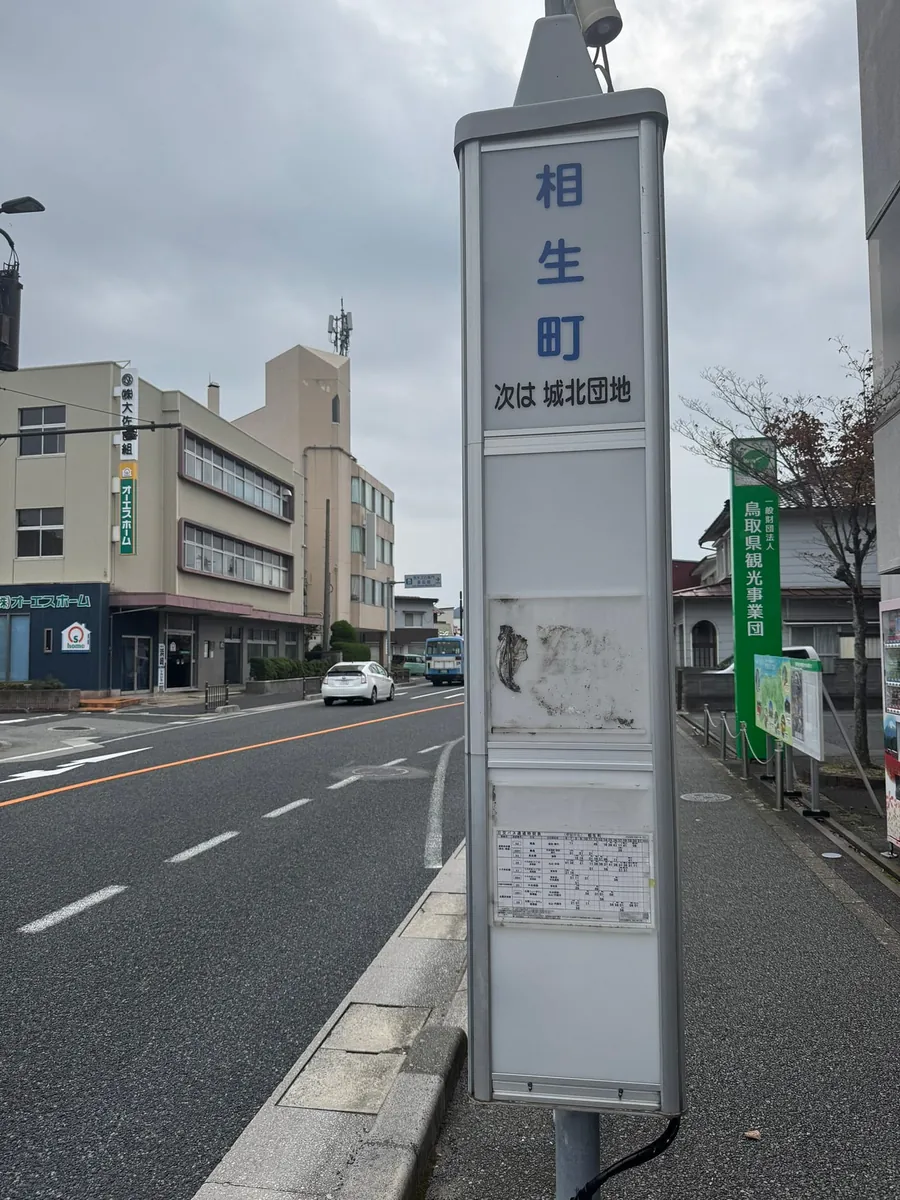
In the morning, first visit Hakuto Shrine (for matchmaking) to pray. Return to the north exit of Tottori Station and head to the bus terminal. Walk through the bus hall to the back and wait at platform 4 for the bus.
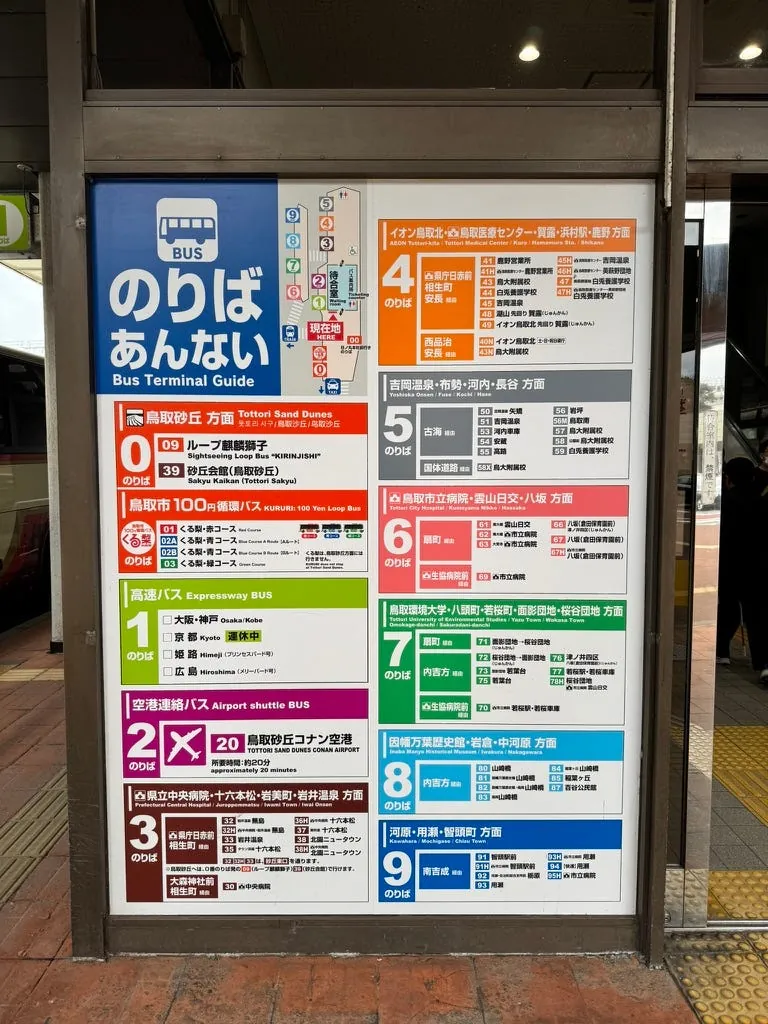
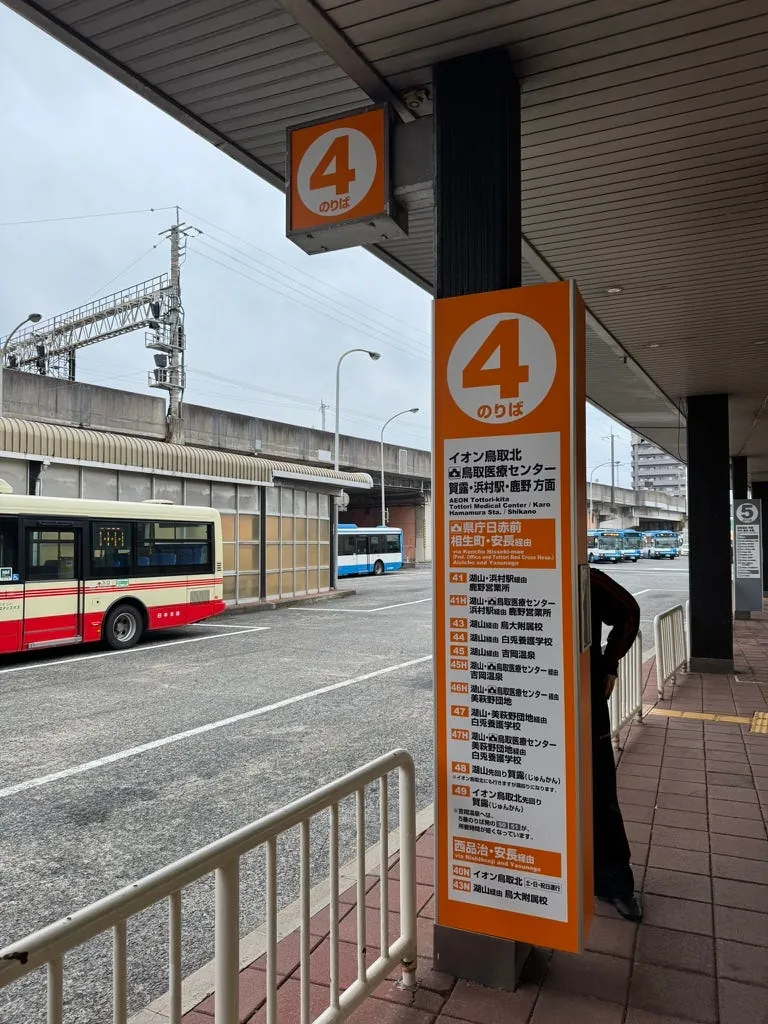
Take the Hakuto Coast Line bus No. 41 from Shikano Office to Hakuto Shrine-mae according to Google Maps.
Buses in Tottori do not accept electronic payments; cash only
Buses in Tottori do not accept electronic payments; cash only
Buses in Tottori do not accept electronic payments; cash only
Please prepare exact change in advance or exchange a 1000-yen bill for smaller bills next to the driver. ⚠️⚠️⚠️
The fare is about 610 yen.
Or buy a one-day sightseeing pass at Tottori Station for better value.
Before getting off, insert coins according to the amount shown on the screen. Since we boarded at the last stop without a ticket, we paid the amount shown in the first section before the previous one.
~= 09:30 Arrive at Shirahama Shrine

After getting off, walk back towards the overpass to reach the entrance of Hakuto Shrine.
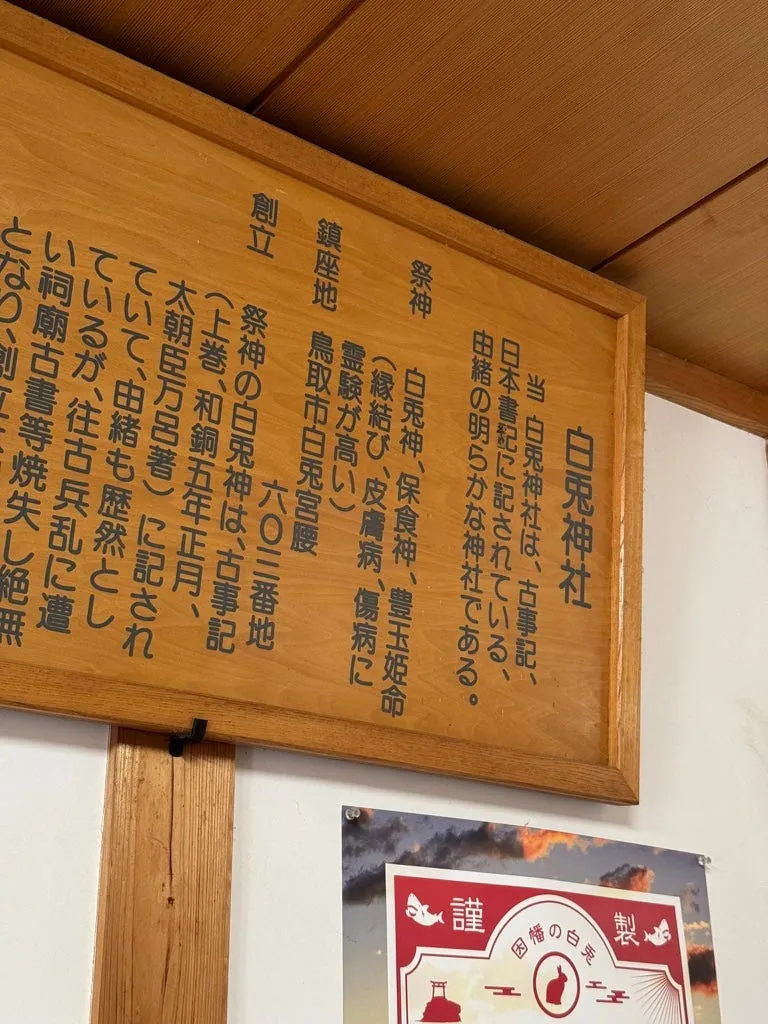
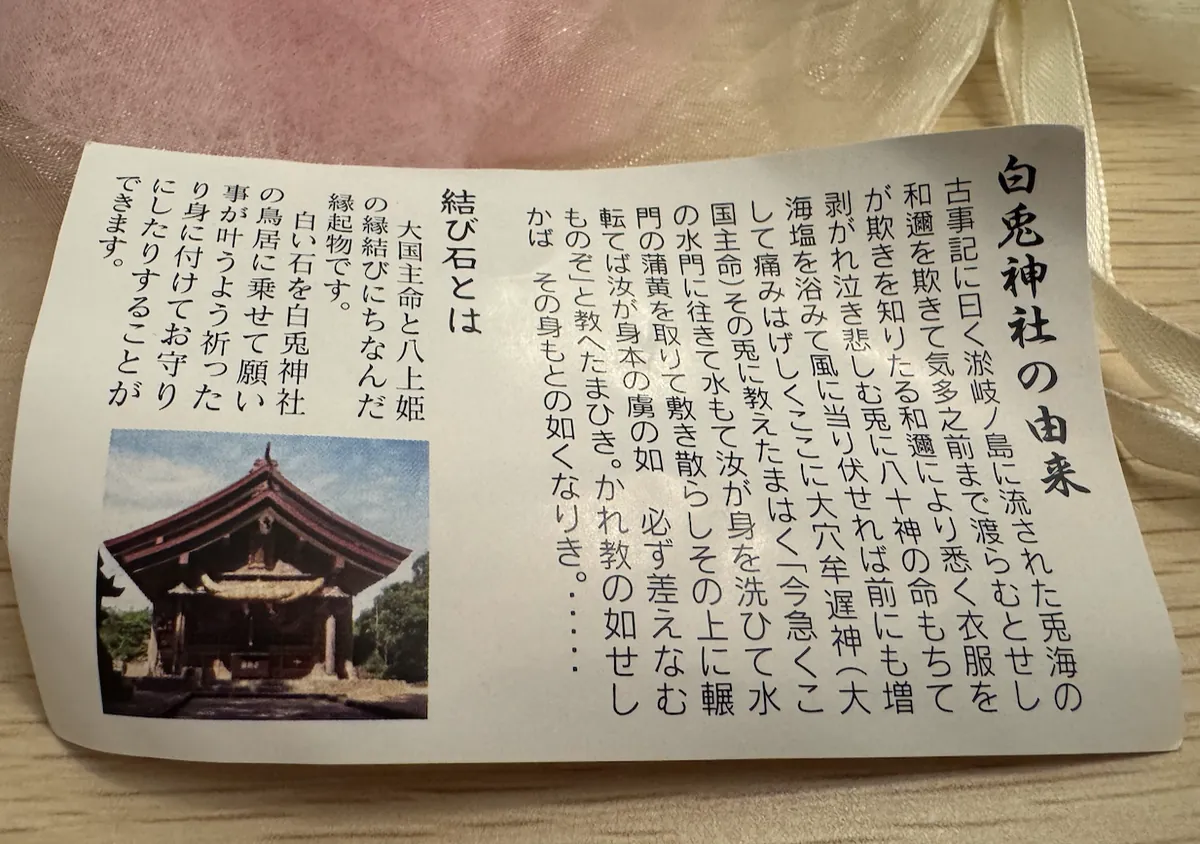
The White Rabbit Shrine originates from the legend of the “White Rabbit of Inaba.” According to the tale, Okuninushi no Mikoto (from Izumo Taisha) helped the injured white rabbit recover, received its blessing, and successfully won the love of Princess Yakami-hime.
Shirousagi Shrine symbolizes good relationships and healing. Both shrines share the sacred meaning of praying for happiness and connections.

The shrine is not far away, but along the way, there are many rabbit statues, all covered with love stones.
Izumo Taisha also has many Inaba white rabbit statues, but I forgot to take photos of them.
The torii gate is also piled with matchmaking stones.
The shrine is not very large; it takes about 15–20 minutes to visit.
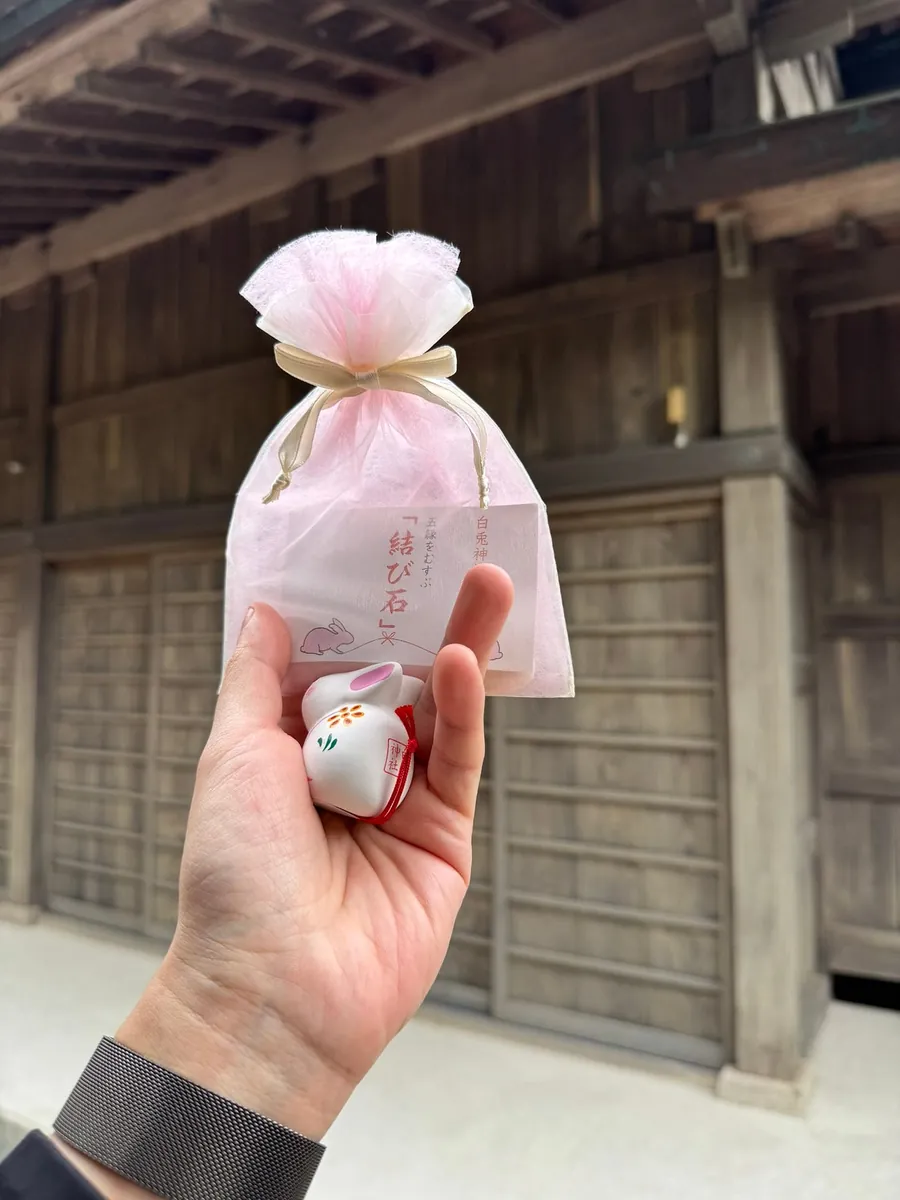
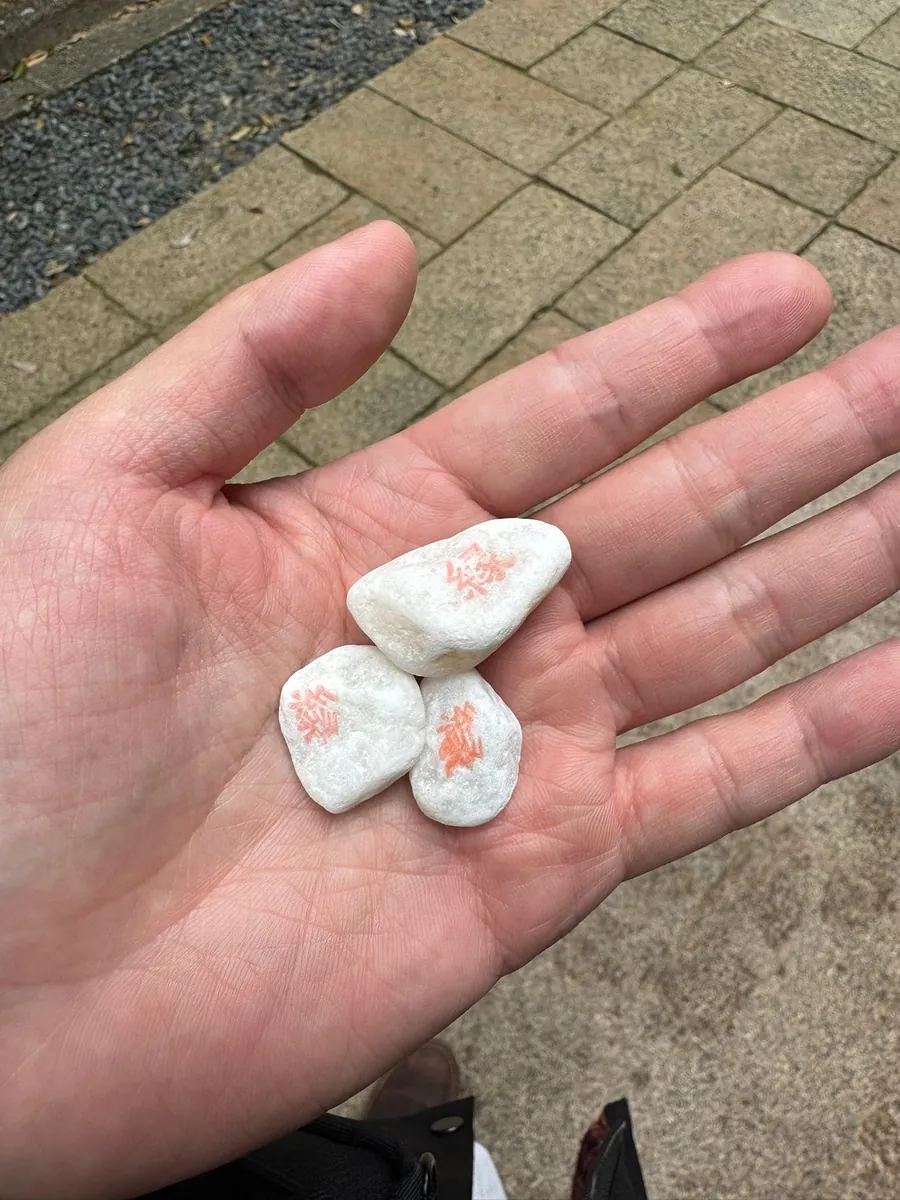

I also spent 500 yen to buy a matchmaking stone to place at the statue.
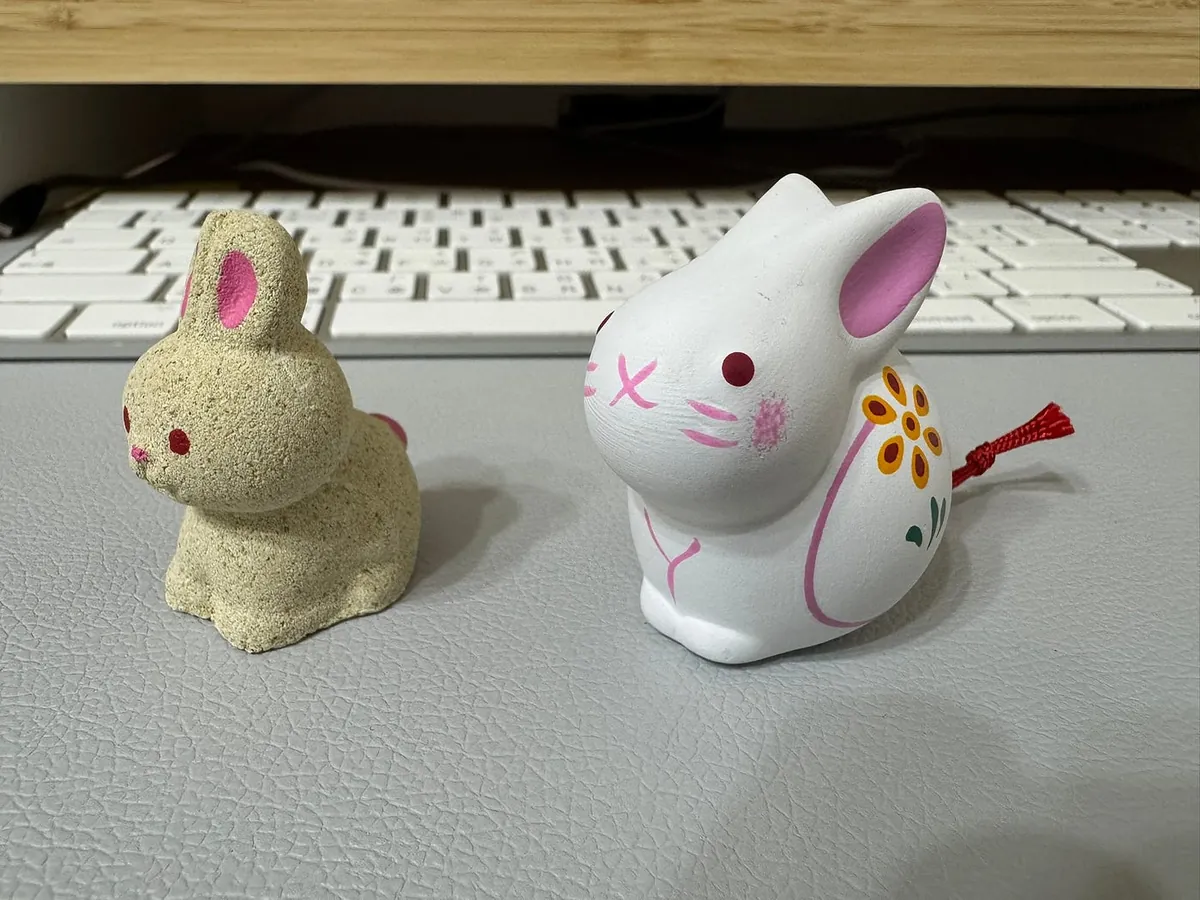
The Inaba White Rabbit I Bought:
-
Left: Bought at a souvenir shop outside Izumo Taisha Shrine
-
Right side: Bought at Shirahama Shrine (includes a poem fortune slip)
The story of the White Rabbit of Inaba and the deity Okuninushi.
~= 09:50 White Rabbit Shrine Tourist Information Center, White Rabbit Beach
The tourist information center really has a white rabbit, and they also sell some snacks and souvenirs. I bought a bread to fill my stomach.
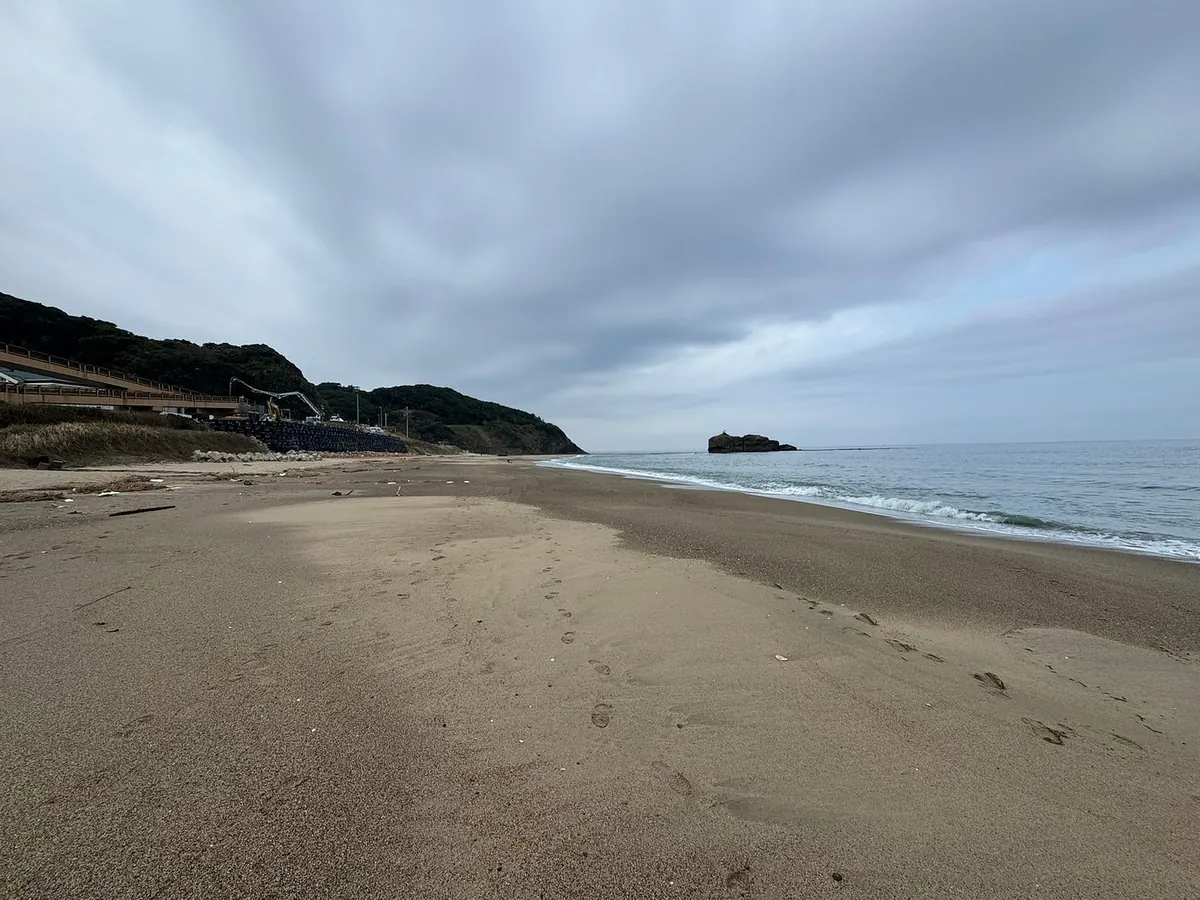
White Rabbit Beach is very desolate.
The bus only departs towards Tottori Station at 10:45. It’s better to arrive earlier and take an earlier bus to save time.
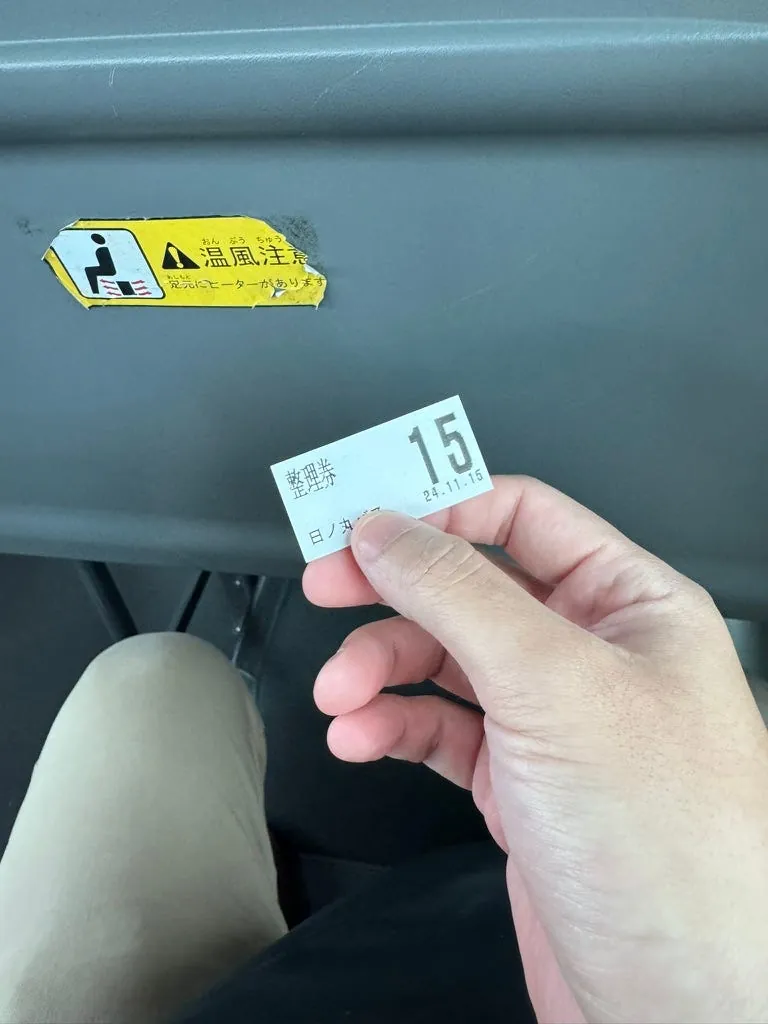
from: Sheng Wei
Remember to take a boarding ticket when you get on. It has a number, and when you get off, pay the corresponding amount in coins along with the ticket. ⚠️
On the train, I met a tourist from Fujian, China; his itinerary was the opposite of mine. He went to Himeji first and then to Shimane. We exchanged recommendations—he suggested visiting Shosha-san Engyo-ji Temple before Himeji Castle, and said the photo spot shown in the picture is great for taking pictures of the castle.
Thanks to him! In the end, it was definitely worth it.

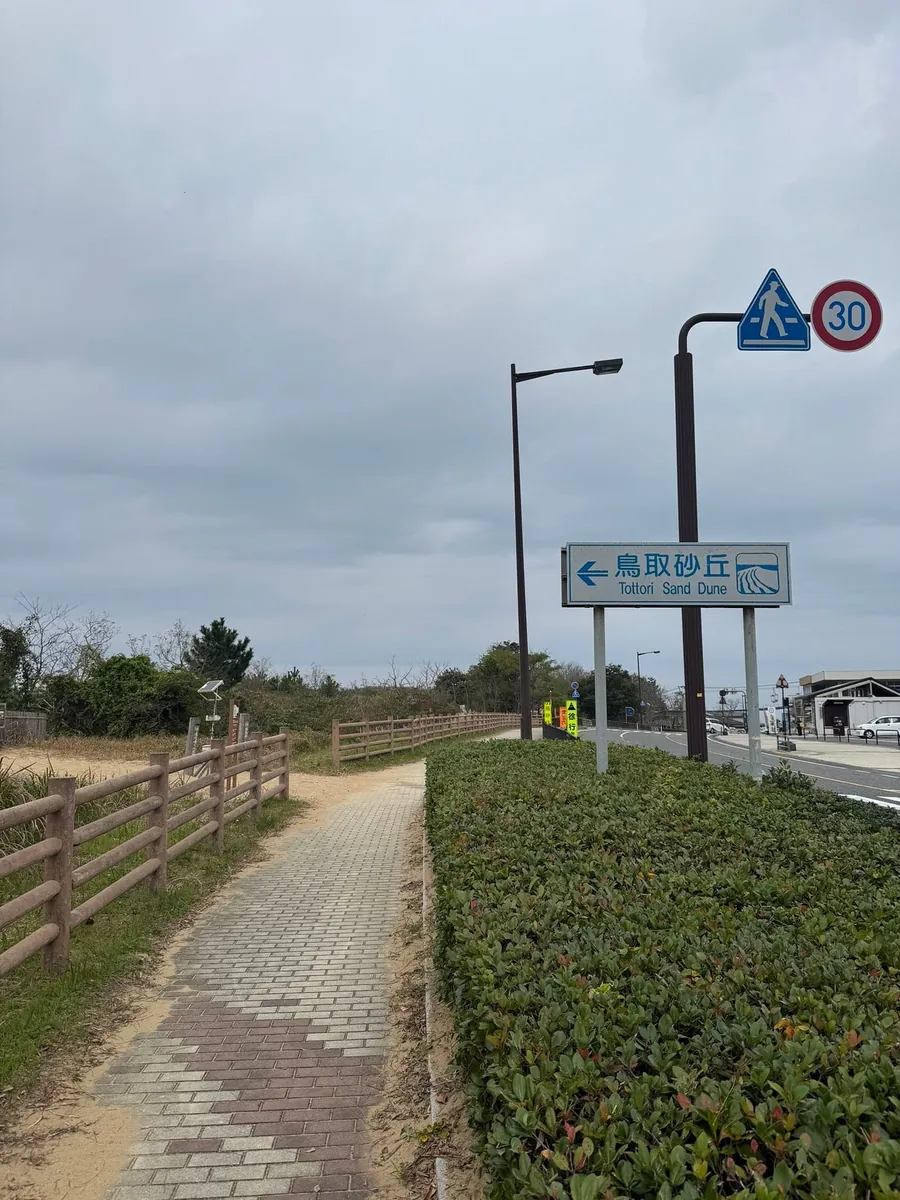
Get off at Aioi-cho, then transfer at the opposite bus stop to the bus heading to Tottori Sand Dunes.
Take this bus and get off at the Dune East Entrance to walk up.
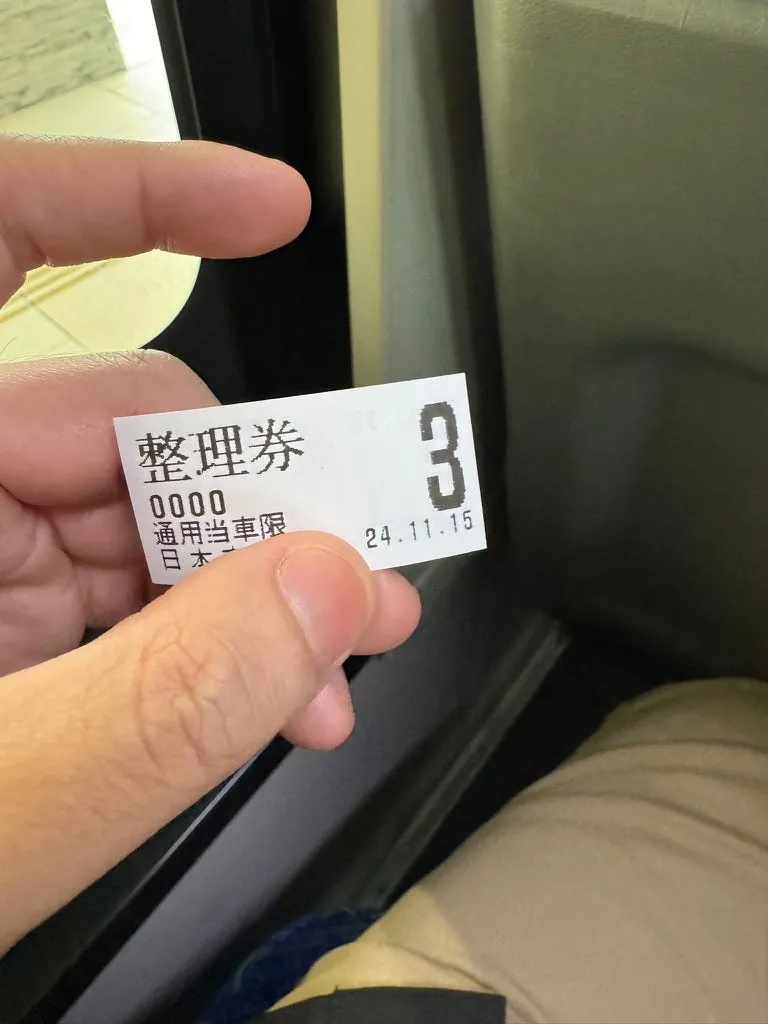
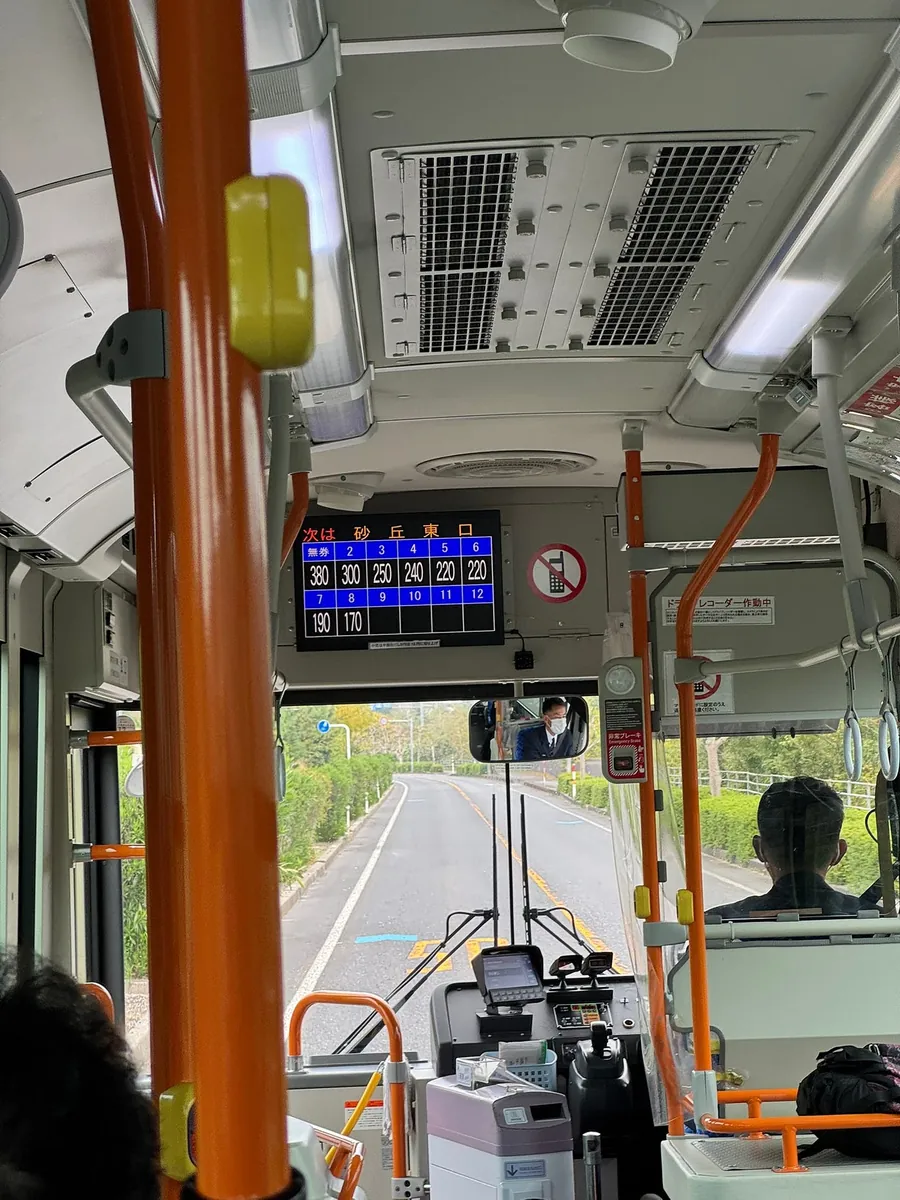
Take ticket number 3 when boarding, then check the screen for the fare corresponding to number 3 when getting off. In this example, you need to pay 250 yen.
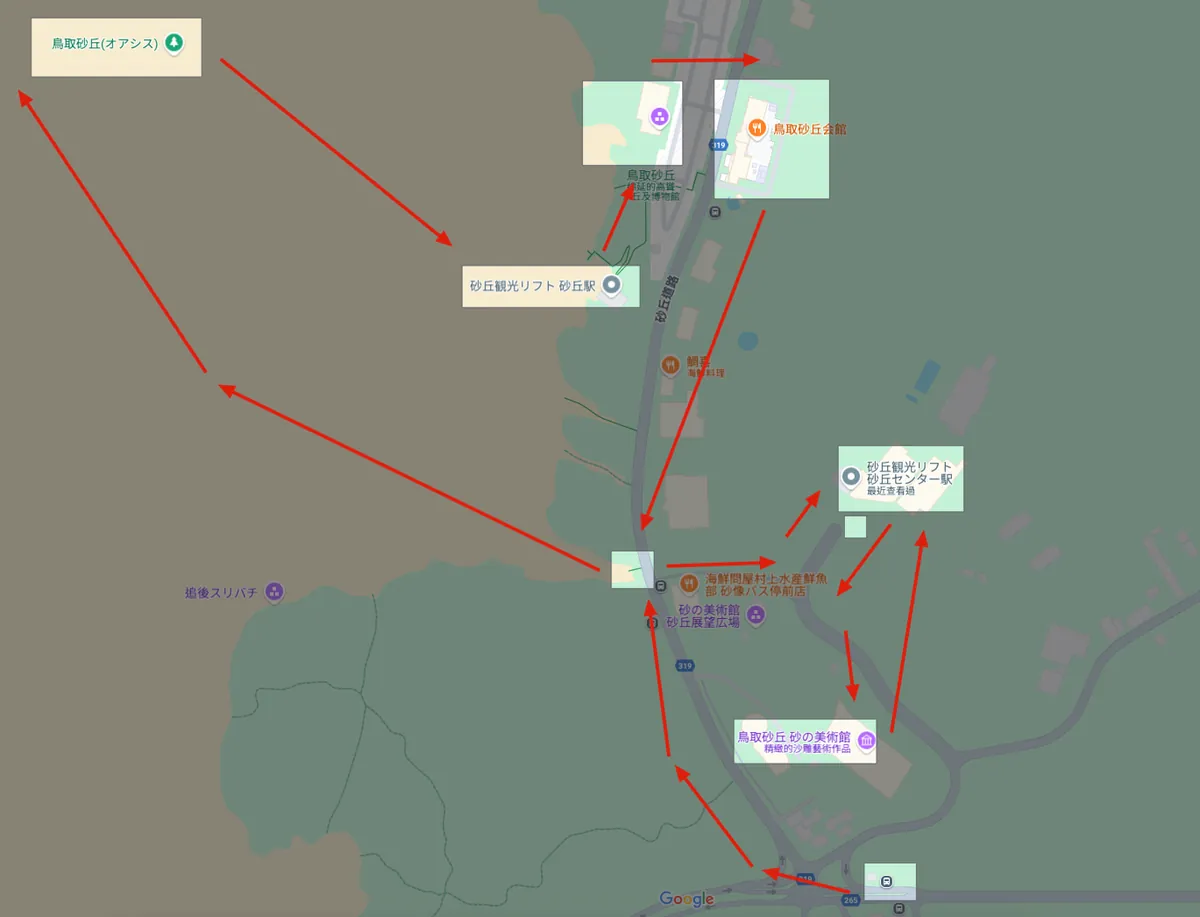
My chaotic visiting route.
After getting off, turn back at the fork and follow the signs uphill, passing the Tottori Sand Dunes Art Museum, then continue to the entrance of the Tottori Sand Dunes.
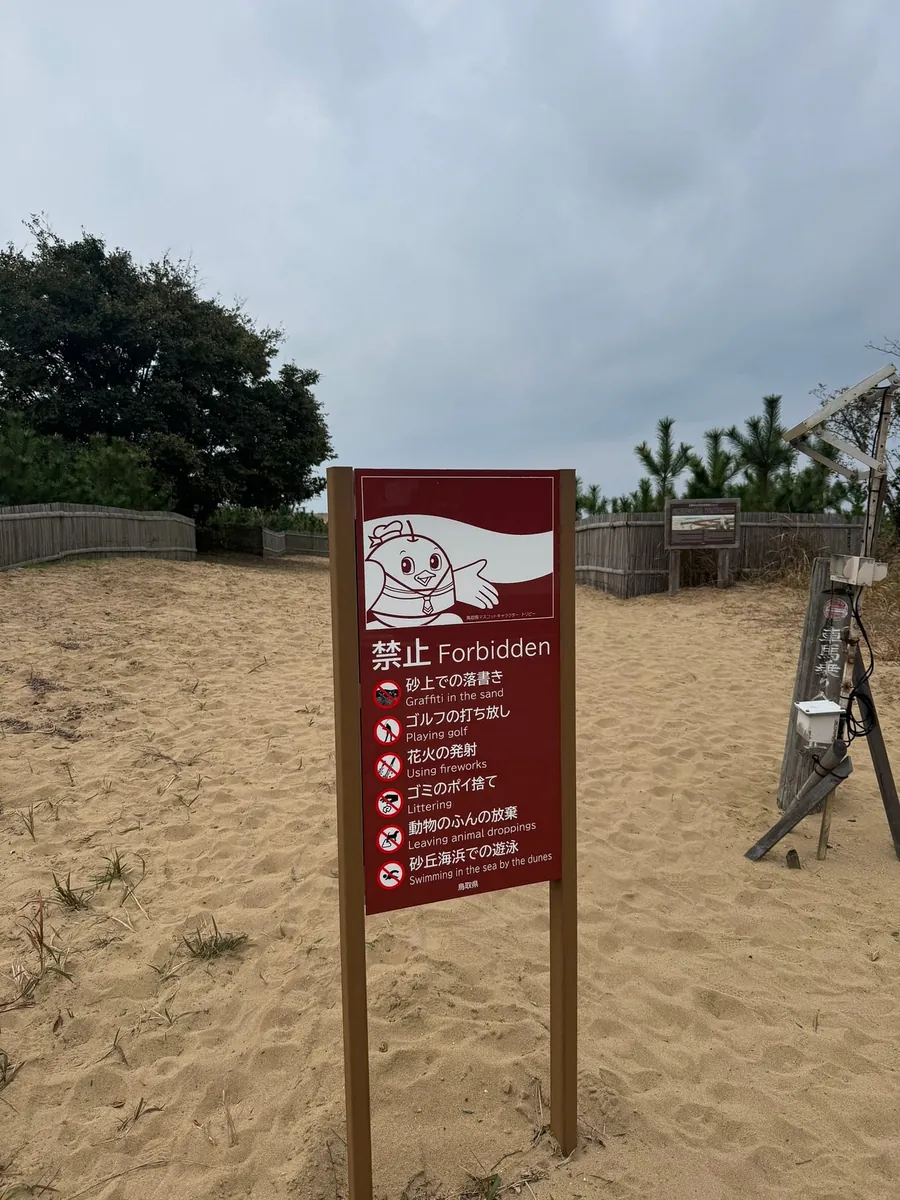
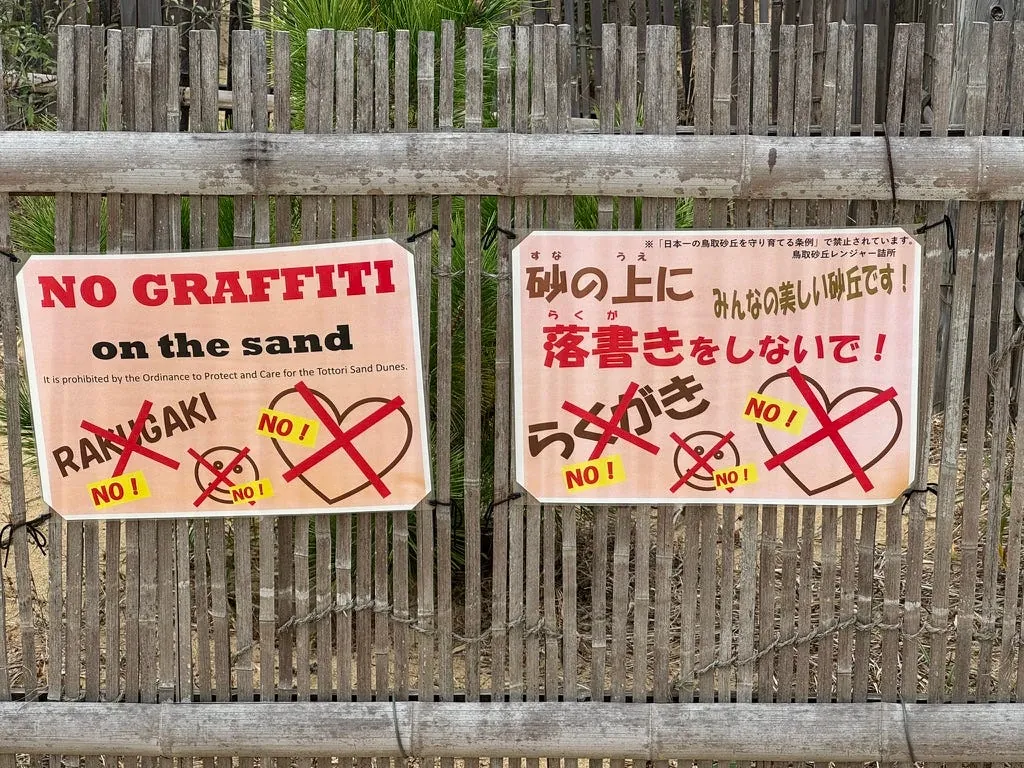
Tottori Sand Dunes Prohibited Actions, especially forbidden to draw on the sand and harm nature. ⚠️
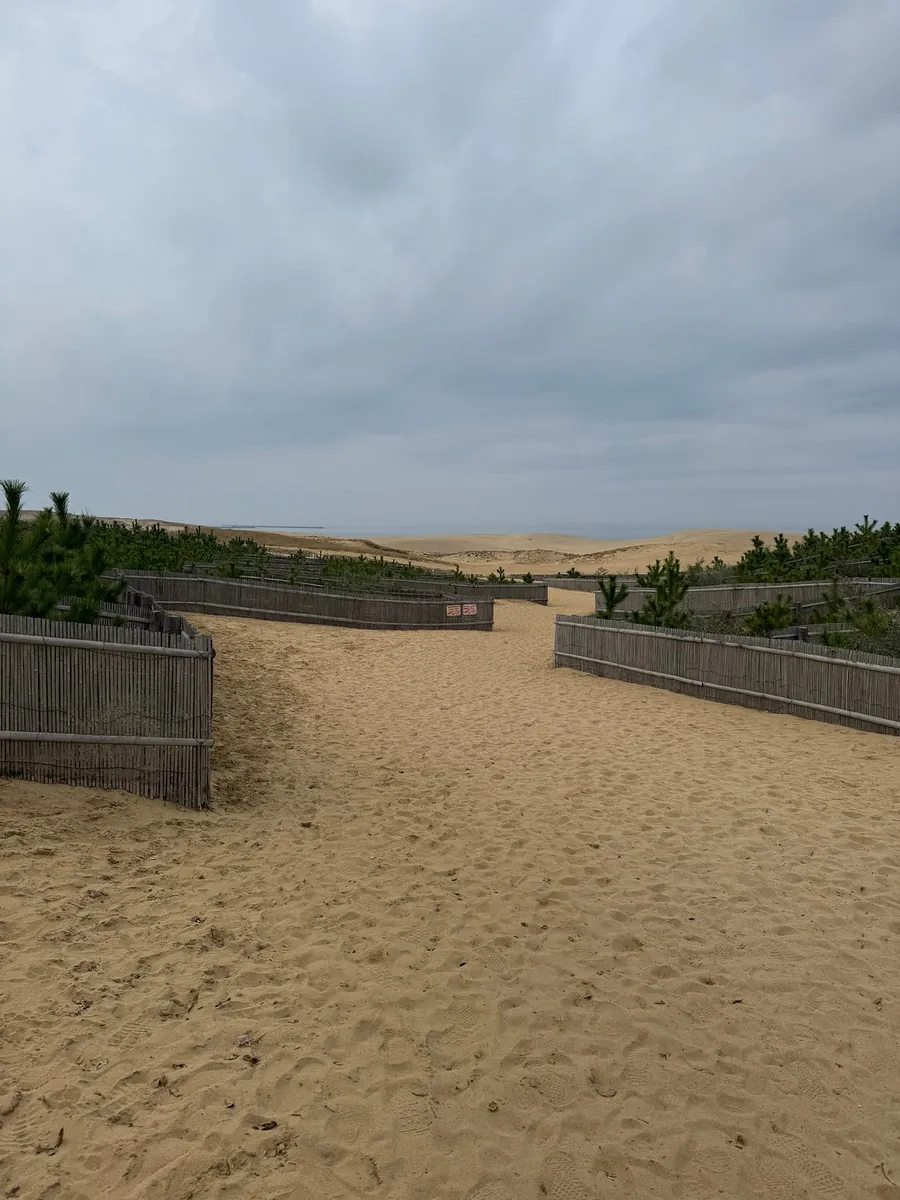
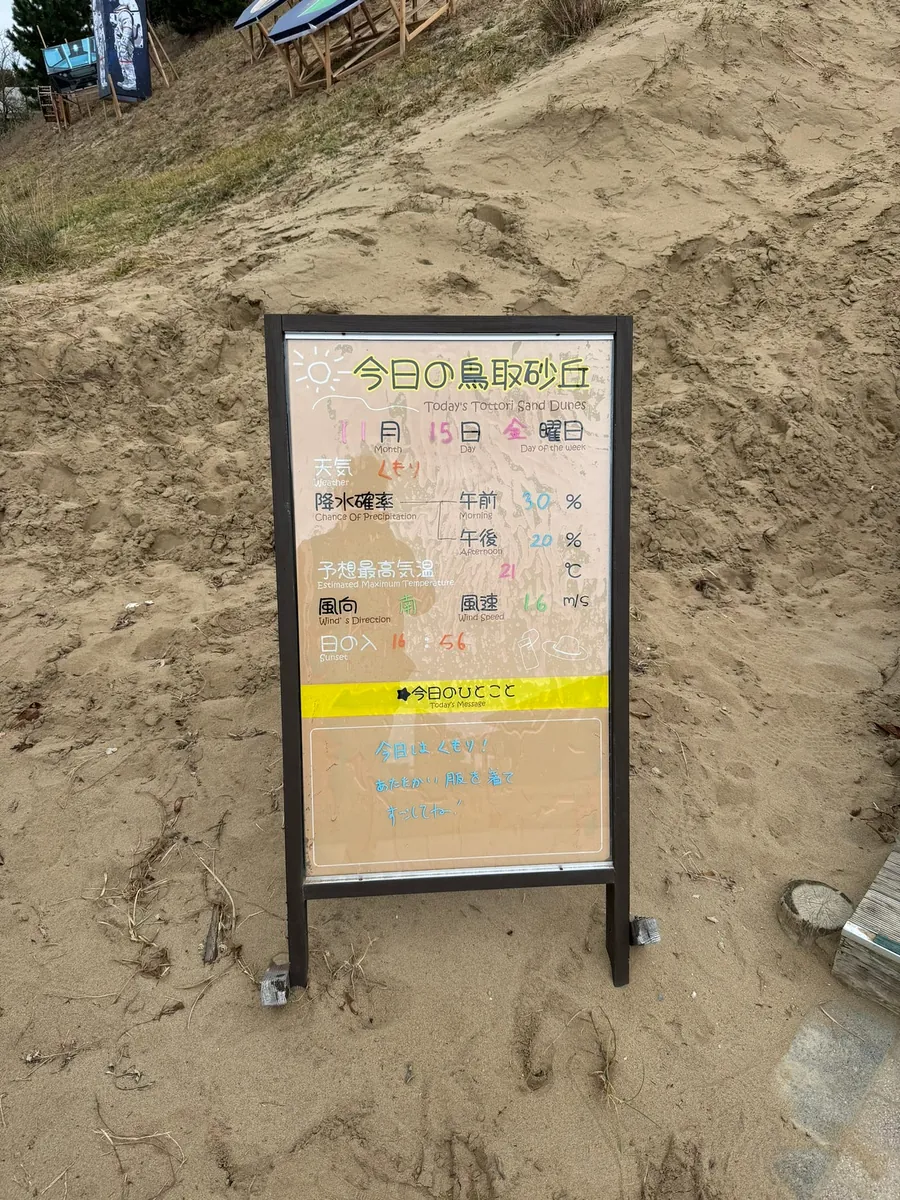
The Tottori Sand Dunes are really vast. The sky was a bit gloomy and rainy at the time, but if it were sunny, it would probably be very hot.
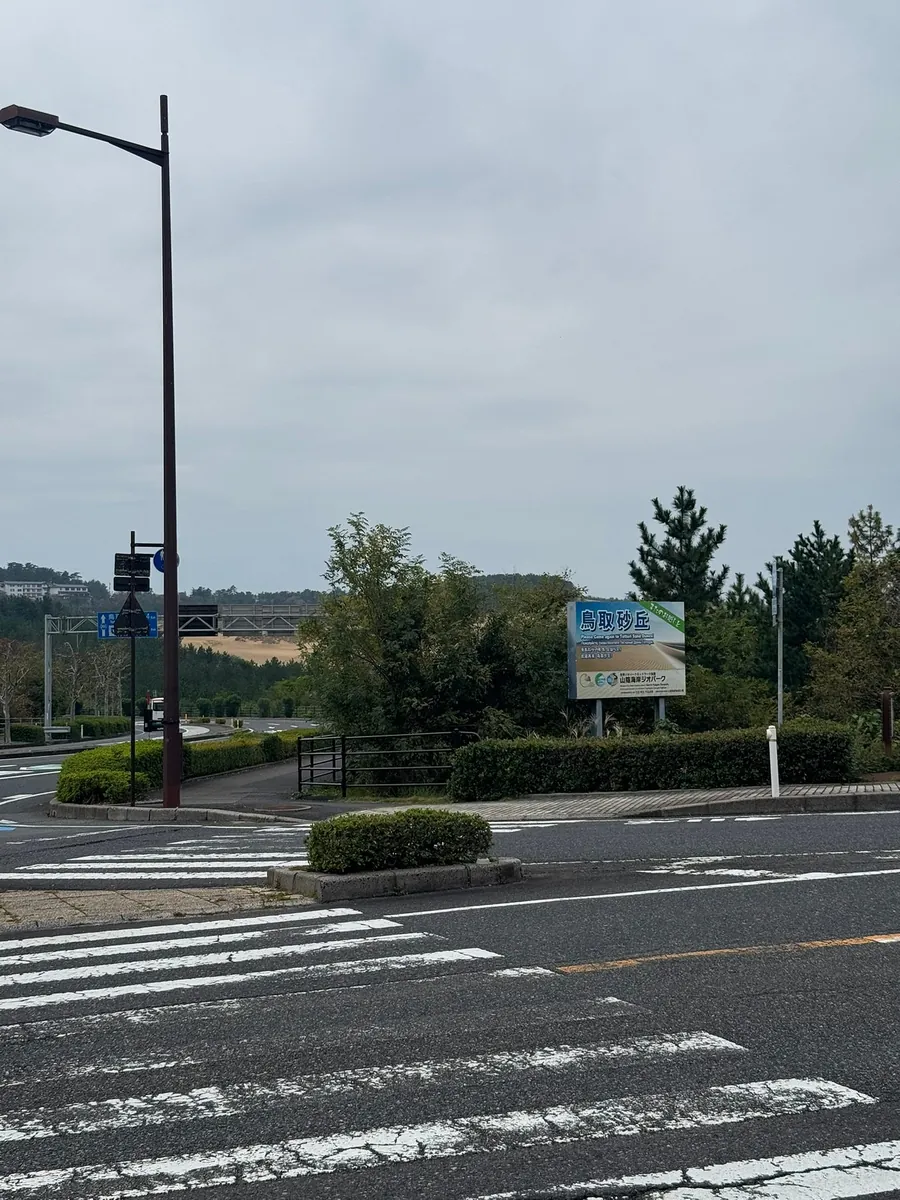
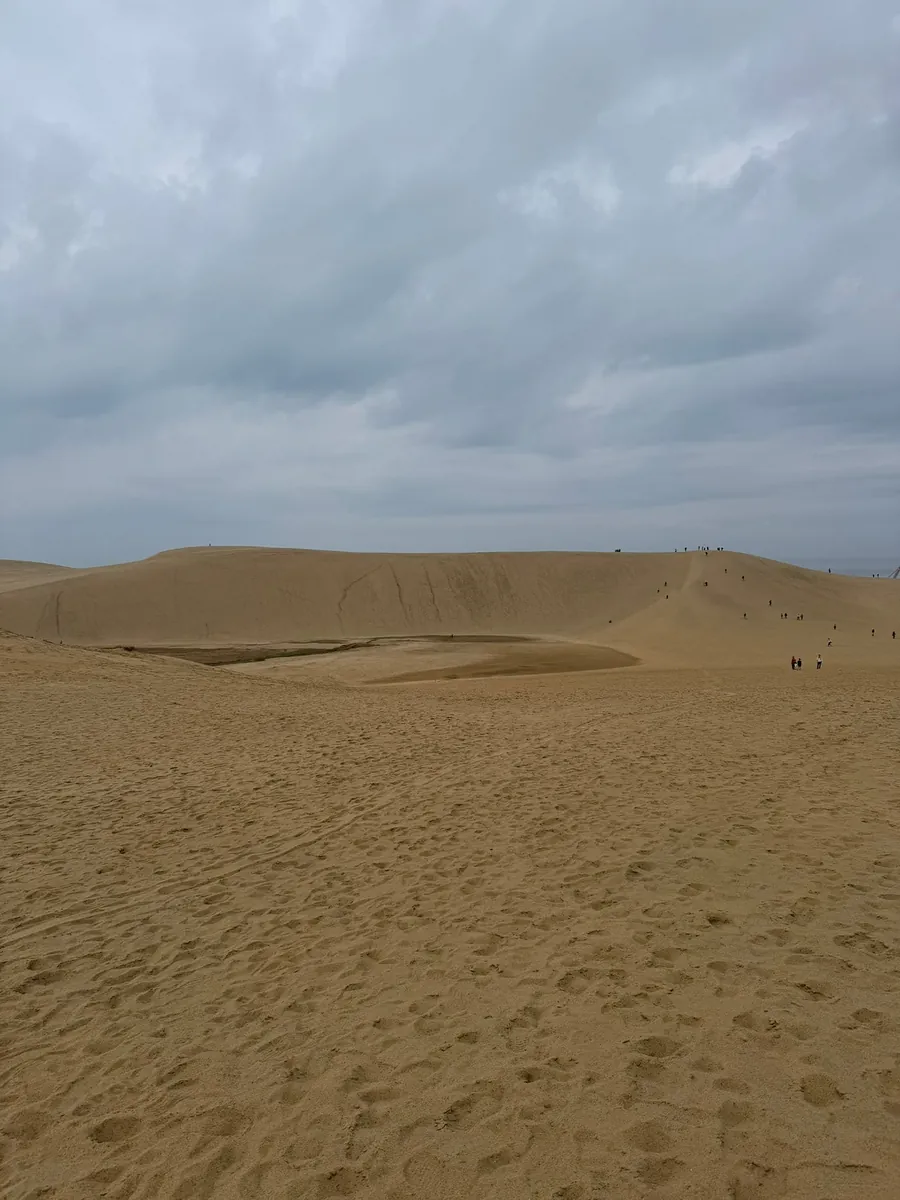
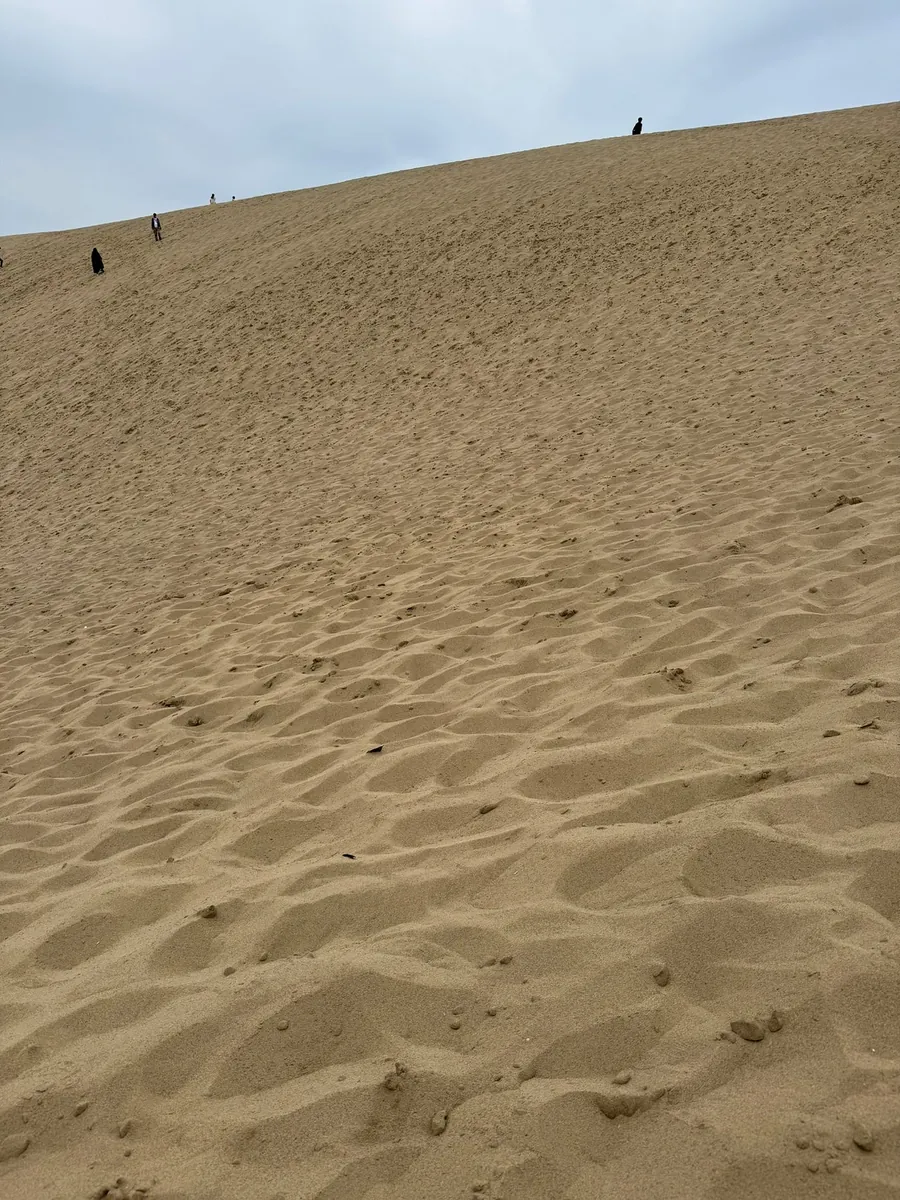
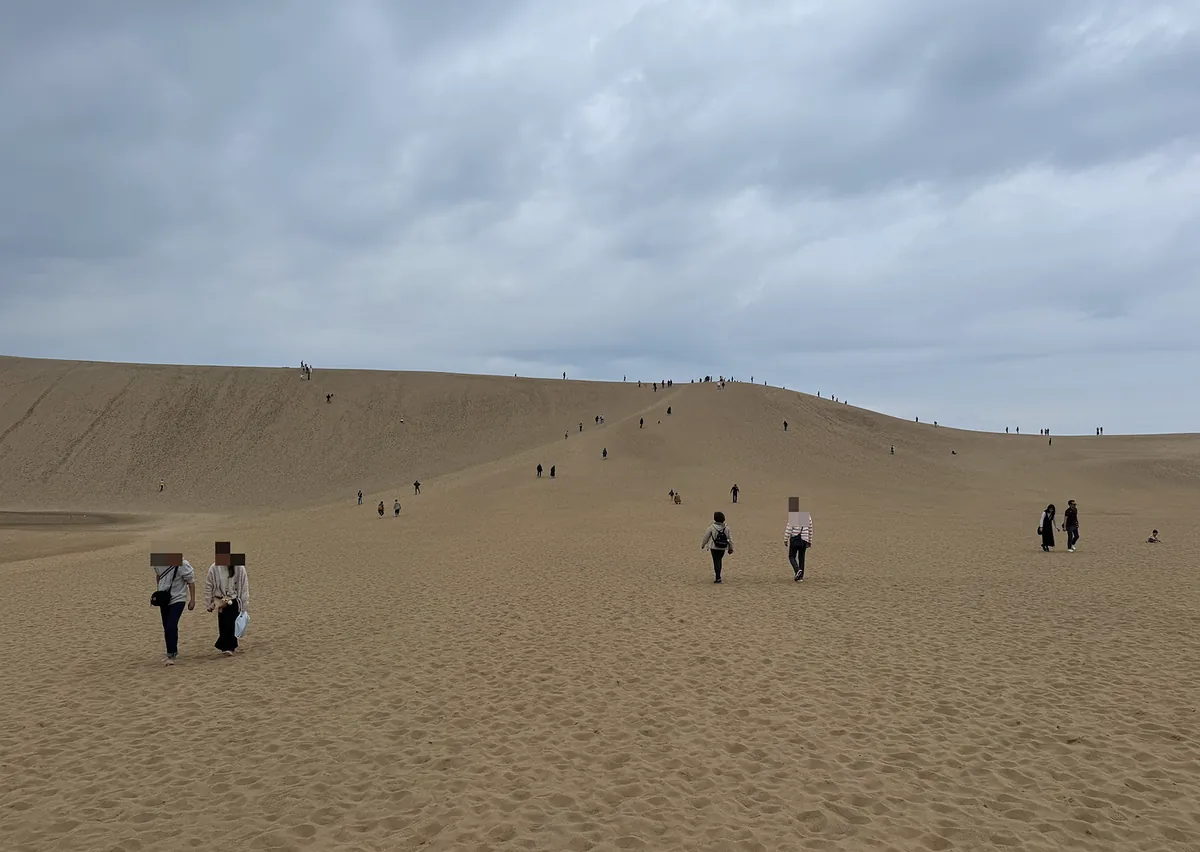
~=12:00 Arrive at Tottori Sand Dunes
Japan’s largest sand dune.
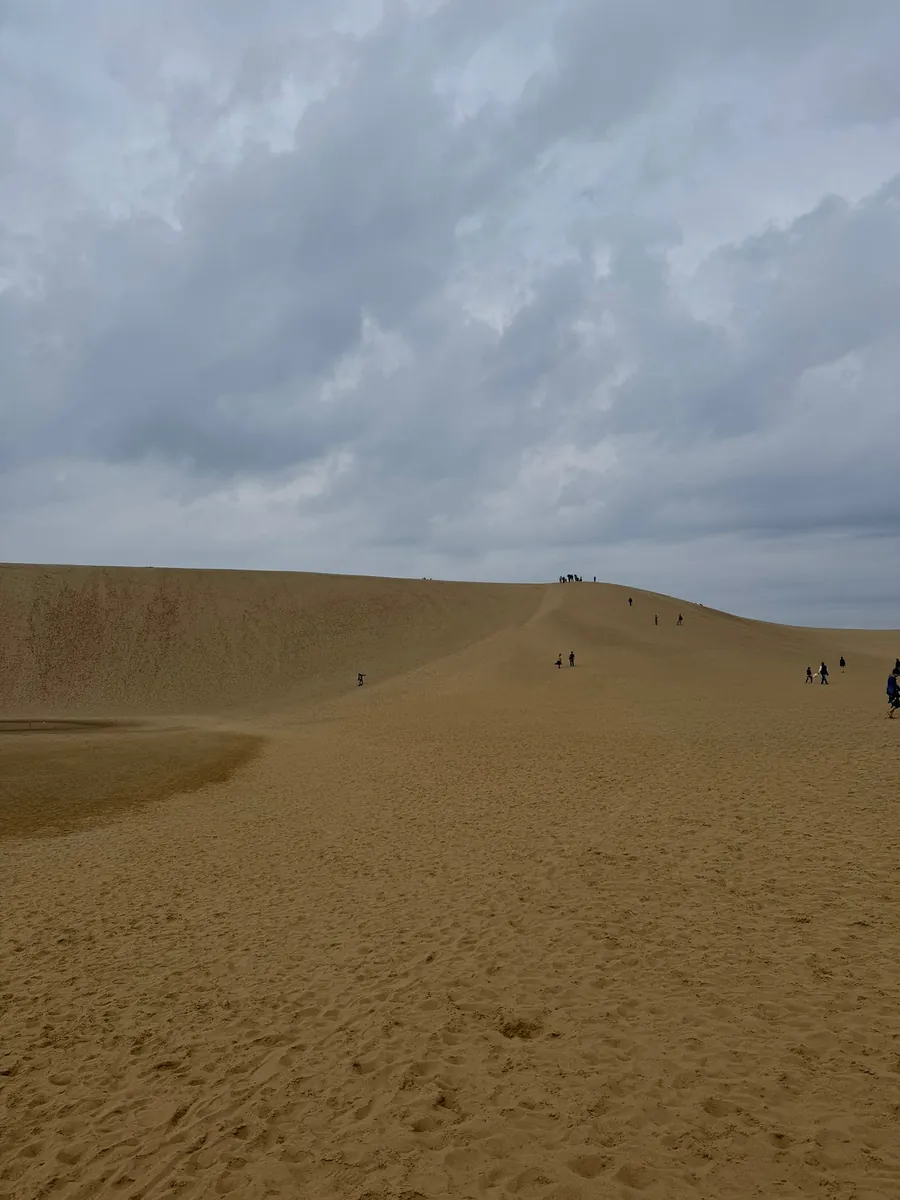
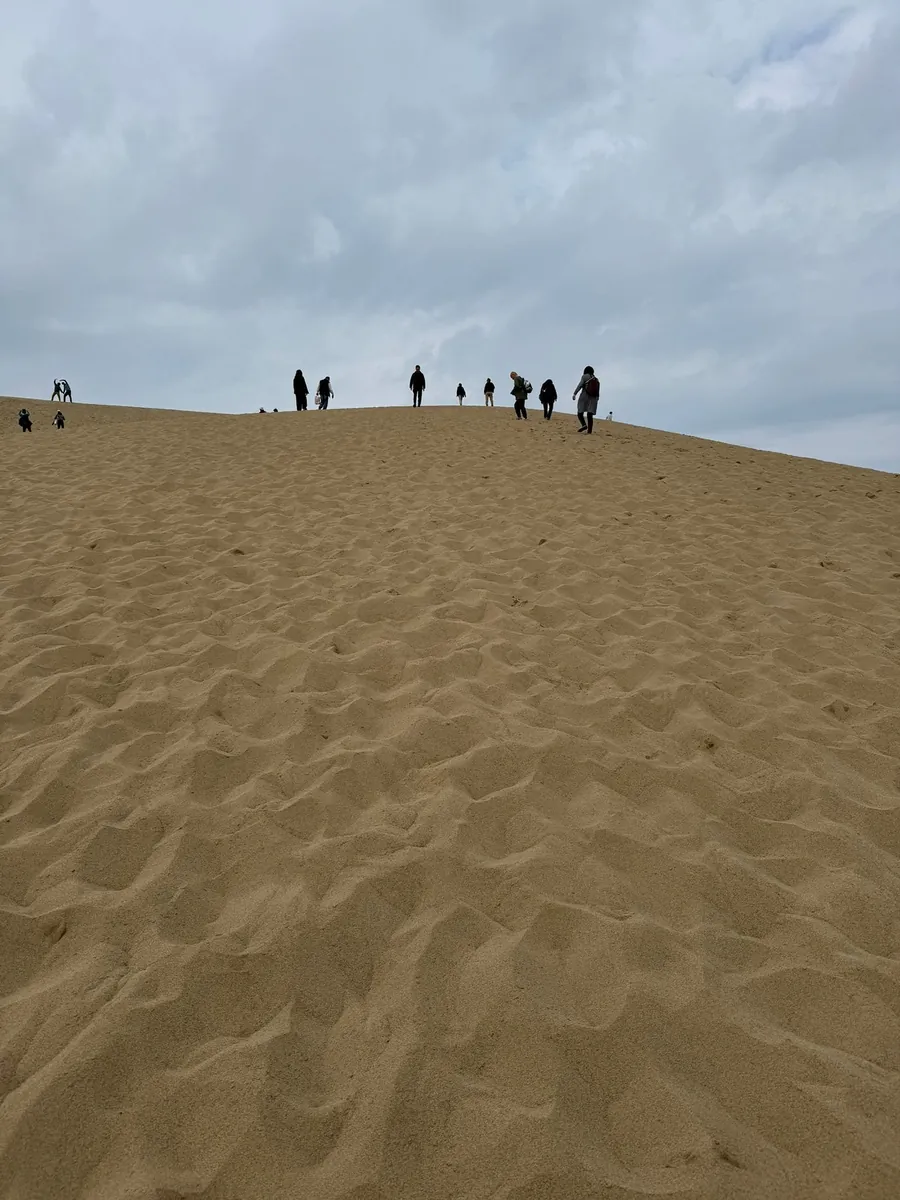
People look very small. Walking all the way up to the dune ridge was a bit shaky, and the sand was loose and hard to walk on.
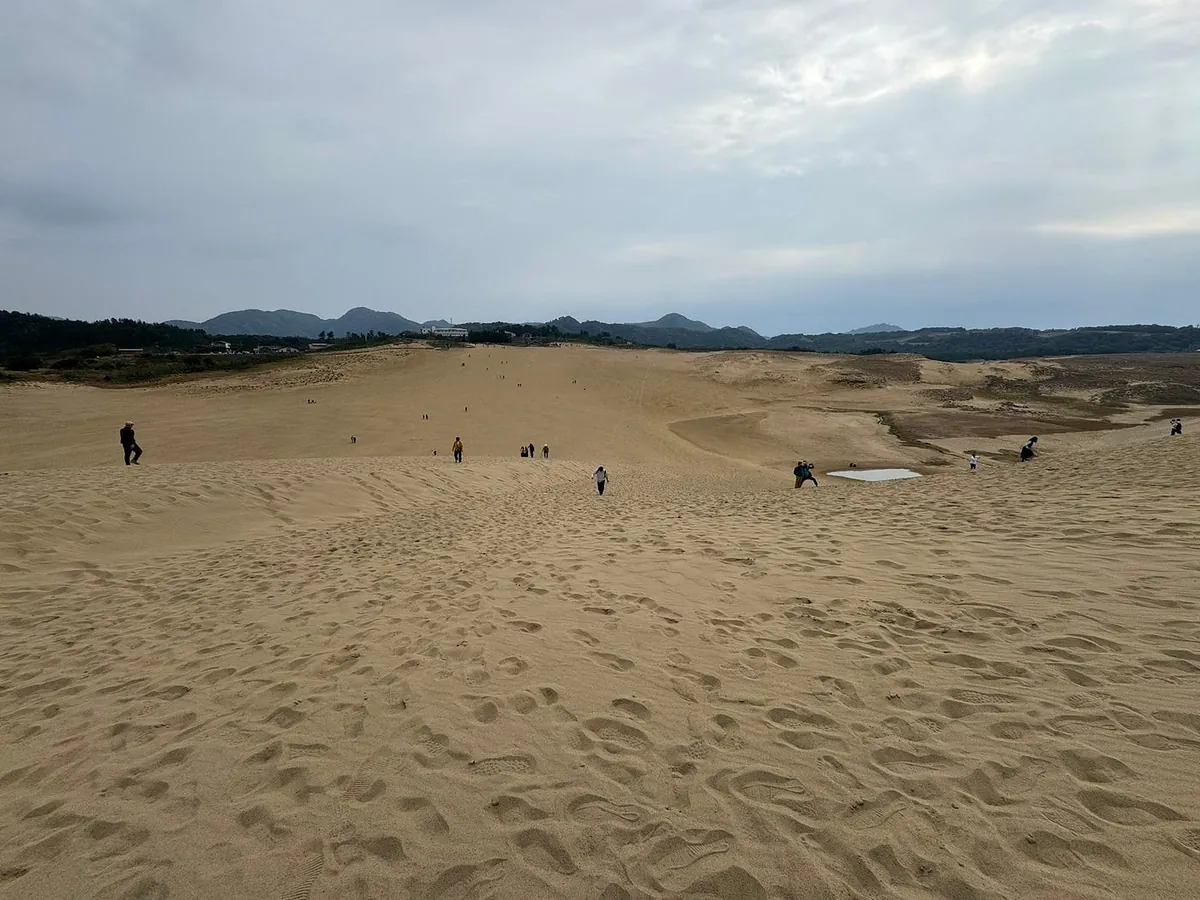
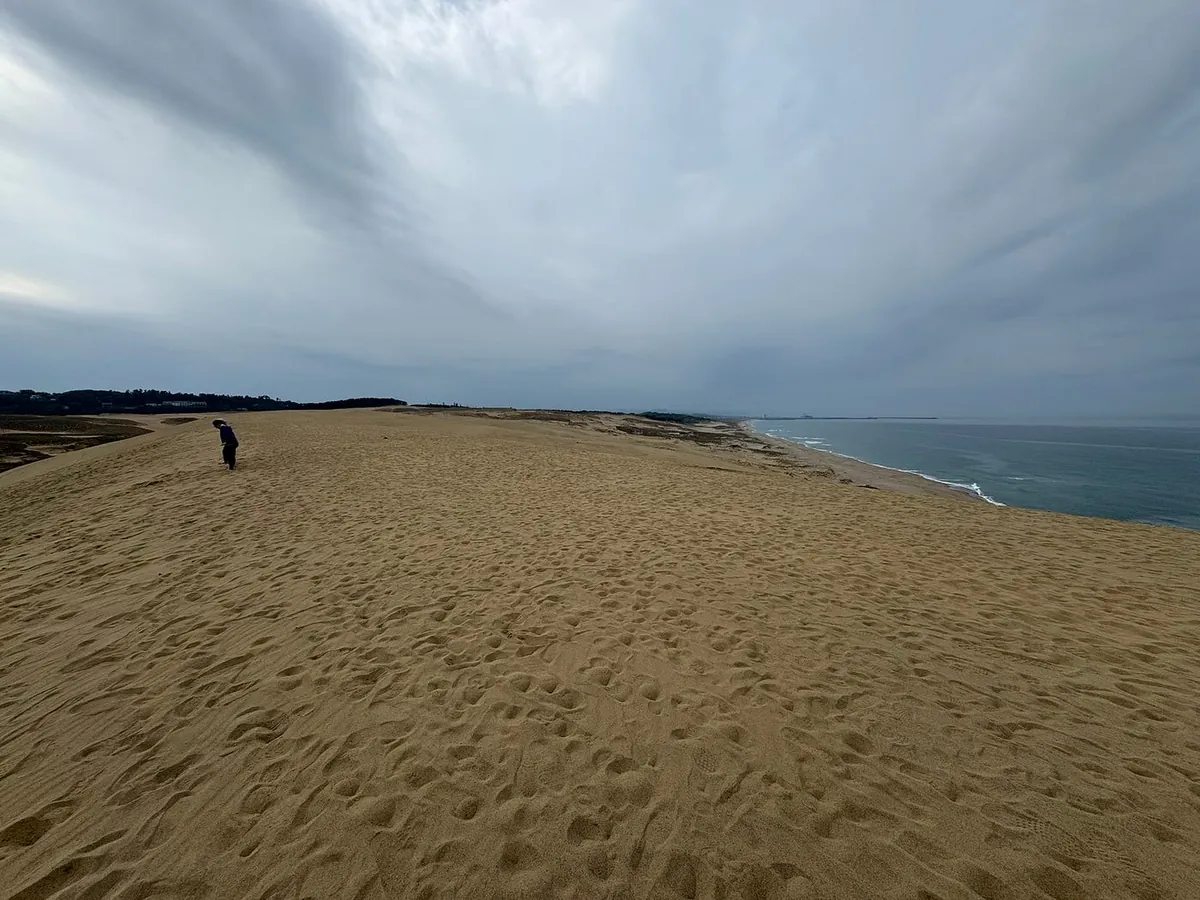
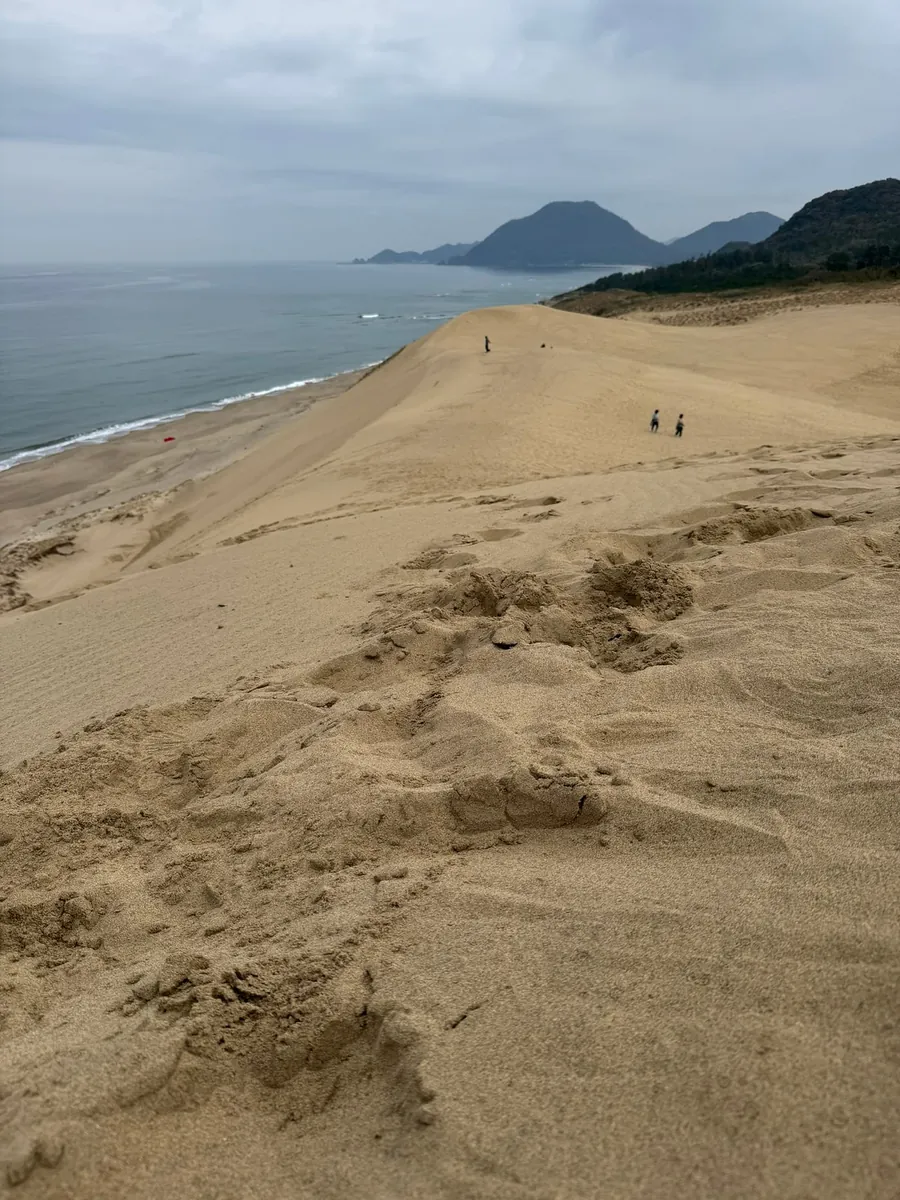
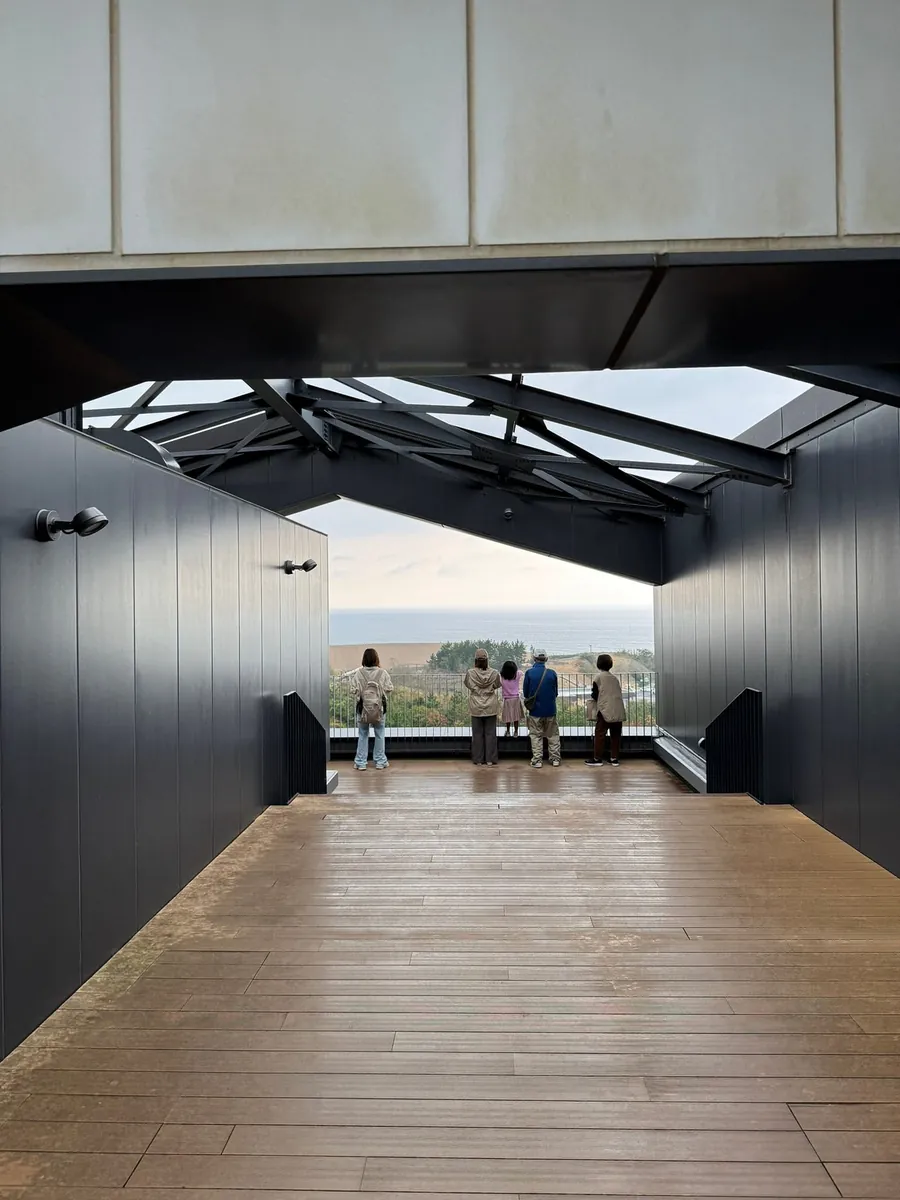
From the highest point, you can overlook the entire coastline. The view of the sand dunes facing the sea is unique to this spot.
According to online information, camel riding is usually available, but it seems it was canceled today due to bad weather.
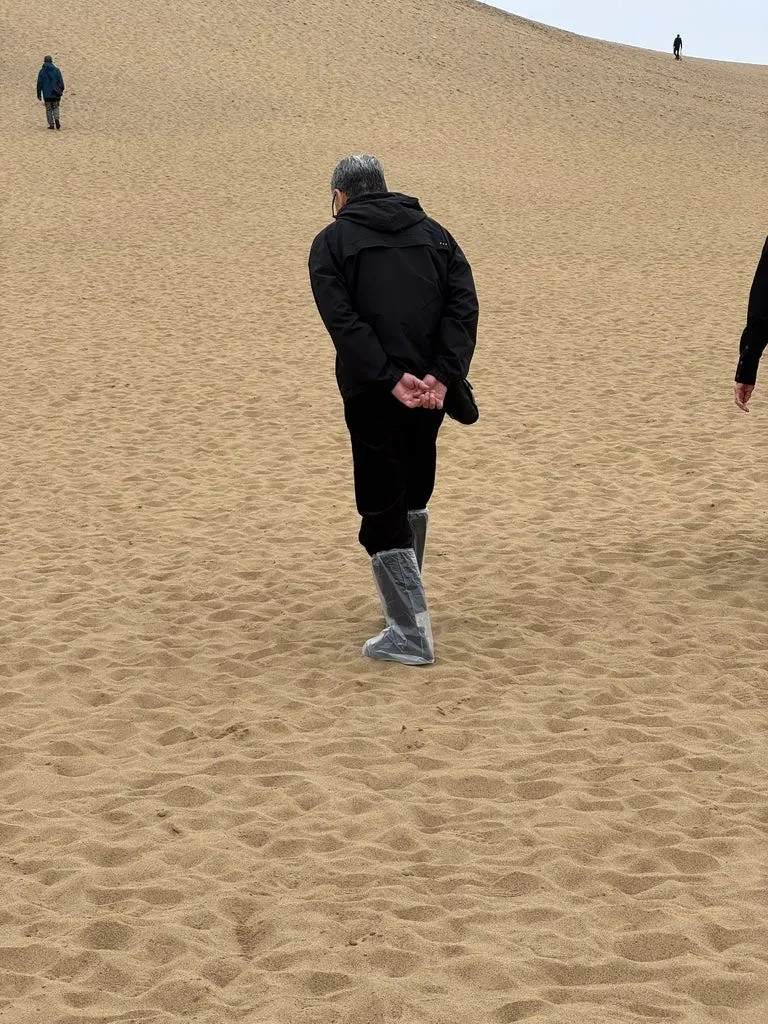
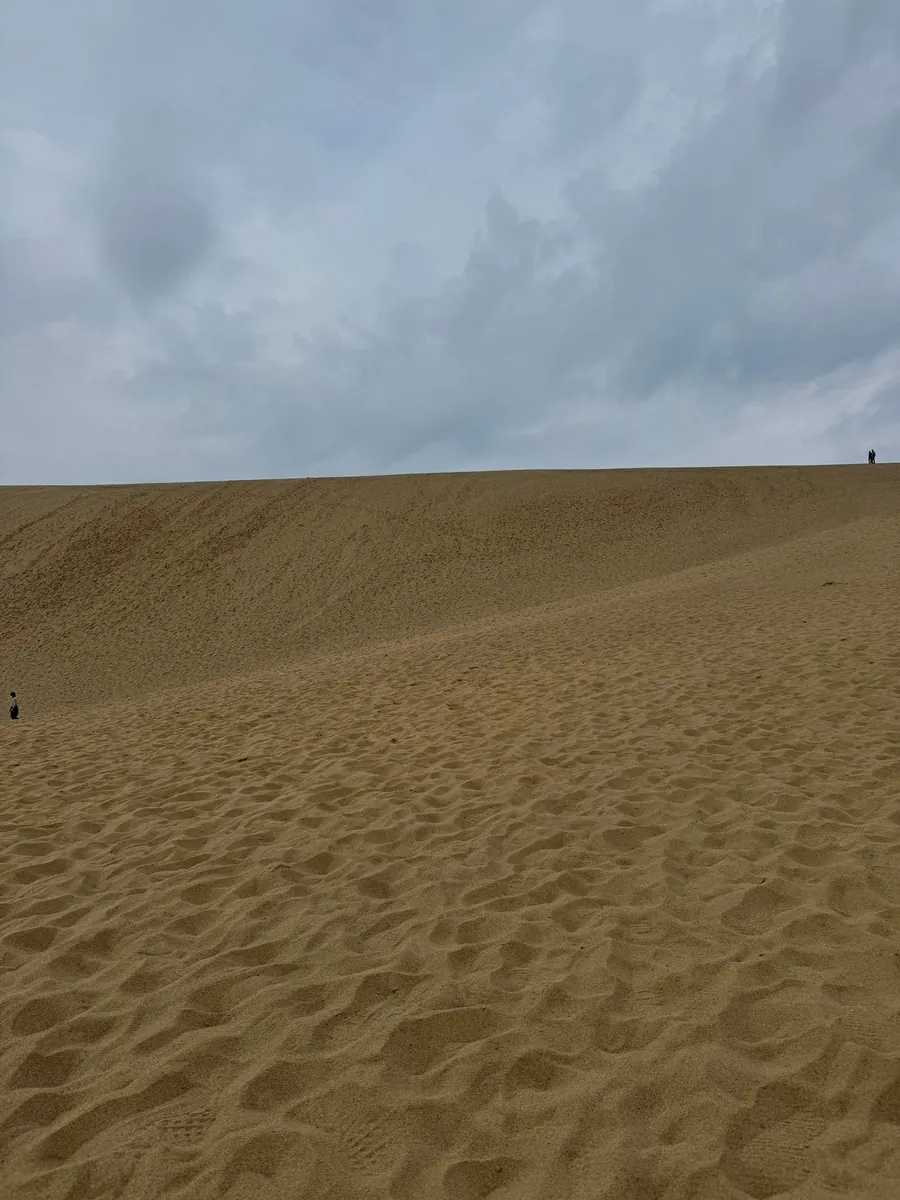
Looking back at Tottori Sand Dunes as I left, it really is huge; some sand inevitably got into my shoes. I saw someone smartly put on plastic shoe covers.
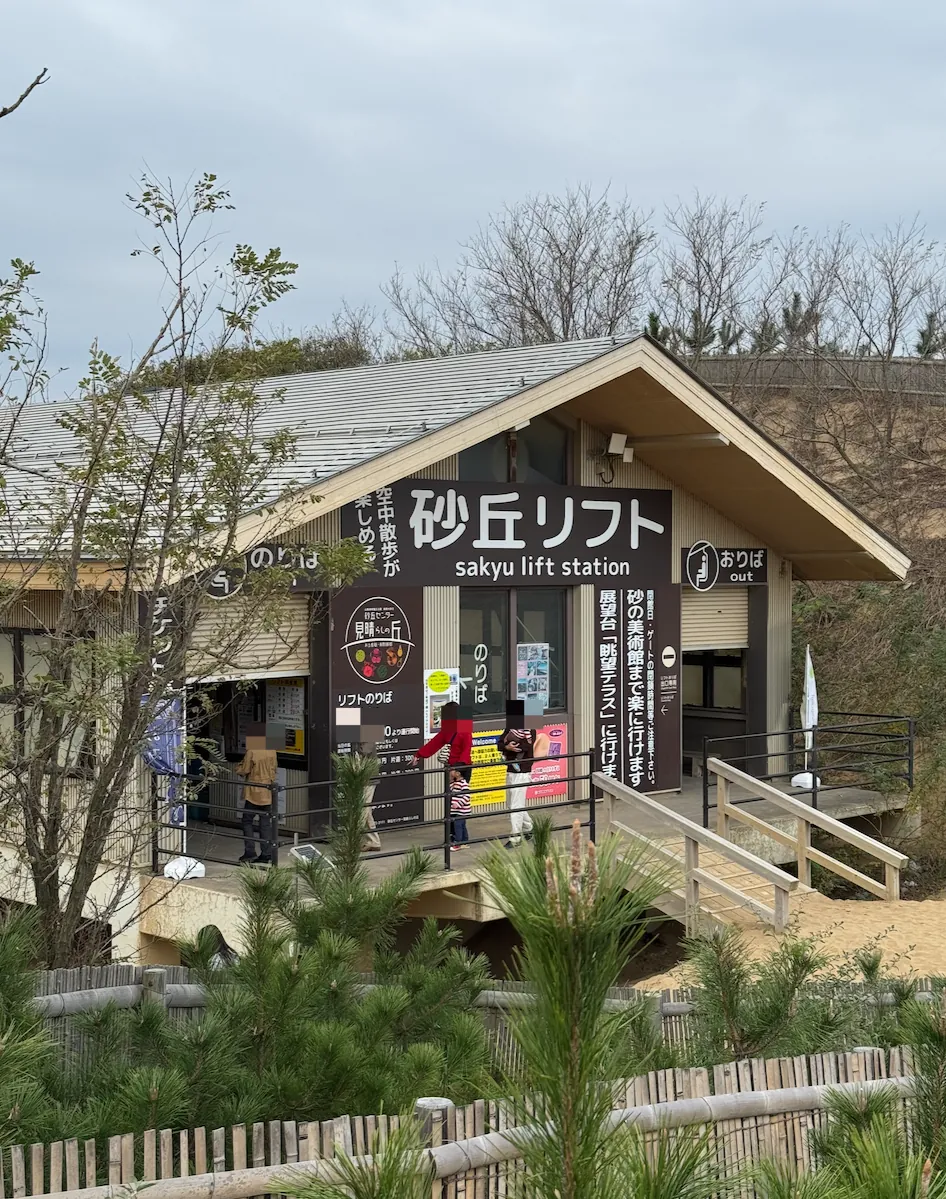
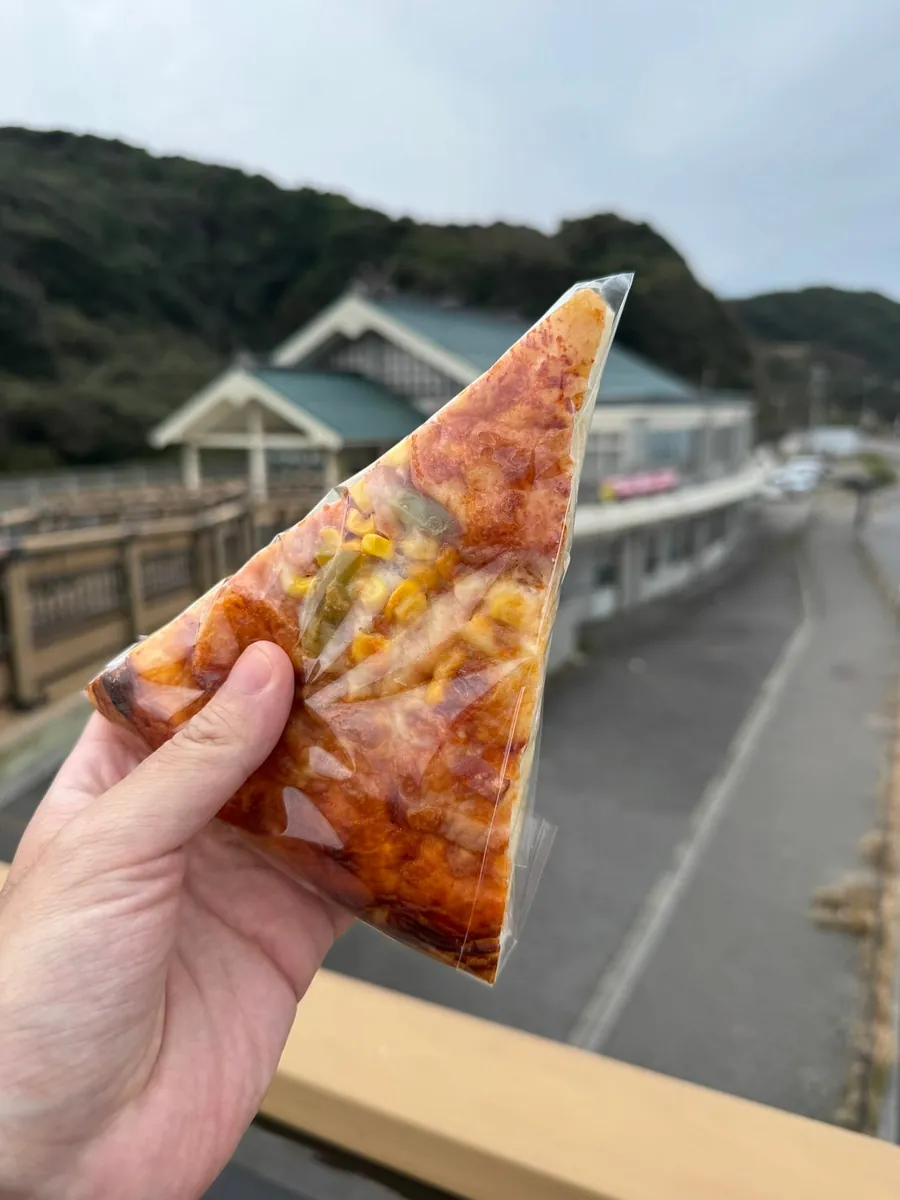
You can take the cable car directly to the Tottori Sand Dunes Observatory. I decided to first go down and try the famous Tottori No.1 Sand Dune Pudding, so I didn’t take the cable car. Later, I walked up since it was on the way and not far (about 15 minutes).
Exiting from the parking lot, you can see across the street the Tottori Sand Dunes “Takahama Cafe 高濱咖啡廳,” designed by Kengo Kuma.


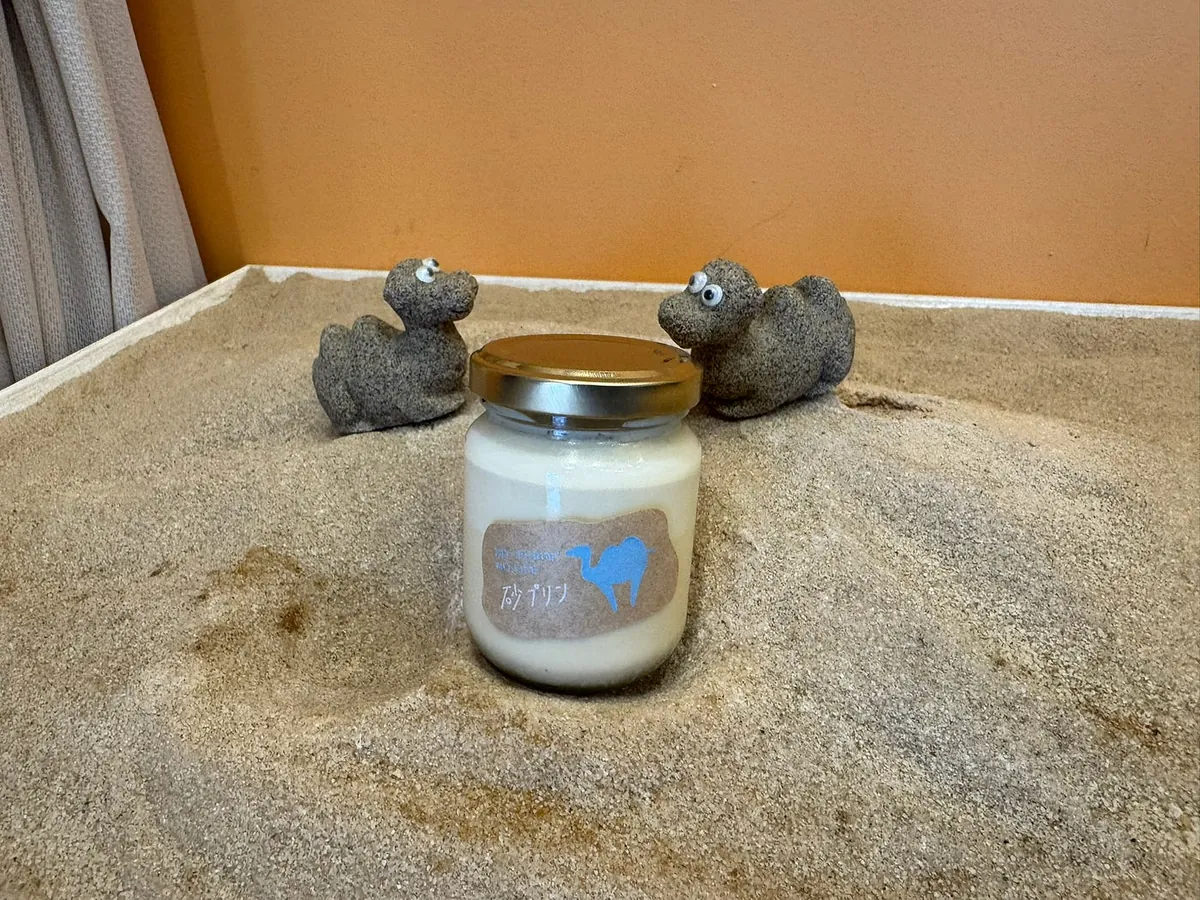
Bought one to try, the taste is really good. The pudding has a rich milk flavor and a texture similar to cheesecake.
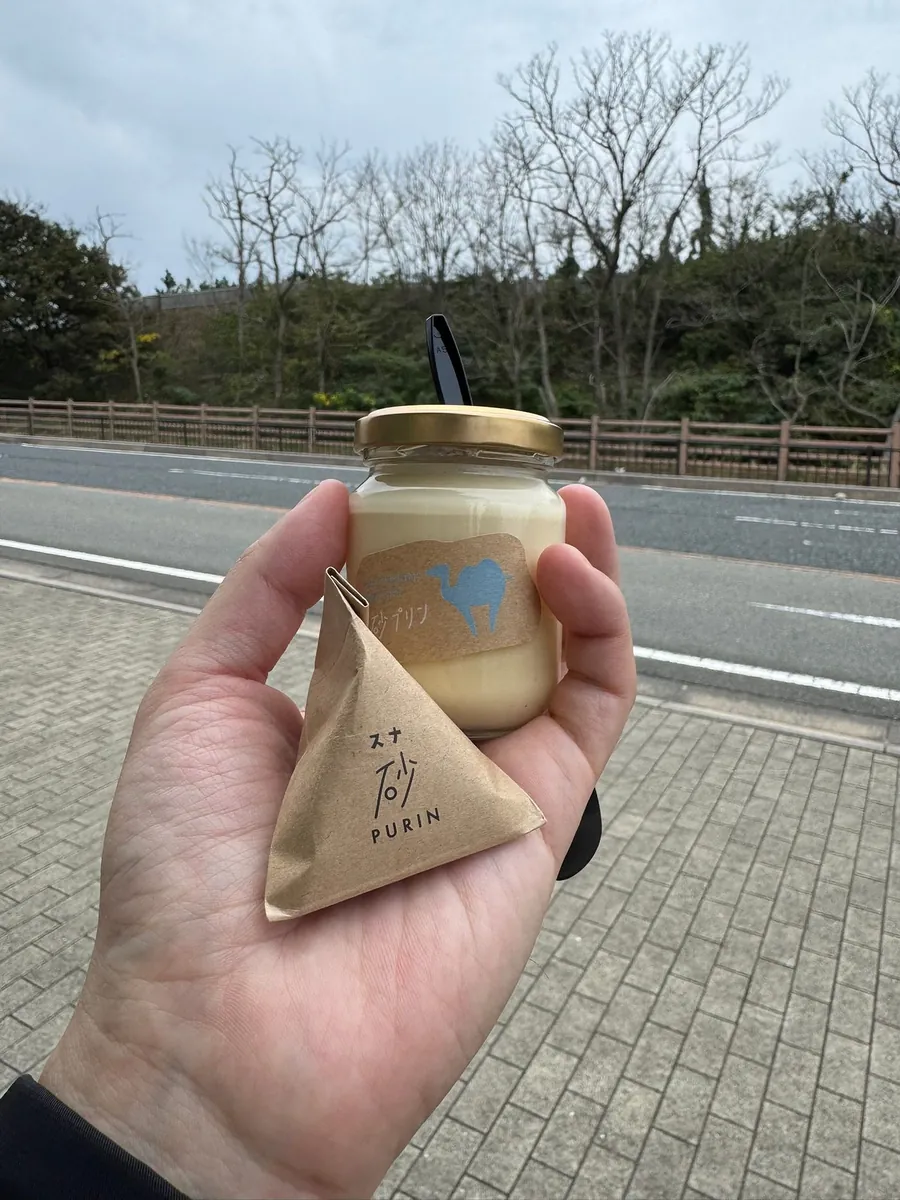
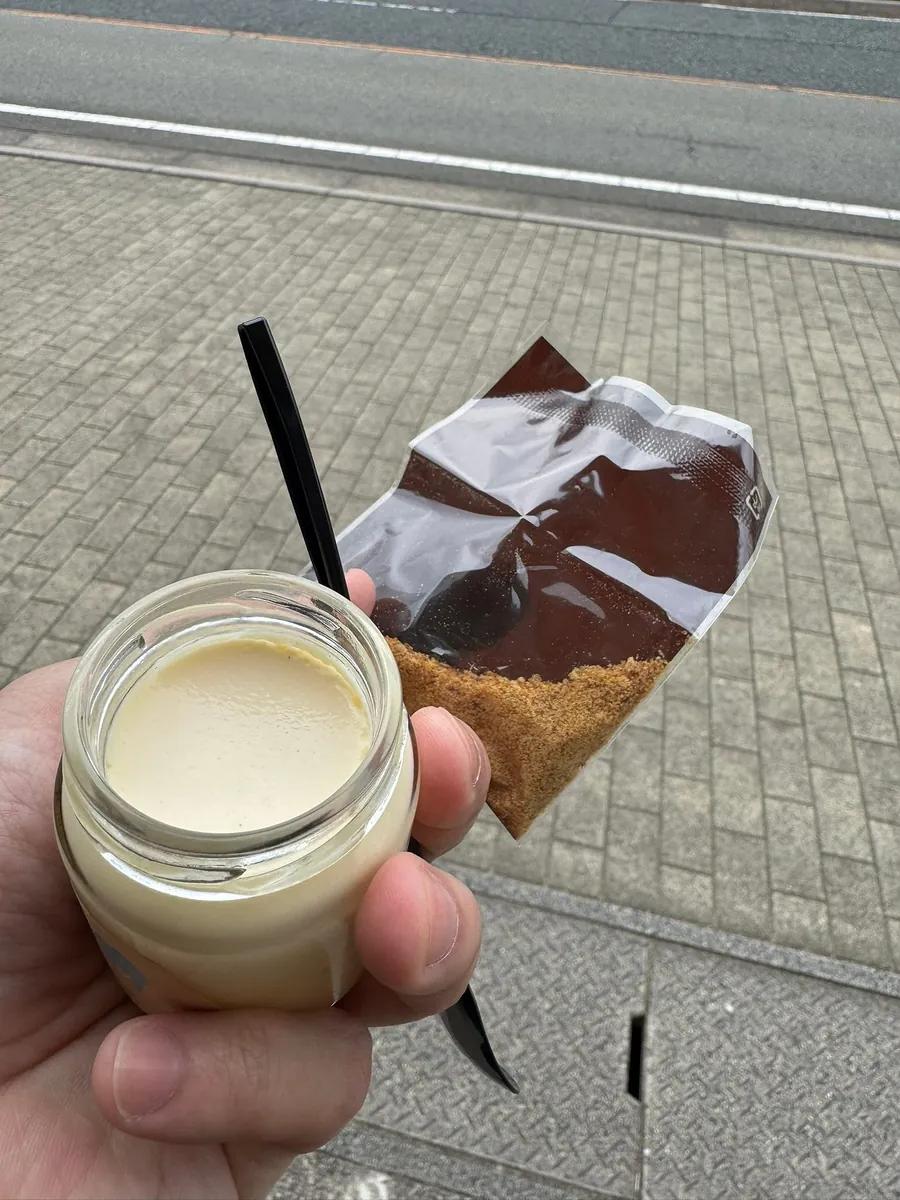
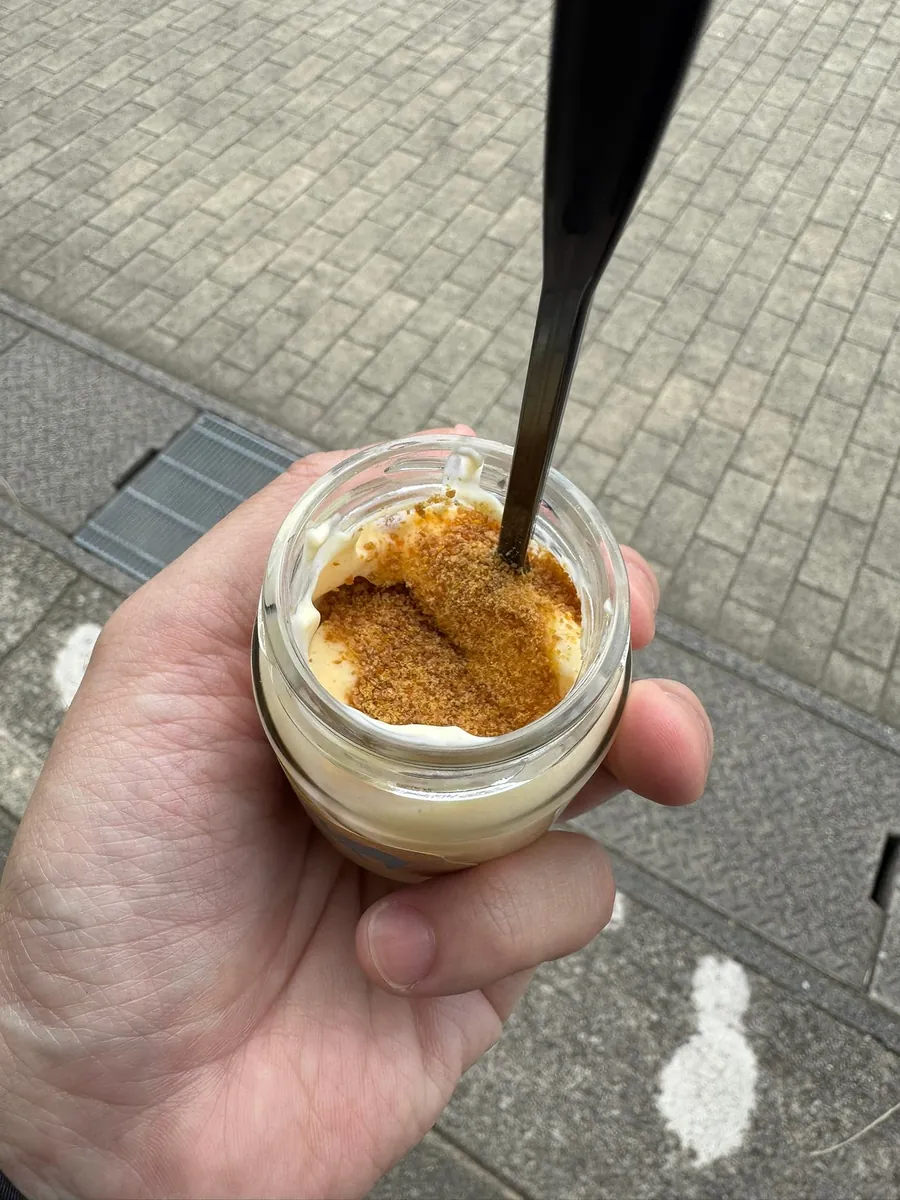
A special feature is that they give you a small packet of sugar that looks like sand to add and eat together.
There are also some restaurants along this road. Continuing back, there is a small path; walk up a short distance and the Sand Dunes Museum second entrance is on the right. On the left, if you go up a bit further, you’ll reach the “Tottori Sand Dunes Observatory” where the cable car arrives.
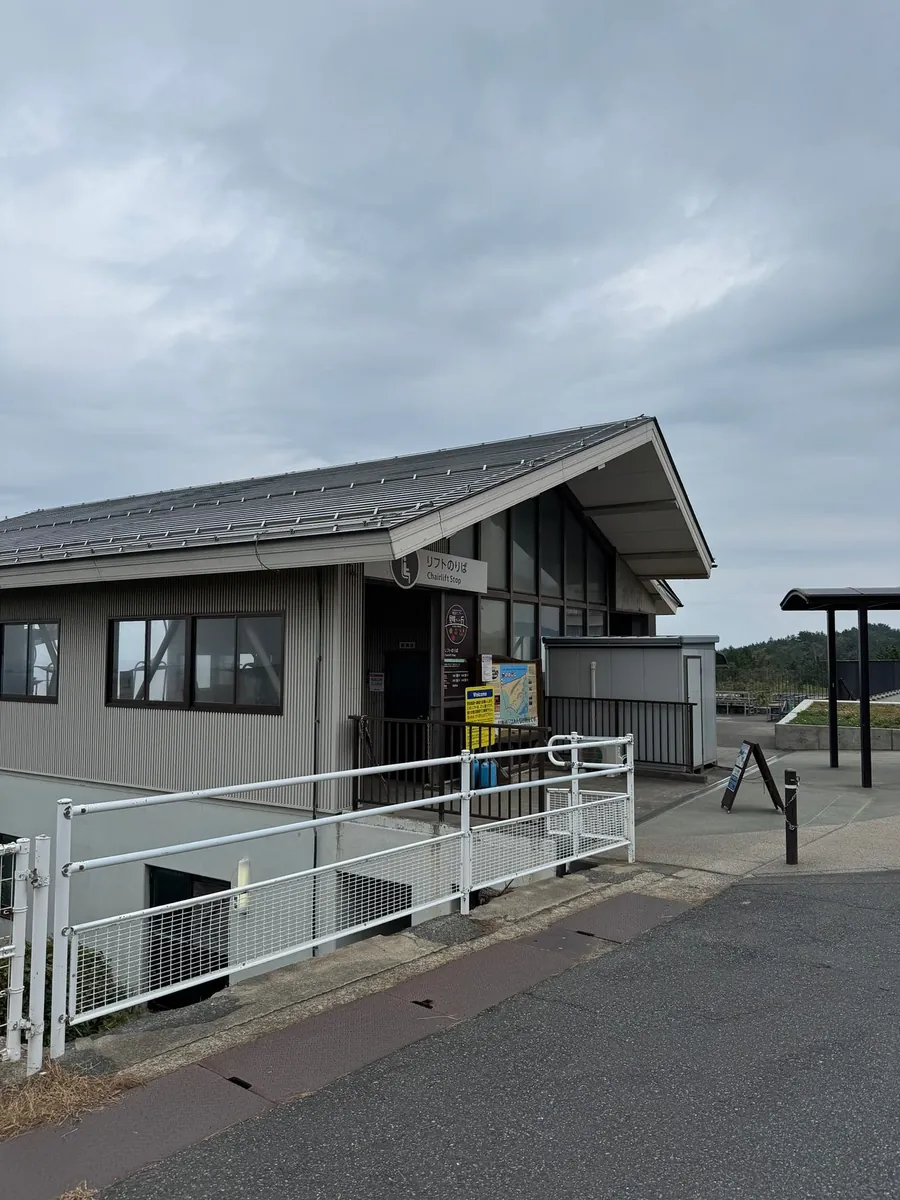
First, head left to the Tottori Sand Dunes Observatory to enjoy the view and have some food. You will arrive at the cable car boarding area first.
You can first go to the vending area and use the brush nearby to clean the sand off your shoes. (The staff at the entrance will also remind you.)
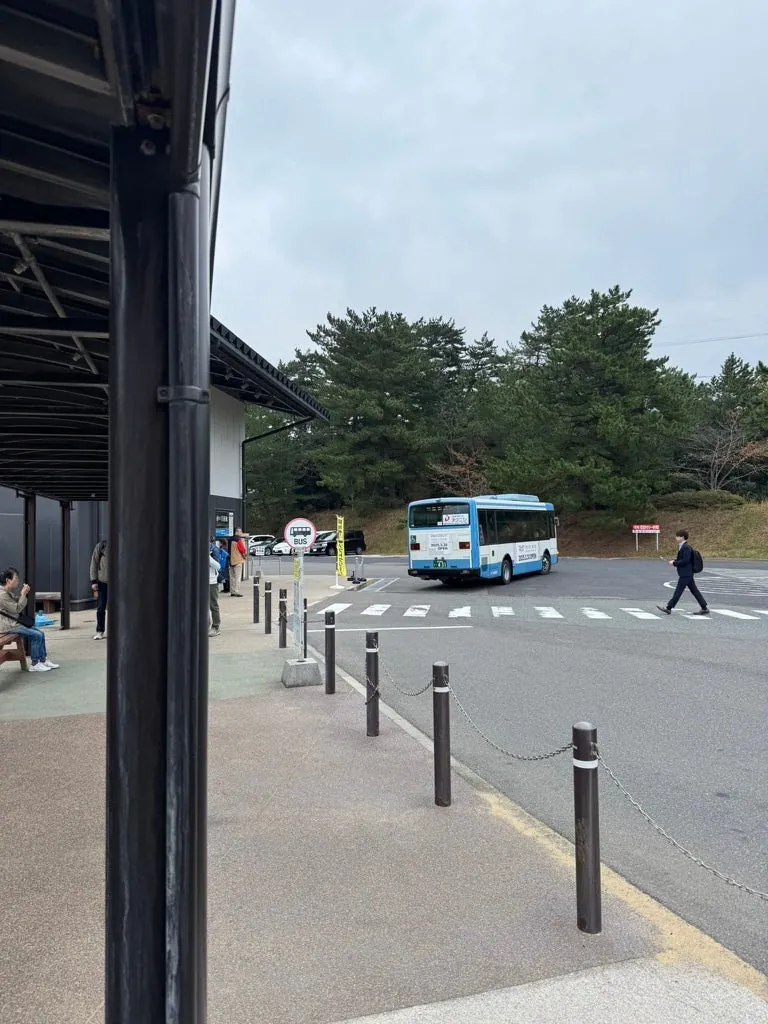
Finally, waited here for the bus back to Tottori.

The first and second floors of the observation deck sell souvenirs and have a small restaurant. On the third floor, you can go up to view the Tottori Sand Dunes (although there isn’t much to see).

There aren’t many food options inside. You need to first buy the corresponding meal ticket from the nearby vending machine, then enter, find a seat, and hand the ticket to the staff.
Had a casual oyster set meal.
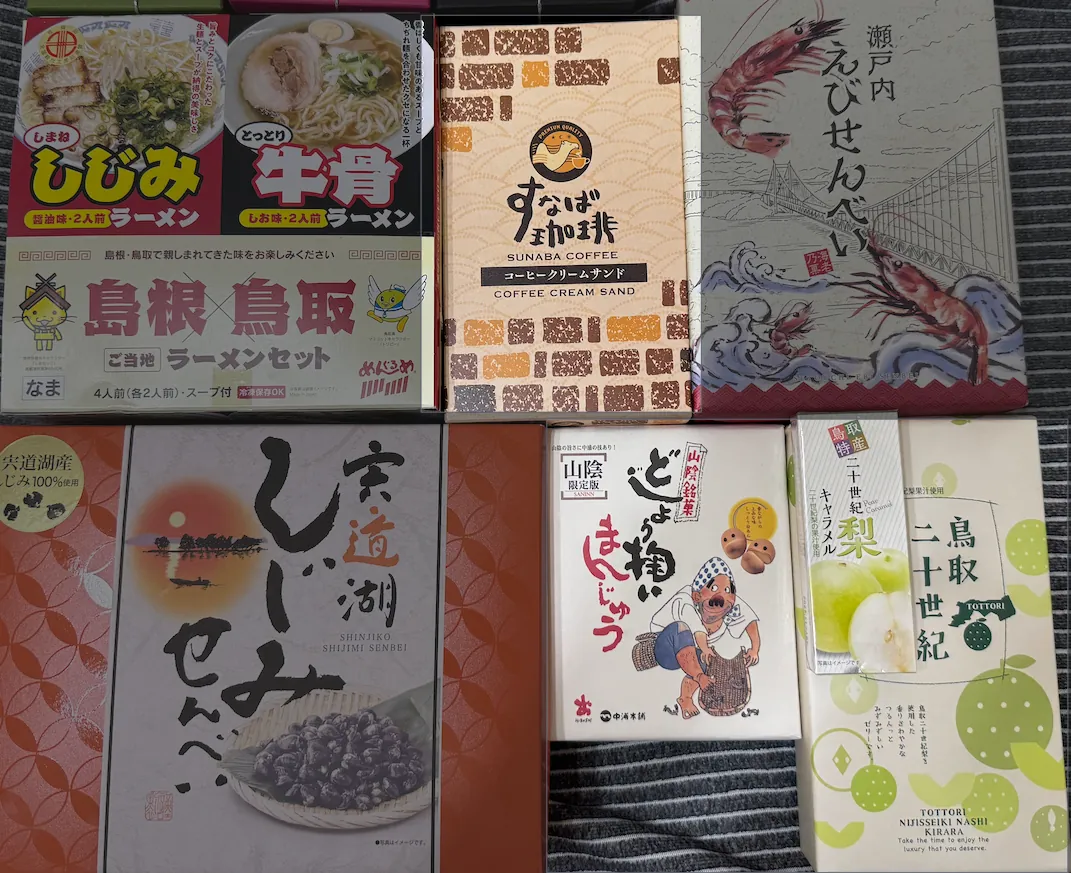
I also bought some souvenirs from Tottori here.
13:30 Dune Art Museum
After eating, head down from Entrance No. 2 to visit the Sand Dunes Museum. (Also free admission with the 3-Day Pass )
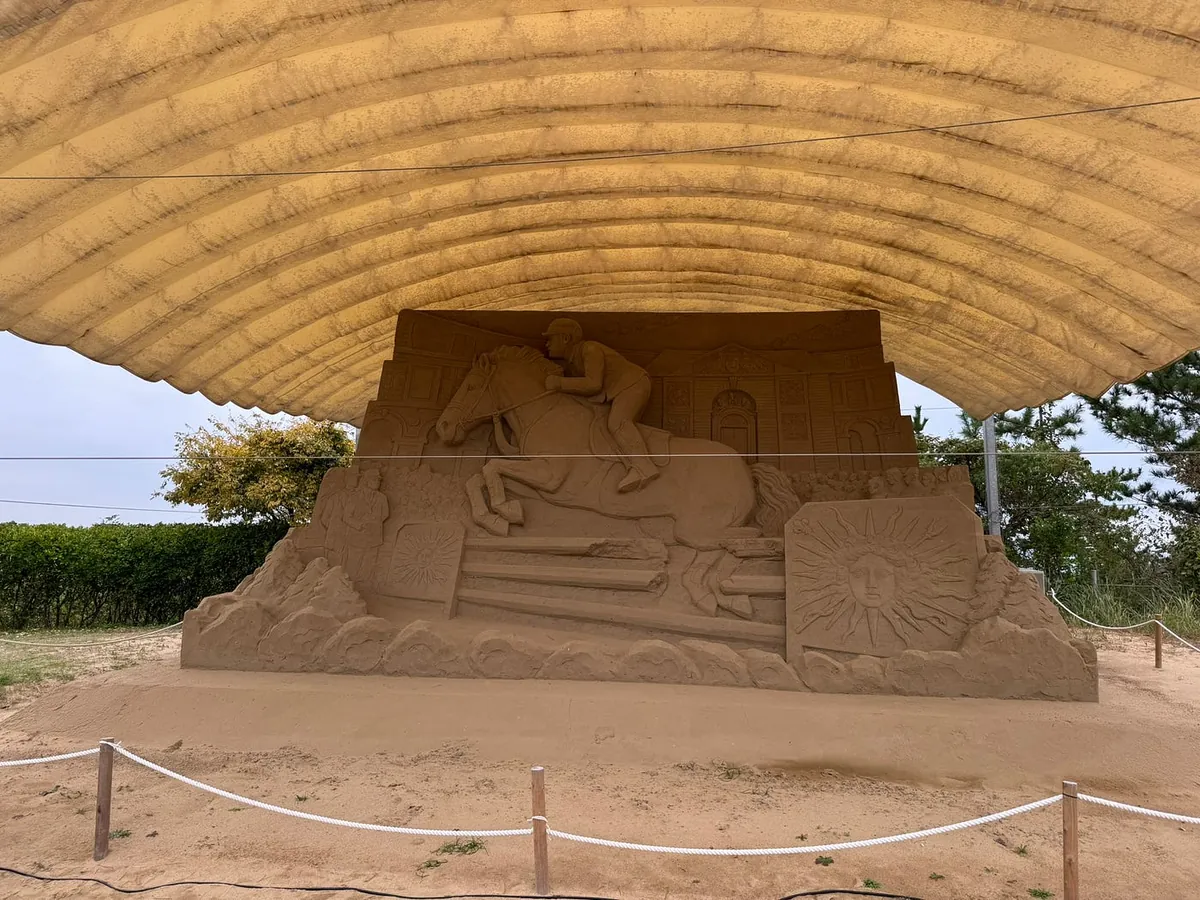
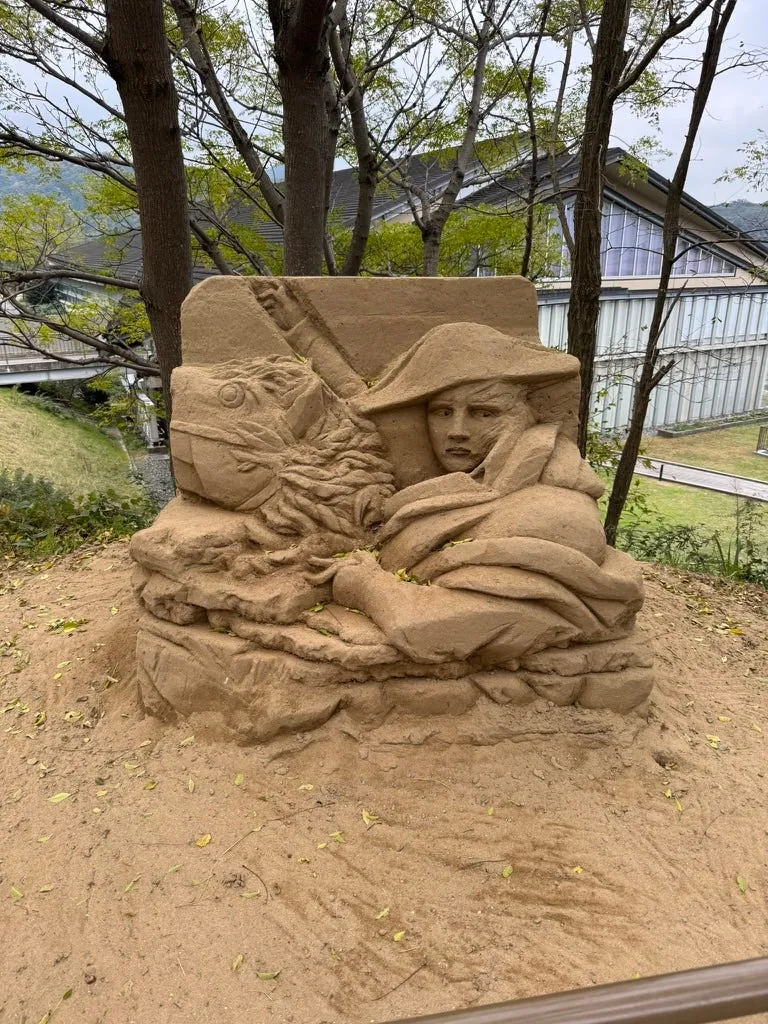
Starting from Entrance No. 2, the tour begins with the sand sculptures outside, then goes down from the 3rd floor to the 2nd floor. Actually, the sand sculptures are only on the 2nd floor inside the building. The venue is small, and if it weren’t free, I probably wouldn’t have entered.


Although the venue is small, the details of each sand sculpture are very exquisite.
There is also a funny QR Code for the Sand Dunes Art Museum that you can scan.
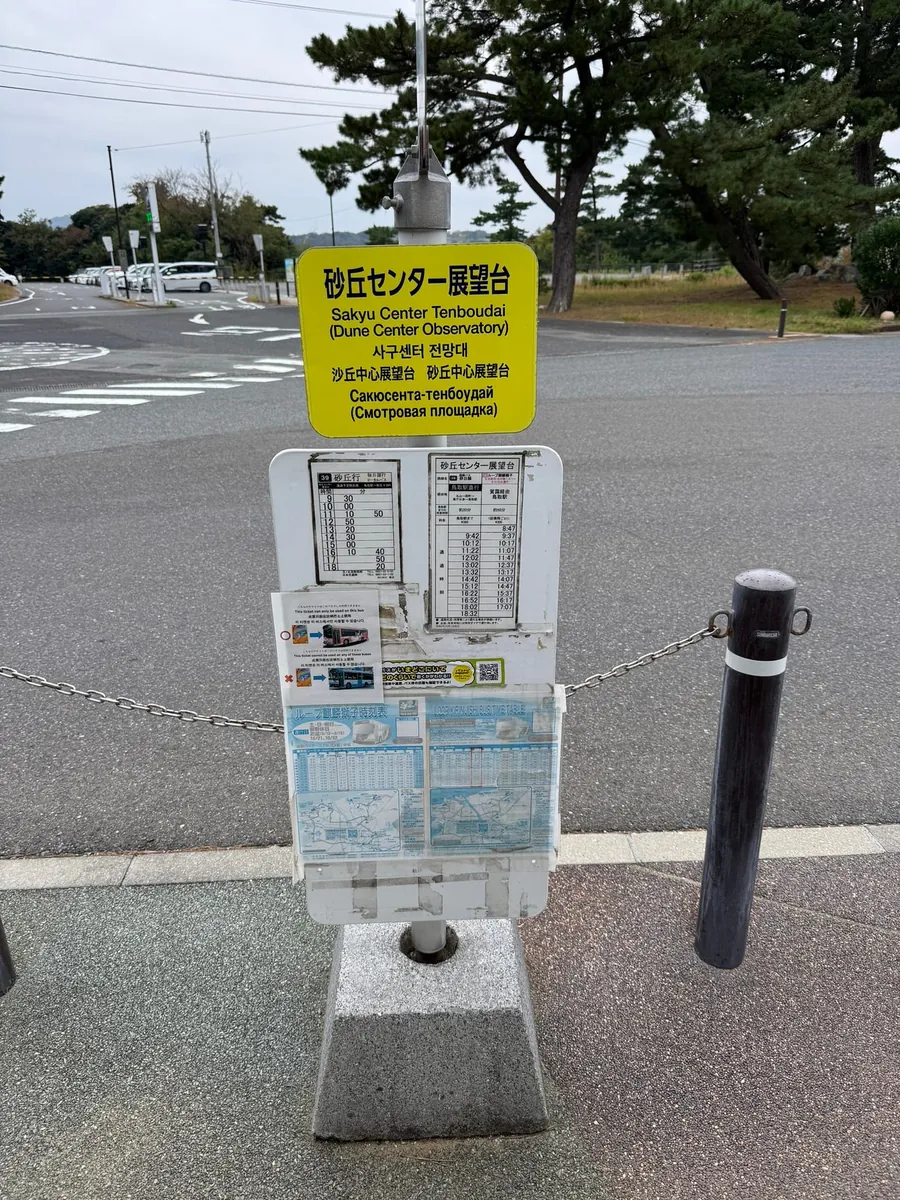
After walking around, I went back up to the Tottori Sand Dunes Observatory. Wandering around, I had a Tottori pear ice cream. Around 14:20, I waited at the bus stop for the 14:42 bus heading to Tottori Station.
The bus back to Tottori was almost full when it arrived at this stop, and I barely squeezed on. If you have time, it might be better to board at the previous stop.
2025/01 Update
After returning, I noticed that because transportation in Tottori is less convenient, there is a taxi charter service for a one-day tour. For details, please refer to the tourist center or this website.
15:10 Return to Tottori Station
Around 15:10, I returned to Tottori Station, and it started raining at that time.
Wandering around the shops in the station, the souvenir store here also sells Dune pudding!
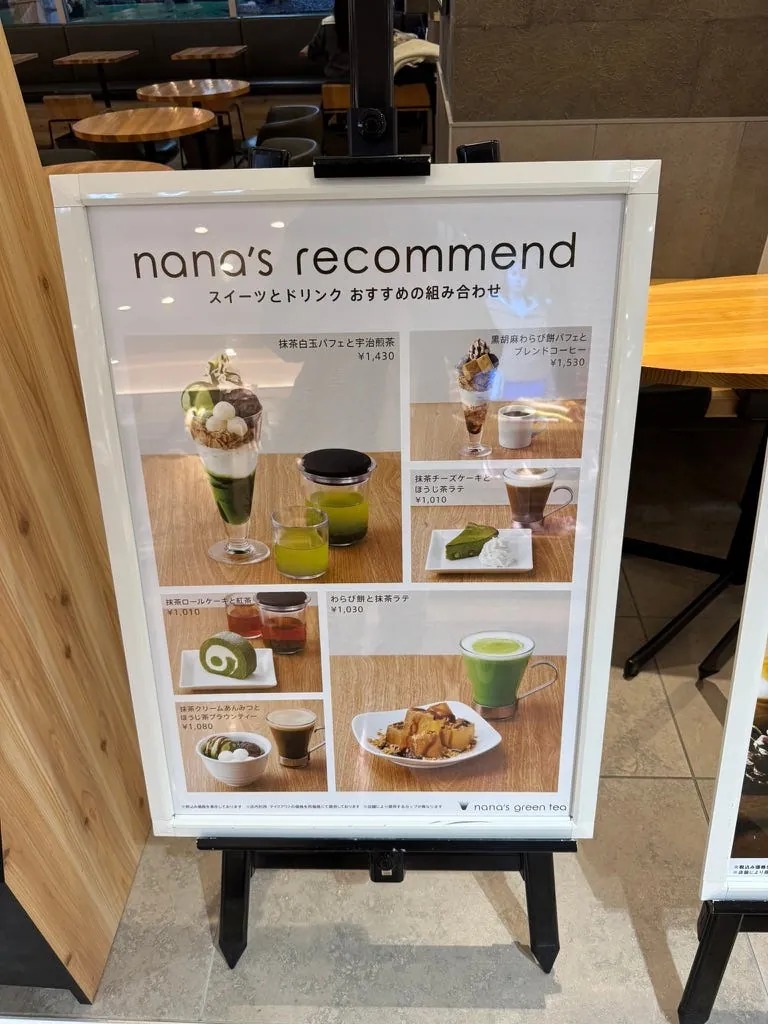
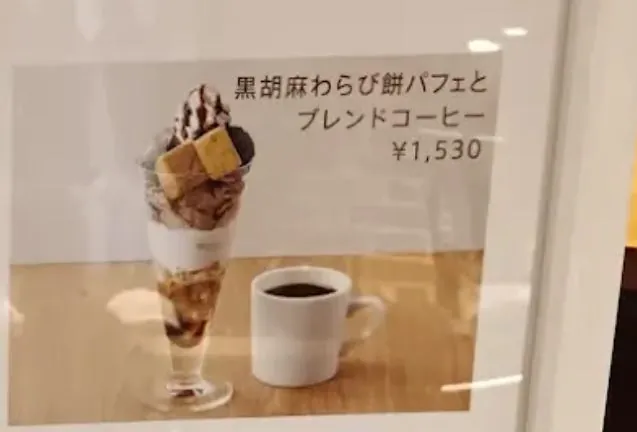
I originally wanted to visit Tottori’s famous すなば珈琲 (Sunaba Coffee), but they were already closed after 3 PM. So I found a nana’s green tea inside the station to have some dessert and coffee to recharge (both myself and my phone).
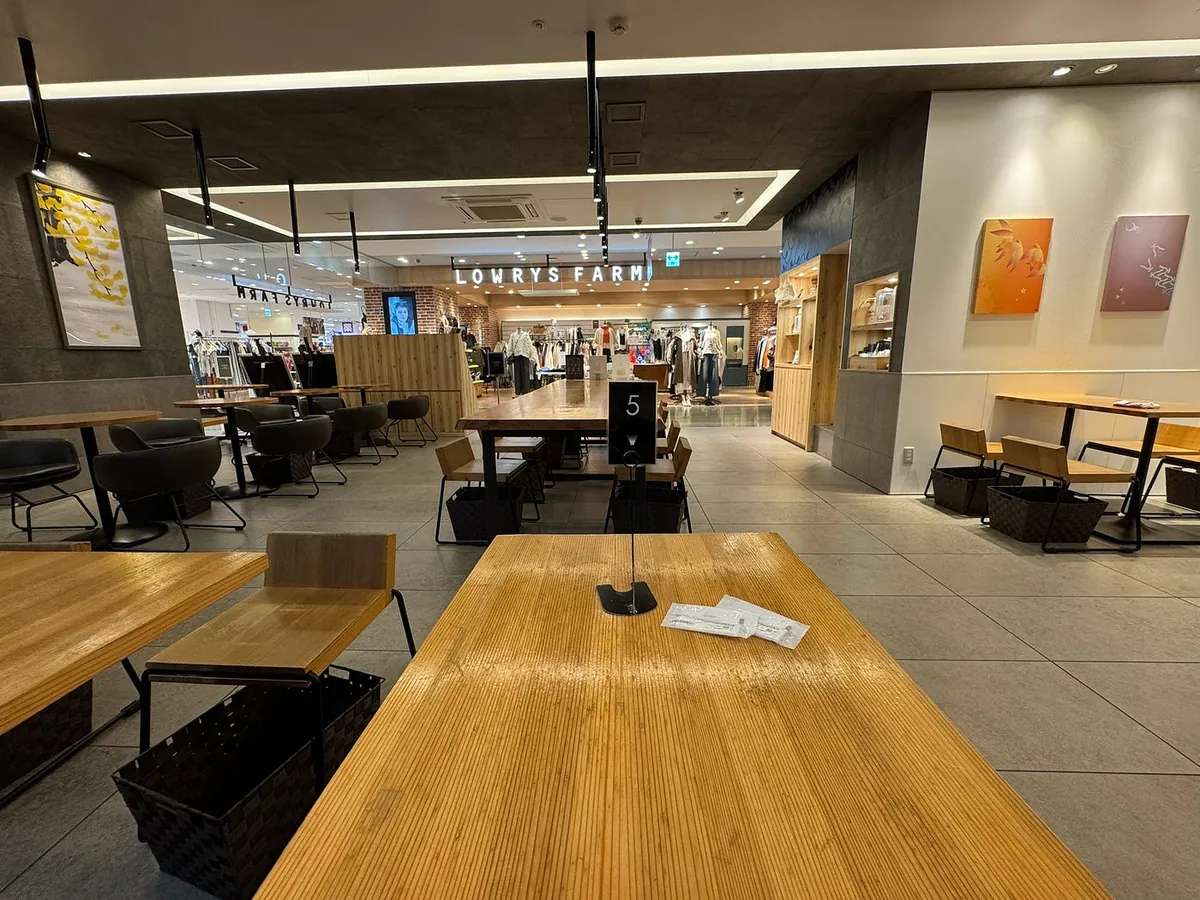
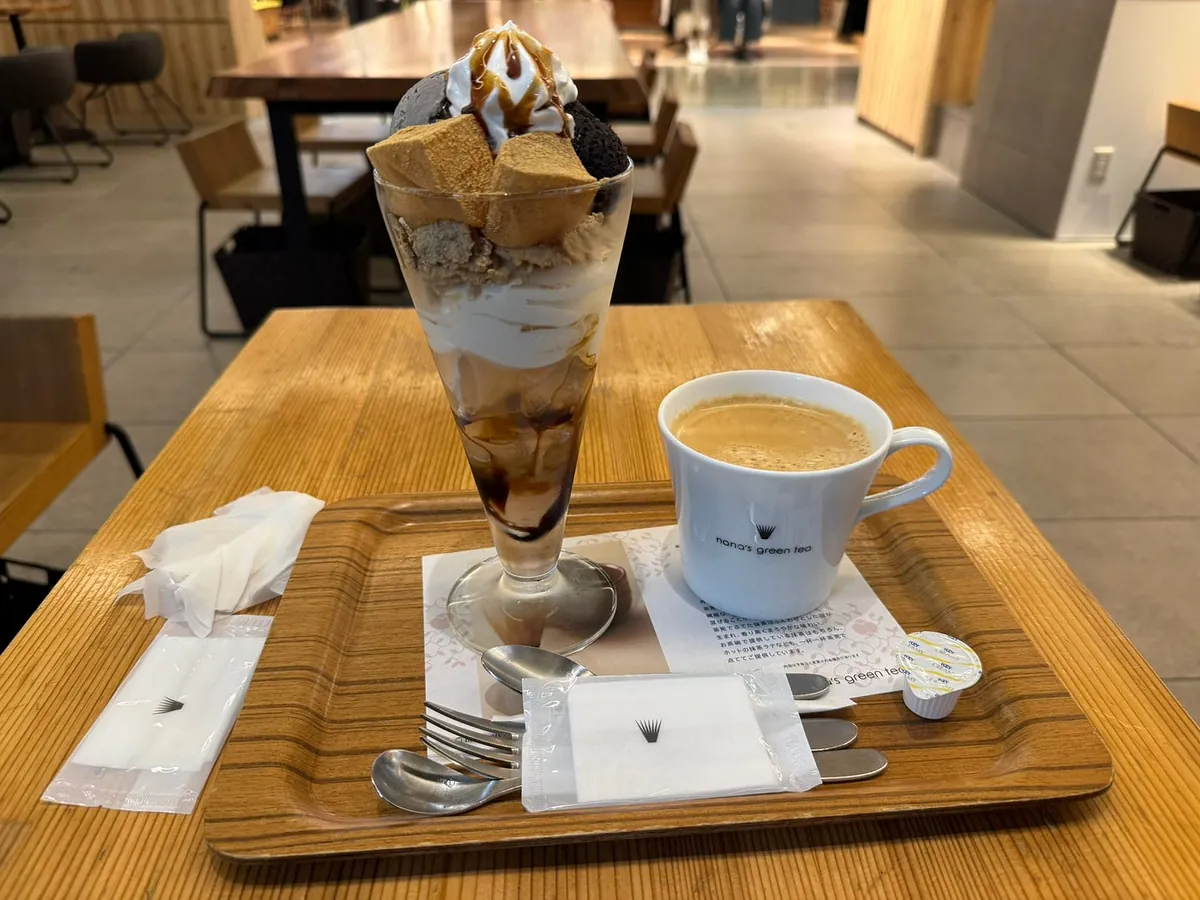
The store is comfortable and not crowded.
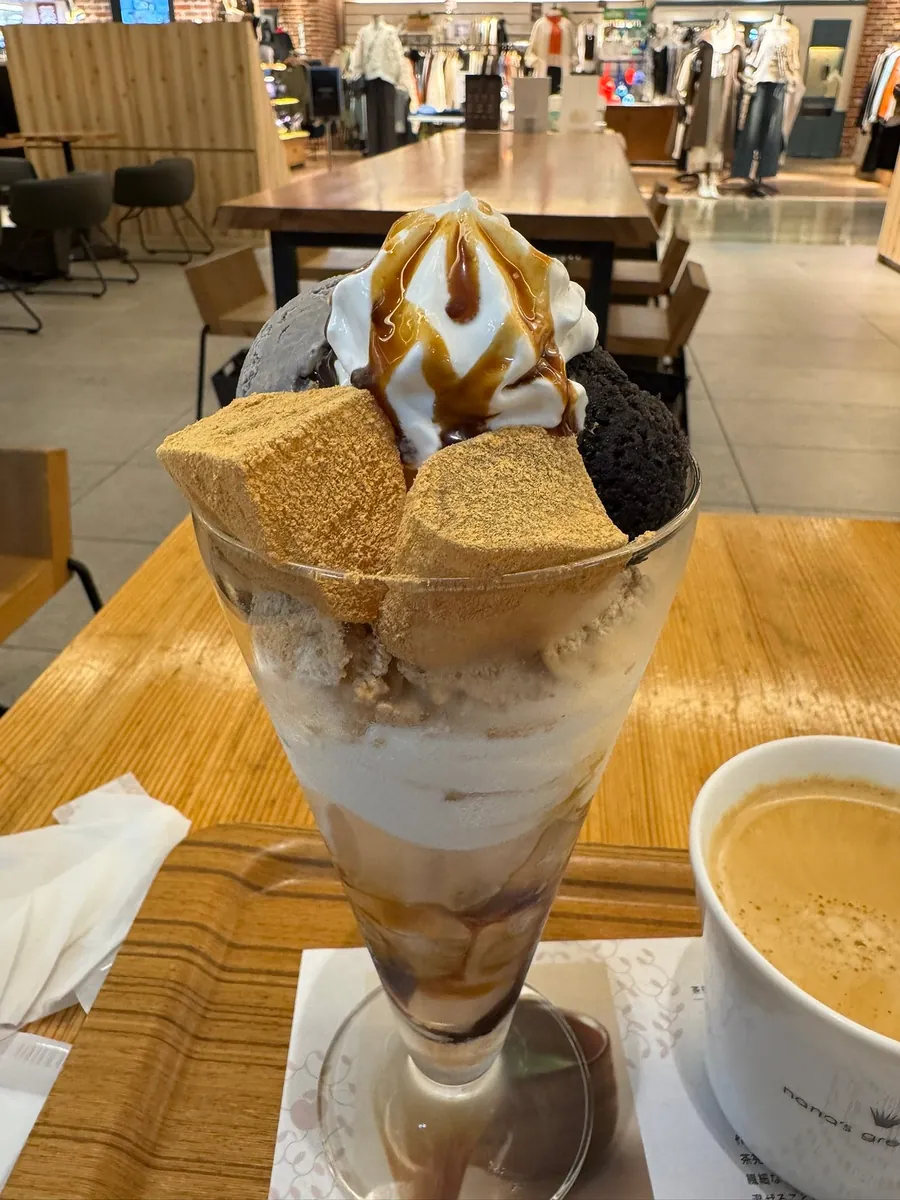
Warabi mochi + ice cream + hot coffee, very satisfying.
16:15 Return to the hotel to pick up luggage, then go back to the station to wait for the train
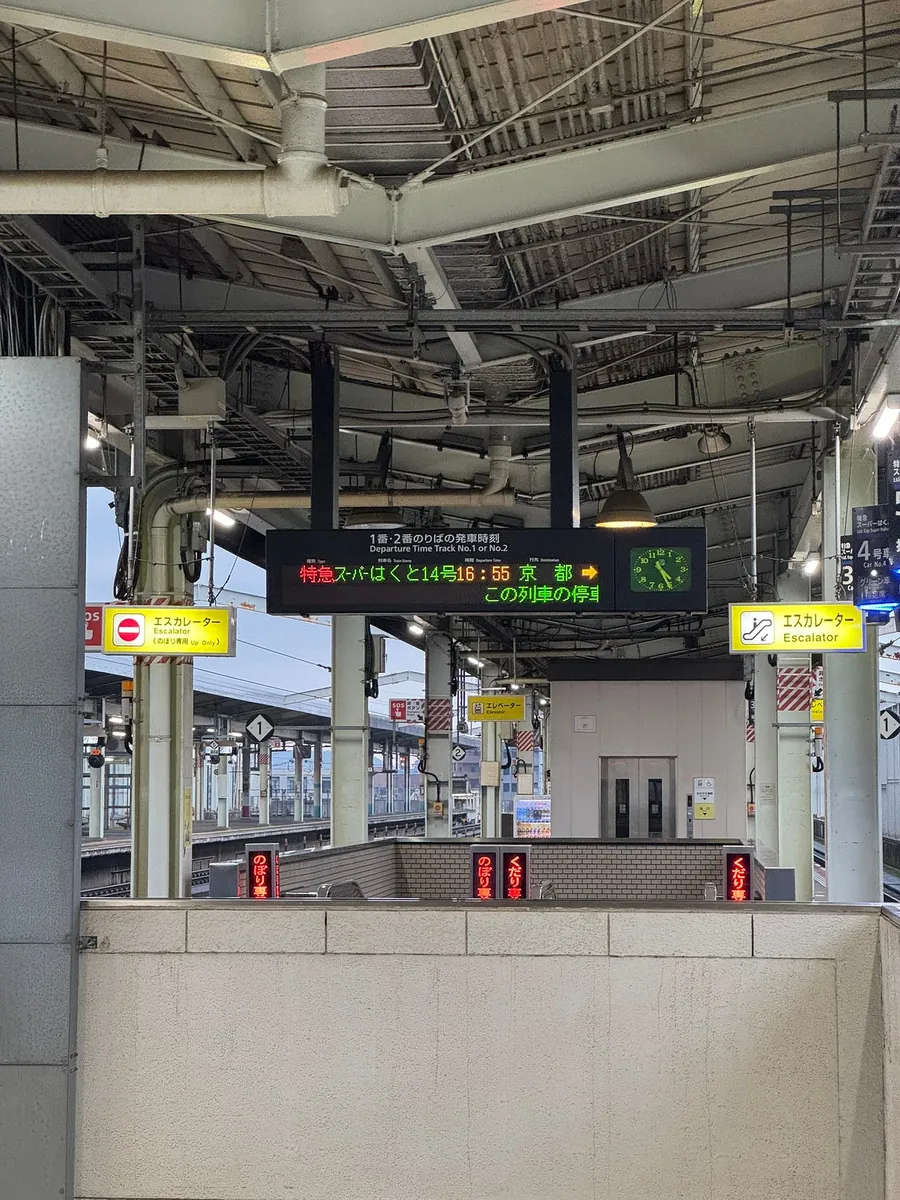
It’s still early, and we will take the 16:55 Limited Express Super Hakuto to Himeji.
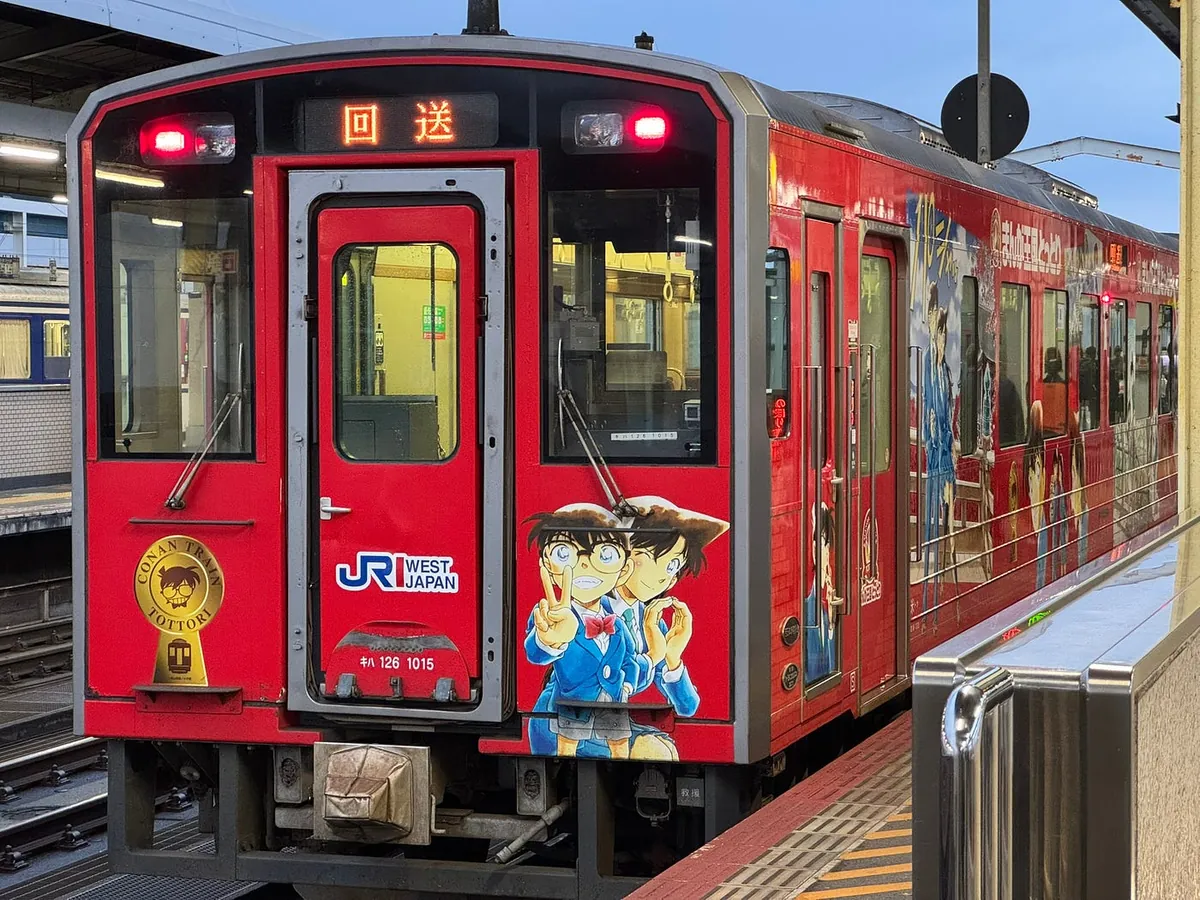
I saw the Conan train while waiting for the bus.
16:55 Board the train to Himeji
Goodbye San’in.
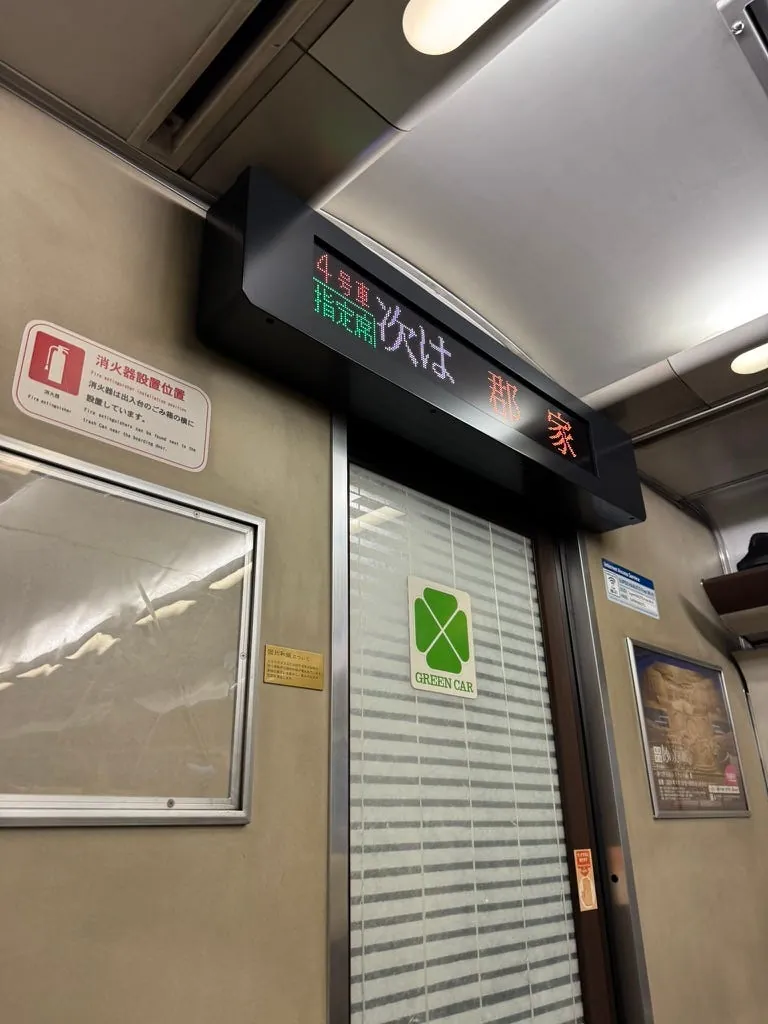
Got a seat in the first row of the Green Car, very comfortable.
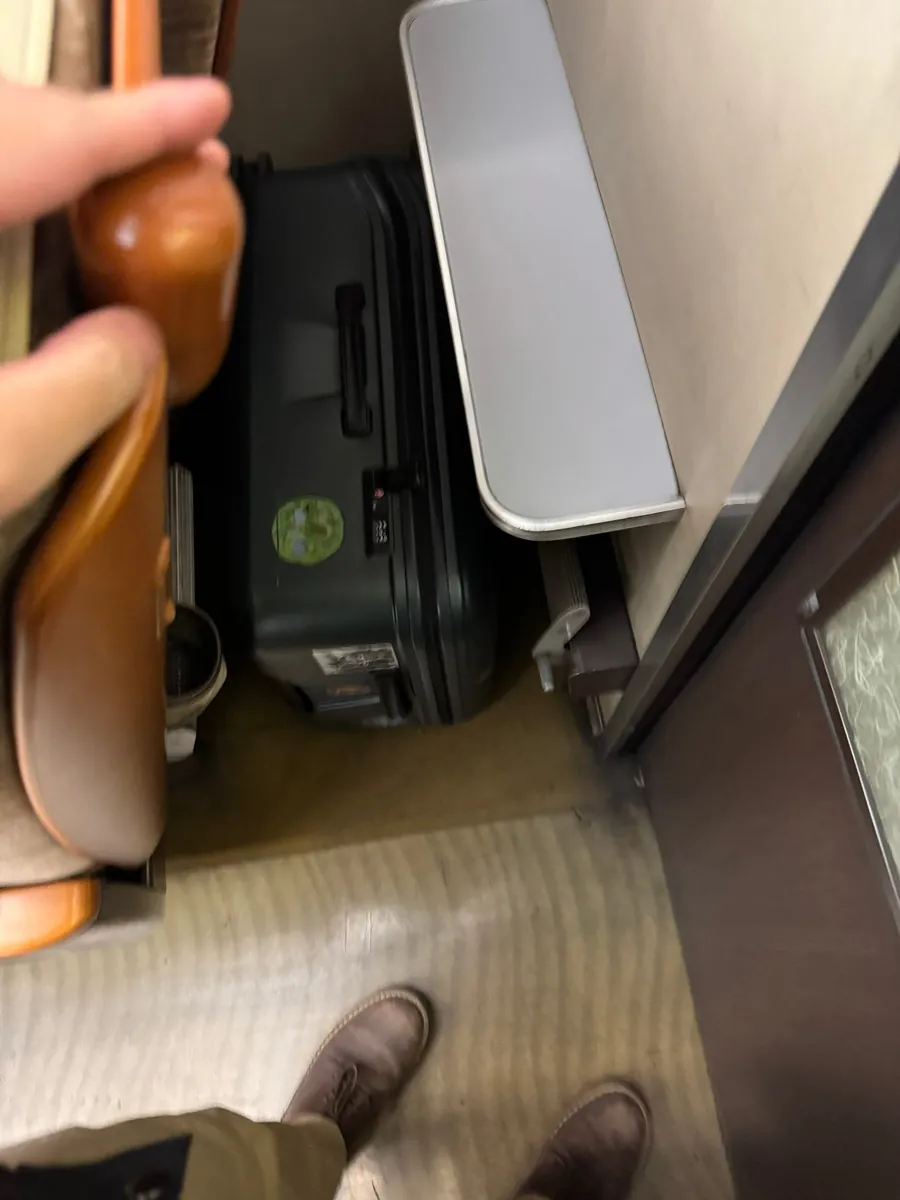
Because the train was quite shaky, I didn’t dare to put my luggage overhead. Instead, I placed it sideways behind the last row of seats.
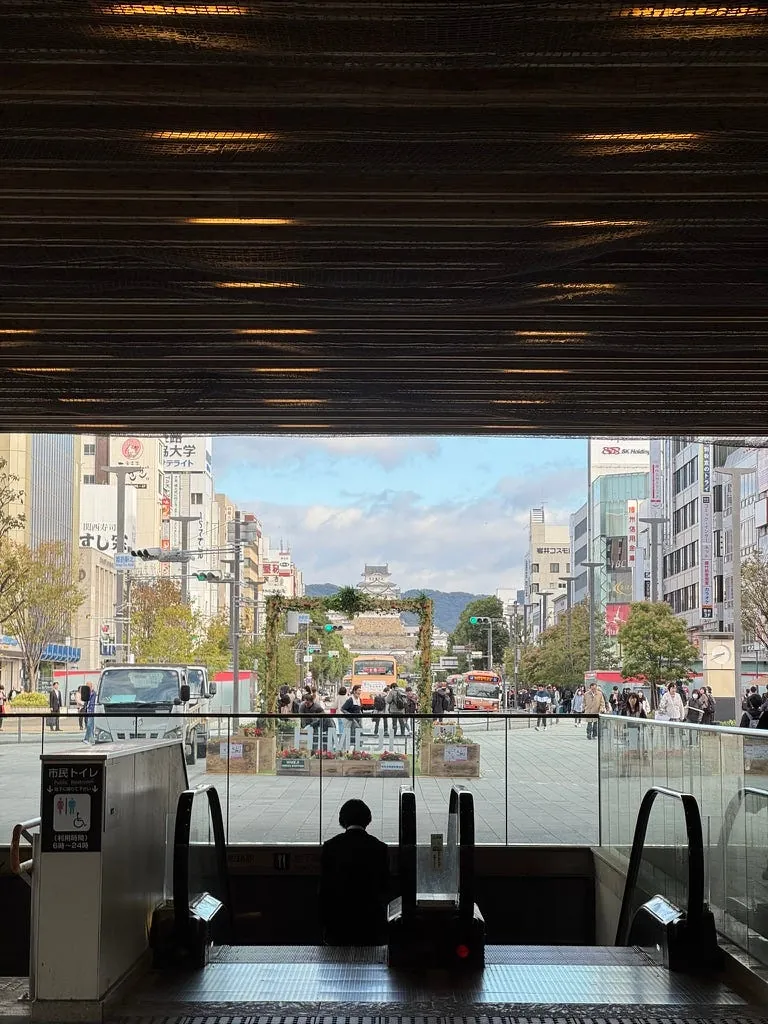
18:27 Arrive at Himeji Station
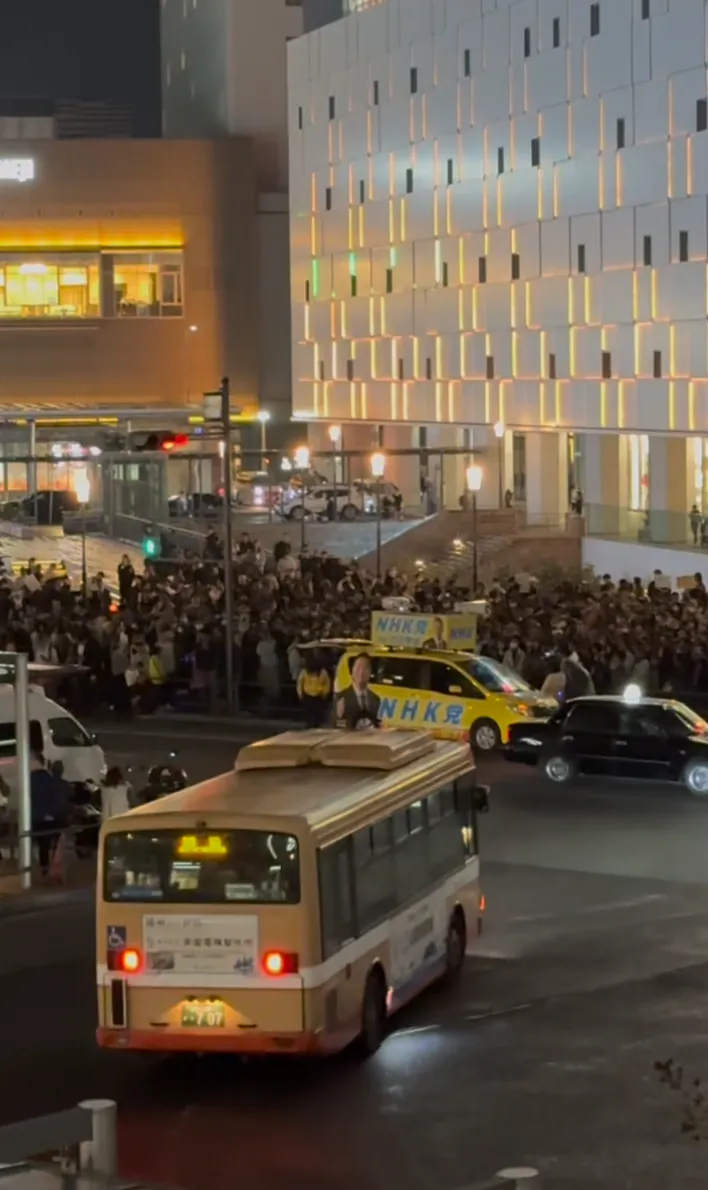
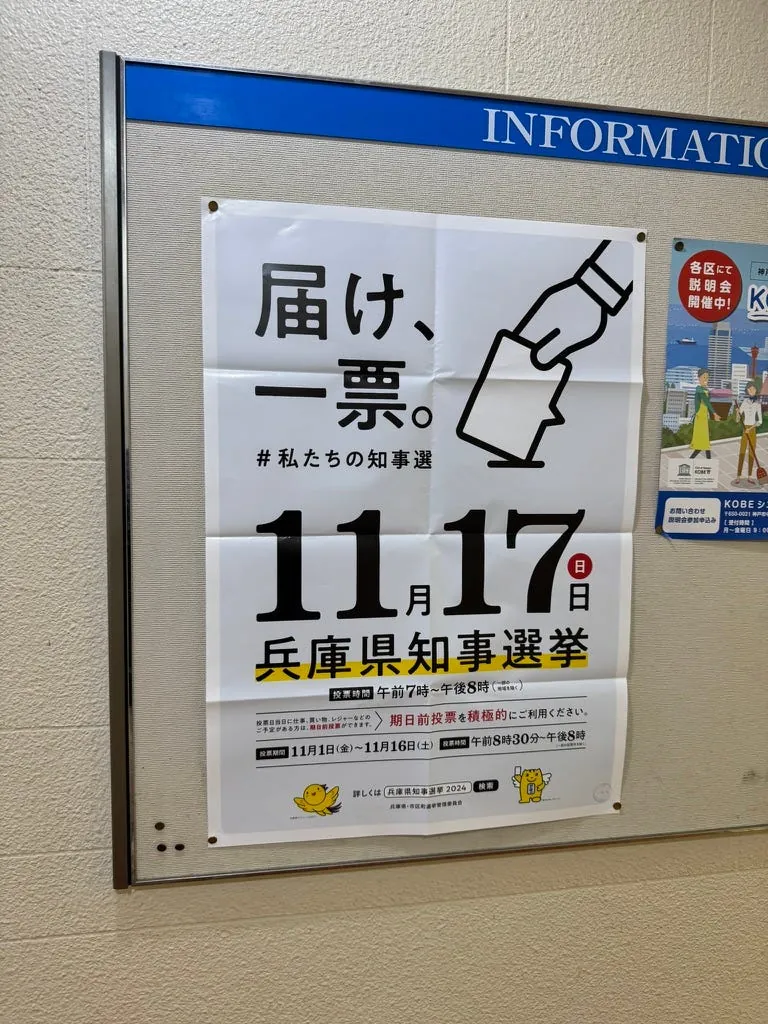
I happened to catch their councilor election campaign outside, where a councilor was giving a rally speech with a large crowd.
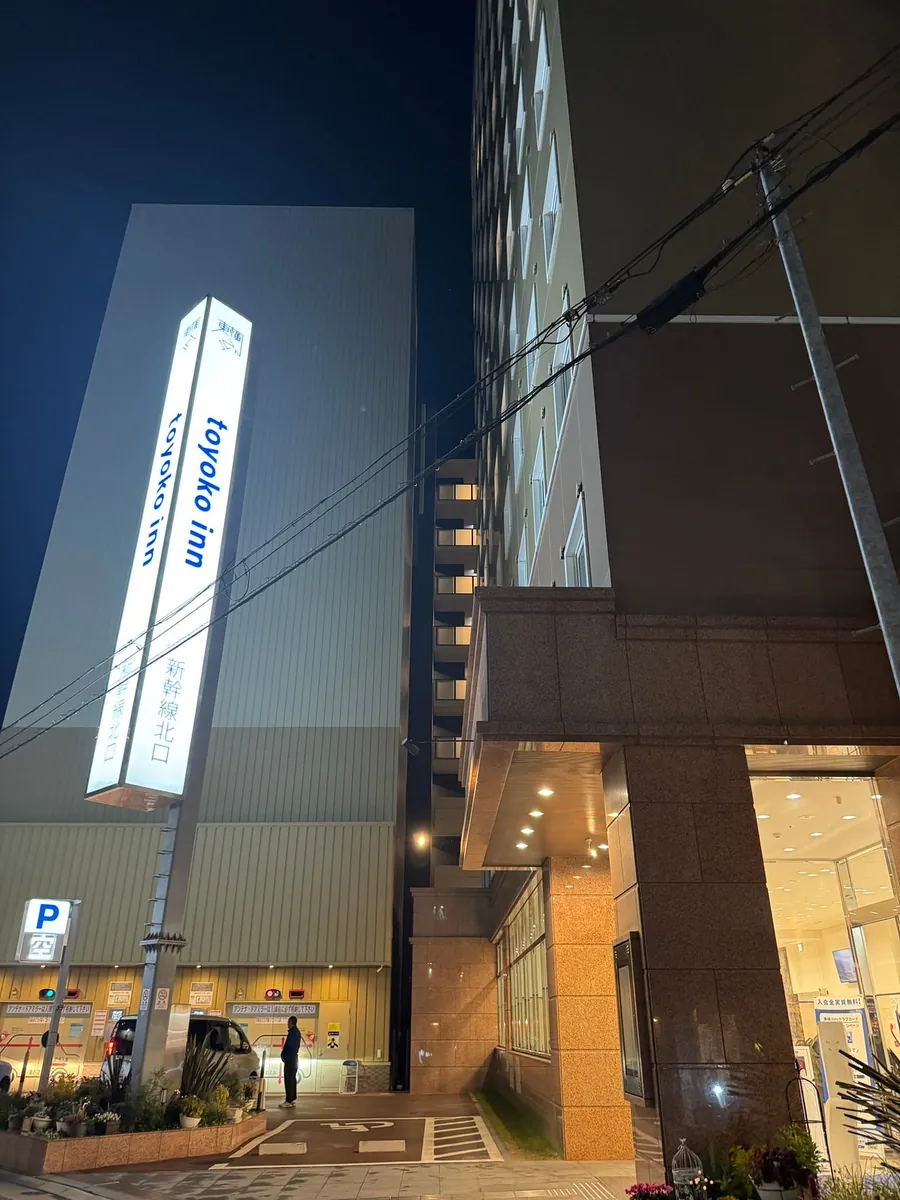
After exiting the station, head straight to the hotel Toyoko INN Himeji Station Shinkansen North Exit. The last three nights were all spent here. The Toyoko INN near the north exit is livelier; it looks close on the map but feels a bit farther when walking, taking about 10 minutes.
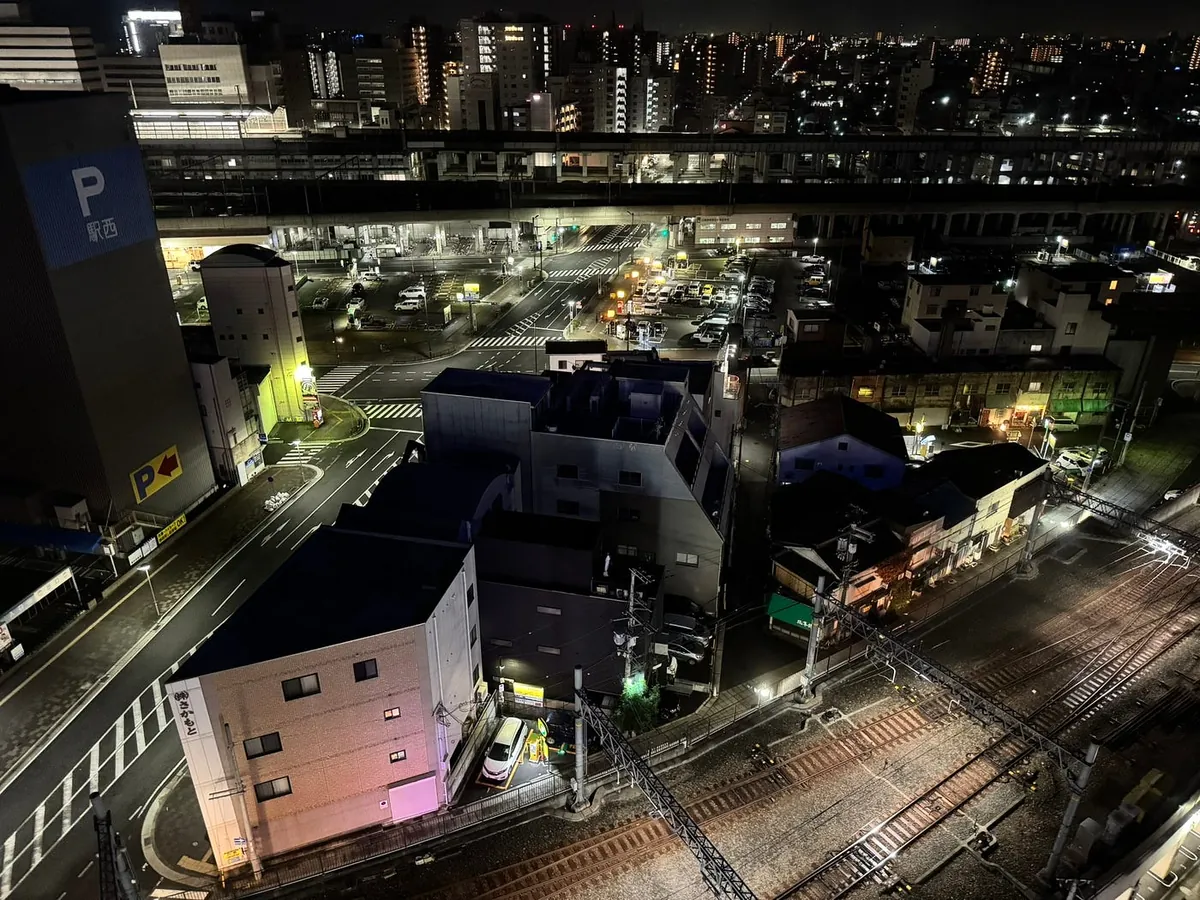
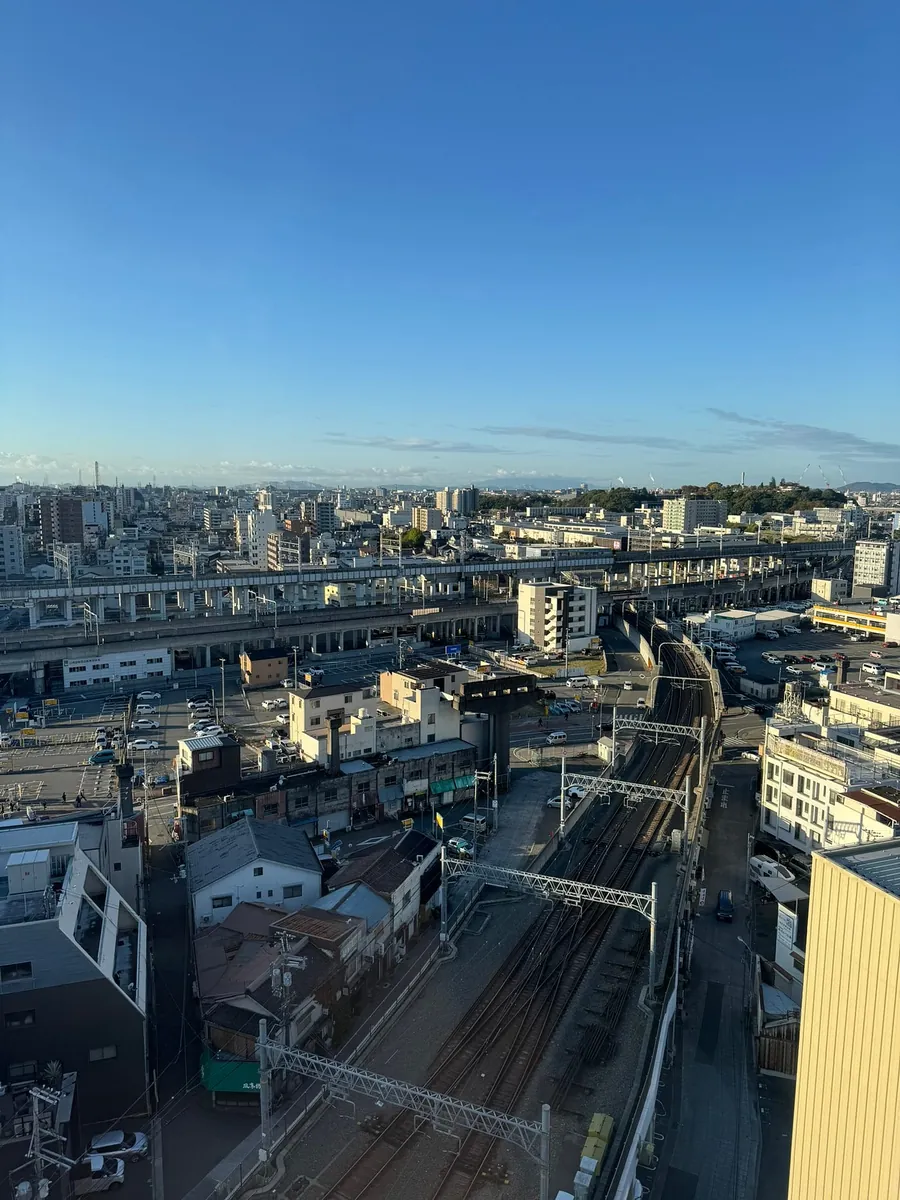
Assigned a room on the 14th-floor rooftop, with a great view outside the window.
You can directly look back at Himeji Station railway from the window. Trains passing by make slight track noises, but fortunately, there are no trains after nightfall.
19:00 Go out for a casual food hunt
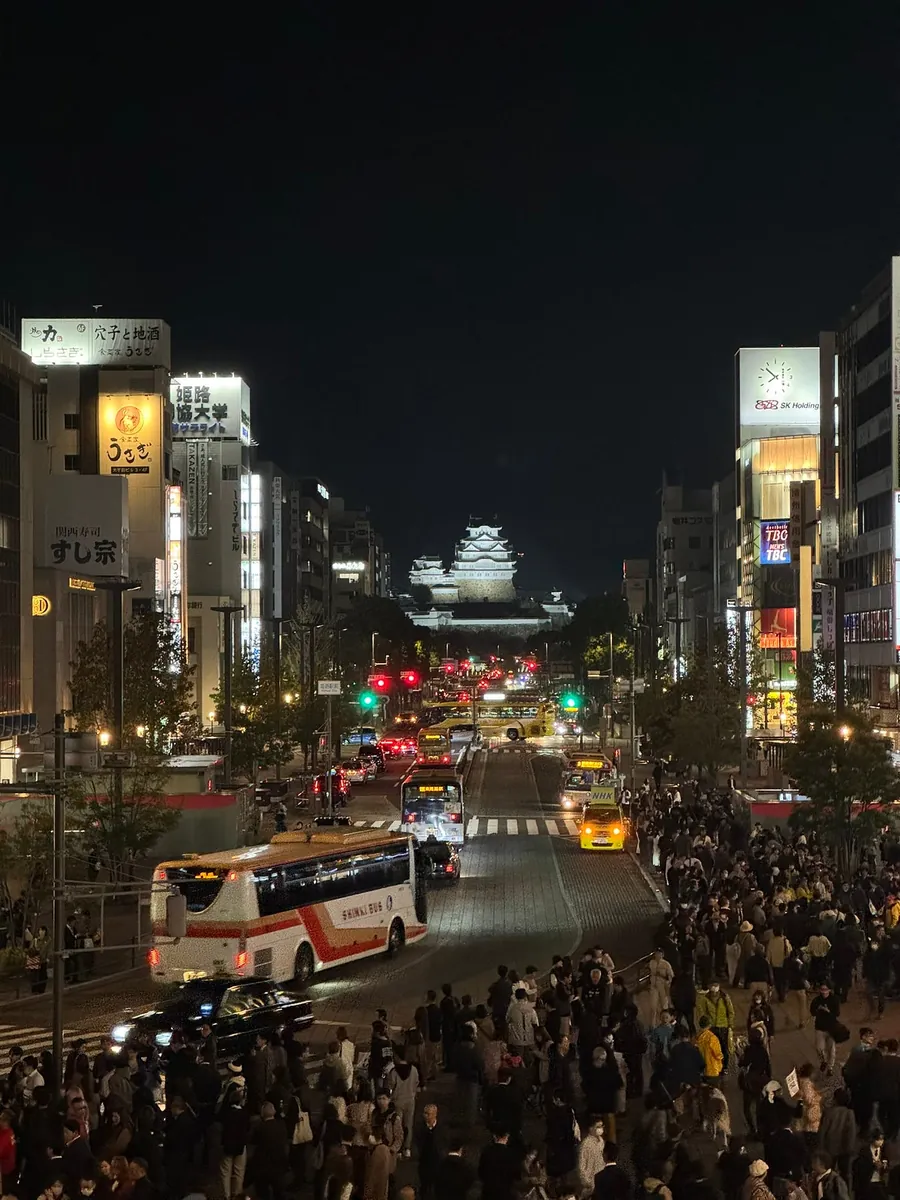
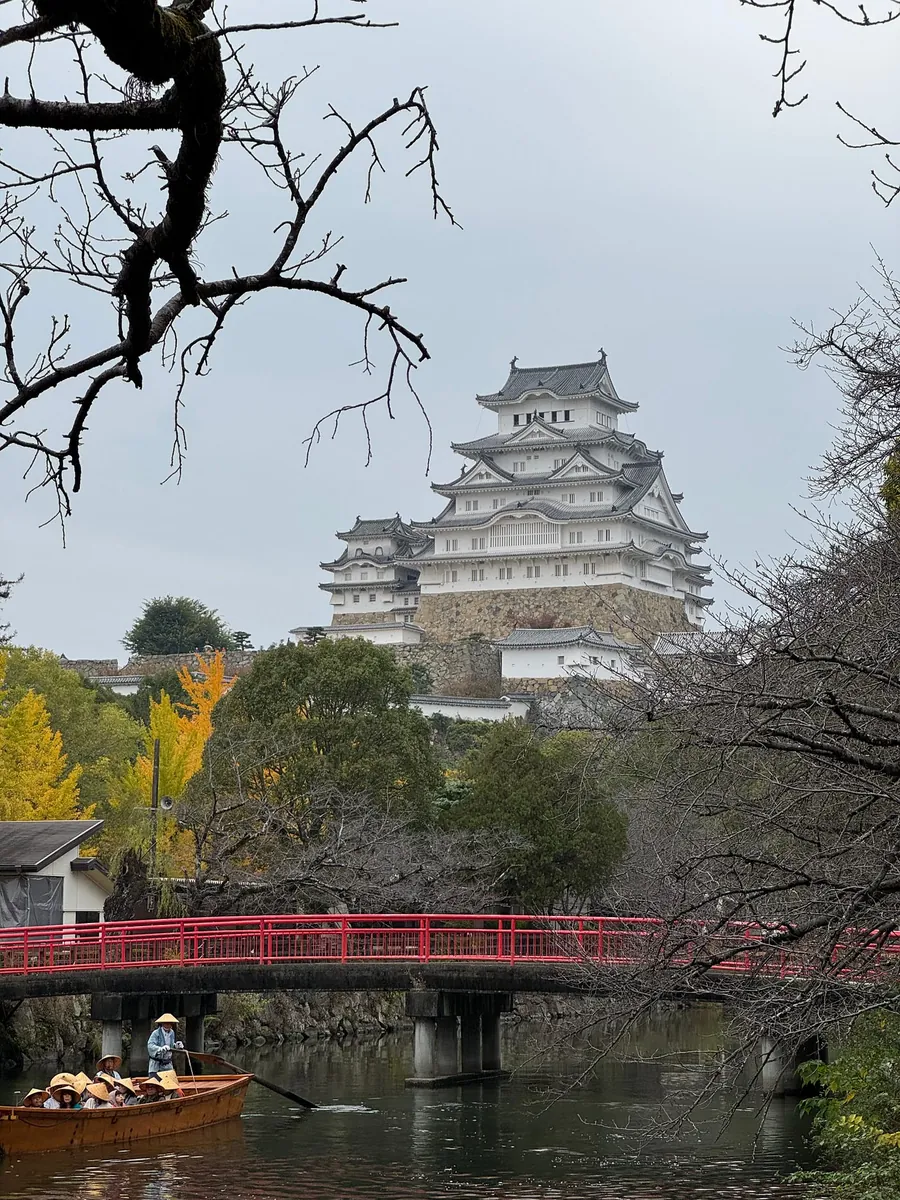
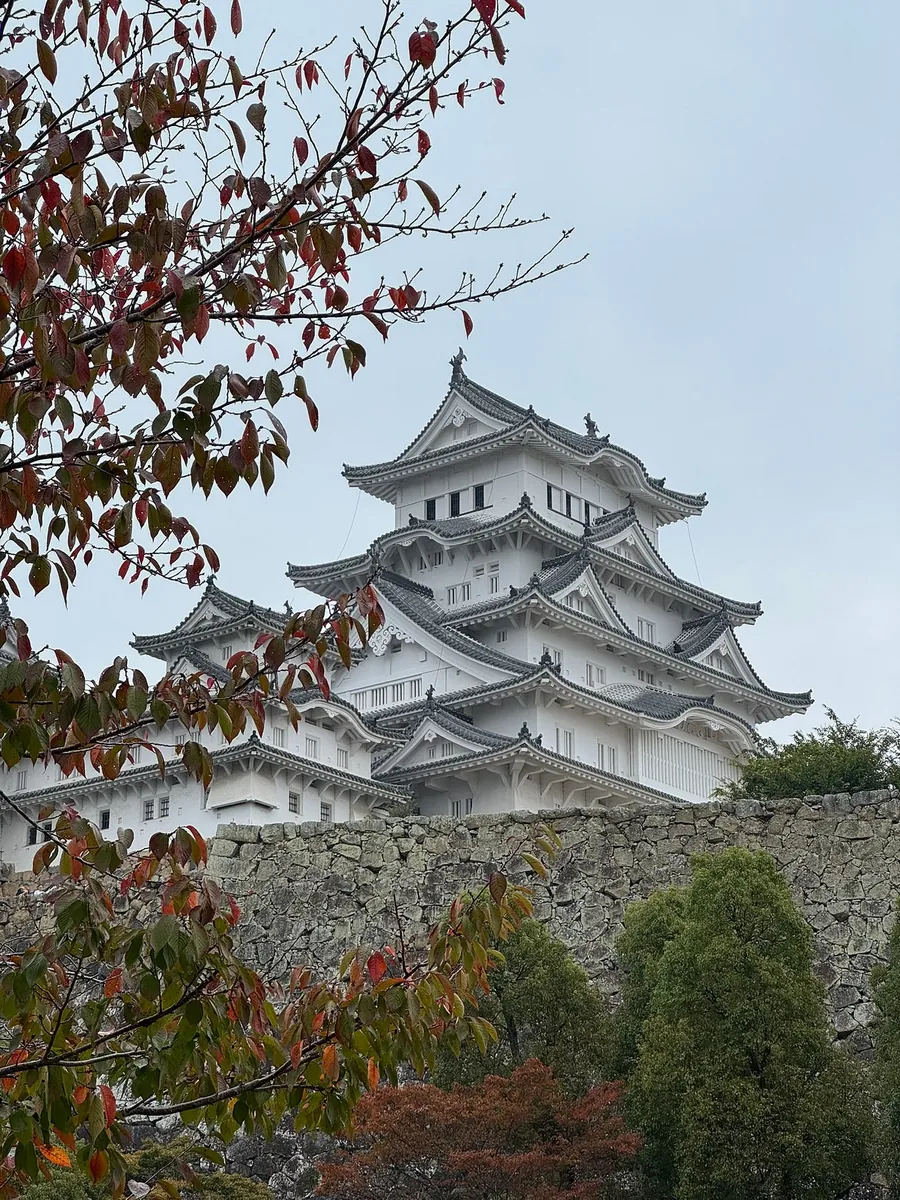
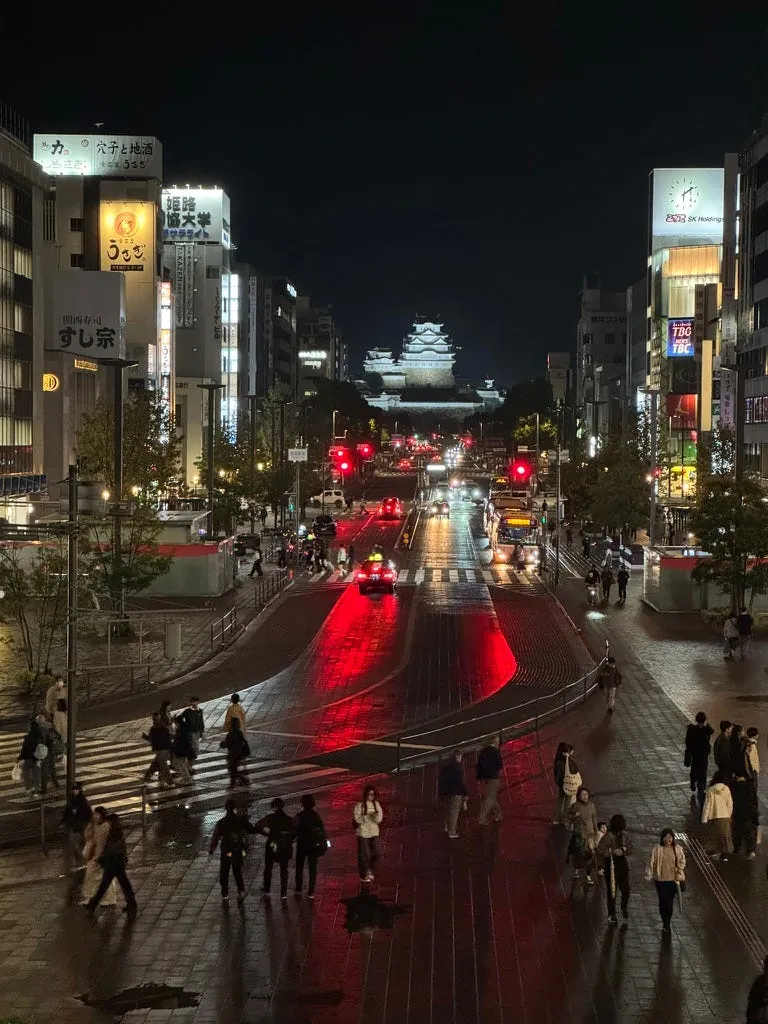
As soon as I came out, I saw the night view of Himeji Castle and thought it was beautiful. For some reason, I decided to walk to Himeji Castle to take night photos. Being too close made it hard to frame the shots, so I didn’t take many photos and left quickly. It was cold and I was hungry the whole way—I should have just gone straight to eat.
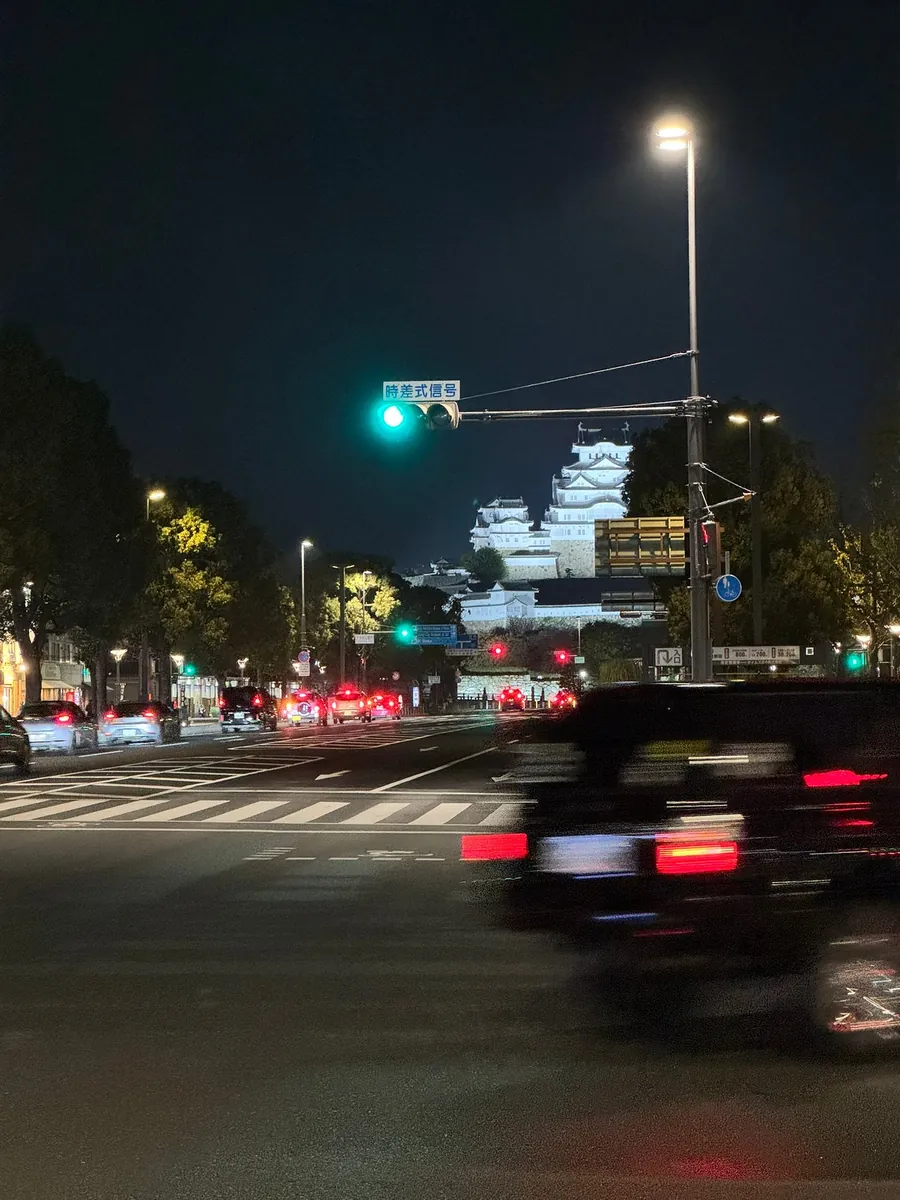
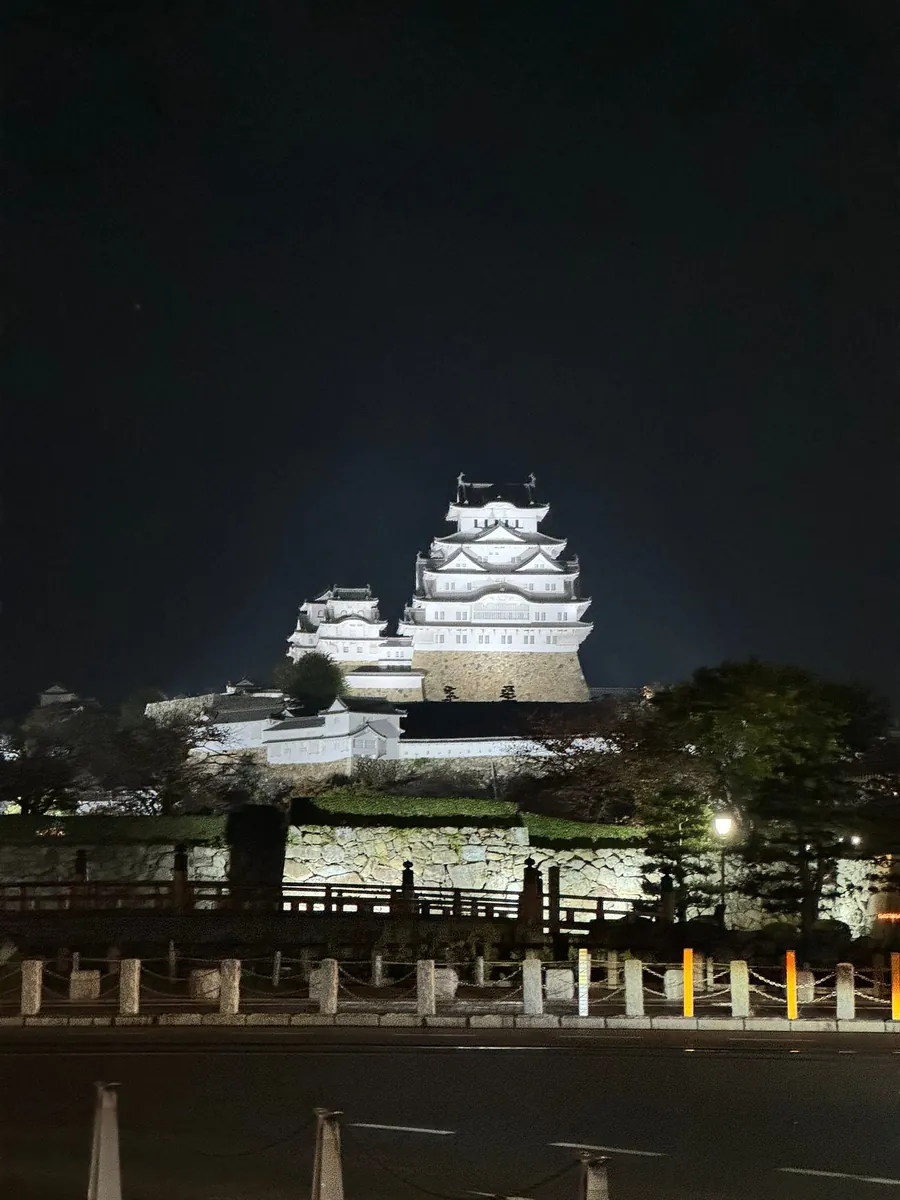
Himeji Castle is about 1 kilometer from the station, taking nearly 30 minutes to walk round trip.
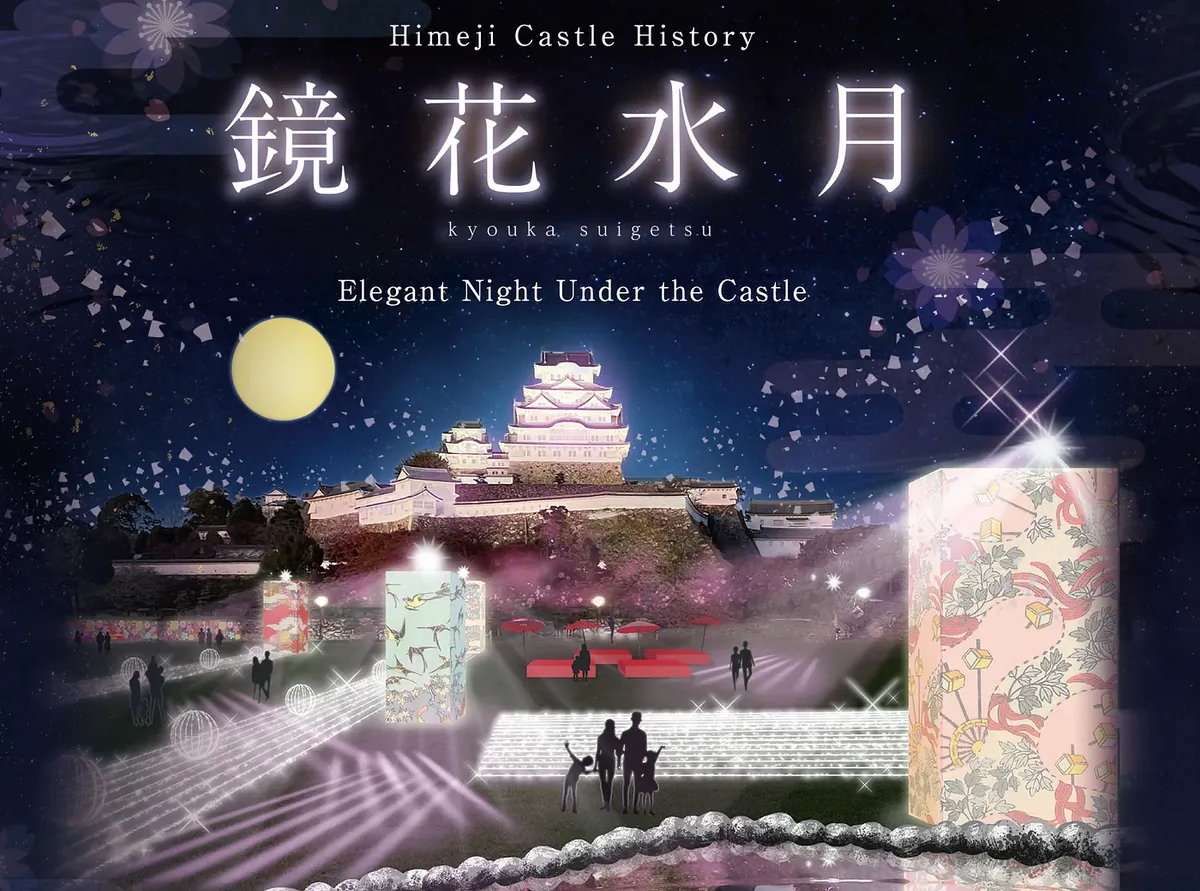
https://himeji-kyoukasuigetsu.com/en/
https://himeji-kyoukasuigetsu.com/en/
Unfortunately, I missed the Himeji Castle winter illumination event this time. It looked beautiful and romantic. Hopefully, I can visit again someday.
The event starts on Friday, November 22, 2024, and runs until Sunday, February 23, 2025.
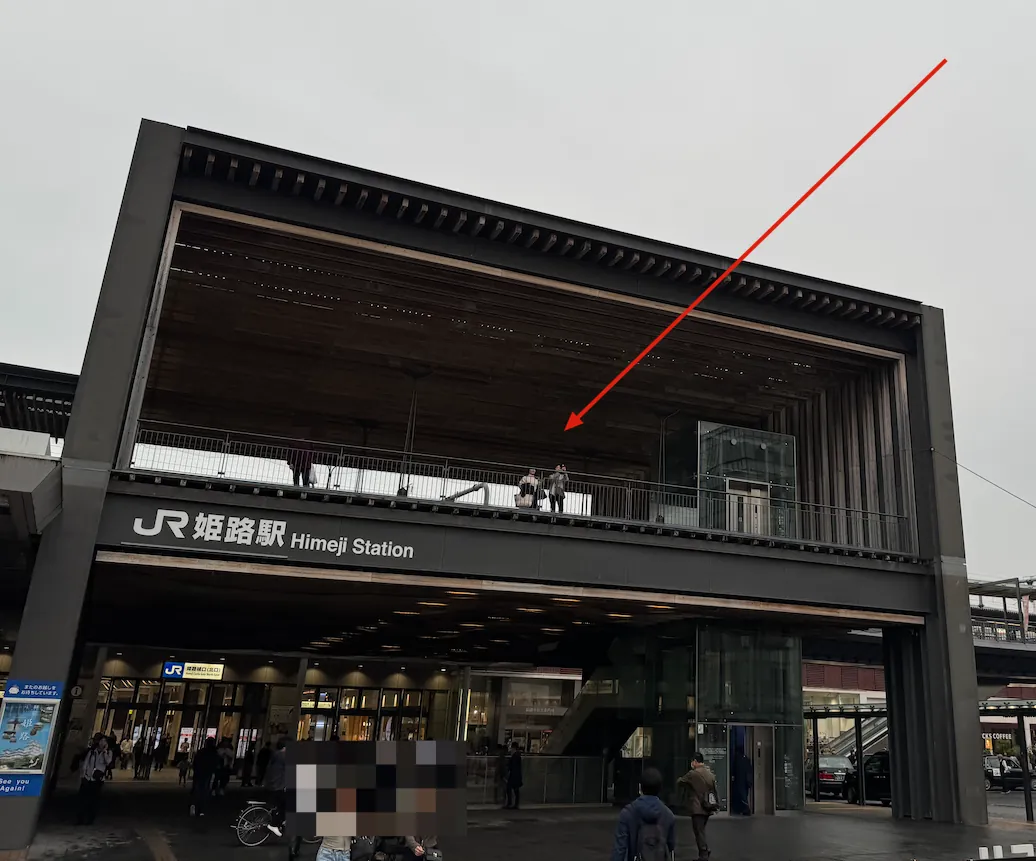
I found that the viewing platform on the second floor of the station’s north exit is the best spot to photograph Himeji Castle.
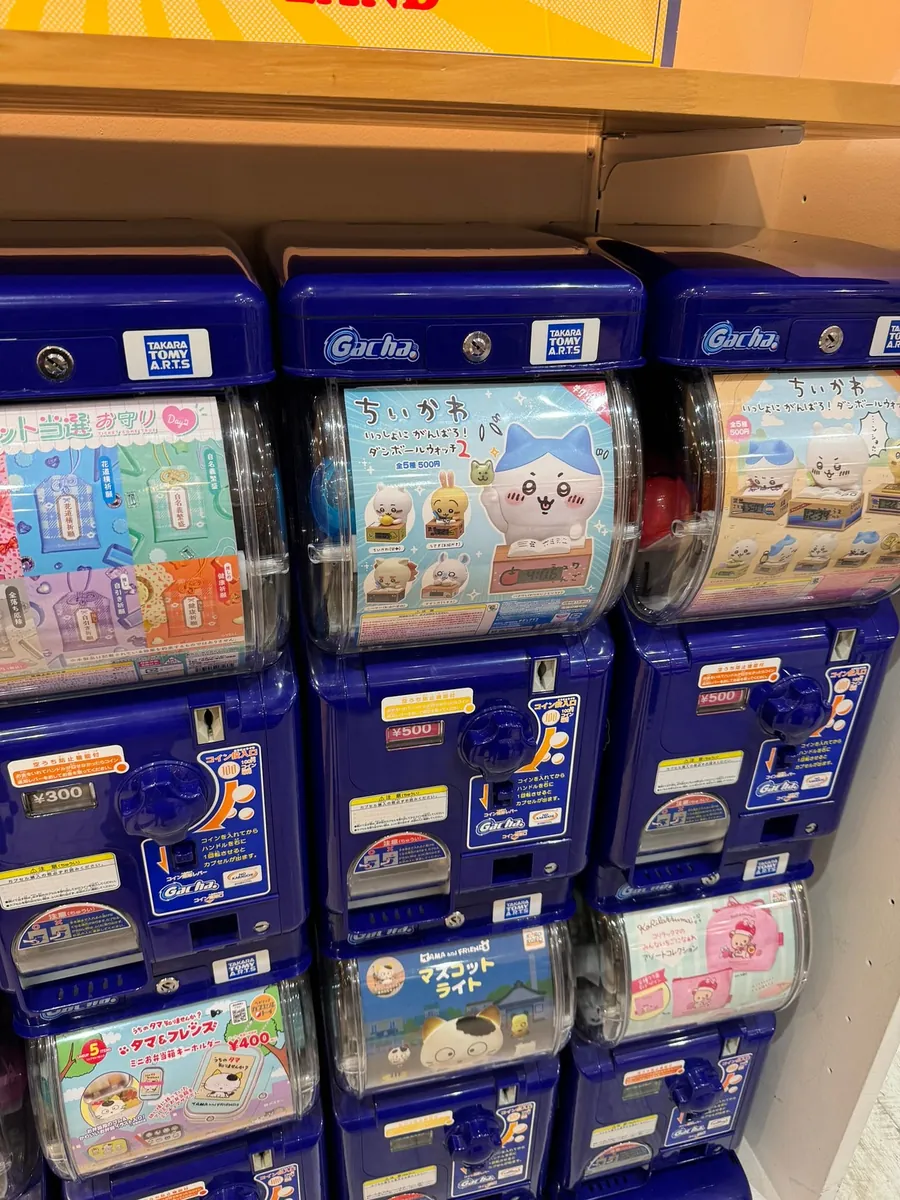
Before buying dinner, I took a short walk and played with capsule toys at the department store Piole Himeji near Himeji Station.
~=20:00 Buy dinner and go back
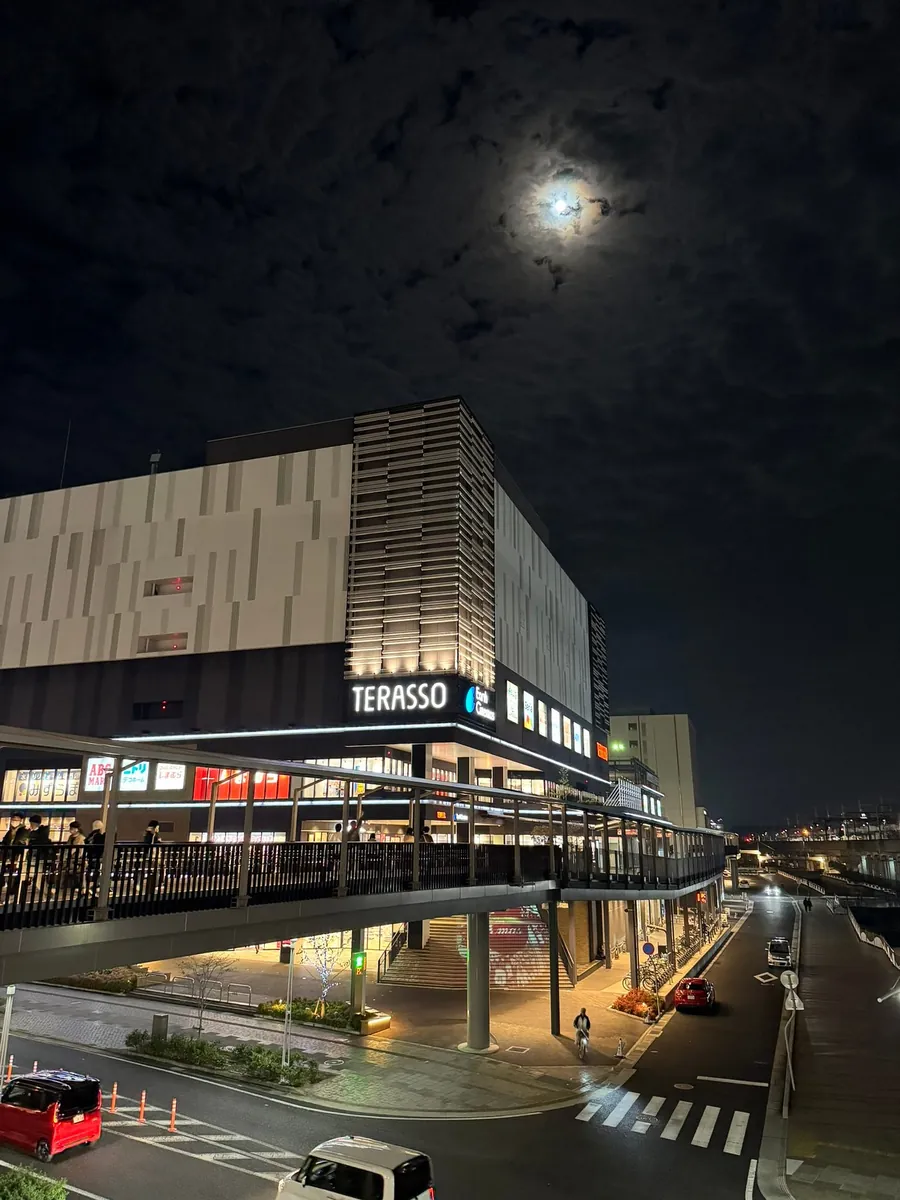
Walked from the second-floor skybridge to the adjacent TERASSO and found a yakiniku restaurant that was still open. Took out a yakiniku bento to eat back at the hotel.
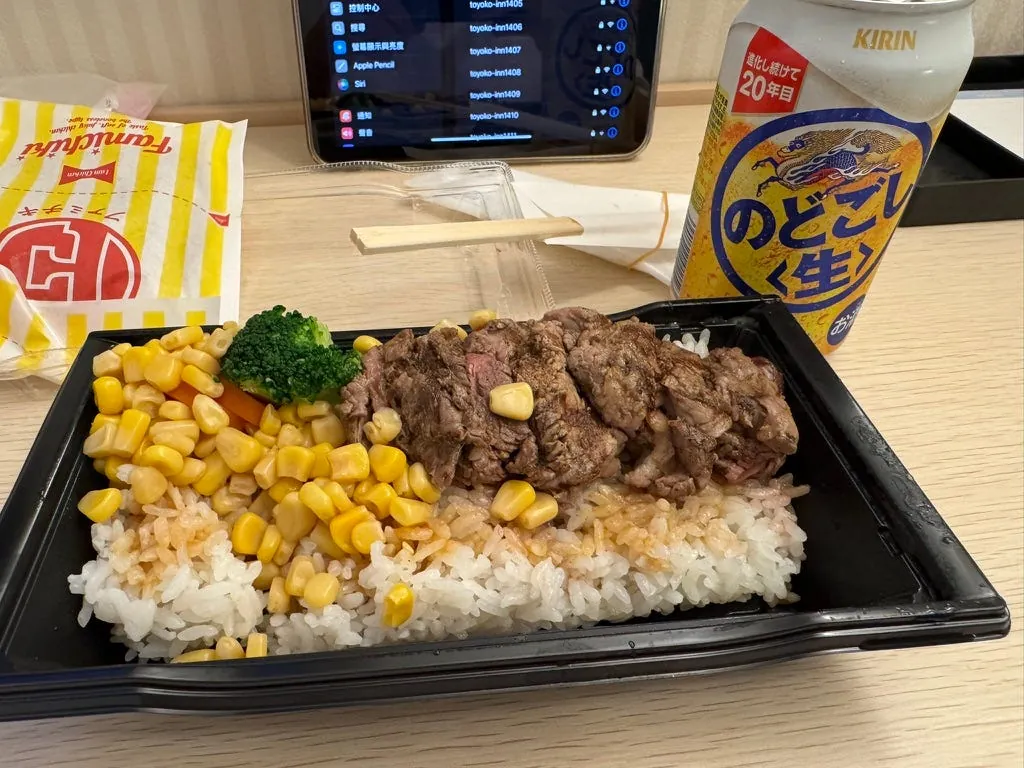
Stopped by a convenience store and bought some food and drinks.
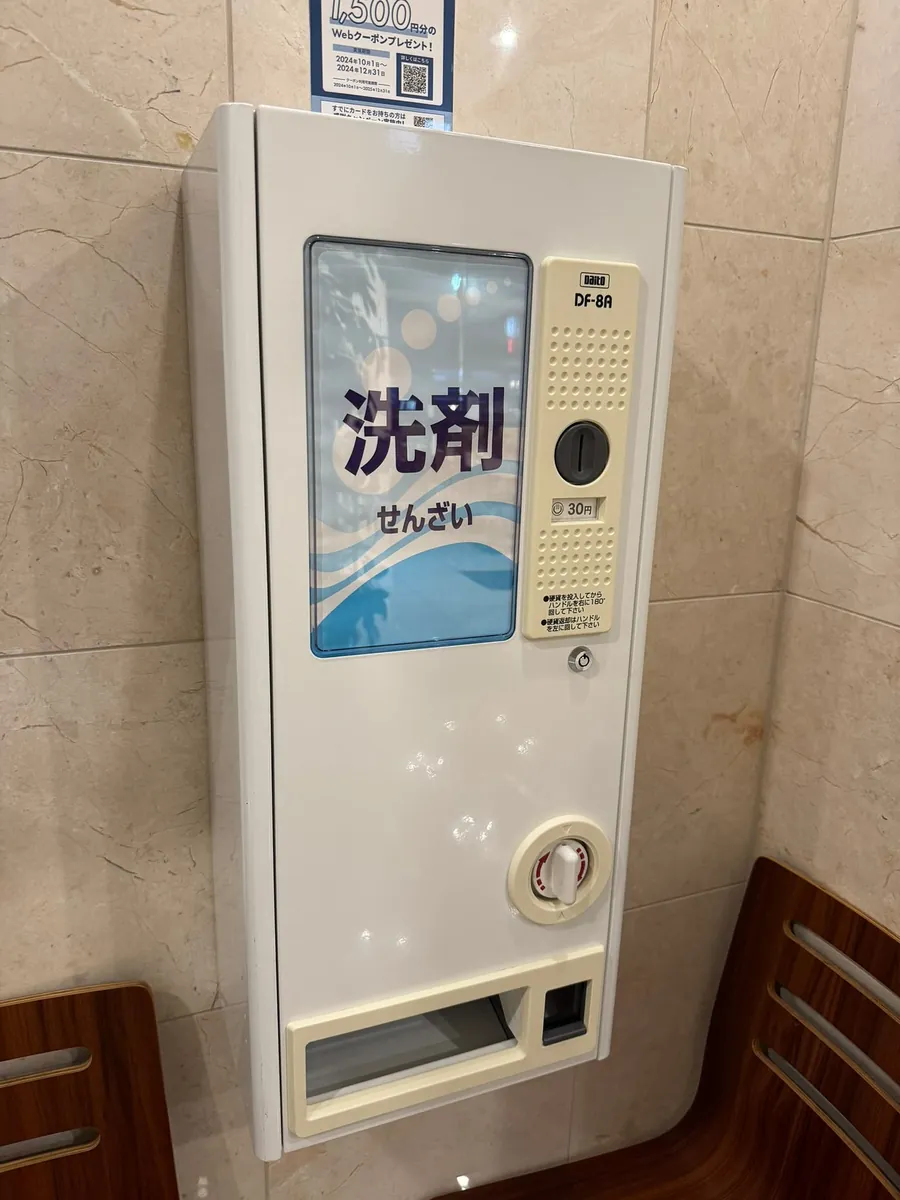
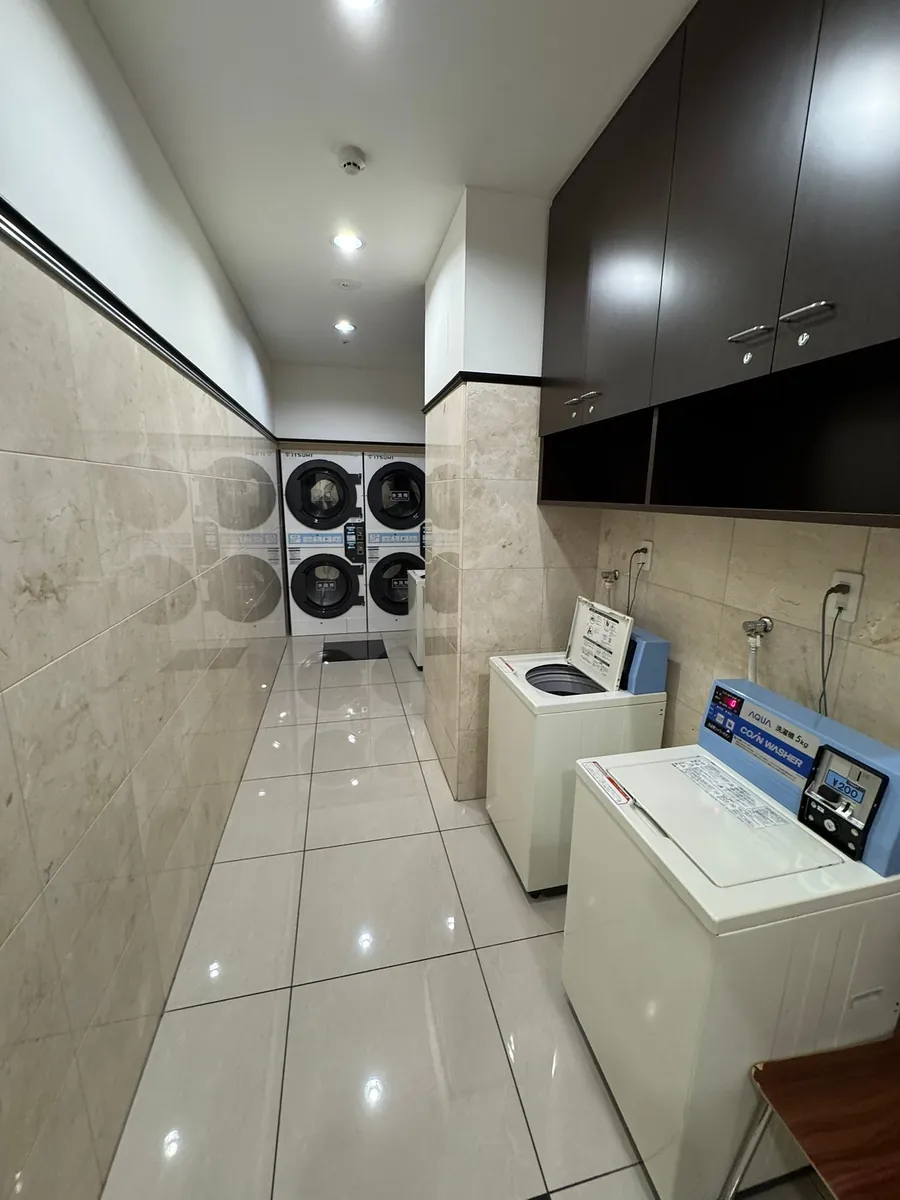
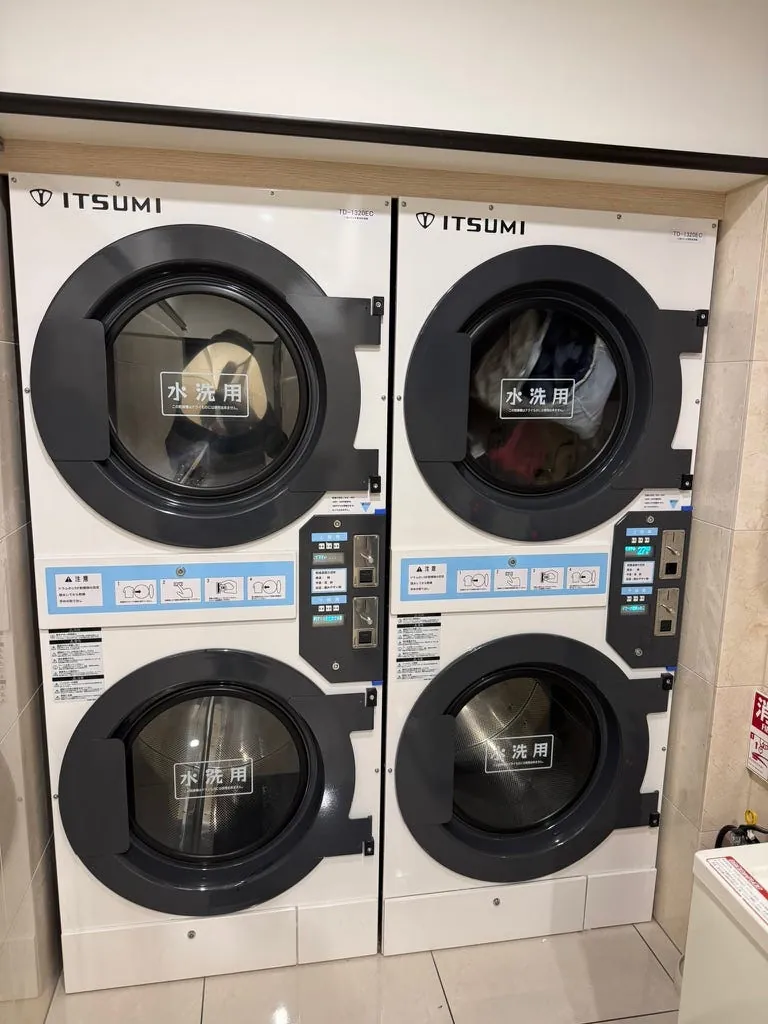
After eating and drinking, taking a shower, I went downstairs to do laundry. This time I knew Toyoko Inn requires bringing your own detergent, so I first bought washing powder with coins and put it in the washing machine along with my clothes. The dryer here is very new and high-end, and you can even select the temperature.
Good night, Himeji.
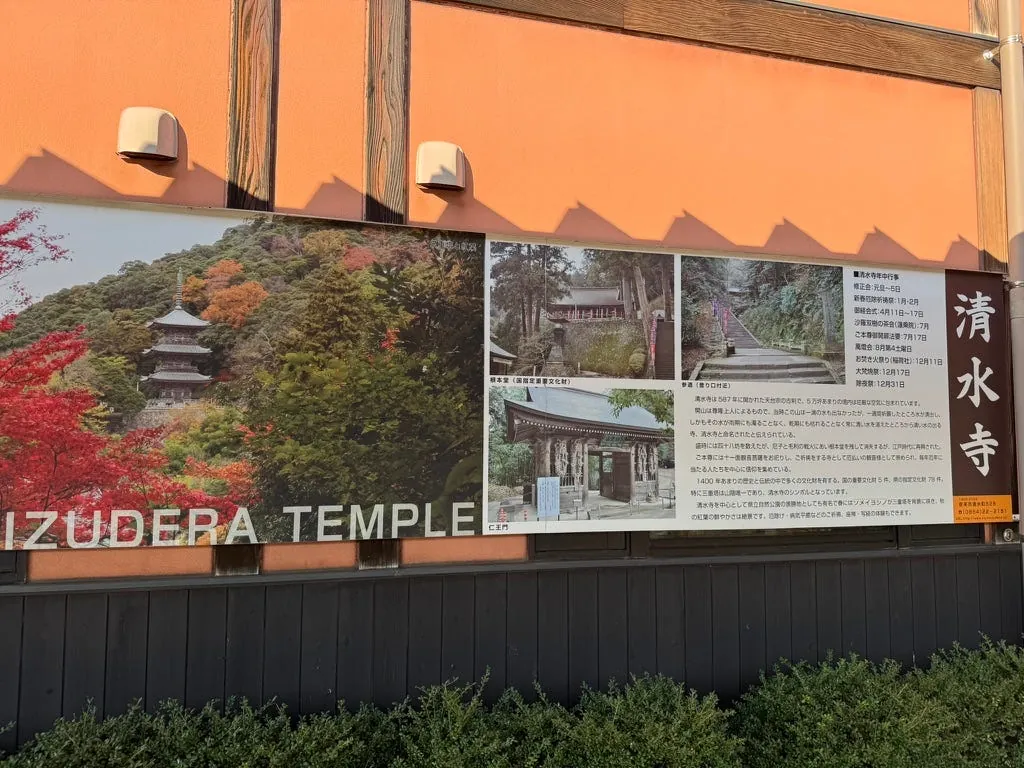
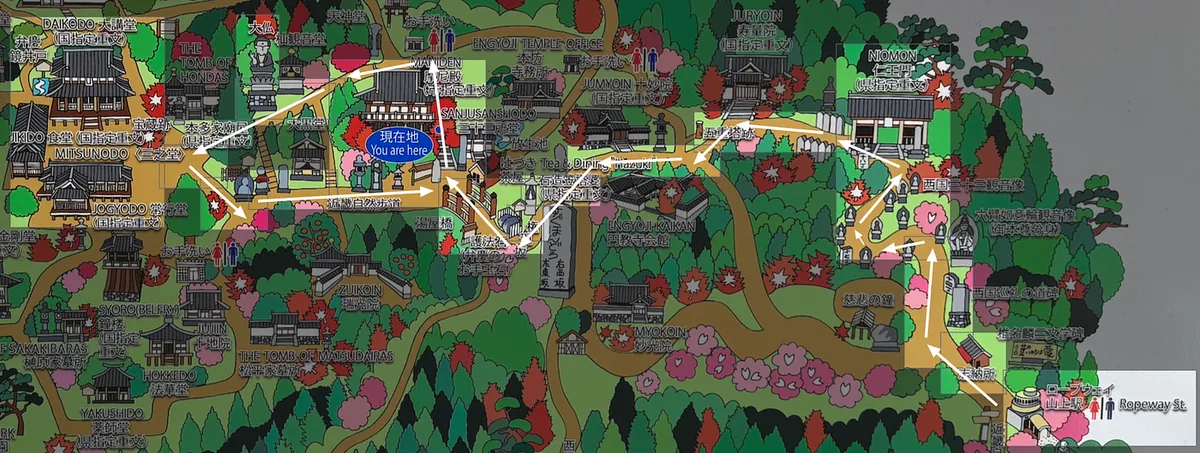
Day 5 (11/16 Saturday) Mount Shosha Engyo-ji Temple, Himeji Castle, Shopping Around Himeji
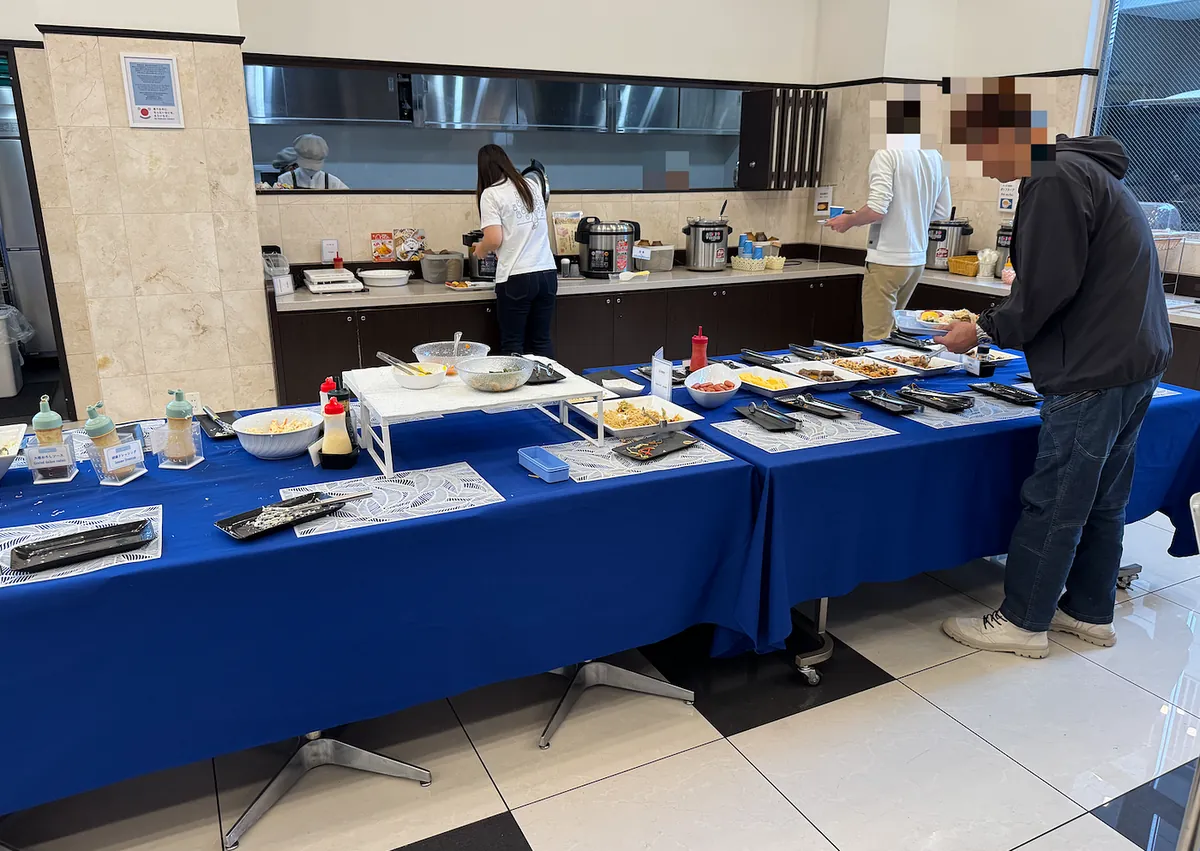
Every Toyoko INN offers free breakfast, but since I was rushing my schedule, I usually just grabbed some convenience store bread and coffee I bought the night before and headed out.
08:45 Leave the house
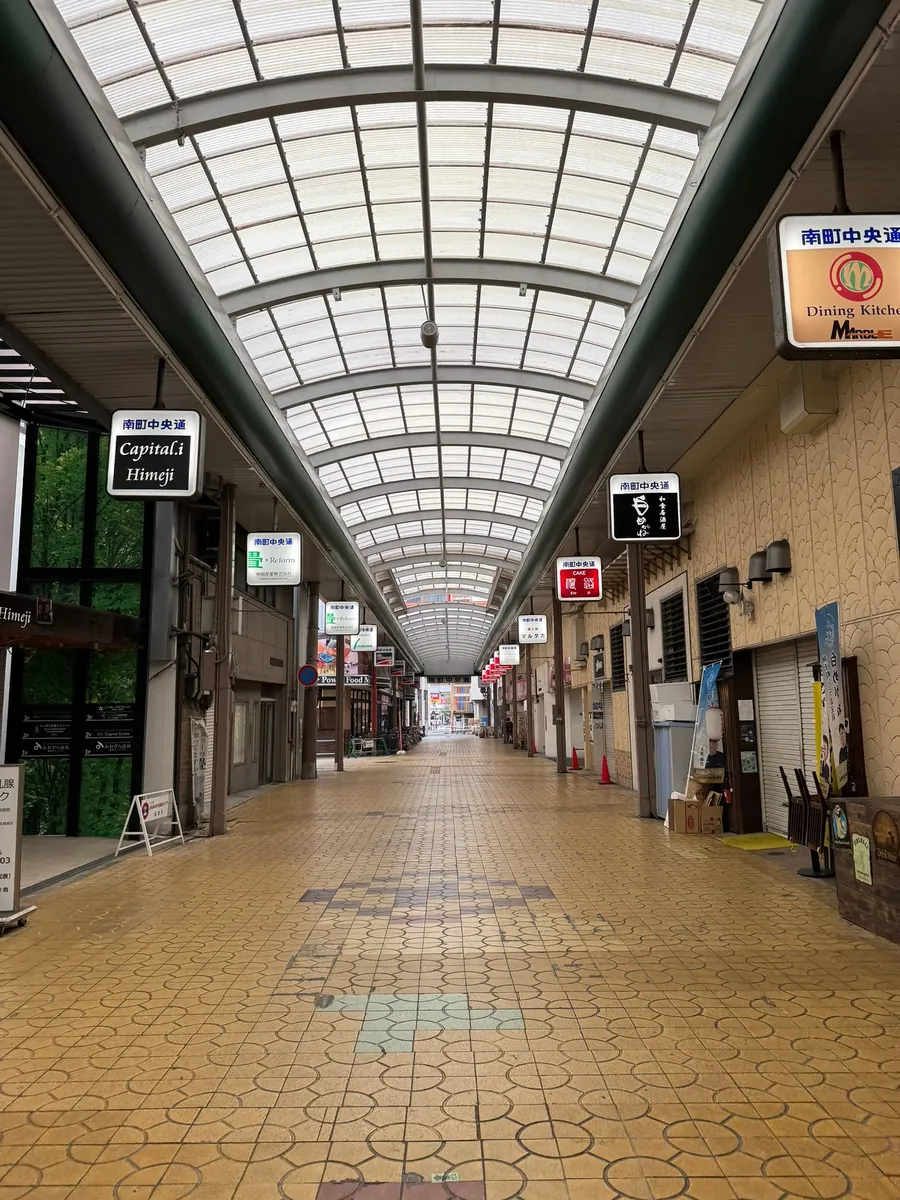
At 8:45 AM, left the hotel and walked through the deserted shopping street to the station.
08:55 Take the bus to Shoshazan Engyoji Temple
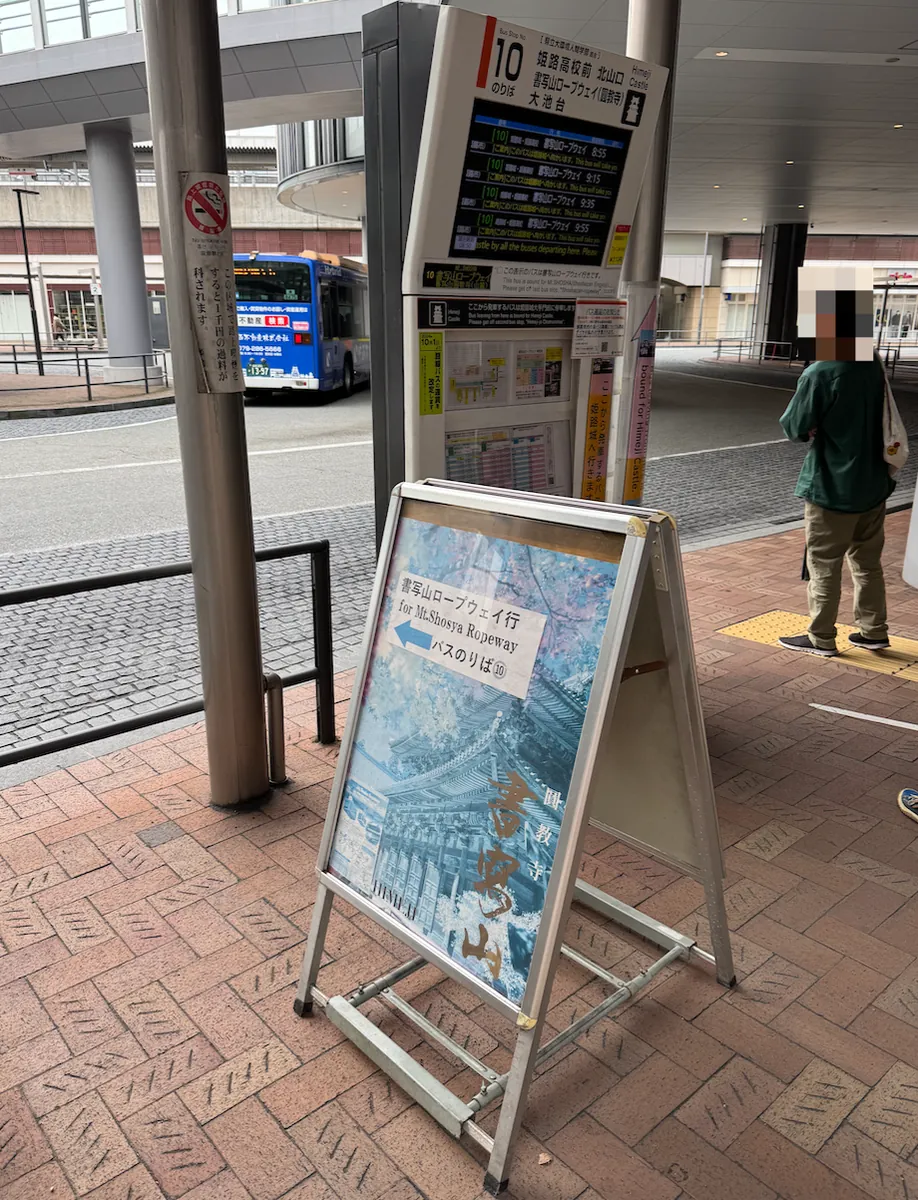
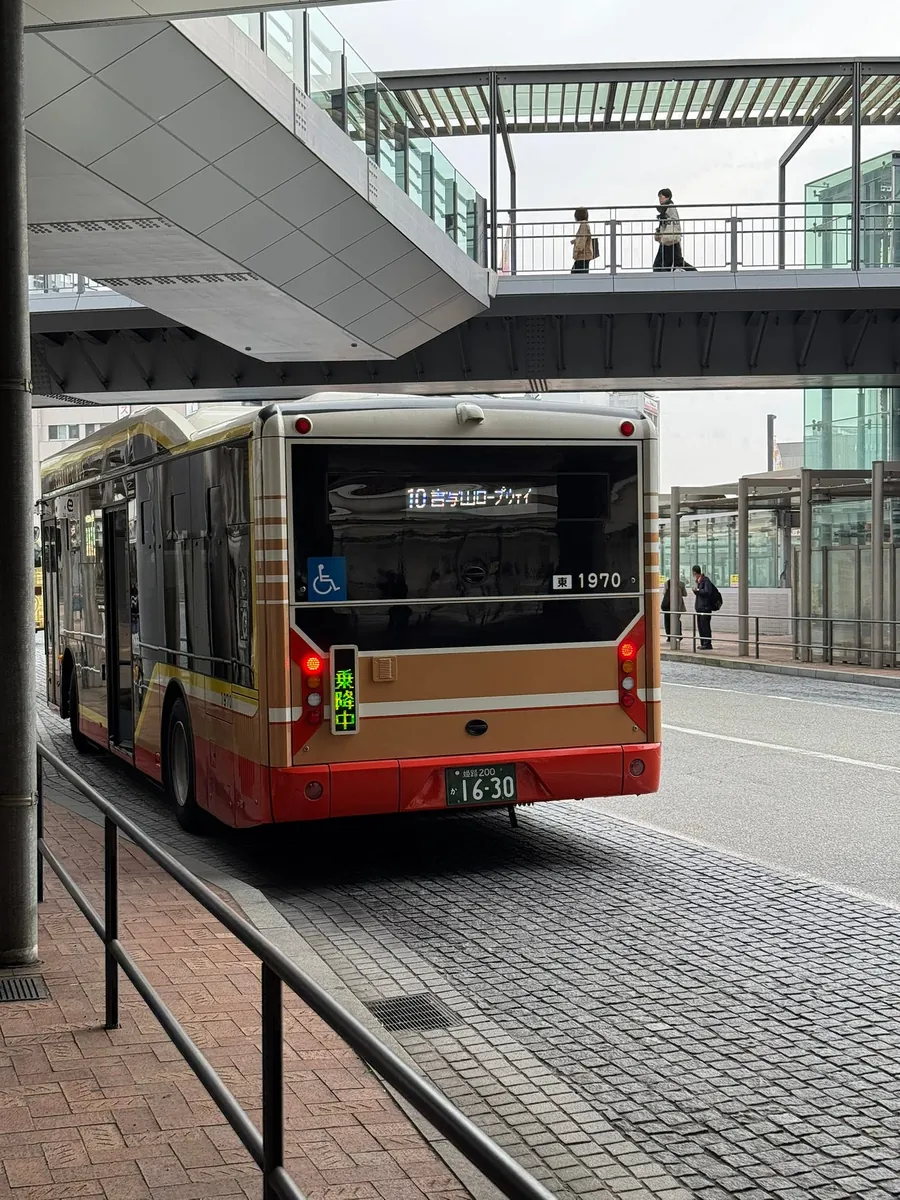
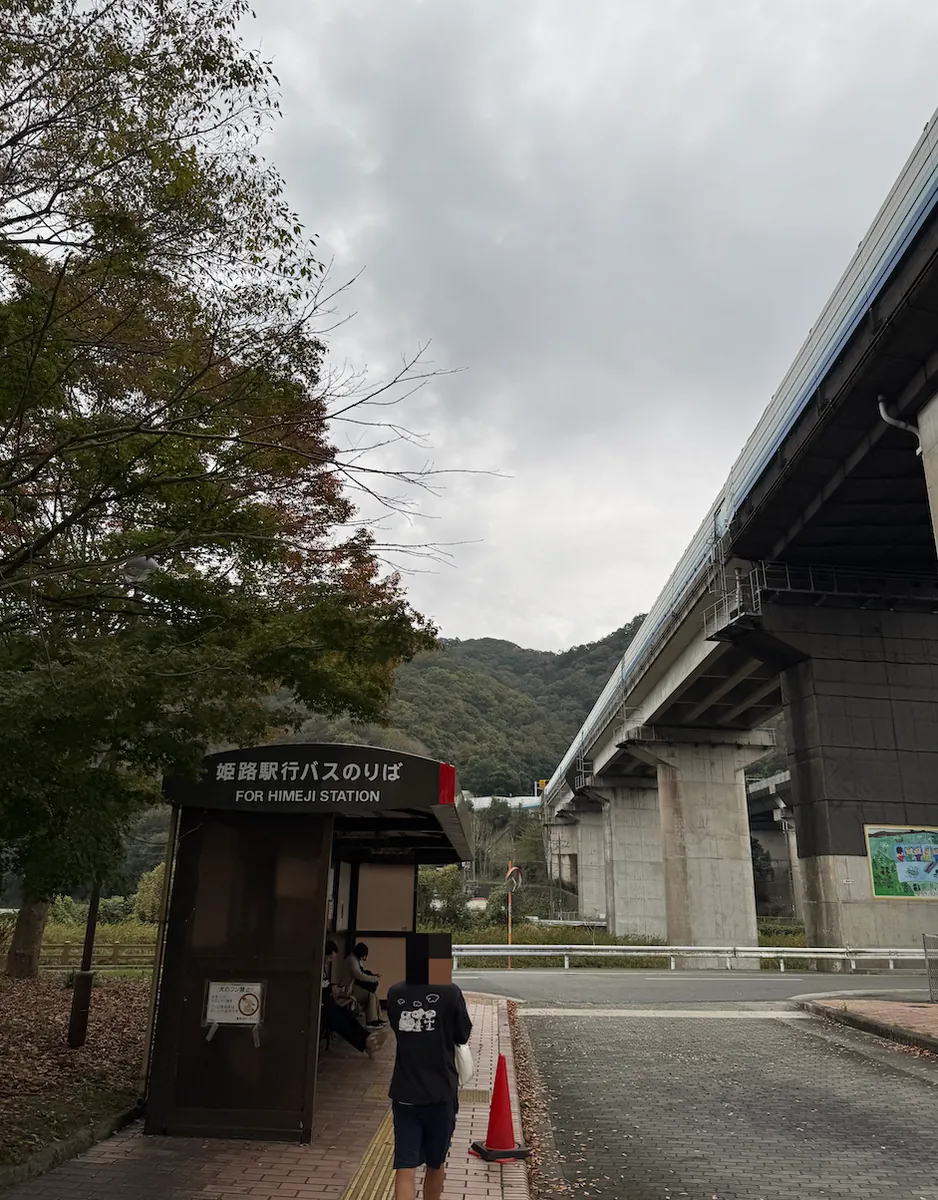
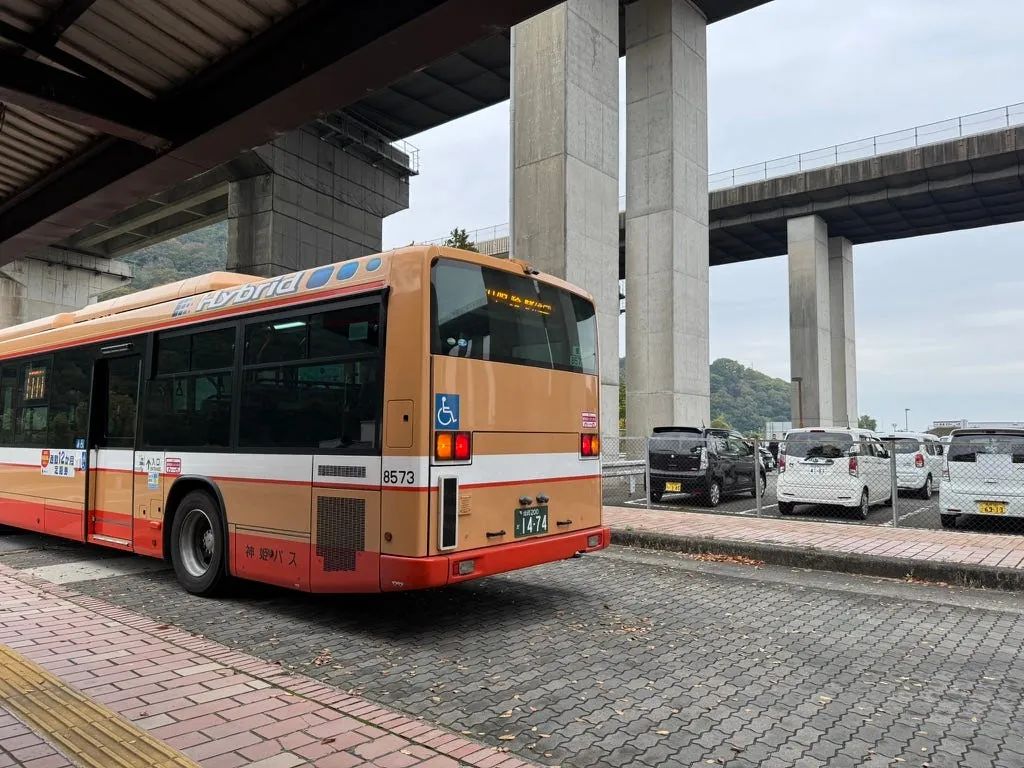
Himeji Station has several platforms. Google Maps doesn’t specify which platform or bus number to take, so you need to follow the signs on site. Take bus number 10 from platform 10, bound for Himeji Station North to Shoshazan Ropeway.
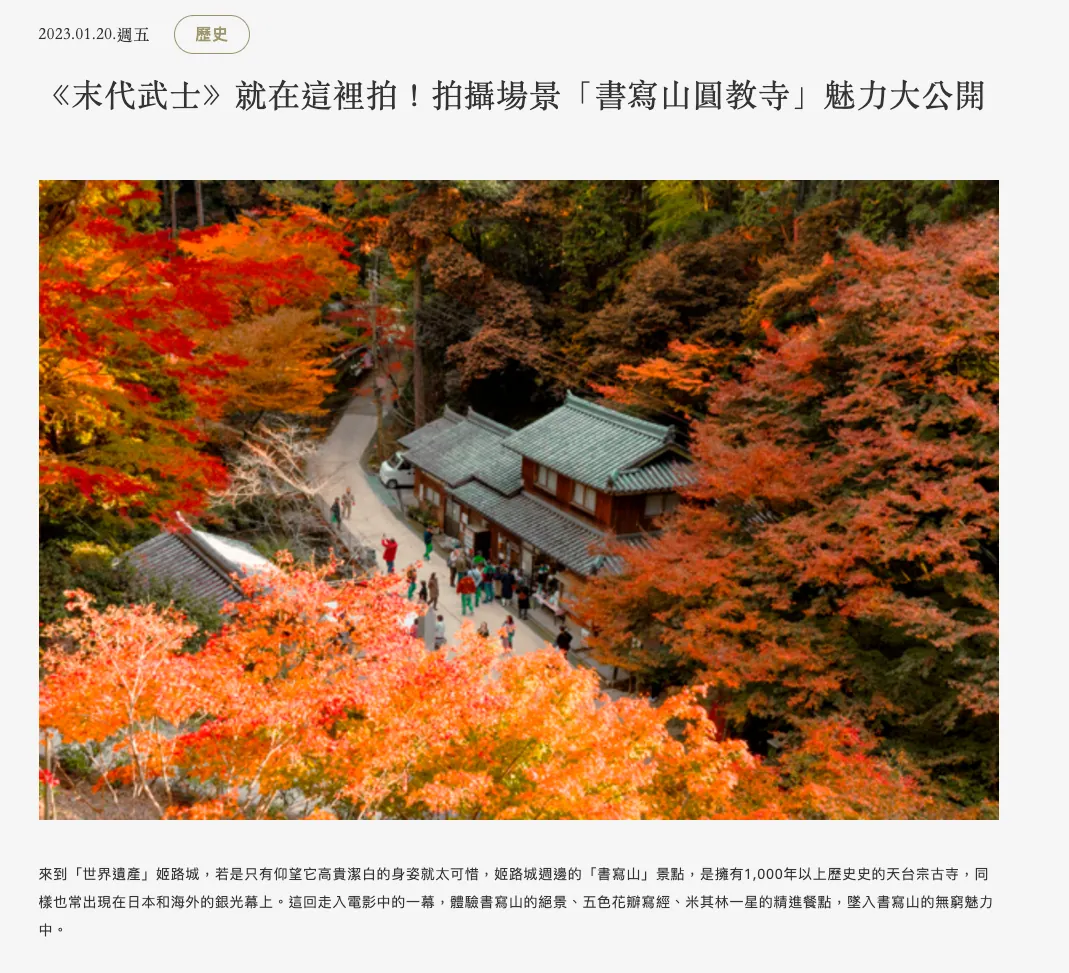
Mount Shosha Engyo-ji Temple was a filming location for the movie The Last Samurai:
~=09:20 Arrive at Shosha Cable Car Boarding Area
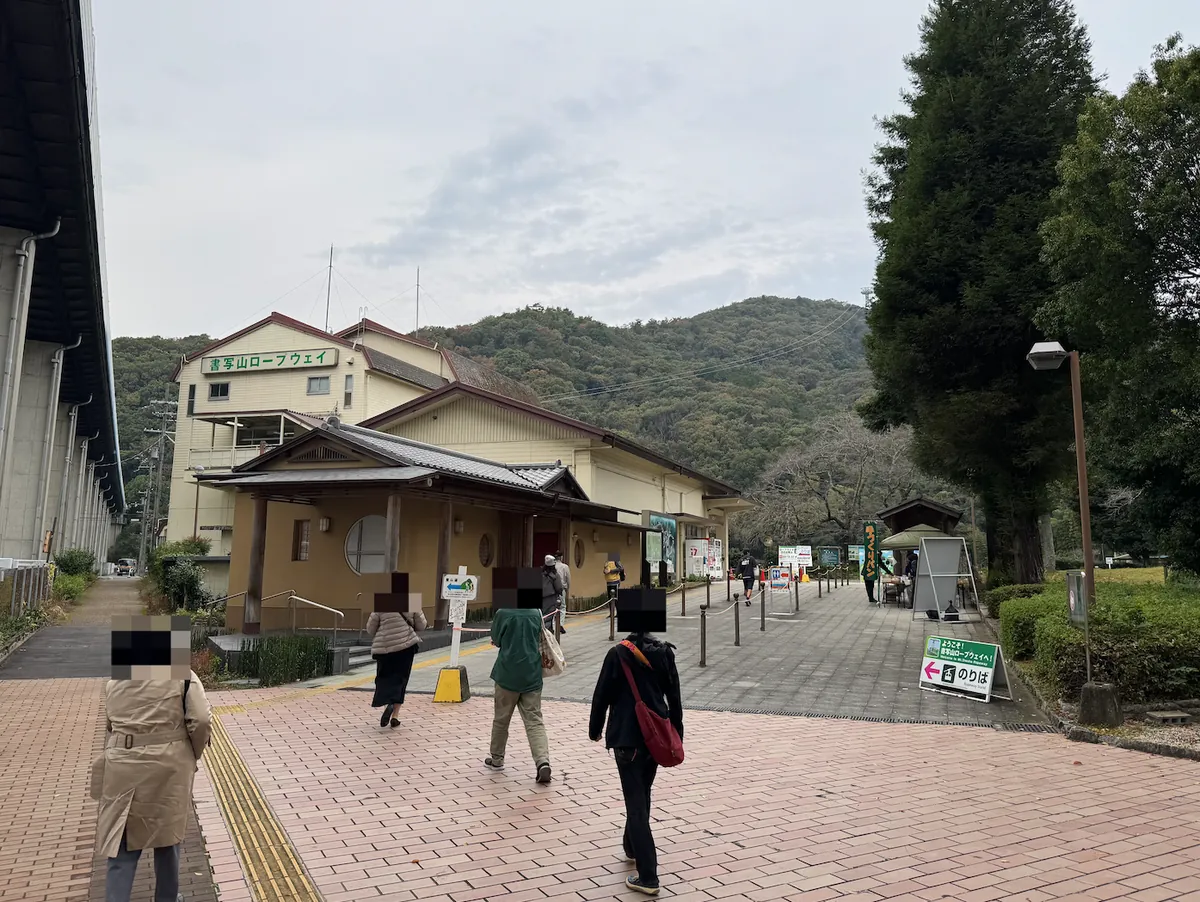
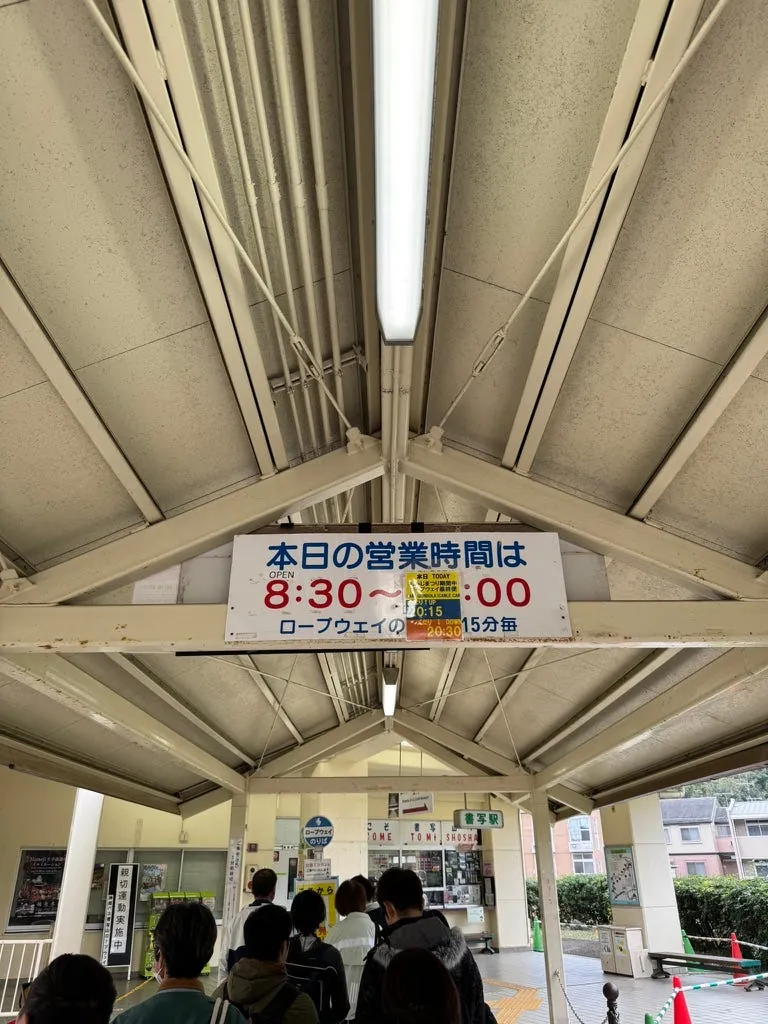
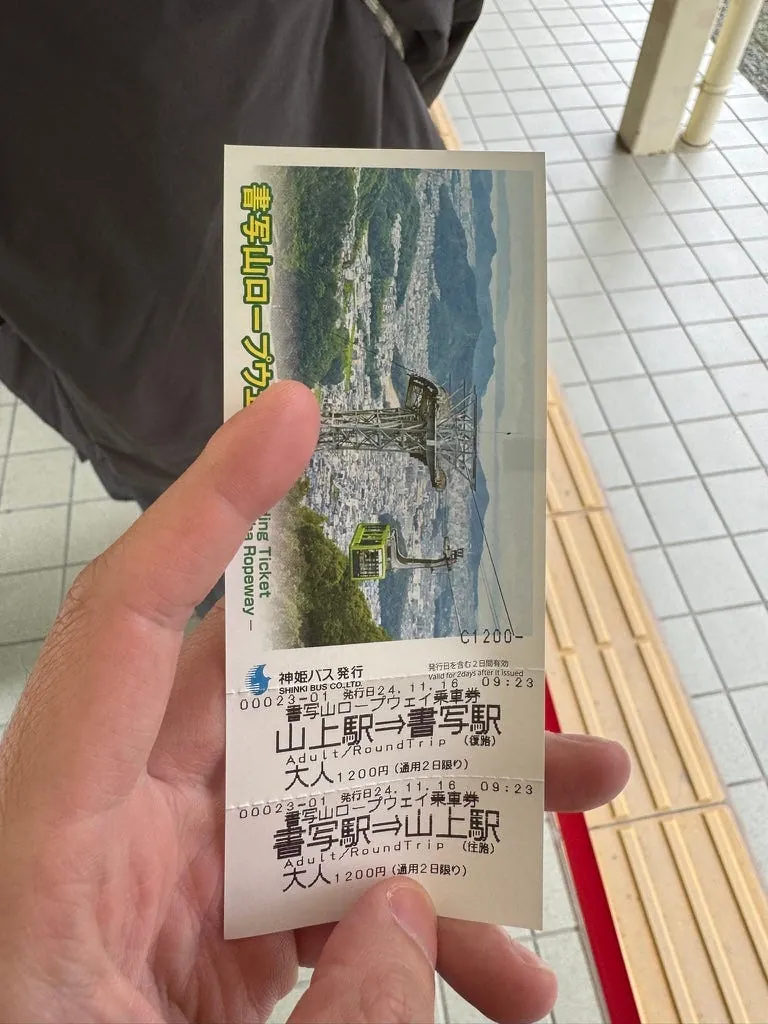
After getting off, you will find the cable car station. After buying a round-trip ticket from the vending machine, you can line up to wait for the cable car. (Runs every 15 minutes)
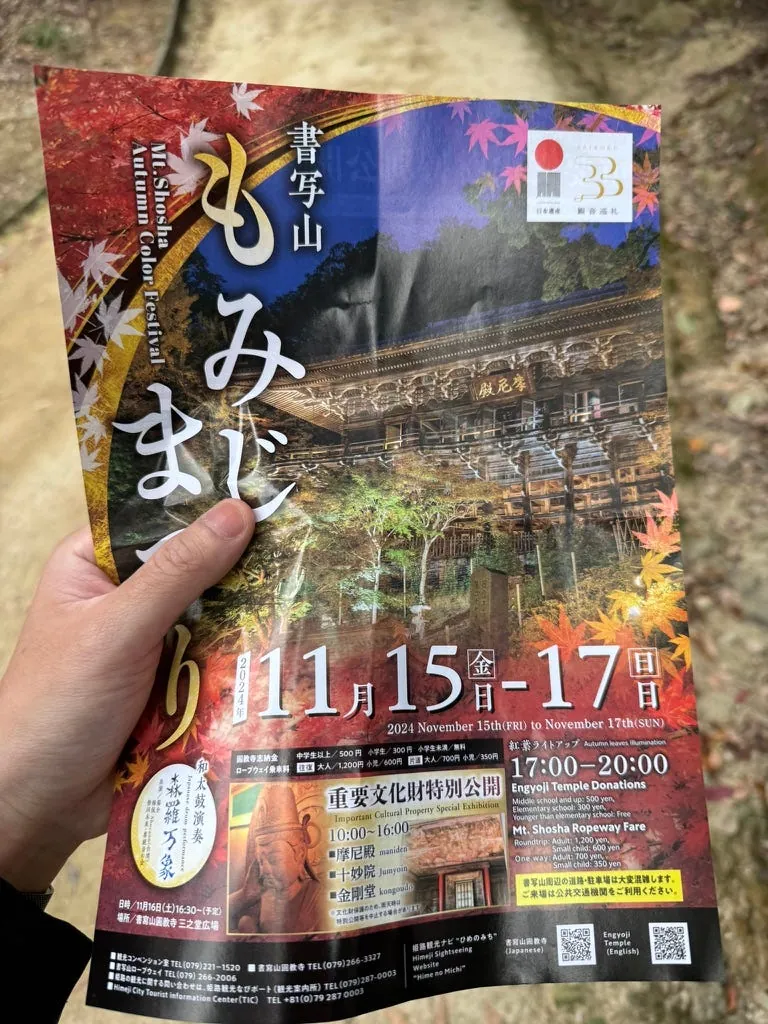
At Mount Shosha, from 11/15 to 11/17, there is a special night opening event until 8:00 PM, and the cable car service is extended until 8:30 PM.
09:30 Take the cable car up the mountain
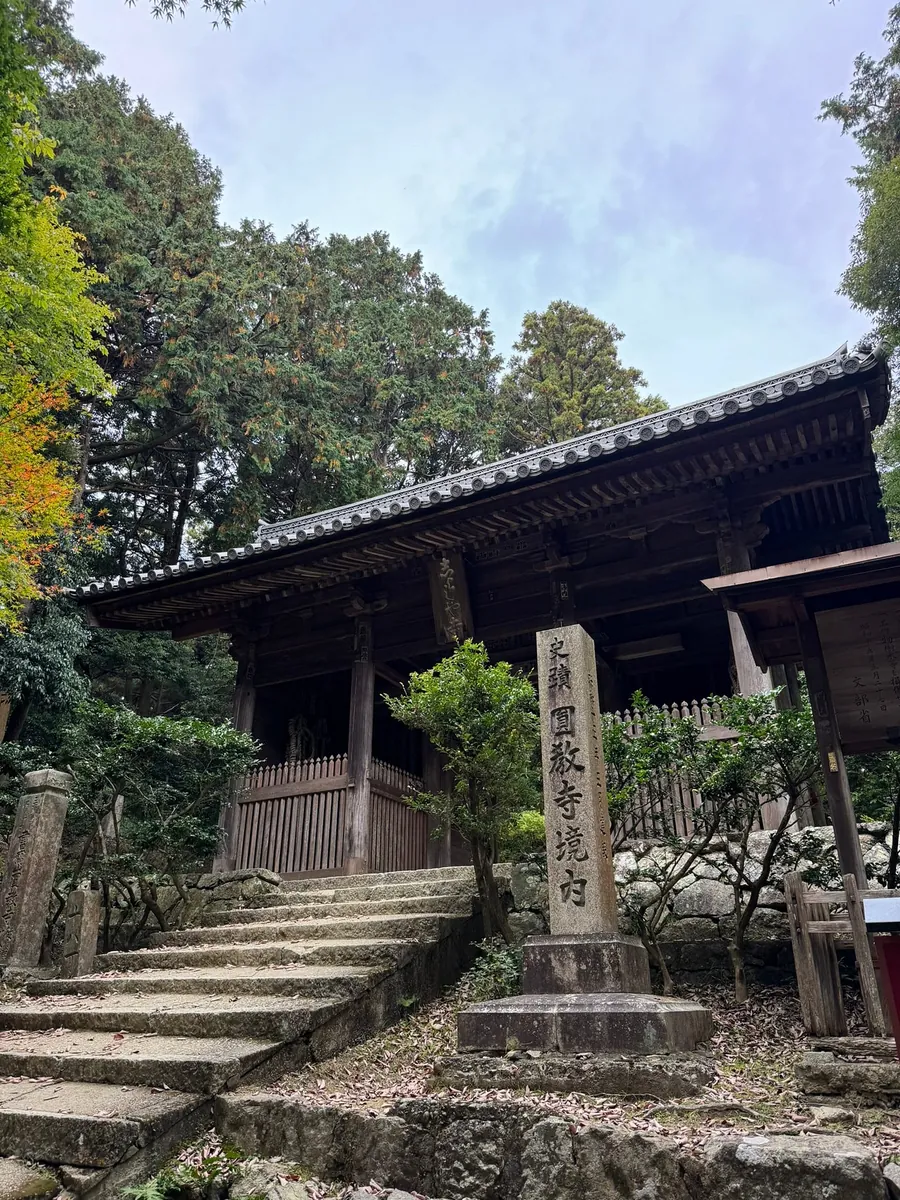
09:35 Arrive at the entrance of Shoshazan Engyo-ji Temple
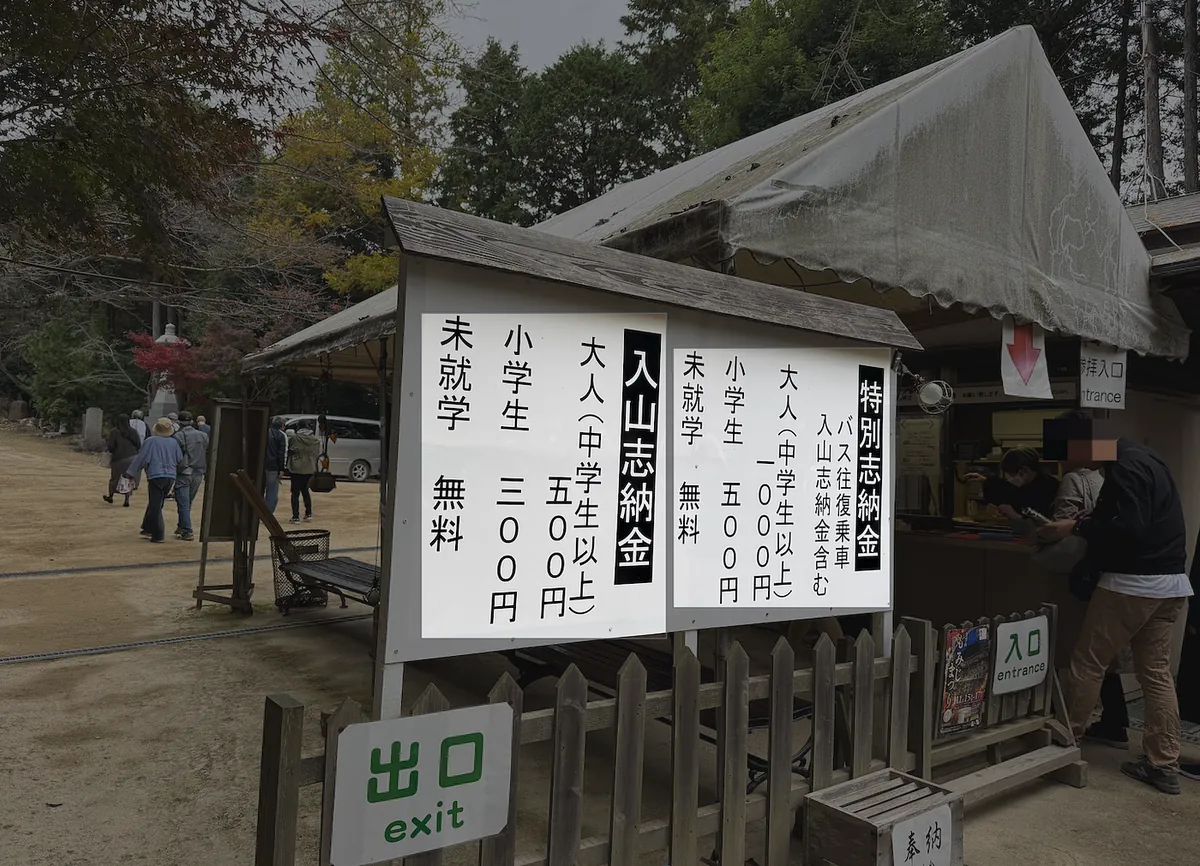
Tickets are required for entry. At that time, I only bought the regular mountain admission fee, which does not include the round-trip shuttle bus, so you have to walk up the mountain. ⚠️⚠️⚠️
About a 5-minute ride
Hiking time: about 20 minutes (1 KM)
If I had to choose again, I would pay an extra 500 yen to save time and energy.
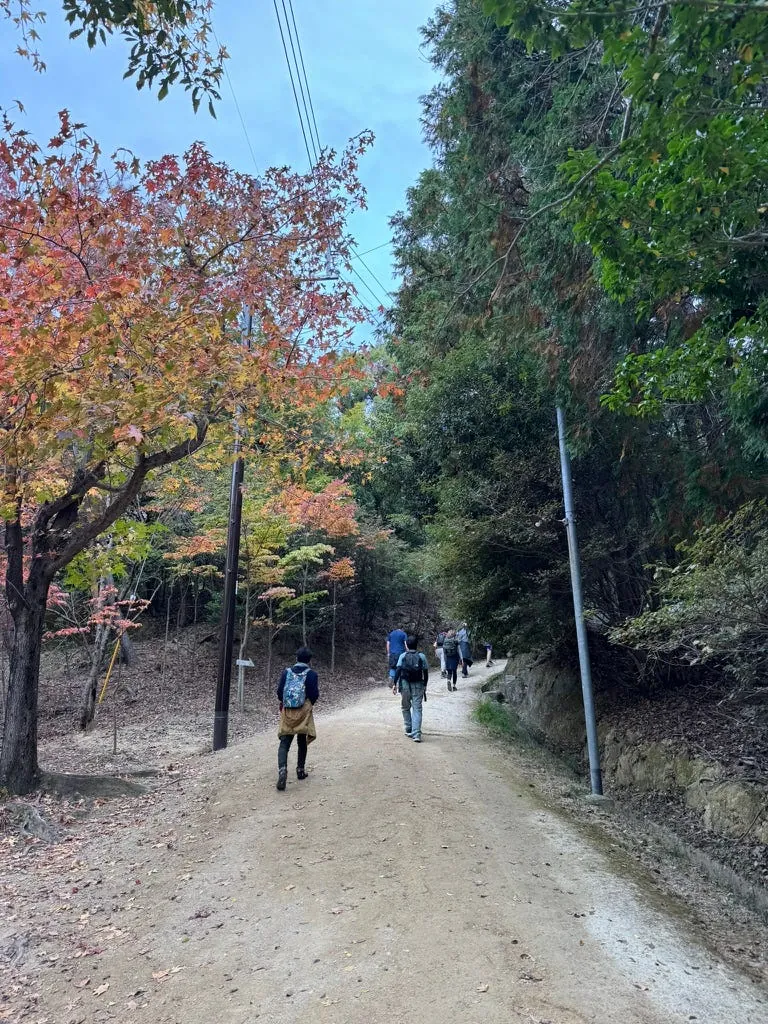
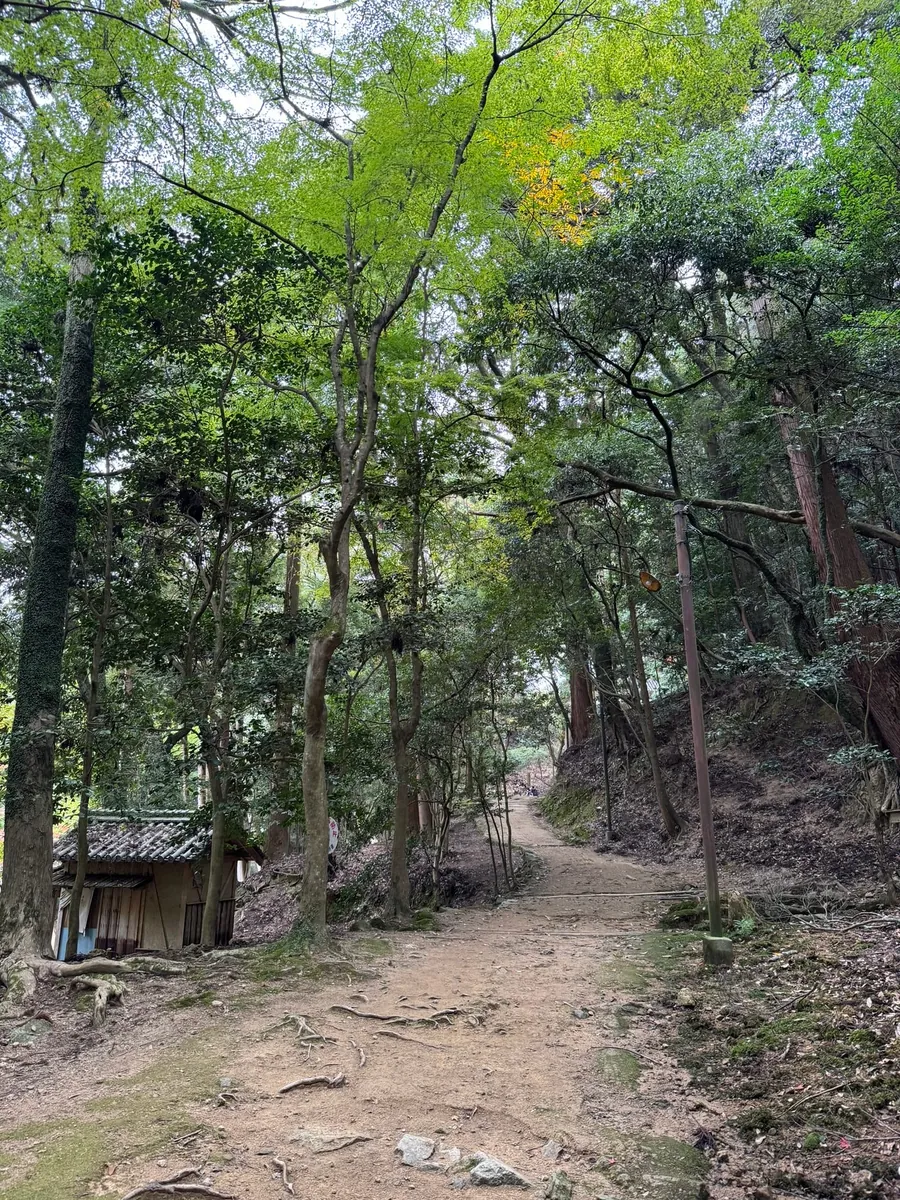
Fortunately, it was early in the morning and I still had plenty of energy and spirit, so I walked up the gentle slope while enjoying the autumn leaves.
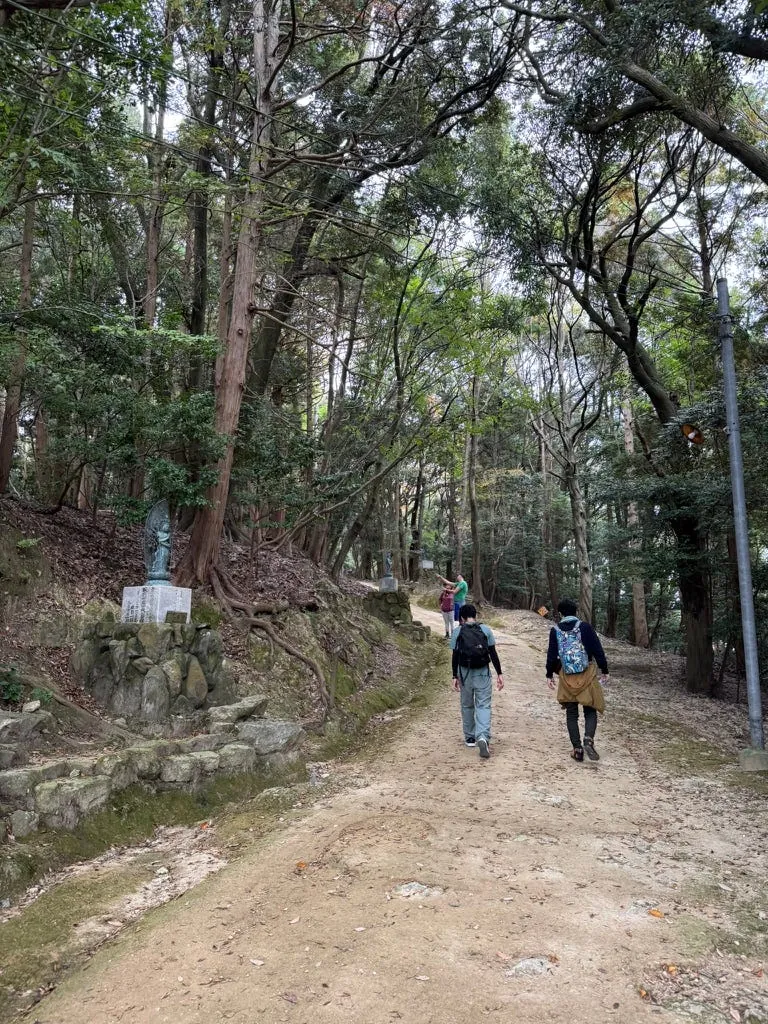
About 400 meters left after passing through the Niomon Gate.
09:55 Arrive at Moni Hall

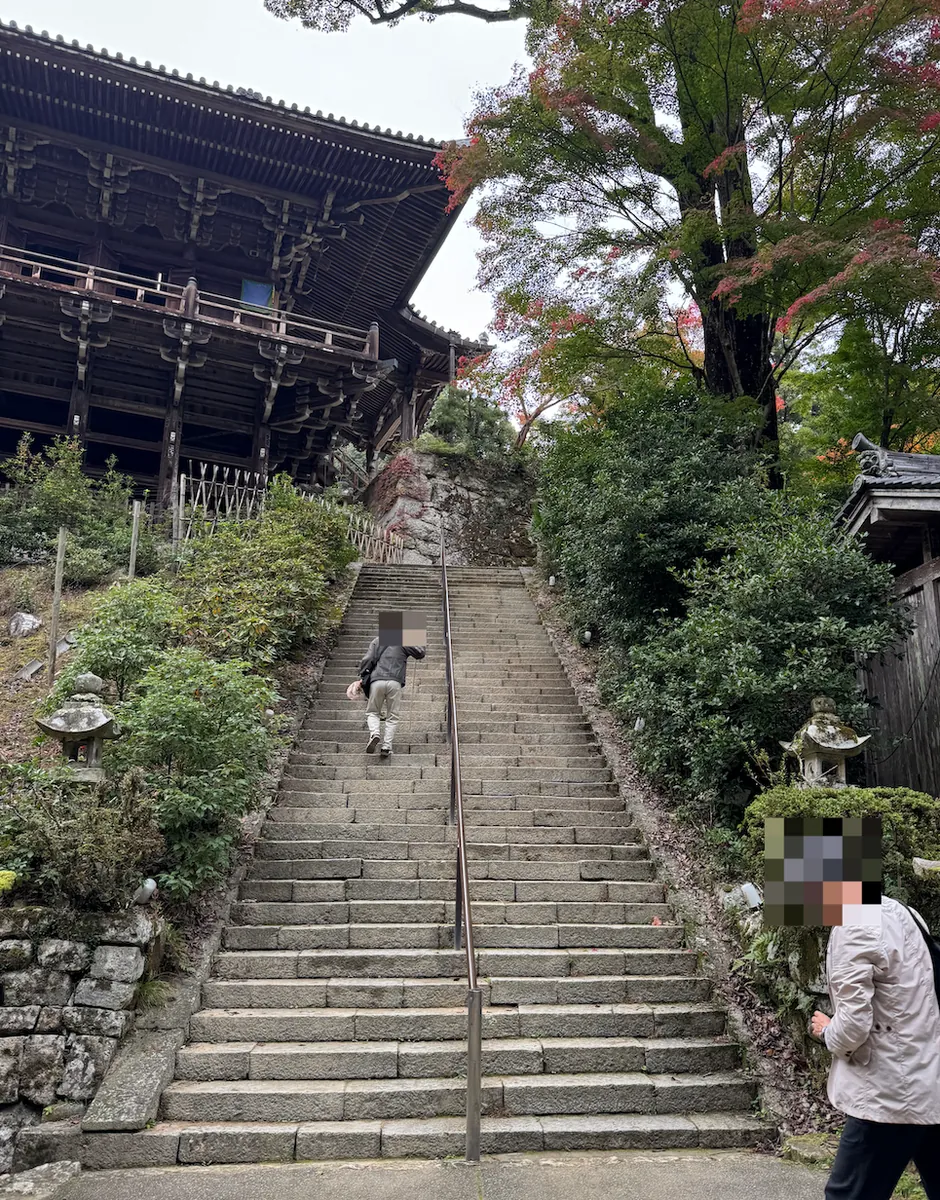
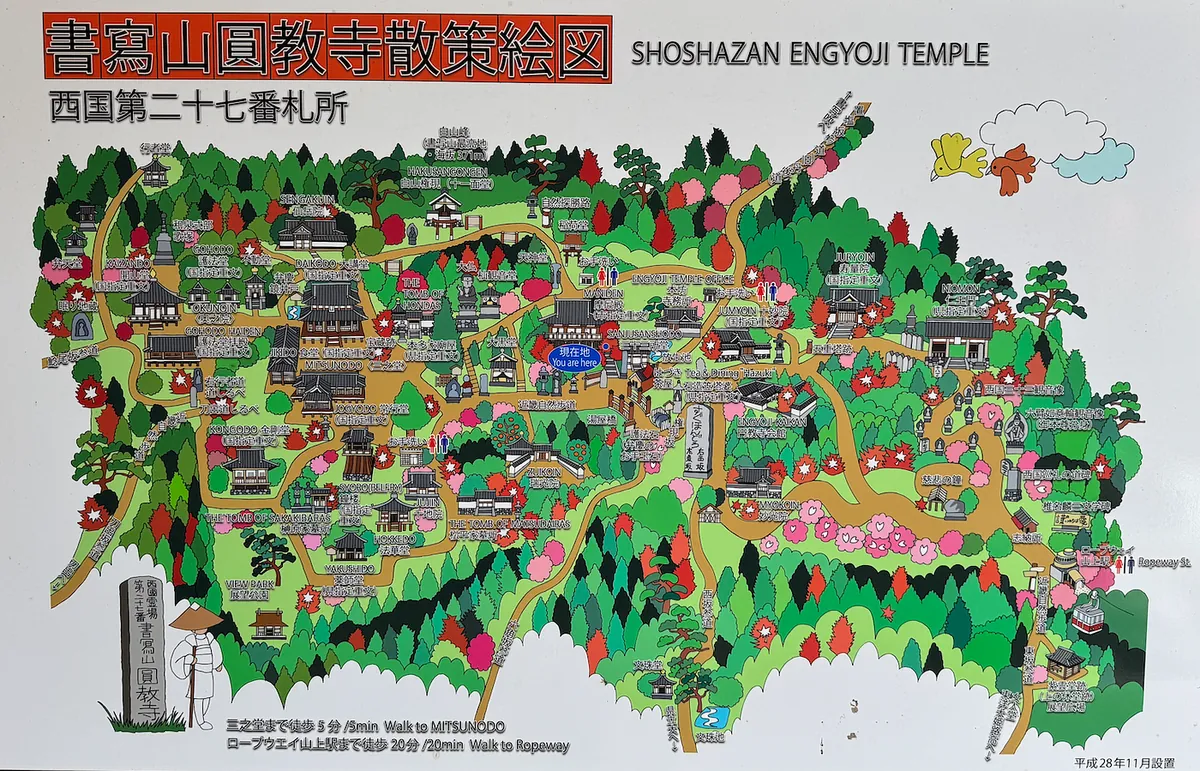
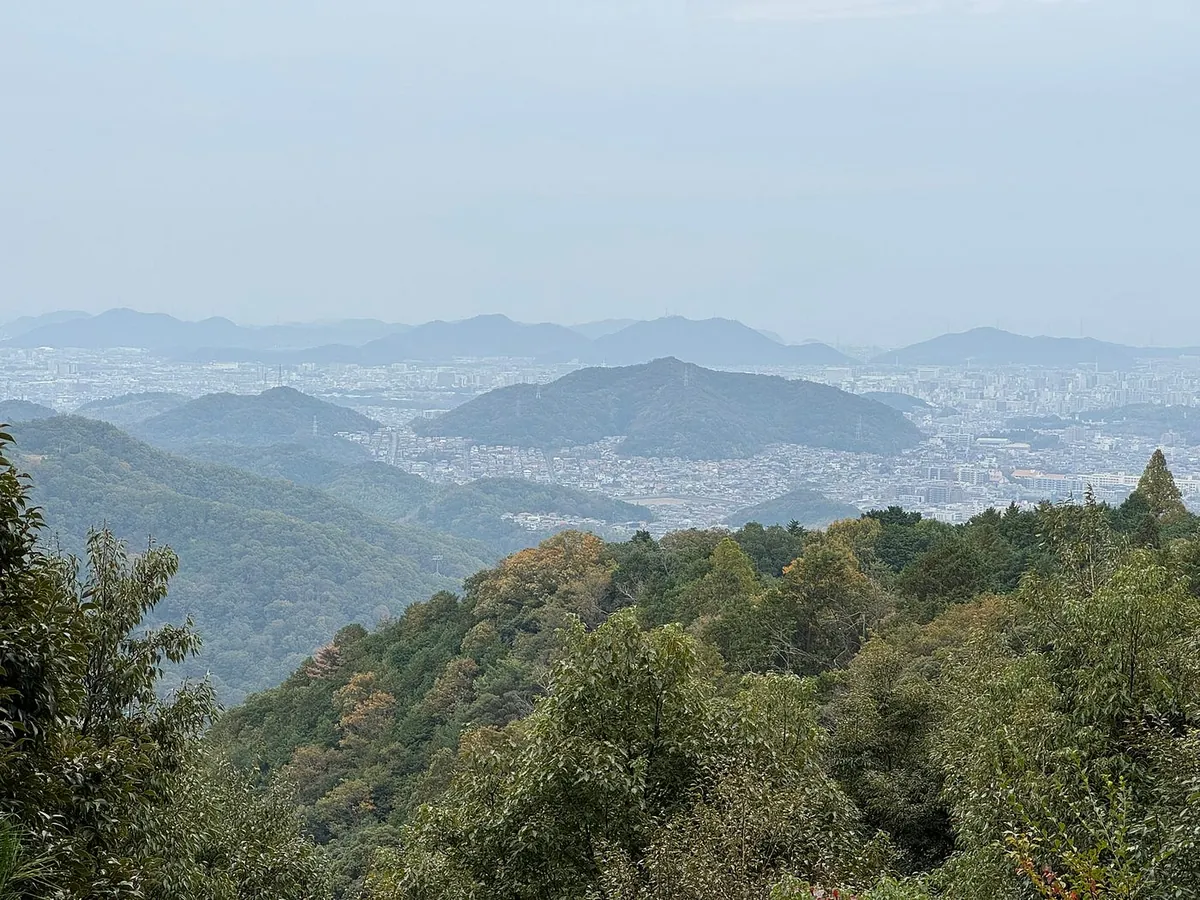
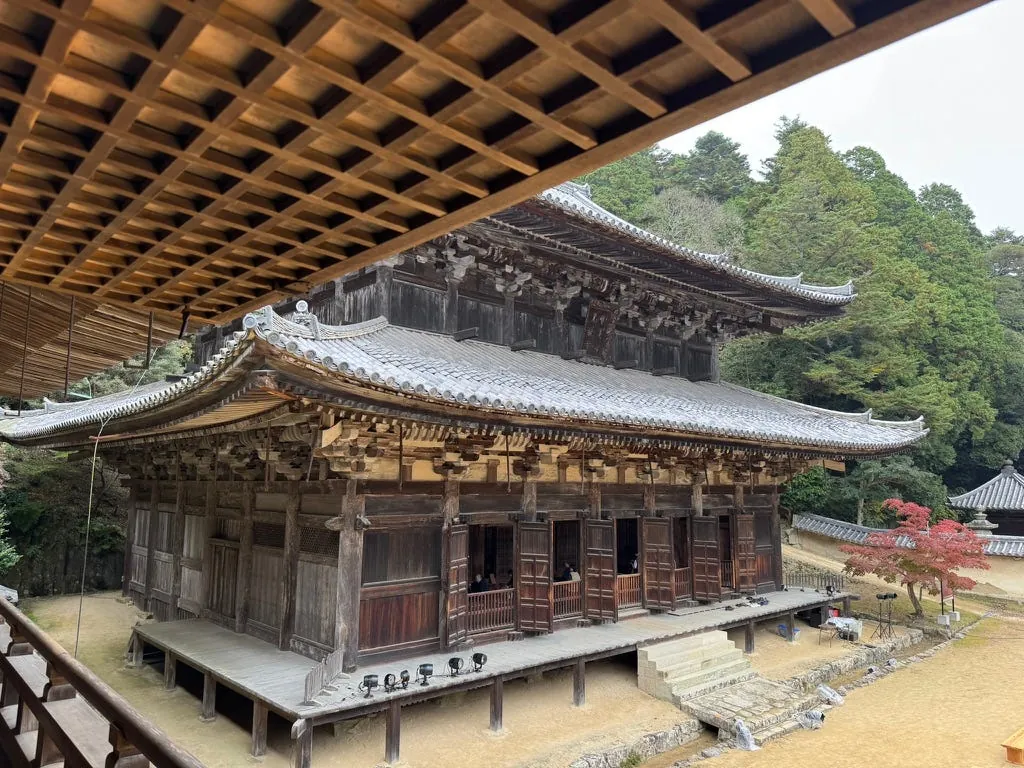
Mount Shosha Engyo-ji Temple covers a vast area, and I think it takes at least 2 hours to explore it all.
I only visited the Mani Hall and the Great Lecture Hall before heading back down the mountain.
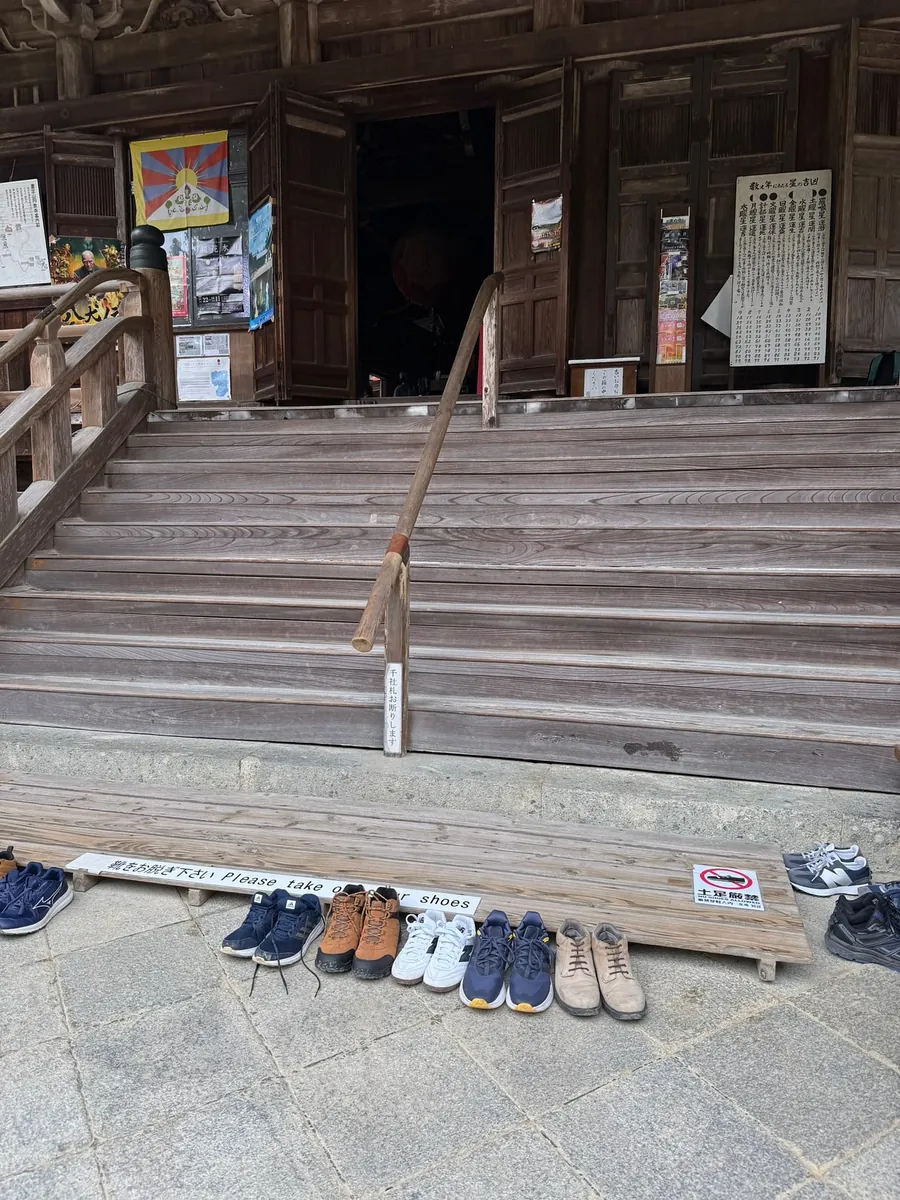

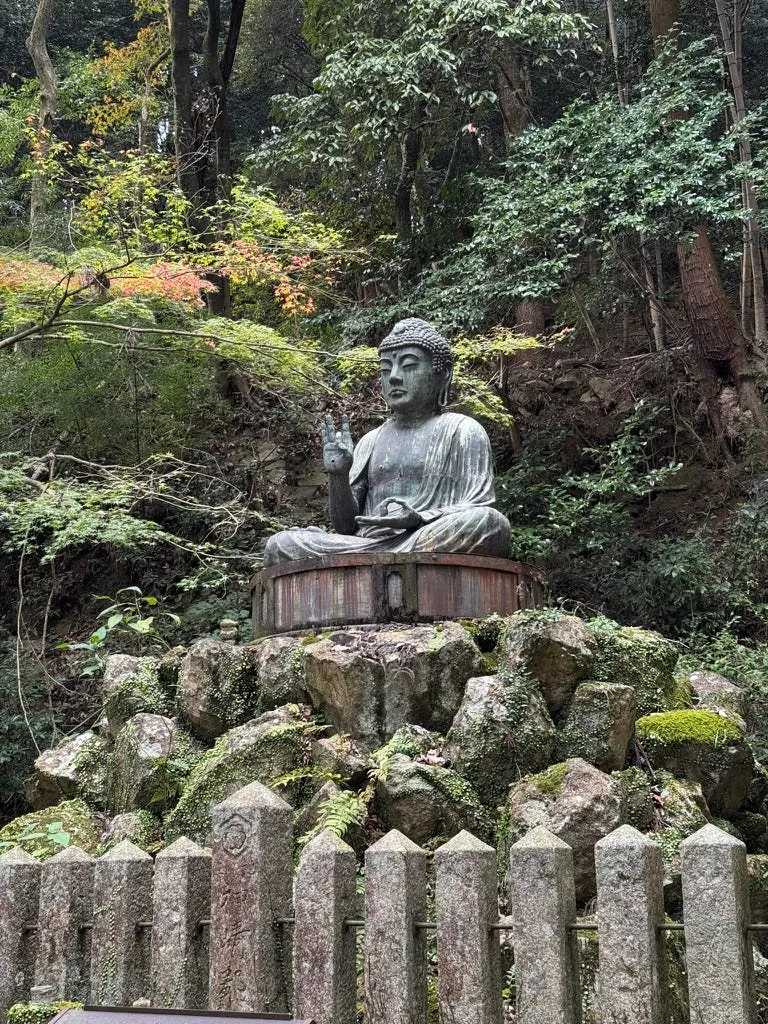
You can take off your shoes and enter the Mani Hall to pray, and also enjoy a bird’s-eye view of the maple leaves from here.
It is very quiet and peaceful, but this year the maple leaves turned red later, with only a few scattered trees showing color.
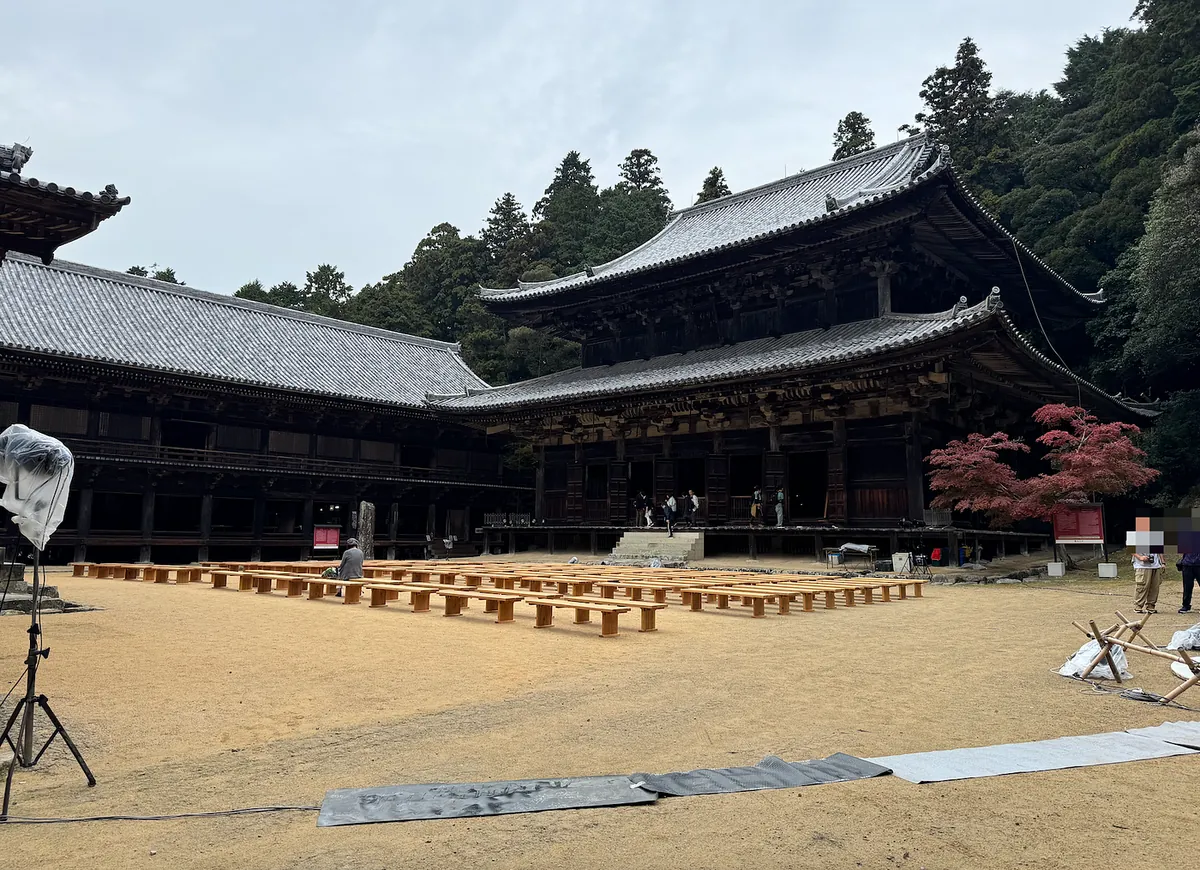
Walk forward from the rear corridor towards the Main Lecture Hall.

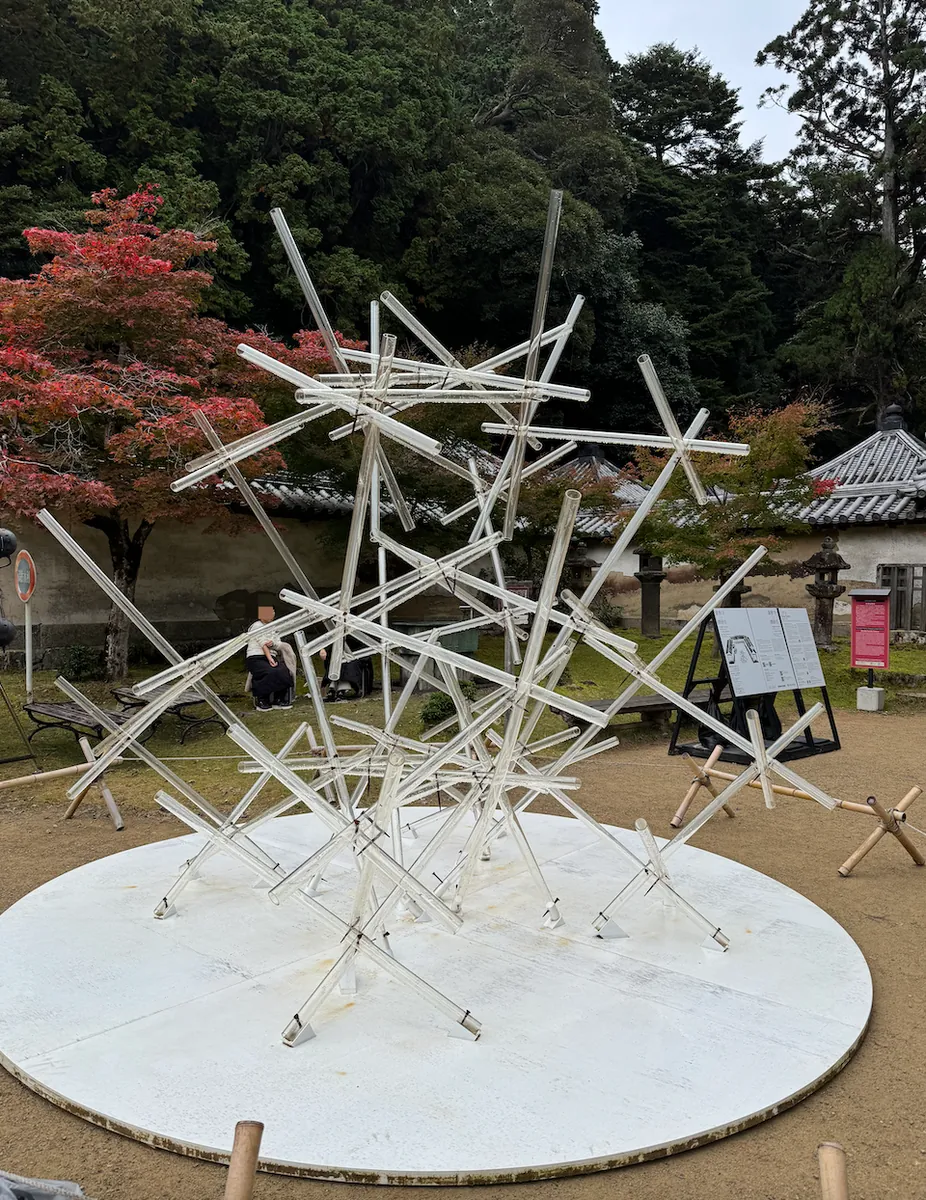
The main hall features a Engyoji x Kengo Kuma installation art, on display until 12/1.
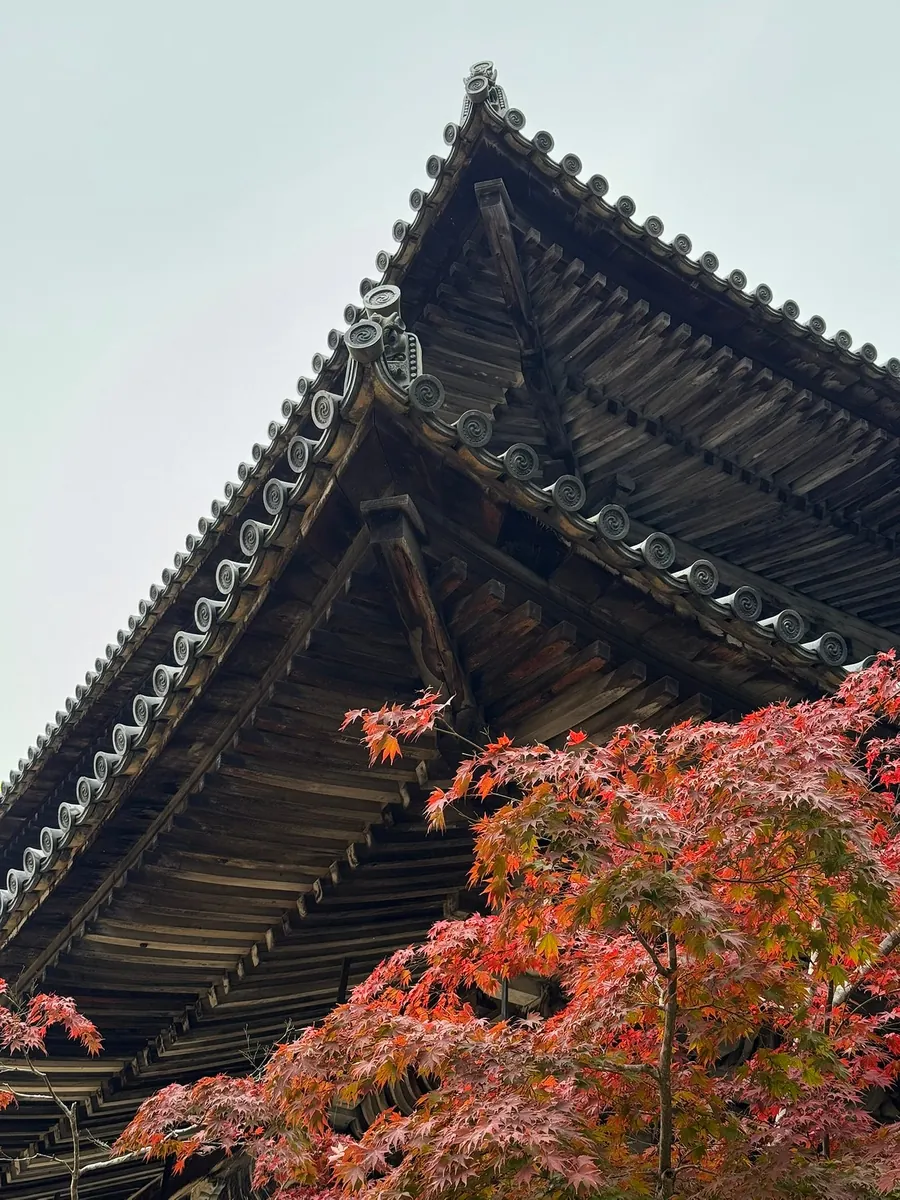
The maple leaves beside the main hall are very red.
When we arrived at the main hall, a sutra chanting was in progress. Visitors can remove their shoes and enter to pray. The chanting style of Japanese monks is different from Taiwan’s; they spread out the entire sutra, chant along, then fold it back and clap at the end.
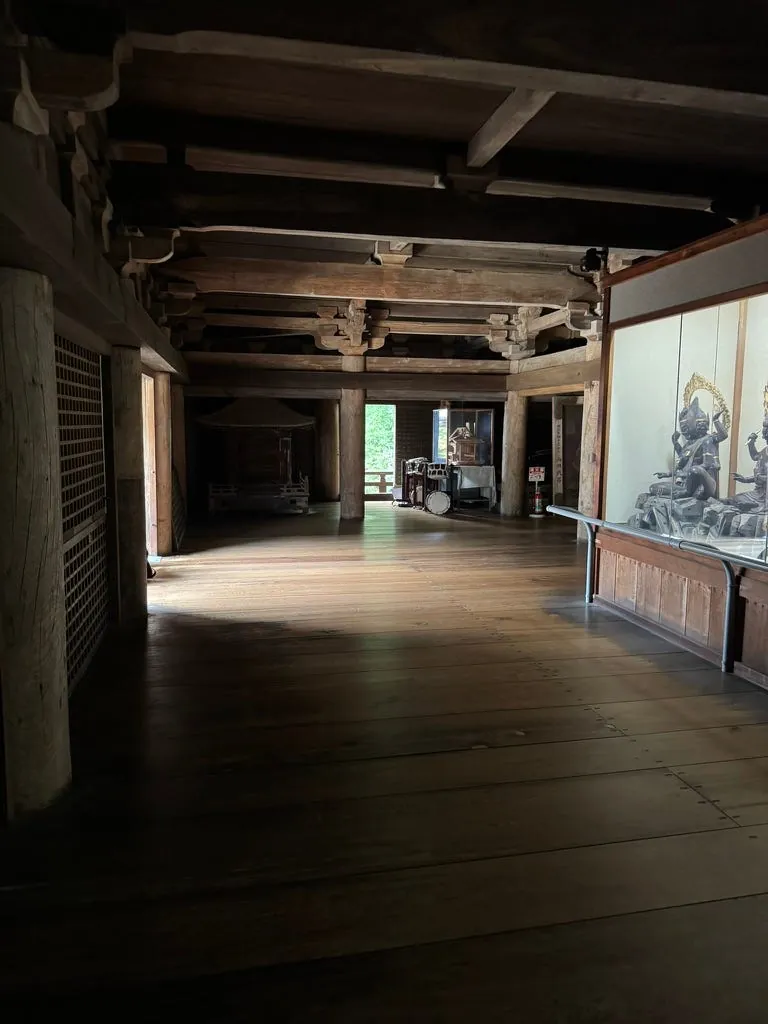
The adjacent cafeteria is also open for visits, displaying many historical artifacts.
All the buildings are historical monuments (built in 1282). Walking on them gives a feeling of traveling through history. The entire architecture is well preserved and maintained.
View of the main auditorium from the second floor of the cafeteria.
After visiting the Great Lecture Hall, I returned to the Mani Hall and bought a freshly grilled red bean mochi at the shop outside to recharge. (The freshly grilled one was delicious, with a crispy skin)

Have a safe trip home.
After eating, spend another 20 minutes walking down the mountain back to the Shinosho entrance.
~=10:55 Take the cable car down the mountain
11:10 Return to Himeji City Center
The bus stop when walking back down the mountain, around 11:05, waiting for the 11:10 bus back to Himeji city.
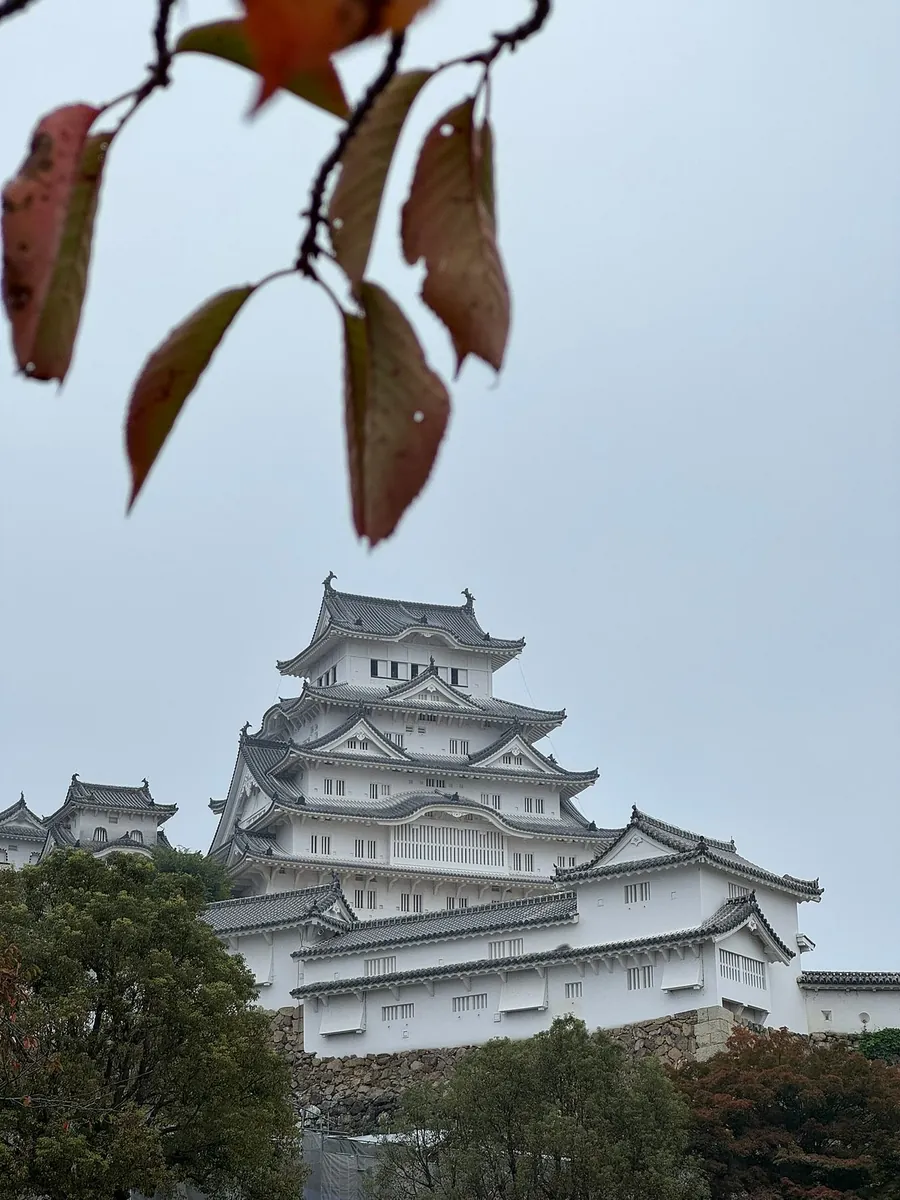
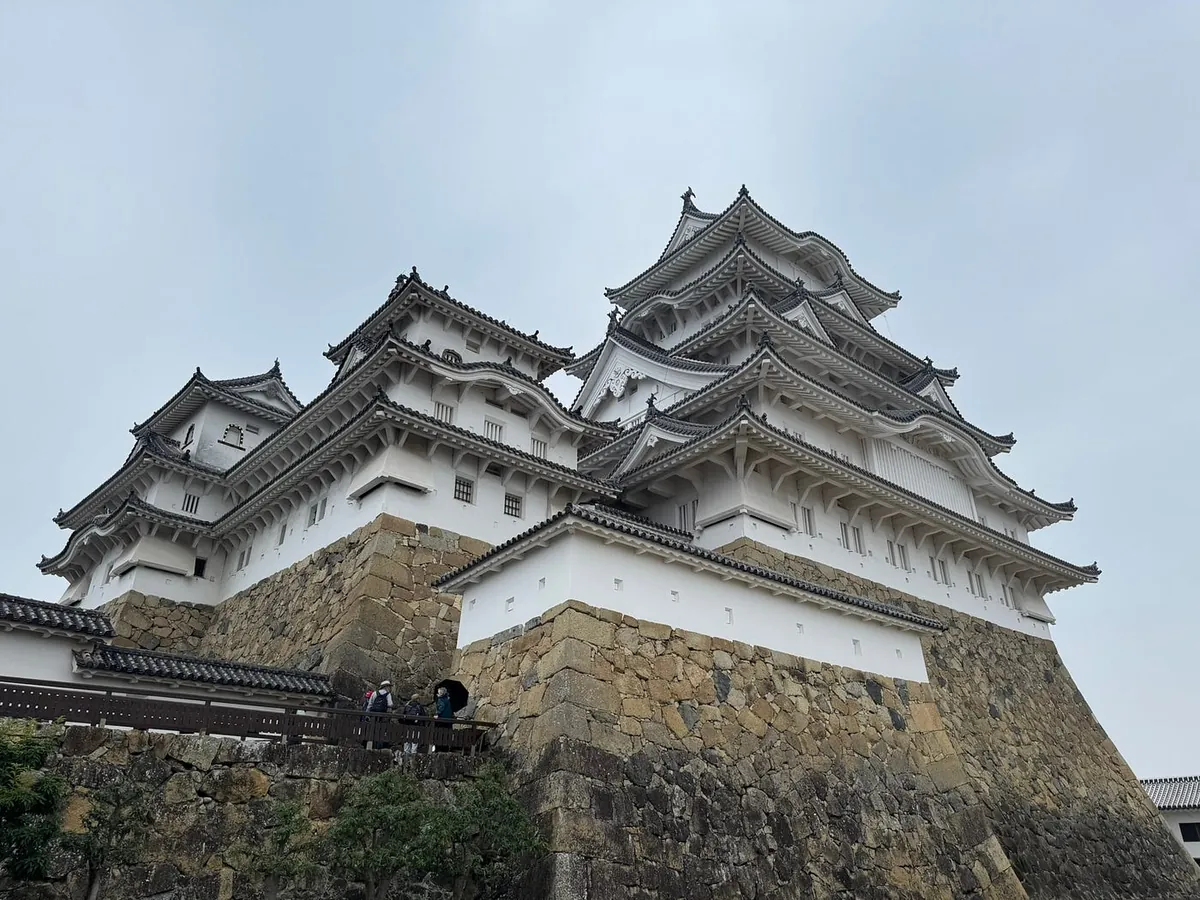
~= 11:35 Arrive at Himeji Castle
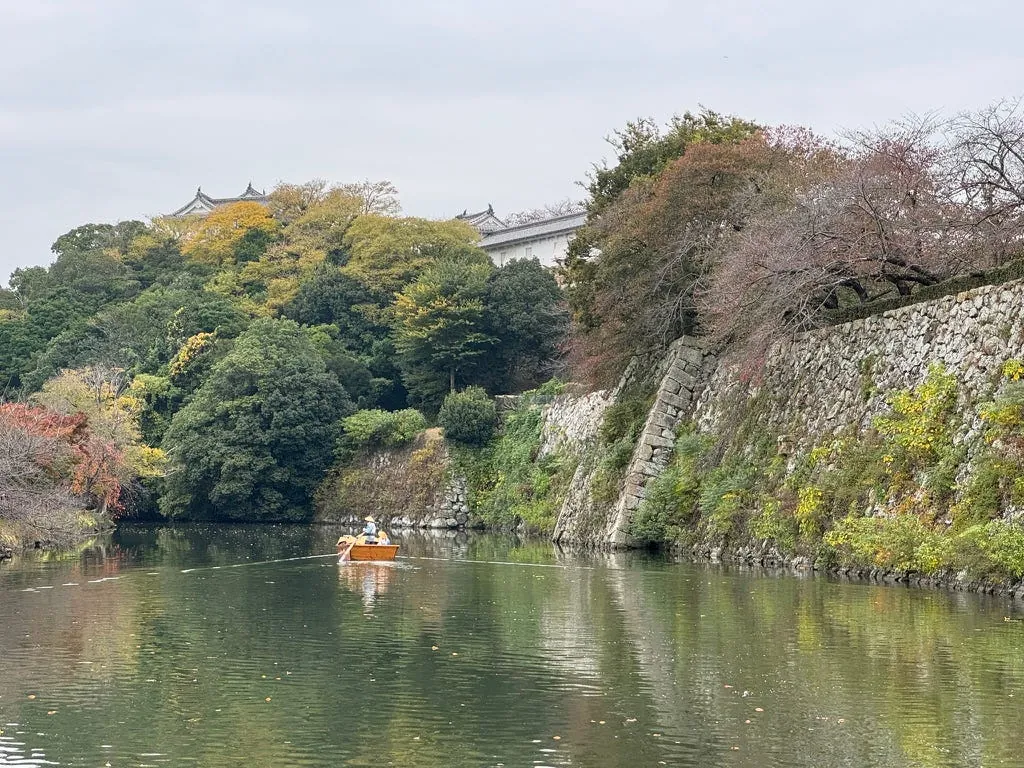
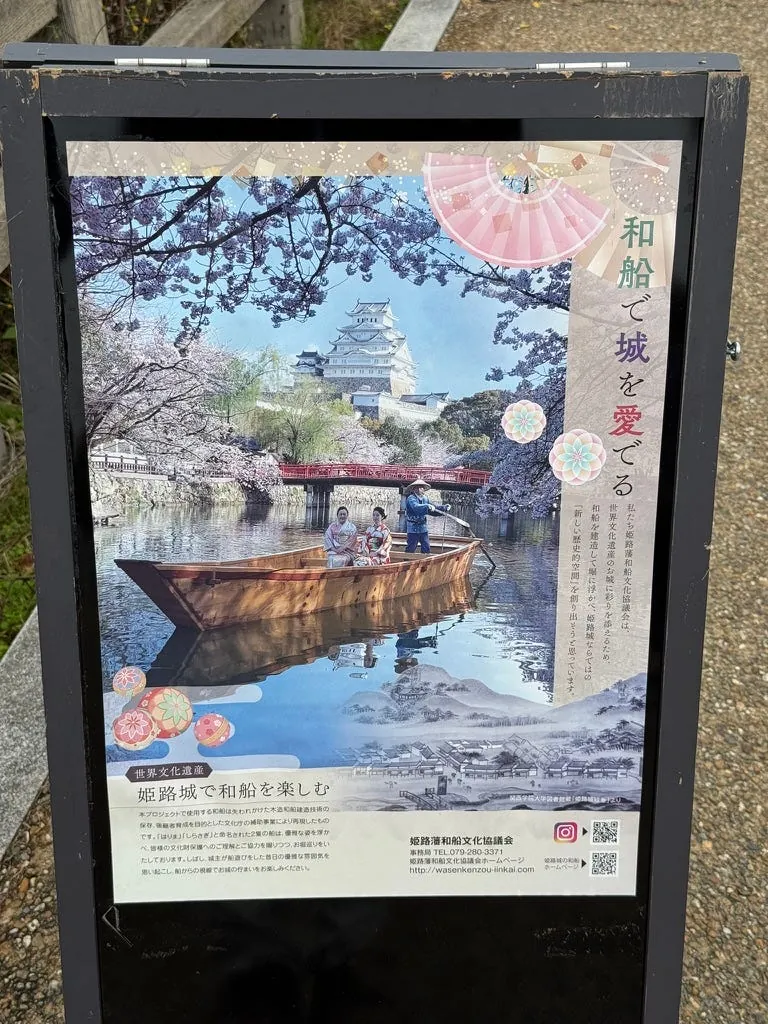
After getting off the bus, walk a bit ahead to reach the Himeji Castle boat tour. However, since the weather was gloomy and it looked like rain, I didn’t go.
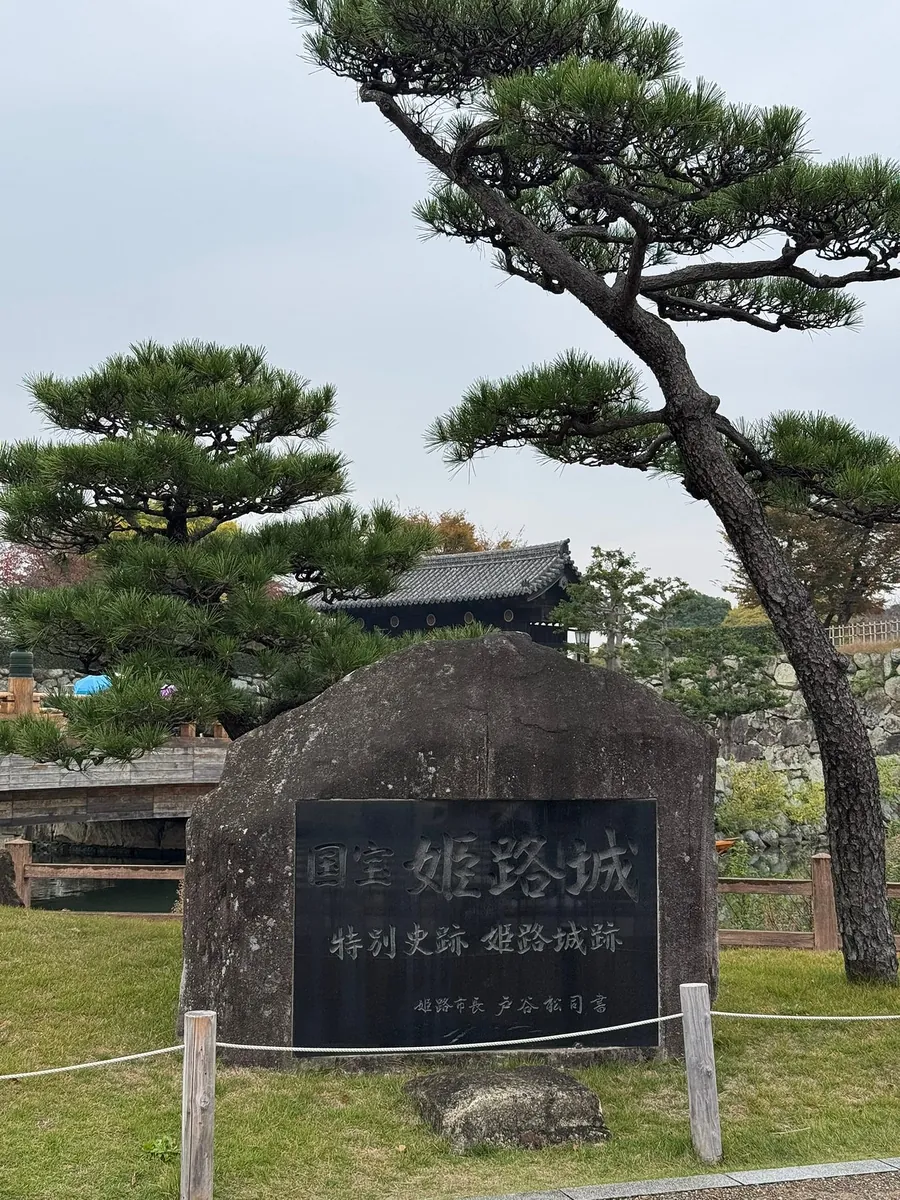
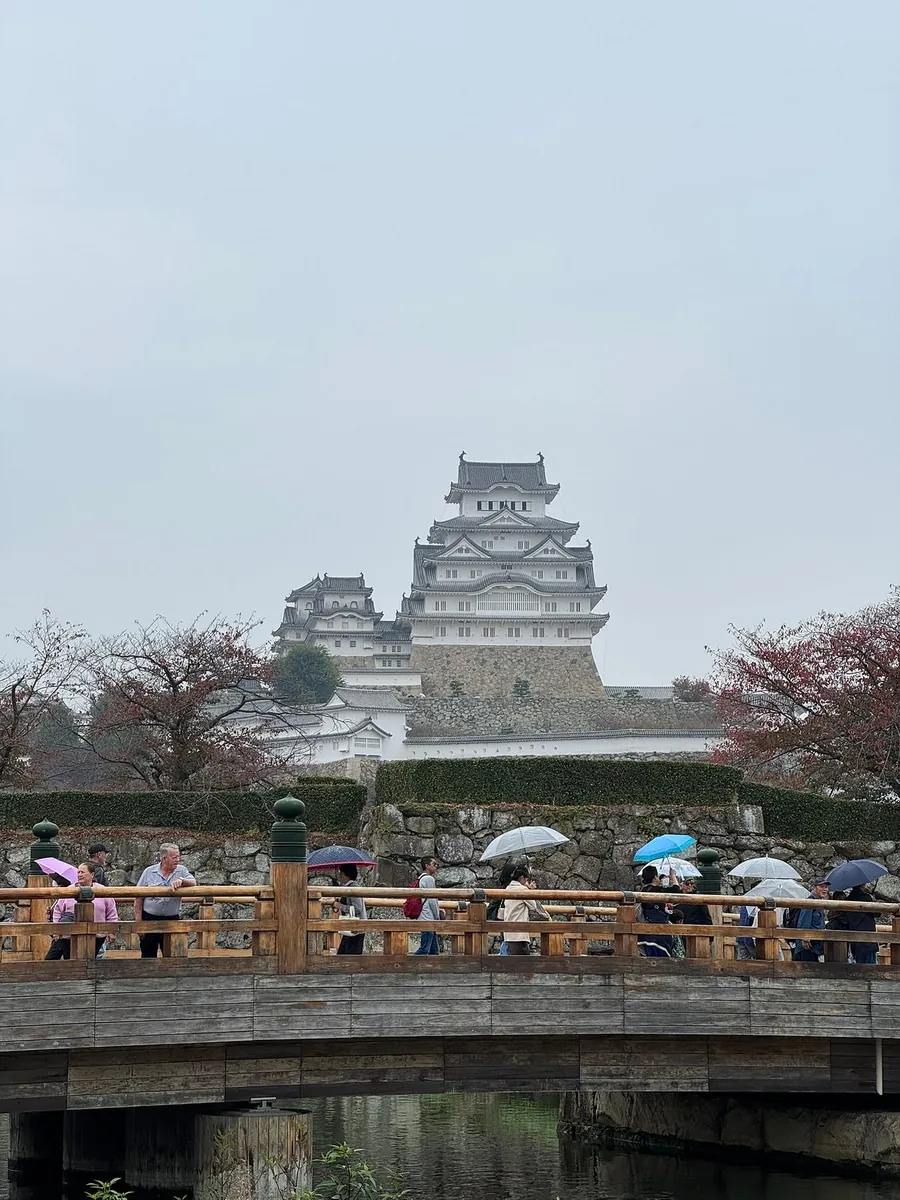
Entering Himeji Castle, the bridge at the entrance is a great spot for photos!
The San-no-maru Square in front of Himeji Castle is very large, and it takes another 5 minutes on foot from here to reach the castle entrance.
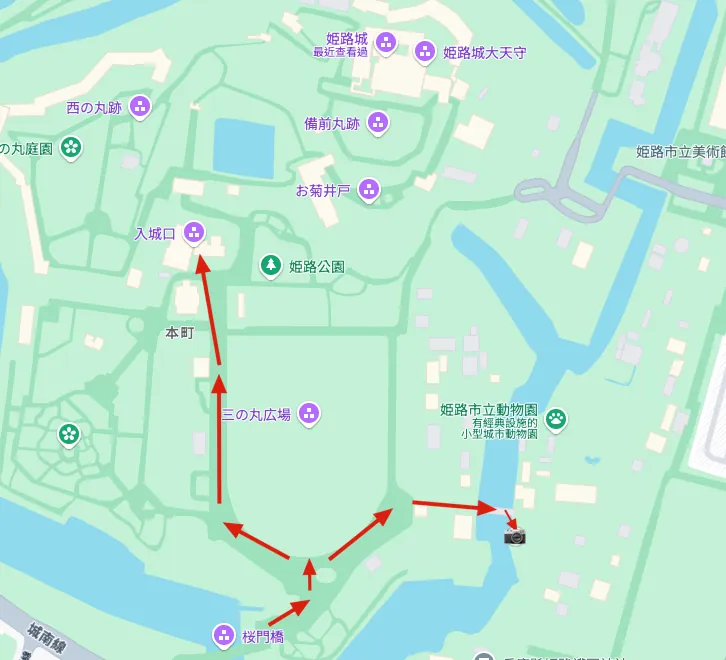
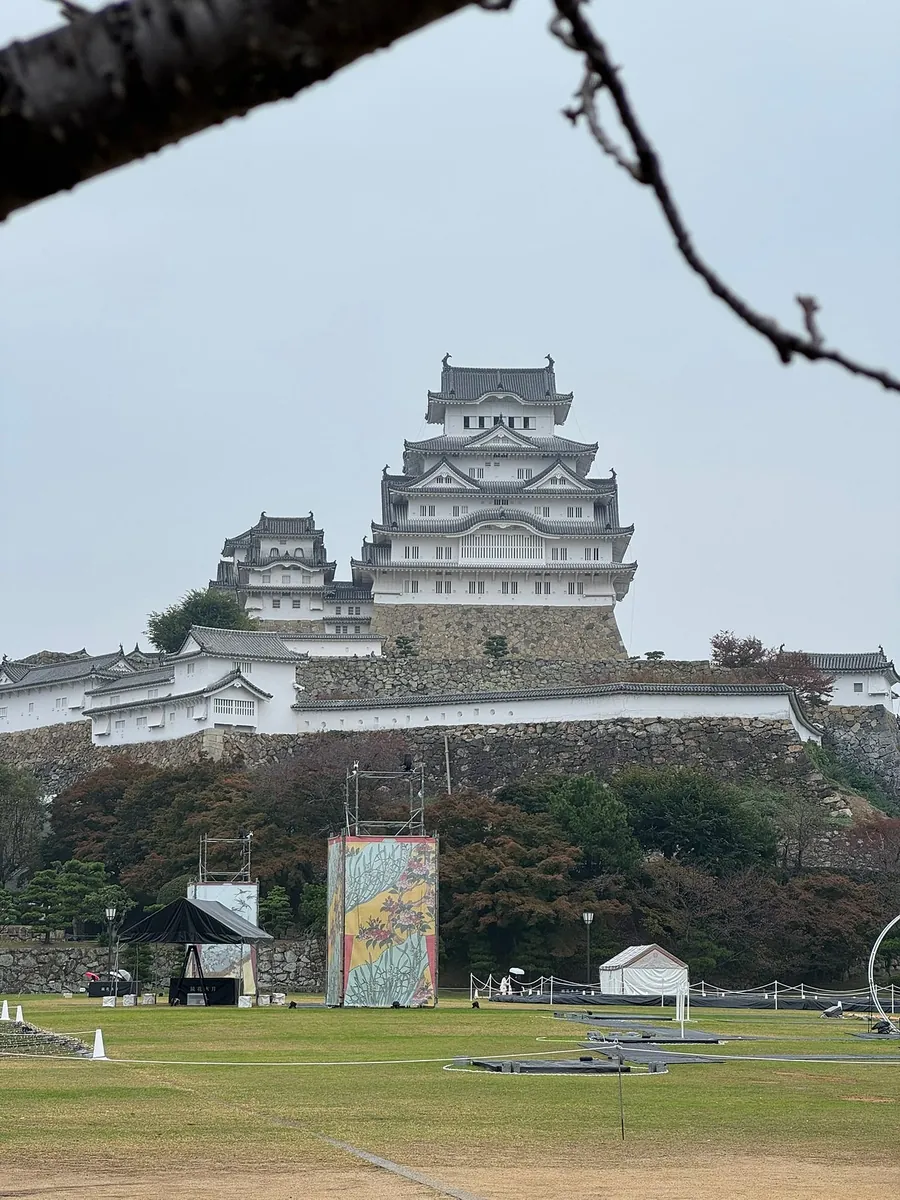
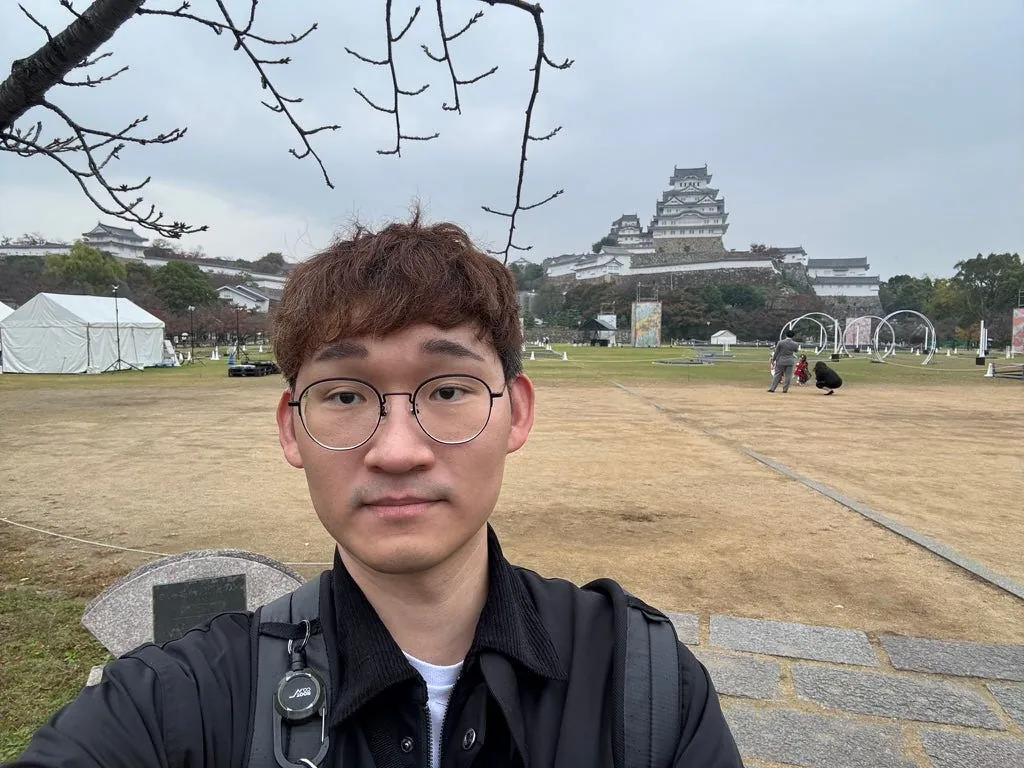
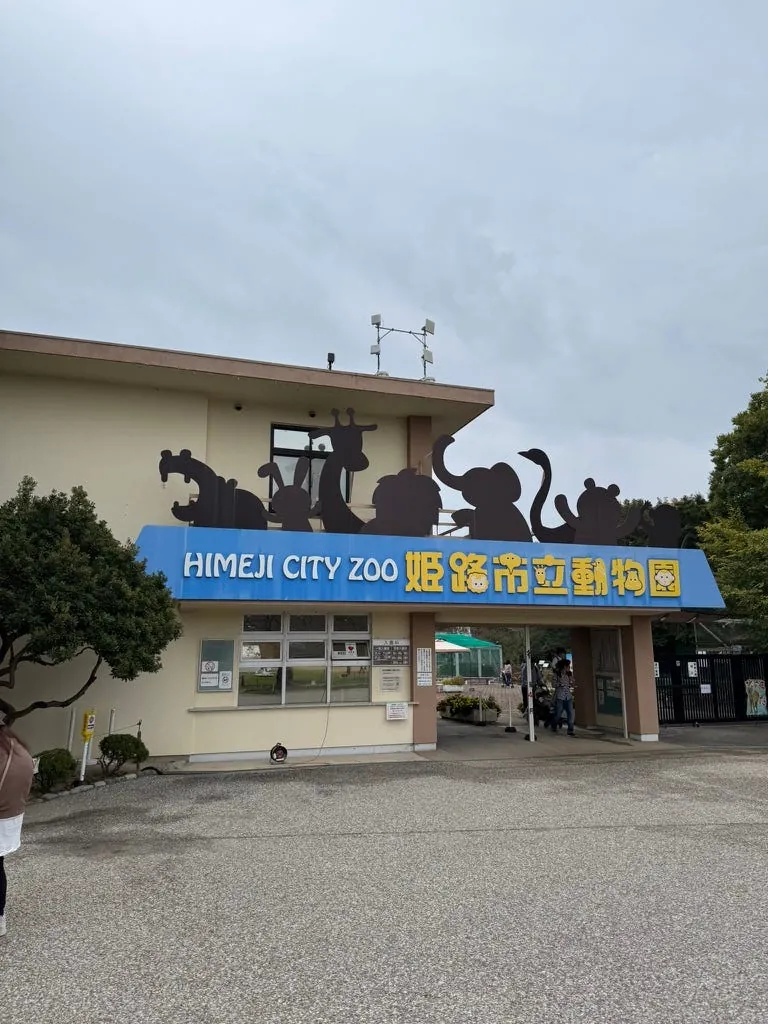
I decided to first visit the Himeji Castle photo spot recommended by a passerby yesterday. The spot is opposite the castle entrance, inside the “Himeji City Zoo” on the right side.
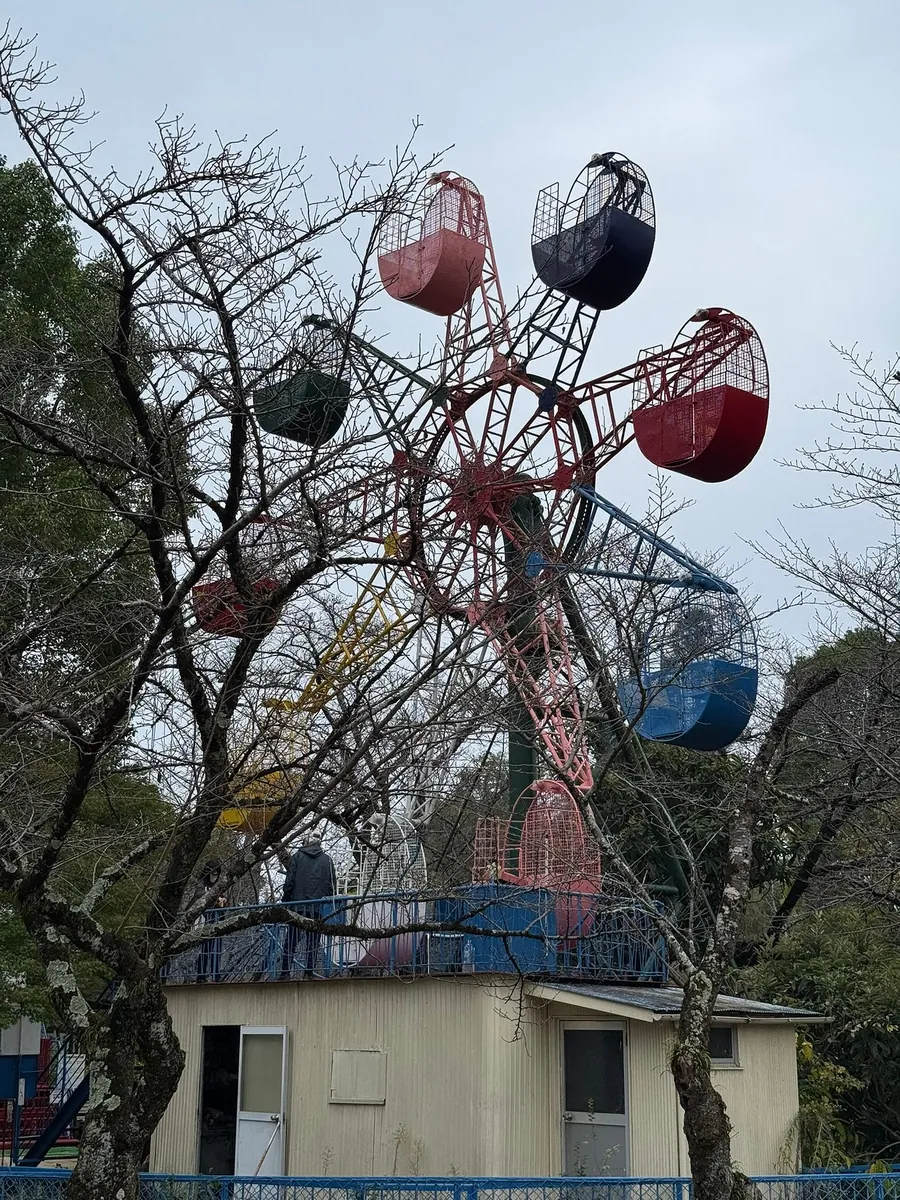
According to the promotion, there is a capybara on the right side, but it might not have come out due to the cold. After entering, go straight across the bridge, turn right after seeing the Ferris wheel, and there is an open space behind it which is the photo spot.
https://youtube.com/shorts/XDquPOanhpQ
This shooting spot has a great view, but unfortunately, there are no cherry blossoms or maple leaves to complement it.
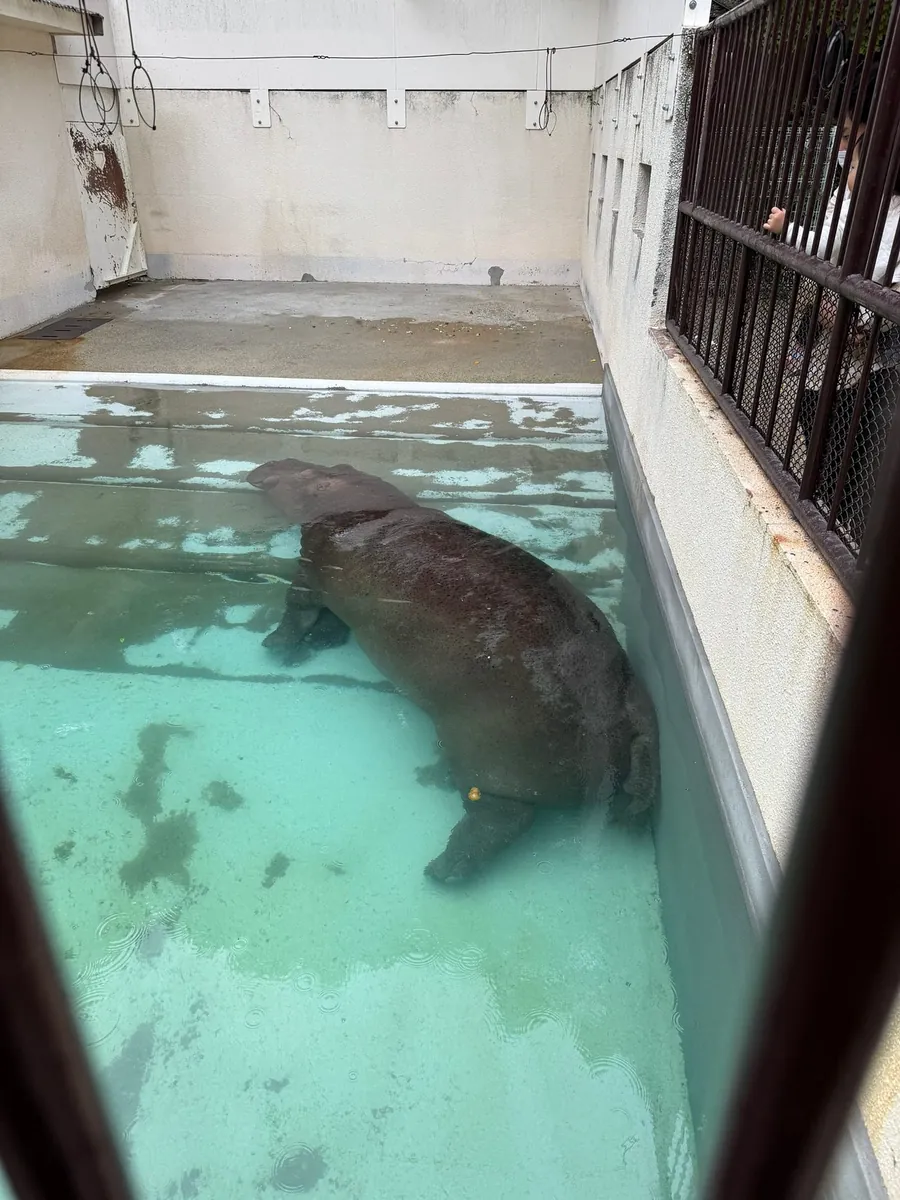
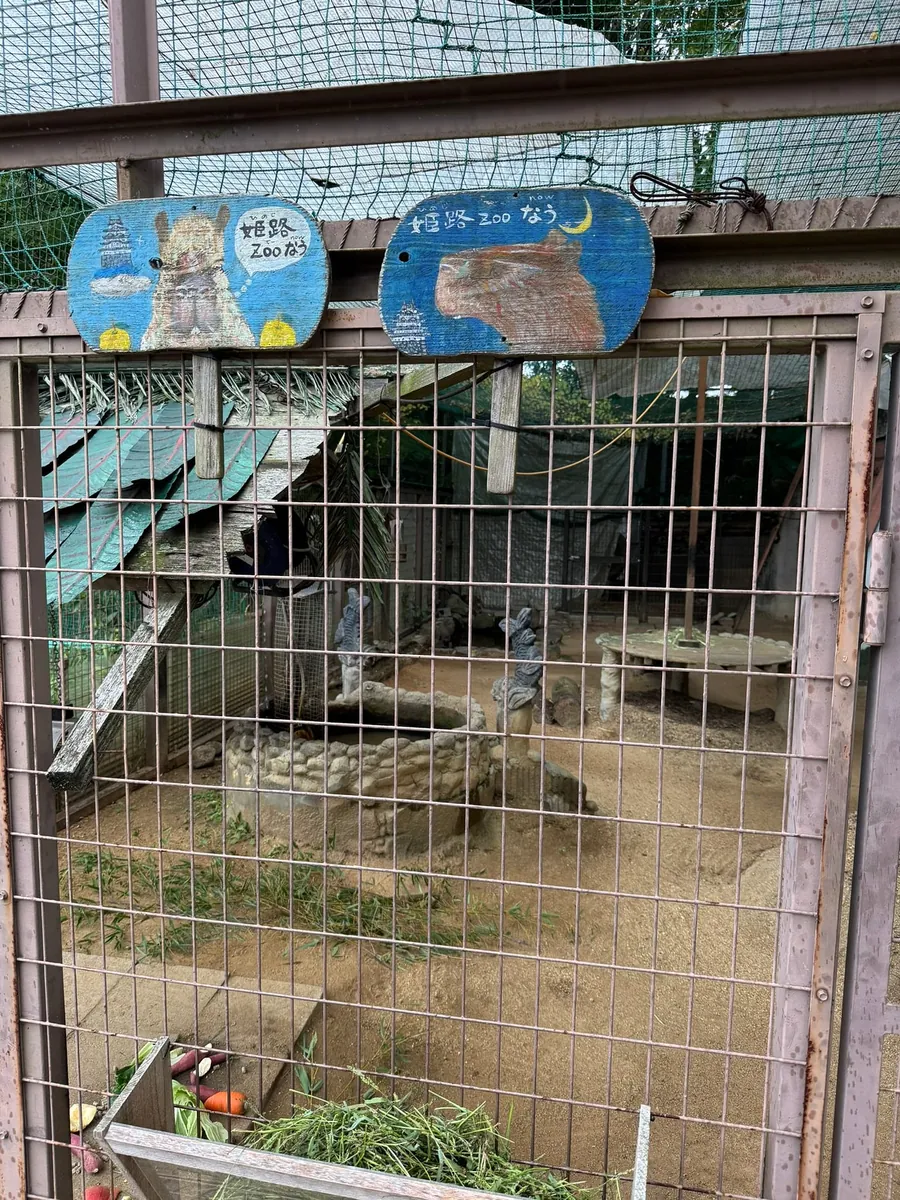
After filming, I walked around the zoo a bit. The facilities are very old (rides require extra payment), animal spaces are cramped, many animals appeared very depressed and showed repetitive behaviors, hard to watch, so I left shortly after.
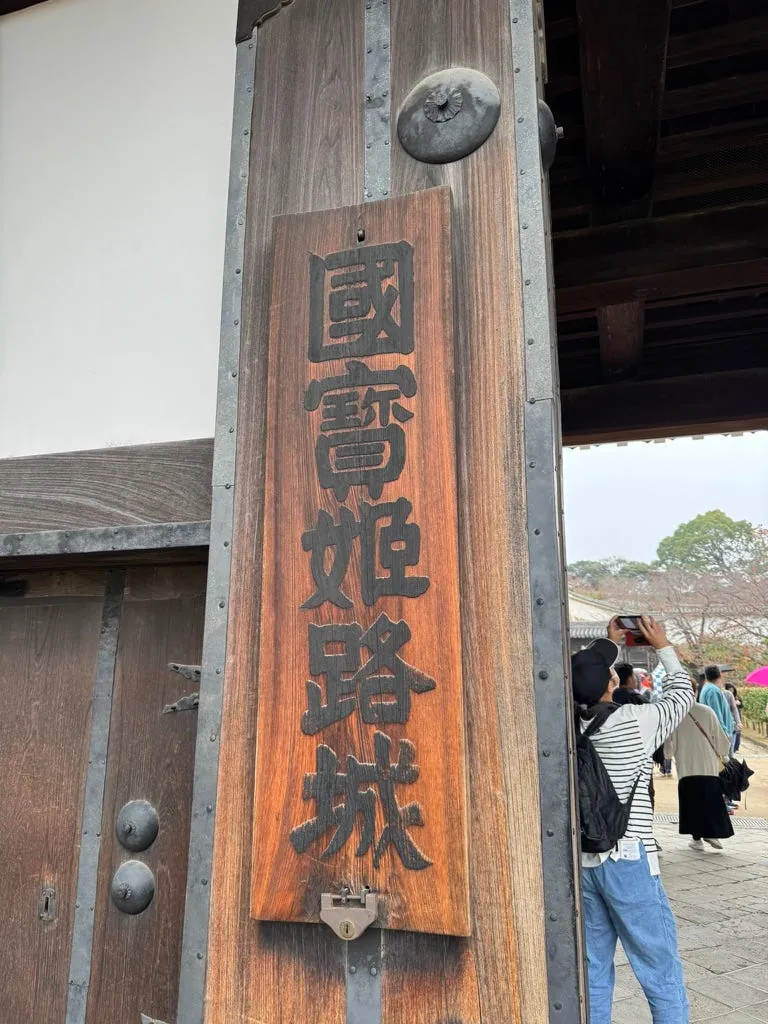
After taking photos of Himeji Castle, walk back to the left entrance to visit inside the castle.


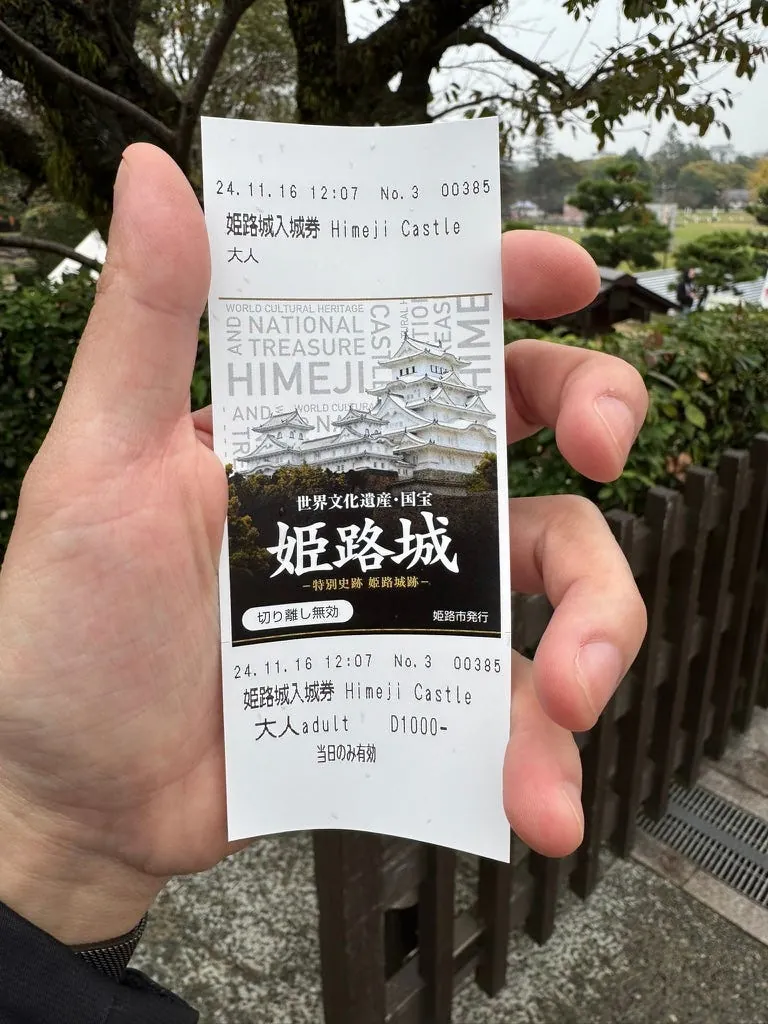
After buying the ticket, follow the tour route straight into the castle.
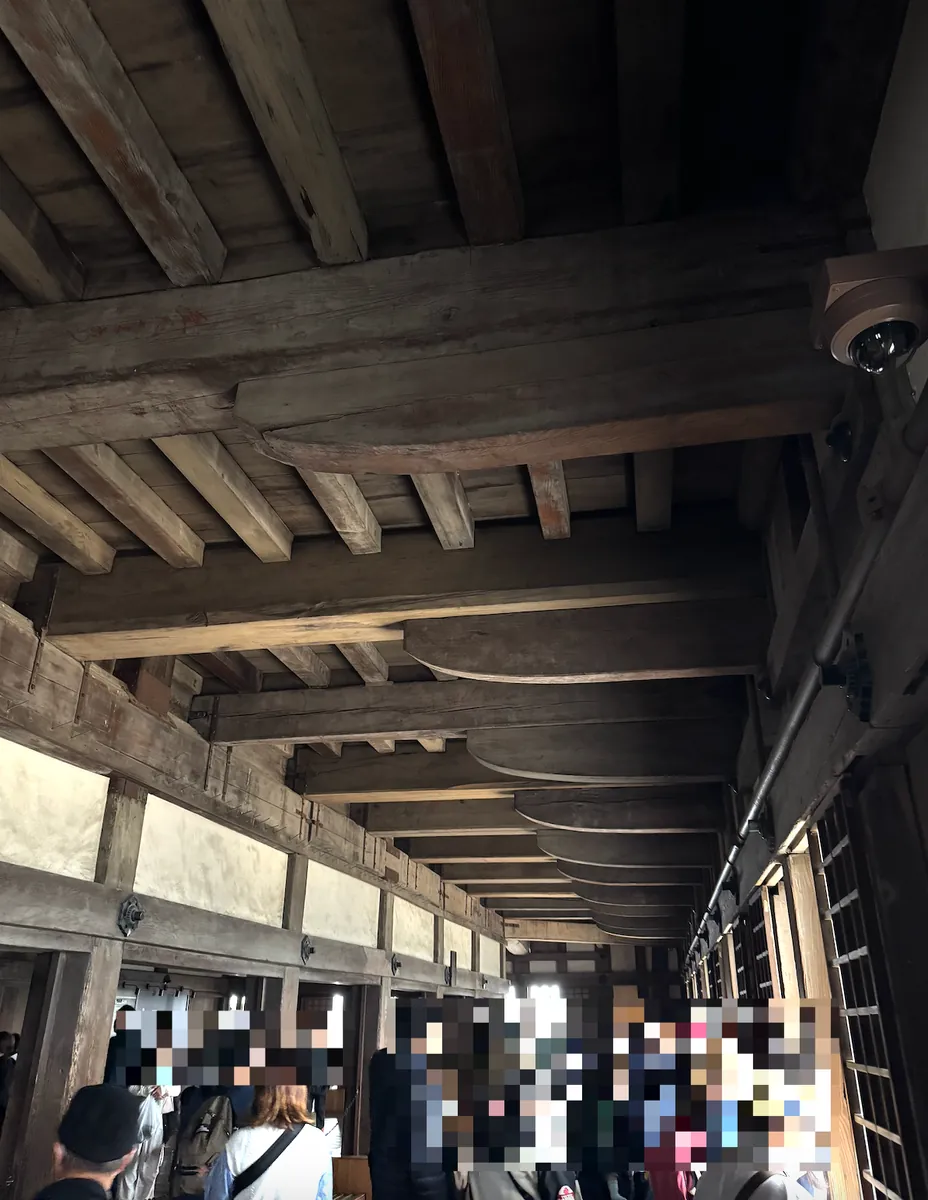
After entering indoors, you also need to take off your shoes. A plastic bag will be given to store your shoes.
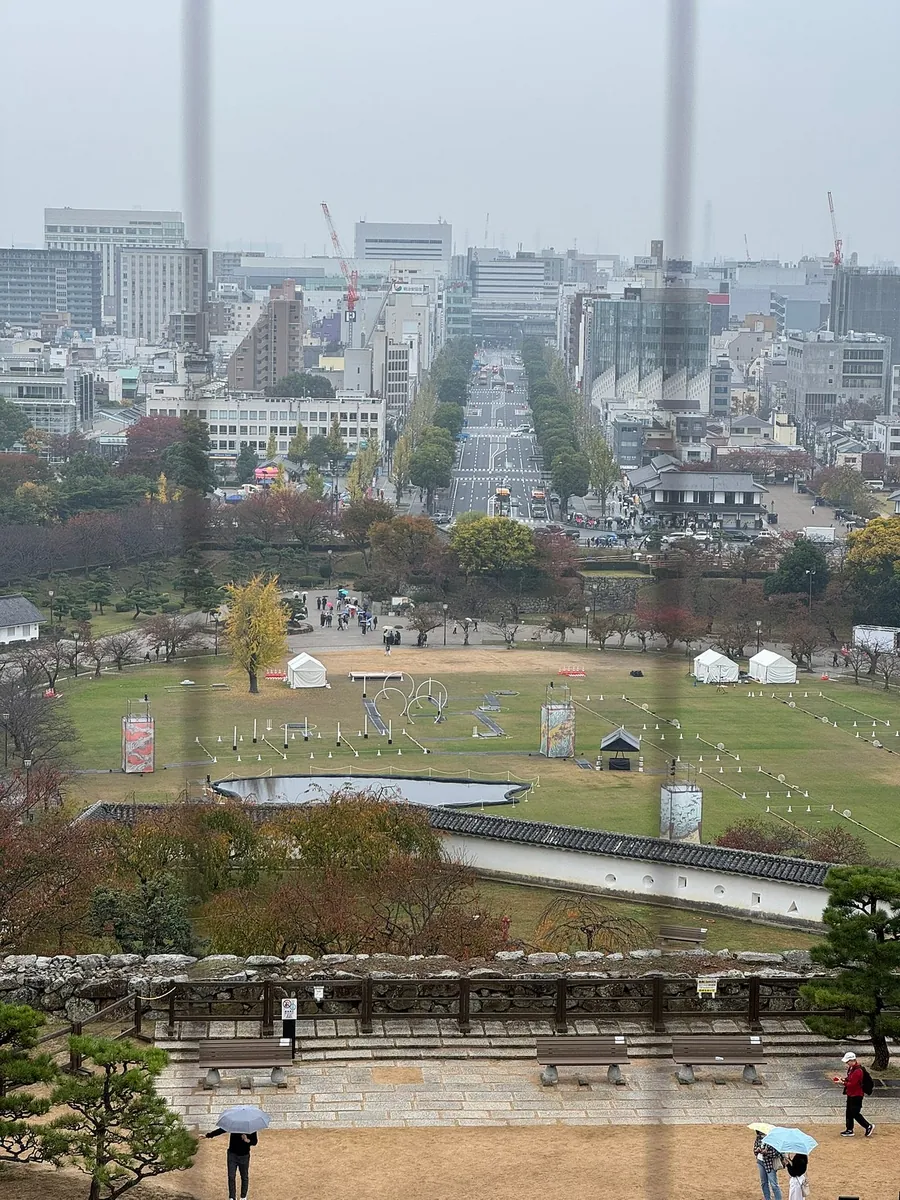
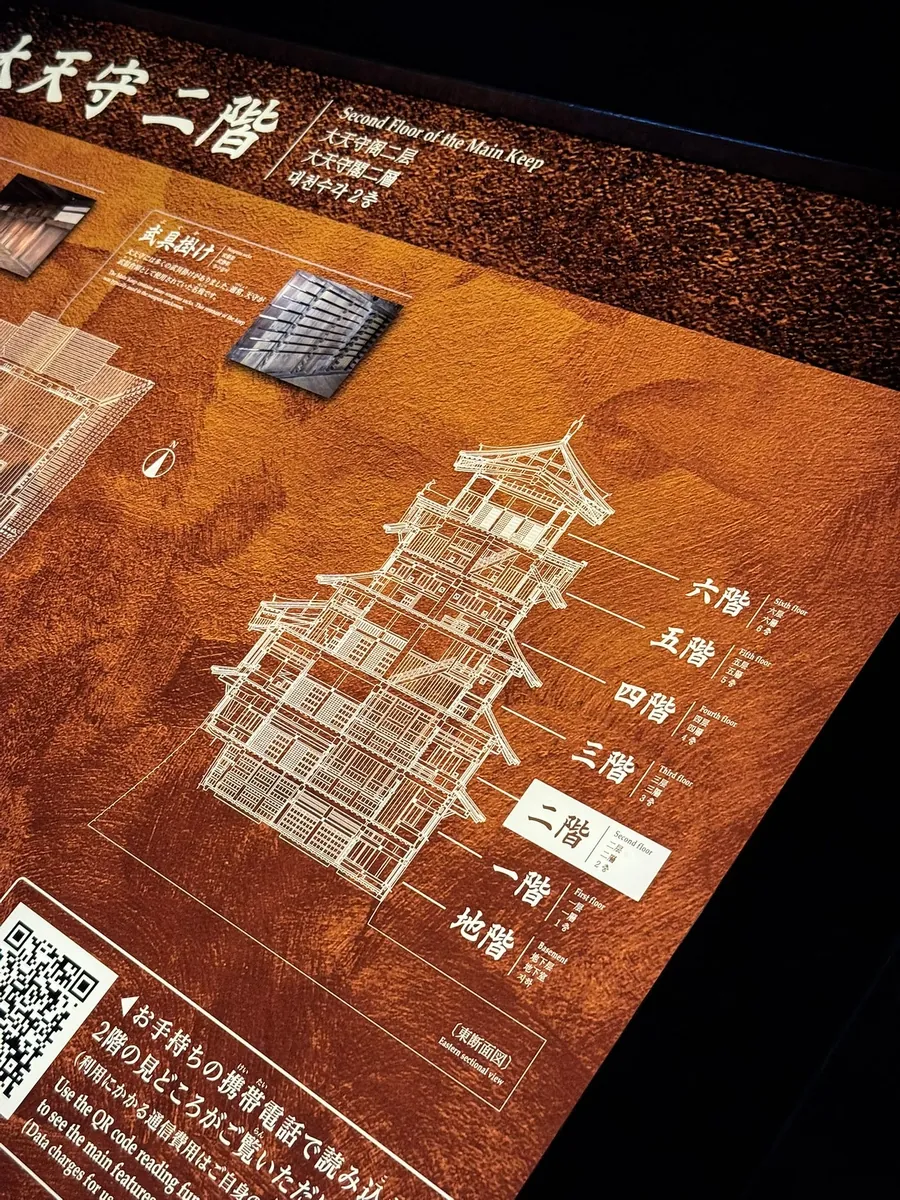
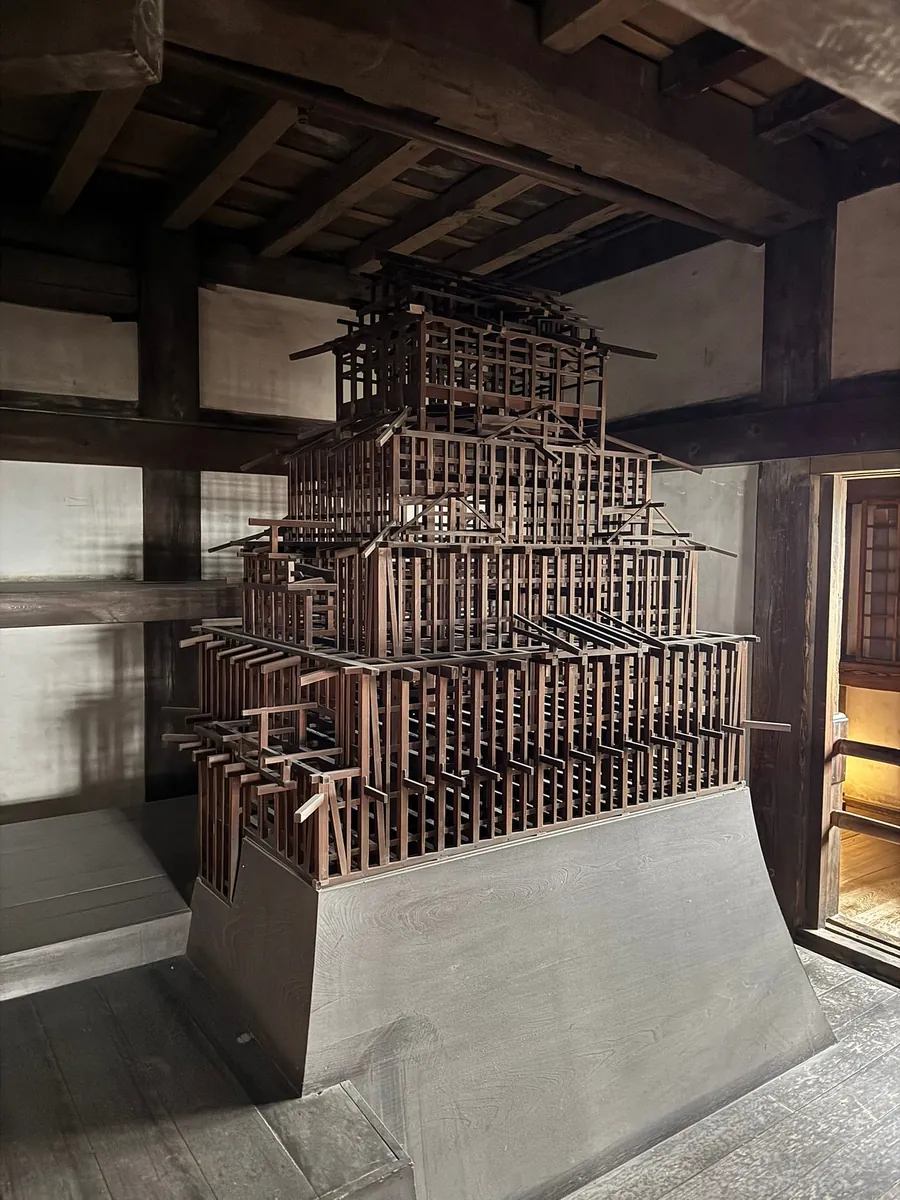
Looking back at Himeji Station from the second floor, there are six floors in total. The higher you go, the smaller and steeper the stairs become, requiring you to queue to go up.
It was nearly 12:30 PM, and I was very hungry. I also forgot to bring a power bank today, so my phone was almost out of battery. With a large crowd waiting in line, I decided not to continue climbing and turned back at the second level to exit the castle.
After leaving the castle, walk back to Sannomaru Plaza and then exit outside.
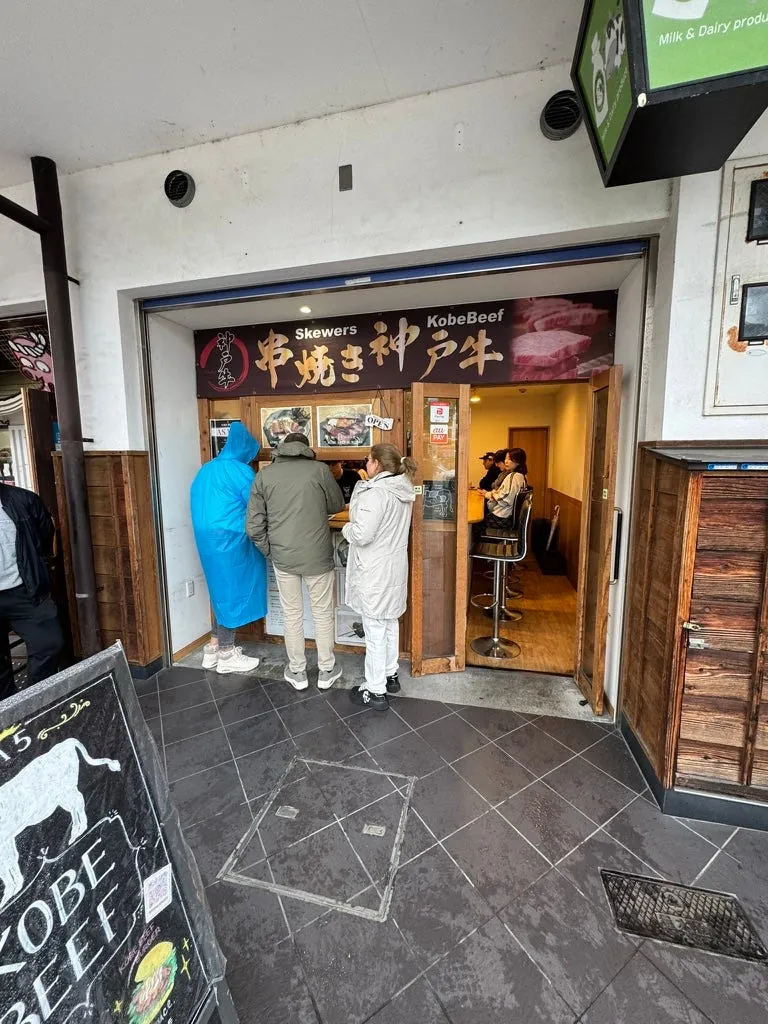
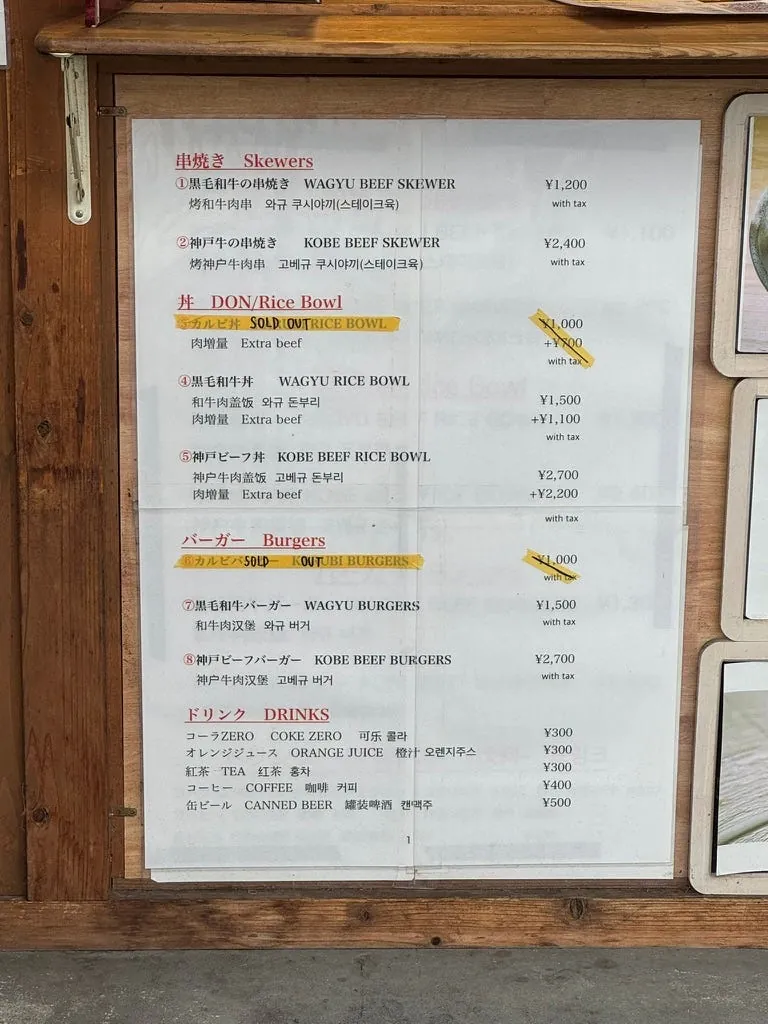
Outside Himeji Castle, I found a shop selling Kobe beef in the shopping street and took away Kobe beef rice bowls and skewers to the hotel for rest and recharge.
13:20 Return to the hotel to rest
Bad weather + morning hiking + phone dead = back to the hotel to rest.
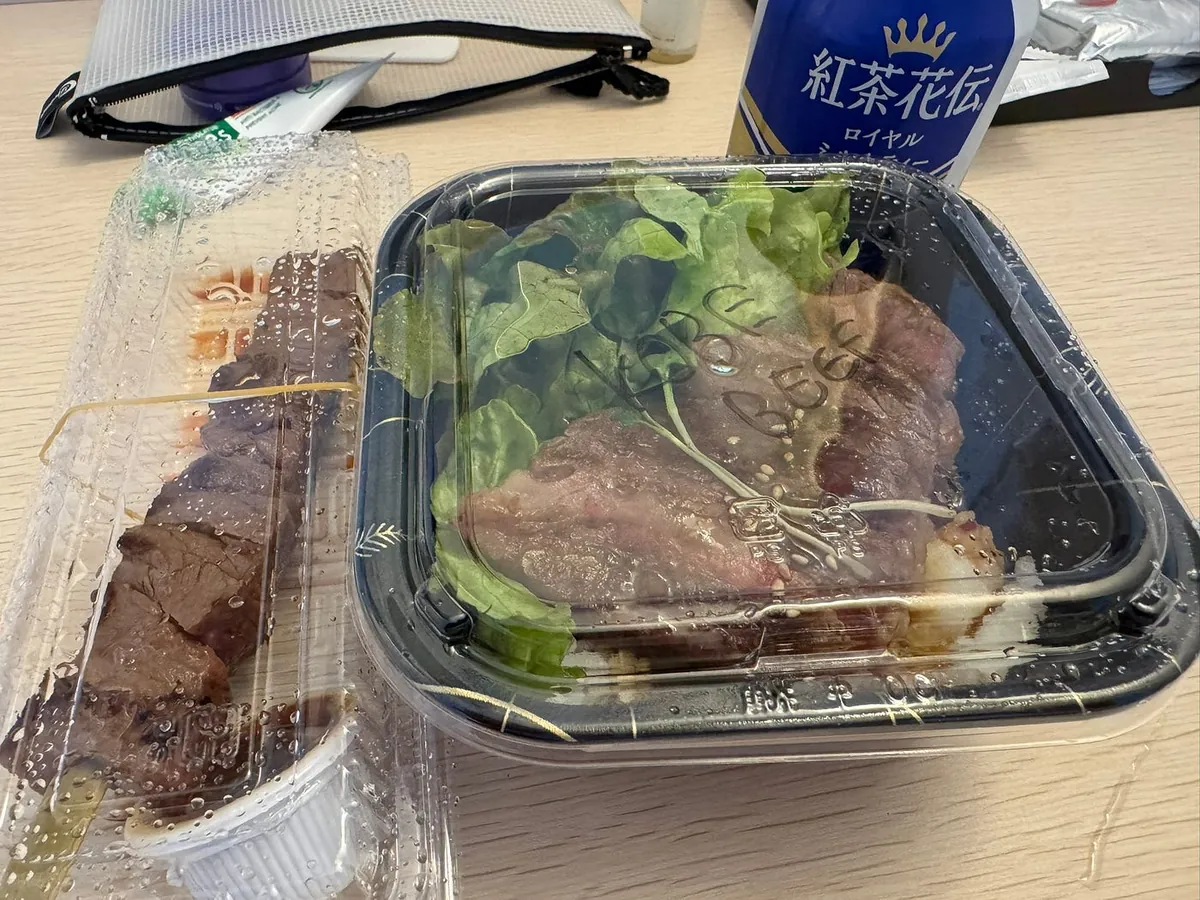
Besides the portion being a bit small, the Kobe beef here tastes quite good.
15:30 Shopping near Himeji Station
Rested until about 15:30 and then went out again.
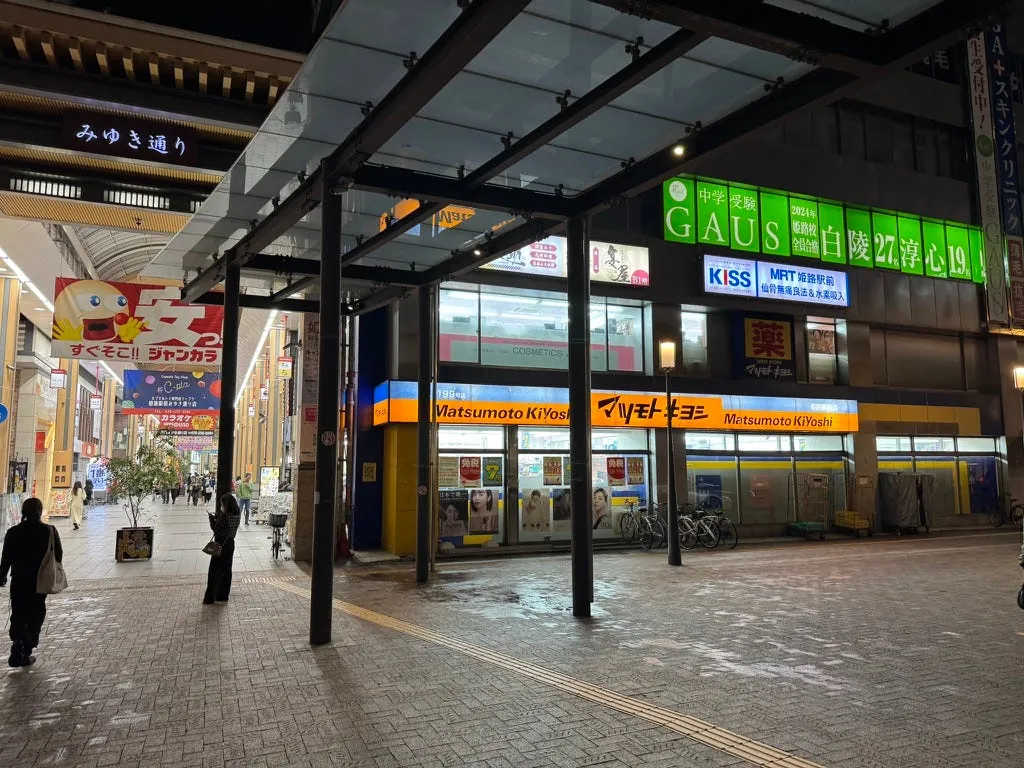
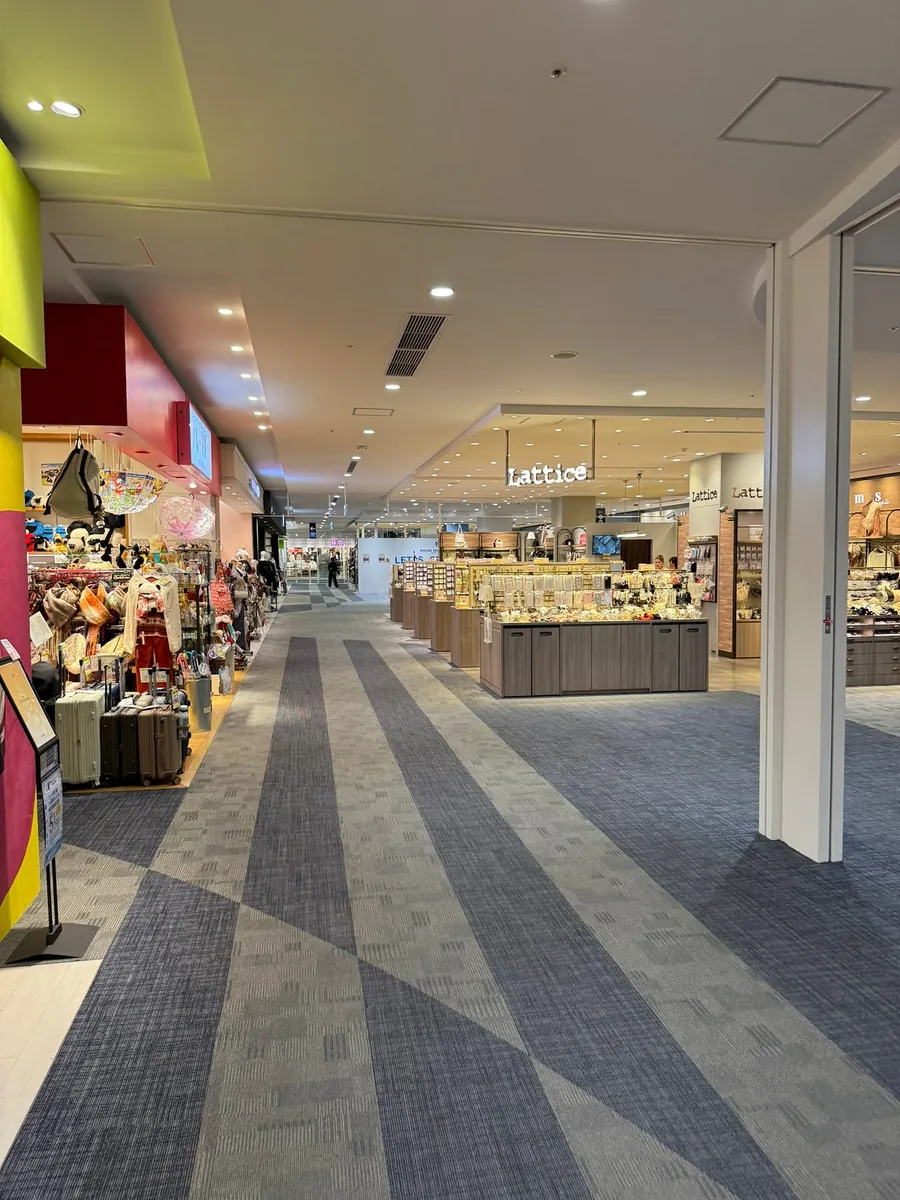
There isn’t much to shop around Himeji Station. Only the Piole mall at the station and the department store in the SANYO Electric Railway building, plus a nearby shopping street. There’s no Don Quijote or McDonald’s, only one Lawson, and just one Matsumoto Kiyoshi drugstore.
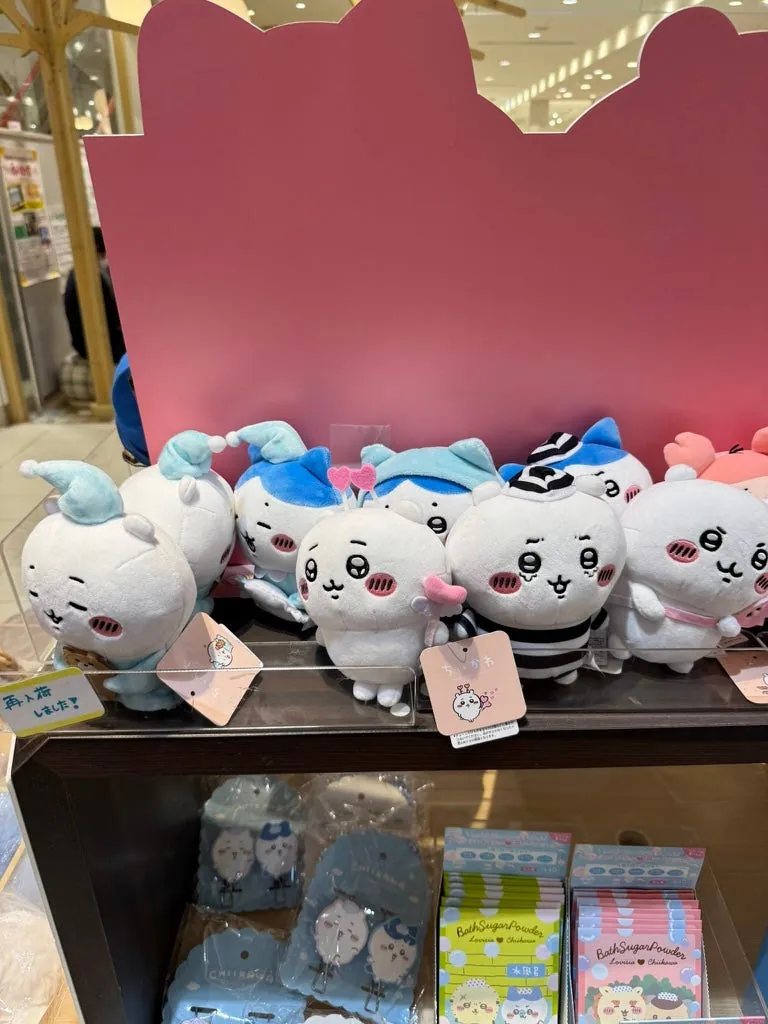

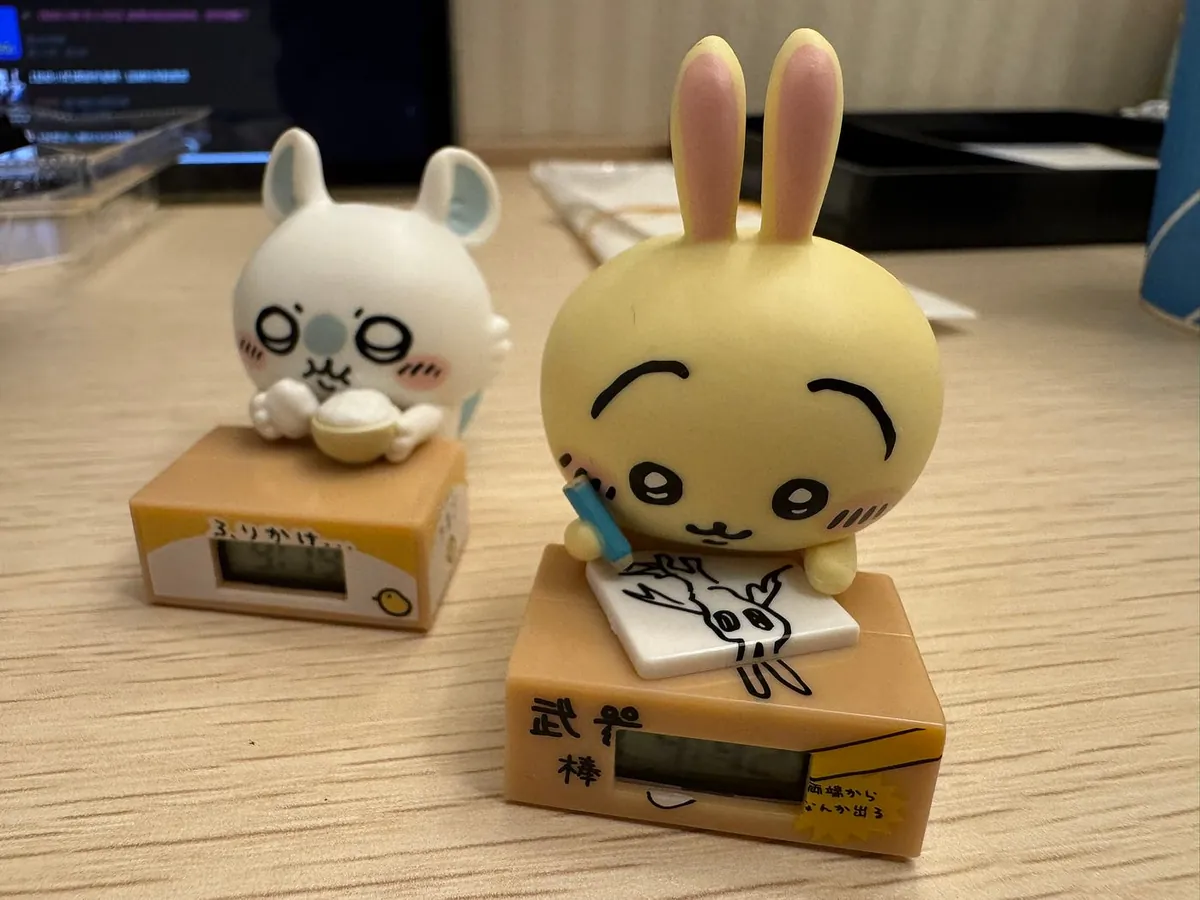
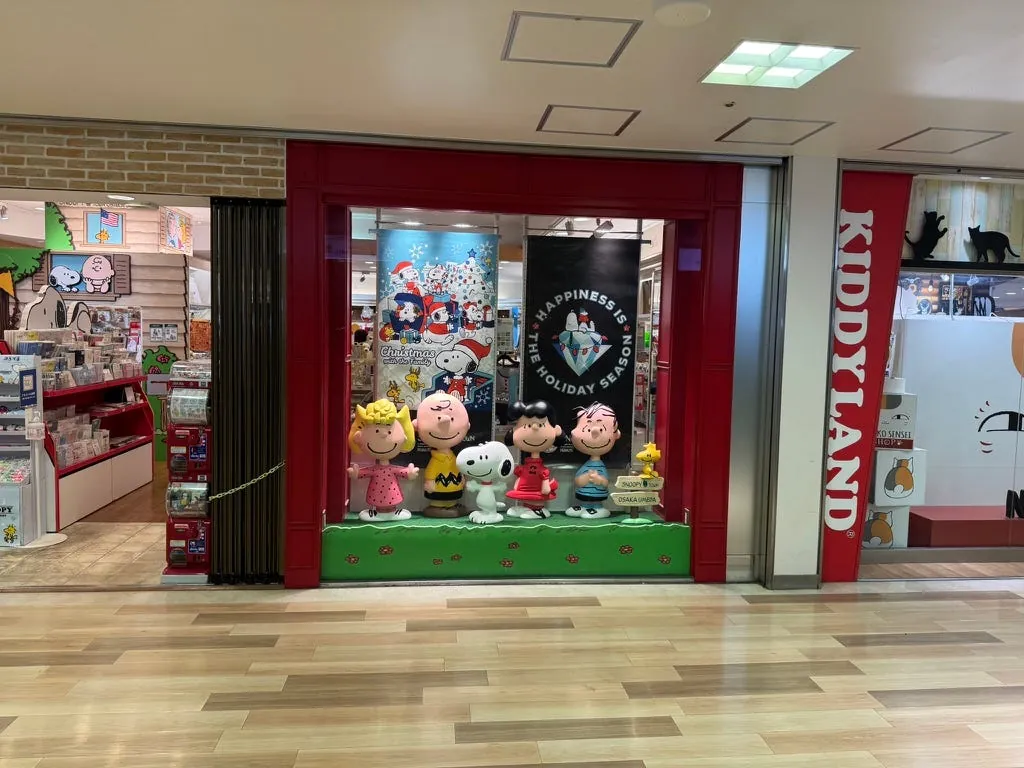
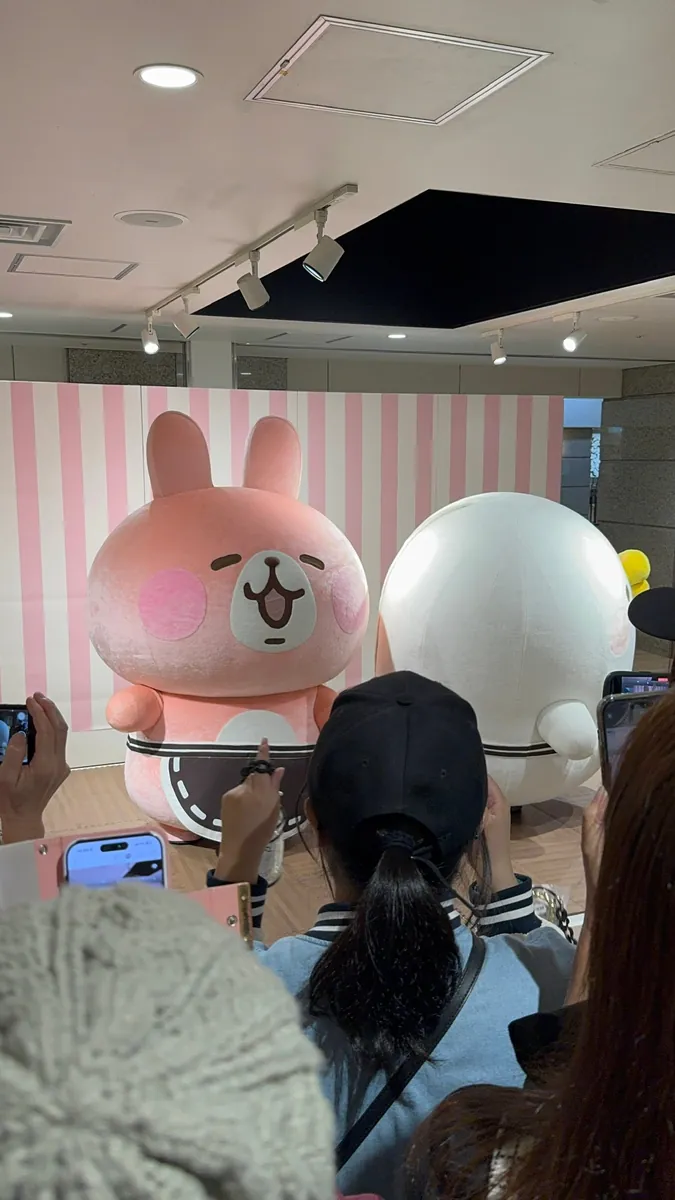
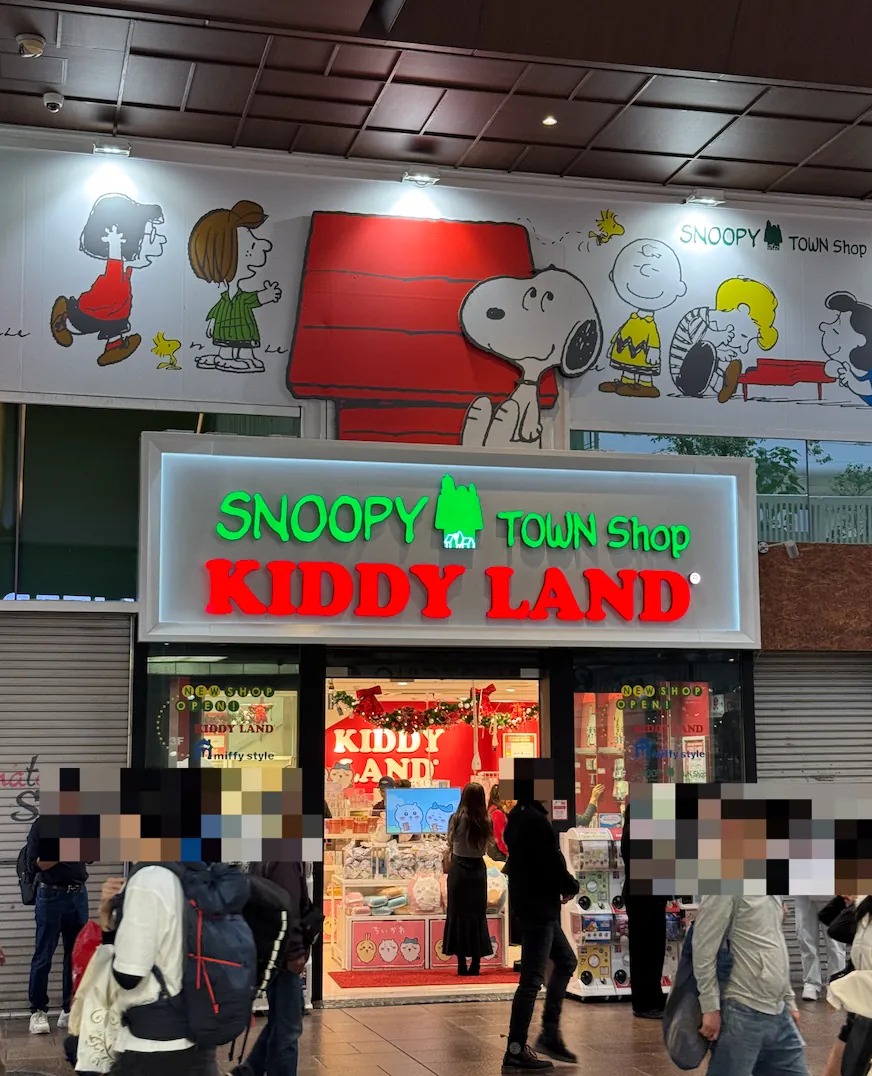
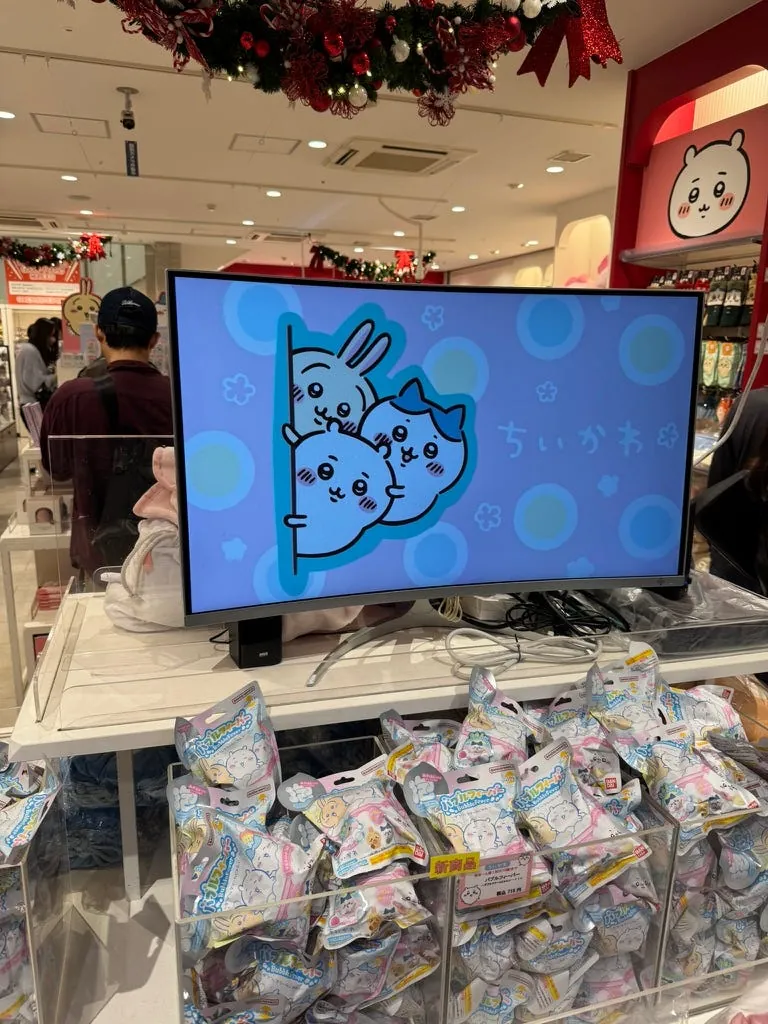
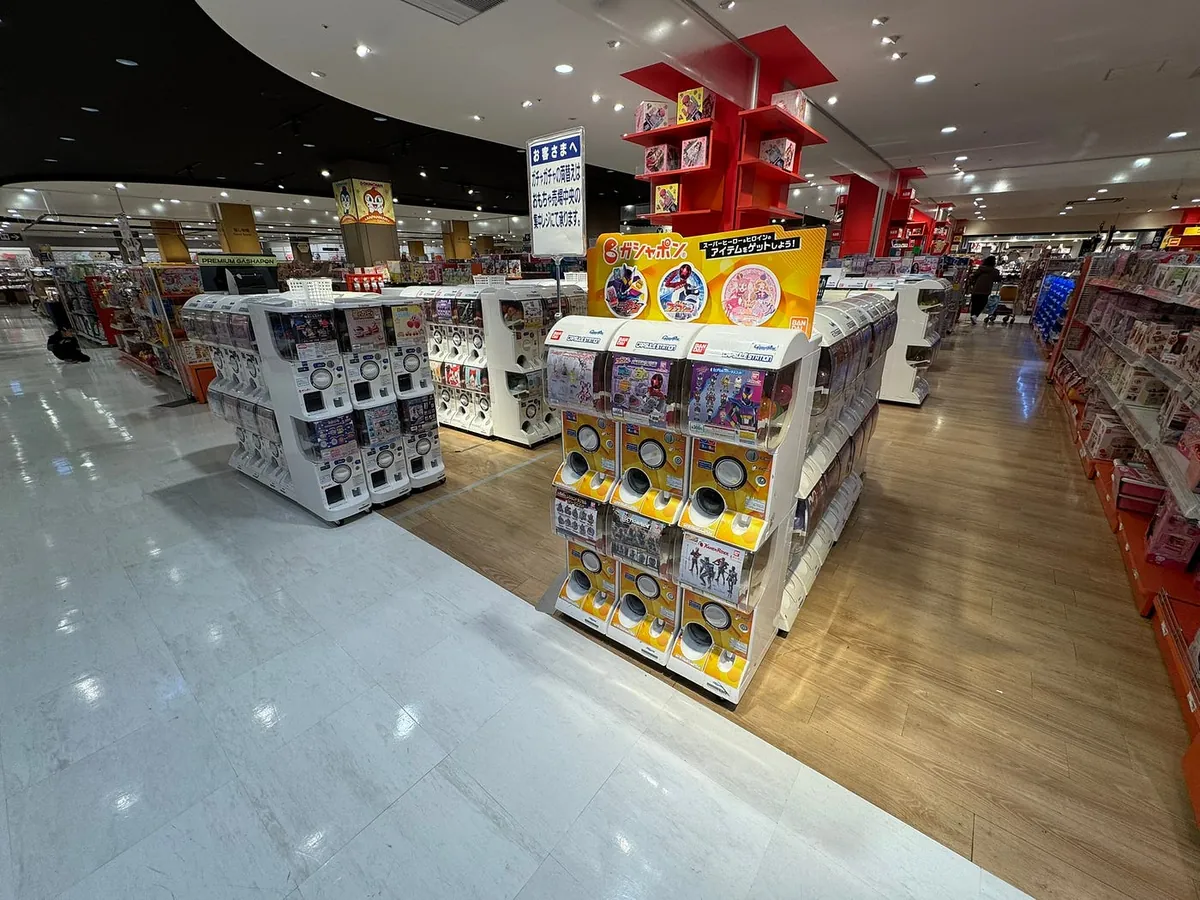
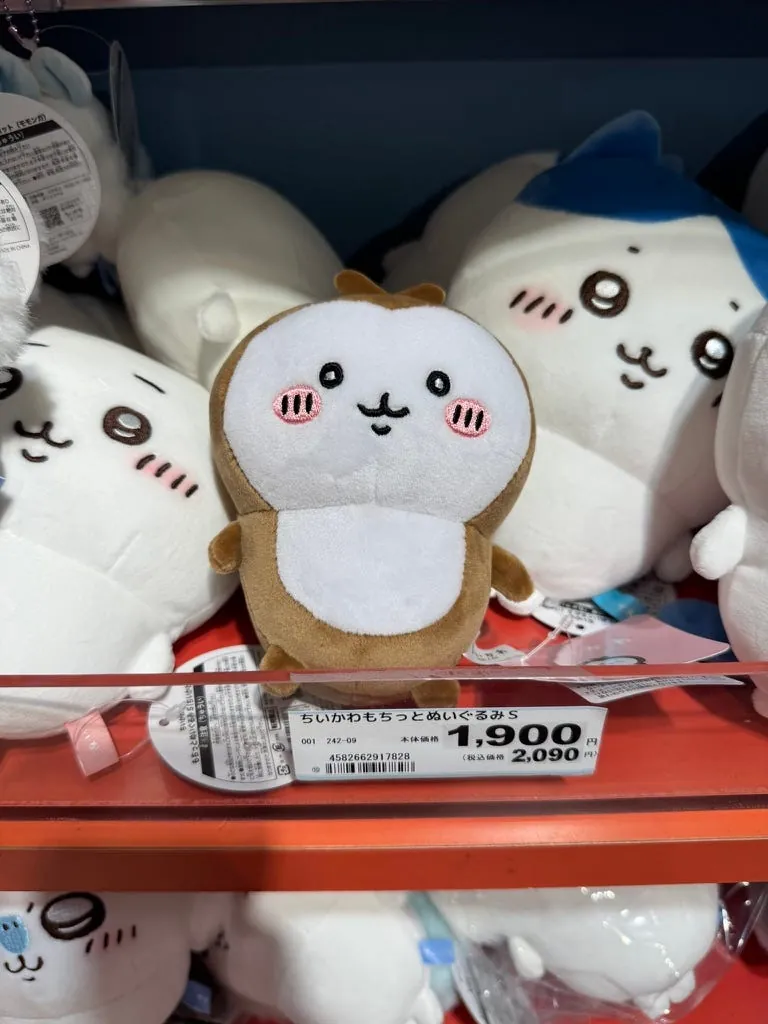
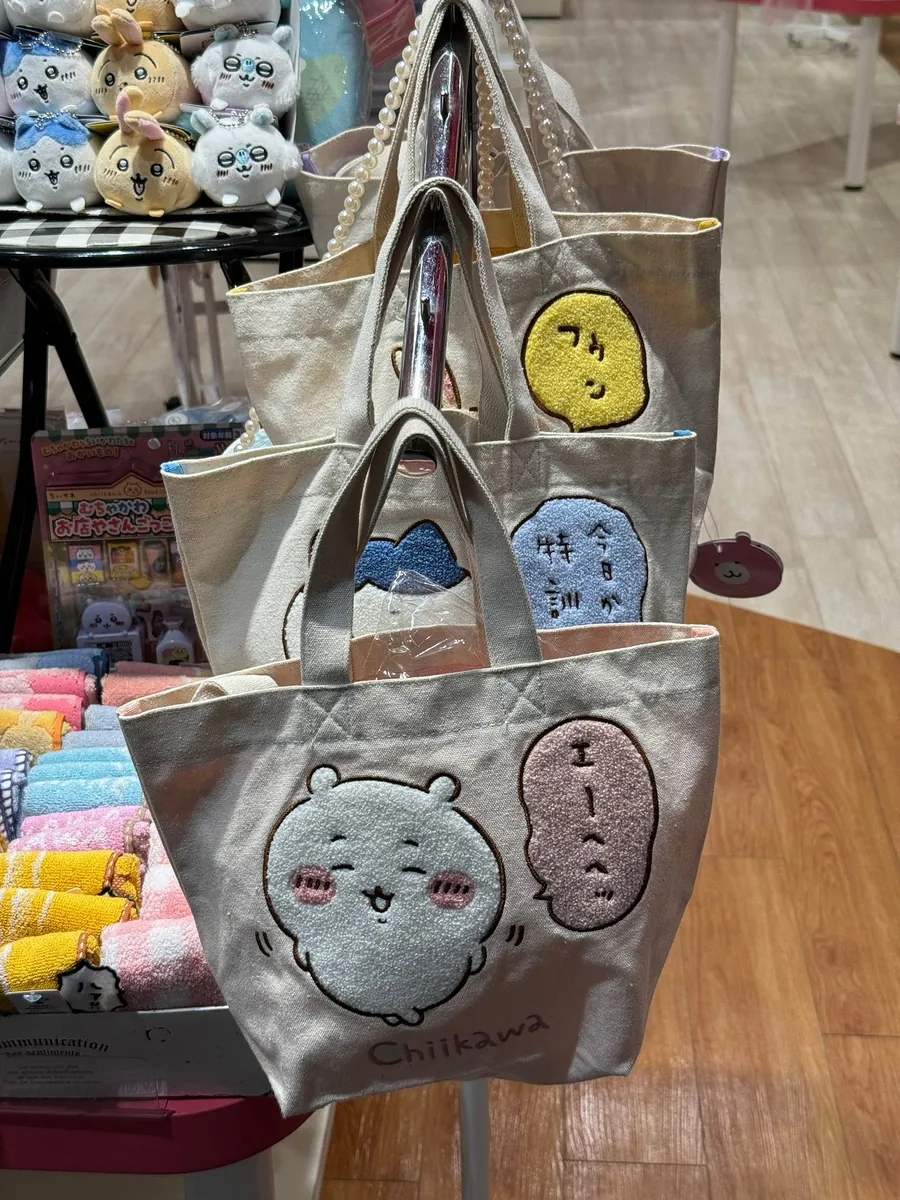
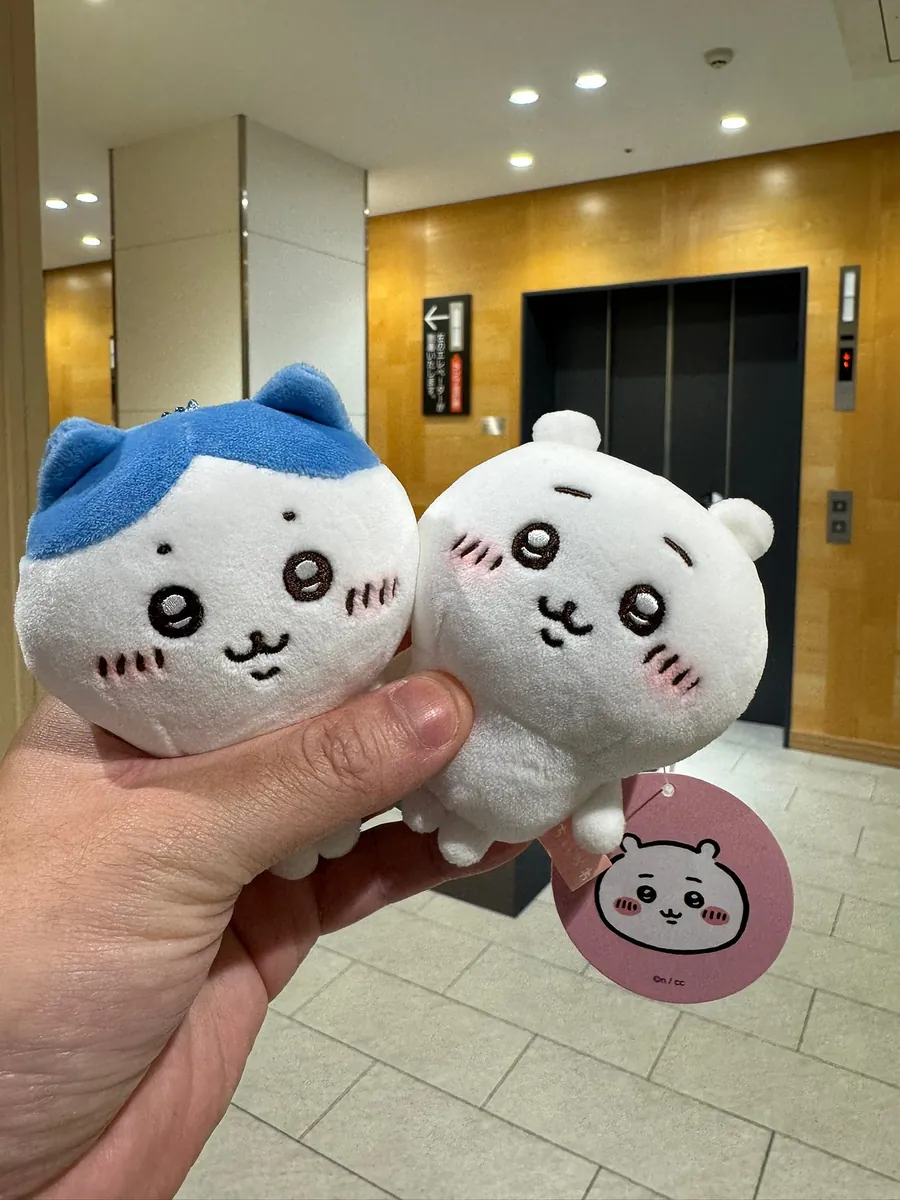
On the third floor of Piole, Kiddy Land has some GiiKawa items. There aren’t many people here, so no need to queue. I brought three little ones home. Unfortunately, I couldn’t get the Usagi pajama version QQ.
Wandering around the shopping street, looking for a capsule toy machine.
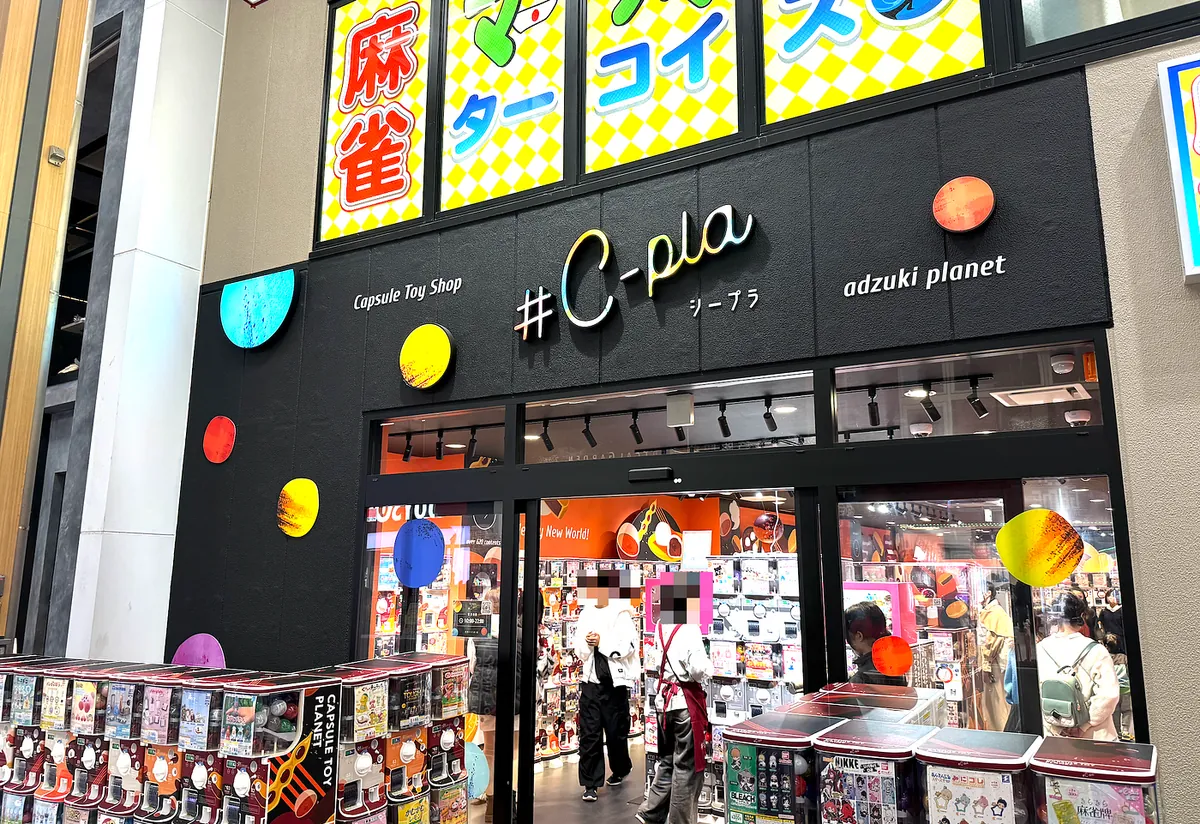
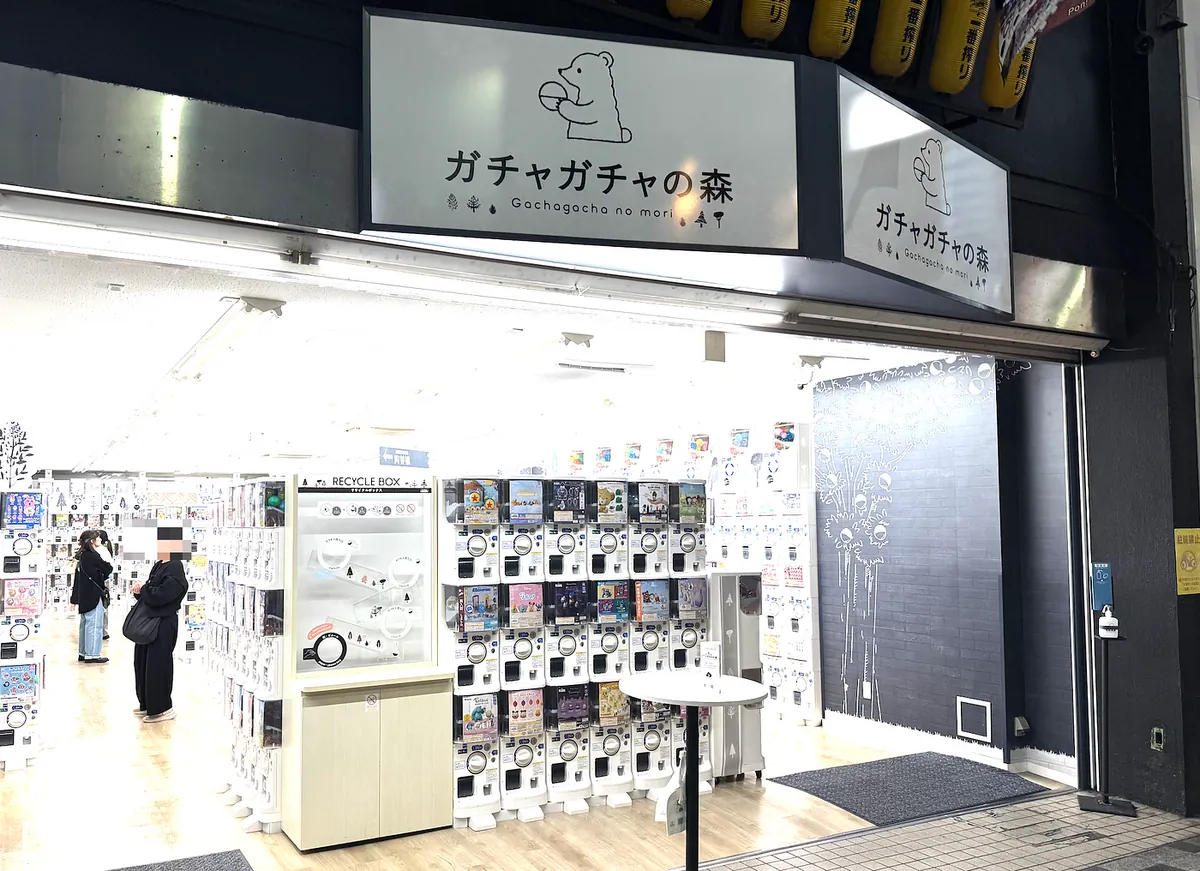
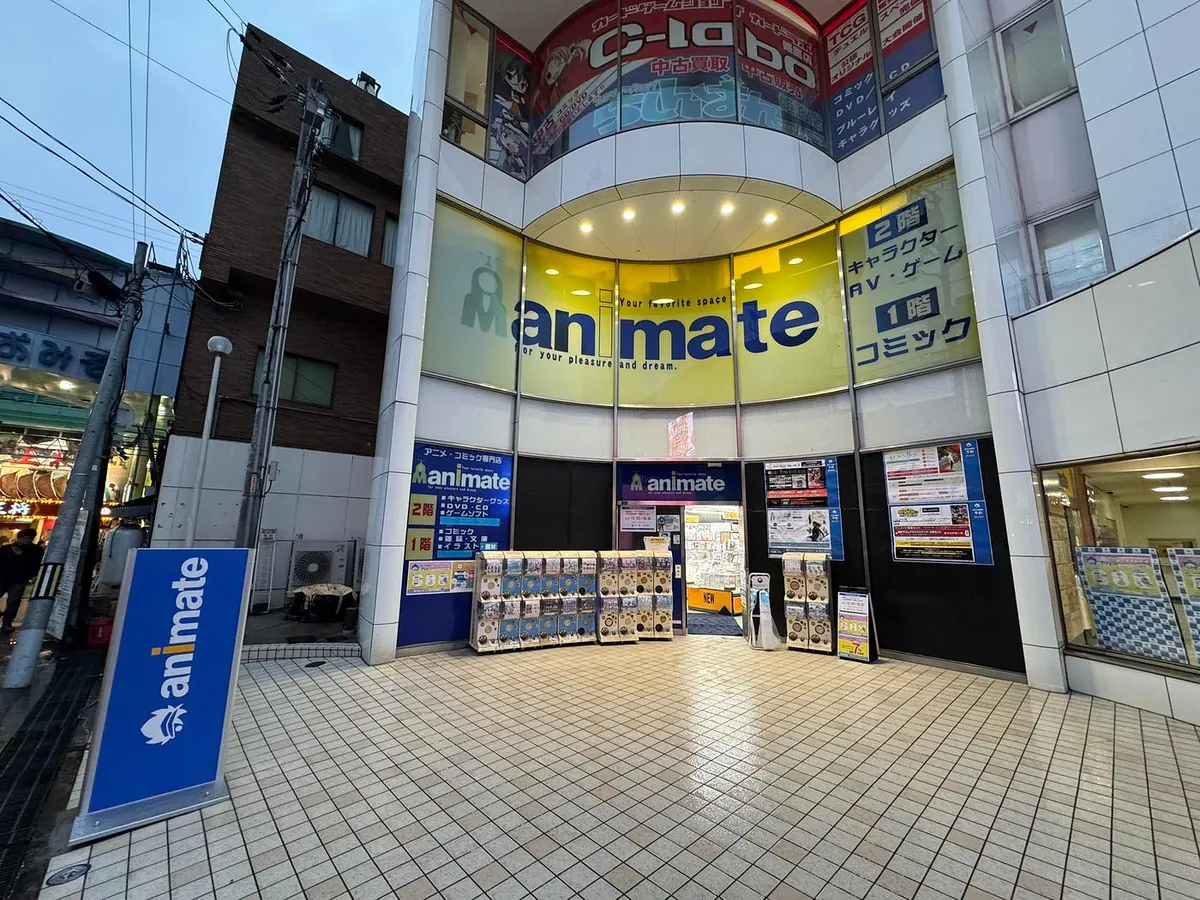
Although I just said there’s not much to shop for, there is at least a gacha capsule toy store and an Animate shop.
It started raining heavily near dusk, but fortunately, there were no special plans for today.
~=18:00 Dinner
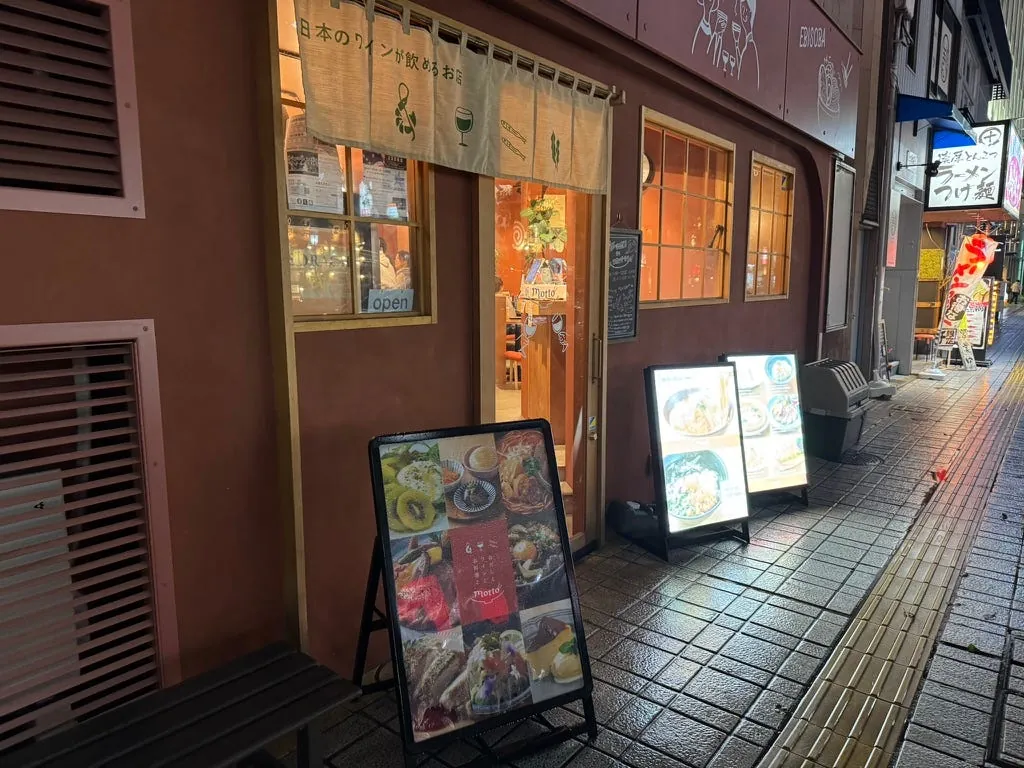
O-dashi, Wine, and Cuisine. motto
I randomly picked a restaurant with Kobe beef in the shopping street for dinner.
This place features a lucky cat dessert as an appetizer, which is not too sweet and quite good.
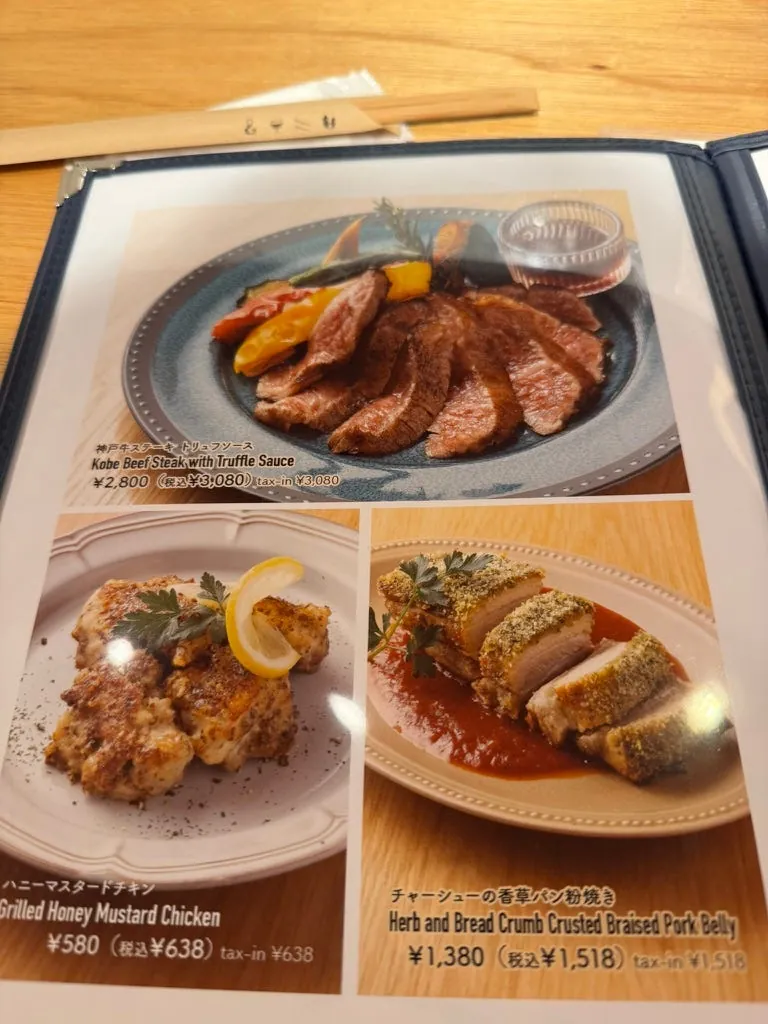
Ordered Kobe beef steak, ochazuke, and draft beer.
I found their Kobe beef steak quite average; it was a bit tough and lacked the distinctive Kobe beef flavor. However, the chazuke (tea poured over rice) was quite tasty.

After eating, I wandered around a bit—Himeji after the rain.
~=20:00 Return to hotel to rest & watch the Taiwan-Japan game
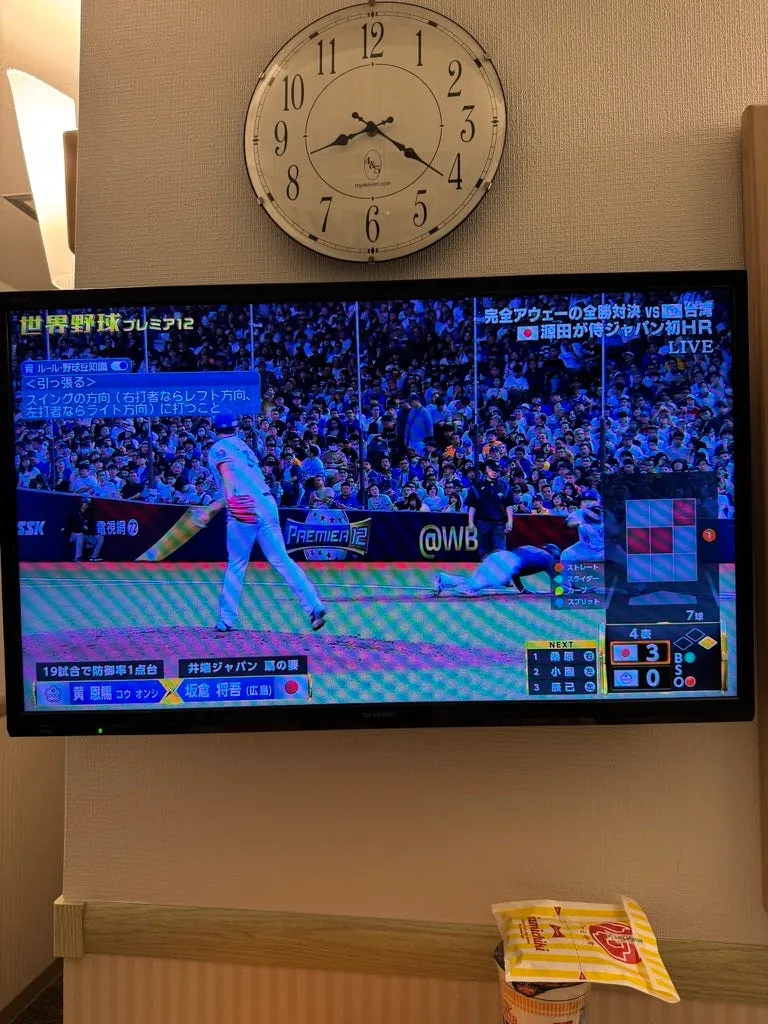
The Japanese broadcast is completely unintelligible to me, but their coverage is very thorough. On the left, there are baseball knowledge supplements, and on the right, a detailed analysis of the pitch types.
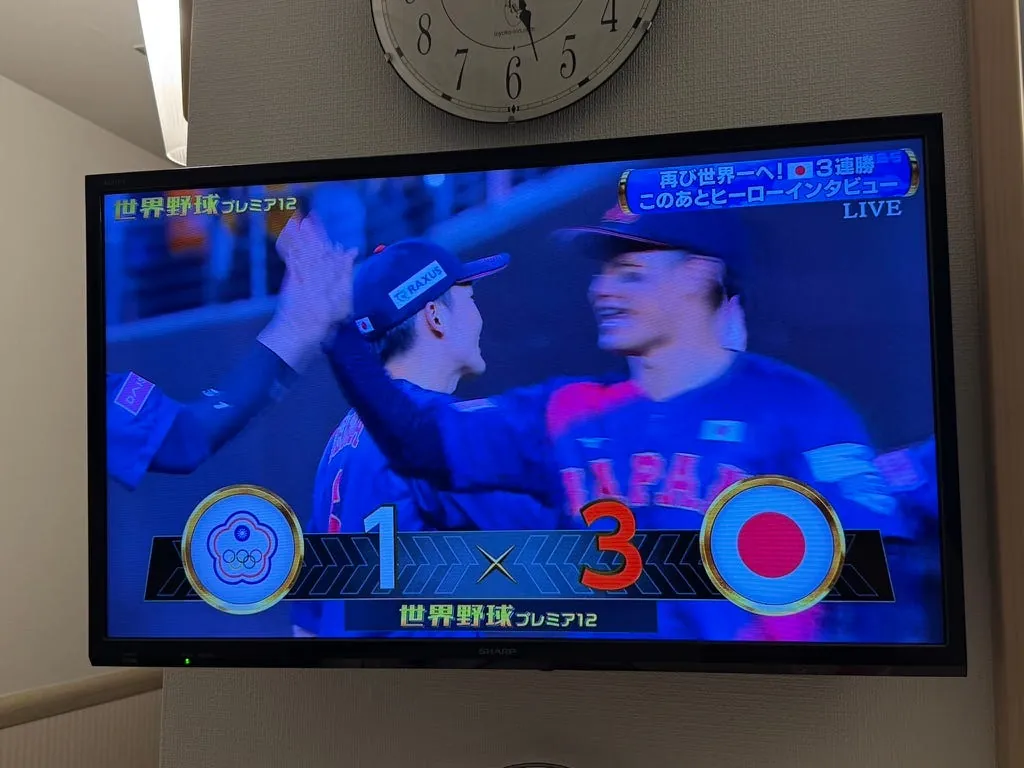
The final match was a win for Japan.
Good night, Himeji.
Day 6 (11/17 Sunday) Osaka, Kobe
Originally planned to visit Naruto Whirlpools and Akashi Kaikyō Bridge, but due to bad weather, switched to shopping in Osaka and Kobe.
~= 08:45 Take the Shinkansen non-reserved seat to Shin-Osaka
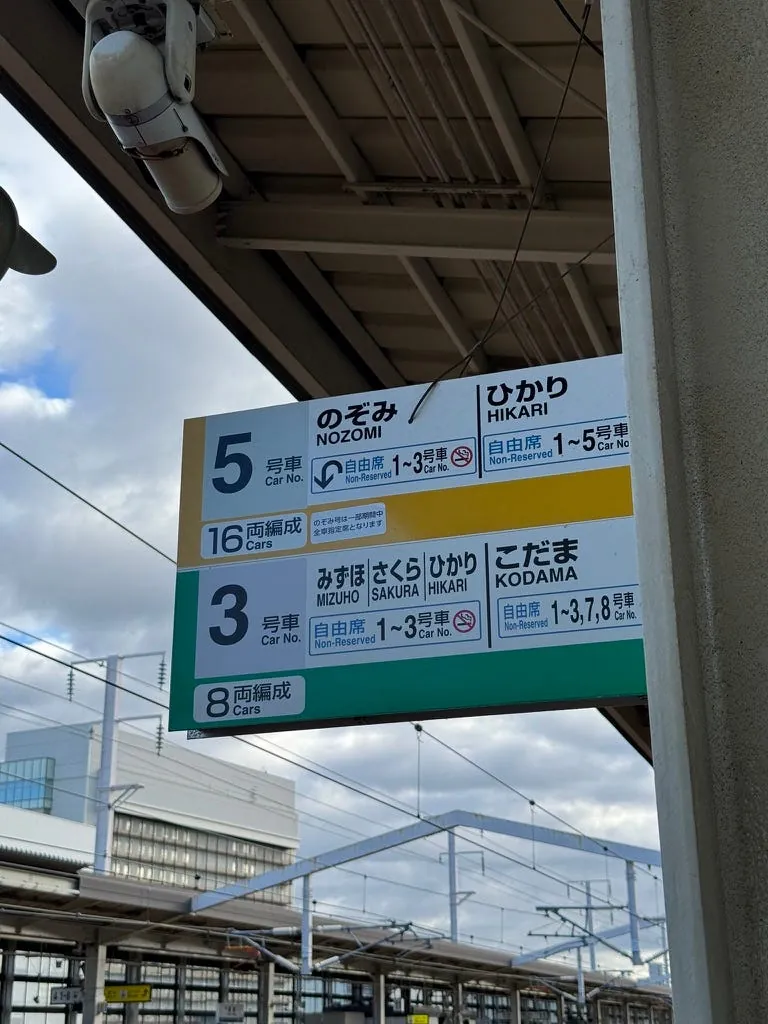
Taking the Shinkansen to Shin-Osaka (25 minutes) and then transferring to the Midosuji Line to Osaka takes about the same time as taking a regular train directly to Osaka. Since there are many Shinkansen departures, I chose the more comfortable Shinkansen where I could also charge my devices.
9:17 Arrived at Shin-Osaka
After arriving at Shin-Osaka, you still need to walk to the Midosuji Line.
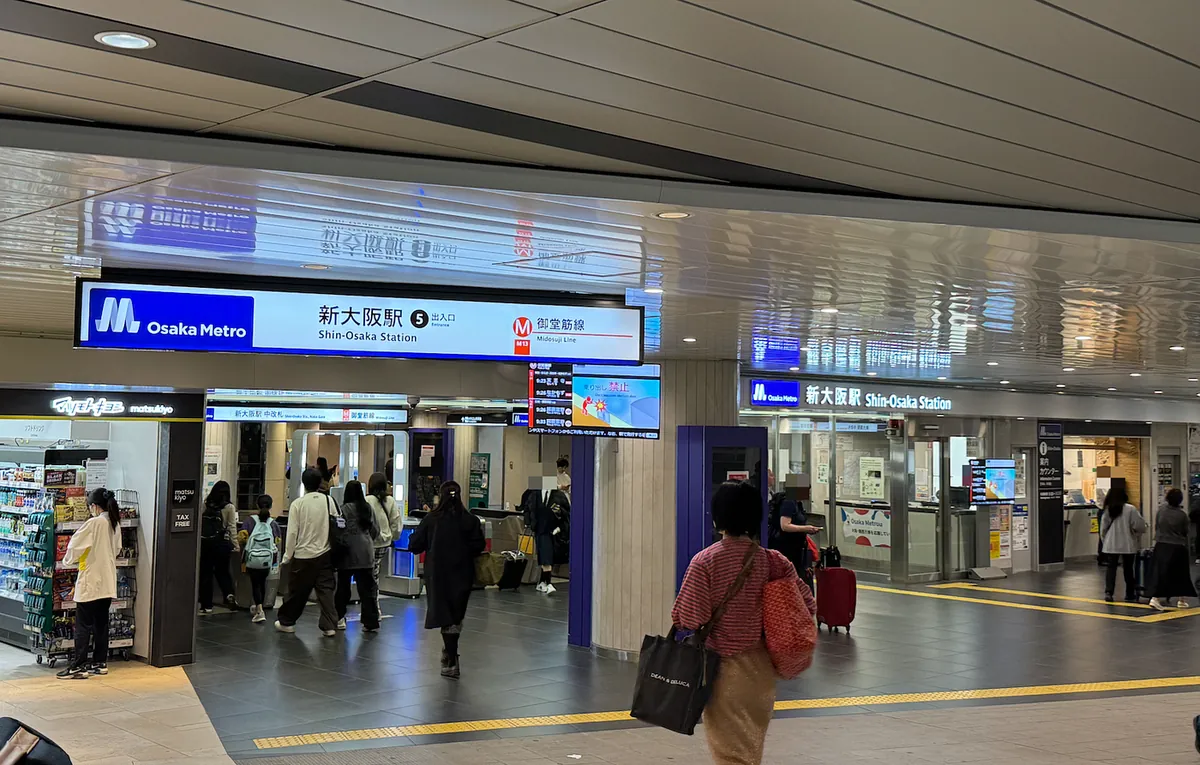
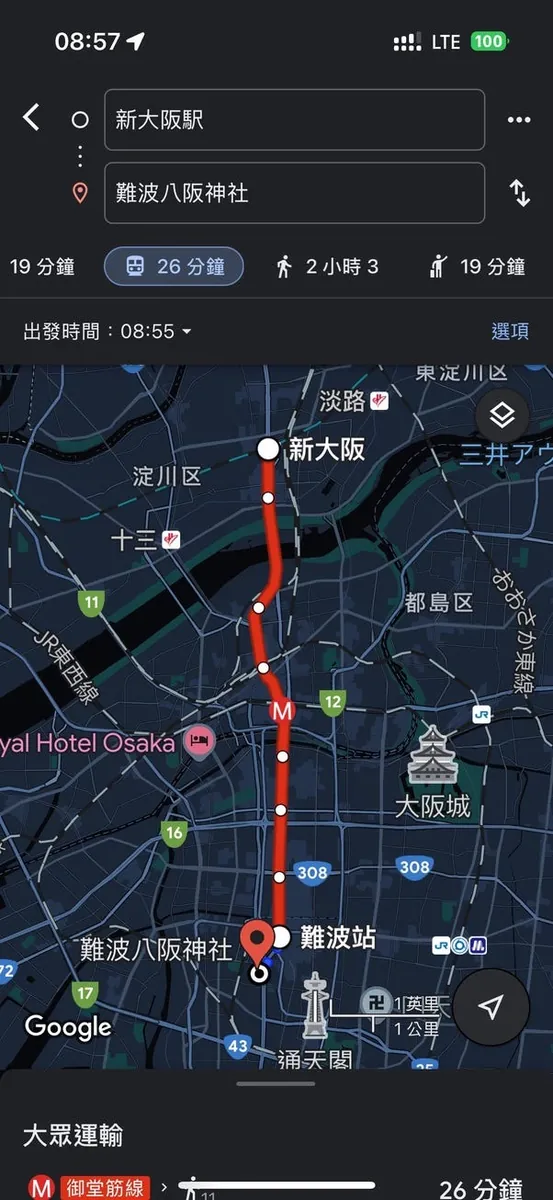
First, visit Namba Yasaka Shrine in Kansai, which I missed last year.
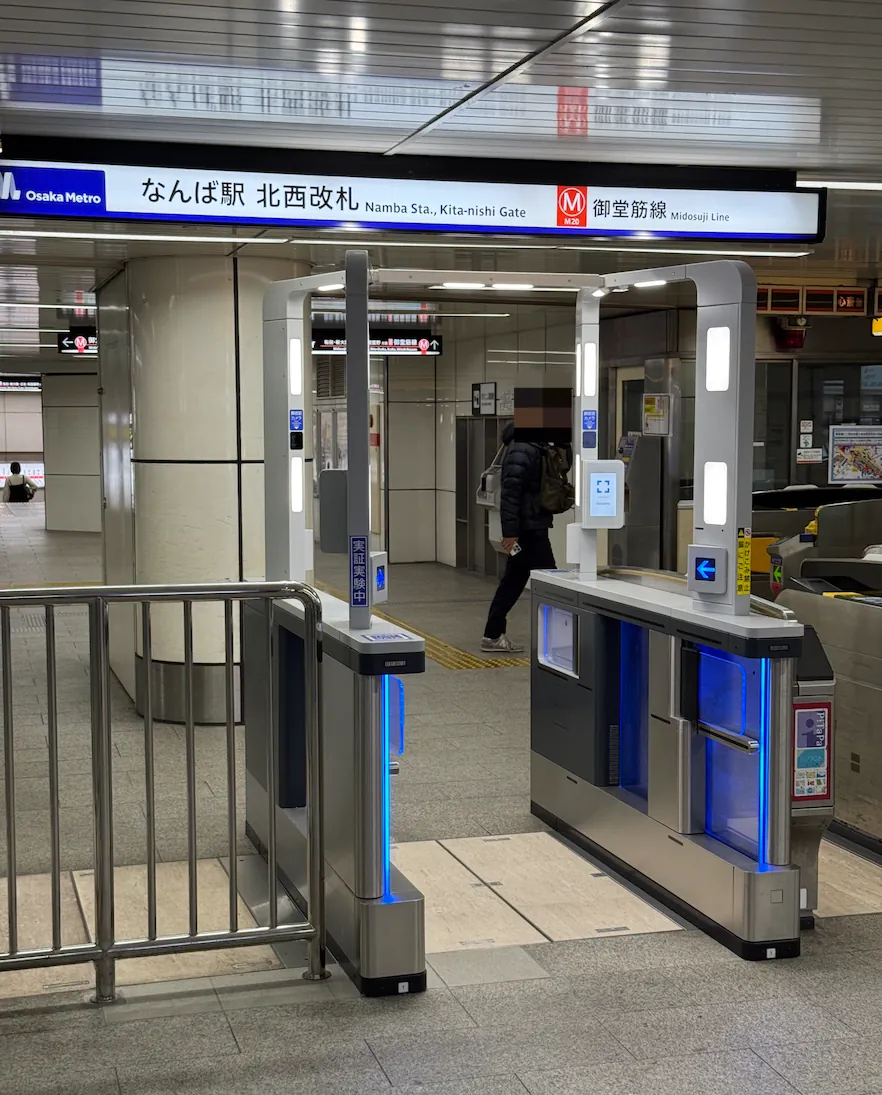
After getting off at Namba Station, walk a short distance into an alley where you’ll find the shrine.
Just found out that Osaka is also testing facial recognition for station entry and exit.
~=9:50 Arrive at Namba Yasaka Shrine
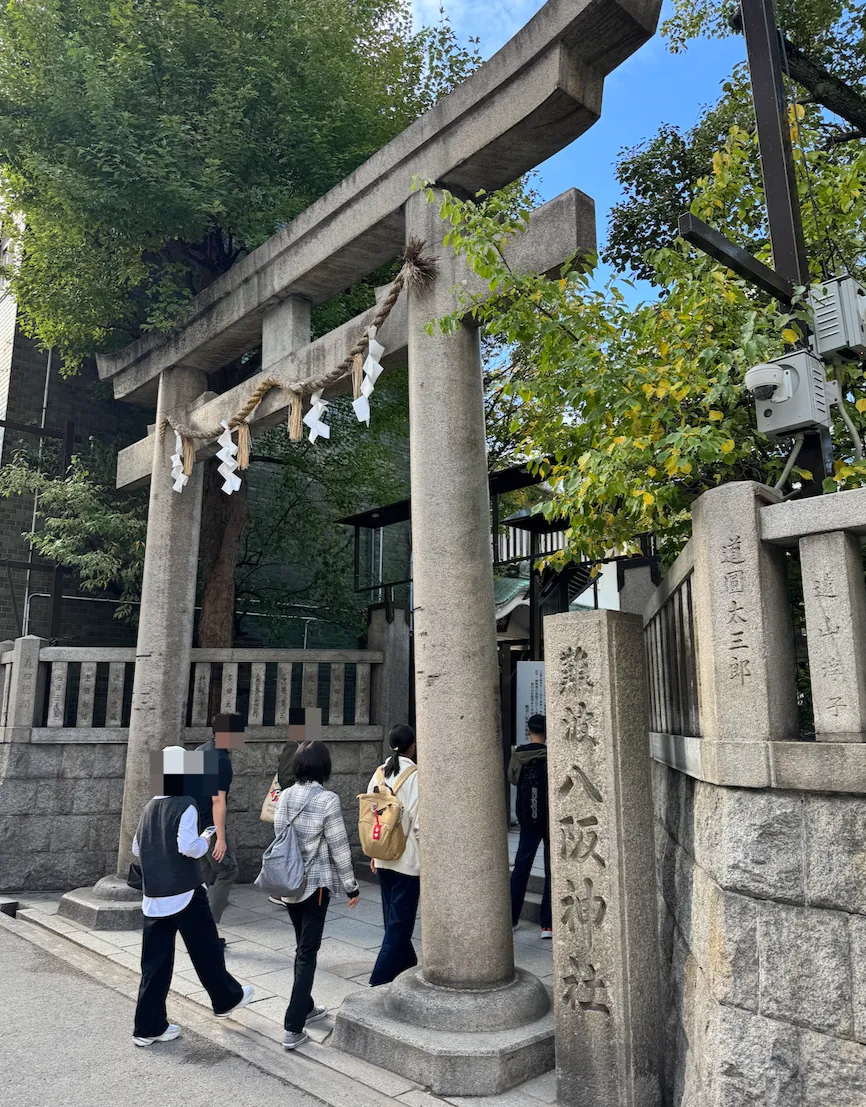
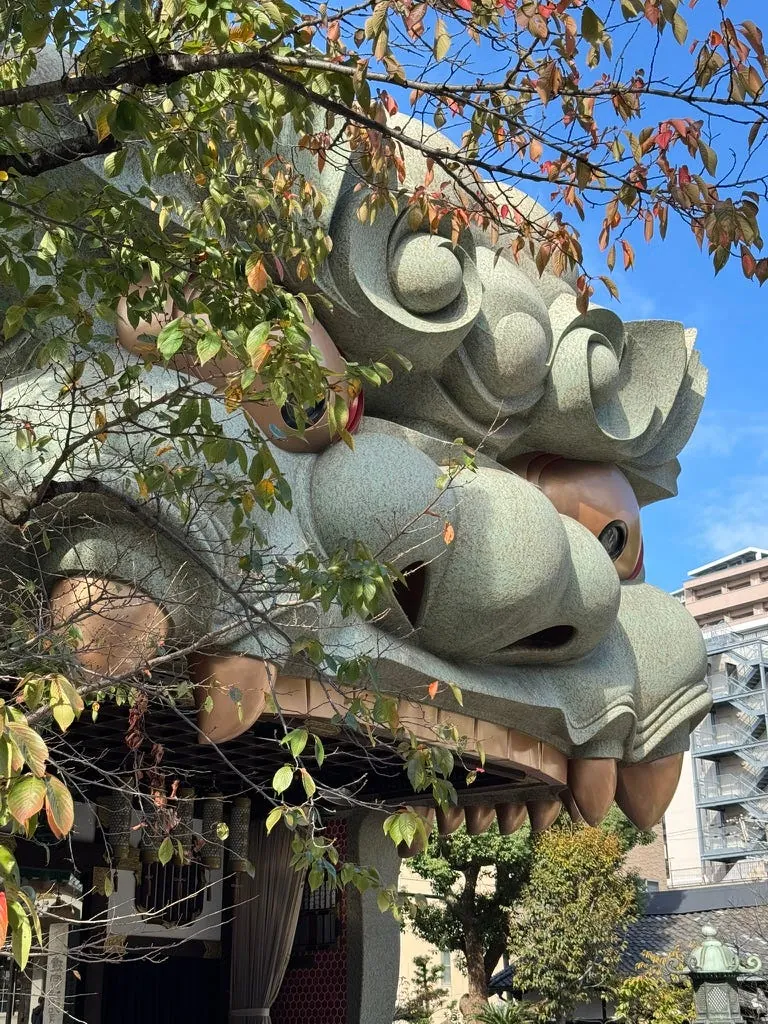
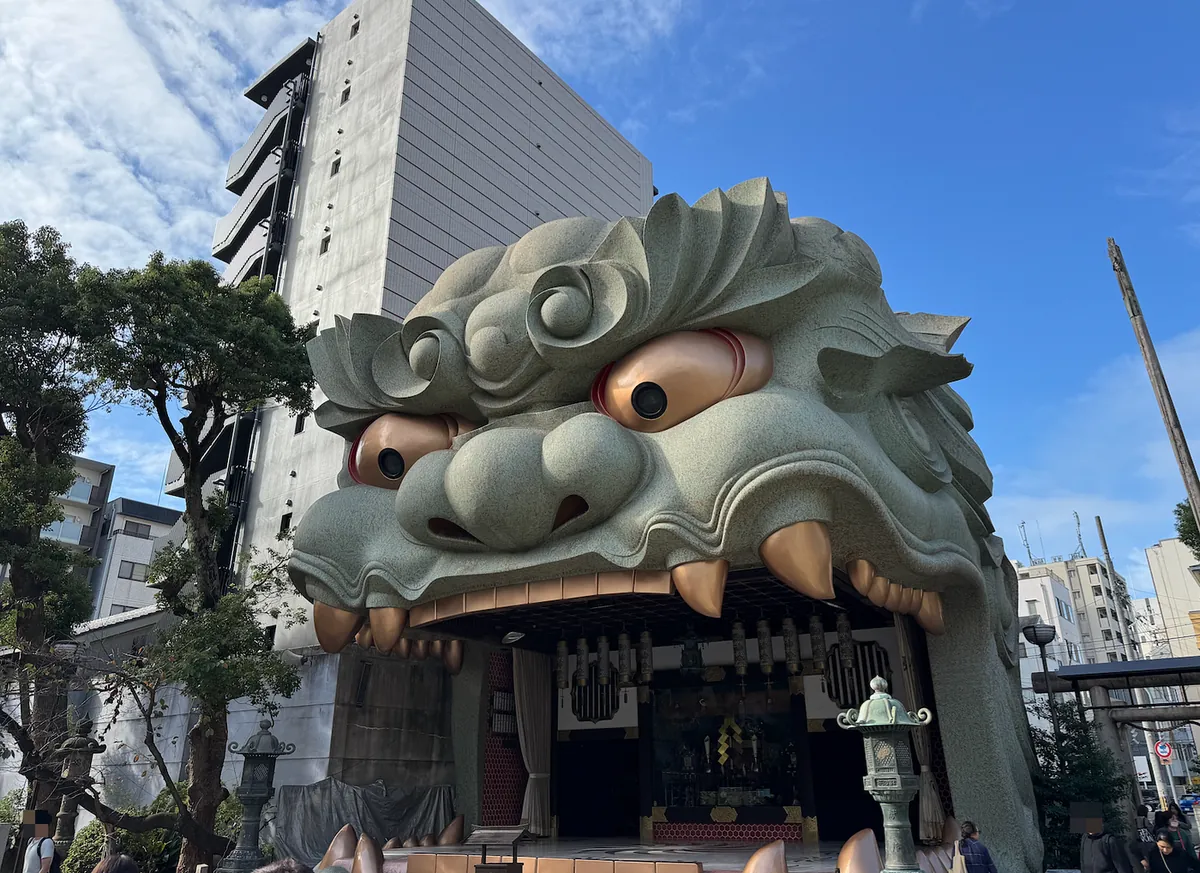
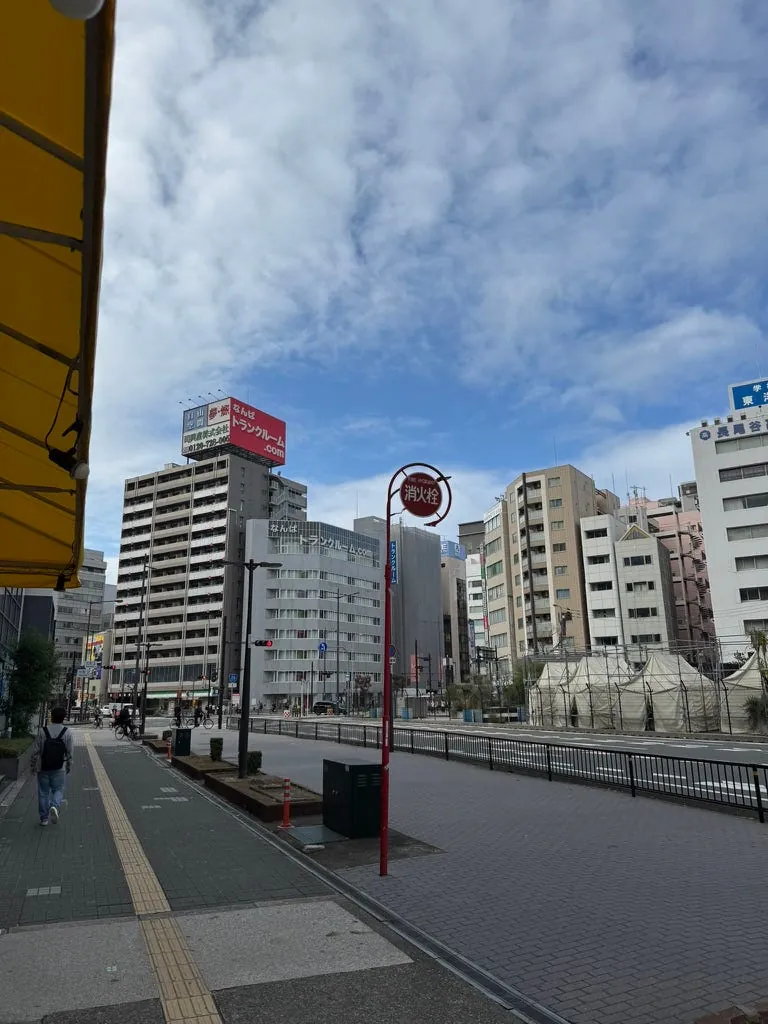
The shrine is small and crowded with tourists. I took a few photos and left shortly after.
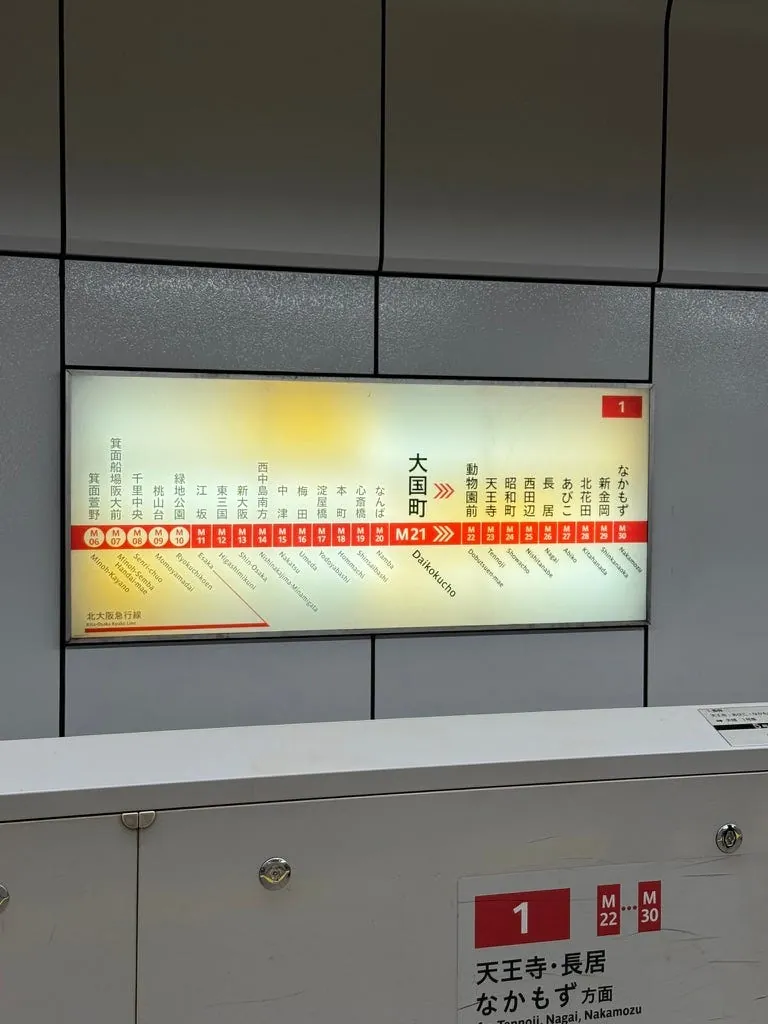
After leaving, continue to the next station “Daikokucho,” take one stop to “Dobutsuen-mae,” and get off to head to Tsutenkaku.
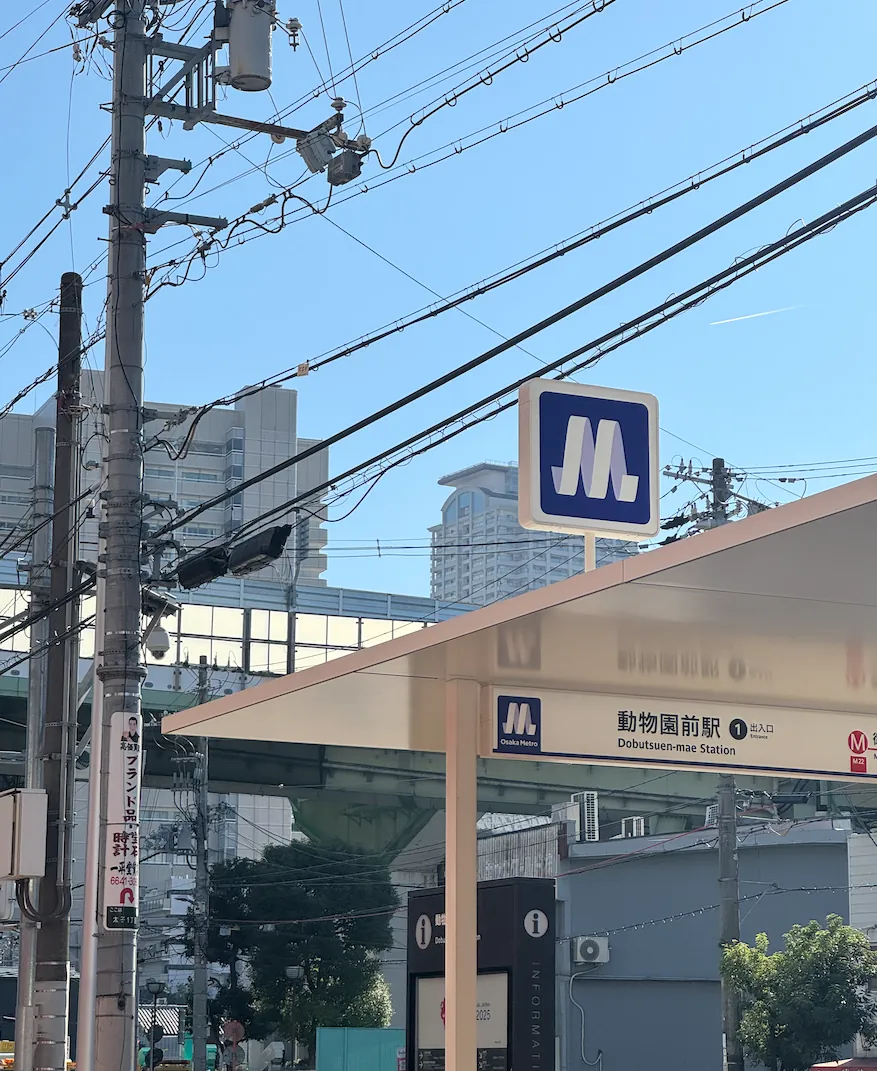
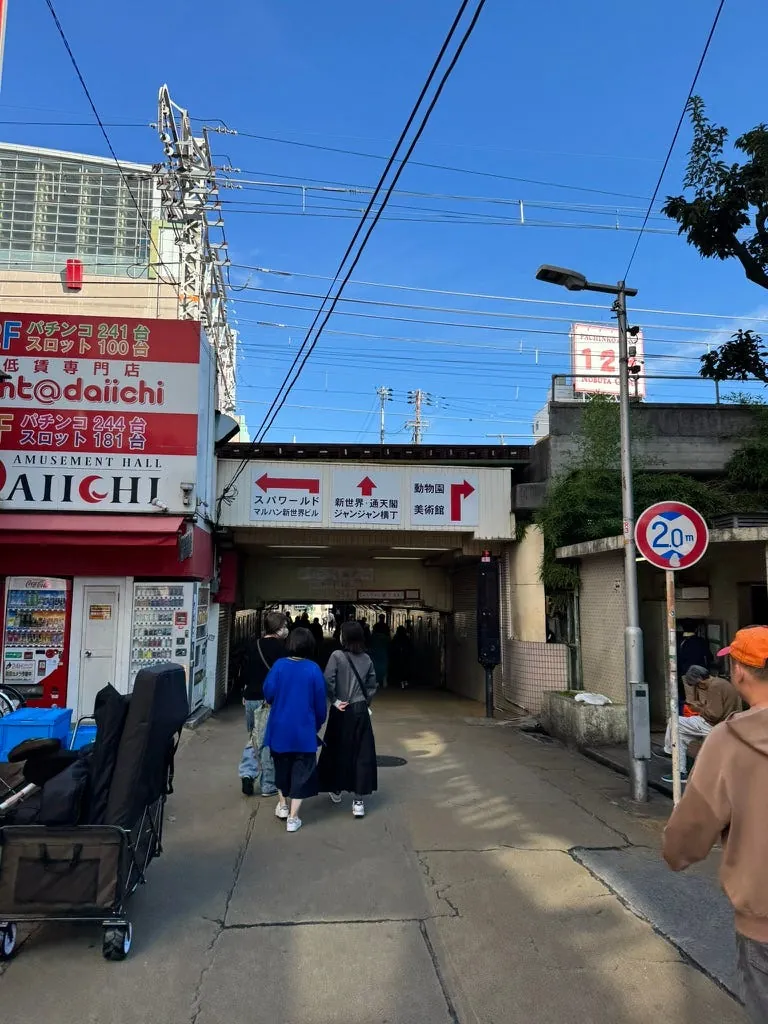
After exiting the station, go through the underground passage and shopping street, then continue straight to see Tsutenkaku Tower.
The area here feels quite unsafe. Right after exiting the station and passing through the underpass, there are many homeless people, and some are loudly arguing. It’s a bit scary.
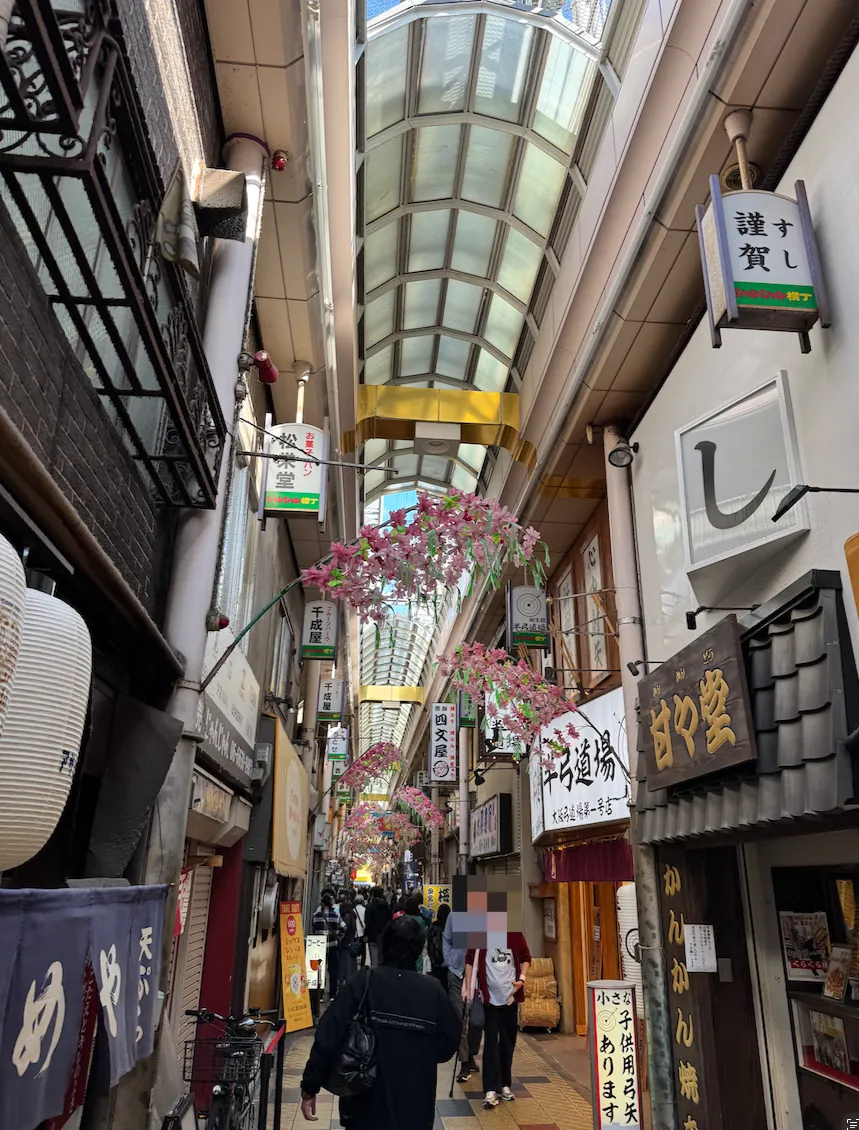
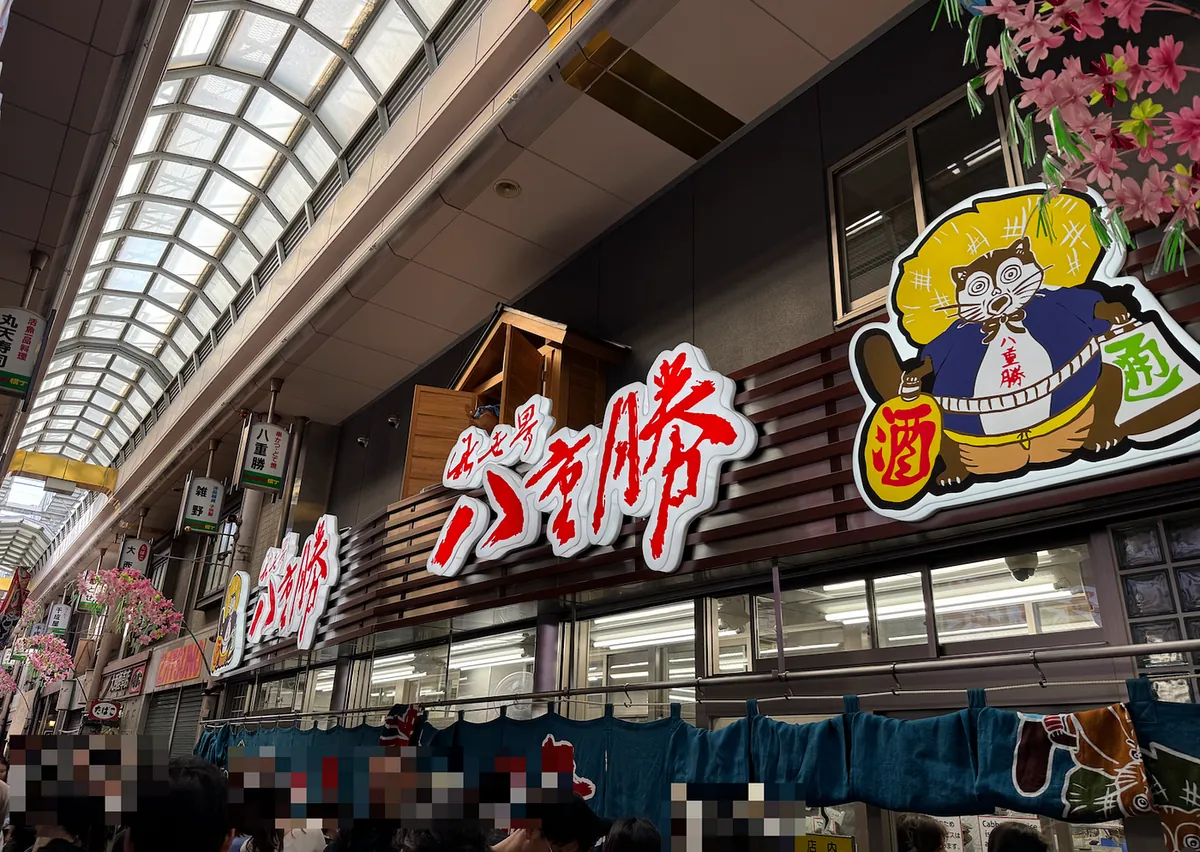
The shopping street alley is narrow with food on both sides. A few shops seem to be popular spots with long queues and many people.
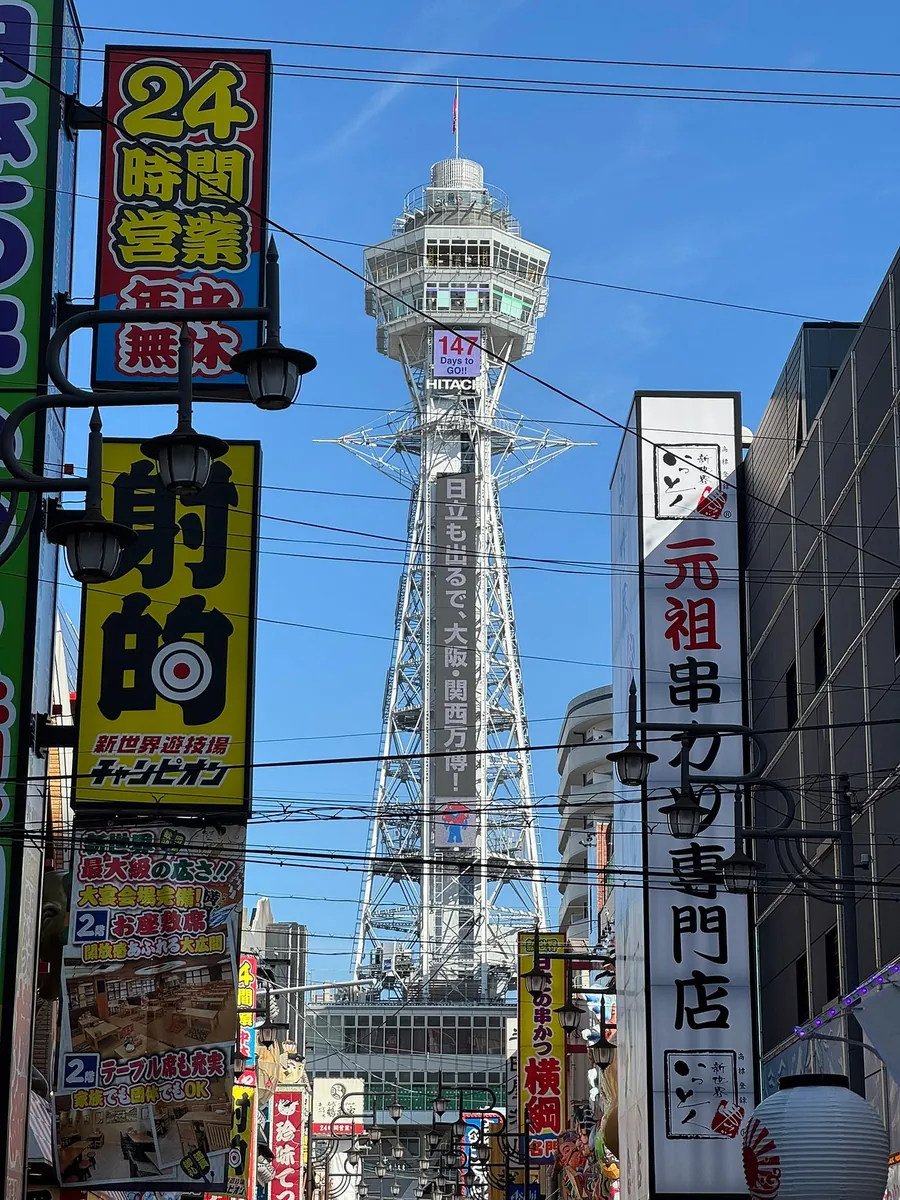
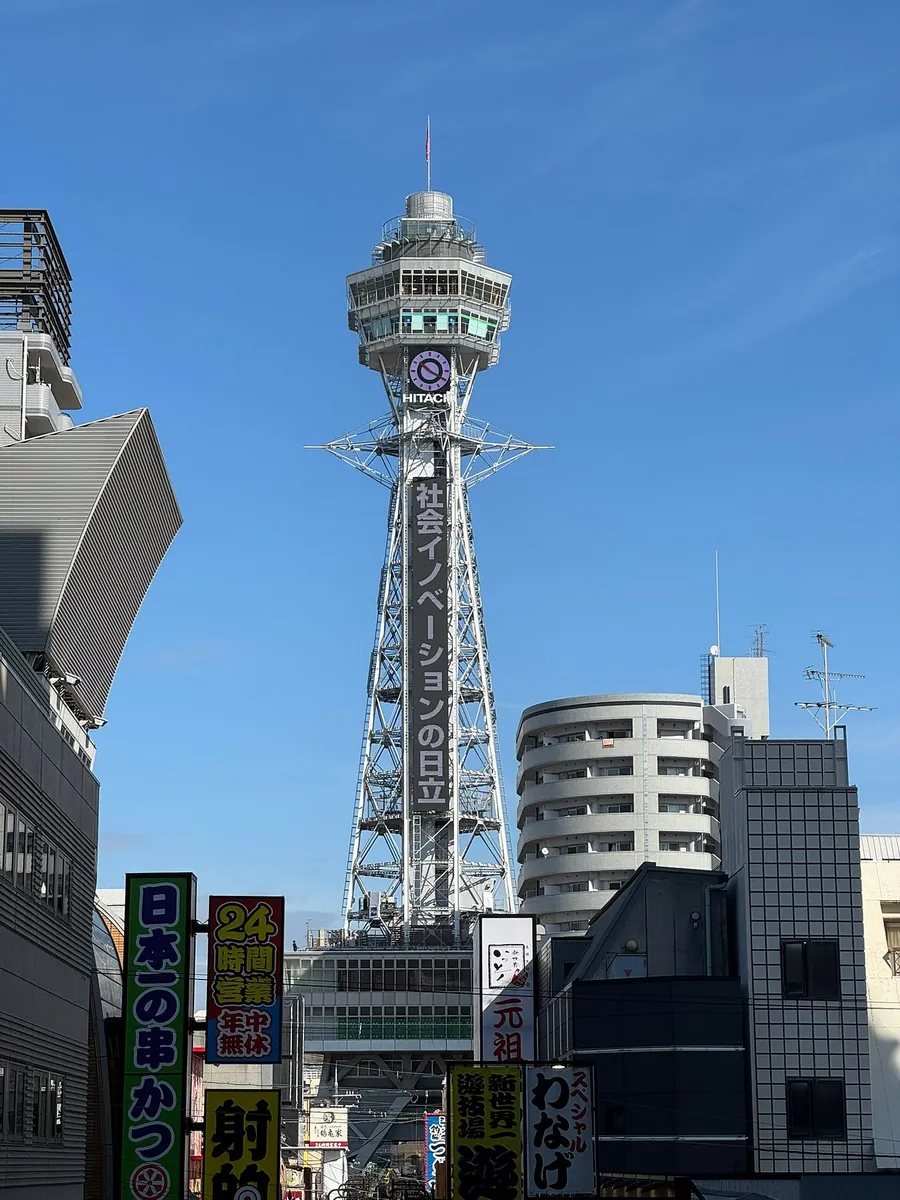
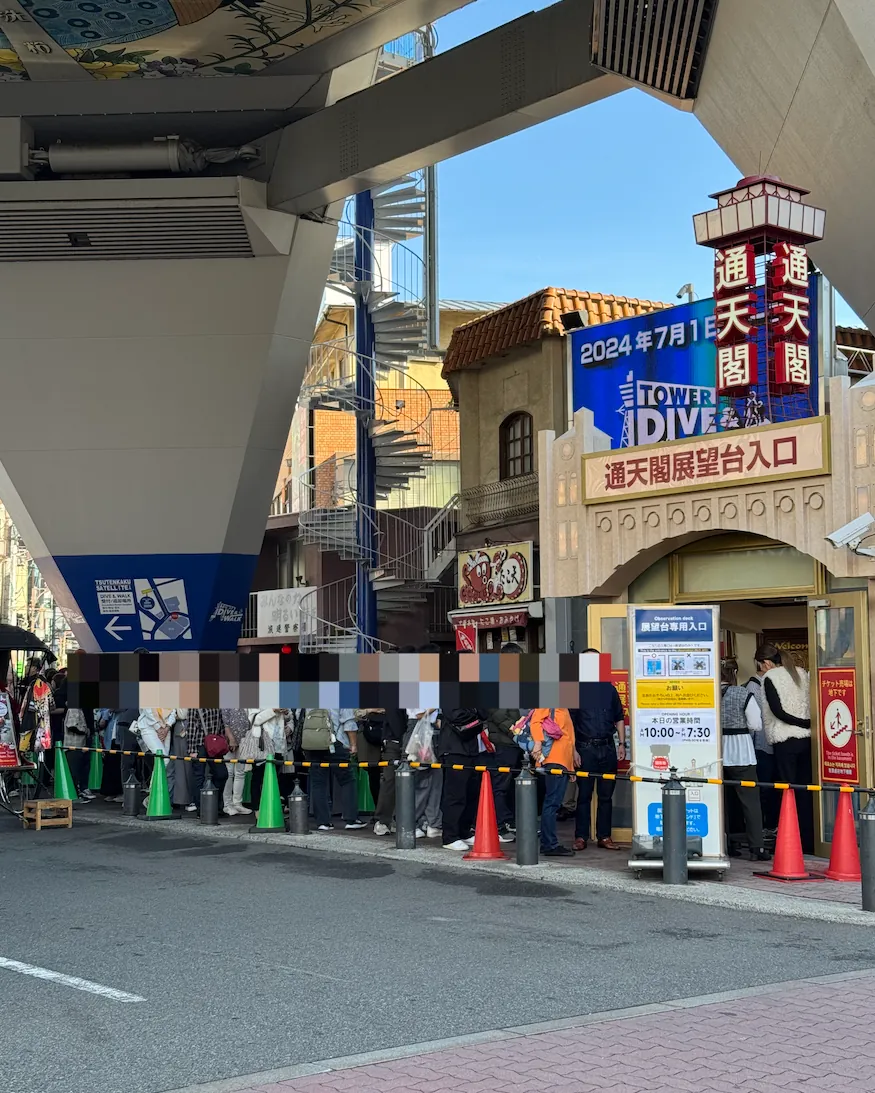
Around 10:30, I arrived at the base of Tsutenkaku. There was a long line of people waiting to go up, so I gave up immediately.
Walk back to the subway station to return to Osaka.
~=11:00 Return to Osaka Umeda
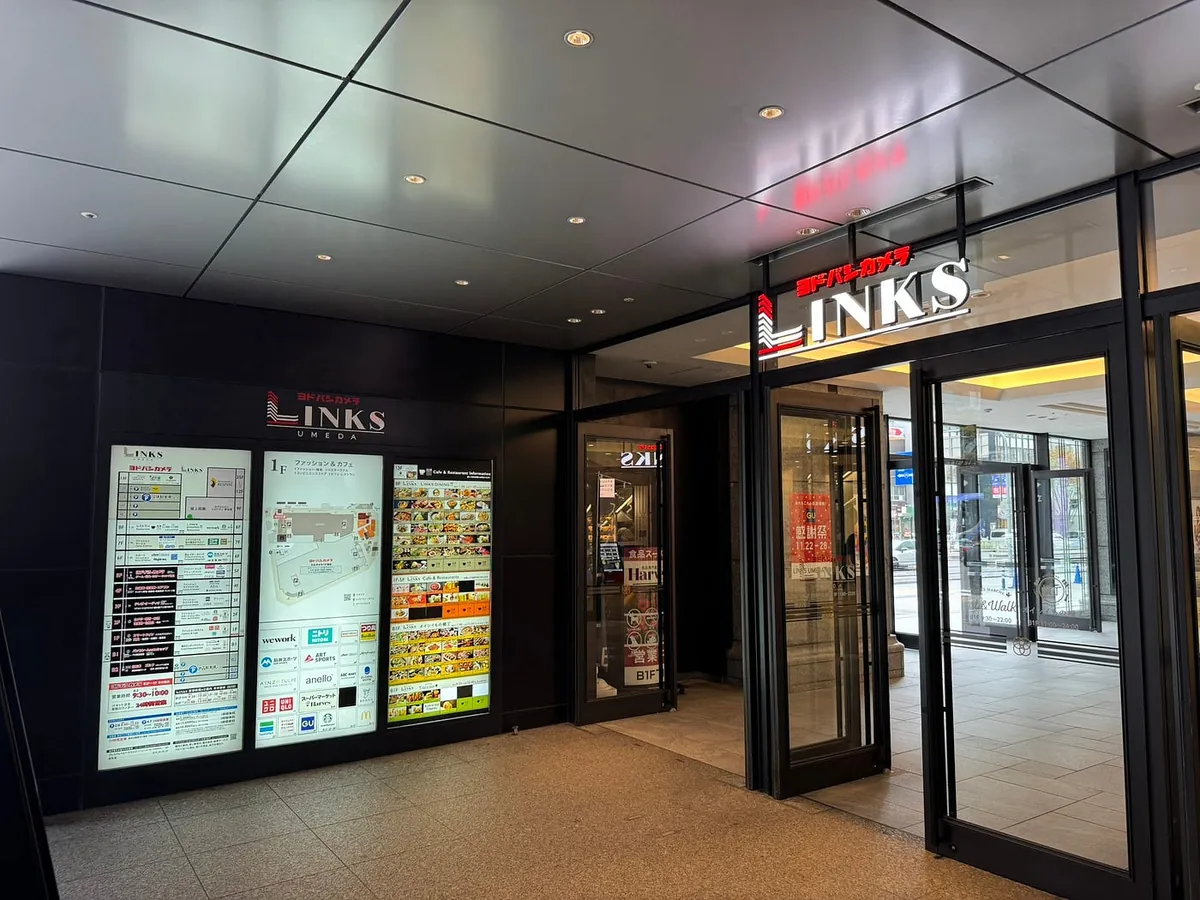
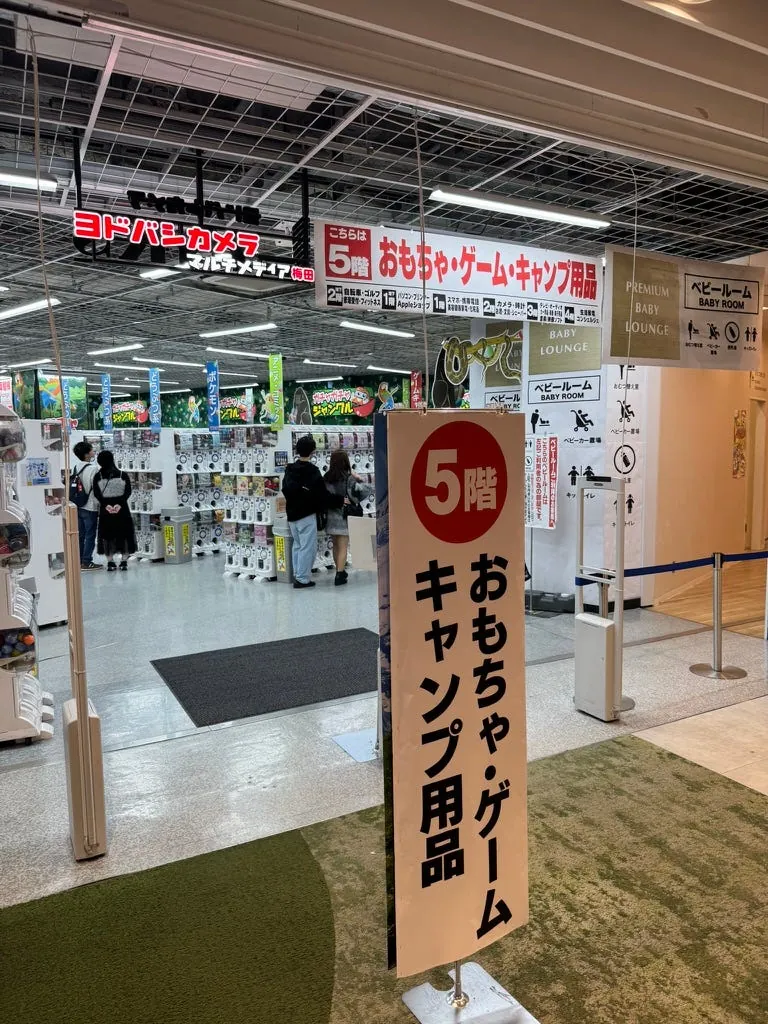
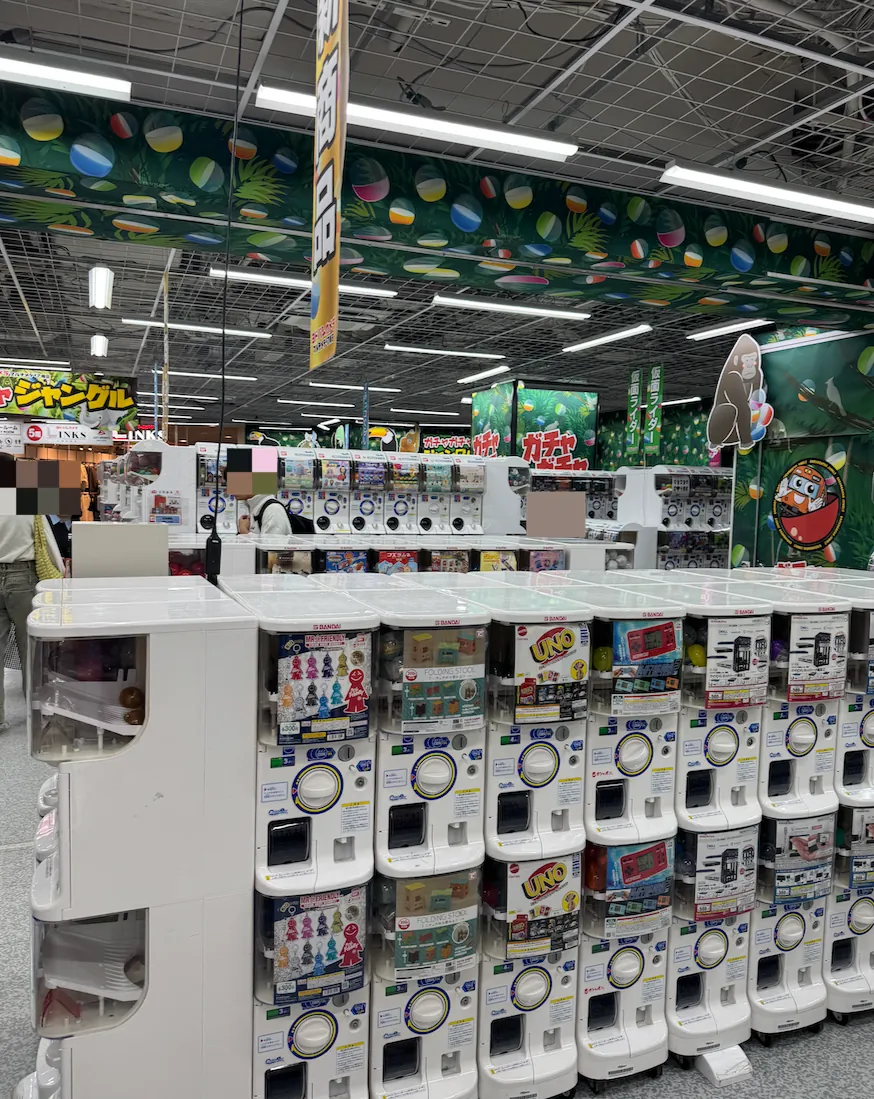
After exiting the station, head to LINKS Department Store. The 5th floor connects directly to the Yodobashi gacha toy area.
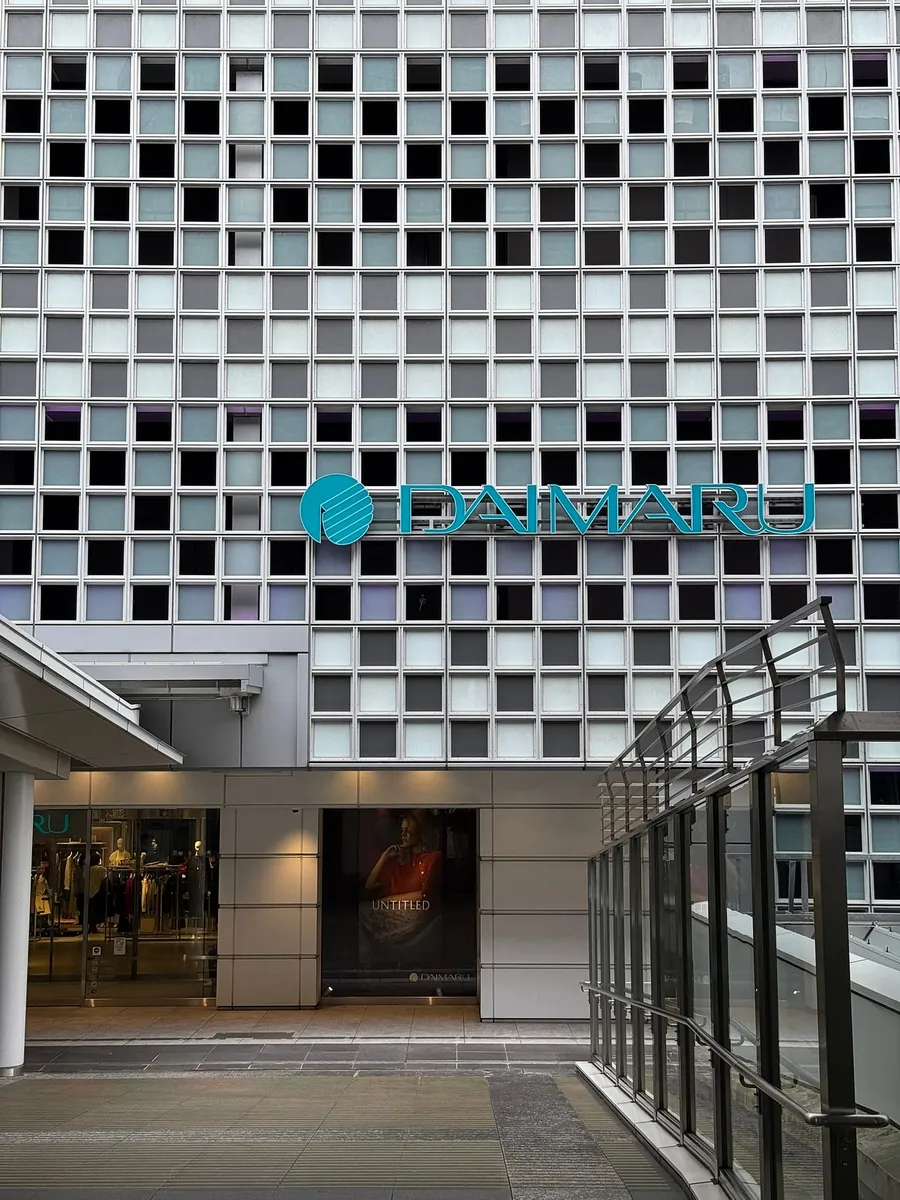
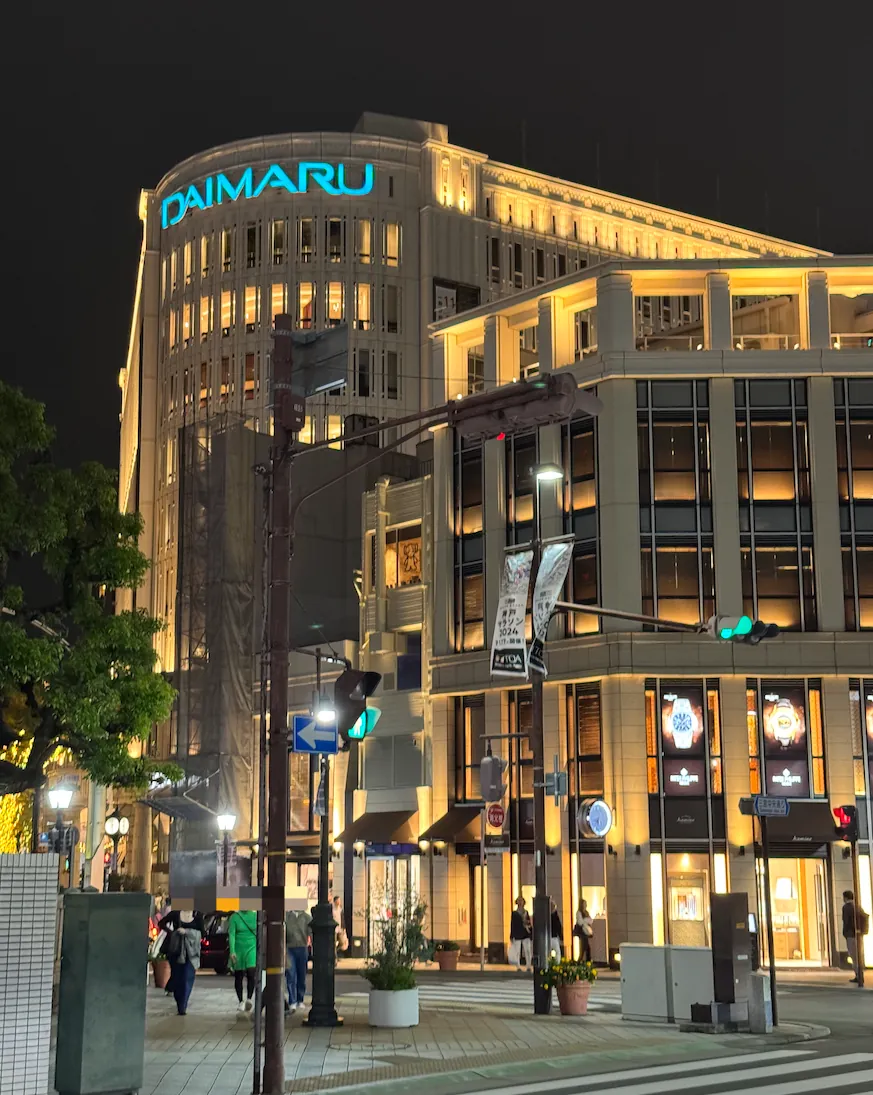
After visiting LINKS, walk through Osaka Station and the Time Square upstairs to reach Osaka Daimaru Department Store.
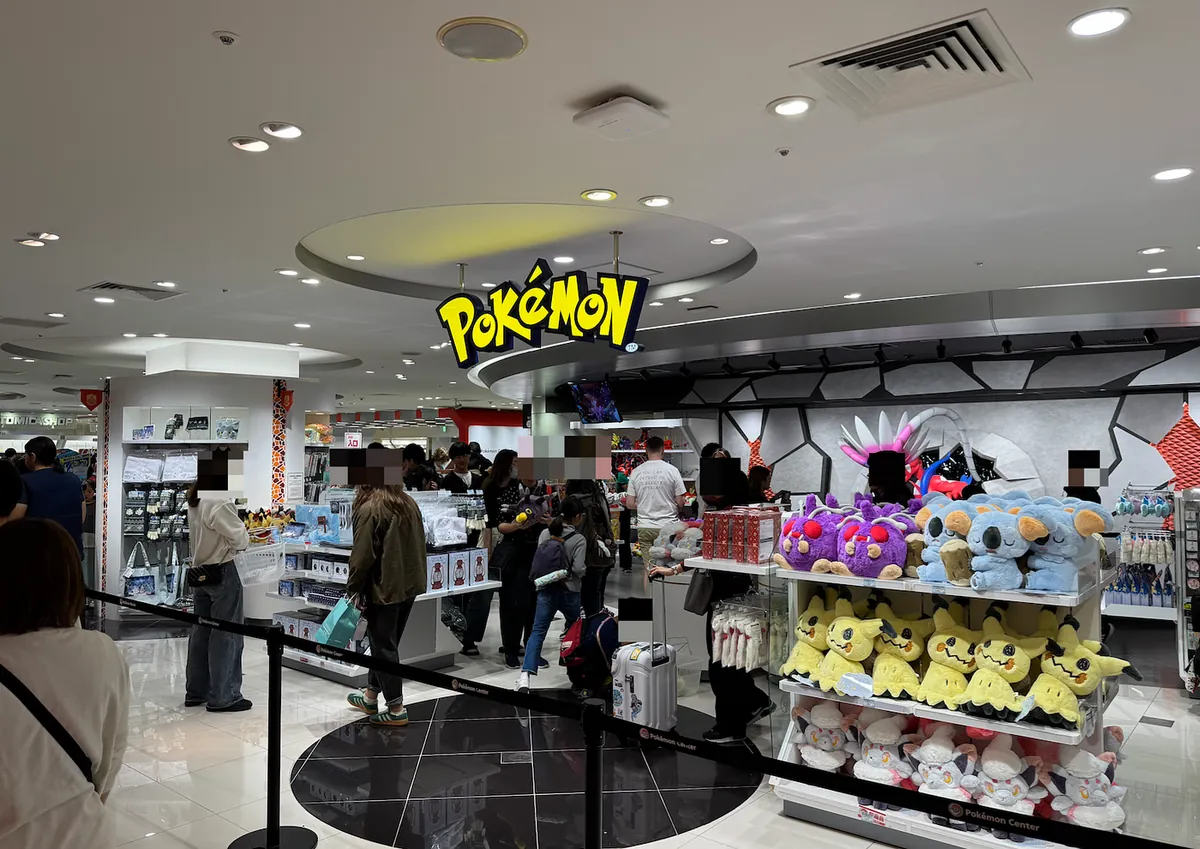
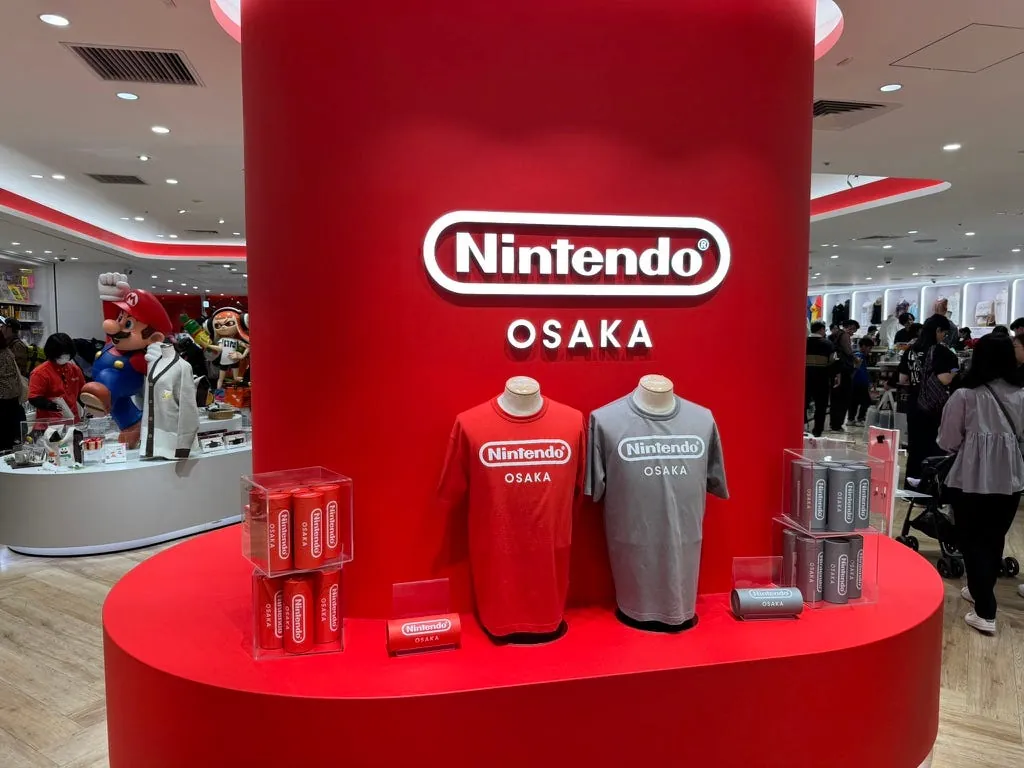
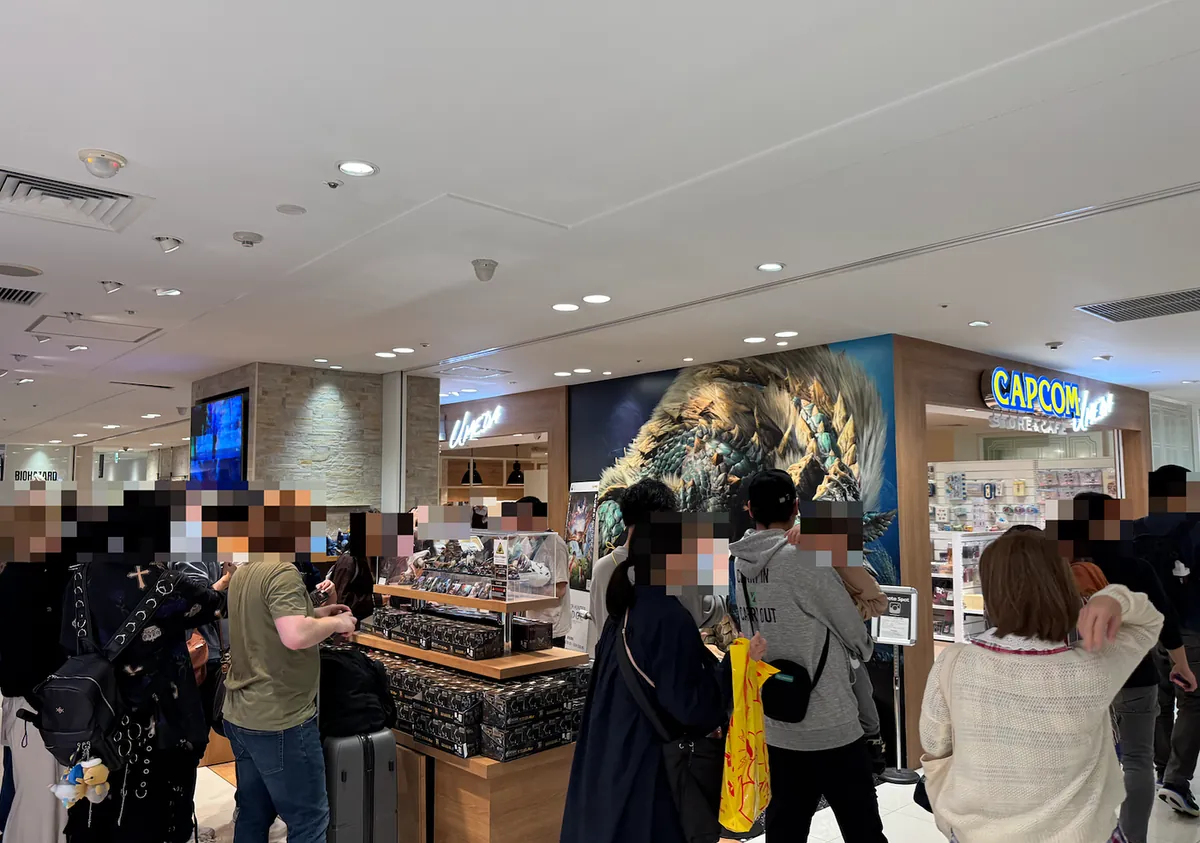
On the 13th floor, there is a Pokémon Center, Nintendo Osaka, CAPCOM…
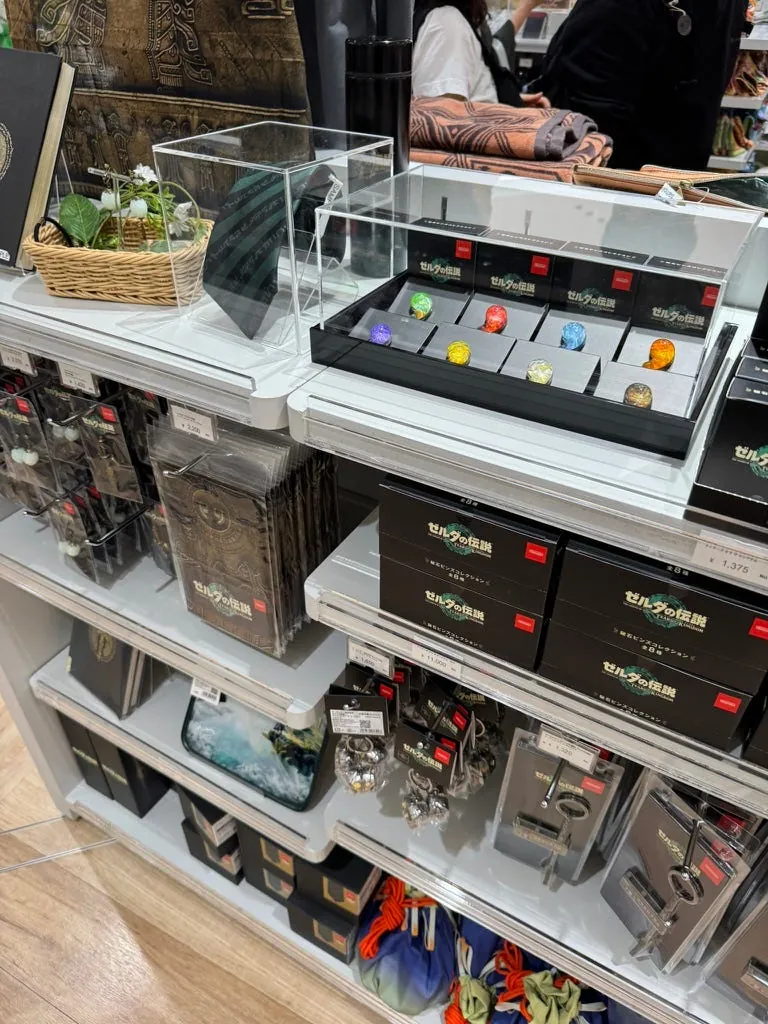
Checked out some Zelda merchandise, but already bought a lot last time, so I left without buying anything this time.

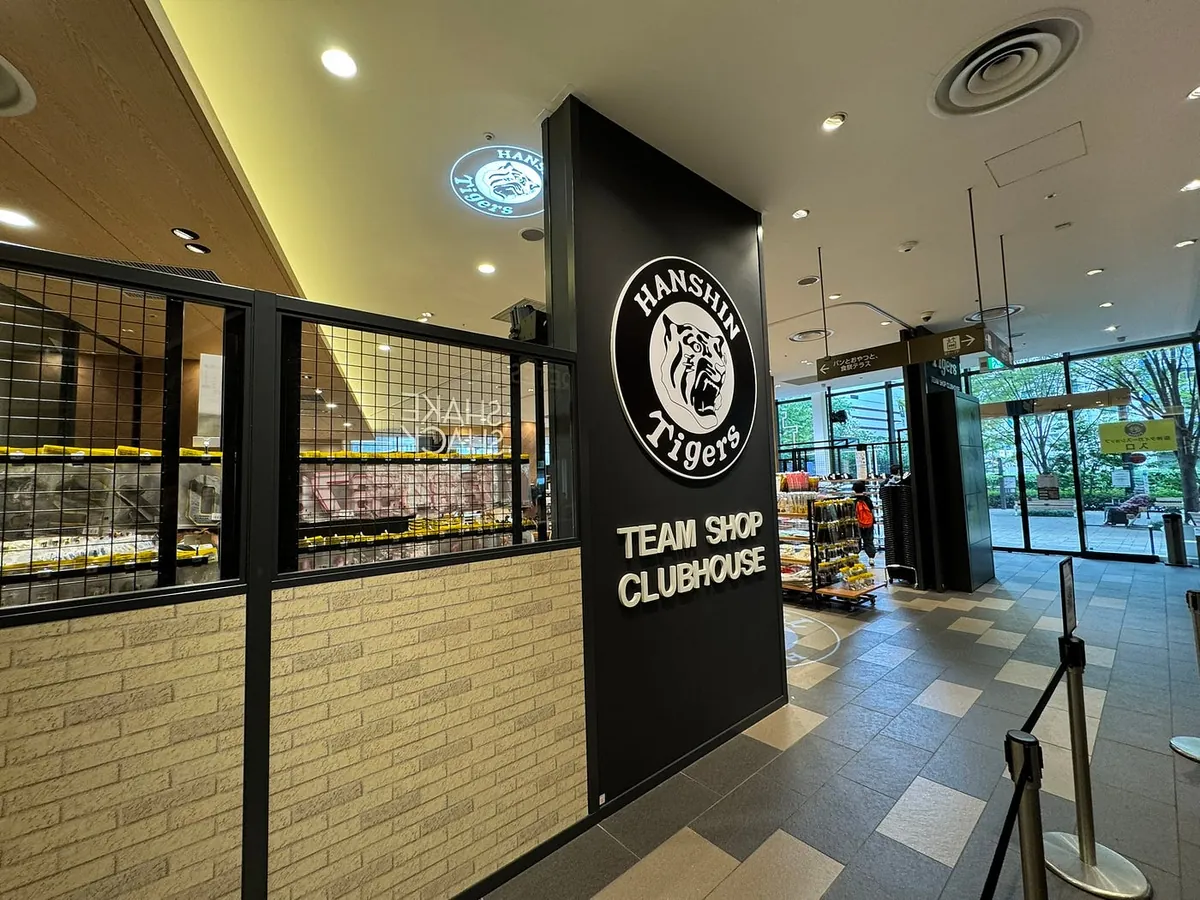

Passing by the Hanshin Tigers merchandise store.
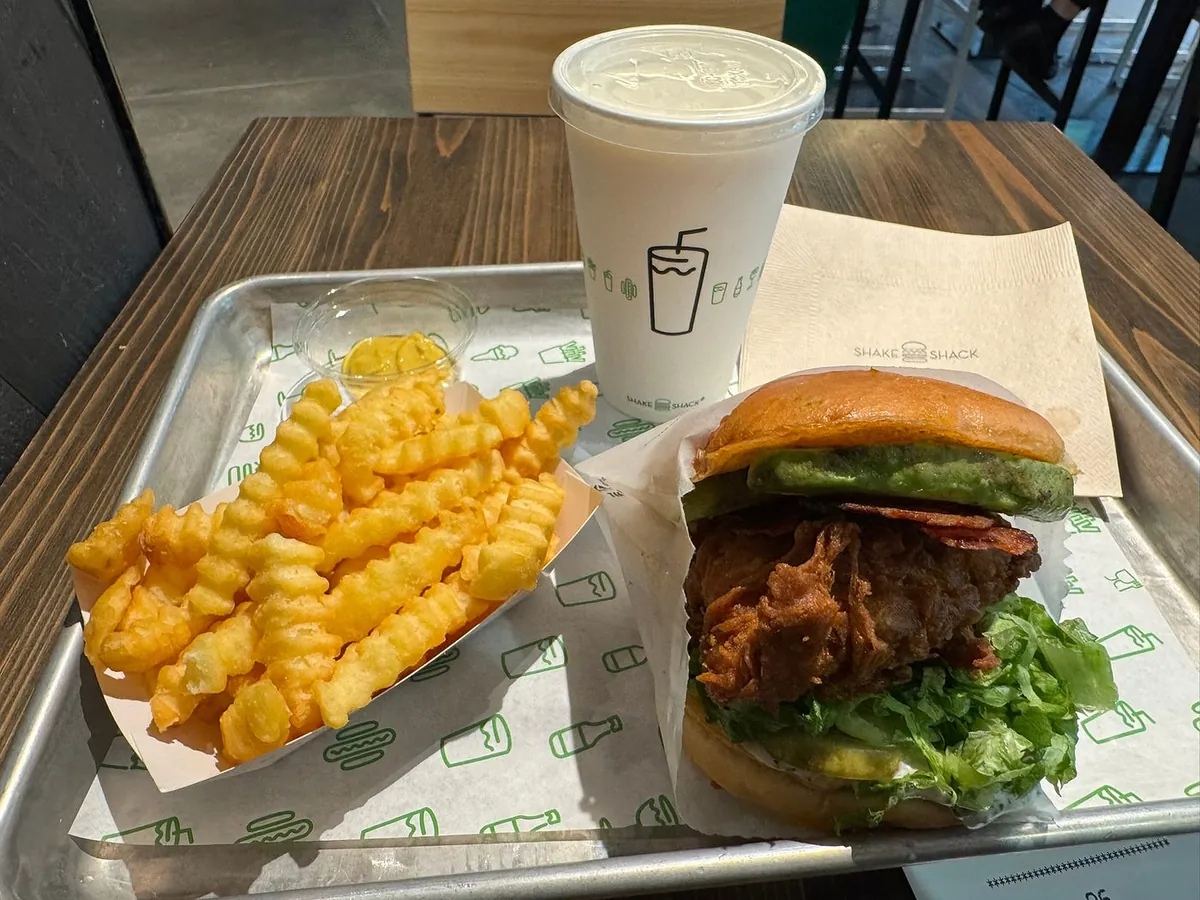
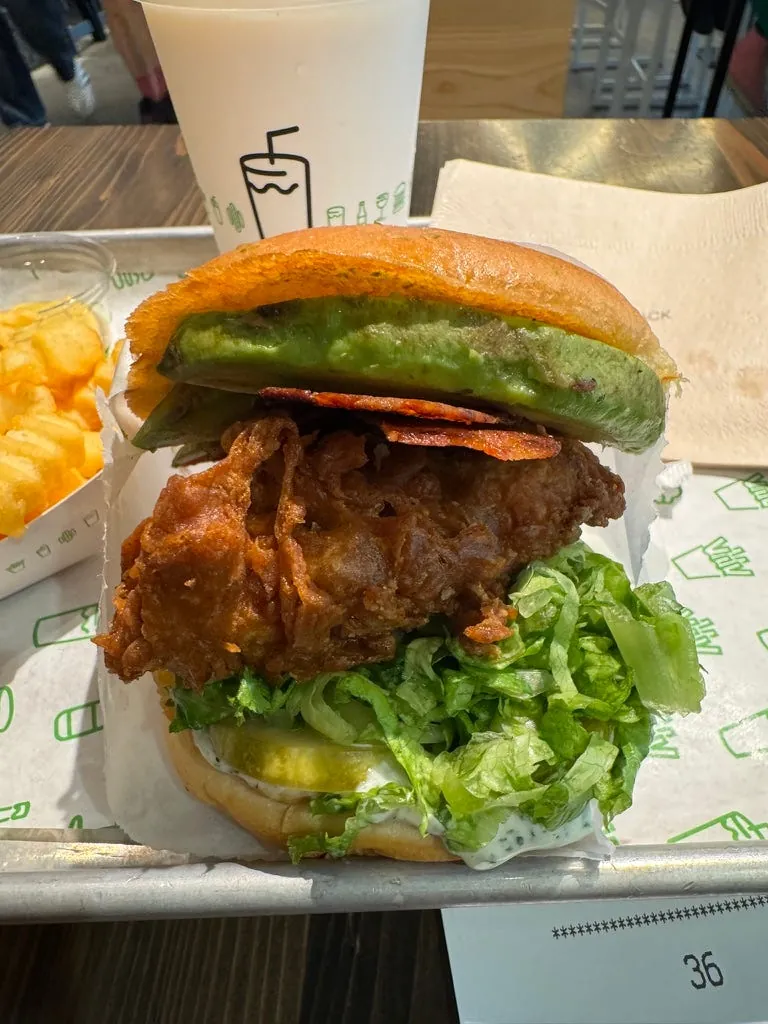
Getting ready to eat at Shake Shack. I tried it in Bangkok last July and still crave it link. Now enjoying it again in Osaka.
~=12:00 Shake Shack
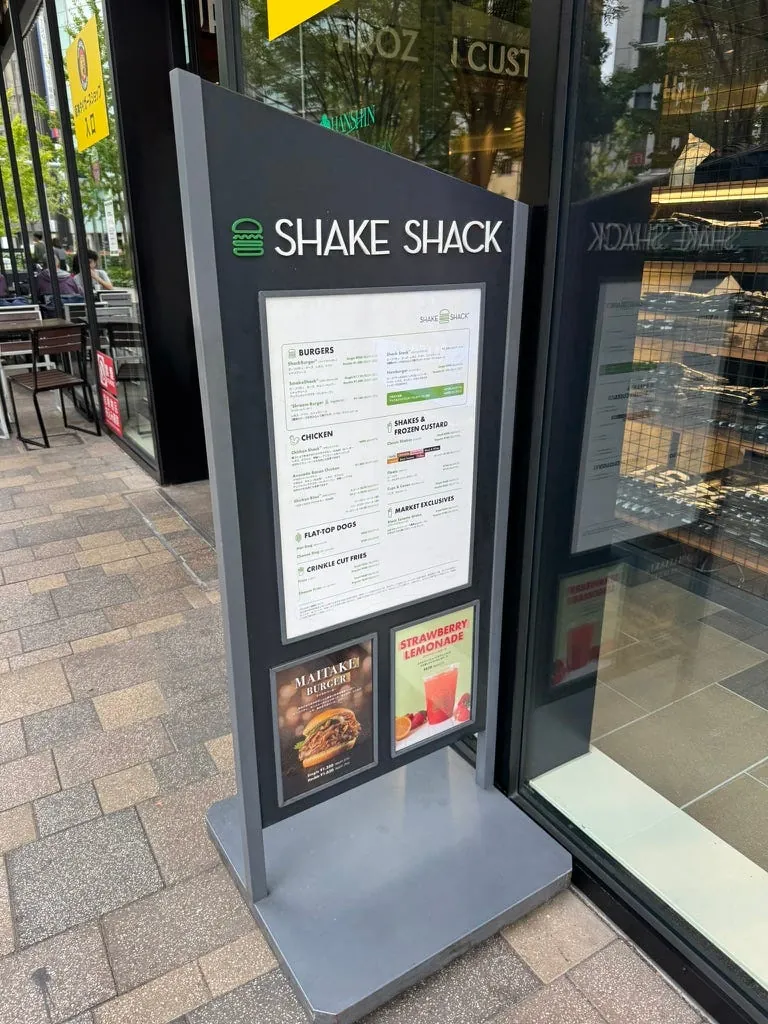
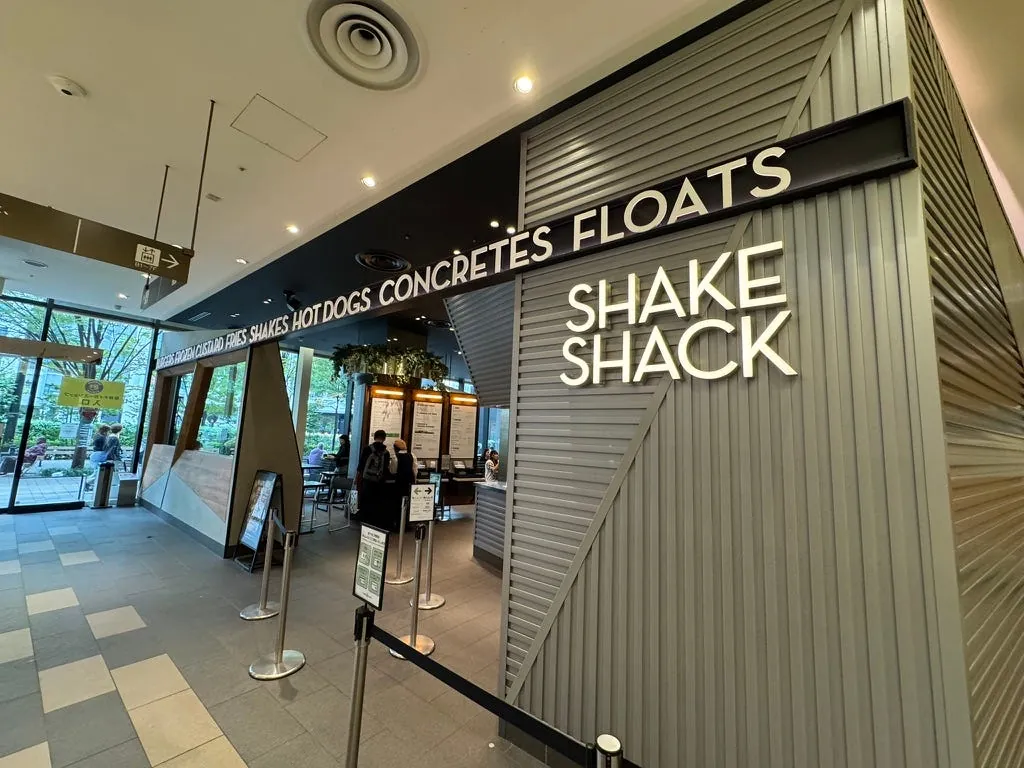
Shake Shack Hanshin Umeda Store is right next to the Hanshin Tigers shop.
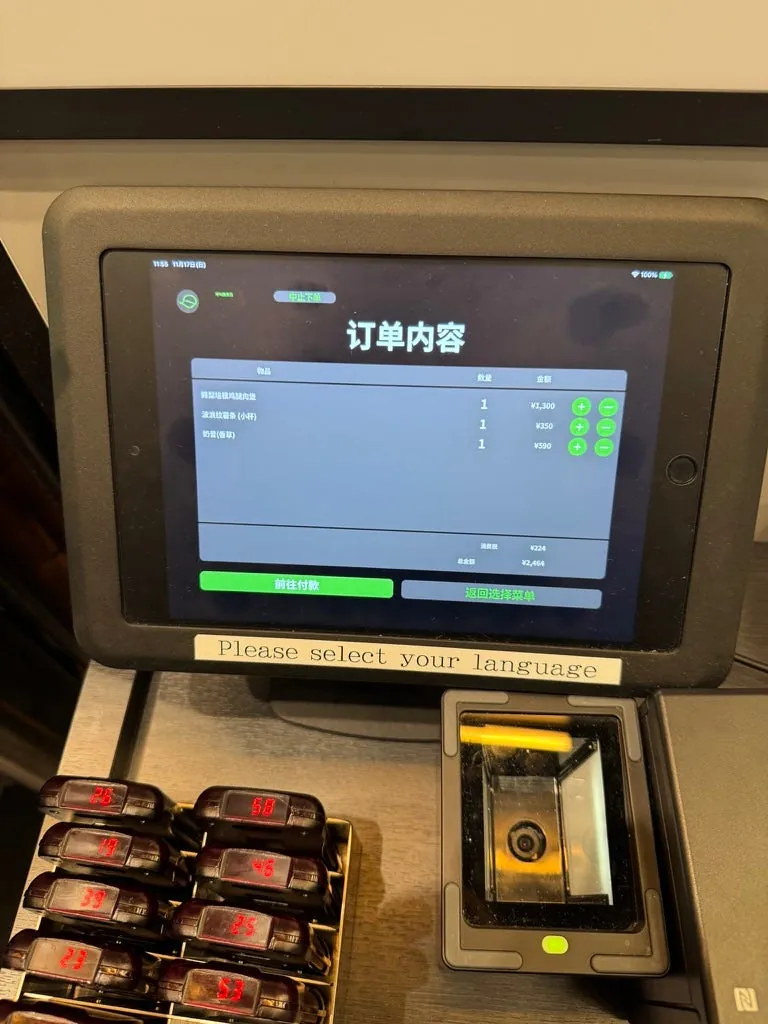
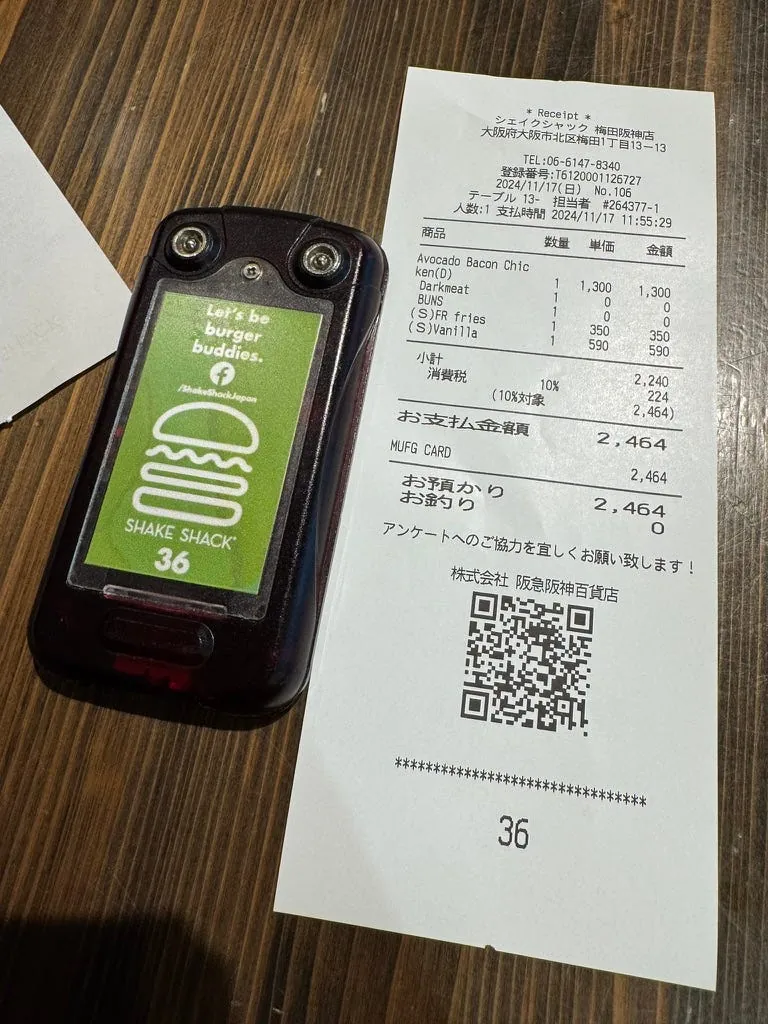
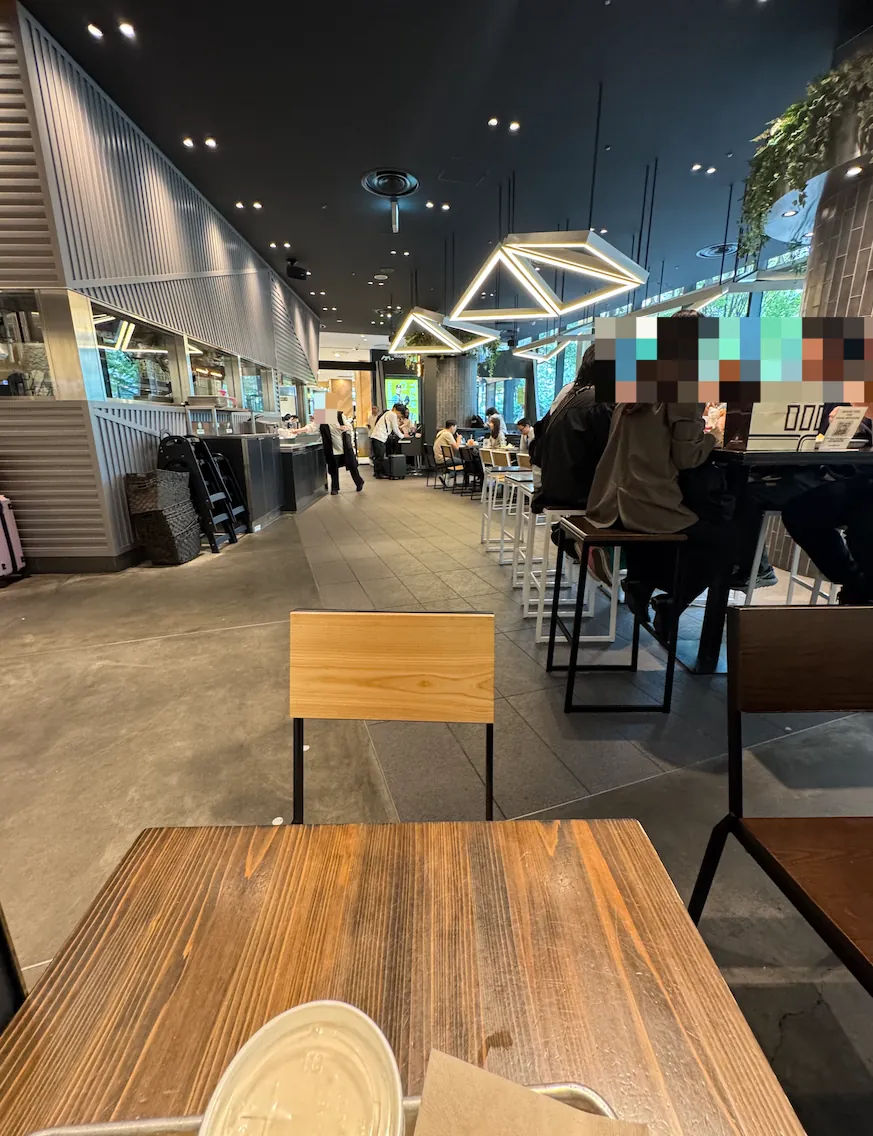
I ordered through the self-service kiosk this time, choosing the avocado bacon chicken burger and a milkshake. This place has a spacious interior with plenty of seats.
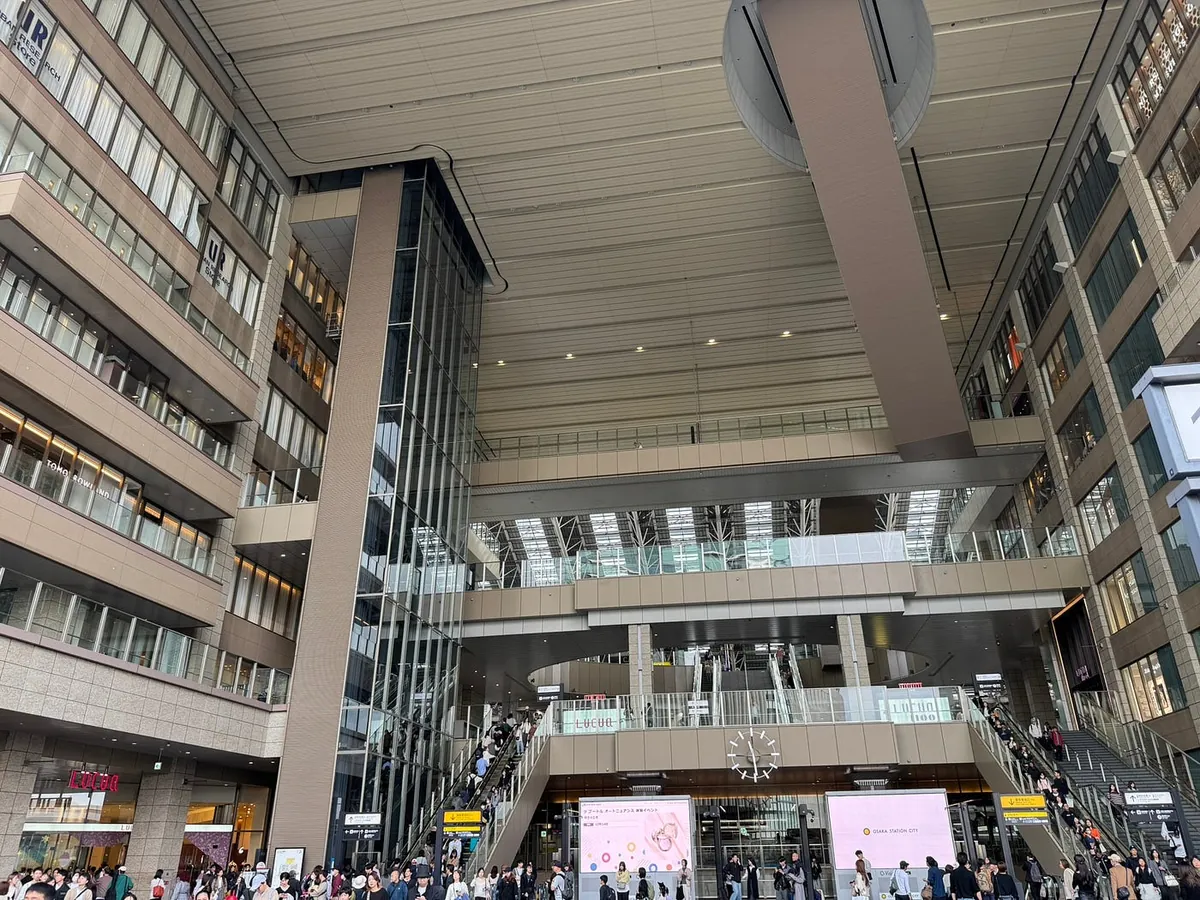
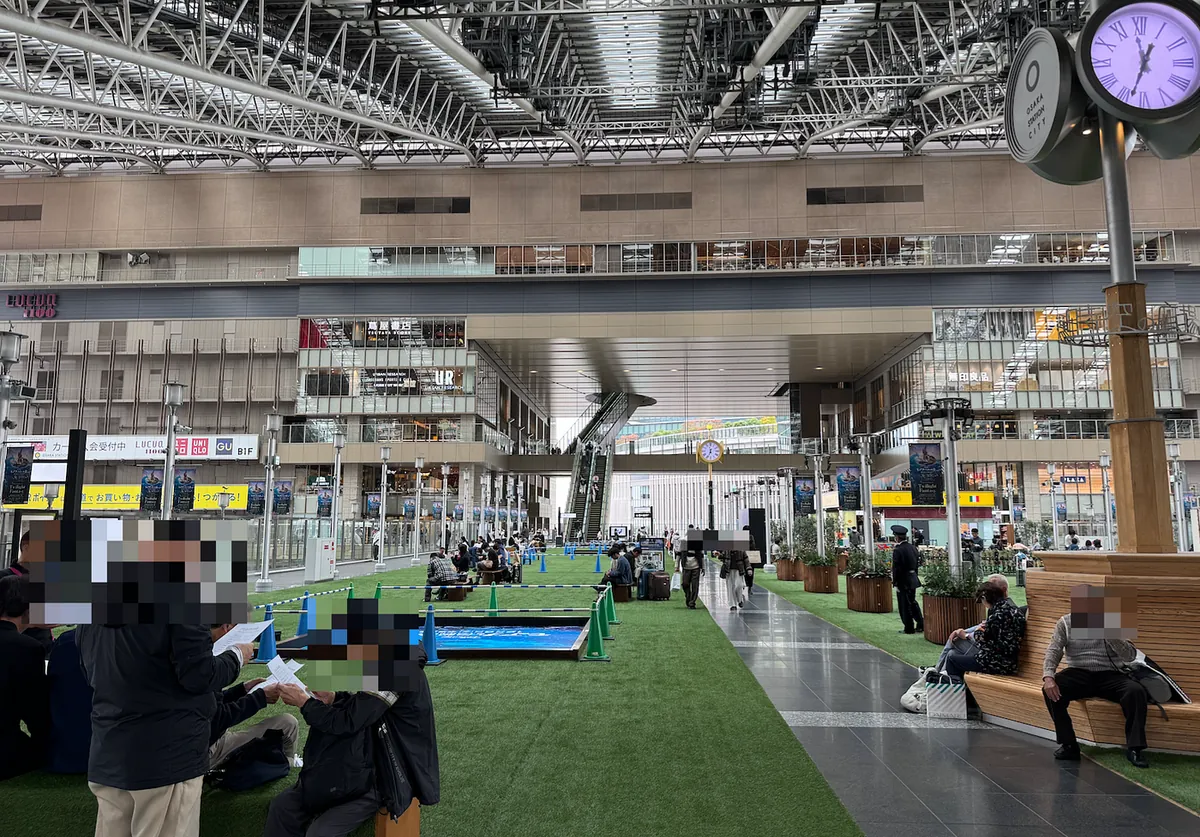
Osaka Station
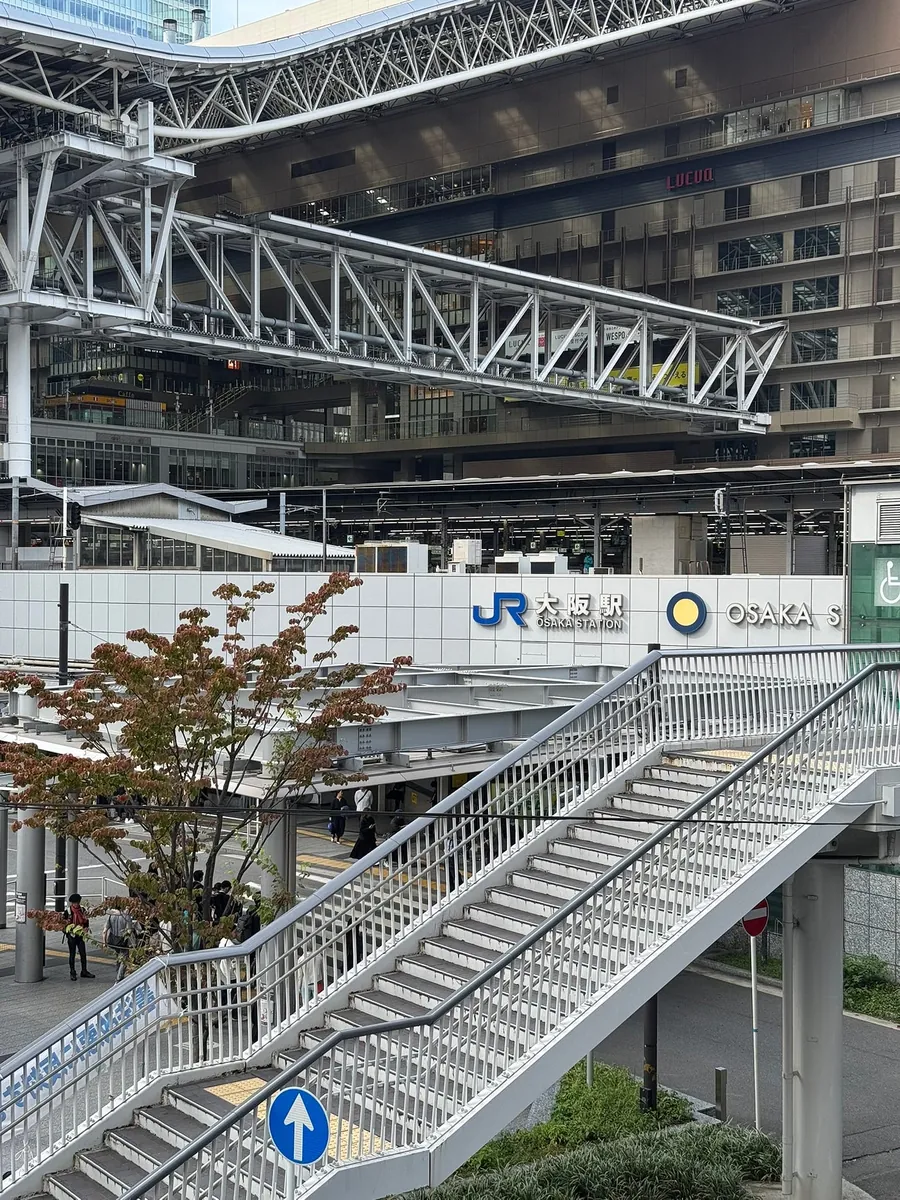
After eating, I wandered around near Osaka Station and decided to visit Osaka’s Kiddy Land to look for Gii Kawa.
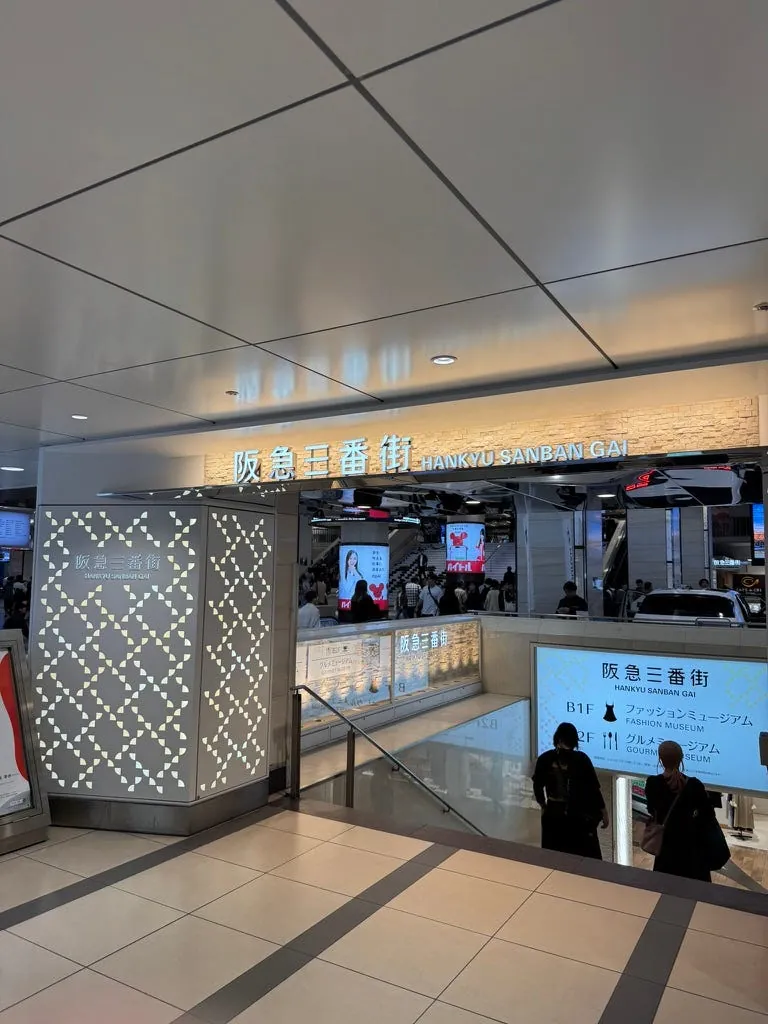
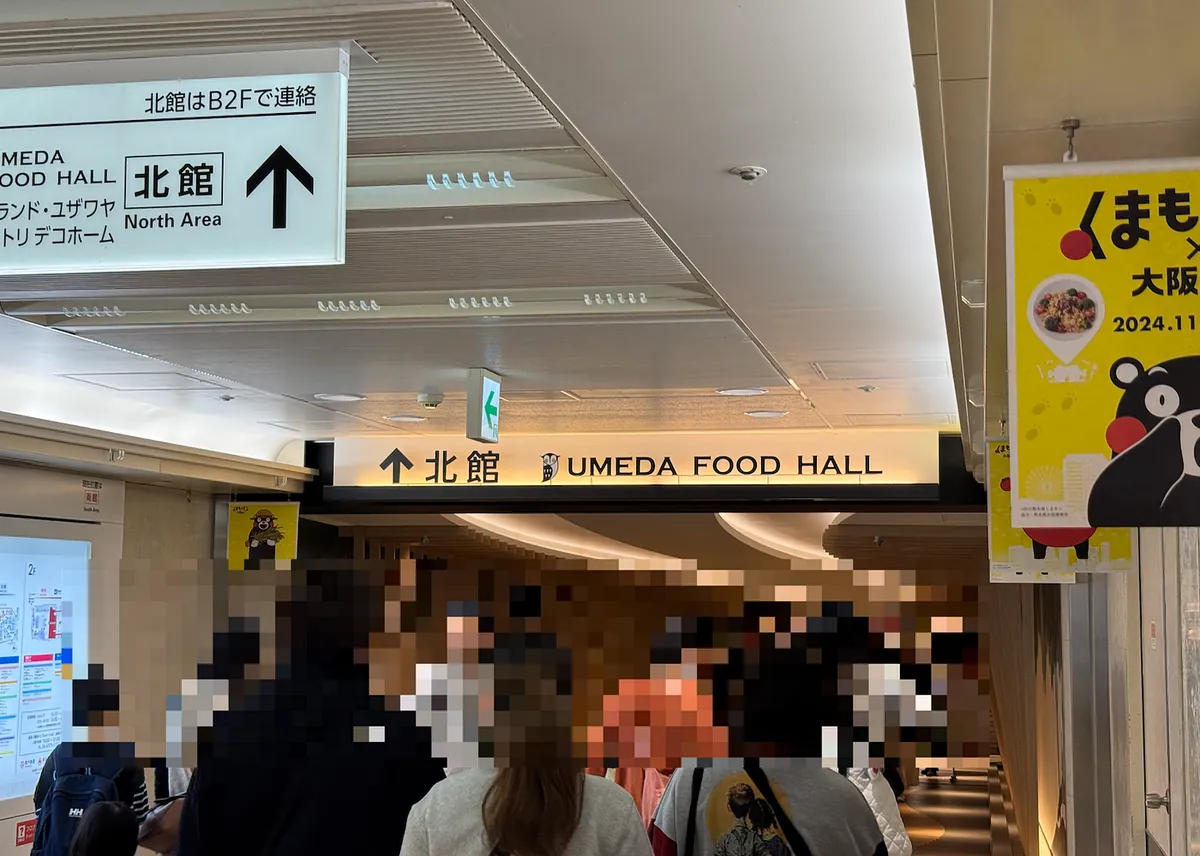
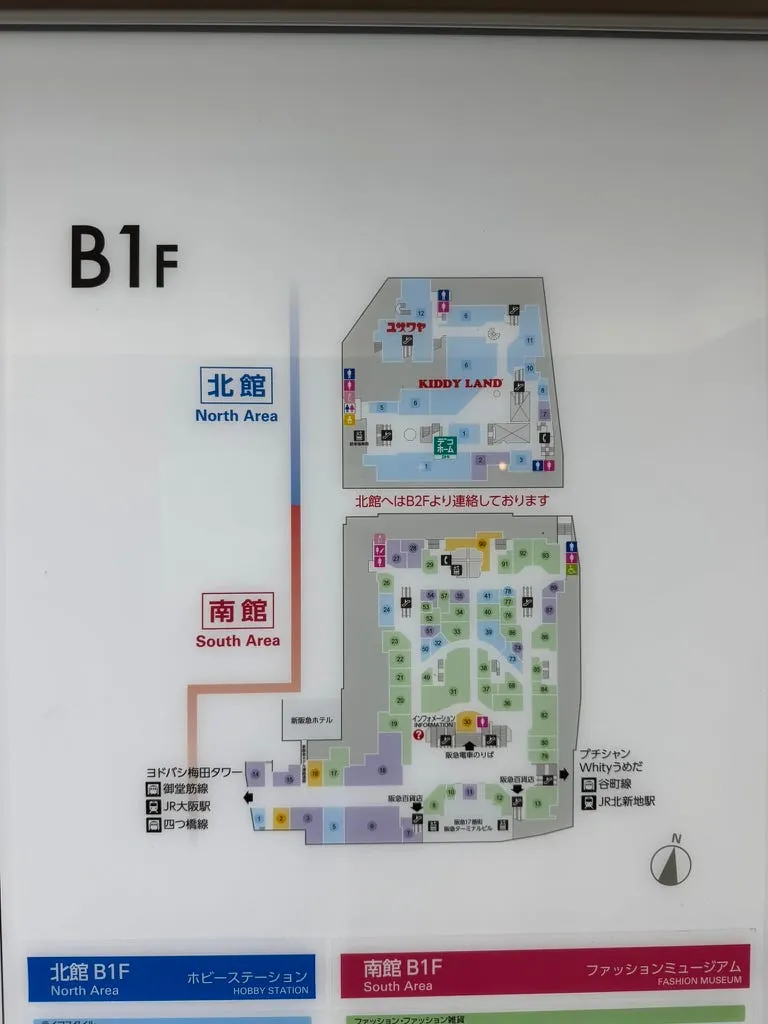
Got lost in the Osaka underground mall and walked for a long time before finding Hankyu Sanbangai. Then I took the underground passage from the South Building to the North Building, and the food court was right upstairs.
Jiikawa has its own separate counter on the other side.
13:00 Kiddy Land Osaka Chiikawa
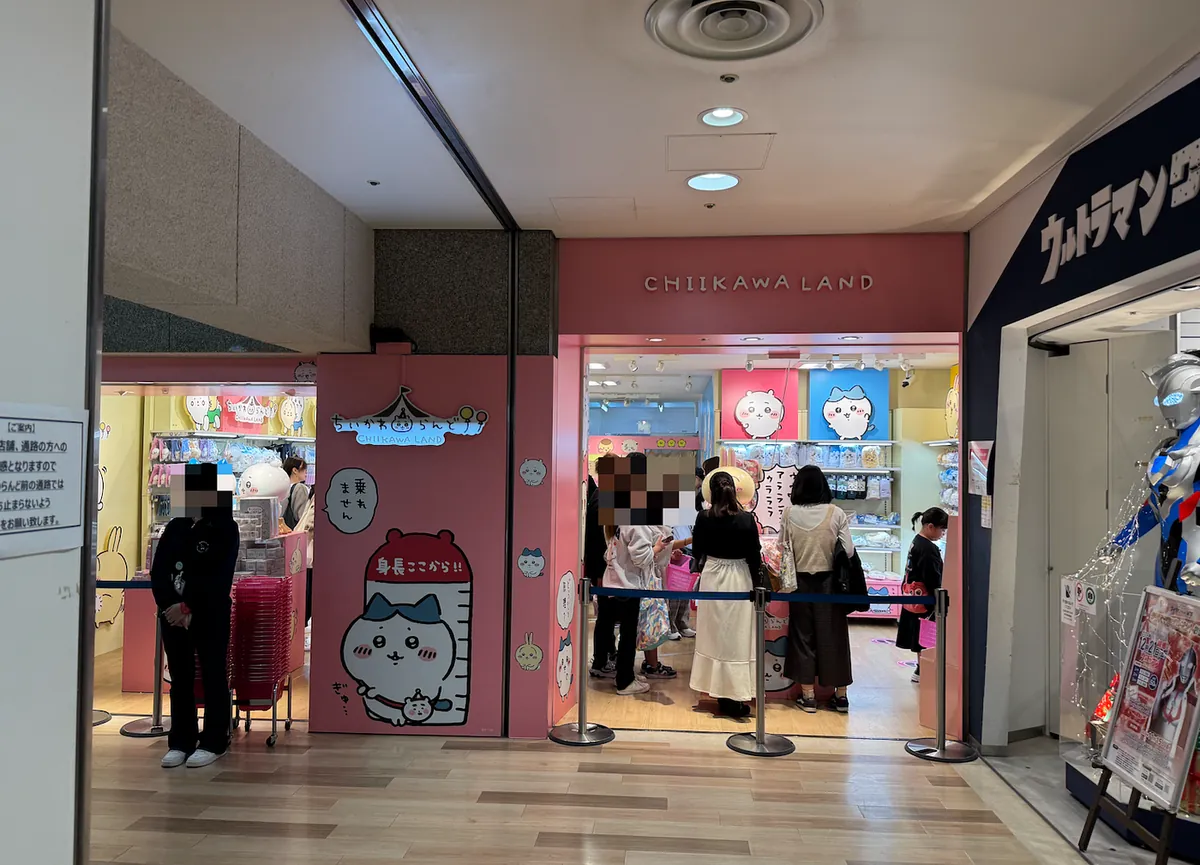


There were quite a few people in line, estimated to wait at least 40 minutes.
Obviously, I didn’t spend time waiting in line.
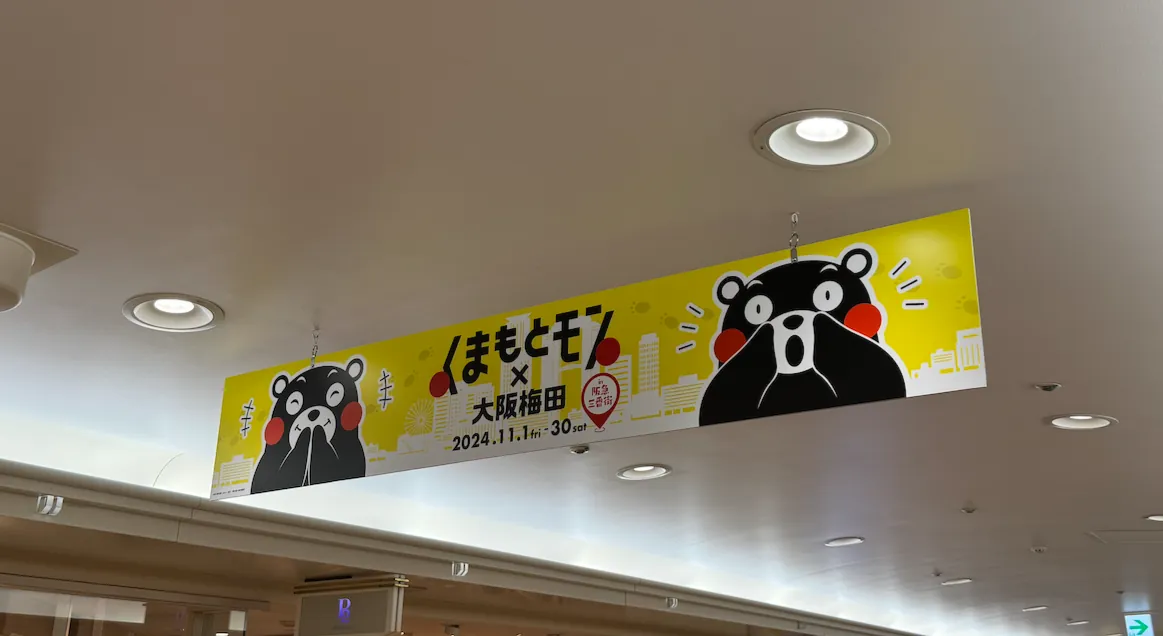
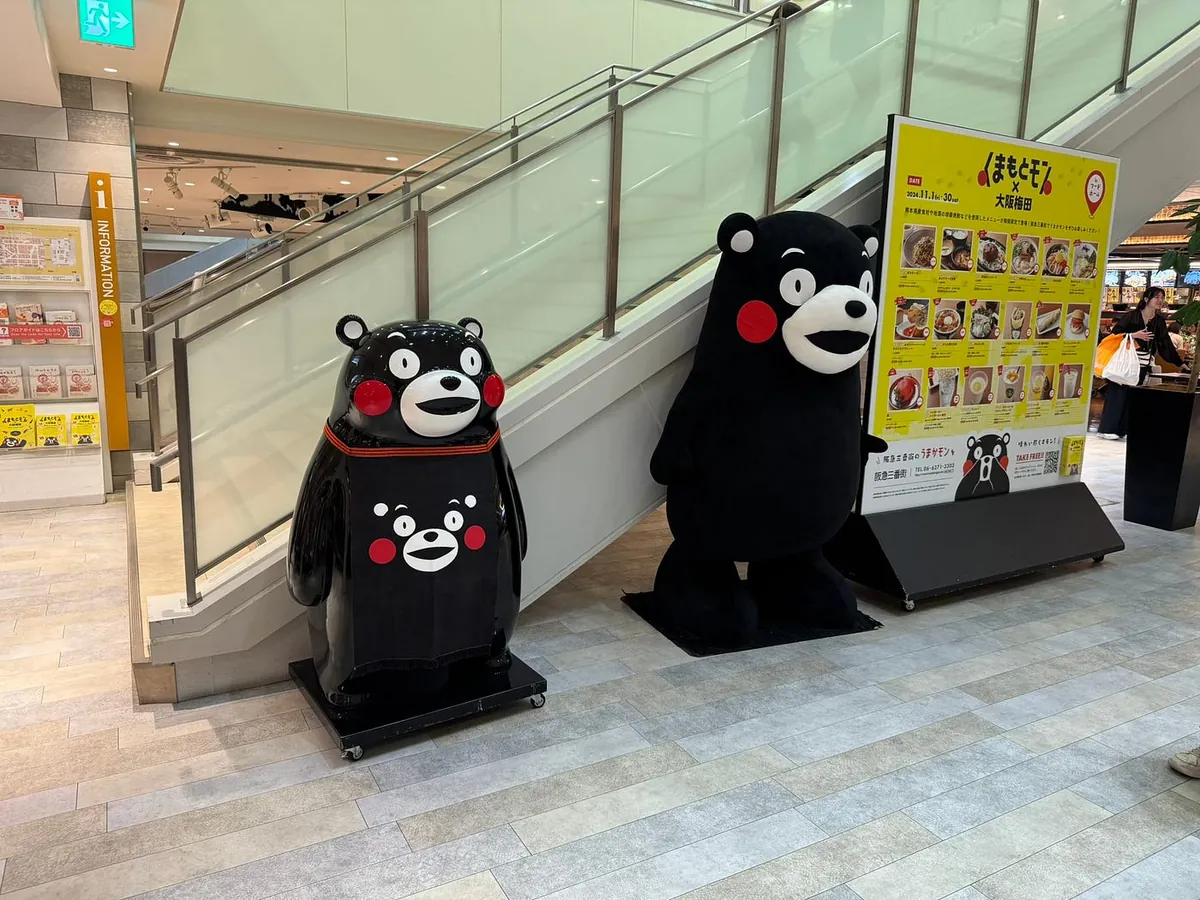
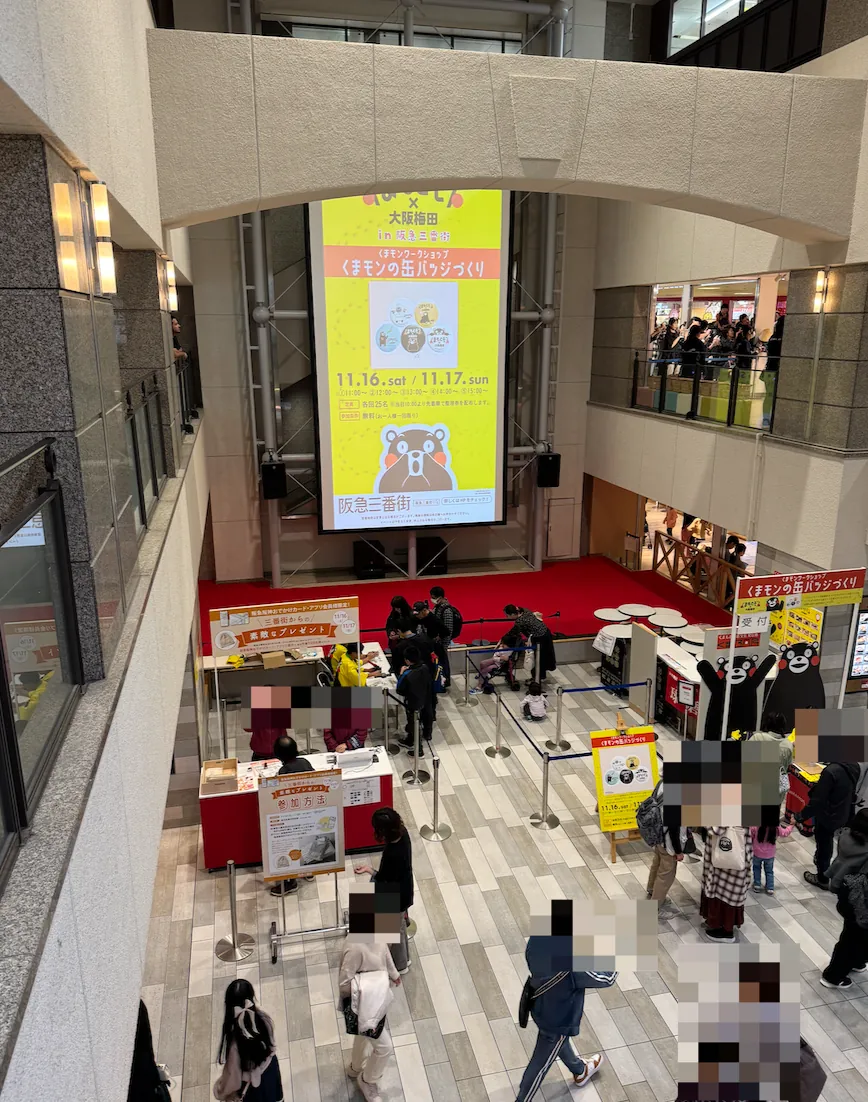
There is a Kumamon event on the first floor.
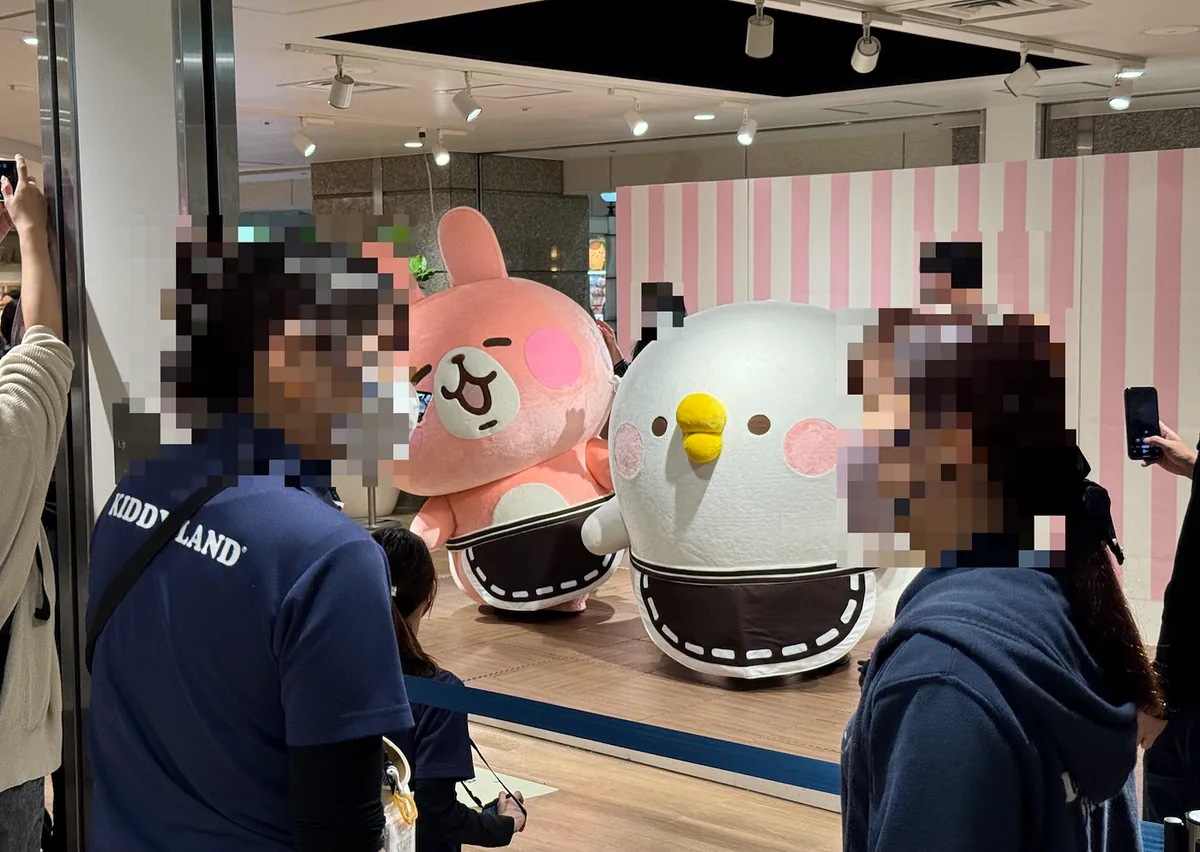
Maybe because it’s a holiday, there are more events. Outside Kiddy Land, there is also a Kanahei photo event. (Another Usagi XD)
13:20 Head to Kobe
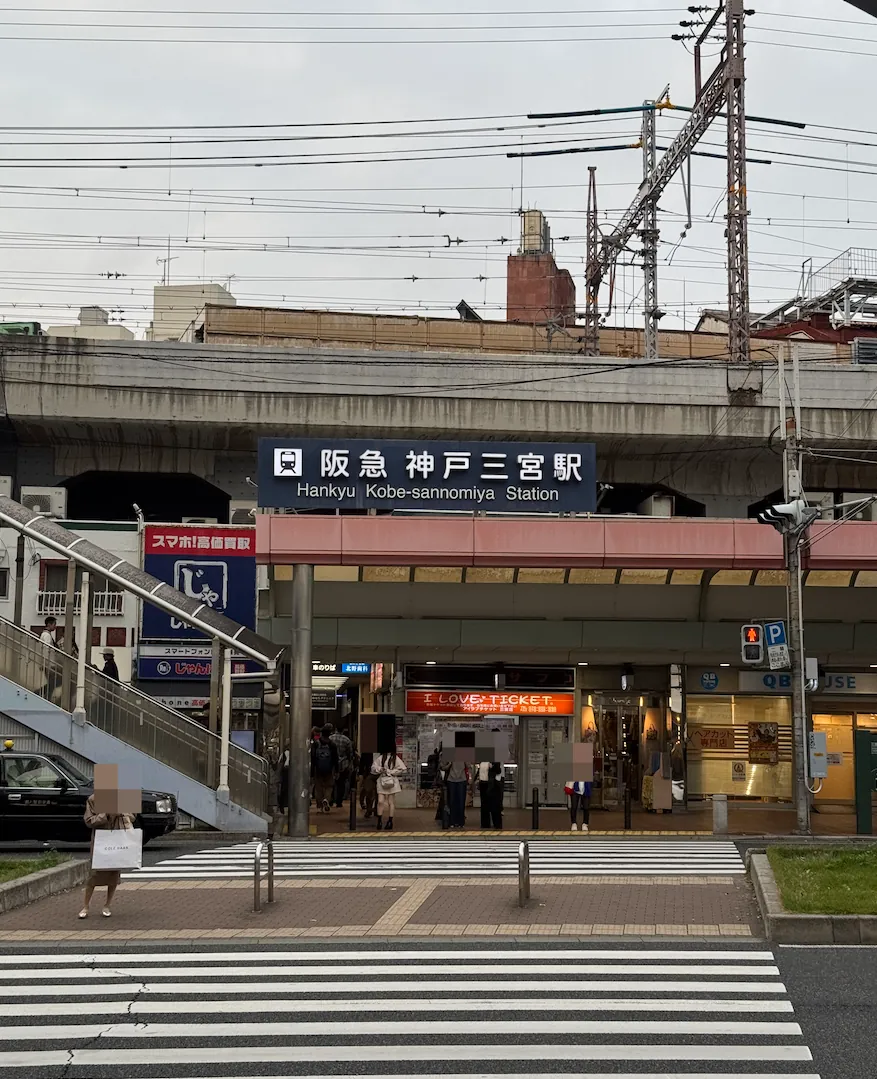
I got a bit lost in the underground mall before finally finding Osaka Umeda subway station, then took the Hankyu Kobe Line to Kobe Sannomiya (Hankyu).
13:50 Arrive at Kobe
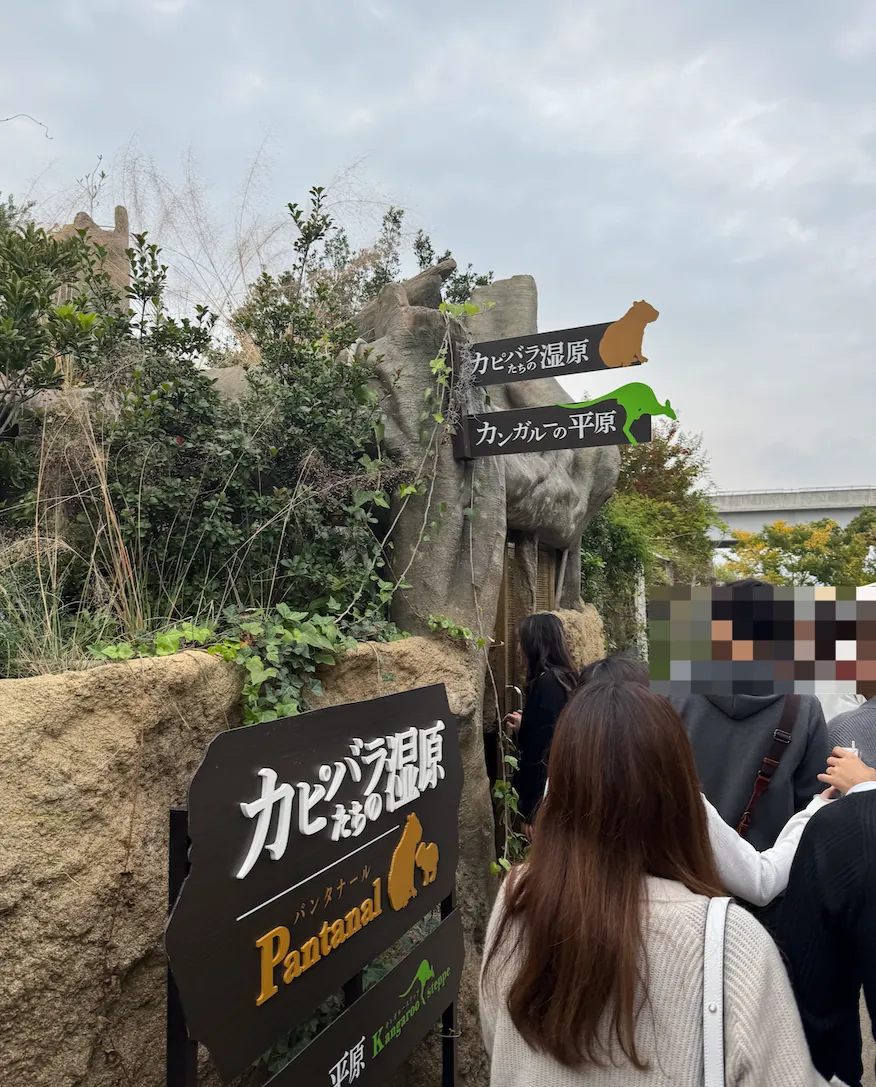
It’s still early, so I plan to visit Kobe Animal Kingdom to see the capybaras first.
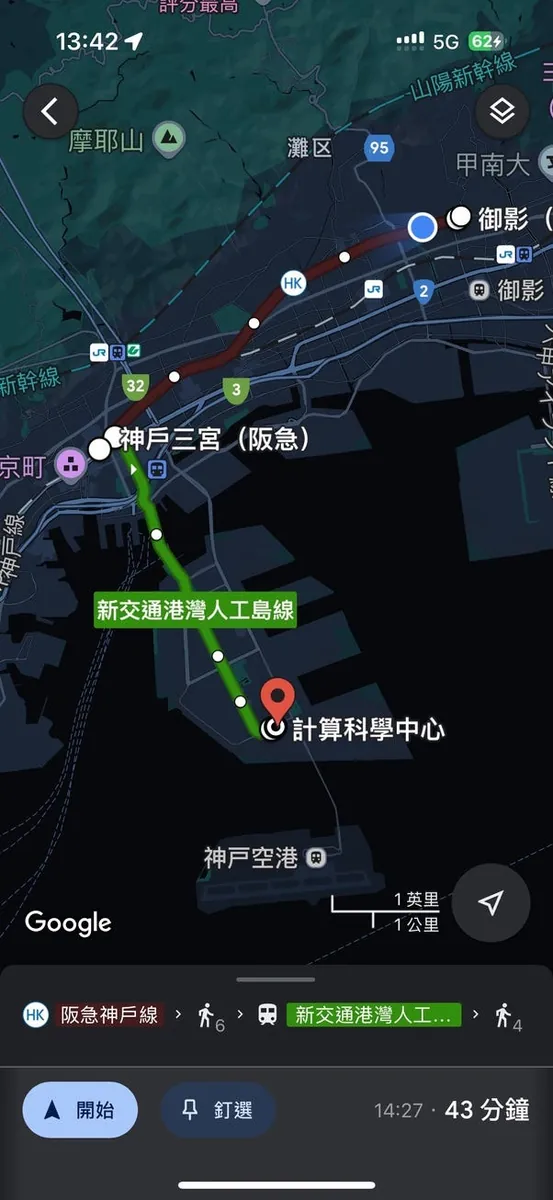
Google Map asked me to take the “New Transit Waterfront Artificial Island Line,” but I wandered around the underground mall for a long time and couldn’t find the corresponding signs. (Lost Day)
Only after exiting the station did I realize this is the one that runs in the sky, entering from the second floor of Sannomiya Station.
The station was very crowded, and I later found out that today happened to be the Kobe Marathon.
Lost Day… Because the bus arrived just then and I didn’t check carefully, I got on the wrong bus heading to the North Pier. The tragedy started from that moment.

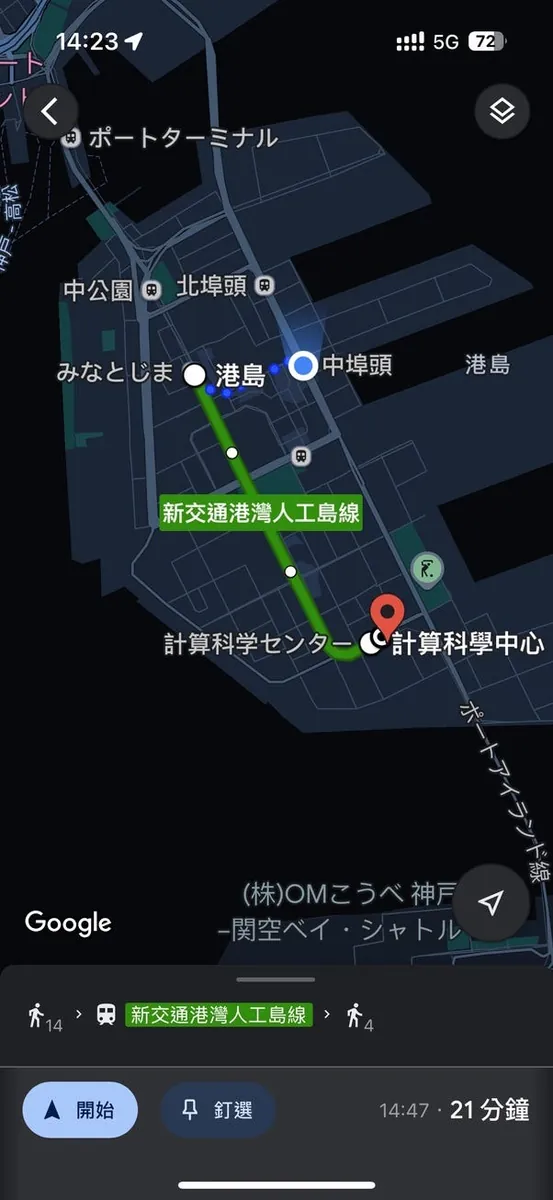
To get to Kobe Animal Kingdom, take the train heading to Kobe Airport. The train to Kitafuto will reverse at Kitafuto and return to Kobe. ⚠️⚠️⚠️

The Kobe Marathon features road closures with runners going onto the elevated highway. This subway line, like Taipei Metro’s Wenhu Line, is an early model of a rubber-tired metro.
14:20 Realized I was on the wrong train, got off at Nakafuto Station
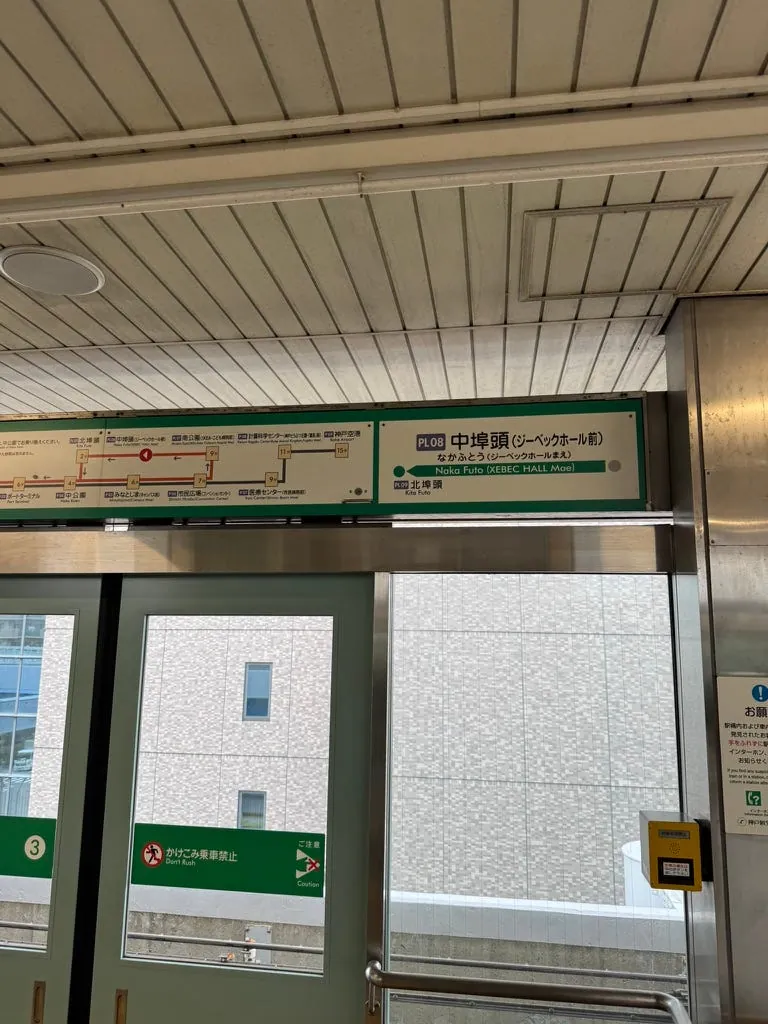
The vibe felt off here, so I got off the bus immediately. Google Maps suggested I walk back to Civic Square Station to catch the next one.
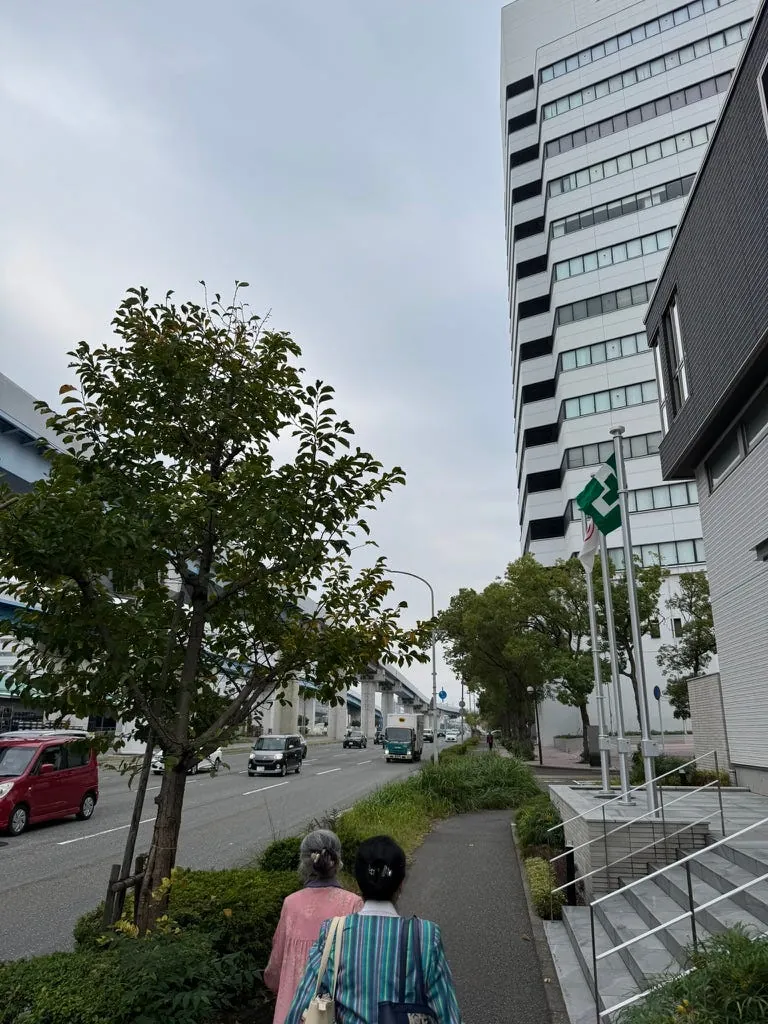

Perhaps because it is a reclaimed port area, this place feels very desolate and the walk seems quite long.
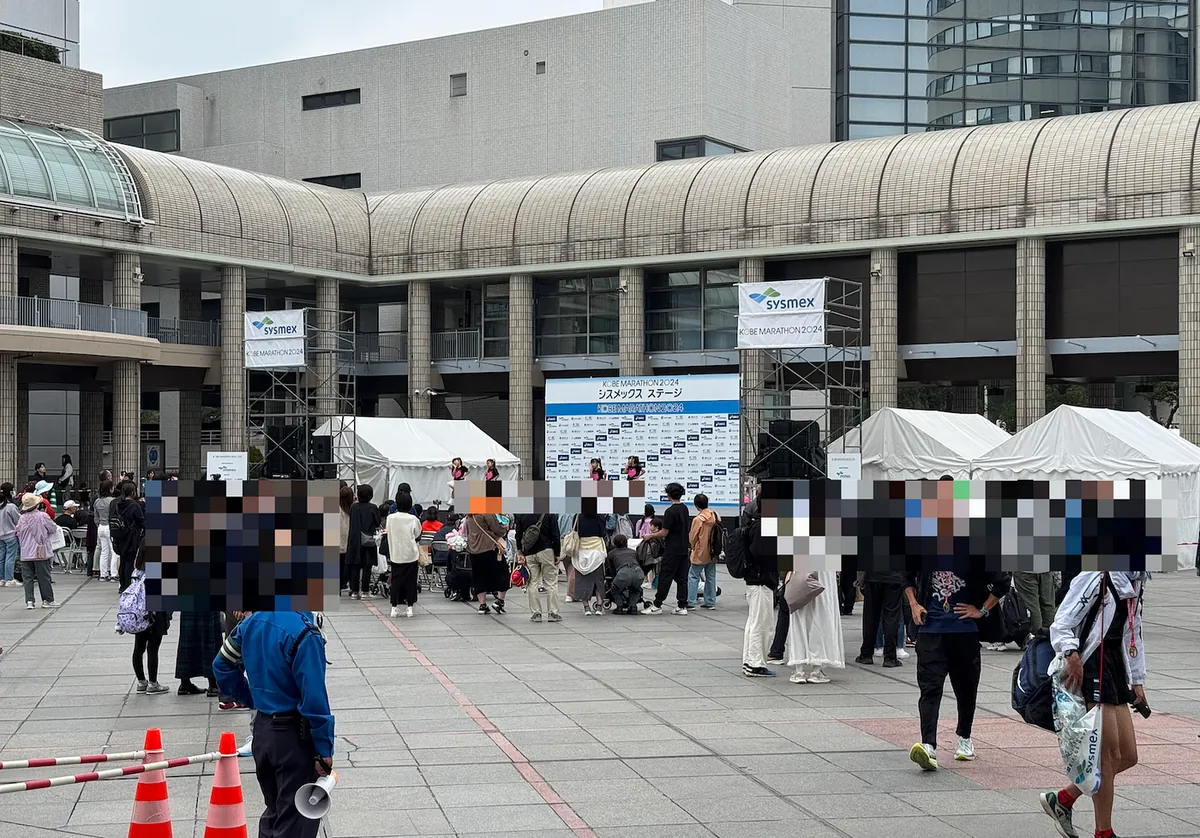
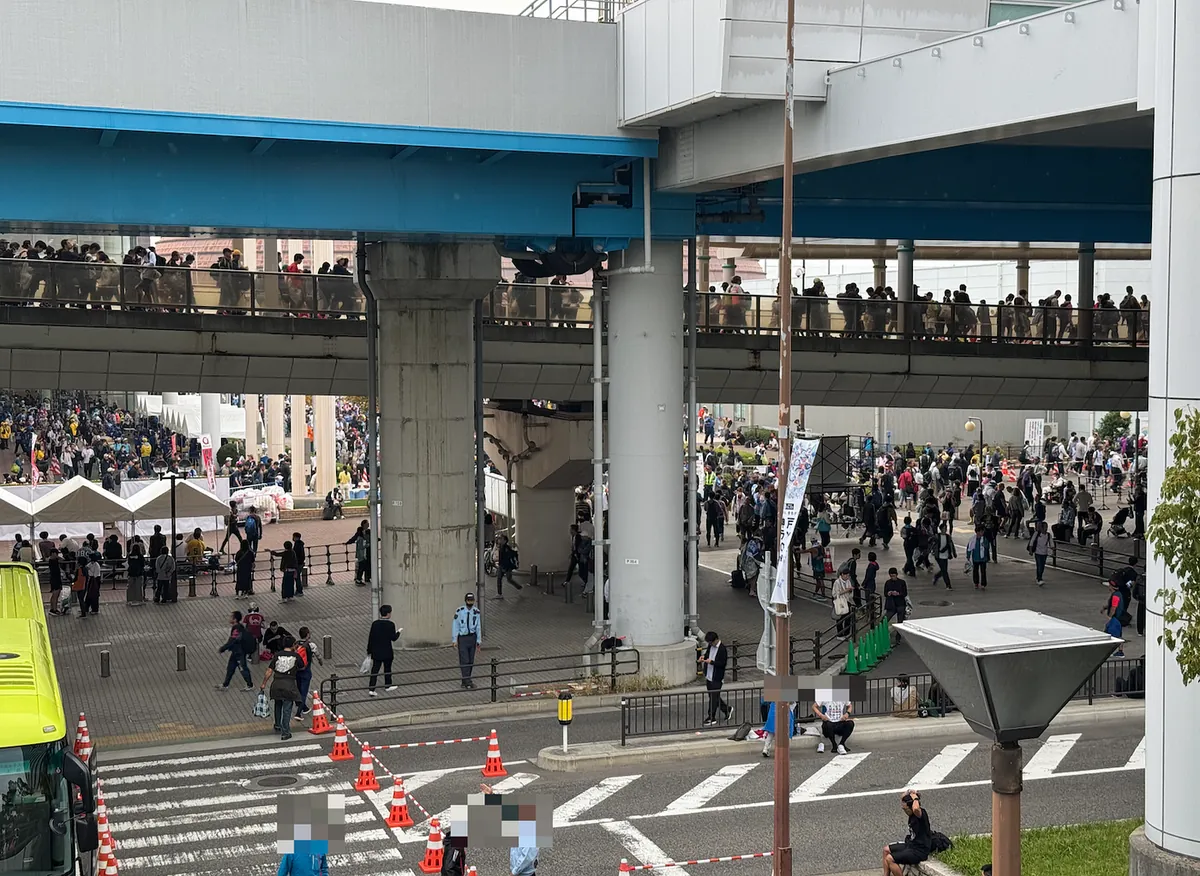
Walking quickly to the front of Civic Square, I wondered why it was so lively. It turned out to be the finish line event area for the Kobe Marathon.
Tragedy 2: Due to overcrowding, this station is closed. You need to walk further to Minami Koen Station.
From Minami Koen Station, it’s just one more stop, but I was too lazy to take the subway and walked straight to Kobe Animal Kingdom…
As mentioned before, it feels very remote and indeed it is quite far—about 2 kilometers (around 30 minutes) walking from Nakakō Wharf.
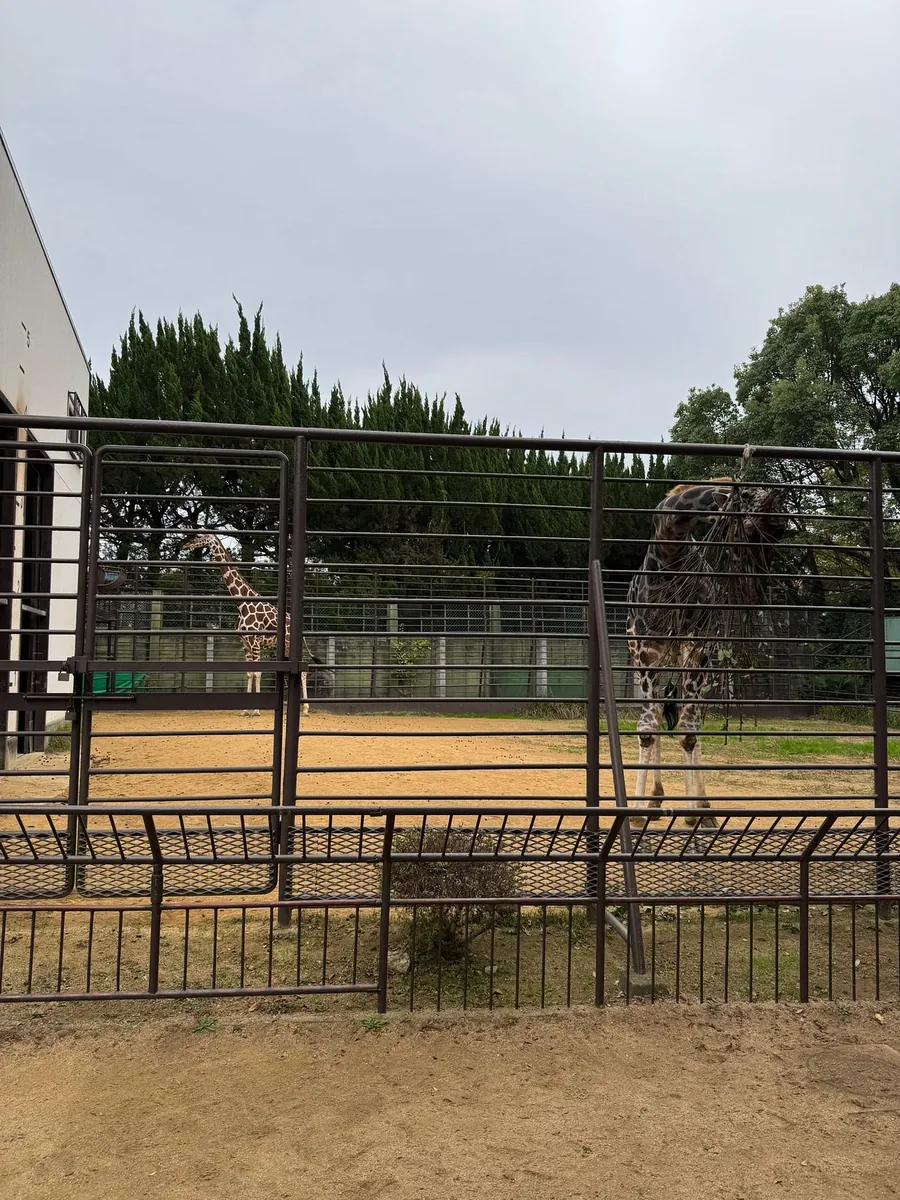
14:50 Arrive at Kobe Animal Kingdom

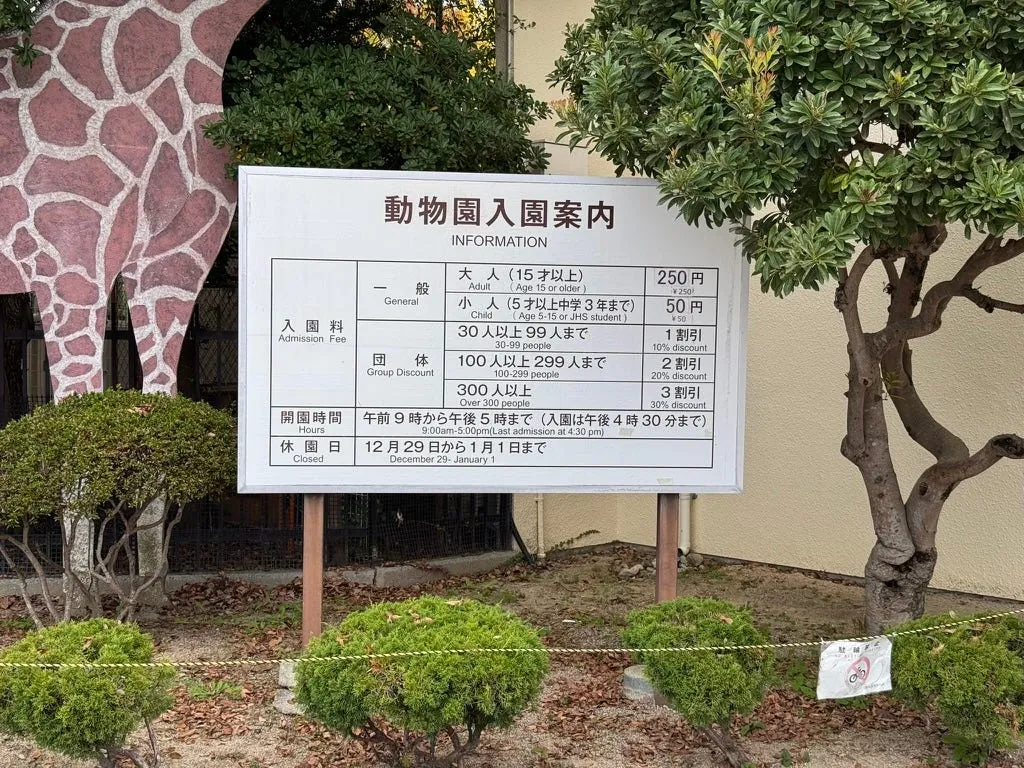
Ticket price: 2,200 JPY
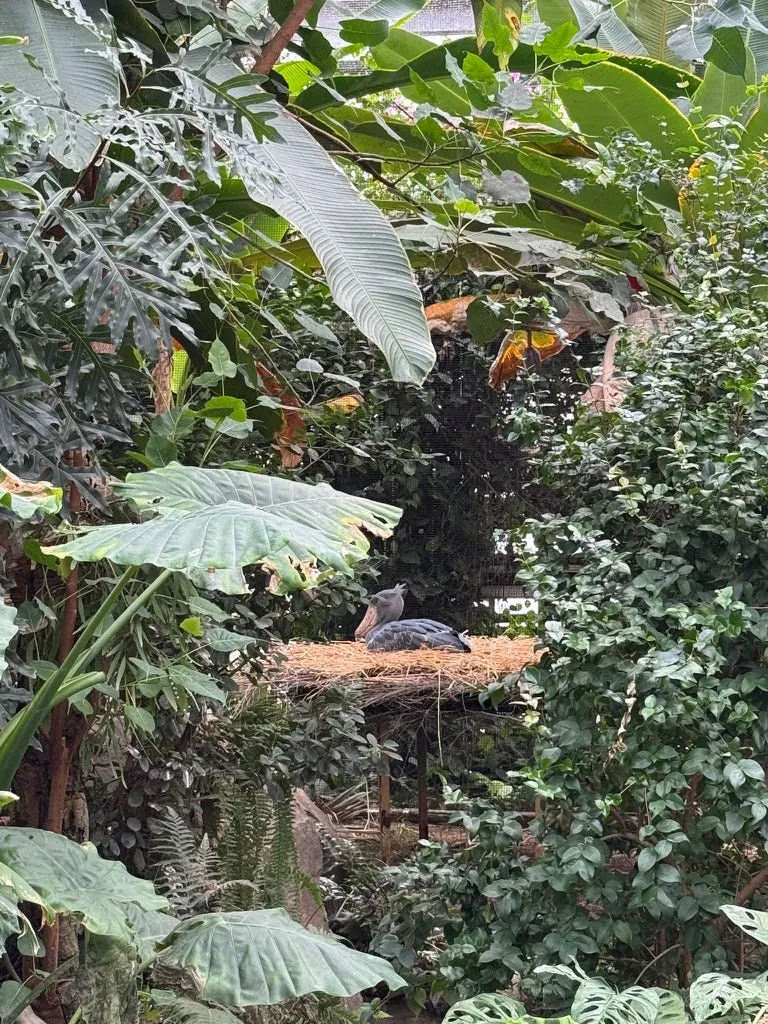
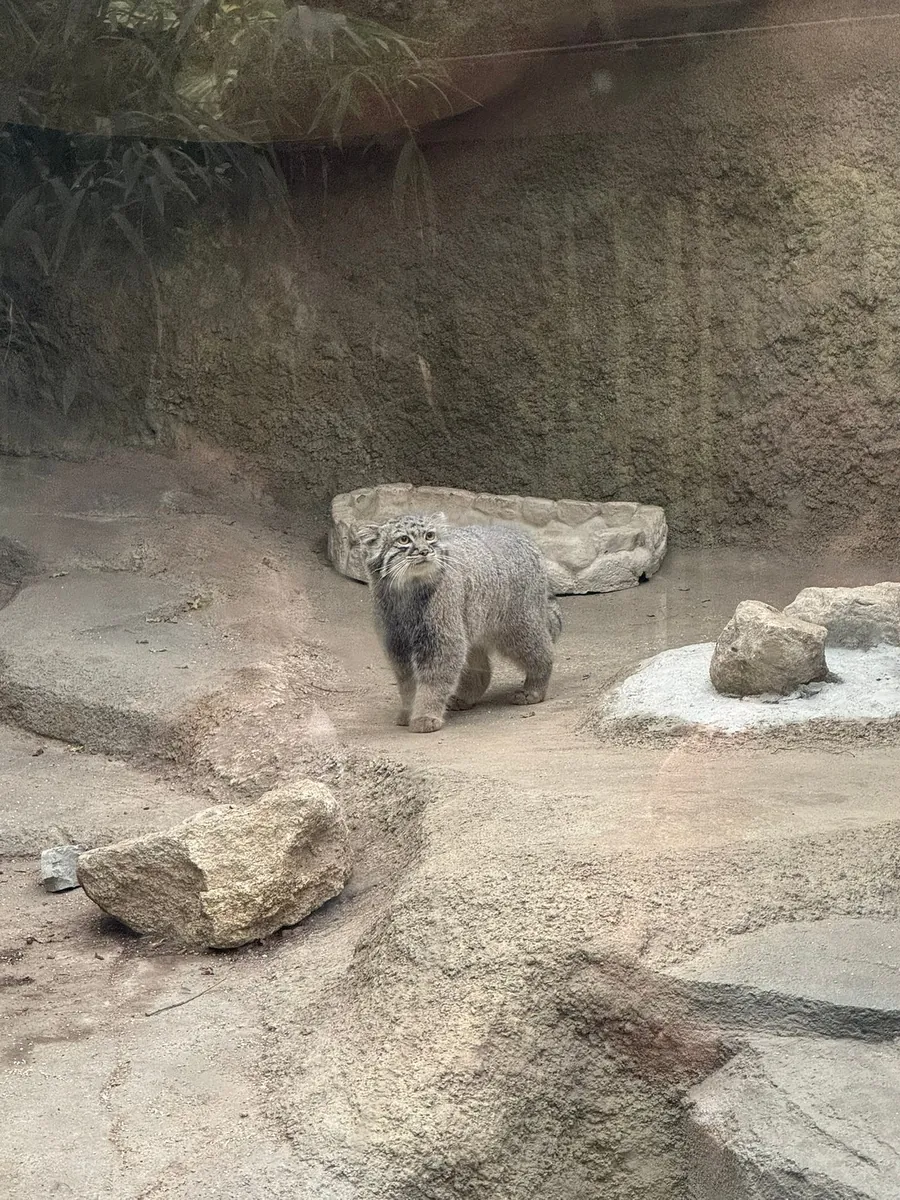
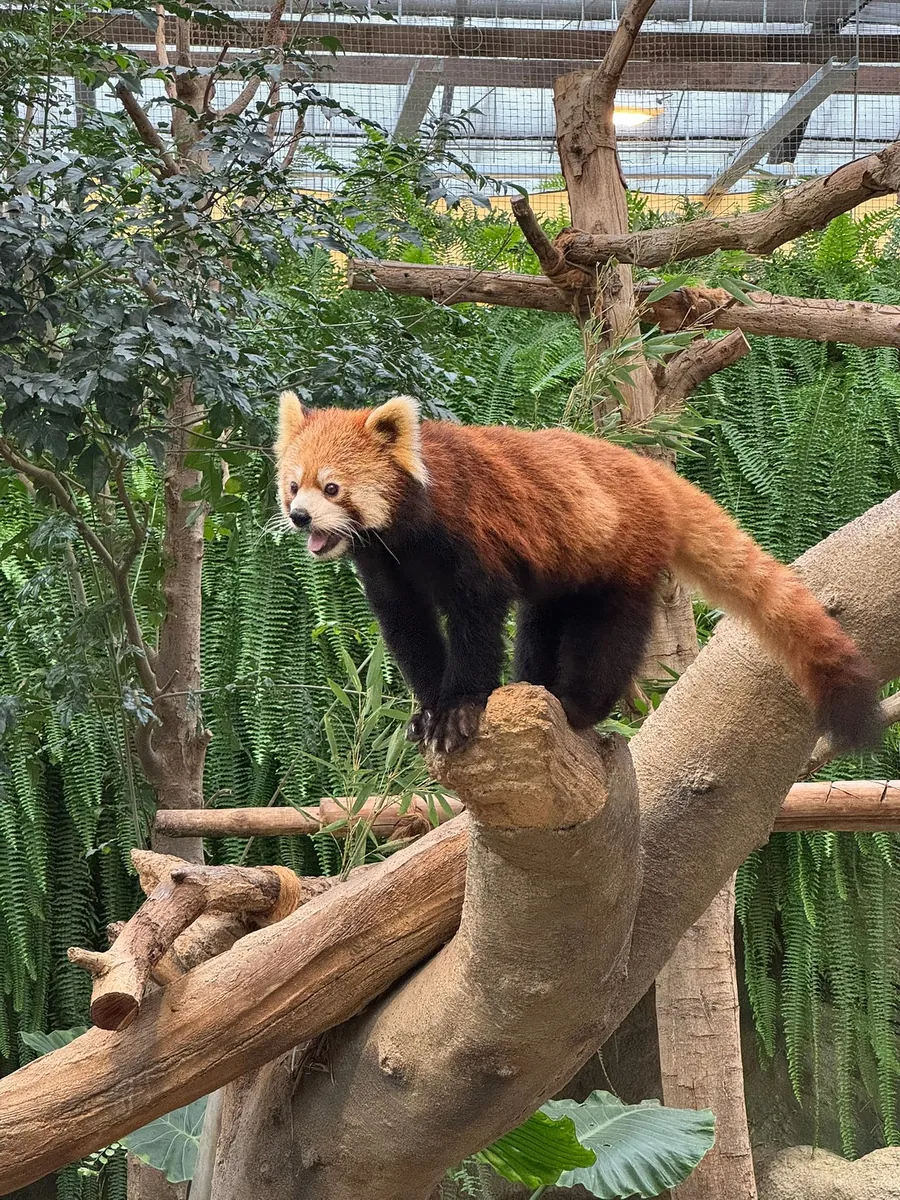
Shoebill, Pallas’s cat, Red panda
Kobe Animal Kingdom is partly indoor and partly outdoor, but the layout is well planned. There are various birds and animals, most of which you can get close to. It’s great for families to spend half a day here. The animals are in much better condition compared to Himeji City Zoo, and the environment is very clean.
Capybara
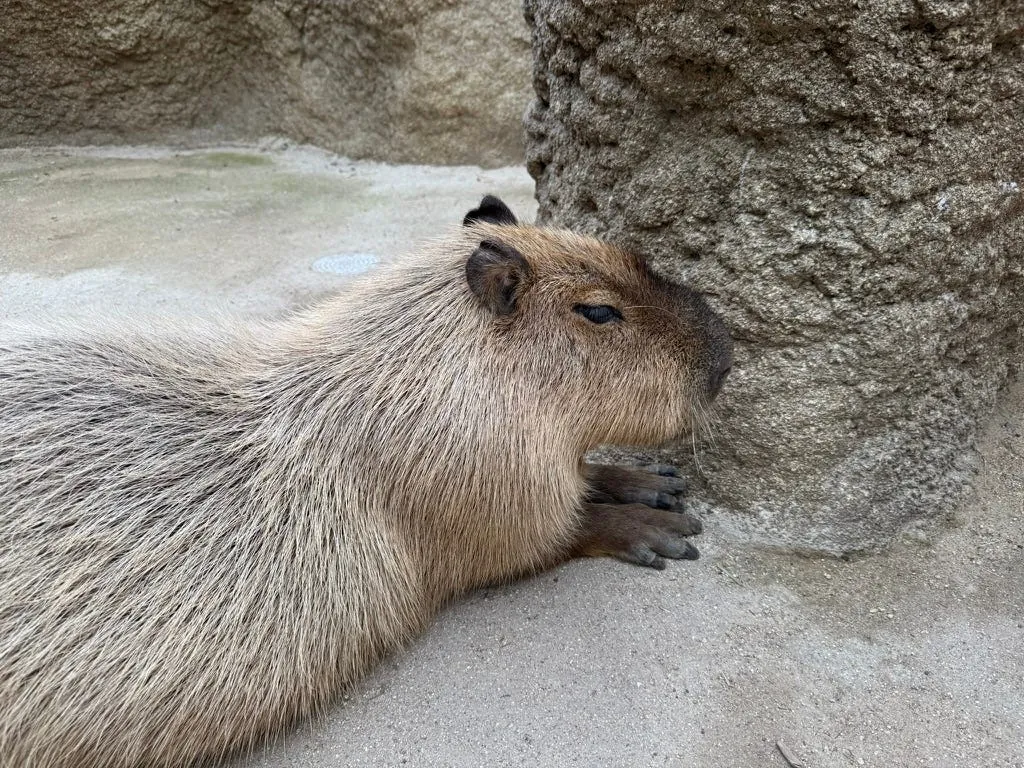
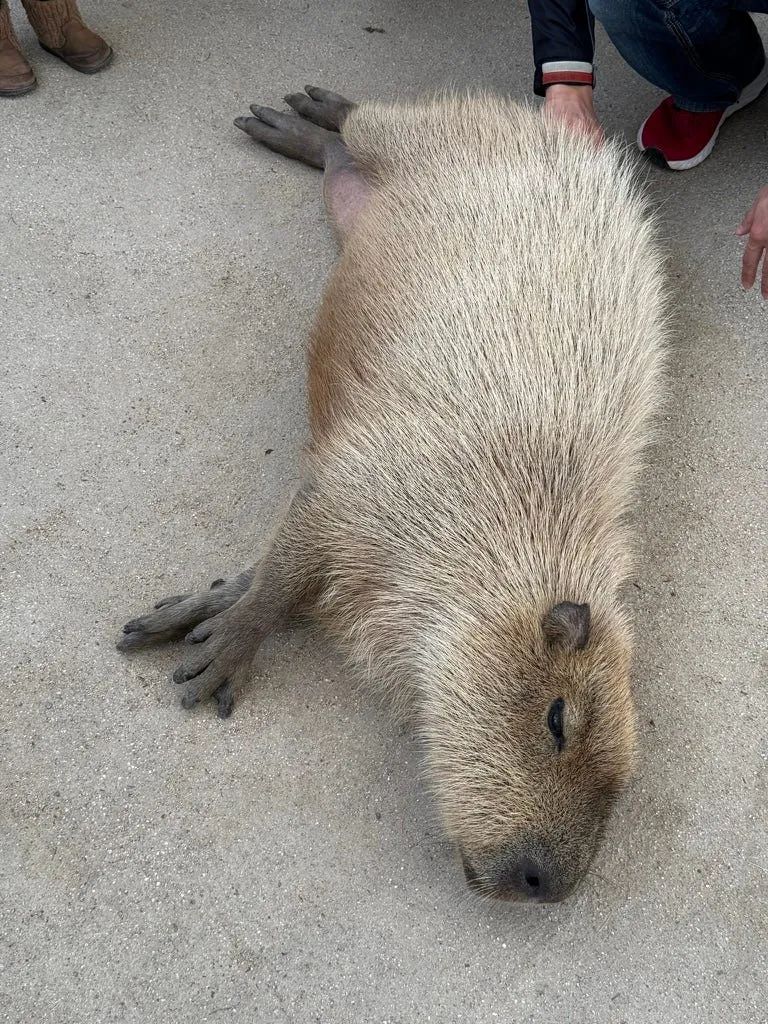
The purpose of coming here is achieved: to touch the capybaras. They are so fat, and their fur feels rough like a broom.
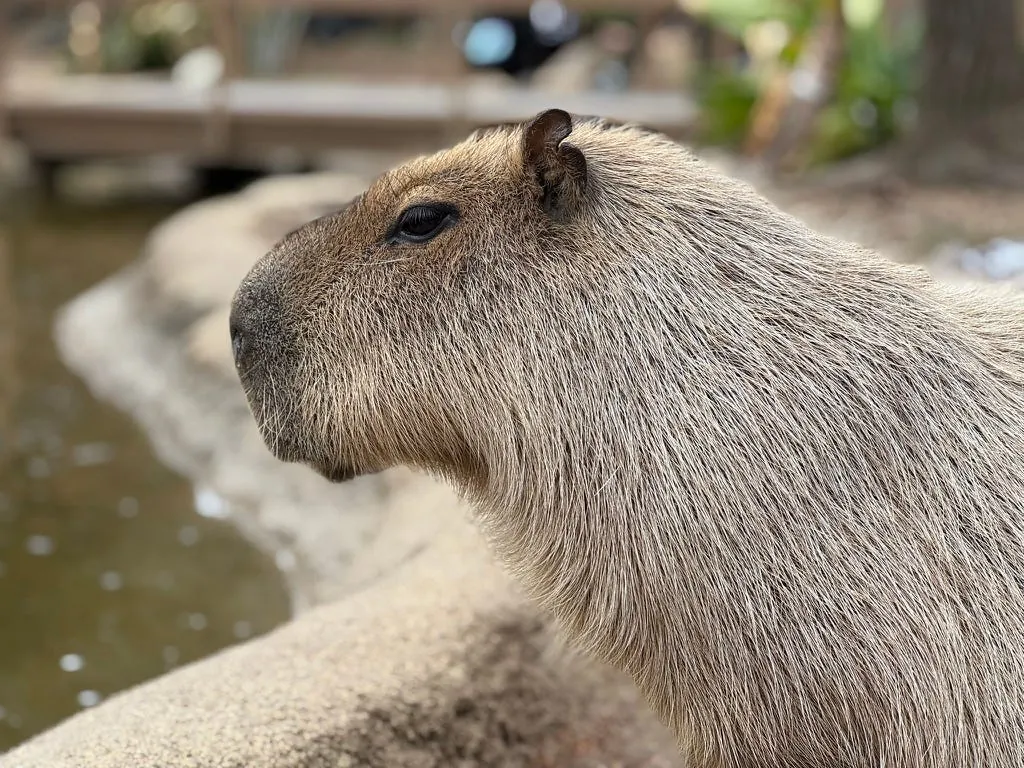
Each one looks so lazy, it must be great not having to work!
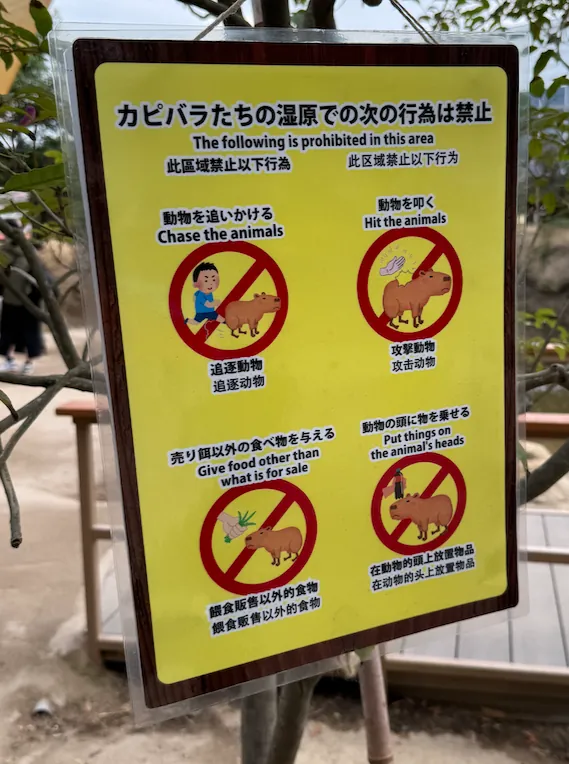
Maybe because it’s too fat, feeding food inside the area is no longer allowed, and you cannot feed it food from outside or put anything on its head.
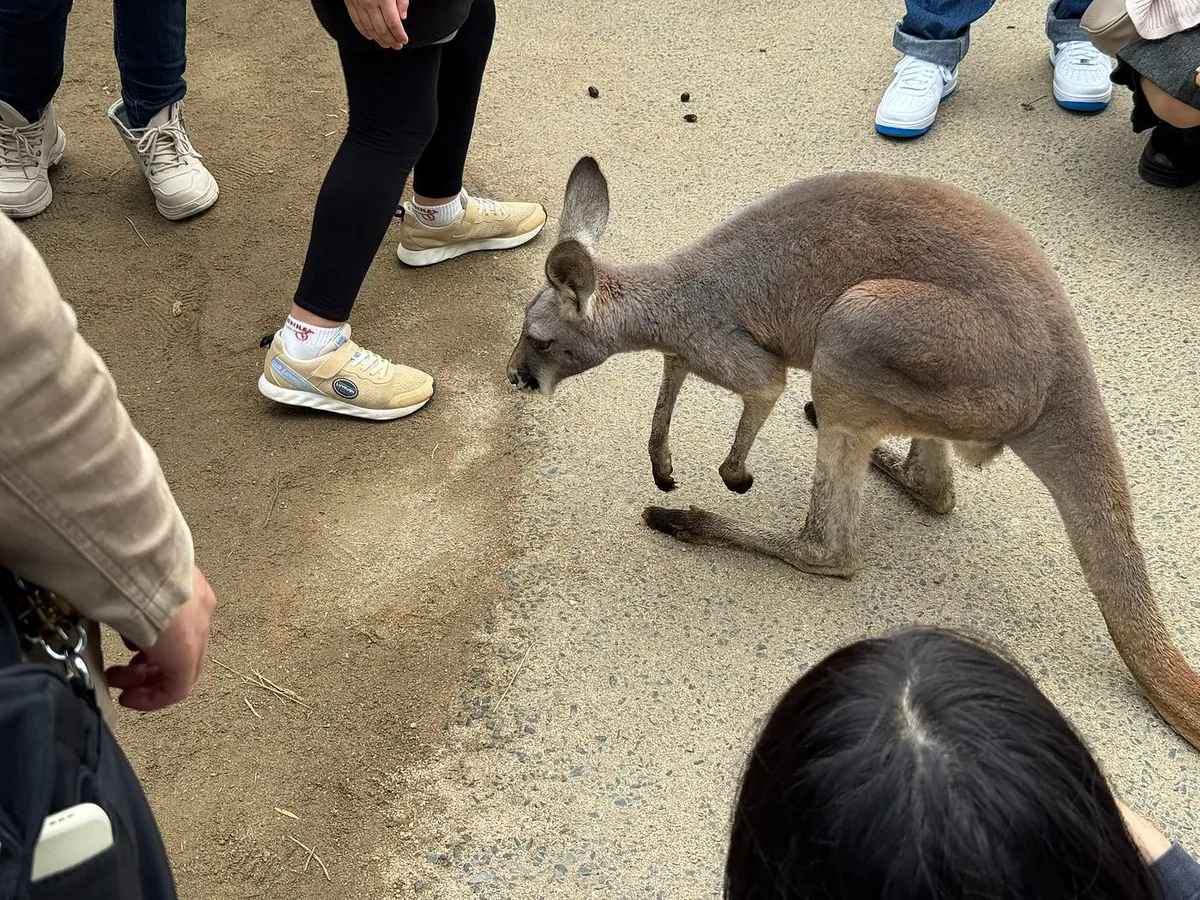
In another area, there are kangaroos and sheep for close-up interactions.
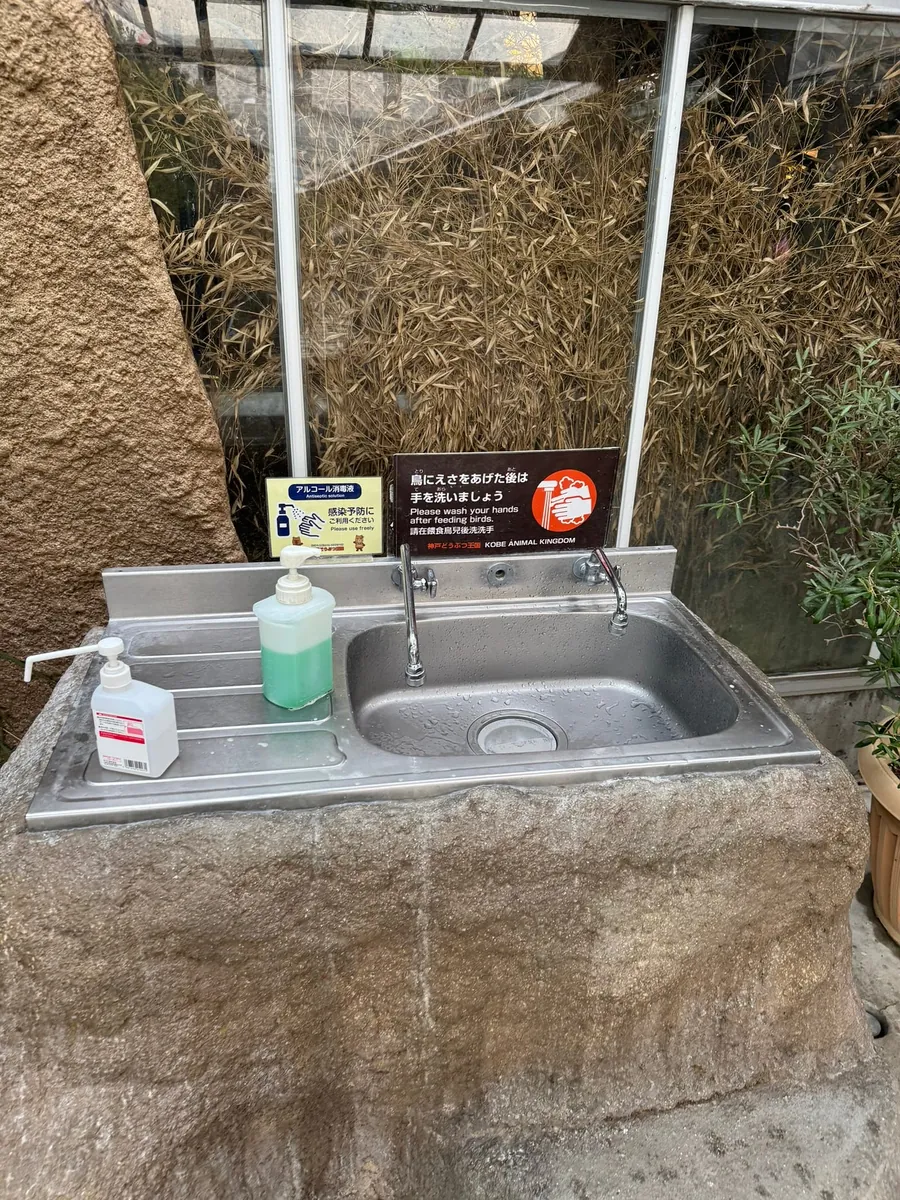
Remember to wash your hands before and after touching.
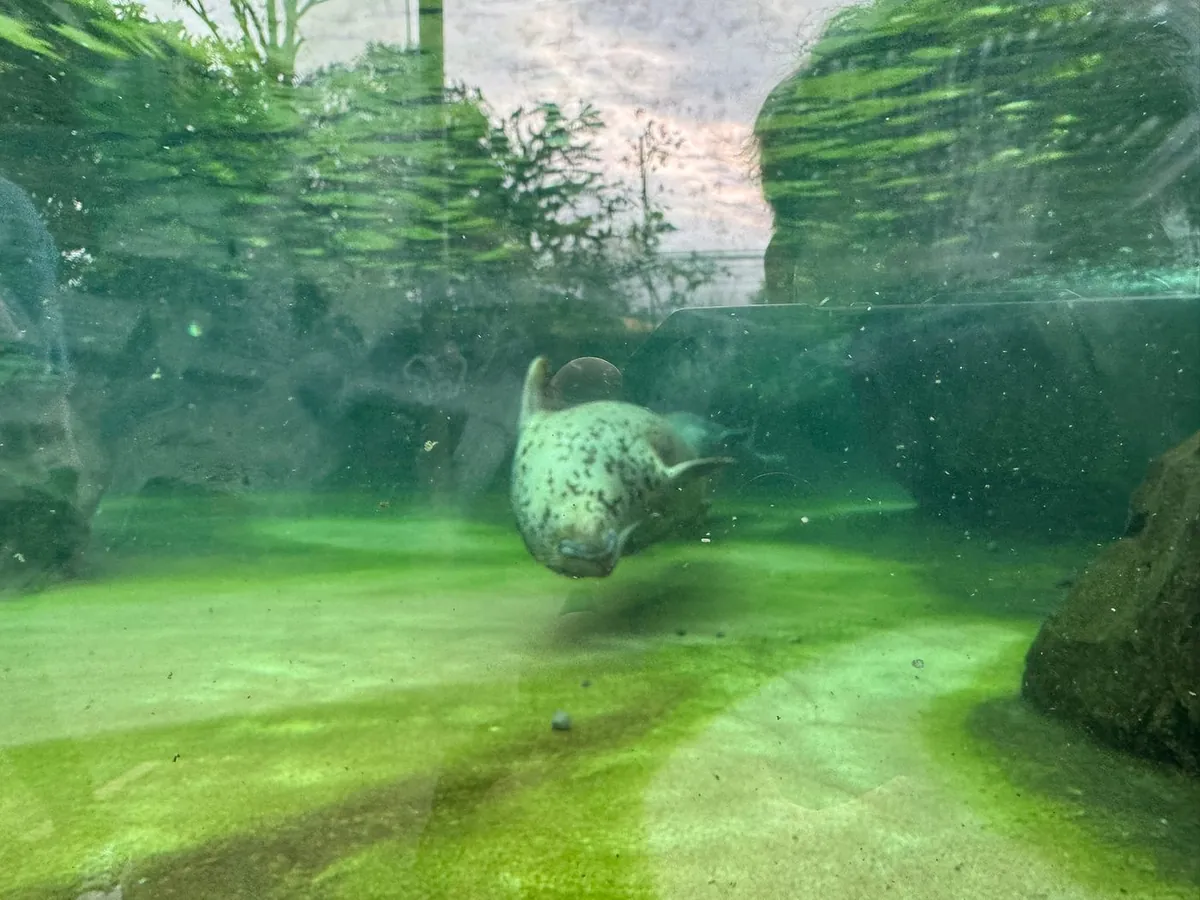
There was also a seal, but the space seemed too small, so it kept swimming in circles QQ
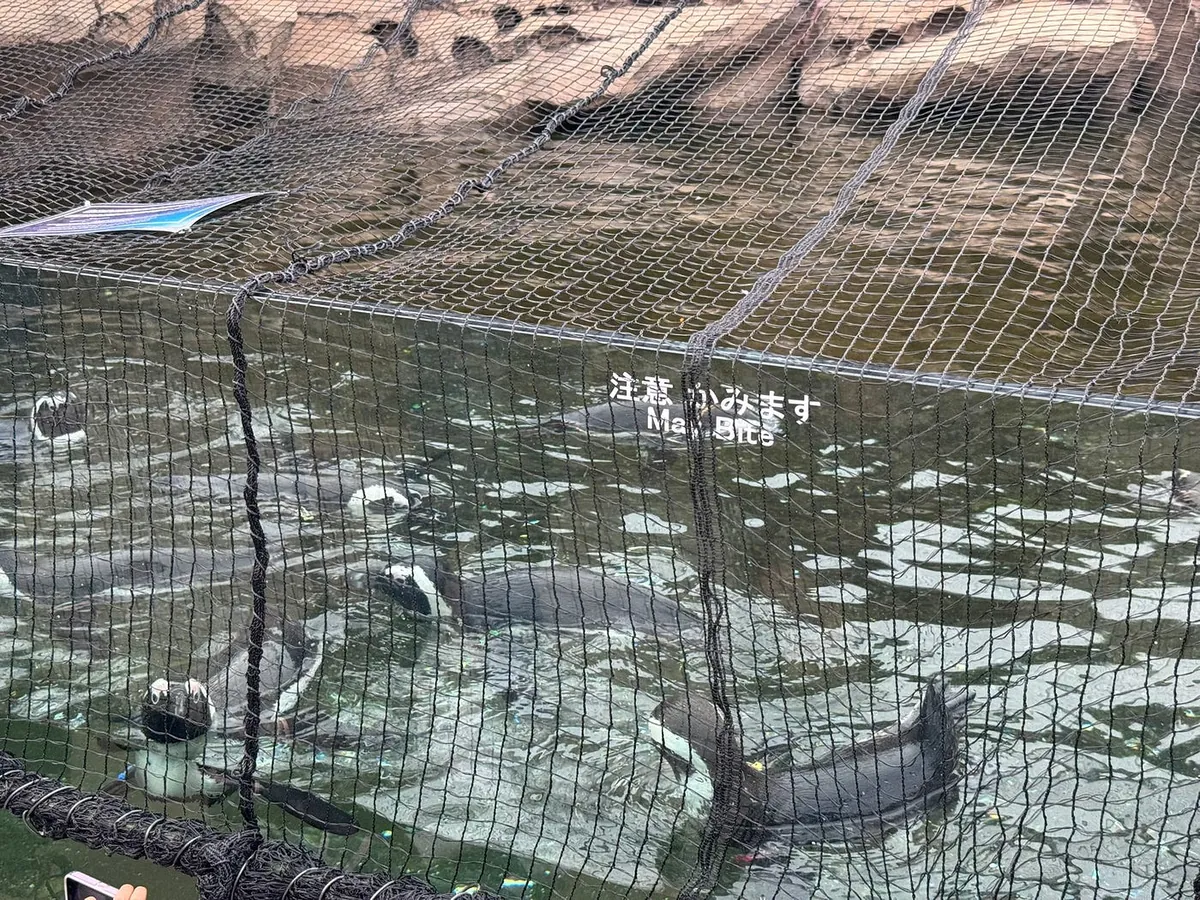
Penguin feeding (requires a numbered ticket).
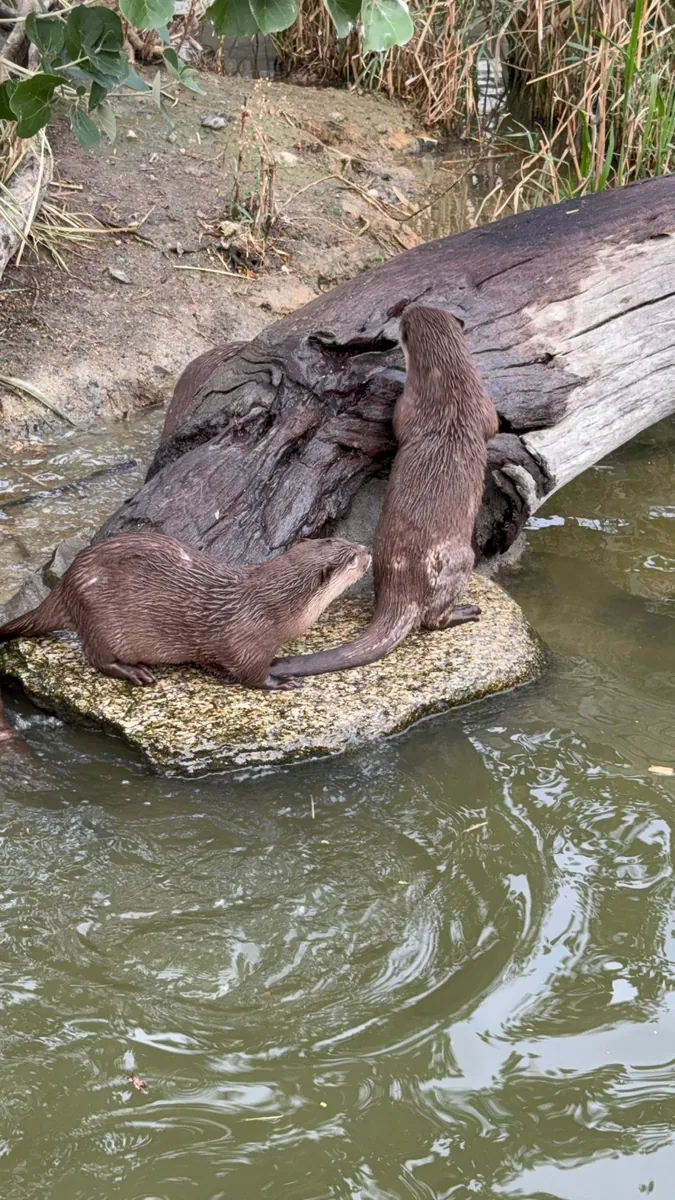
The cute little clawed otter family kept chirping.
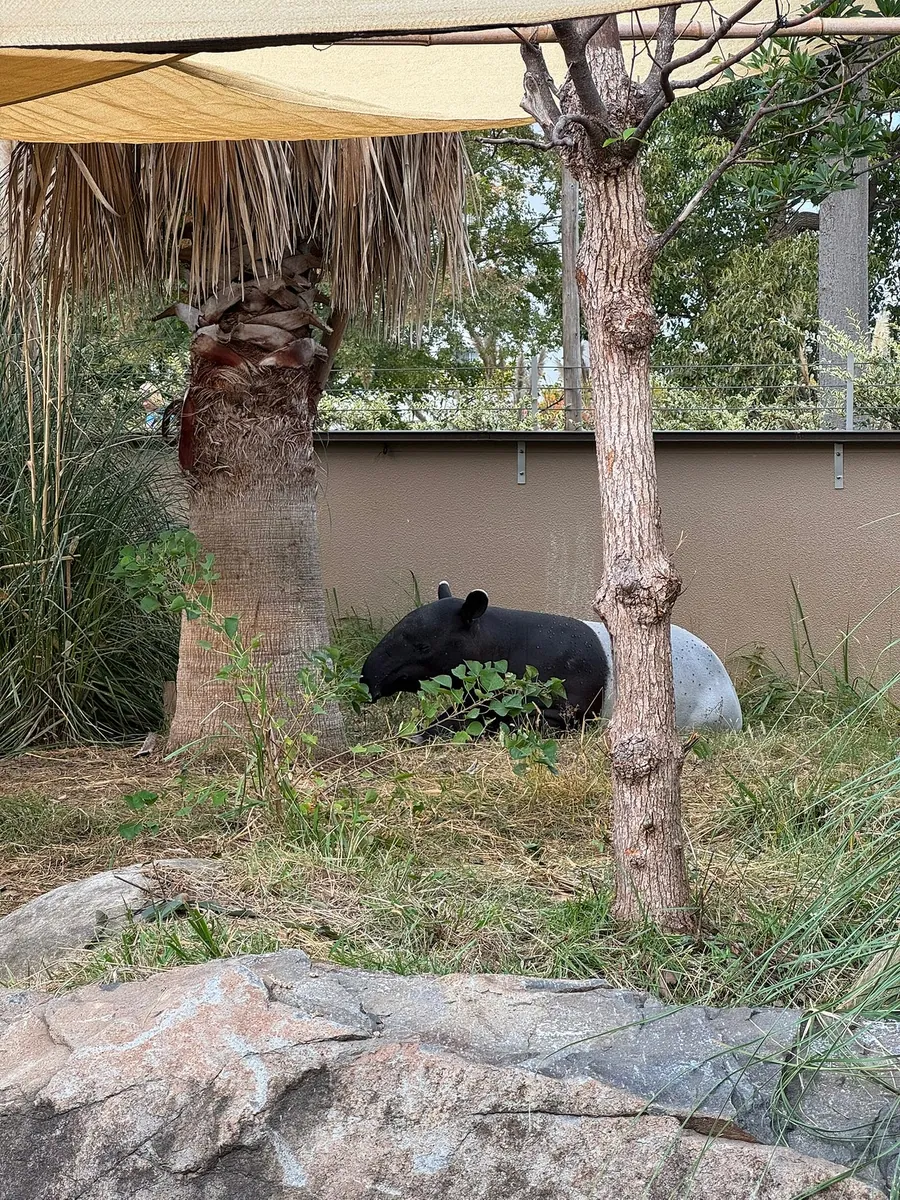
There is a Malayan tapir here at the otter enclosure, but it’s mostly ignored QQ
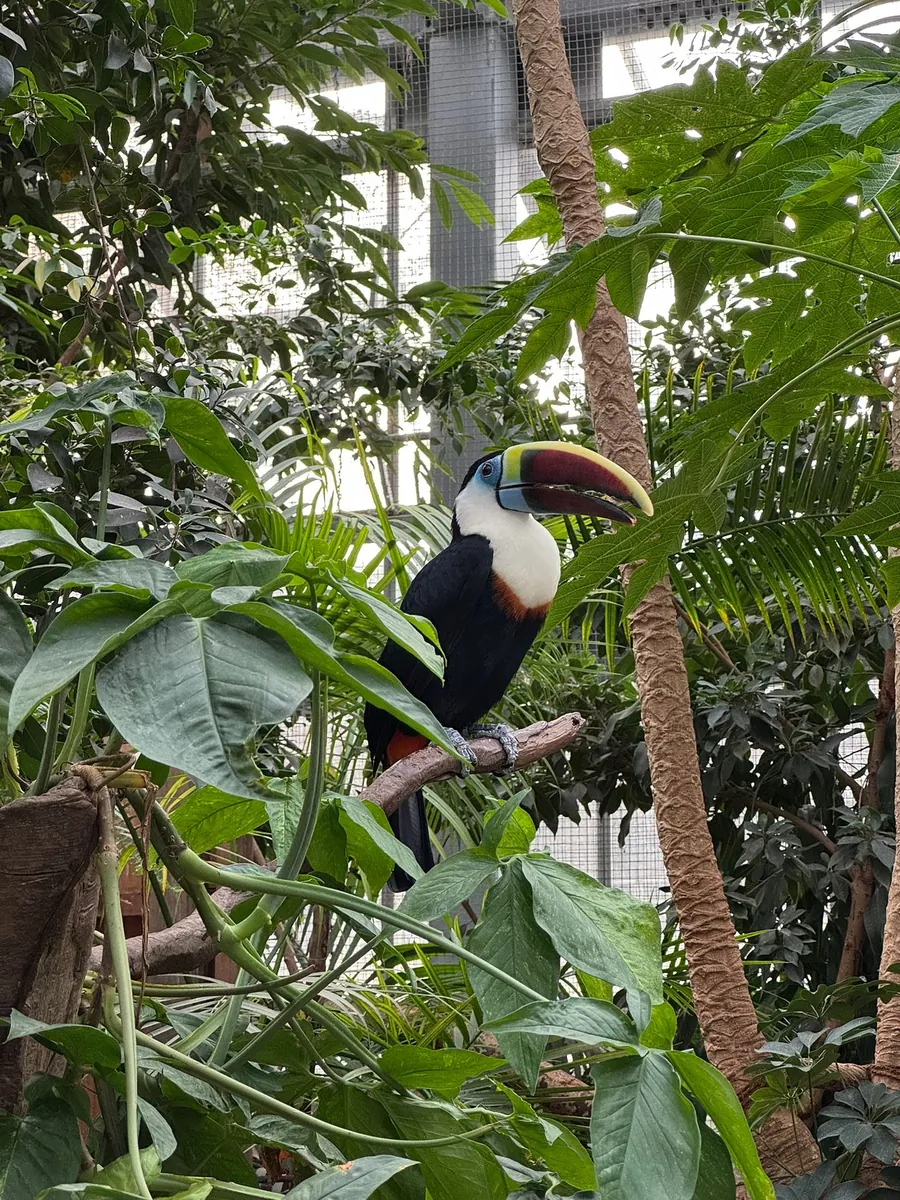
Toucan and owl, along with pheasants that appear near your feet. (Be careful not to step on them ⚠️)
King Julian and pelicans that eat colleagues, also night-dwelling owls
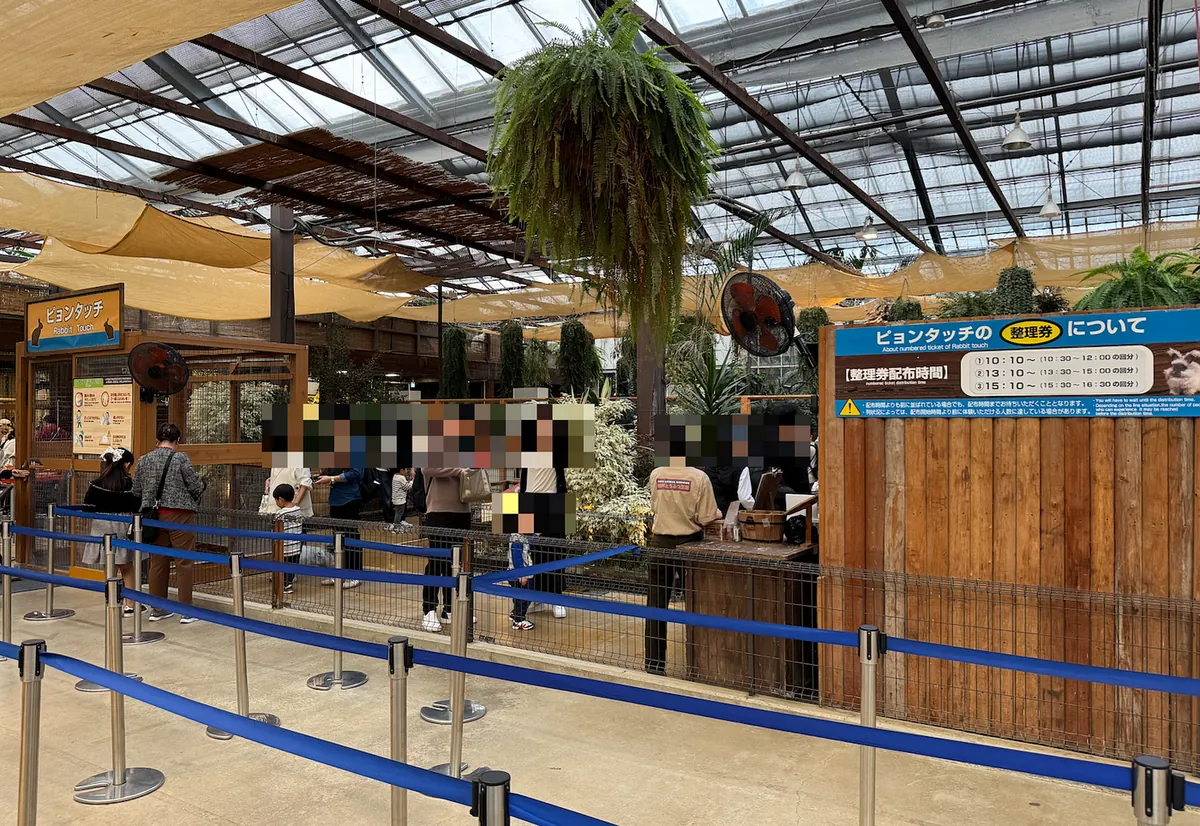
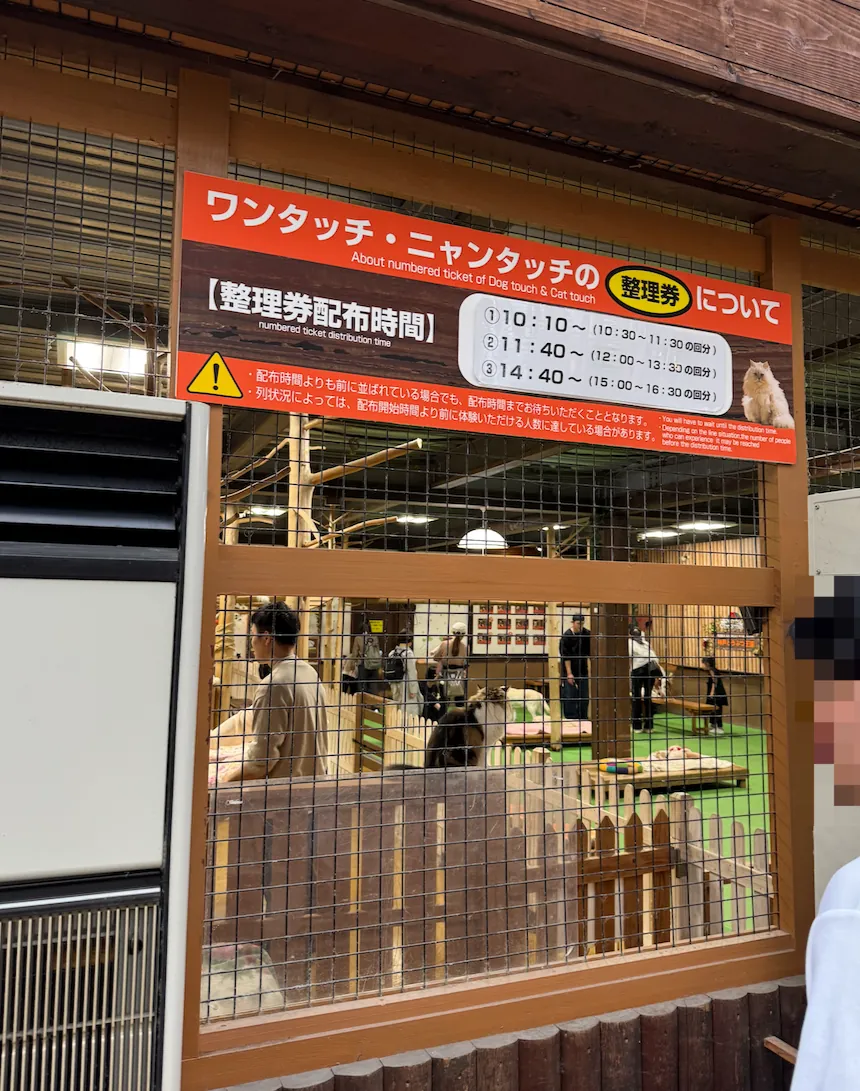
Indoors, there is also an interaction area with rabbits, cats, and dogs (requires a numbered ticket), as well as dining and souvenir shops… and more.
Overall, the experience was quite good!
15:50 Departure, preparing to return to Kobe
The main purpose was to see the capybaras, and since time was limited, the stay was brief.
~= 16:05 Arrive at (Kobe) Sannomiya Station
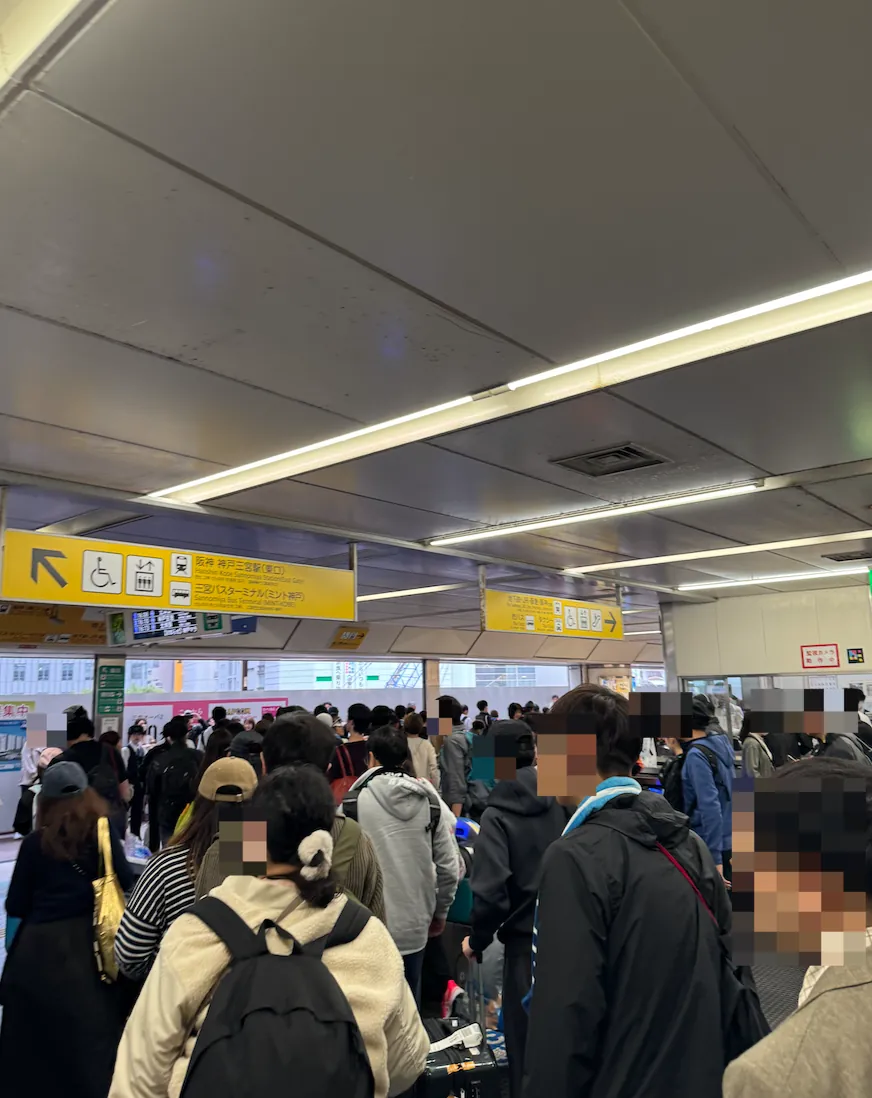
Due to the Kobe Marathon, there were many people exiting the station.
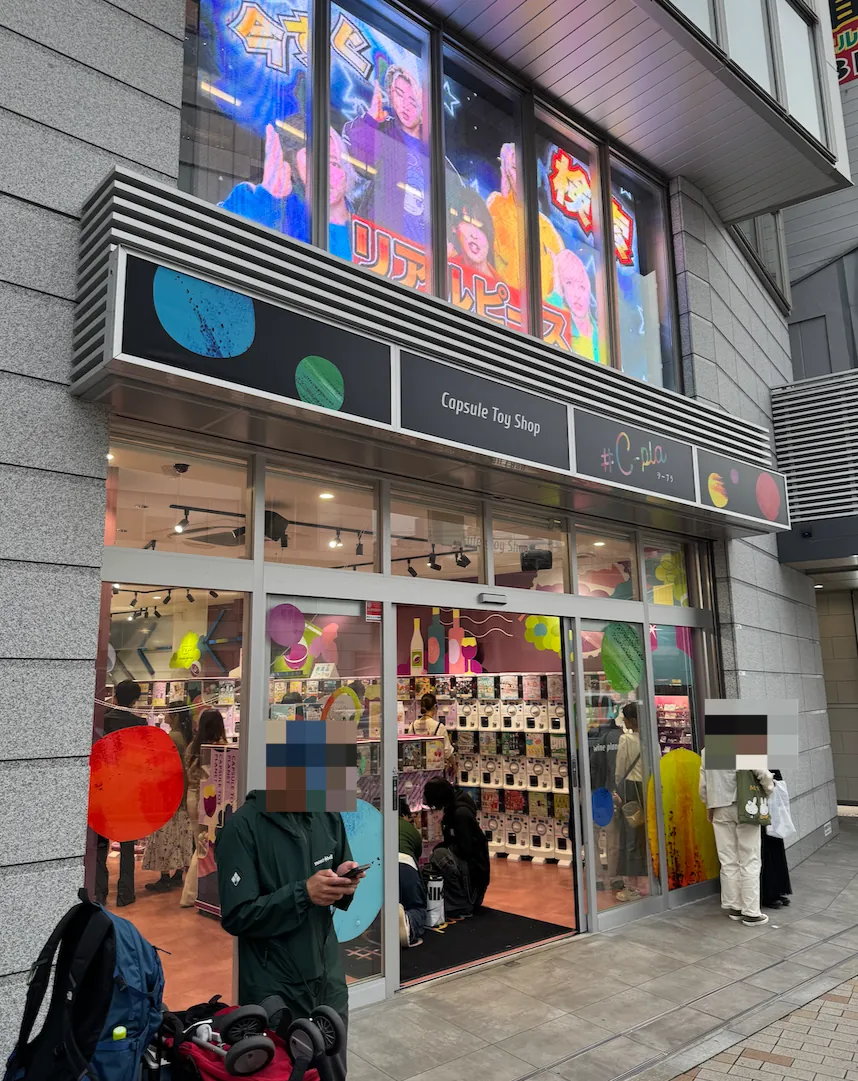
There is still over an hour before mealtime, so I first wandered around near Kobe Sannomiya, looking for gacha capsules and Kiddy Land as usual.
Kiddly Land in Kobe was not crowded, but there were very few Gikawa products. I couldn’t find the Usagi pajamas I wanted.
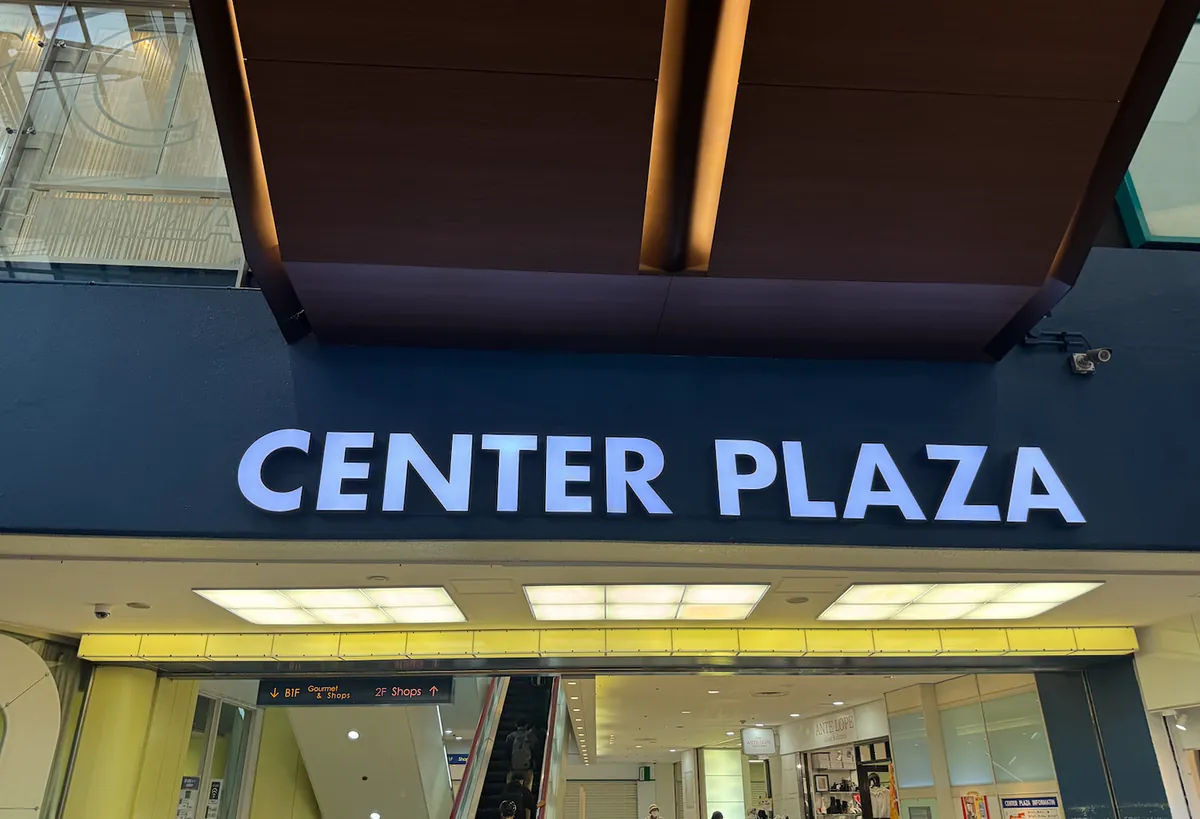
Center Plaza is a bit old-fashioned but has many shops to explore.

Go to the second floor to look for capsule toys and check the second-hand store to see if they have the Usagi I want.
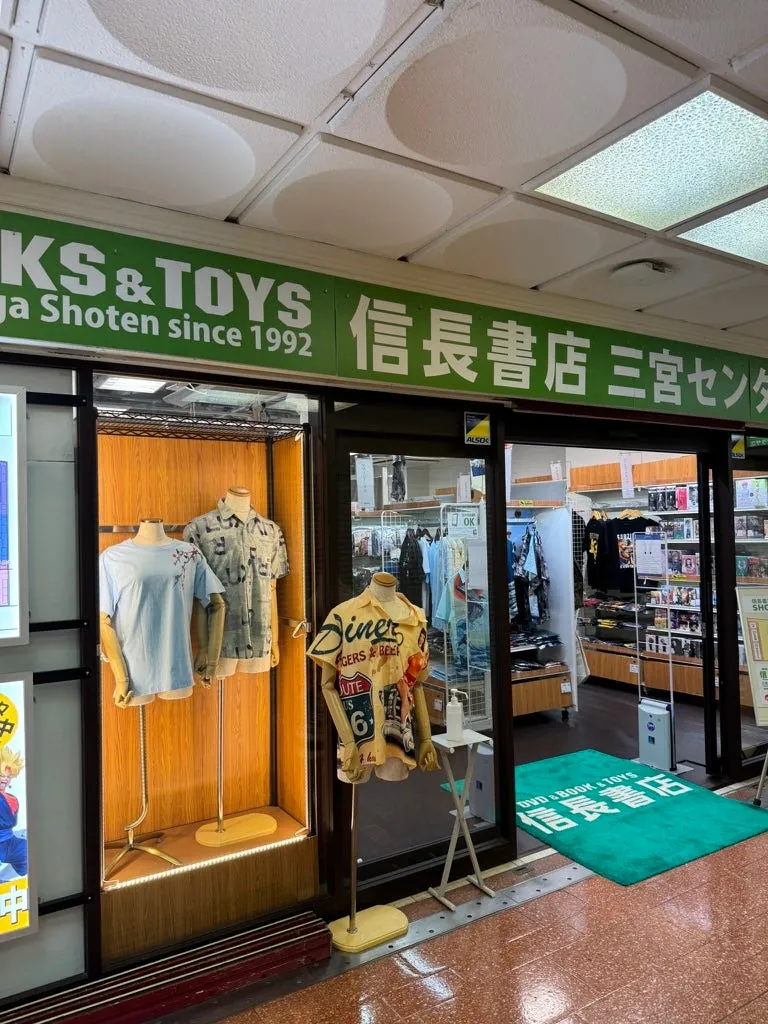
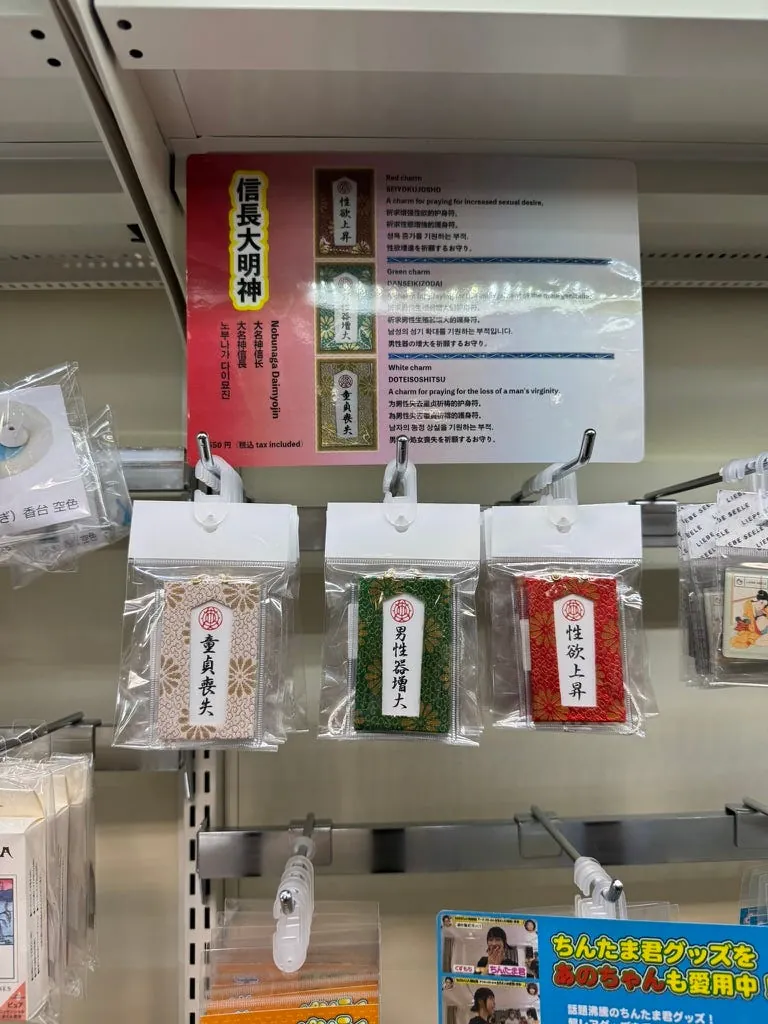
There is a Nobunaga Bookstore where you can buy omamori (amulets) as gifts for friends, hehe.
~=17:00 Kobe Beef Kissho Kichi
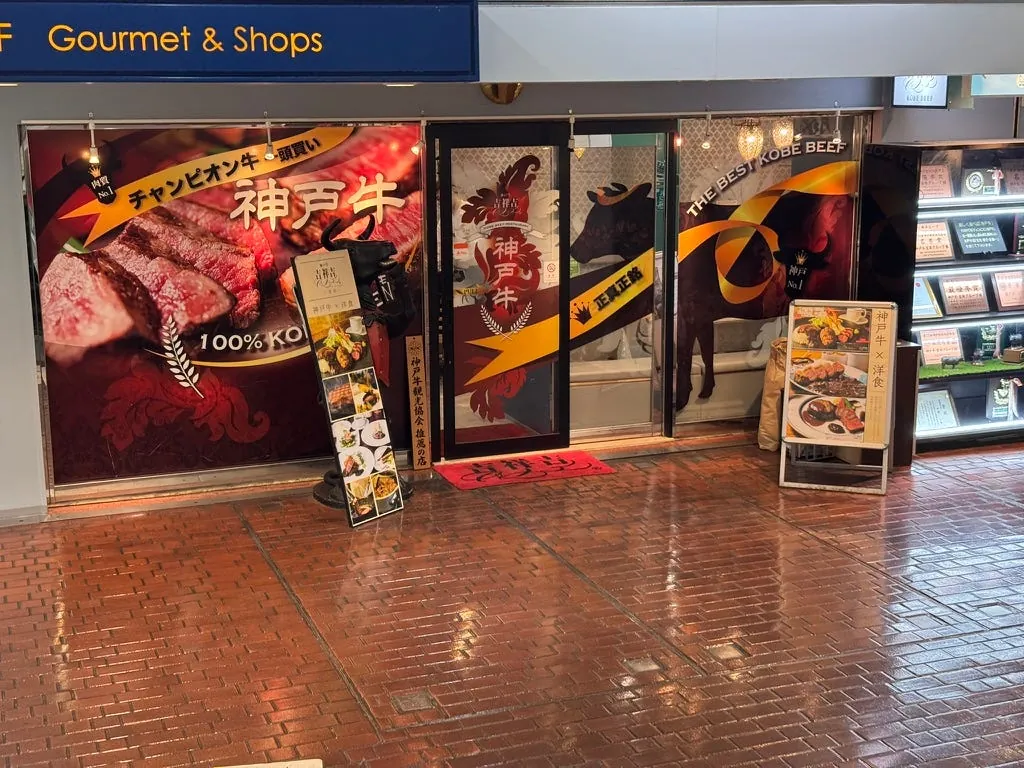
There is a Kobe Beef Kicchou Kicchou on B1, and we came early for dinner around 5 PM.
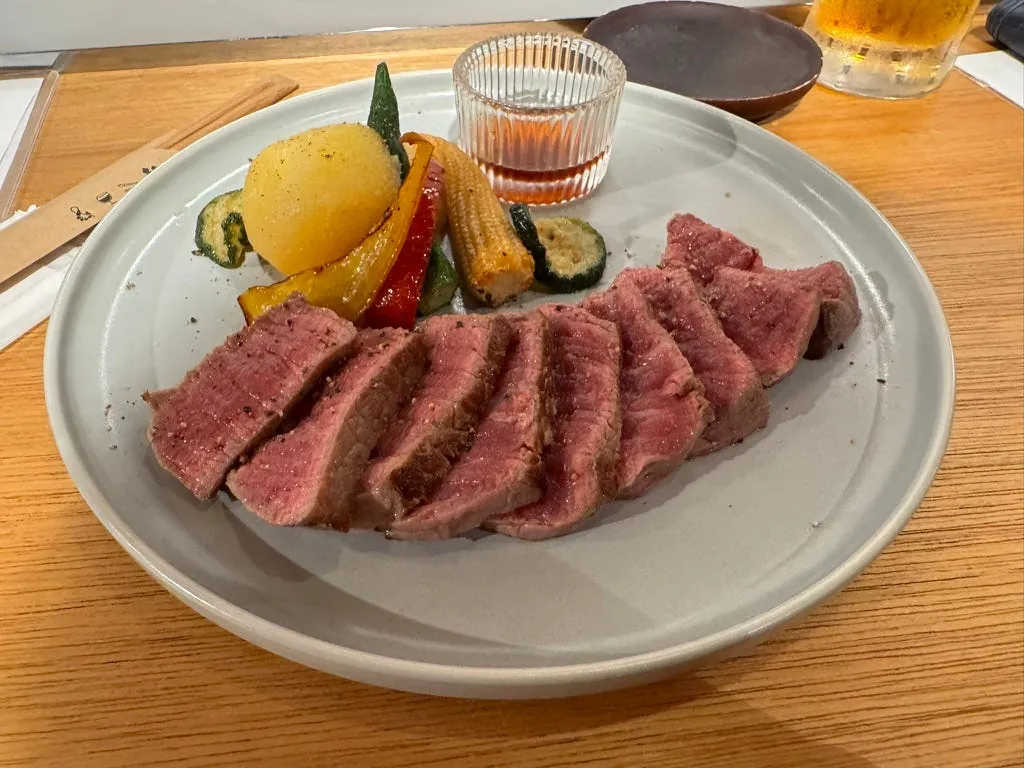
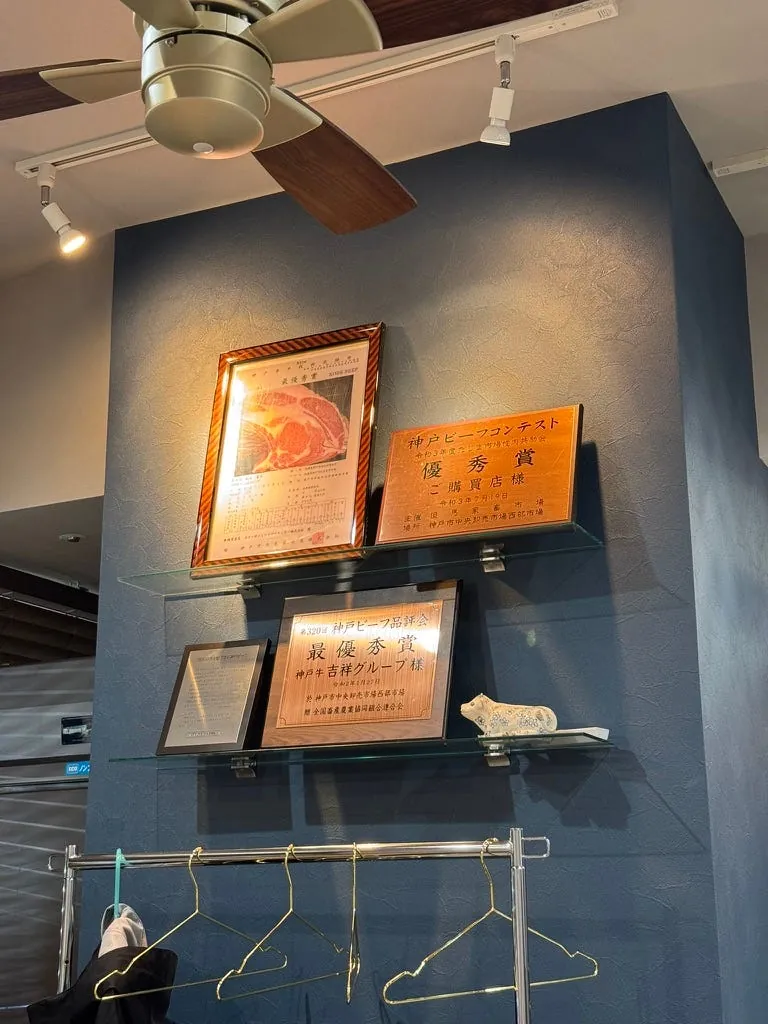
It was still early, and there weren’t many people; the owner was very enthusiastic when he heard I was from Taiwan. This meal was also a main reason for coming to Kobe—to have a good meal of Kobe beef—since I had been eating randomly for the past few days.
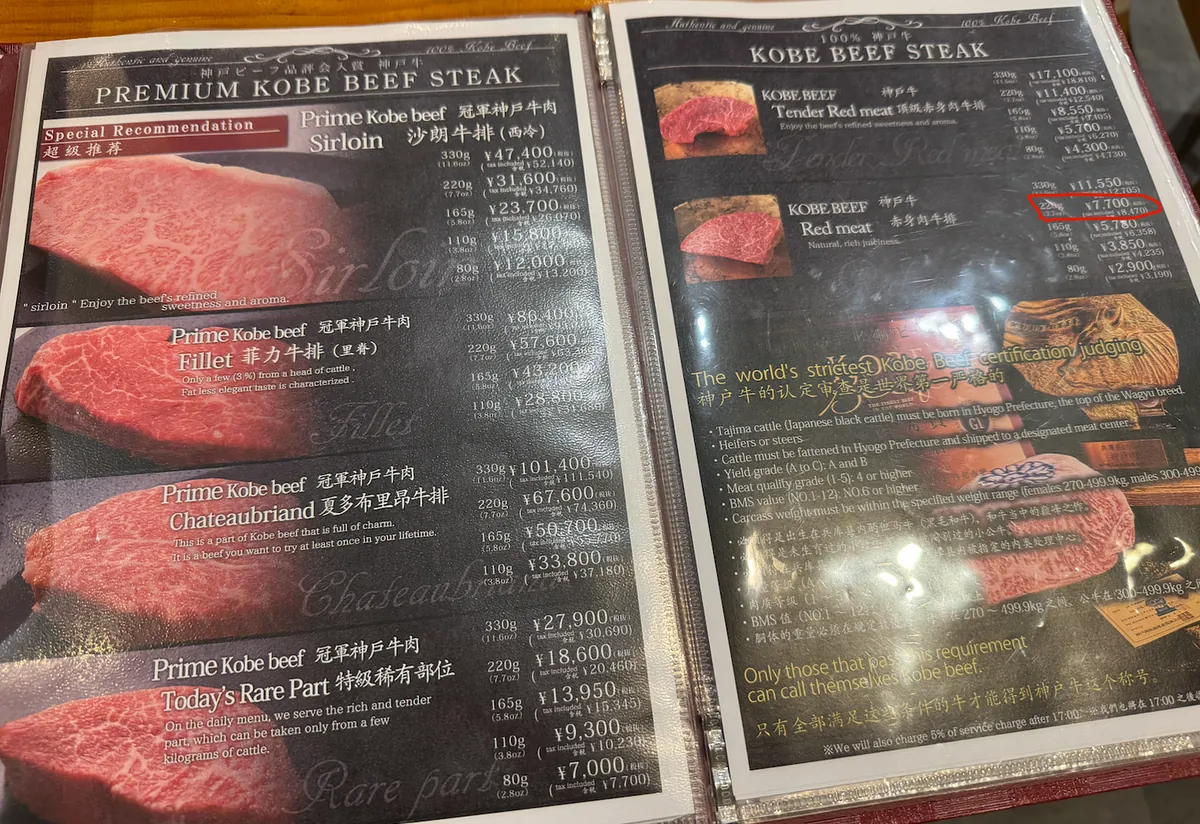
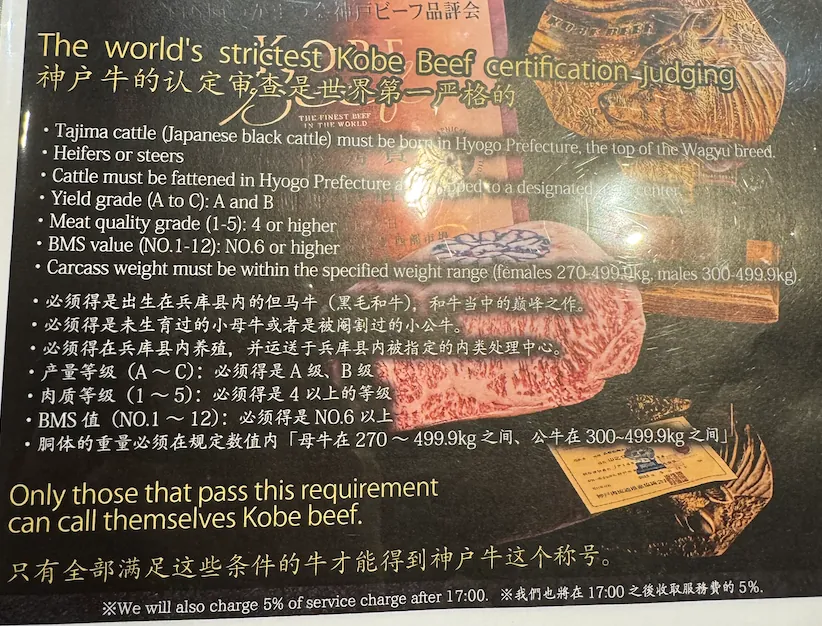
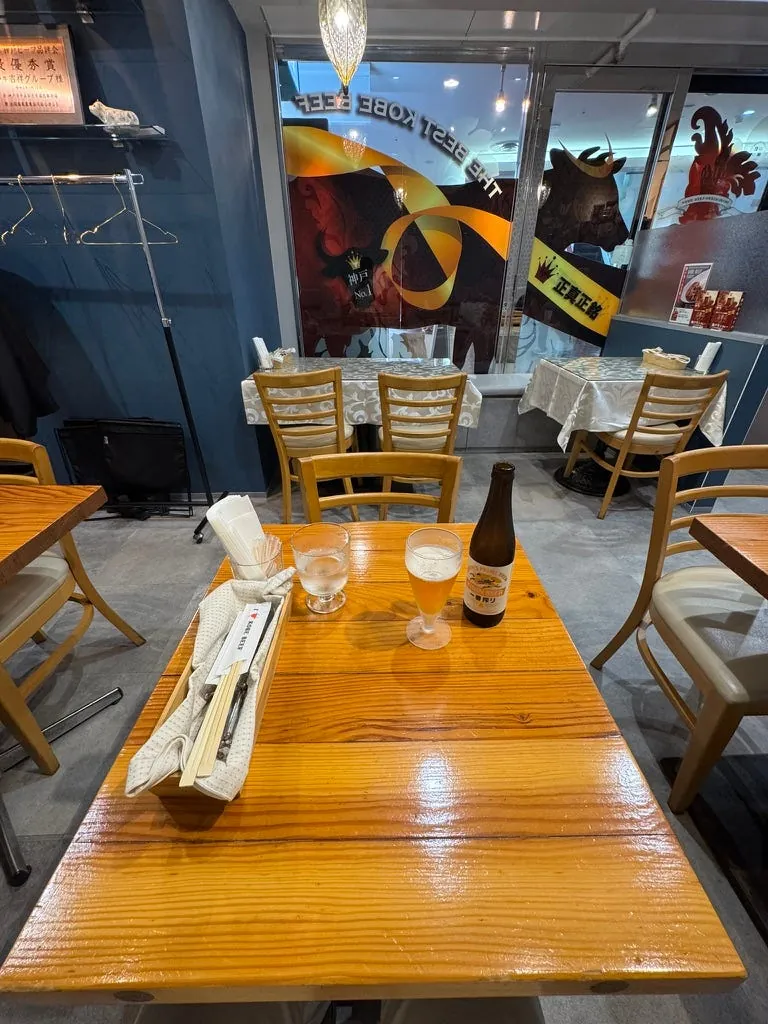
I ordered the “Kobe Beef Lean Steak 220g” for 7,700 yen (pre-tax ⚠️, tax included at checkout) with a set meal (salad, rice, soup) and draft beer.
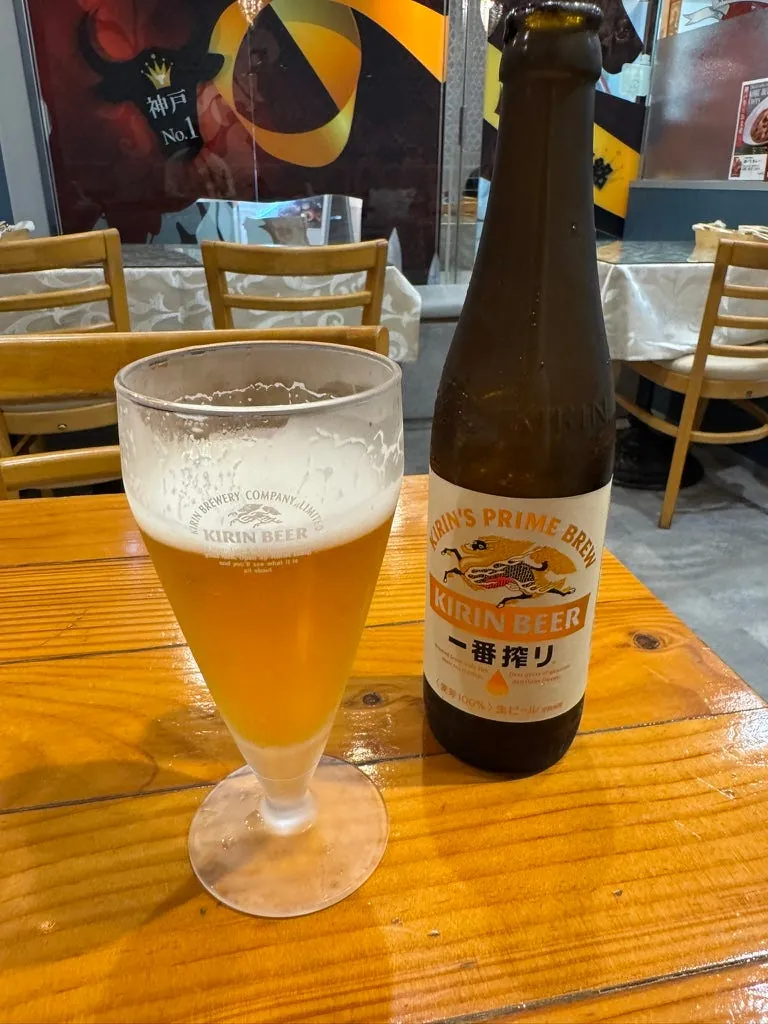
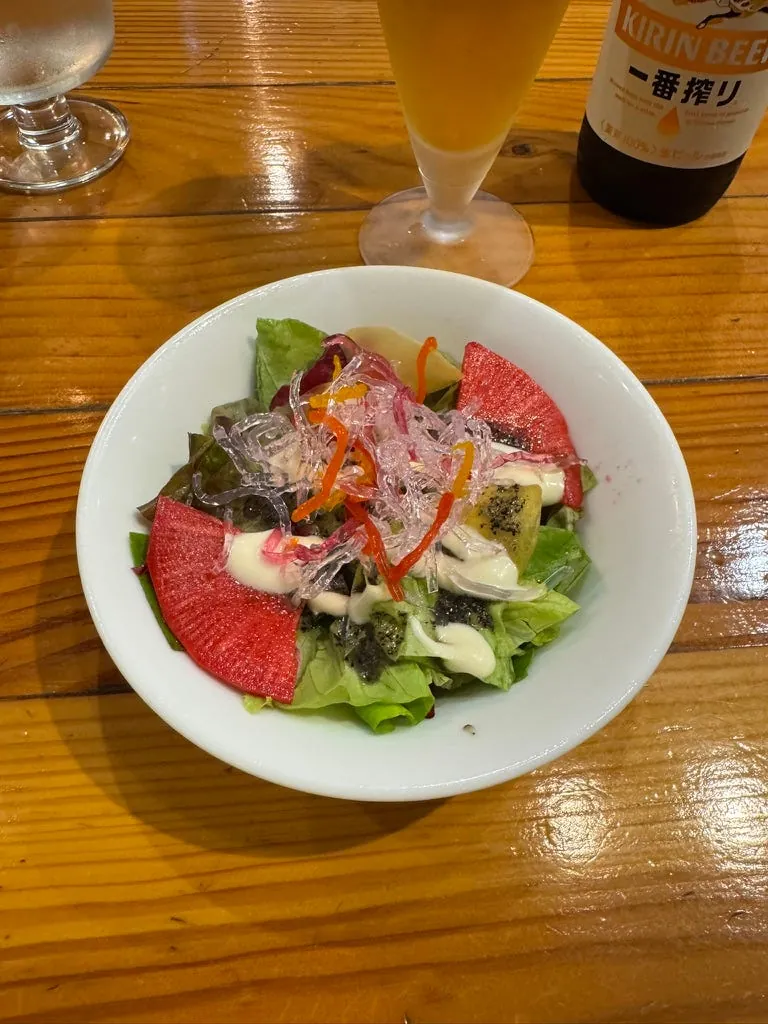

The lettuce is fresh and crisp, and the soup is beef broth, very tasty.
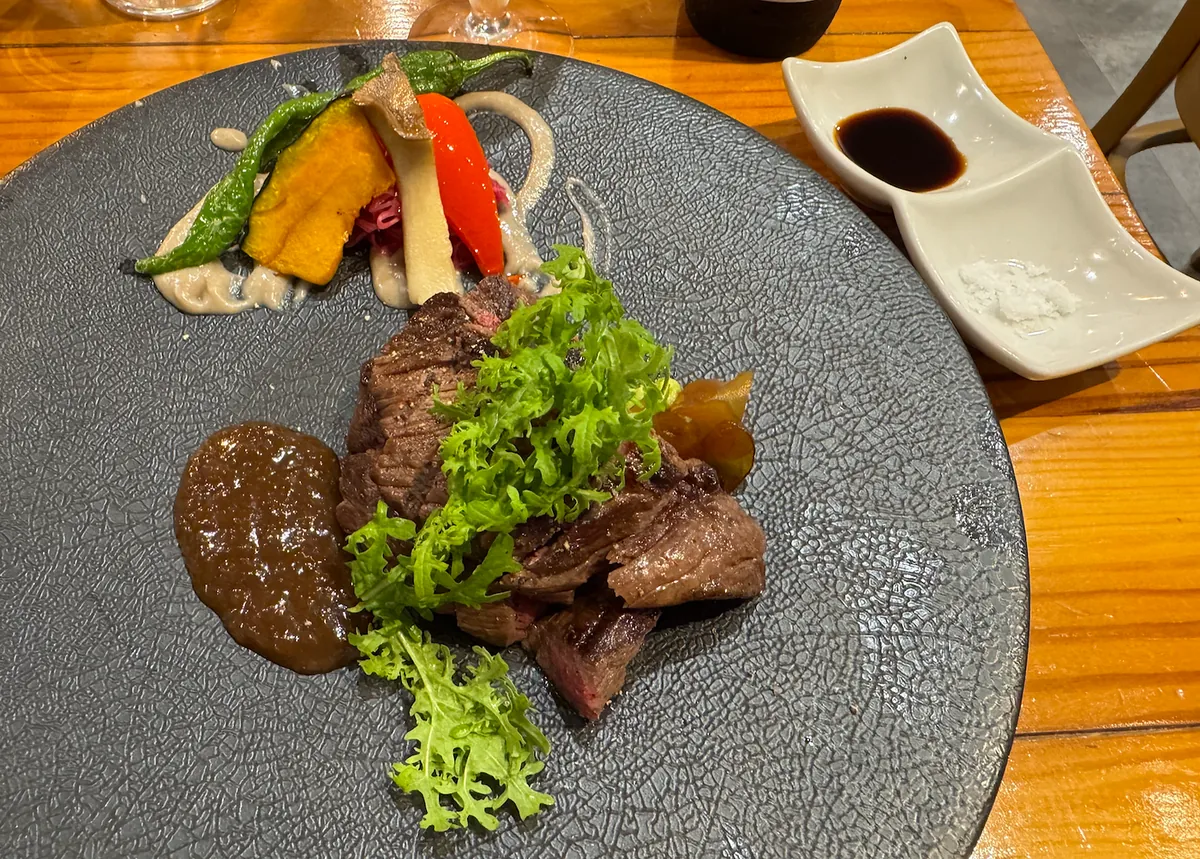
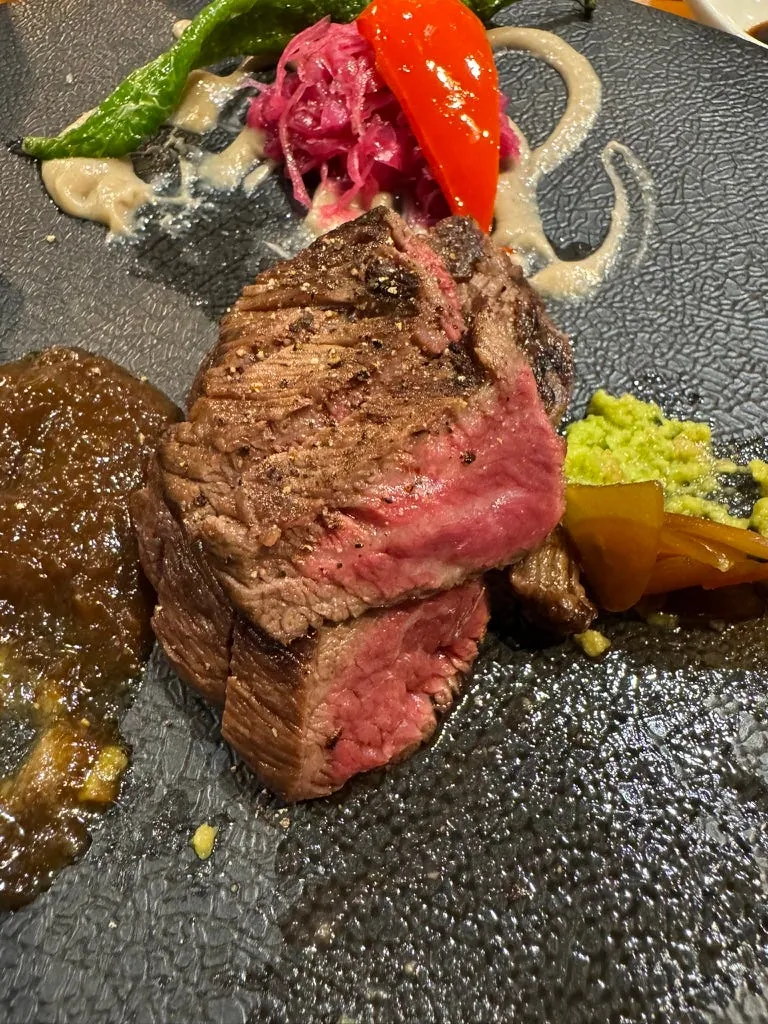
The meat is tender, juicy, and full of flavor. Compared to the Kobe beef I had yesterday, this is the true taste of Kobe beef.
But if I had to choose, I still prefer teppan dishes over Western-style food.
Final actual expense: $2,158 TWD.
17:40 Finished eating and left, heading to Kobe Tower
After eating, walk to the old foreign settlement along the coastline near Daimaru-mae Station, take one stop, then walk to Kobe Tower.
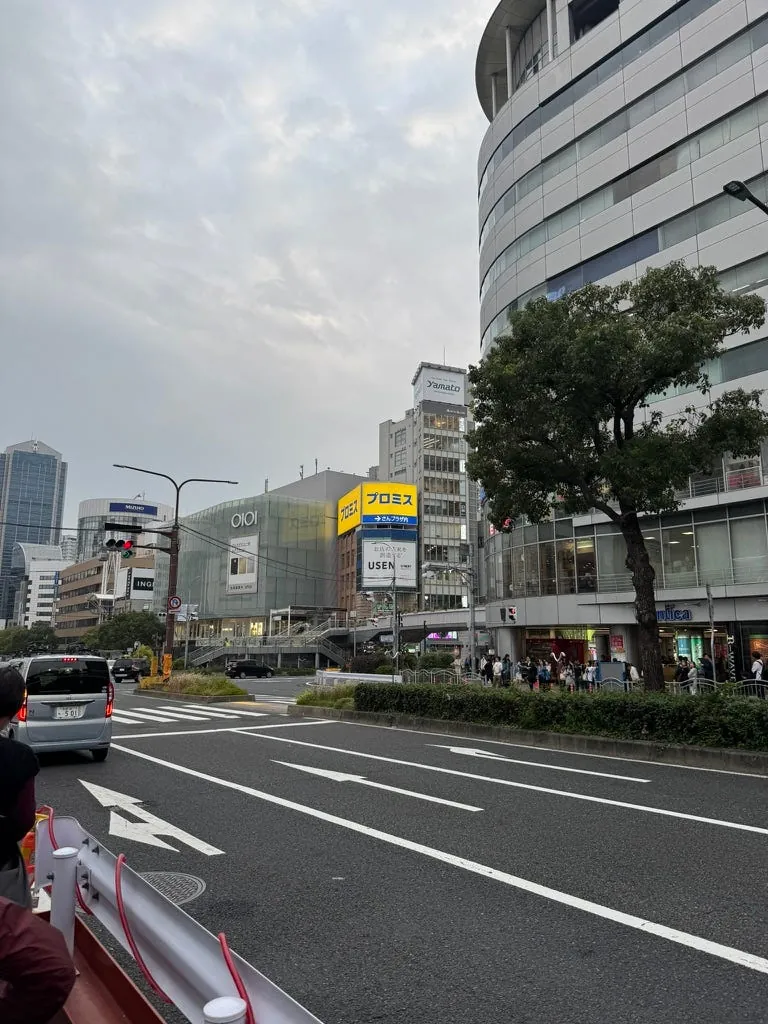
Kobe is very lively (compared to Himeji), with many department stores to explore.
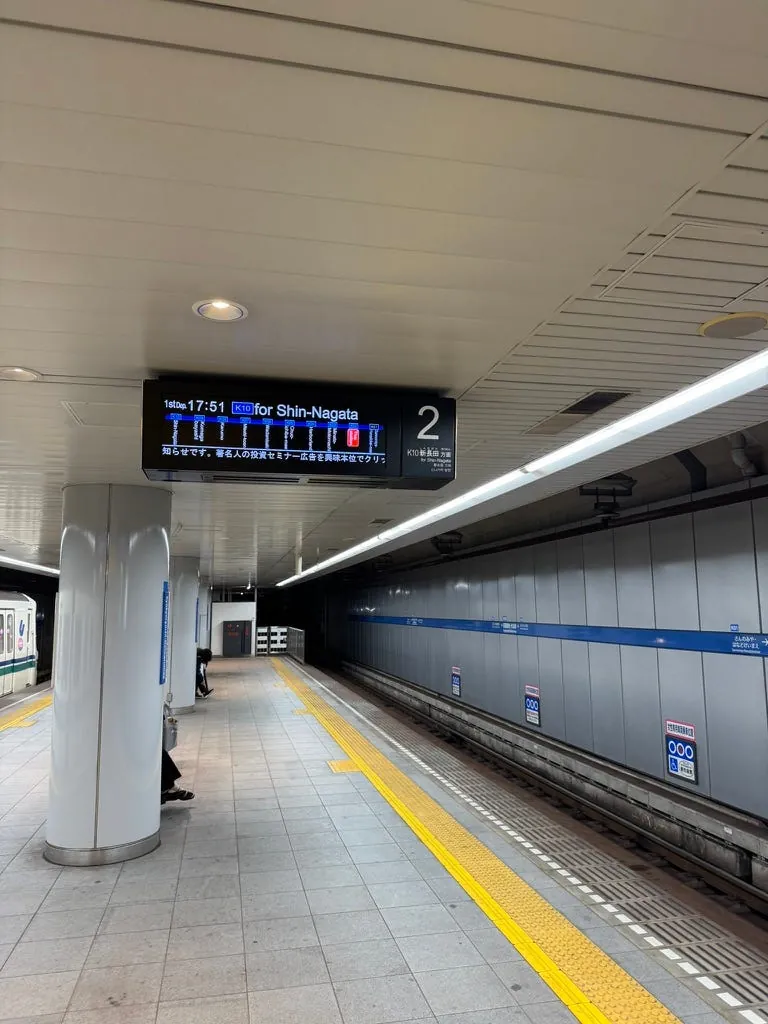
Take the train towards Shin-Nagata and get off at the next stop, Minato Motomachi.
18:05 Arrive around Kobe Tower
It was under maintenance when I came last year, but it is now fully open.

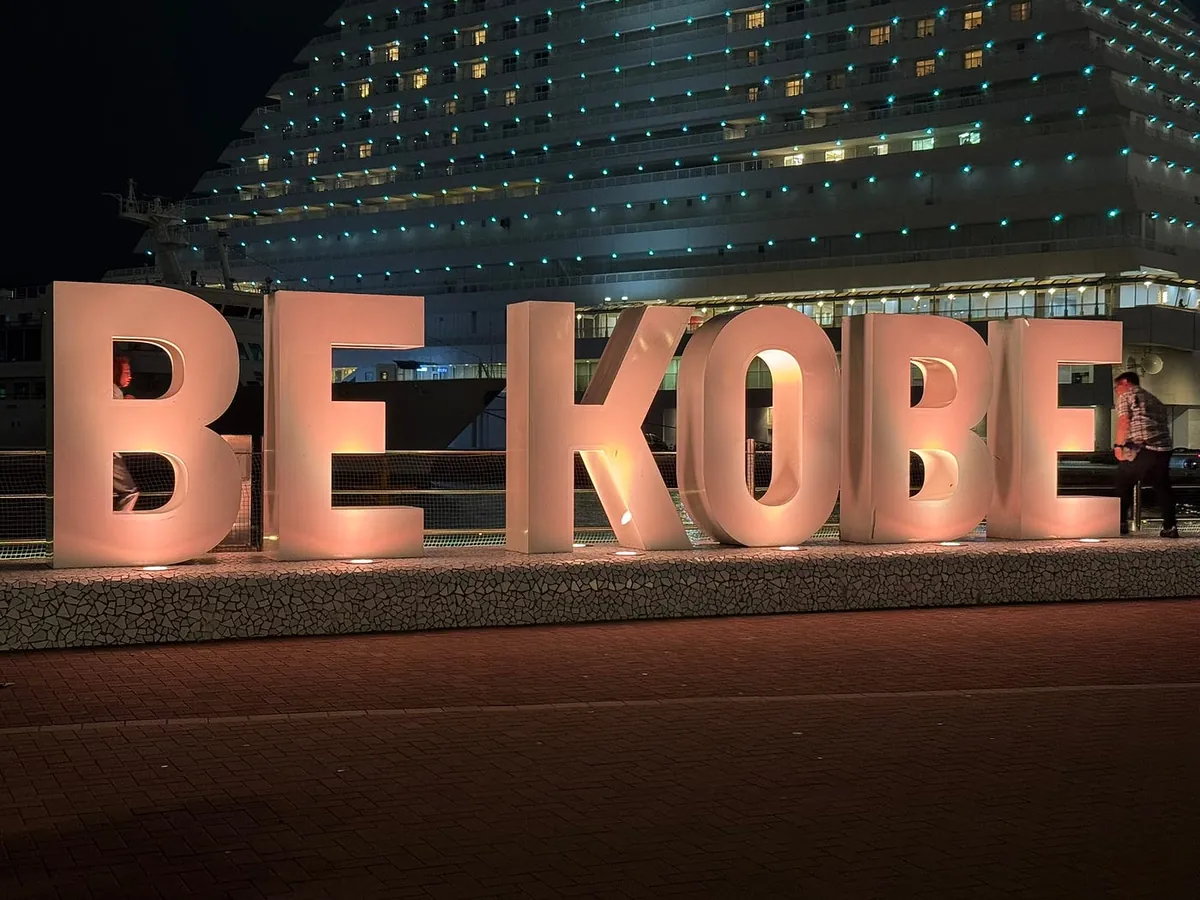
Kobe Port has a nice harbor town vibe. If I get the chance, I would consider staying overnight in Kobe.
This time, I just took a quick glance around and left.
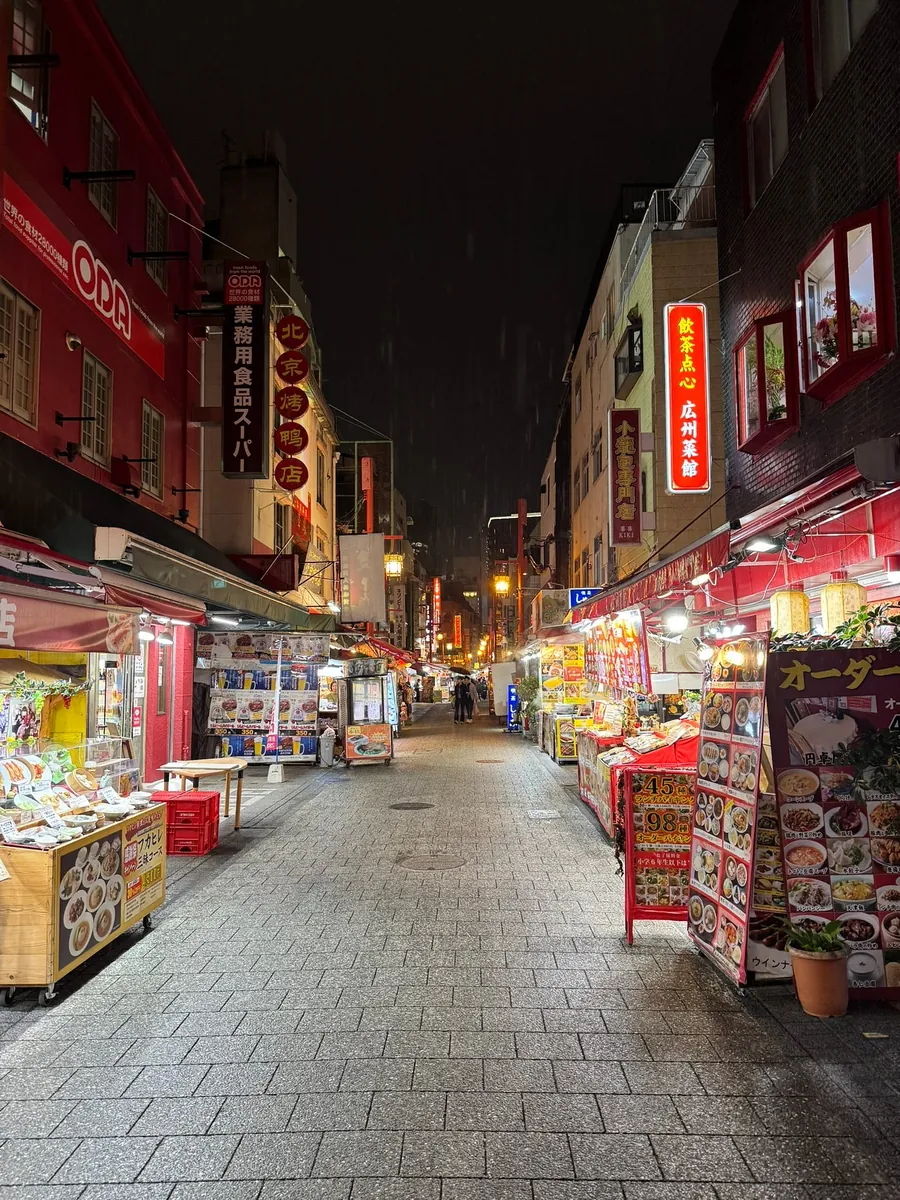
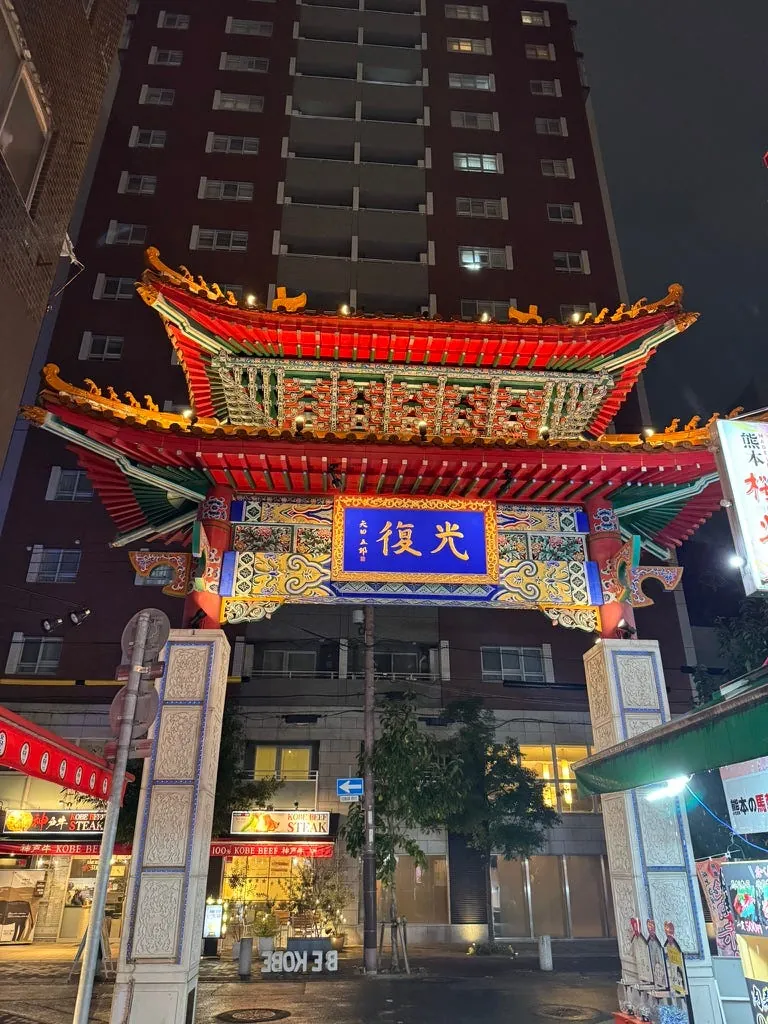
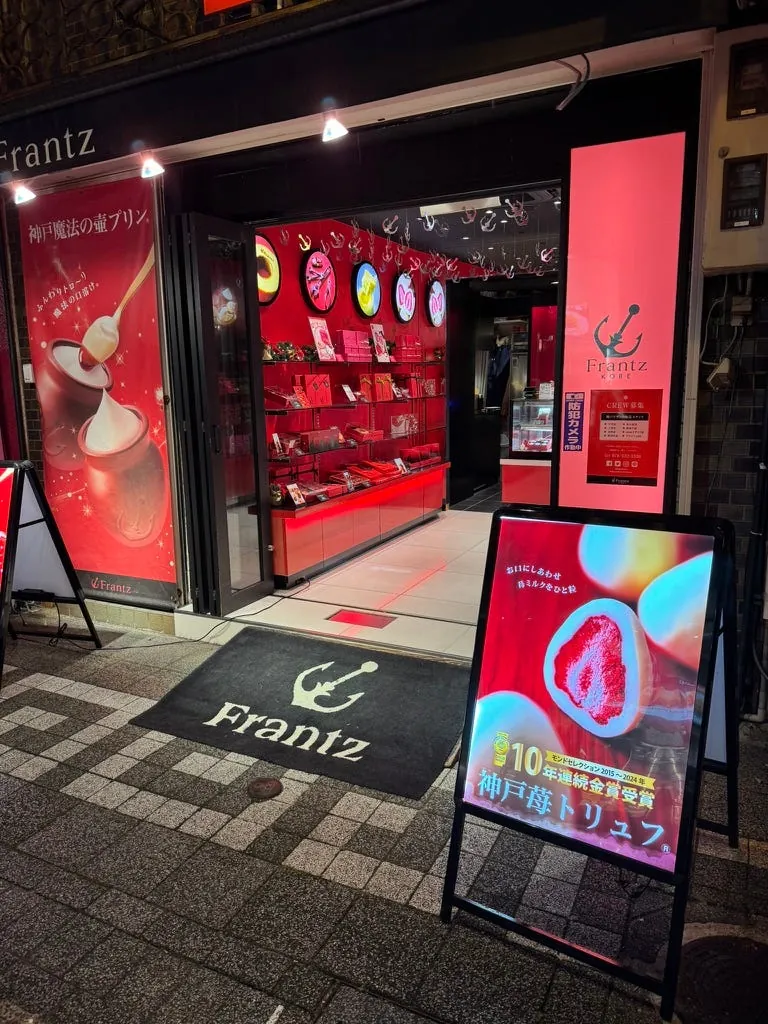
18:30 Return to Kobe Chinatown
On the way back to Kobe Station, I first went to Chinatown to buy Kobe Frantz chocolate souvenirs.

Return to JR Motomachi Station
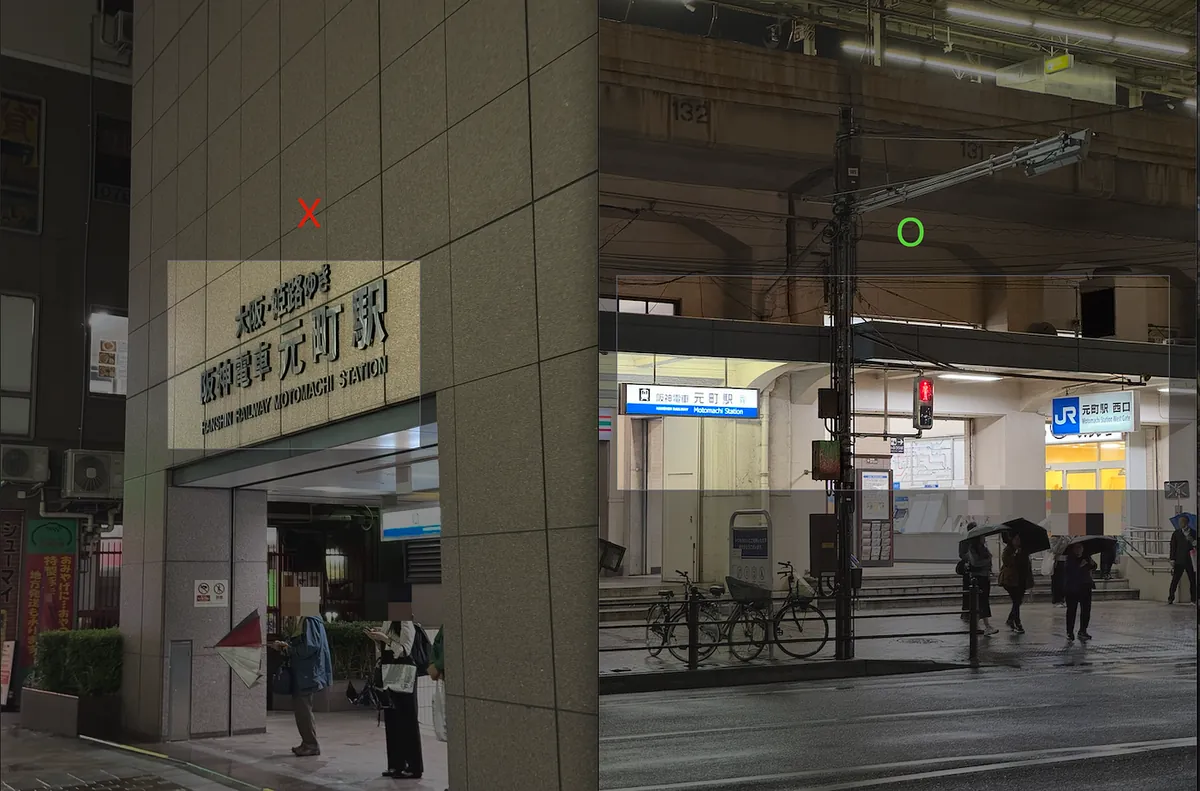
Please make sure to go to JR Motomachi Station, not the Hanshin Electric Railway Motomachi Station.
18:53 Take the Rapid train bound for Himeji from Aboshi to Kobe (Hyogo)
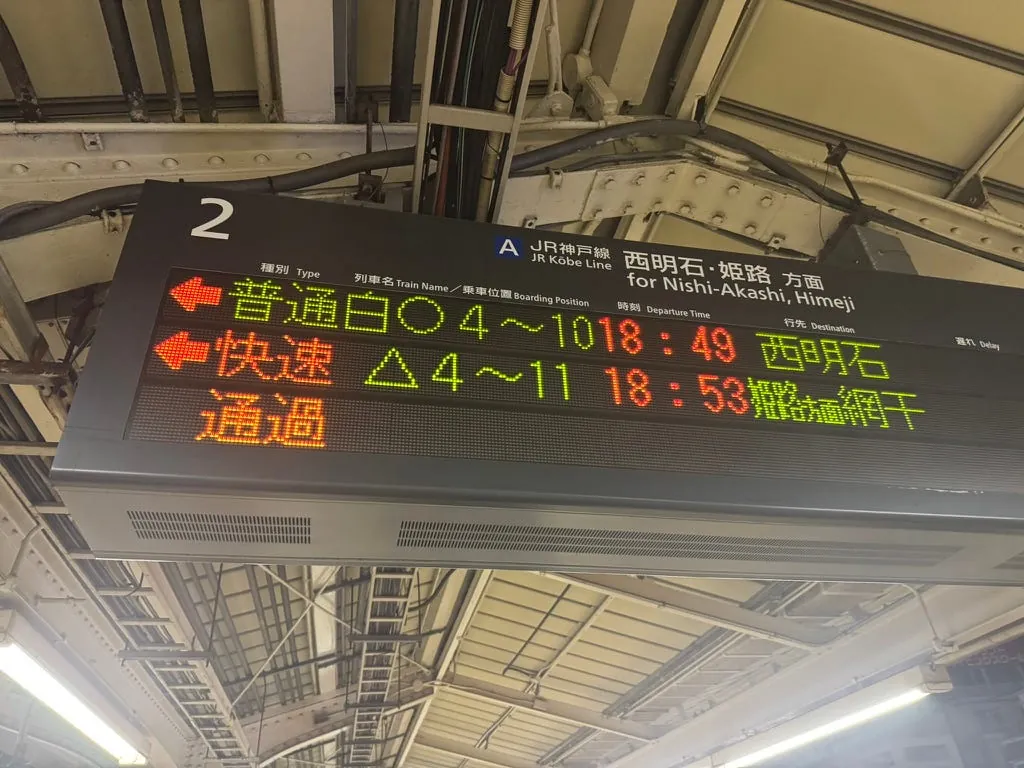
18:57 Transfer on the same platform to the Rapid Service via Kosei Line through Aboshi
Transfer took nearly 20 minutes, luckily I made the switch in time to reach Himeji’s only drugstore, Matsumoto Kiyoshi, before the duty-free hours ended.
This train model also requires pressing the door button next to it to open the door, and the carriages are separated from each other.
19:34 Arrive at Himeji
19:45 Arrive at Himeji Piole, shop for cosmetics at Matsumoto Kiyoshi
Please note that although the business hours are until 21:00, the tax-free service ends at 20:30. ⚠️⚠️⚠️
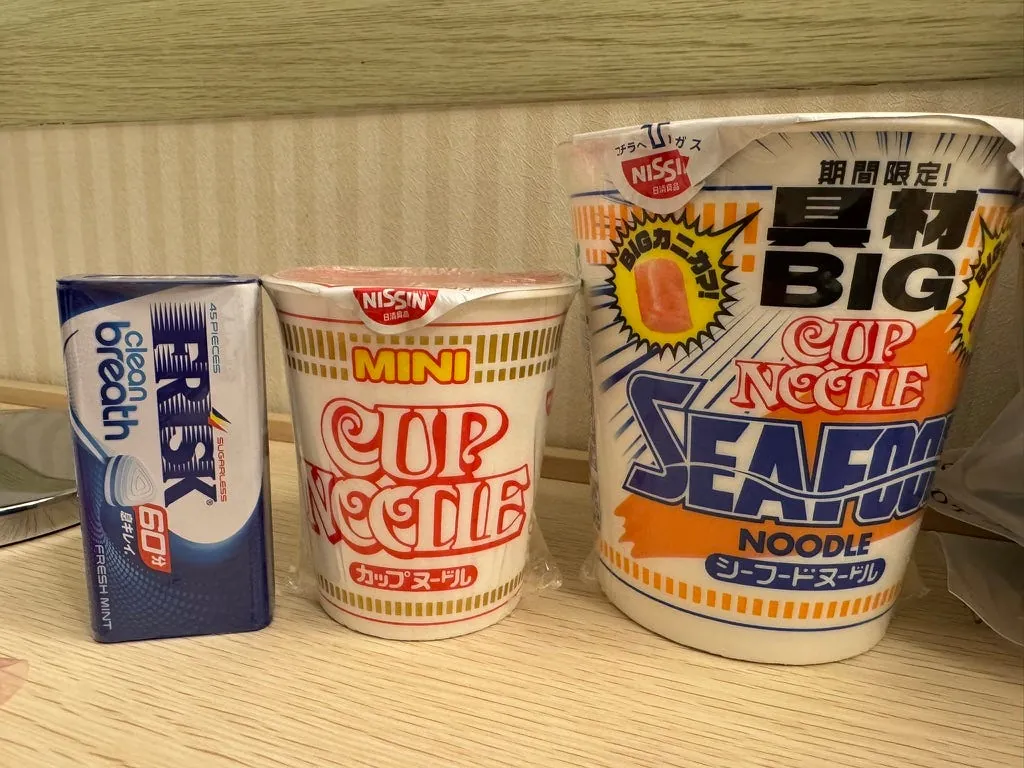
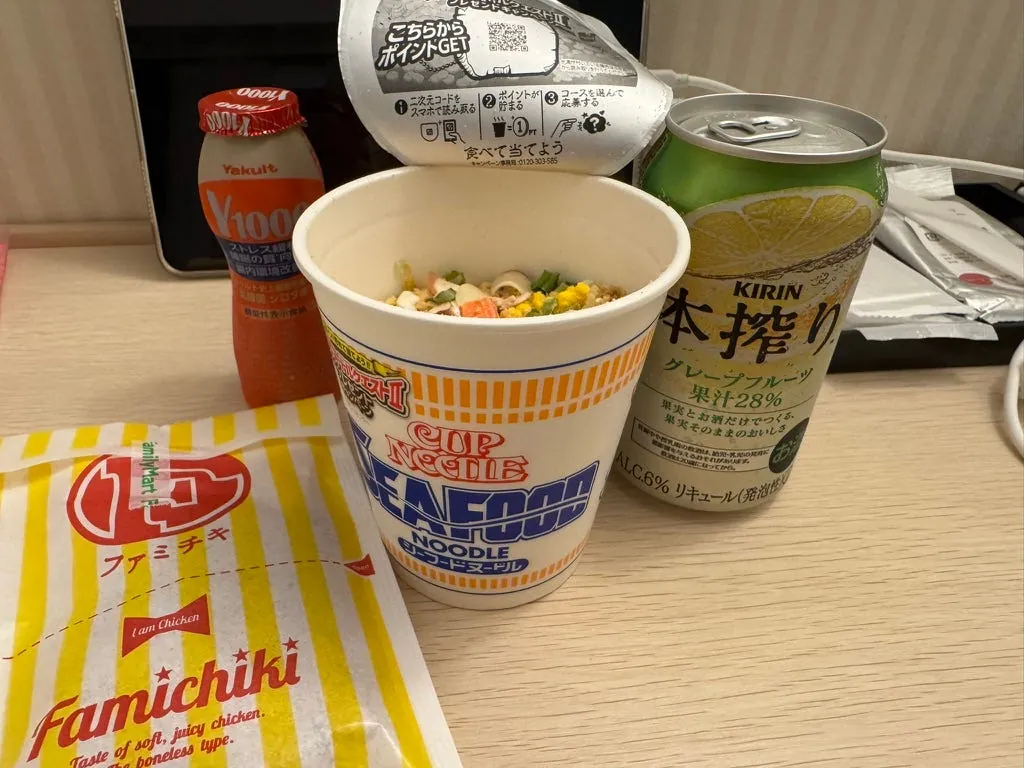
Bought a super mini Cup Noodle
On the last night in Japan, eating and drinking late-night snacks and beer at the hotel. (These meatballs have a soft texture…)
Good night, Himeji.
Day 7 (11/18 Monday) Okayama, Return Trip
08:30 Good morning Himeji
A final glance at the morning in Himeji.
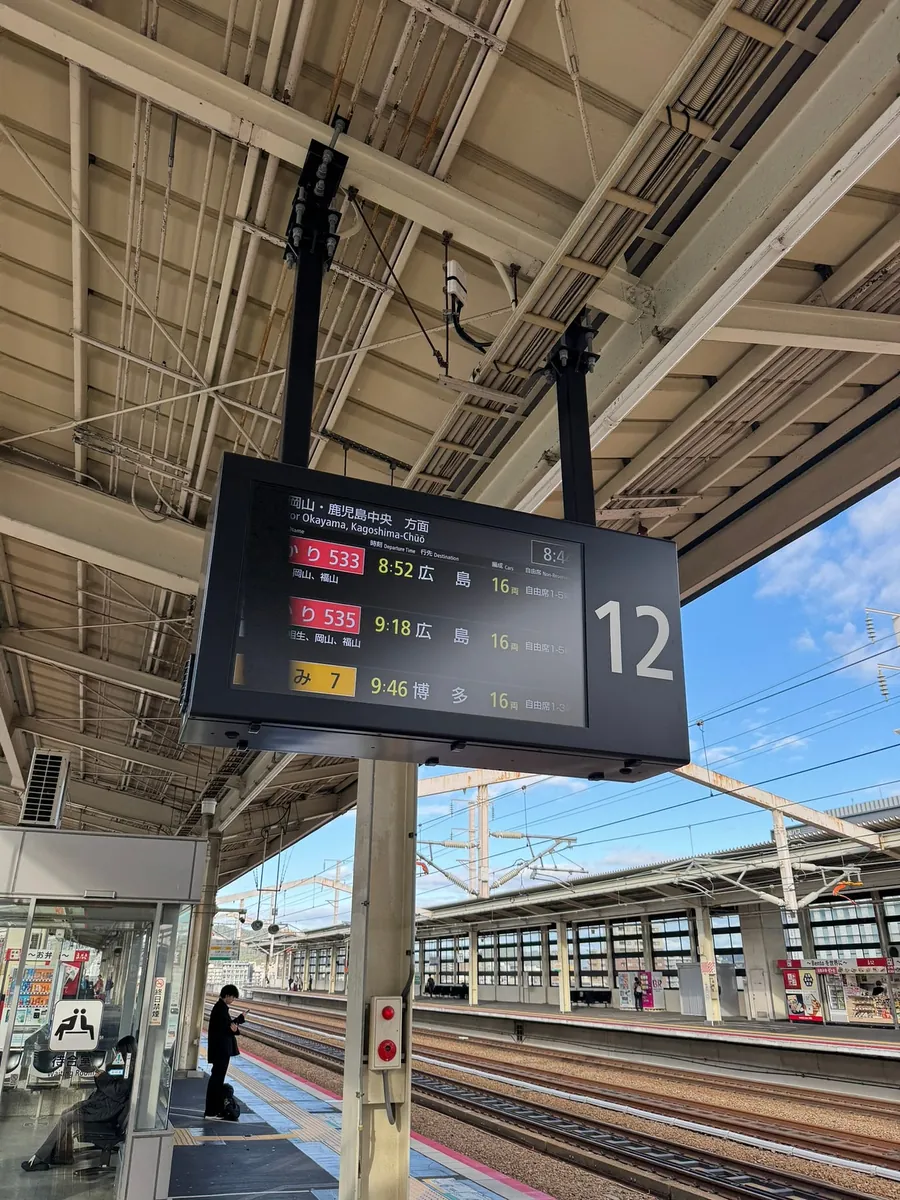
Arrived at the Shinkansen station to catch the 08:52 Shinkansen bound for Okayama.
Take the 08:52 Shinkansen non-reserved seat to Okayama
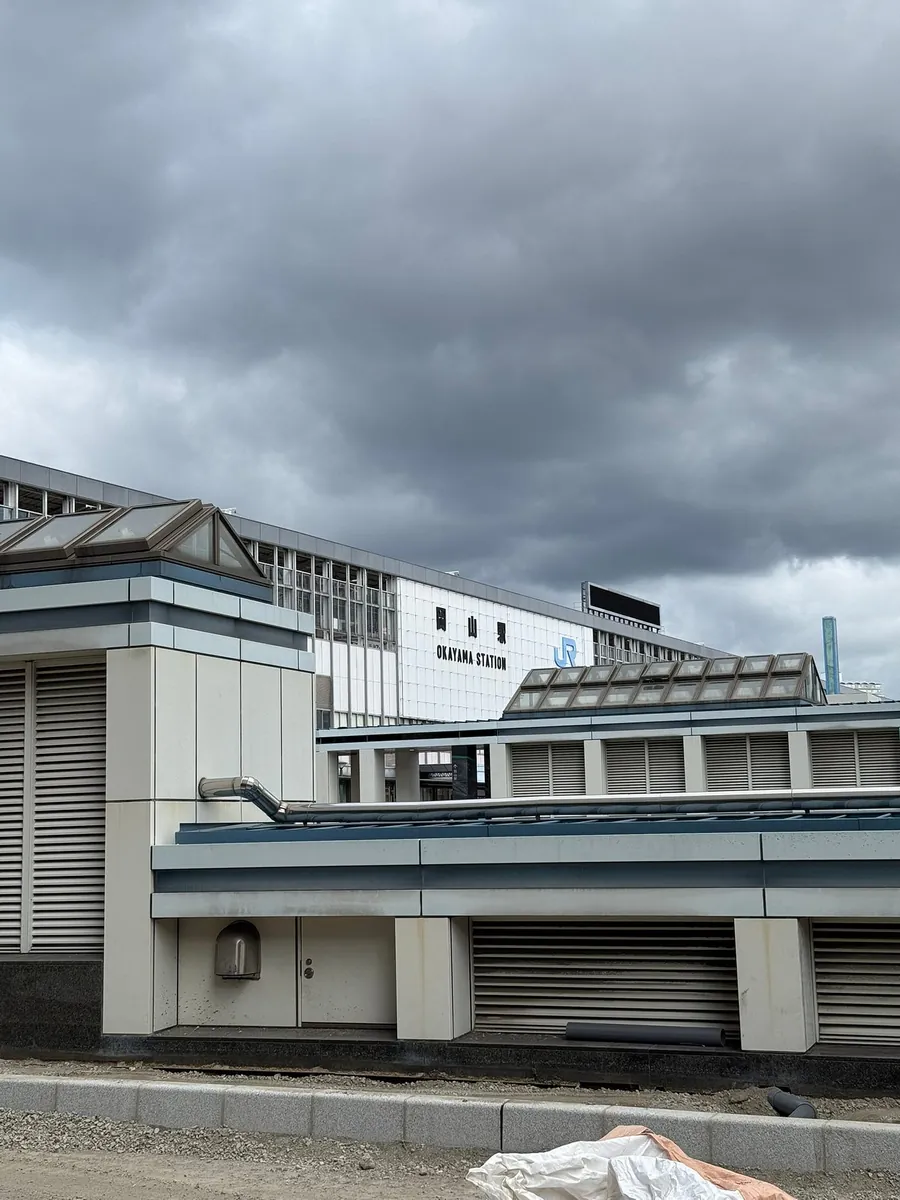
09:13 Arrived at Okayama Station
It takes about 21 minutes by Shinkansen to reach Okayama Station. Unfortunately, I didn’t have enough time this trip to visit Hiroshima again.
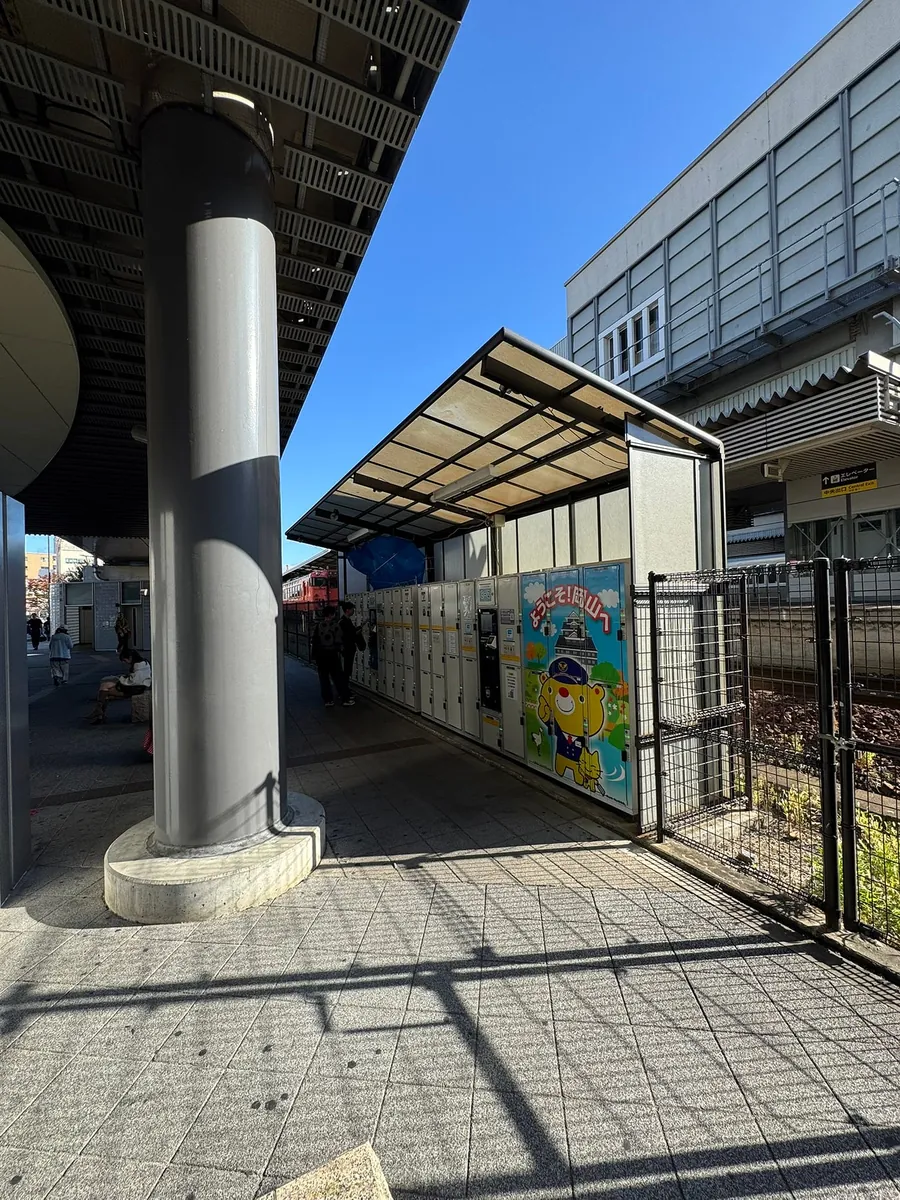
Just like last time, go directly to the west exit of Okayama Station to catch the airport bus. There are lockers here to store luggage and restrooms available (at this time, the department stores are still closed, so restrooms are limited).
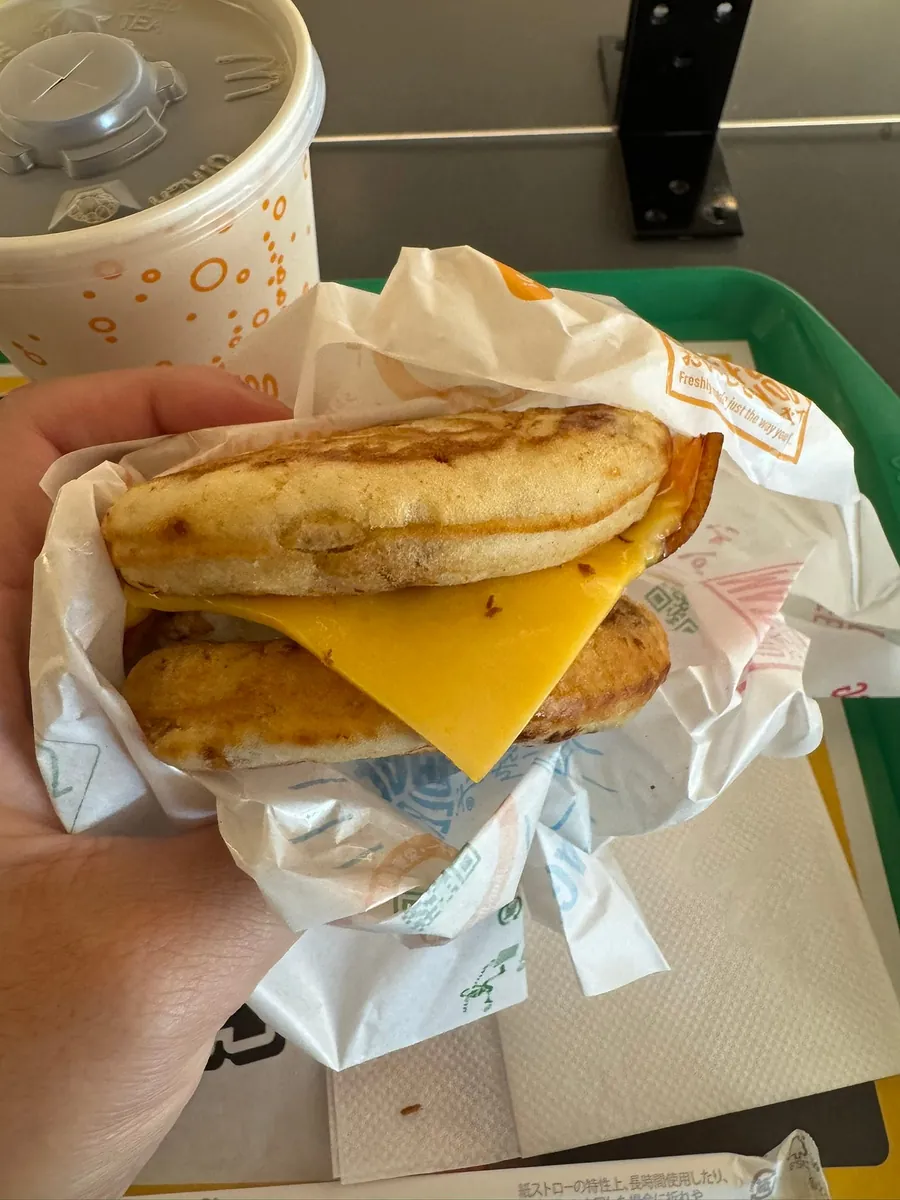
09:30 McDonald’s at Okayama Station to try the popular “pancake burger” trending in Taiwan recently
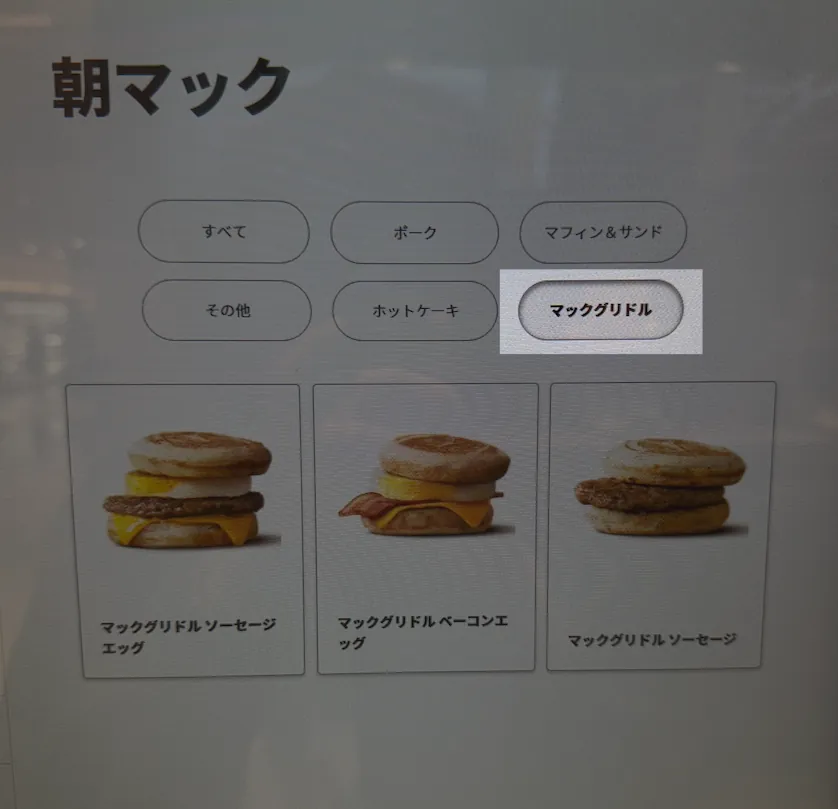
If you can’t read Japanese, you might almost choose the wrong item. You need to select “マックグリドル” for the pancake series.
McDonald’s breakfast hours in Japan last until 10:30.

After eating, around 10:00, there was no particular place I wanted to visit.
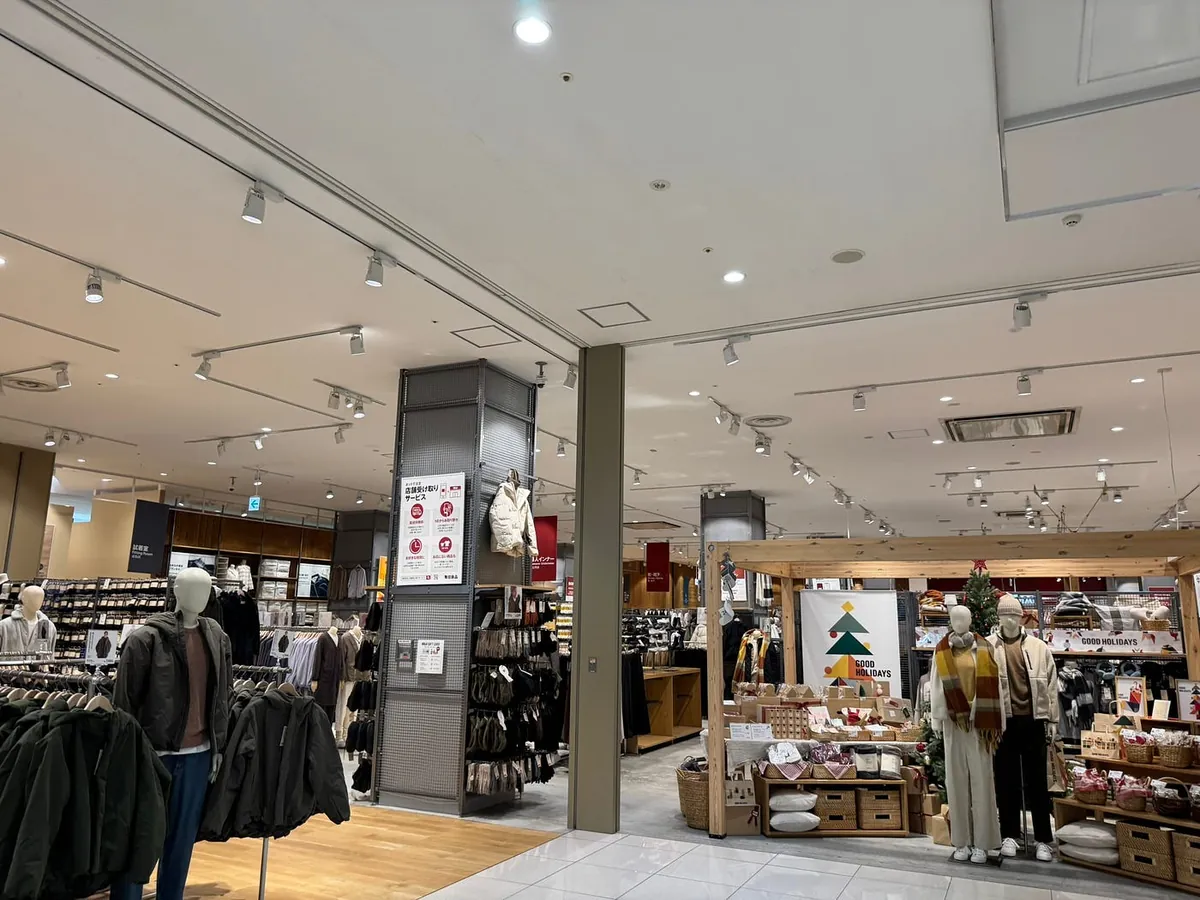
I already visited Okayama Castle and Kibitsu Shrine last time, so I spent the remaining time shopping at Okayama AEON Mall.

This year, Okayama is hosting an arts festival.

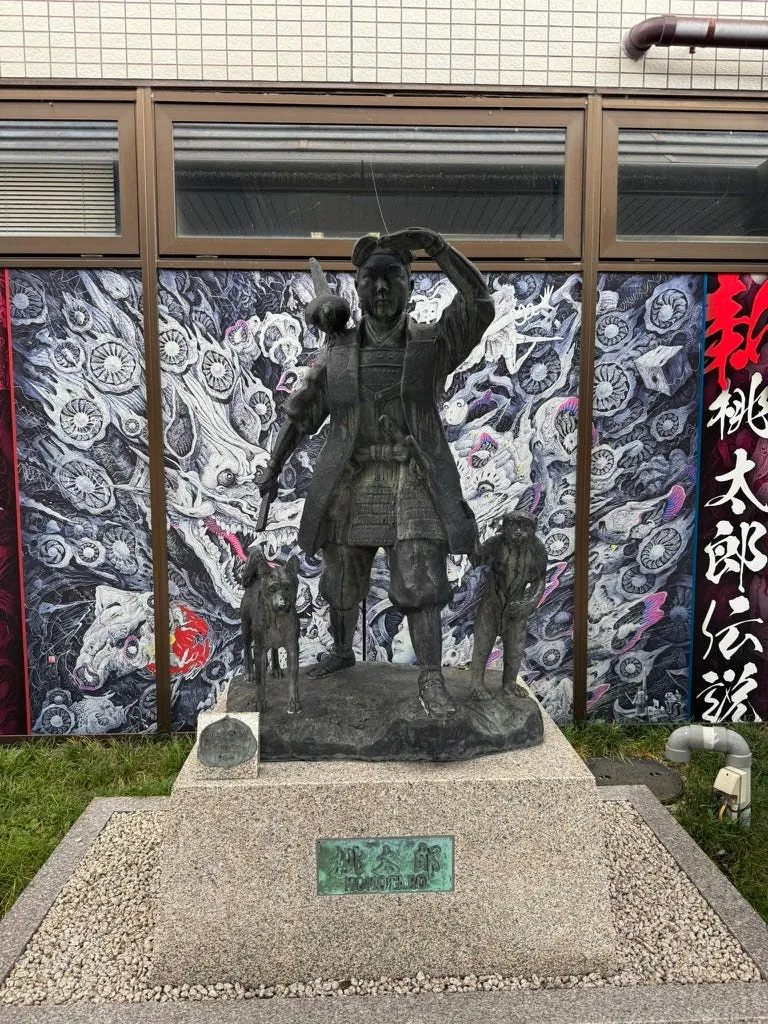
Okayama Station under construction and Momotaro temporarily moved beside the station.
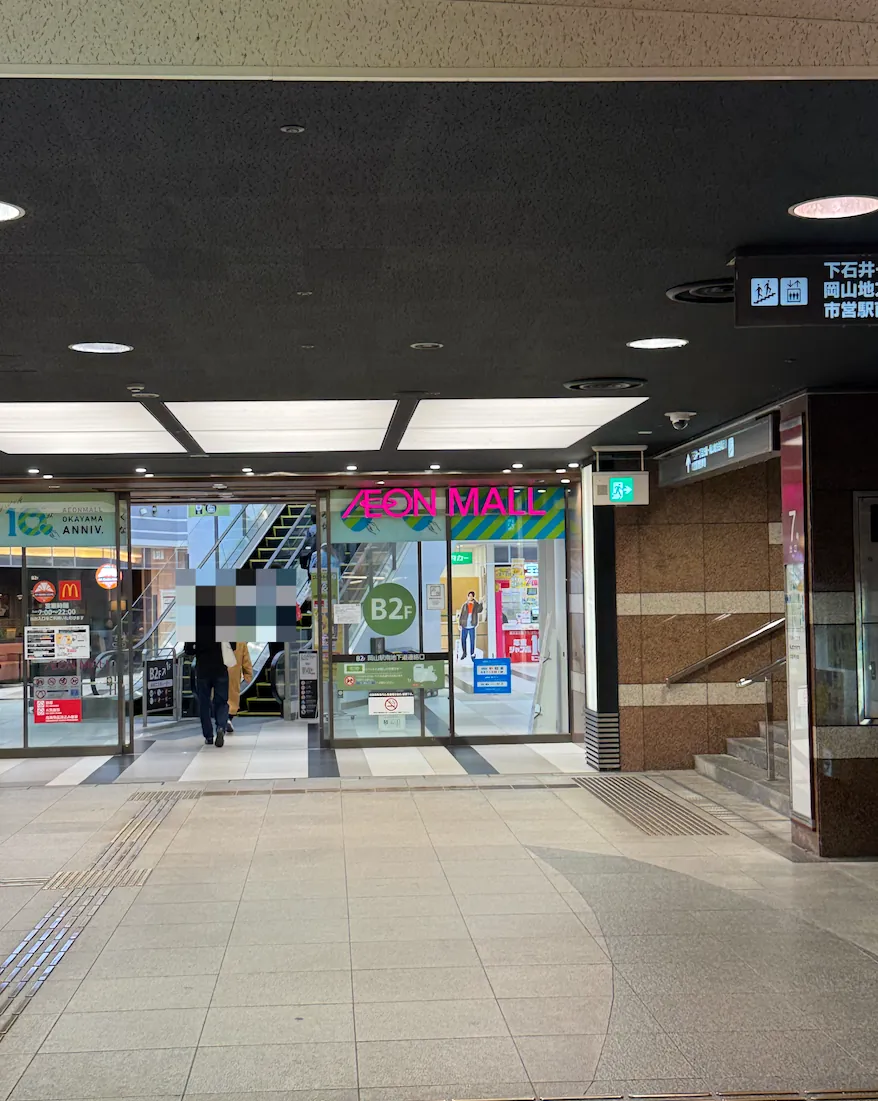
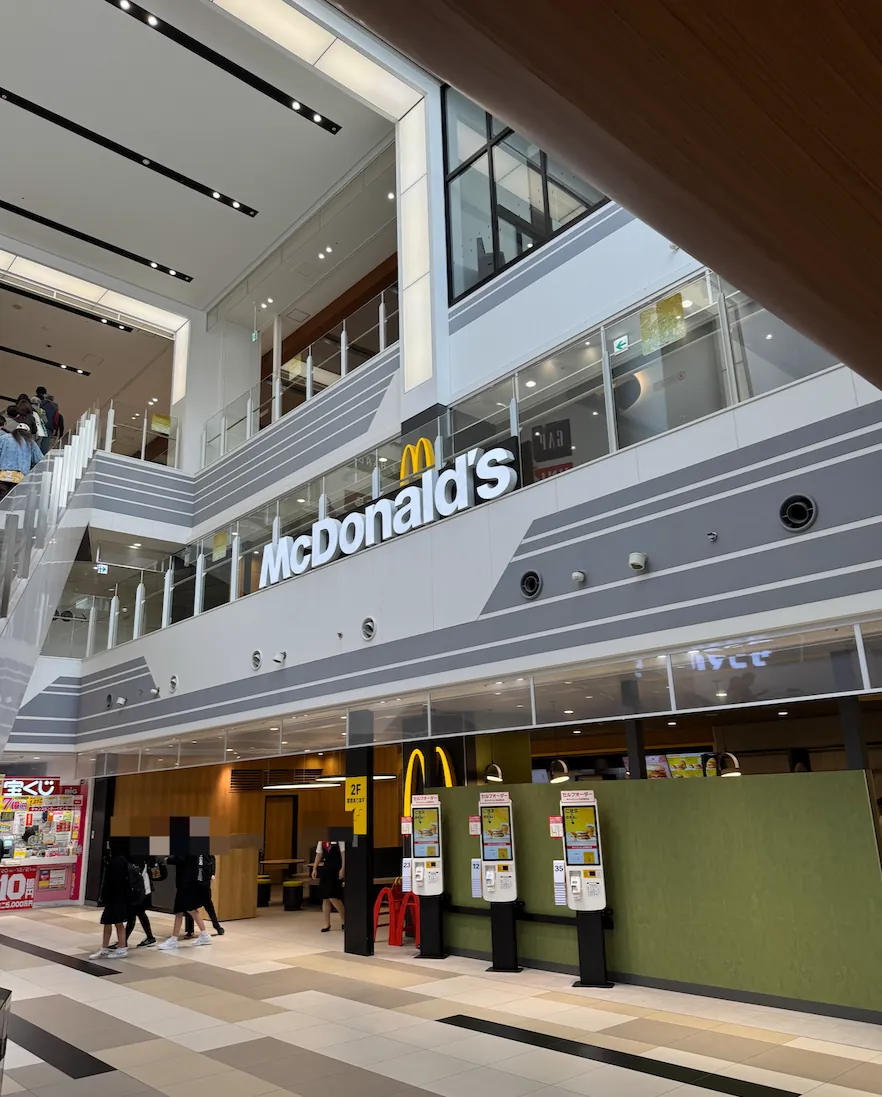
Cross the road from the underground mall to AEON MALL B2, where there is also a McDonald’s.
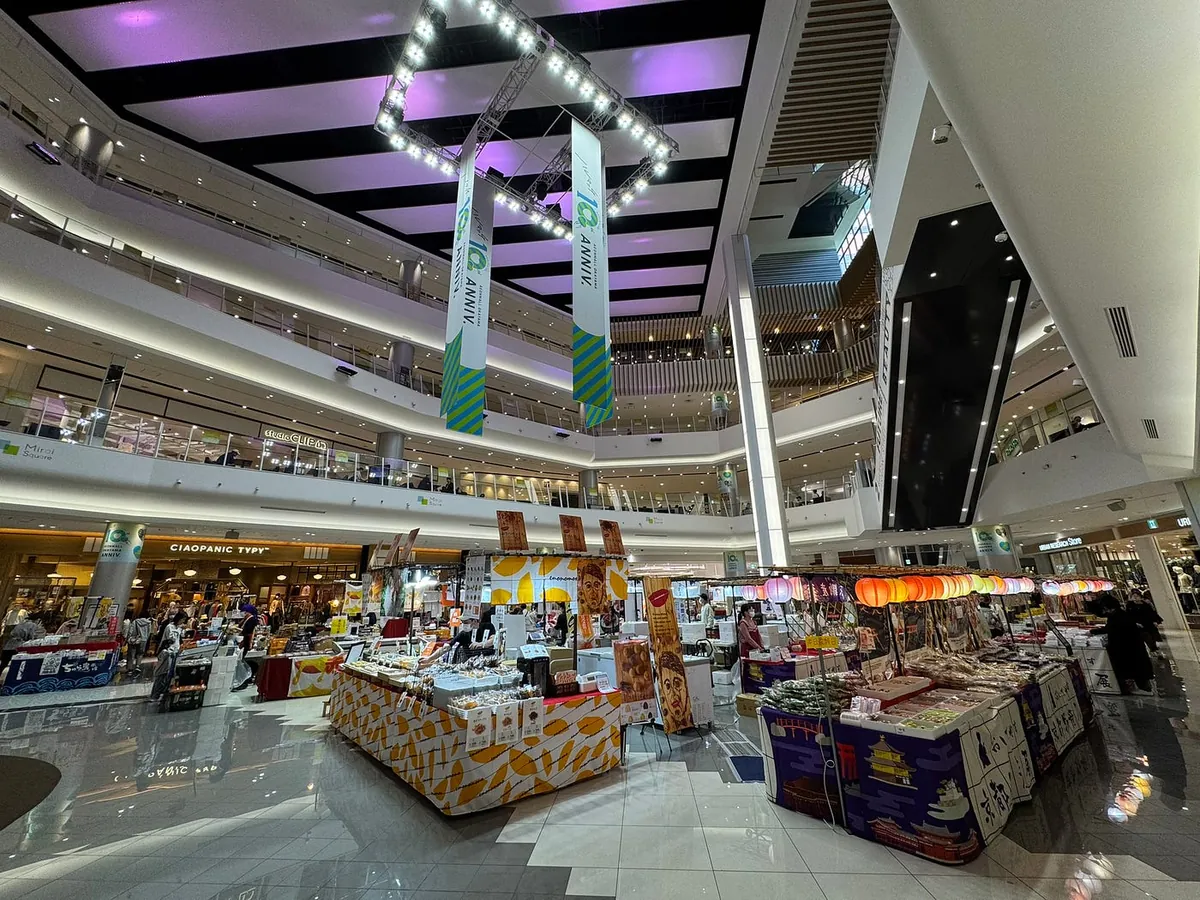
This place is very large and great for shopping, with almost all brands available.
There are also places to eat and buy souvenirs (B1-B2).
Kept looking for the gacha, but couldn’t find the train button gacha I wanted, so I gave up… It’s probably no longer available.
There are also a few shops selling Jiikawa.
~=11:00 Getting ready for lunch
Not very hungry, but still need to eat to prepare for the afternoon flight since Tigerair does not provide meals. ⚠️⚠️⚠️
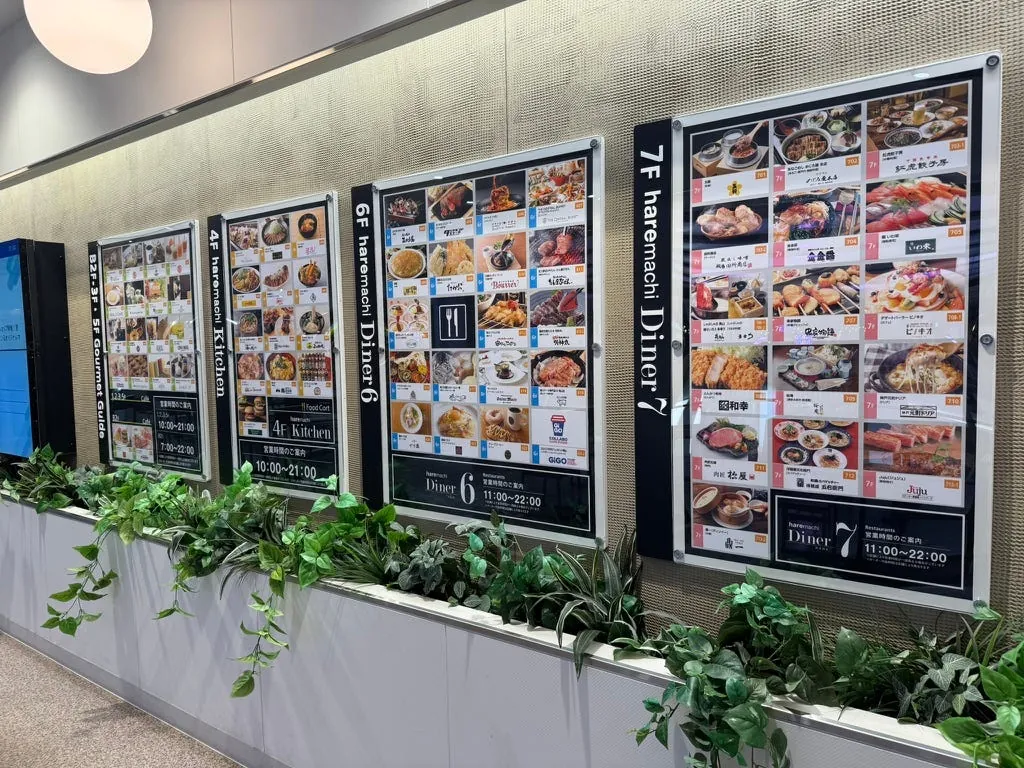
There are many dining options upstairs.

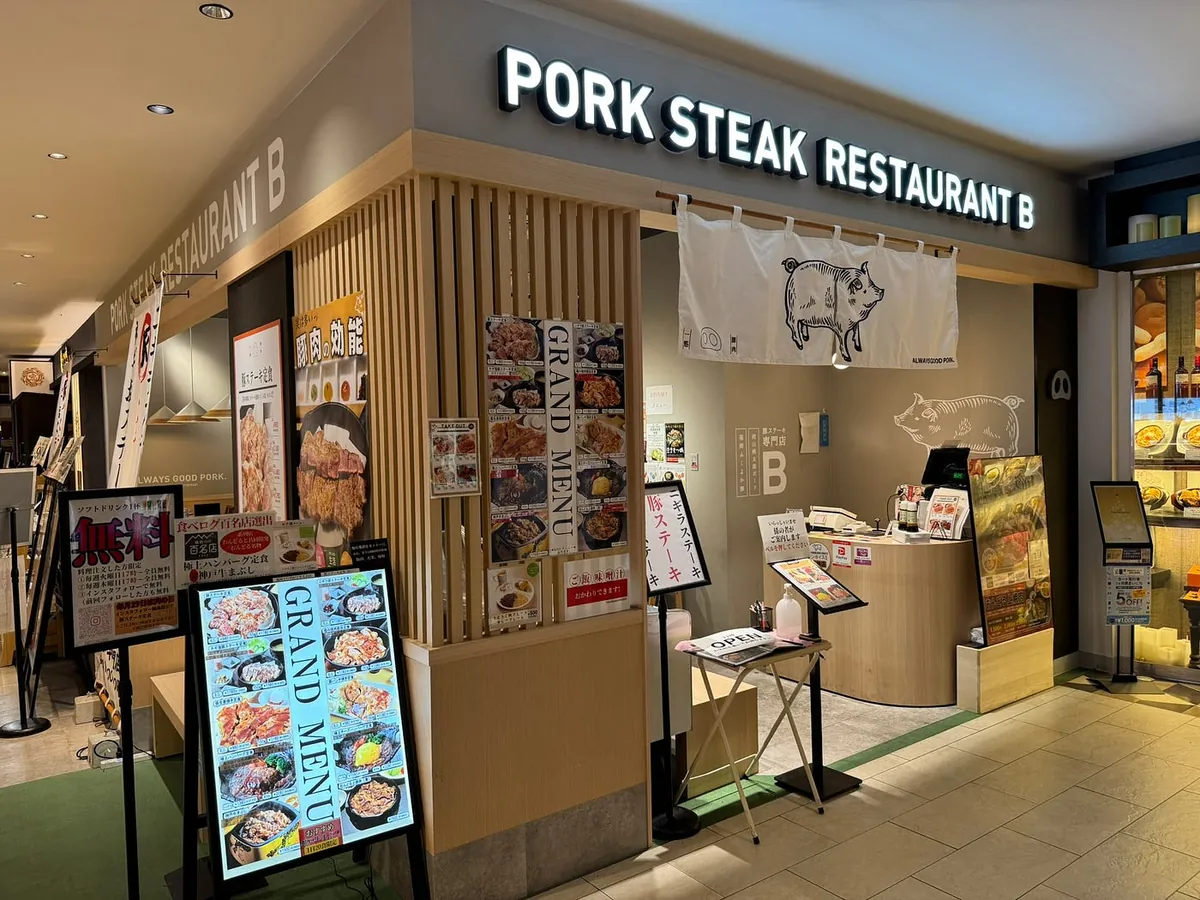
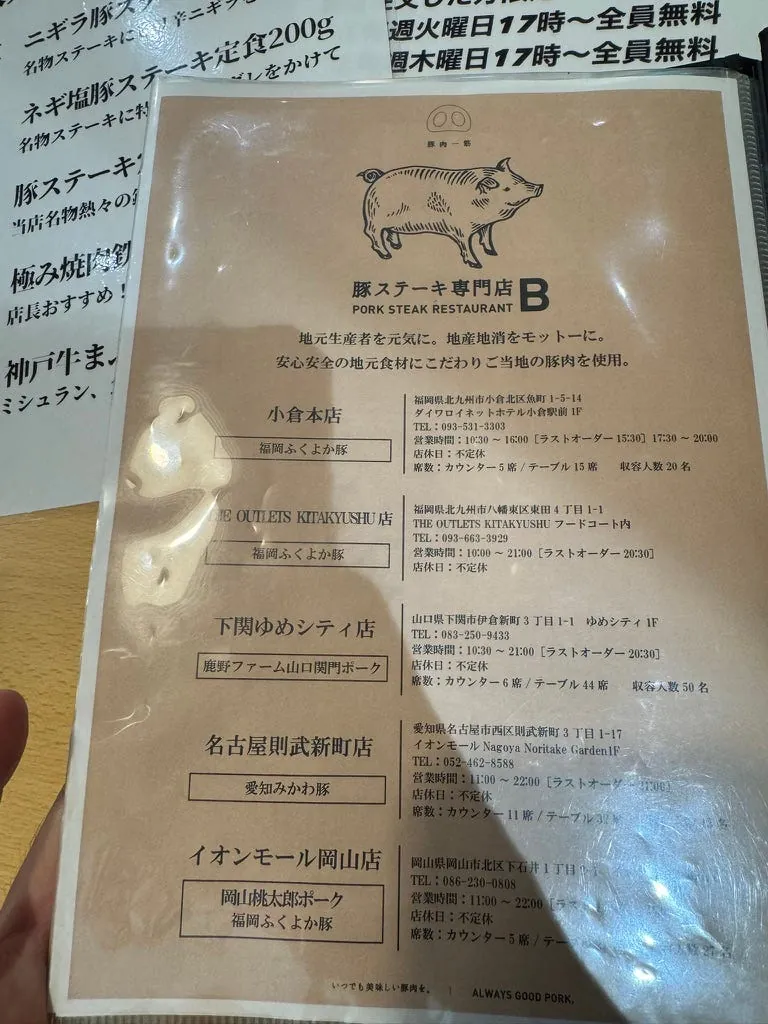
Pork Steak Specialty Restaurant B Okayama Branch
Chose a restaurant specializing in teppan pork cutlet.
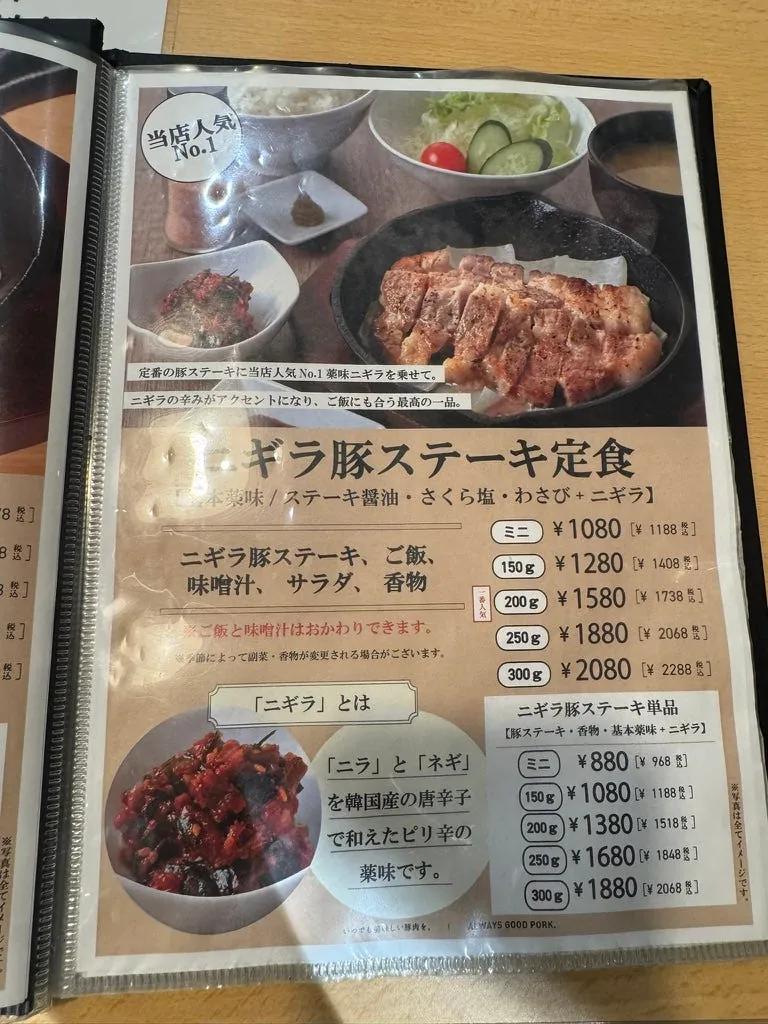
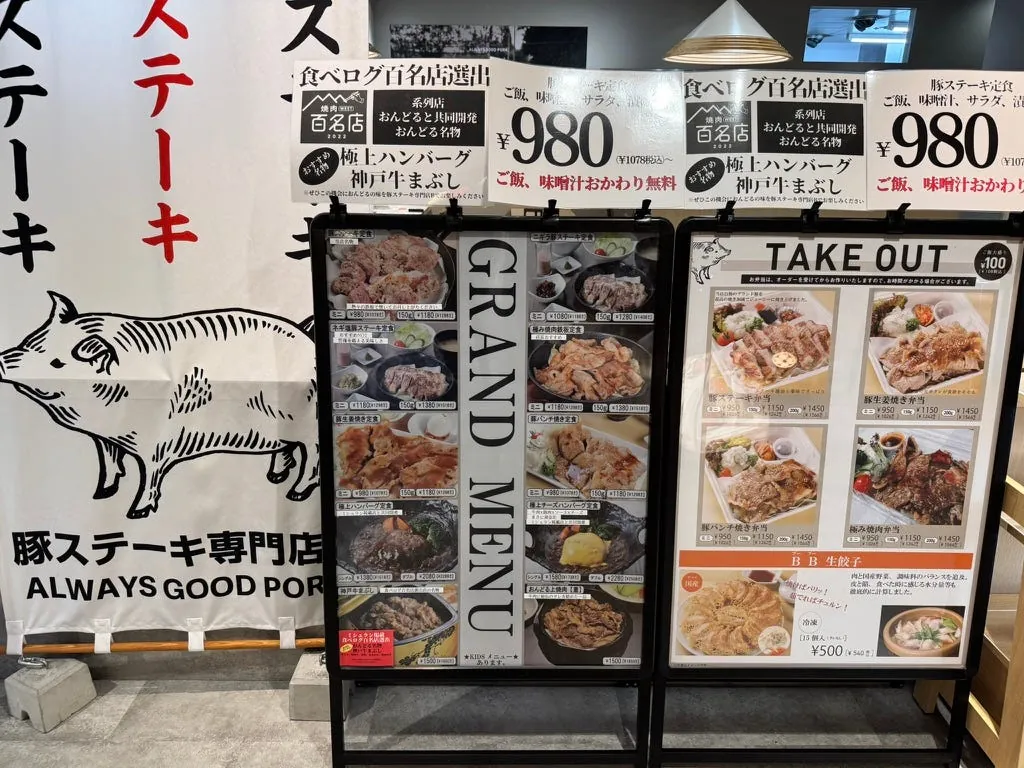
I ordered a 200g teppan pork cutlet set meal and a draft beer. The total came to 2,178 yen.
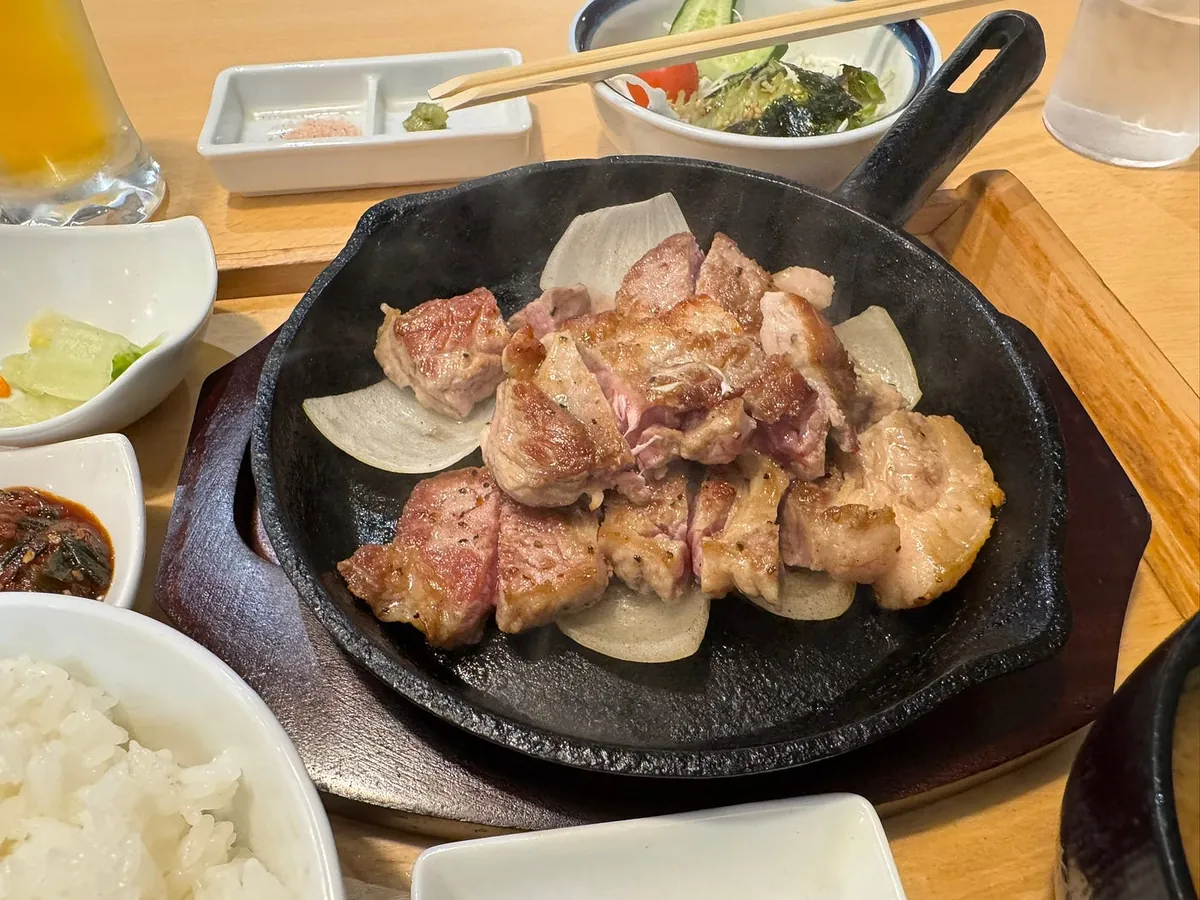
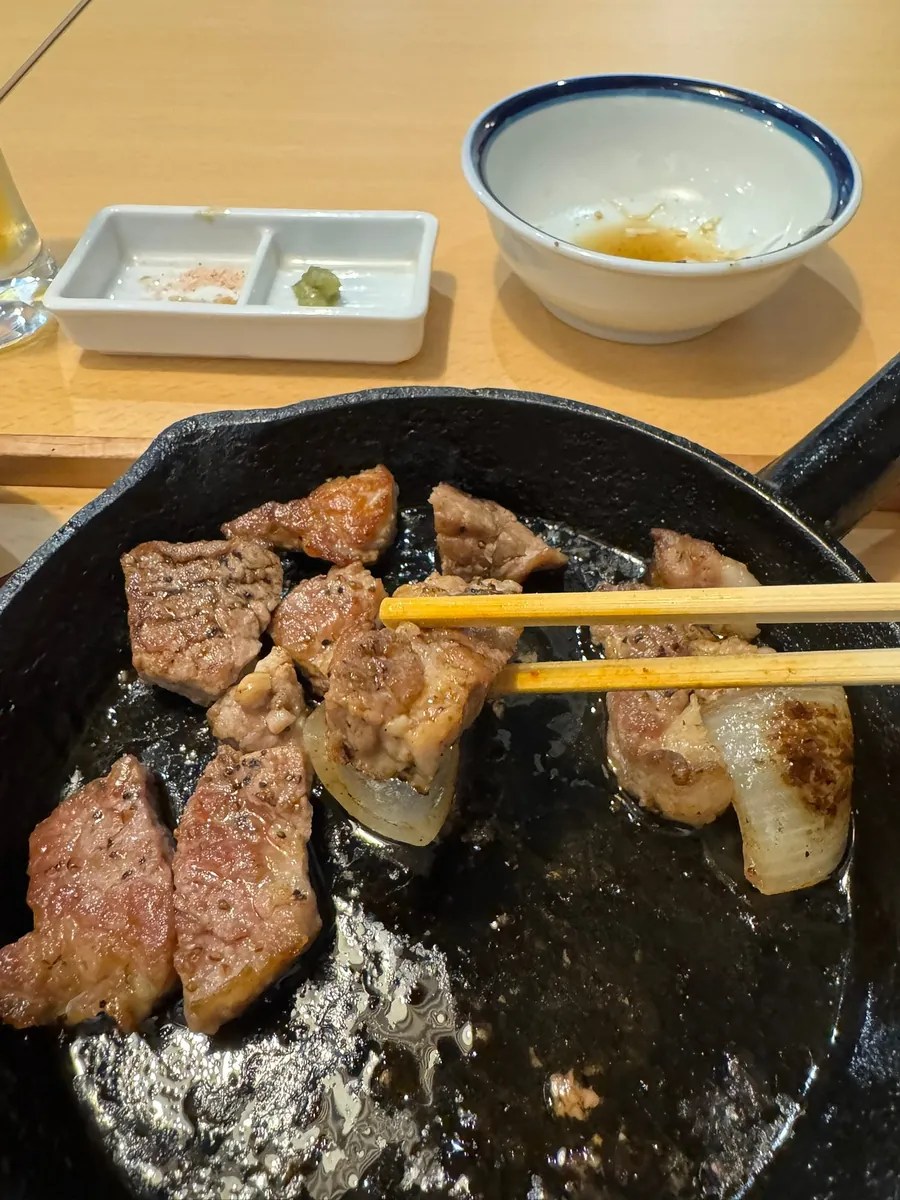
Surprisingly, the pork cutlet was served medium rare, about 70% cooked. After checking reviews and descriptions, it seems this is their specialty. However, I still used the hot iron plate to cook the meat pieces that could be cooked further.
It really tastes great—very juicy, full of meaty flavor, and easy to chew; personally, I think it’s just as good as yesterday’s Kobe beef (I might just not be lucky enough).
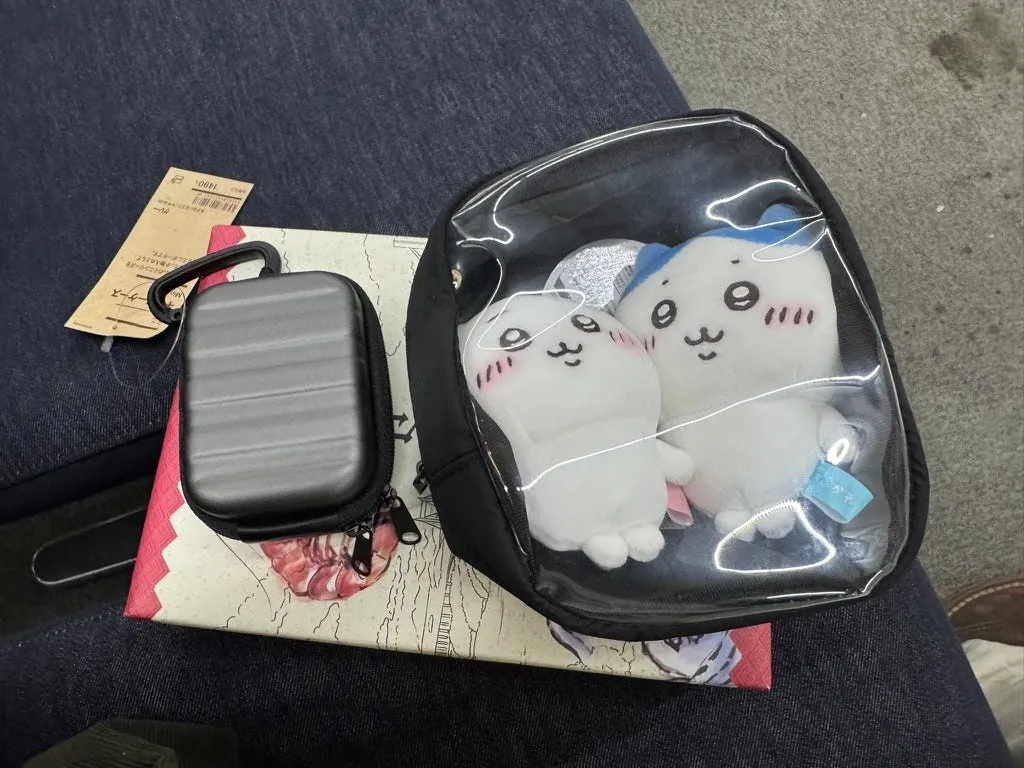
Small useless suitcase (about the same size as AirPods Pro) and a kid’s backpack
Finally, I bought some items at Muji on the first floor and left around 12:15.
~=12:30 Return to Okayama Station
Preparing to take the 13:00 shuttle to Okayama Airport.
One last look at Okayama.
~=13:00 Take the shuttle bus to Okayama Airport
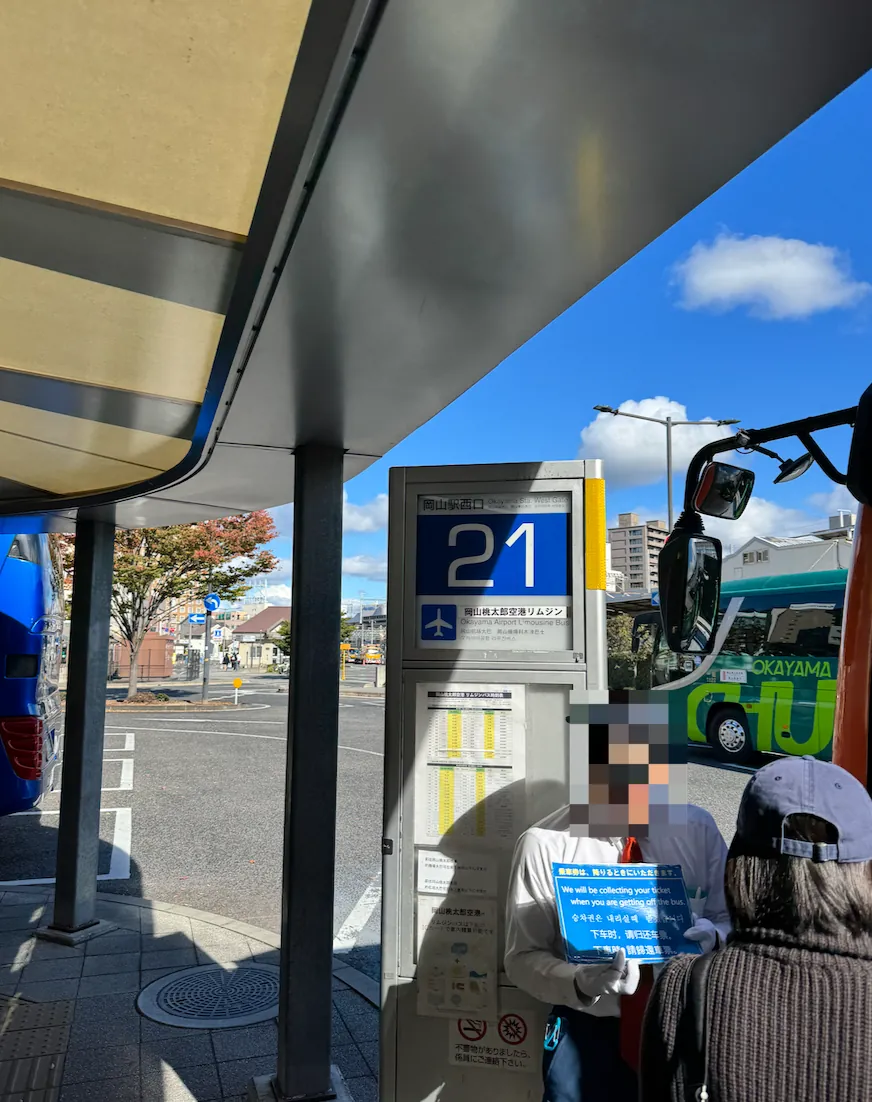
Line up here at Platform 21 to wait for the bus. Don’t worry about missing it; as long as you queue before 13:00, you will be taken to the airport (additional shuttle buses will be added if it’s full).
You can directly tap your transportation card (Suica) when boarding and getting off, or you can go inside the bus shelter to pay by coin and buy a ticket.
The departure was moved up to 12:45 due to full capacity.
~=13:20 Arrive at Okayama Momotaro Airport
The time is still very early. This year, I took the 17:30 flight, while last year I took the 15:25 flight, which was just right. For the 17:30 flight, arriving now means waiting almost 4 hours.
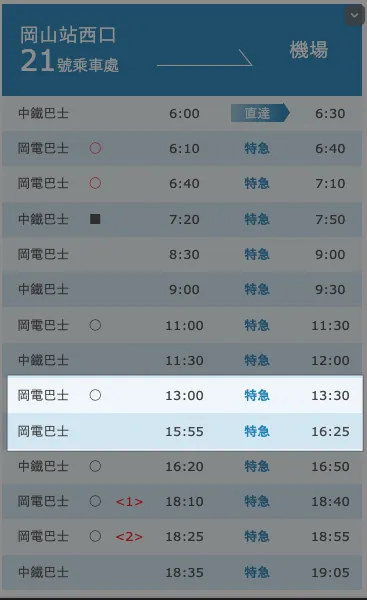
https://www.okayama-airport.org/tw/access/bus
But currently it’s not possible because the next bus is at 15:55, arriving at the airport at 16:25; although the airport is small and there is only one outbound flight at that time, making it relatively quick, traffic jams and other factors make it hard to guarantee arrival by 16:25. For example, when I arrived, I encountered a traffic jam that added almost 30 minutes to the trip.
It depends on whether Okayama Airport will add more shuttle bus services later, or you can go to the Japan Free Travel Discussion Group to find people to share a taxi.
Others shared that a taxi from Okayama Station to the airport costs around 7,000 yen.
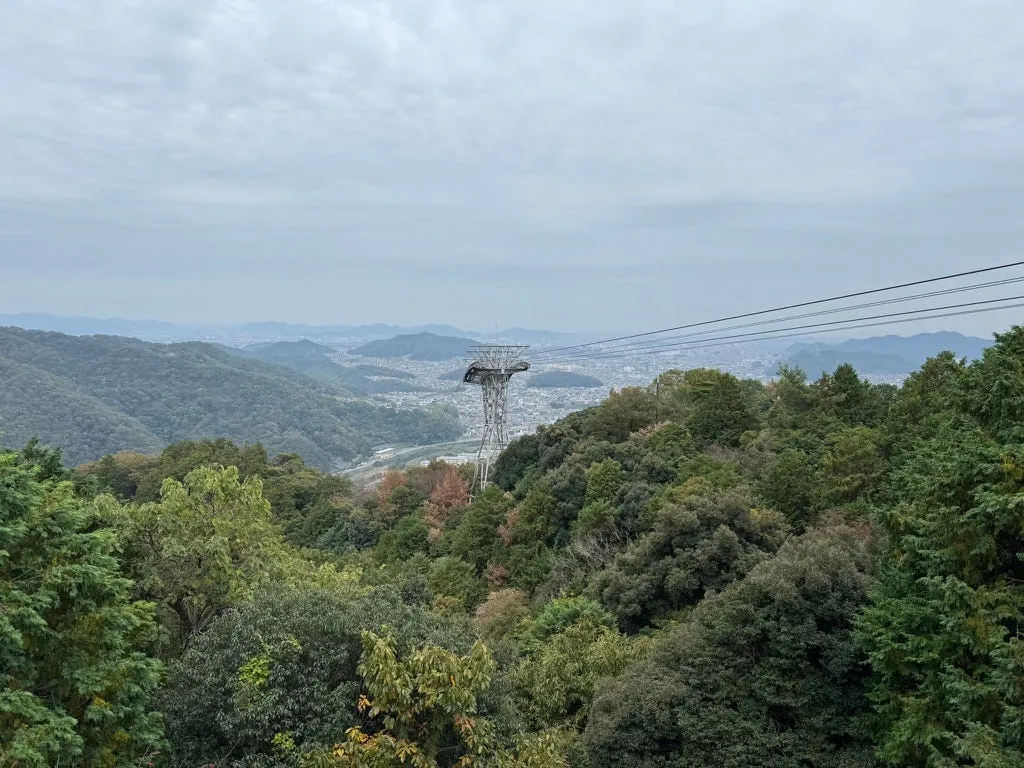
Wandering around near the airport, there is a mini version of Okayama Korakuen outside the airport along with popular autumn maple leaves.
There is also a Momotaro statue outside the station. Additionally, the airport kindly reminds travelers to buy insurance—I almost got hit by a bicycle this time.⚠️
There are quite a few seats available here in the domestic terminal to sit and rest.
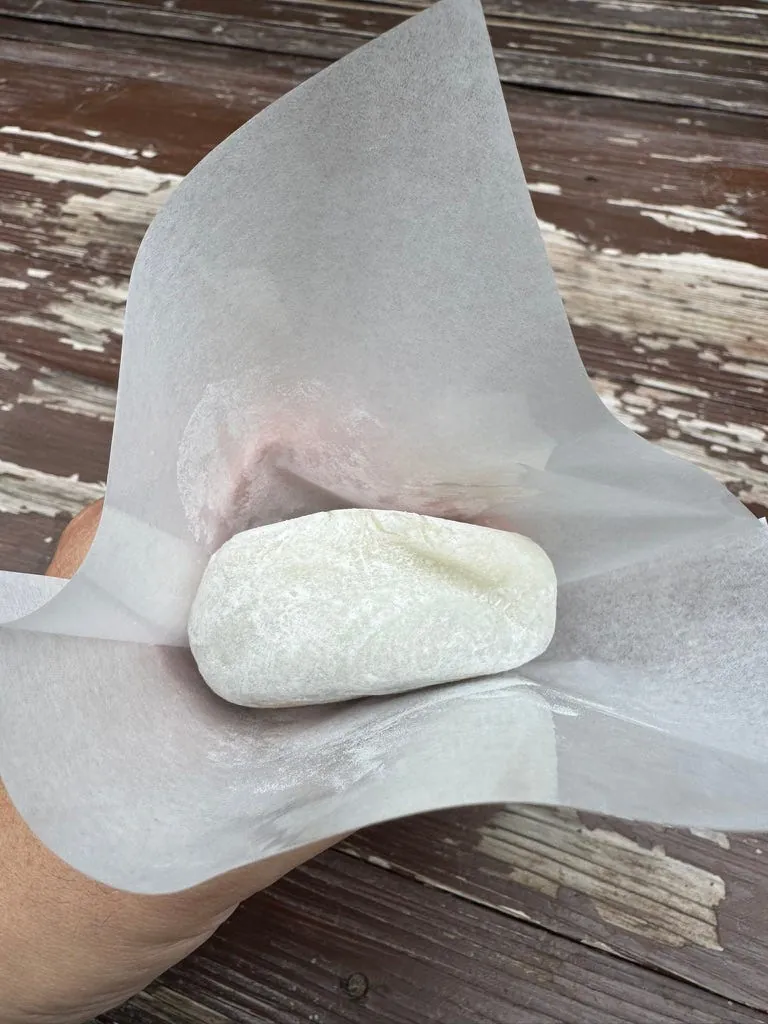
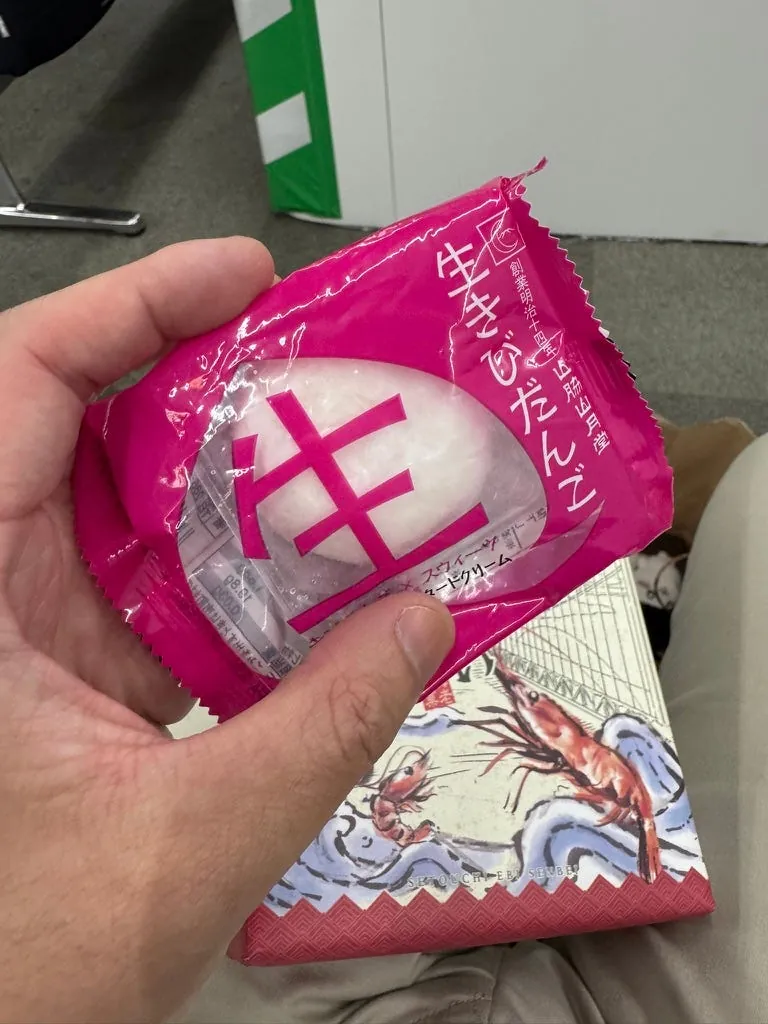
The first floor only has a souvenir shop and nothing else. Just like last year, I bought a peach mochi to eat.

The second floor is under renovation, with only a few shops open. The observation deck that was accessible last year (last year’s visit) seems to be closed; however, there is still at least one souvenir shop and several food outlets.
~=15:00 Start check-in process
Momotaro Airport is very small, and the check-in and baggage drop-off process is different from other airports.
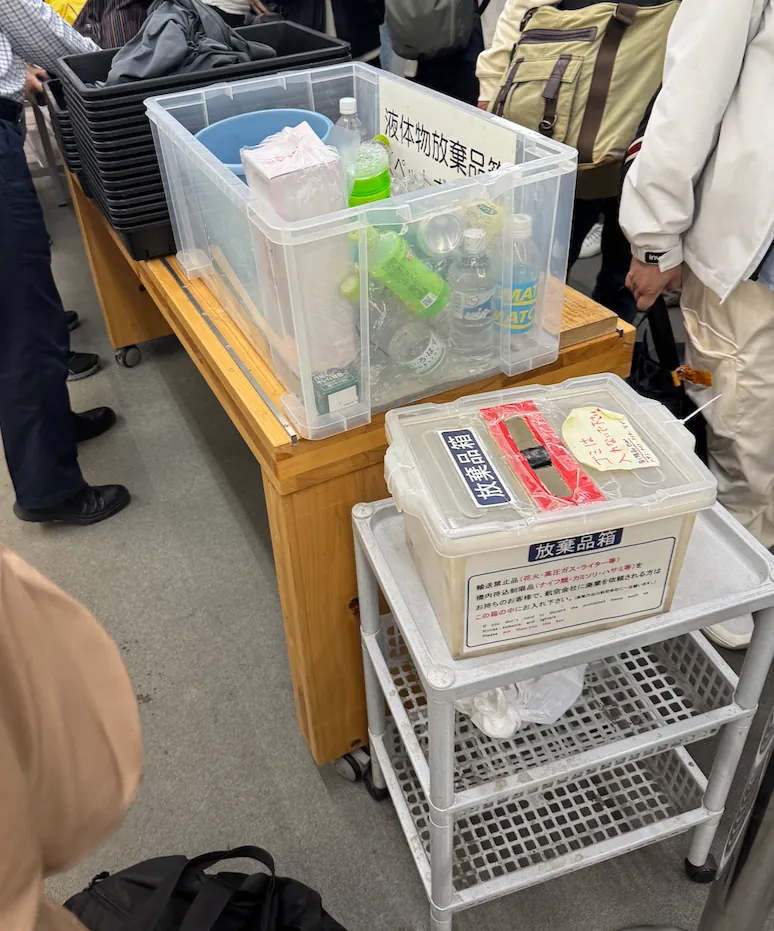
This is the unified queue. Checked luggage goes through X-ray and receives a sealing sticker; carry-on luggage does not (security check before departure will scan other items). Even without checked luggage, you must line up. When it’s your turn, tell the staff you have no checked luggage and proceed directly. If you open your suitcase after the sticker is applied, it must be rescanned and re-stickered. ⚠️⚠️⚠️
The airport staff can speak Chinese… very impressive
~=15:15 Check-in and baggage drop completed
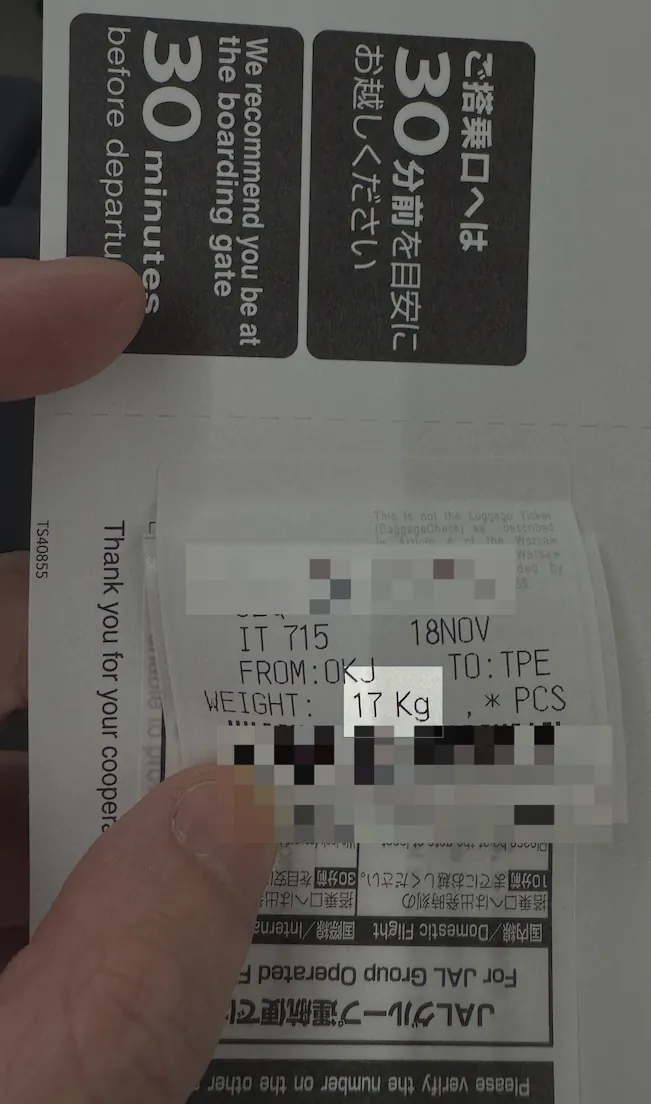
This time I didn’t buy much or any alcohol, yet it still reached 17 kg… but I hardly had any carry-on luggage; everything was packed inside.
~=16:20 Start security check and departure procedures
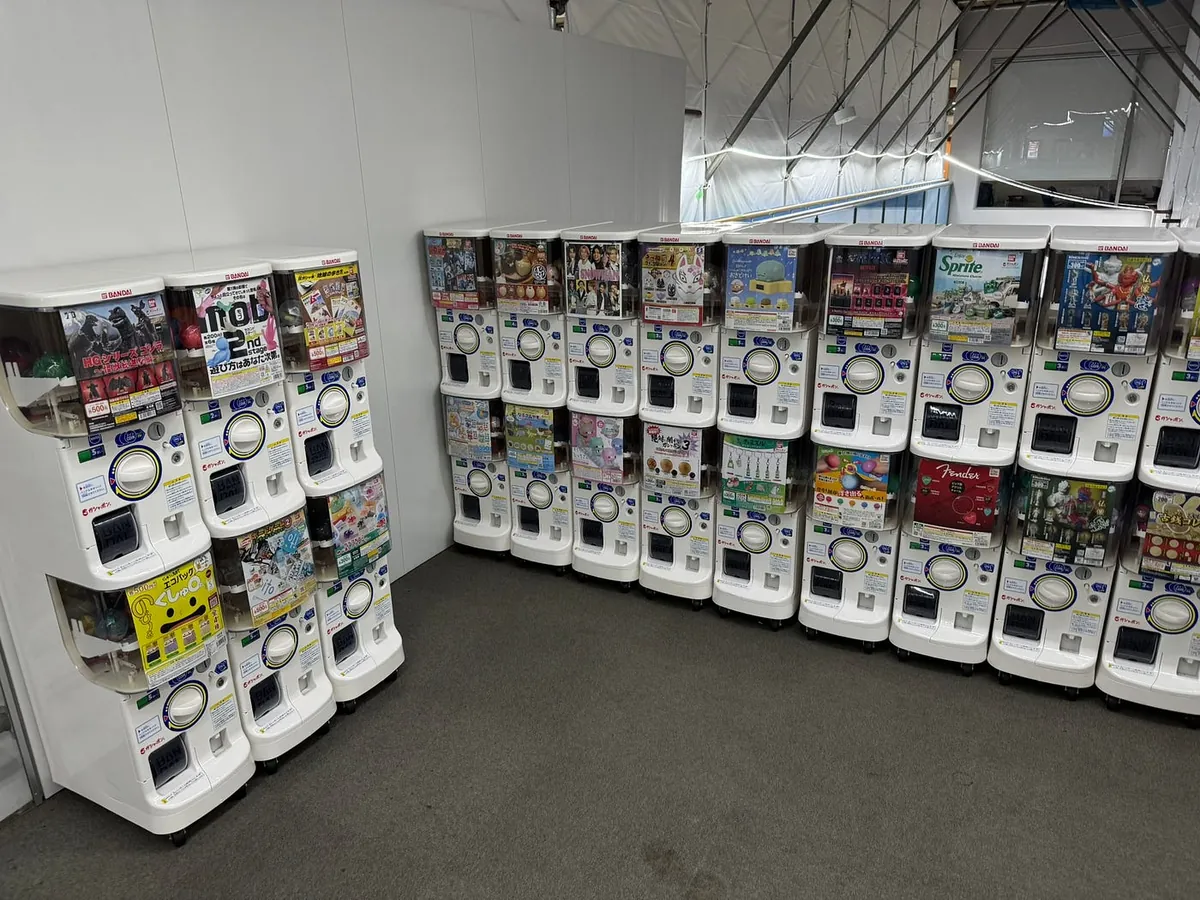
The airport is under renovation… but there are still capsule toys.
Although there was only one flight, the airport is small, has few staff, only one line, and strict checks, so security screening and departure took about 20–30 minutes.
The place for pouring water and disposing of items is just a box.
If you leave Okayama at 15:55 and take the shuttle arriving at the airport at 16:25, you can basically check in and drop off your luggage immediately since the counters are usually empty by then, and then head straight to the departure security check on time.
We are the only flight on this route, so the plane will likely take off only after all checked-in passengers complete security. Arriving early at the airport doesn’t mean faster security if you queue late.
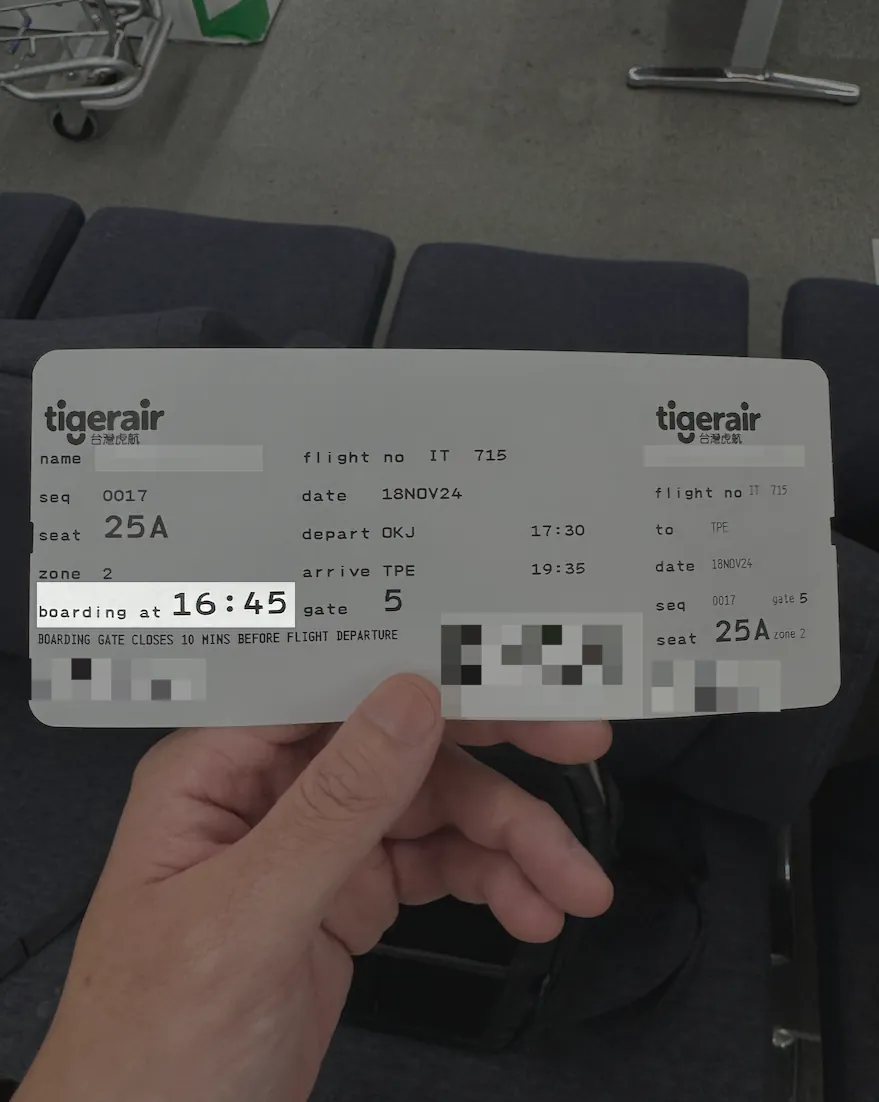
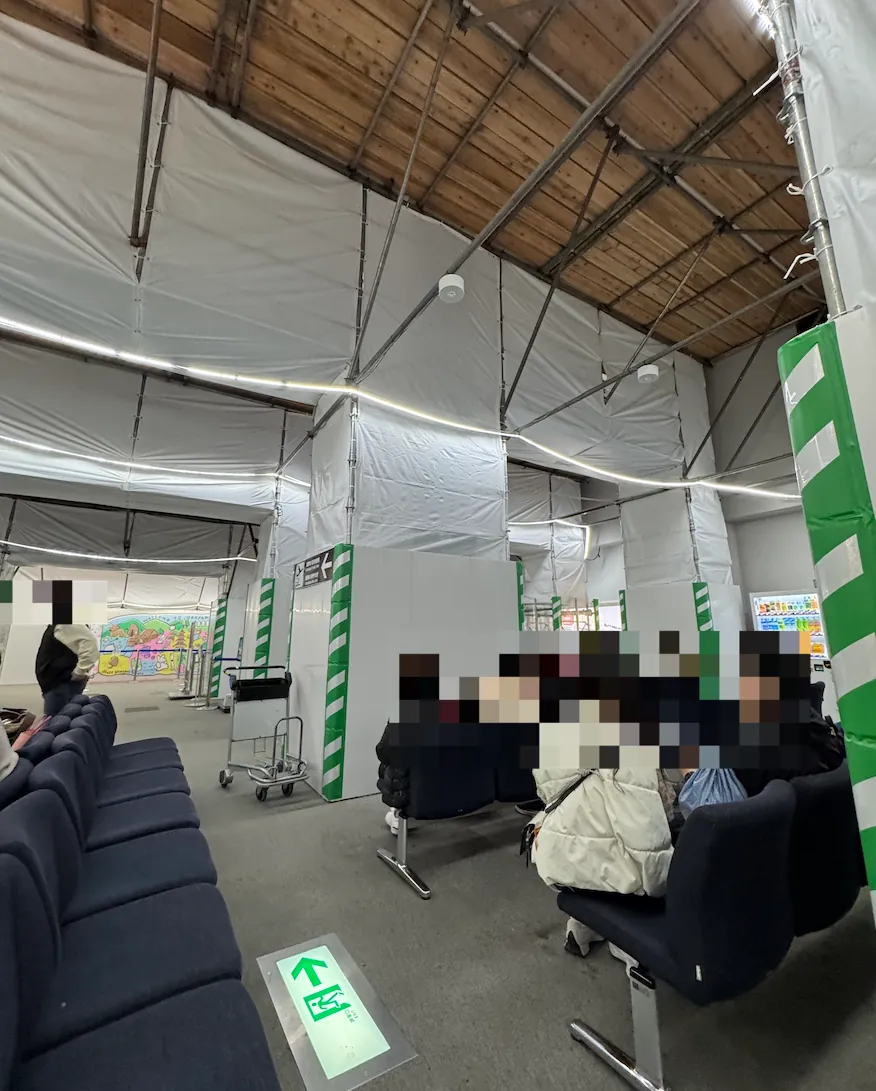
~=16:42 Begin waiting at the gate
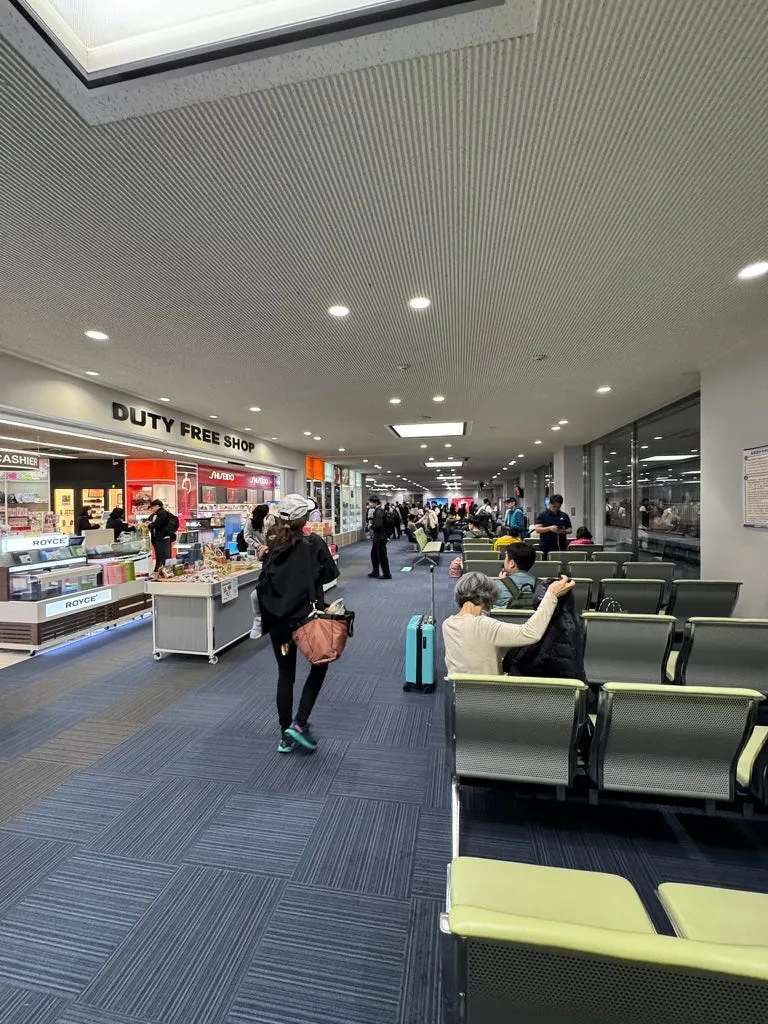
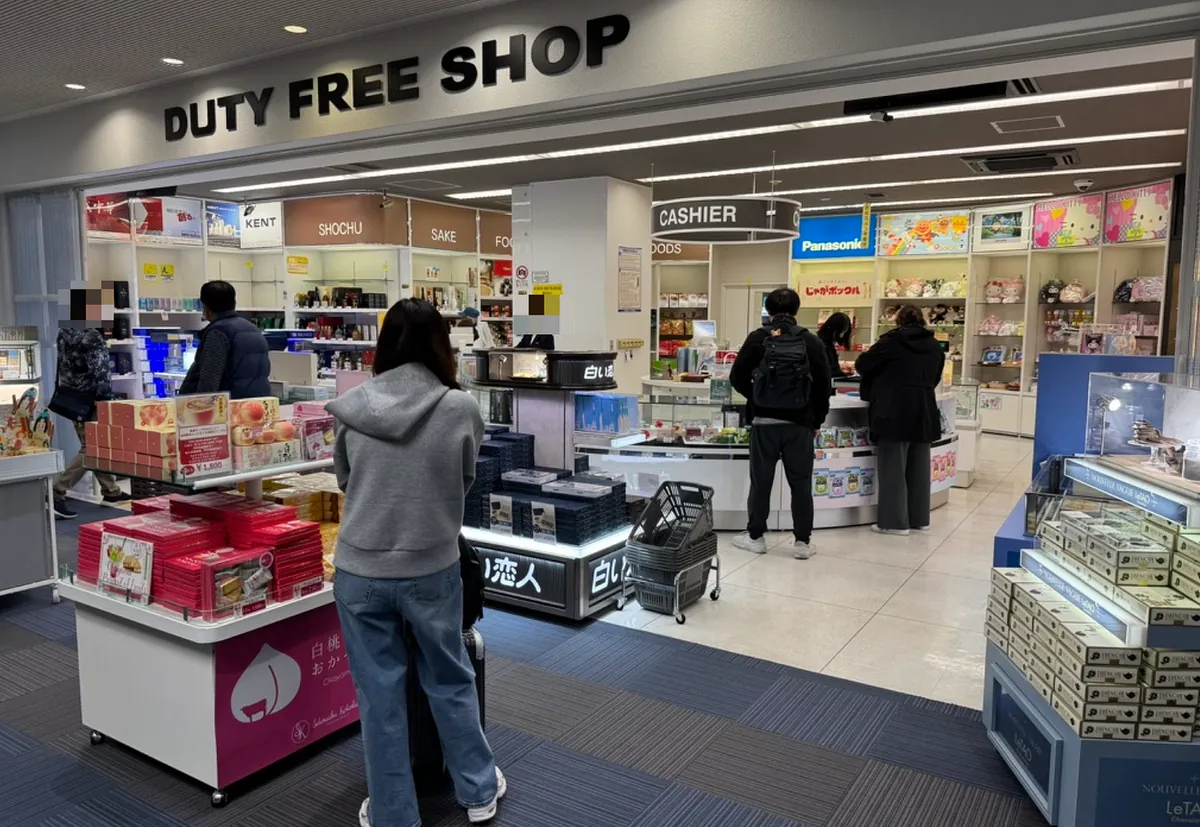
The waiting lounge is small, with only one duty-free shop that sells some souvenirs and a limited selection of tobacco and alcohol.
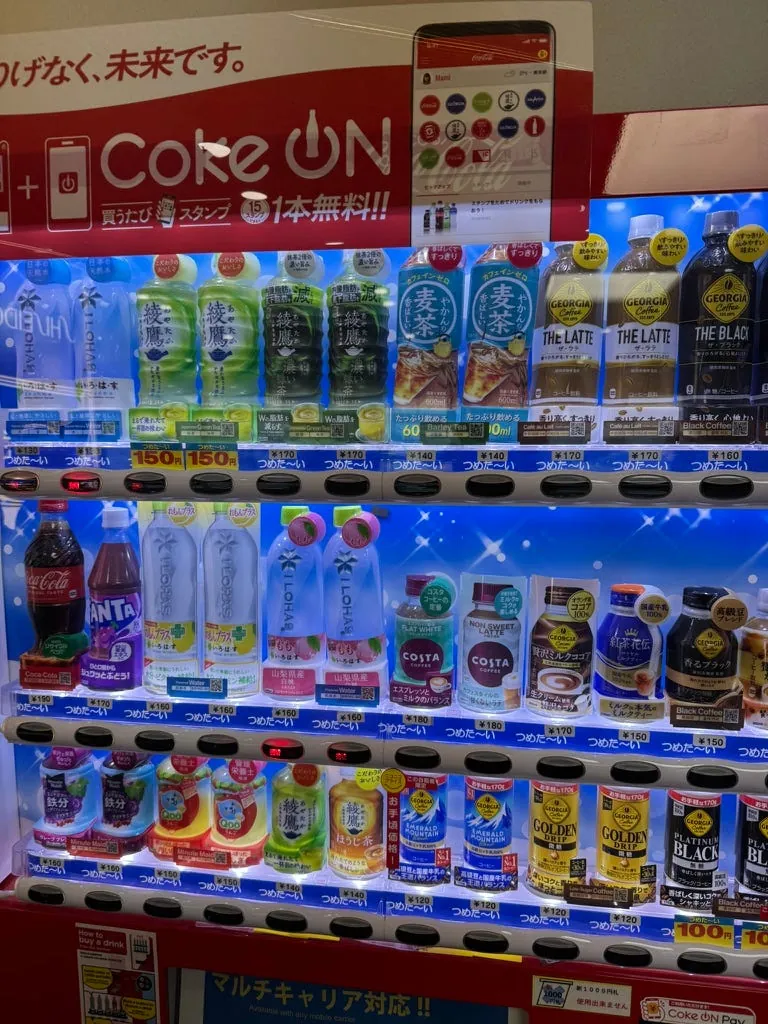
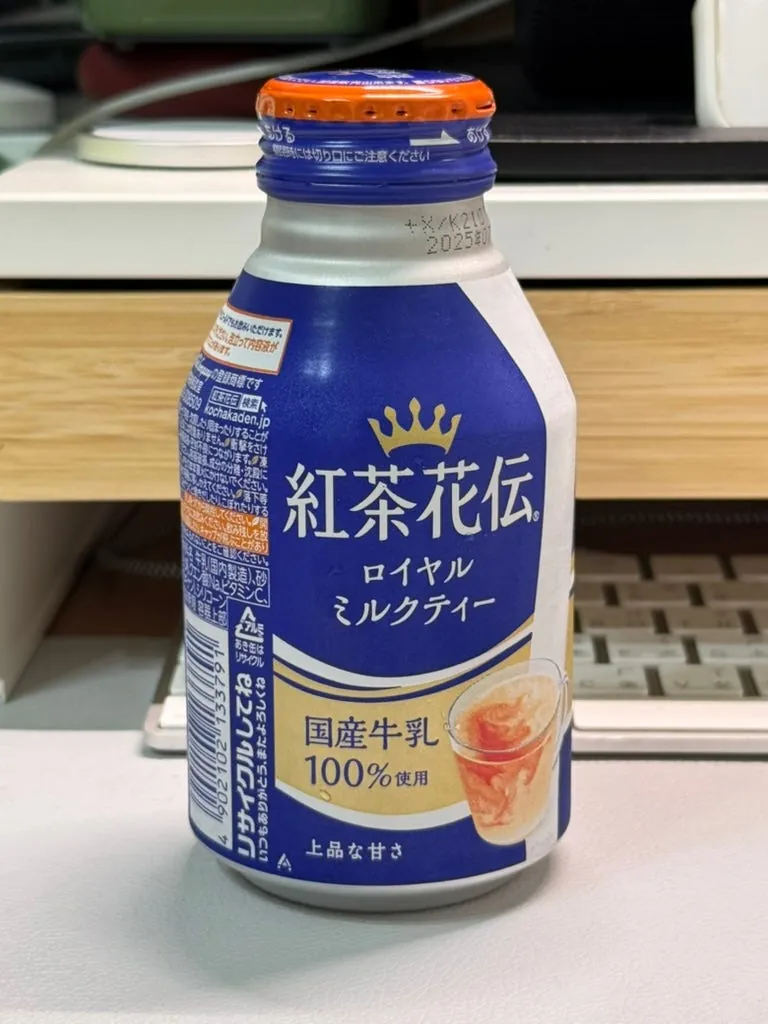
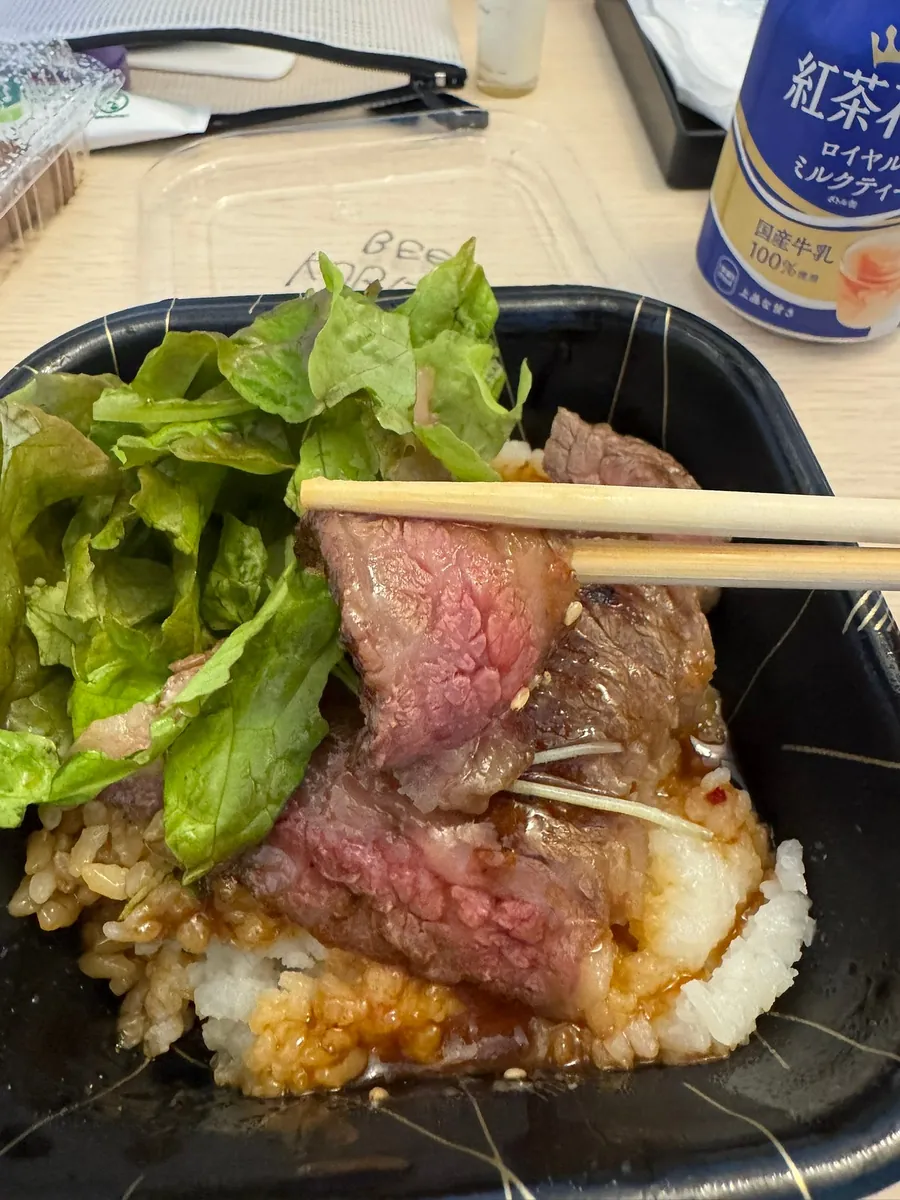
I wanted to buy a few cans of peach water to bring back to Taiwan, but they were all sold out. So I got a can of Red Tea Flower instead. After trying it, I found it very tasty and not too sweet. I regret not buying more.
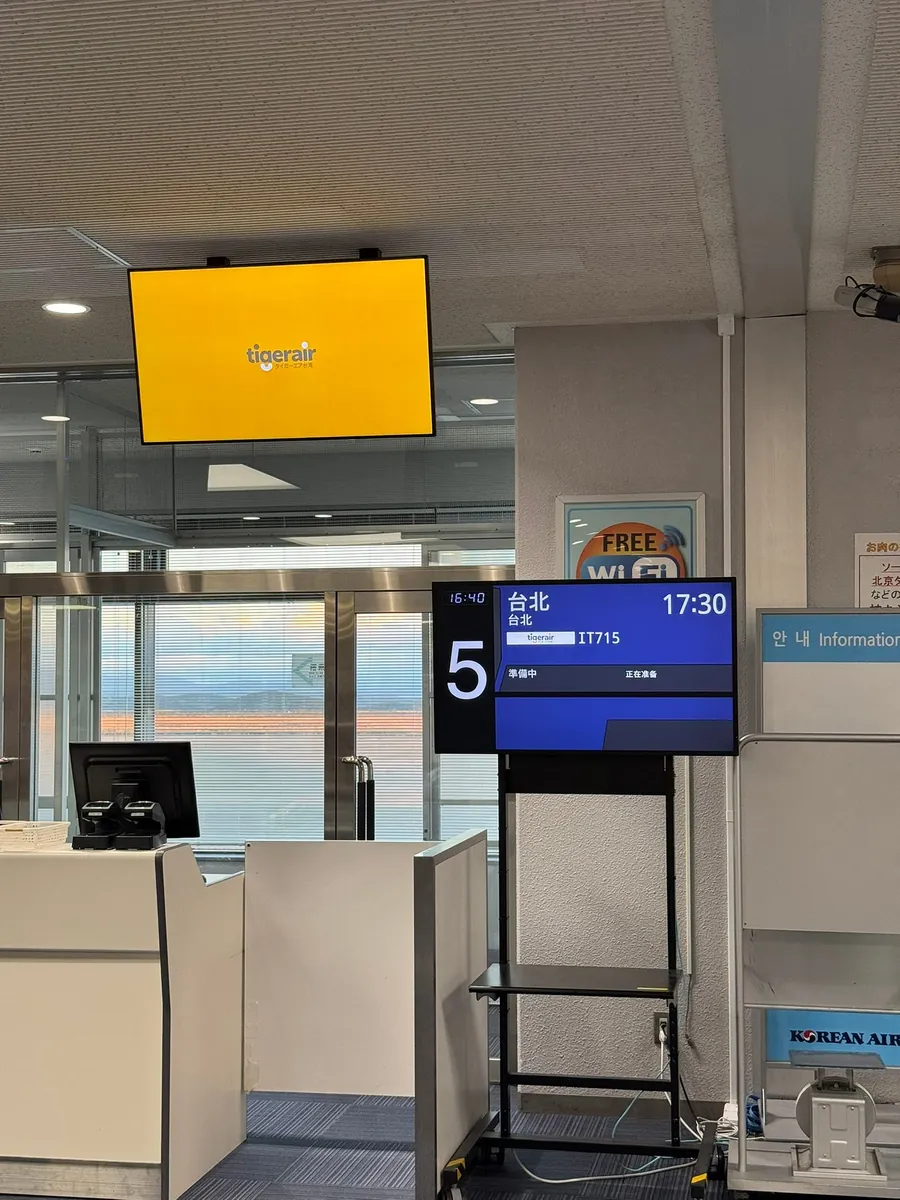
~=18:10 Departure (40 minutes delay)
Goodbye Okayama, goodbye Japan.
On the plane, the person sitting next to me was a YouTuber, Chill with us, a very nice guy. He was going to Shikoku this time. We exchanged some sightseeing recommendations, and now I also want to visit Shikoku.
19:45 Arrive in Taiwan (10-minute delay)
Fortunately, it only affected 10 minutes. I quickly picked up my luggage and rushed to the bus stop.
20:20 Take the Dayou Bus to Taipei
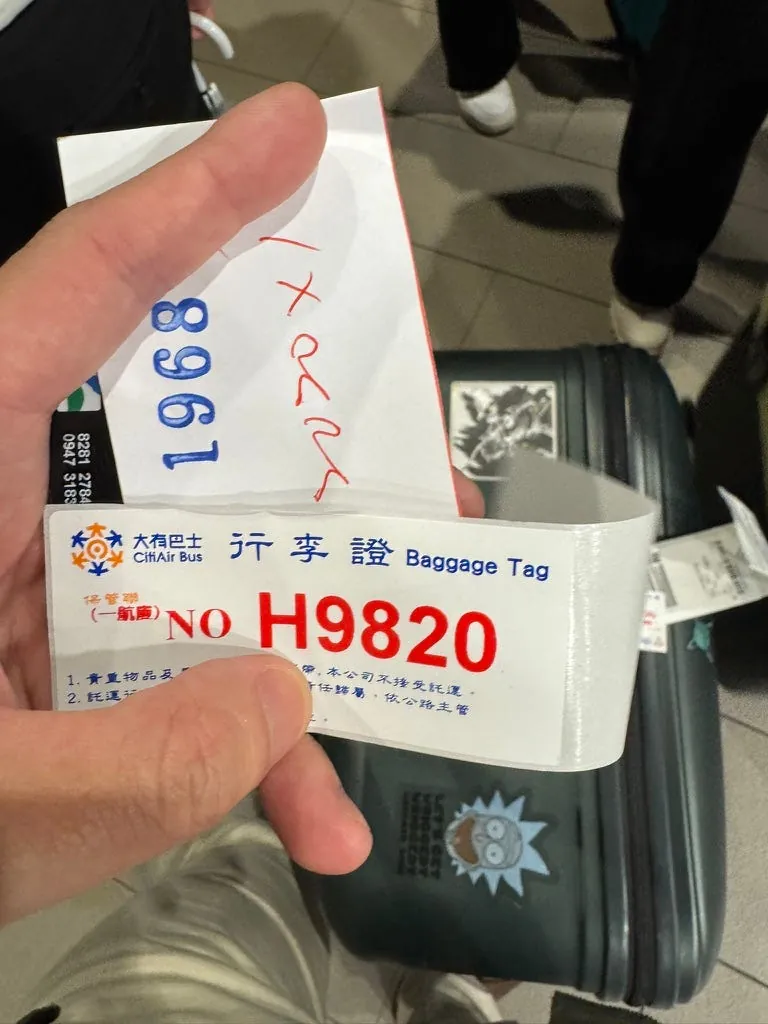
Depending on the location, you can take different buses home. Previously, I took the Kuo-Kuang Bus directly back to Taipei. This time, I will take the Dayou Bus 11 platform back to New Taipei.
Coincidentally, my EasyCard balance was insufficient, so I rushed to the counter to buy a ticket with cash (fortunately, I had brought Taiwanese dollars the day before), and finally caught the bus.
End of the trip.
Summary of Experience
This trip was too tight, and many places were just briefly visited. Especially in the first three days, due to long travel distances and short stays, I couldn’t fully enjoy the beautiful scenery of Izumo and Matsue in Shimane. If I have the chance, I would like to go again to see the sunset, the autumn leaves, and the Kamiari Festival.
If you want to learn about history before going to Izumo, you can refer to Lan Papa’s video:
-
Why did a rabbit provoke a group of sharks? After two near-death experiences, he ended up marrying the daughter of his ancestor! The Myth of Okuninushi \| Okuninushi \| White Rabbit of Inaba \| Land of Roots \| Japanese Mythology \| Storytelling by Papa Lan Includes stories about Amaterasu, Okuninushi (Izumo Shrine), and the White Rabbit of Inaba.
Sanyo Okayama Hiroshima Area Travelogue
You can also refer to the Sanyo area travelogue. If you have time, you can explore both Sanyo and Sanin regions together.
KKday Promotion 🛒
-
Japan JR PASS \| Tottori & Matsue Area Pass \| eMCO e-ticket (Consider this if you only visit Matsue and Tottori-Matsue areas)
-
Kansai & San’in Area Rail Pass JRPass (The best choice for arriving and departing from Okayama Airport)
-
Japan eSIM Card|Daily High-Speed, Total Data, Unlimited Data Plans
-
Japan JR PASS|Sanyo & Sanin Area Rail Pass|eMCO e-Ticket (Explore the entire Sanyo and Sanin regions in one go)
-
Tottori Sand Dunes \| Japan’s Only Thrilling Sandboarding Experience
-
Tour Tottori Sand Dunes and the Famous Izumo Taisha 2-Day Bus Trip (From Osaka)
-
New Year Visit! 3-Hour Stop at Izumo Taisha Shrine 【Departing from Hiroshima】
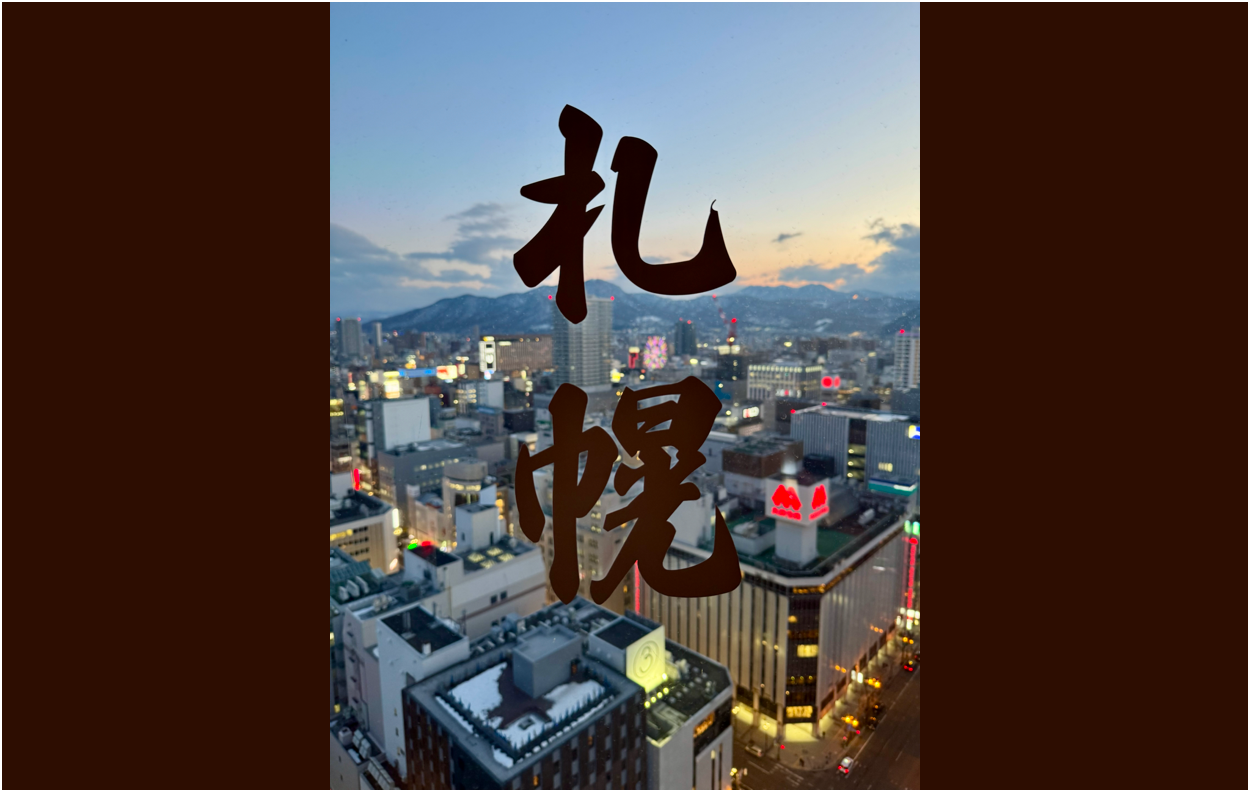
Comments