Google Apps Script|快速串接 Firebase App Distribution API 教学与进阶设定
解决 Google Apps Script 串接 Firebase App Distribution API 权限与 GCP 专案设定问题,掌握 OAuthScopes、进阶服务启用步骤,10 行程式码轻松完成下载连结整合,提升 CI/CD 自动化效率。
Click here to view the English version of this article.
點擊這裡查看本文章正體中文版本。
基于 SEO 考量,本文标题与描述经 AI 调整,原始版本请参考内文。
文章目录
Google Apps Script x Google APIs 快速串接整合方式
以 Google Apps Script x Firebase App Distribution API 串接为例
背景
之前写了之前写了好几篇关于使用 Google Apps Script 的文章,其中「 使用 Google Apps Script 实现每日数据报表 RPA 自动化 」、「 简单 3 步骤 — 打造免费 GA4 自动数据通知机器人 」介绍了如何使用 Google Apps Script 串接 Google Analytics 和 Google Sheet, Web App, Slack, Telegram… 快速建置可视化数据中台及通知服务;另外上个月发的文章「 使用 Google Apps Script Web App 表单串接 Github Action CI/CD 工作 」则是直接使用 Google Apps Script Web App 串接 Github API 作为 CI/CD GUI 表单服务;以上要马是直接使用 Google Apps Script 内建的服务进行串接或是直接串接外部服务 (Slack, Github…) 都没碰到需要串接 Google APIs 的场景。
这次在优化 CI/CD GUI 表单时希望打包内测版后能在 Web App 上直接显示 Firebase Distribution 下载连结,这块就只能串接 Google APIs 才能达成。
Google Apps Script x Firebase App Distribution API v1
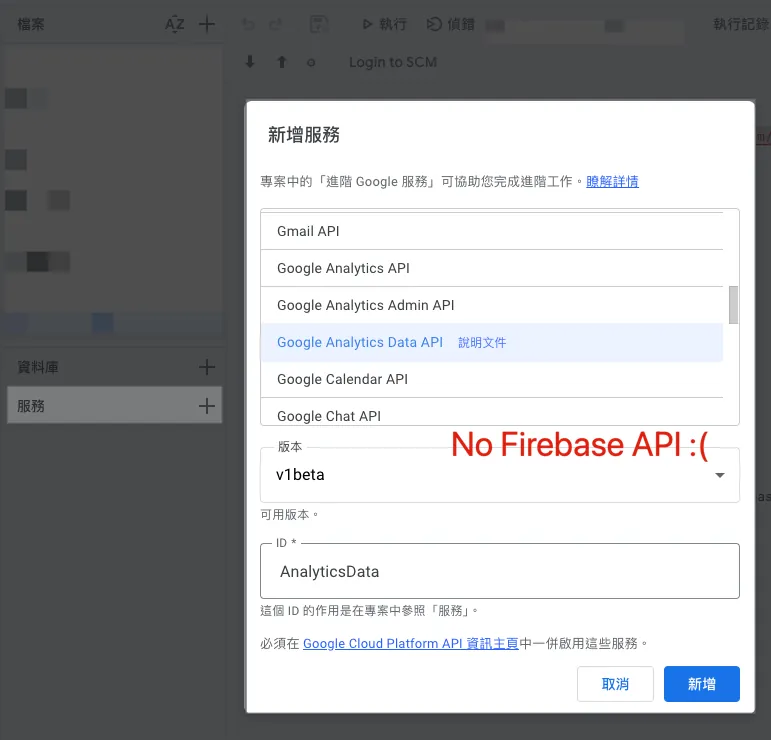
如上图,与以往串接 Google Analytics 有内建服务「AnalyticsData」不同,Firebase App Distribution 并没有提供内建串接服务,所以要用进阶方式进行串接。
本来以为要自行使用 Service Account 完成 Access Token 产生、交换(有点麻烦,可参考我之前的 评价机器人开源专案 ), 但其实不用这么麻烦。
Google Apps Script x Google APIs 进阶服务串接
串接设定
参考 官方文件描述 ,我们需要照以下步骤进行进阶设定:
您必须在指令码专案中 启用进阶服务 。
您必须确认在指令码使用的 Cloud Platform (GCP) 专案 中,已启用对应进阶服务的 API。
如果指令码专案使用的是 2019 年 4 月 8 日当天或之后建立的 预设 GCP 专案 ,您启用进阶服务并储存指令码专案后,API 就会自动启用。如果您尚未同意,系统可能也会要求您同意《 Google Cloud 》和《 Google API 》服务条款。
如果指令码专案使用 标准 GCP 专案 或较旧的预设 GCP 专案,您必须手动在 GCP 专案中 启用进阶服务的对应 API 。您必须具备 GCP 专案的编辑权限,才能进行这项变更。
1. 专案设定 —设定关联的 Google Cloud Platform (GCP) 专案
Google Apps Script x Google APIs 进阶服务串接会需要你建立 GCP 专案并关联到 Google Apps Script,Google APIs 使用权限是依照 GCP 设定。
因此你需要建立一个 GCP 专案(同 Firebase GCP 专案亦可),记下资讯主页的「 专案编号 」并确定这个 GCP 专案有启用你想使用的 Google APIs 及当前登入帐号或欲使用的帐号是有该 GCP 专案、Google APIs 权限。
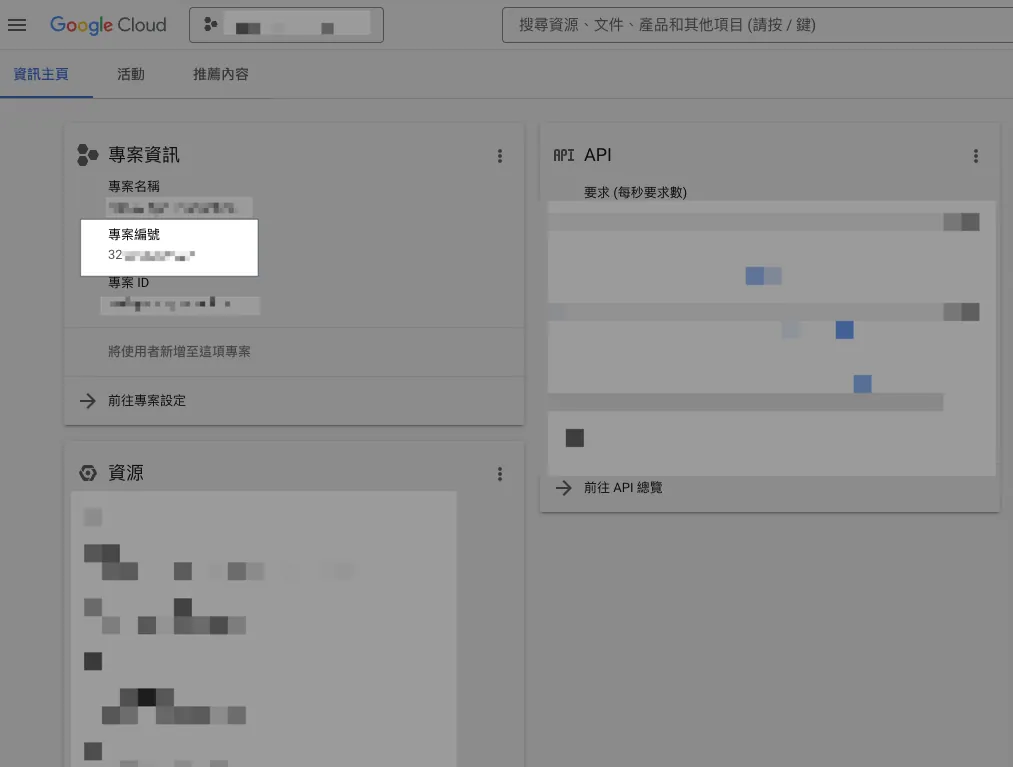
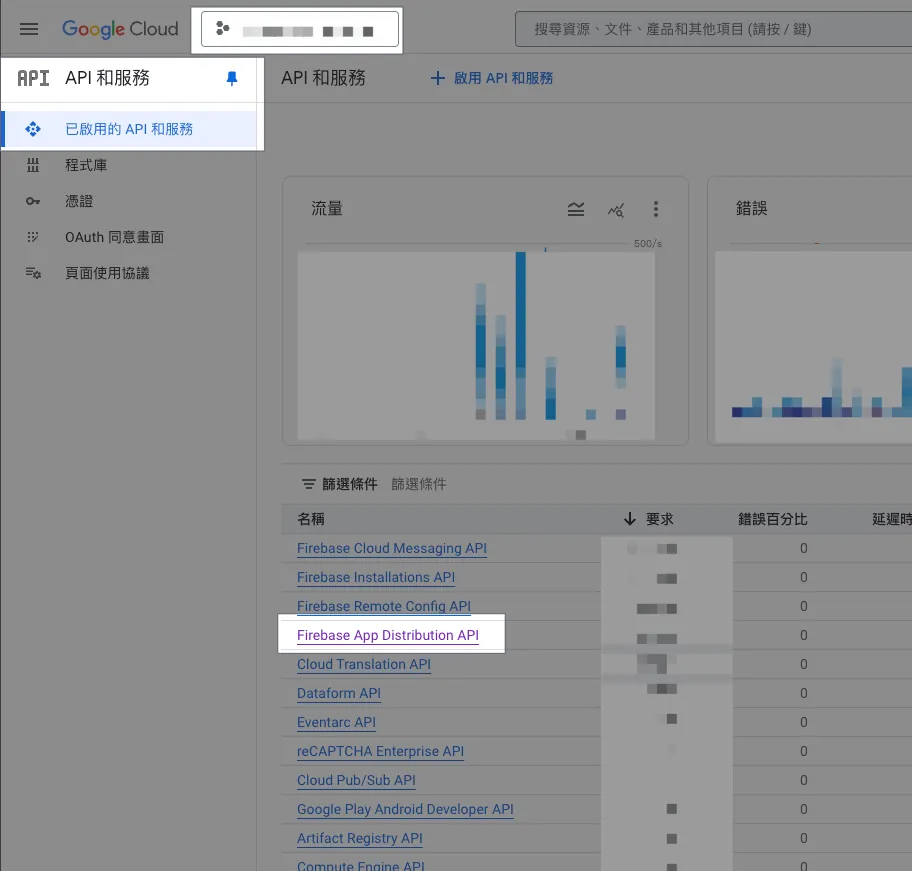
本文以「 Firebase App Distribution API 」为例。
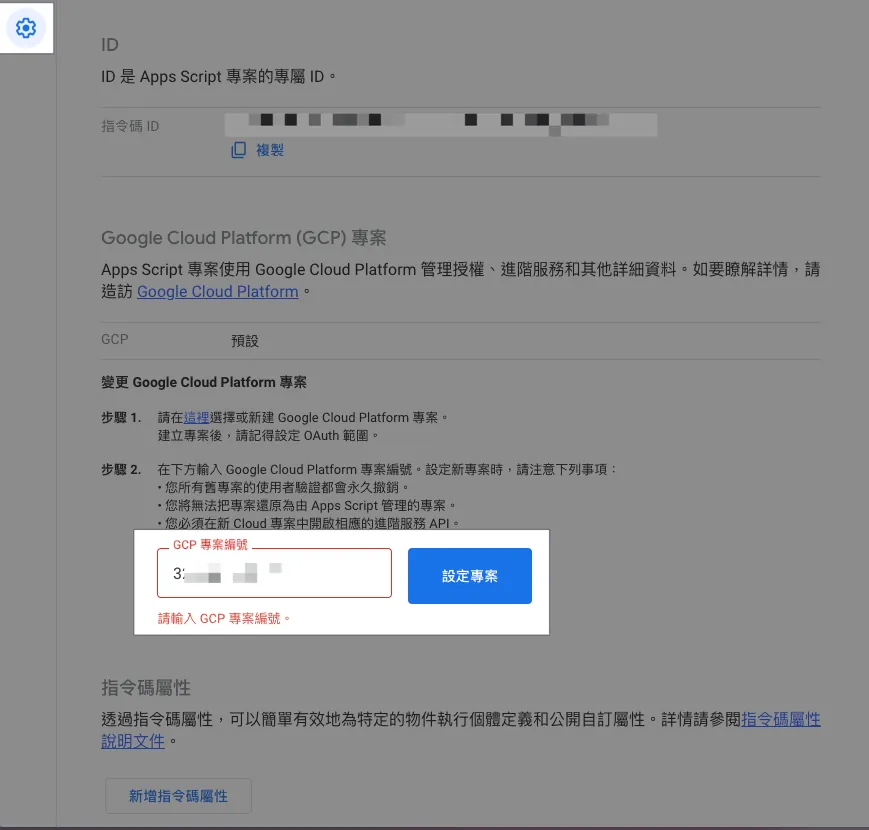
将 专案编号 输入到 Goolge Apps Script 专案设定下方的 Google Cloud Platform 专案编号中,当前登入帐号有该 GCP 专案权限就能自动绑定设定成功。
2. 专案设定 — 启用 在编辑器中显示「appsscript.json」资讯清单档案
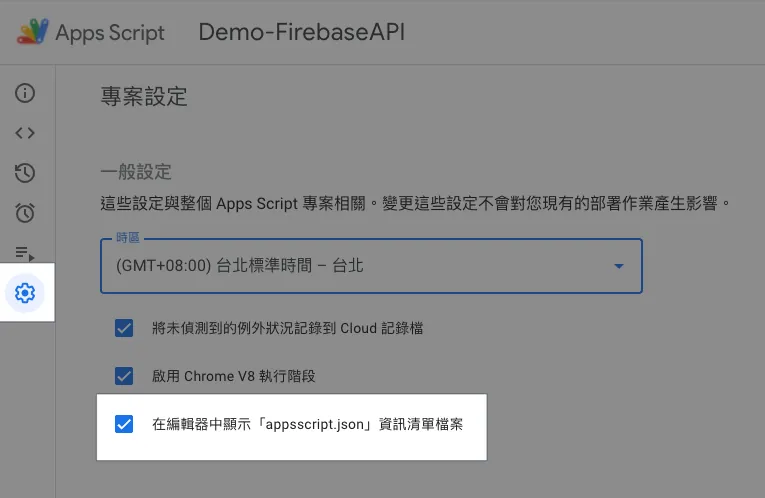
启用后回到编辑器,档案列表就会出现「 appsscript.json 」设定档:
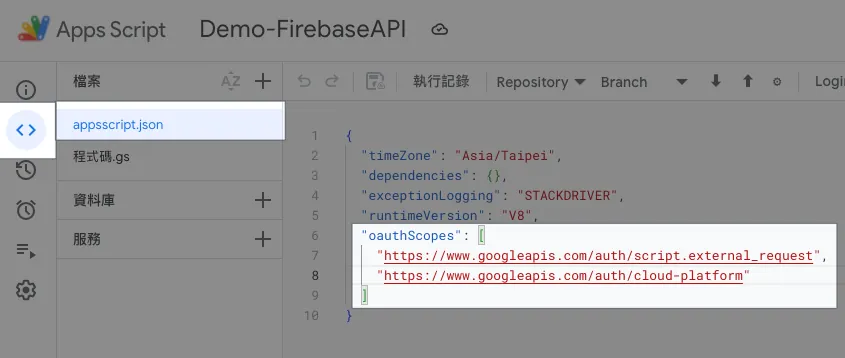
确保 oauthScopes 中包含以下两个描述设定:
1
2
3
4
  "oauthScopes": [
    "https://www.googleapis.com/auth/script.external_request",
    "https://www.googleapis.com/auth/cloud-platform"
  ]
如果没有请手动贴上储存。
3.撰写串接程式码
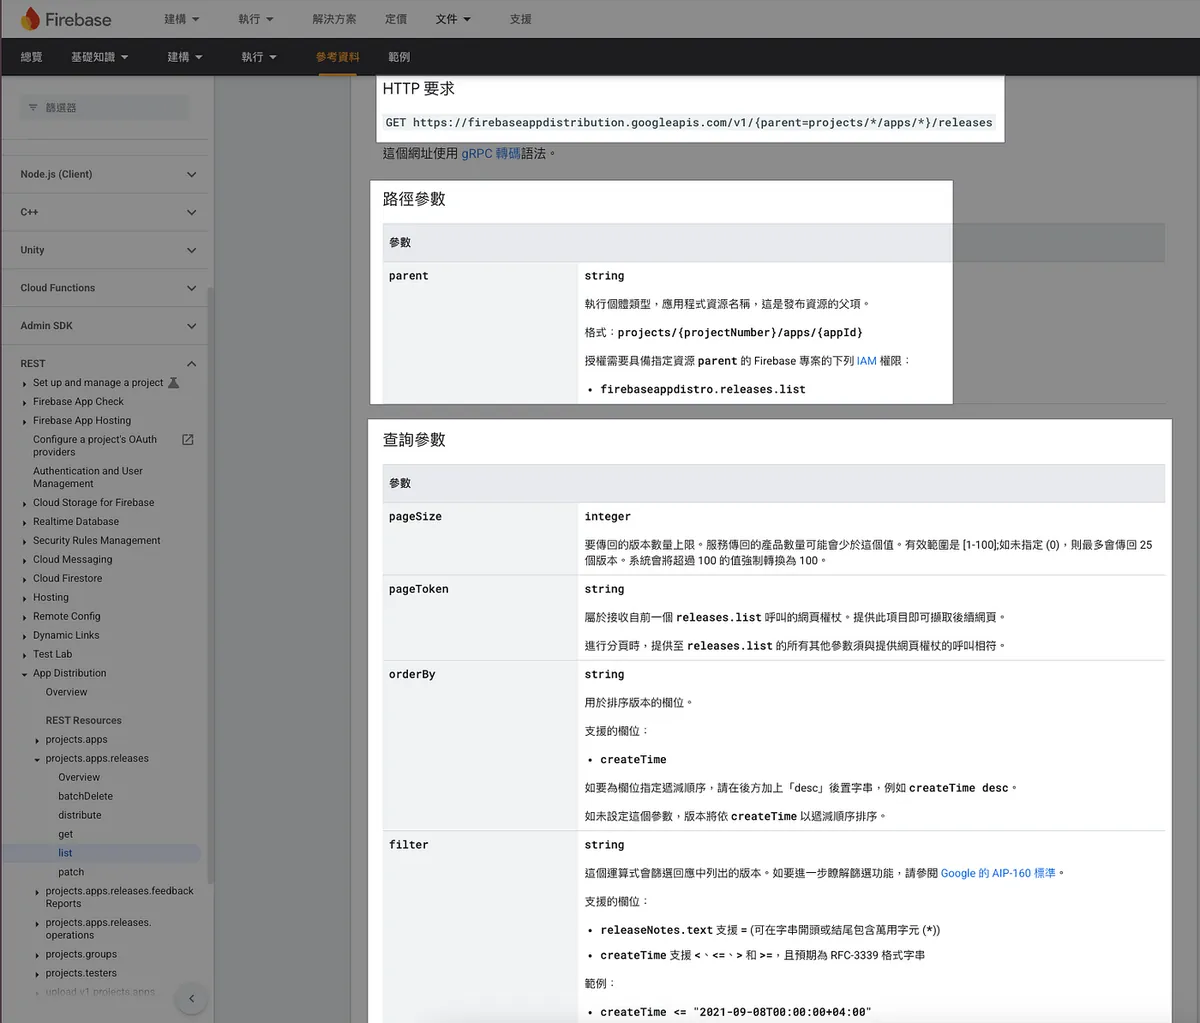
设定好 GCP 专案之后我们就能开始撰写串接程式码,直接参考想串接的 Google APIs 官方文件, Firebase App Distribution API v1 :
1
2
3
4
5
6
7
8
9
10
11
12
13
14
15
16
17
18
19
20
21
22
23
24
25
26
27
28
29
30
31
32
const project = "projects/[Firebase Project ID]/apps/[Firebase APP ID]"; // 请换成你的 Project ID & App ID

function debug() {
  const releases = firebaseDistribution("");

  releases.forEach(function(release) {
    // Release Object: https://firebase.google.com/docs/reference/app-distribution/rest/v1/projects.apps.releases?hl=zh-tw#Release
    Logger.log(`${release.name} Download URL: ${release.testingUri}`);
  });
}

function firebaseDistribution(releaseNote) {
  const url = "https://firebaseappdistribution.googleapis.com/v1/"+project+"/releases?filter=releaseNotes.text%3D*"+releaseNote+"*";
  // Filter: https://firebase.google.com/docs/reference/app-distribution/rest/v1/projects.apps.releases/list?hl=zh-tw
  const headers = {
    "Content-Type": "application/json; charset=UTF-8",
    "Authorization": "Bearer " + ScriptApp.getOAuthToken(), // 直接使用当前帐号换取权杖
  };

  const options = {
    "method": "get",
    "headers": headers
  };
  const data = UrlFetchApp.fetch(url, options);
  const result = JSON.parse(data.getContentText()).releases;

  if (result == undefined) {
    return [];
  }

  return result;
}
[Firebase Project ID] 与 [Firebase APP ID] 可在 Firebase 专案设定中取得:

贴上程式码后,第一次执行需要完成权限授权。
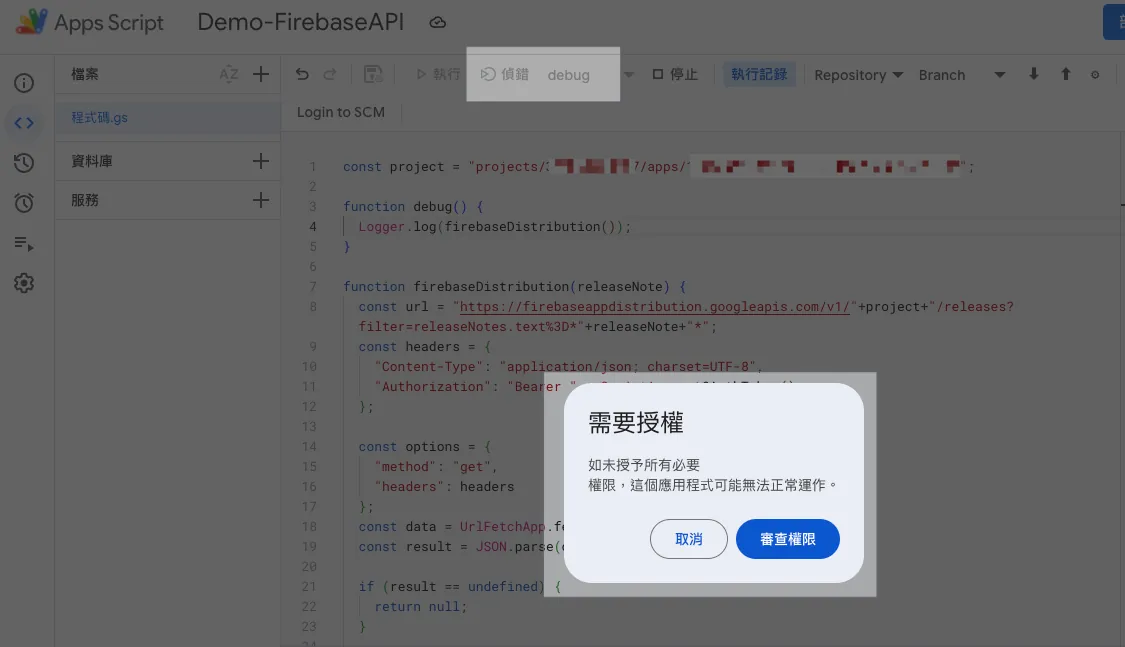
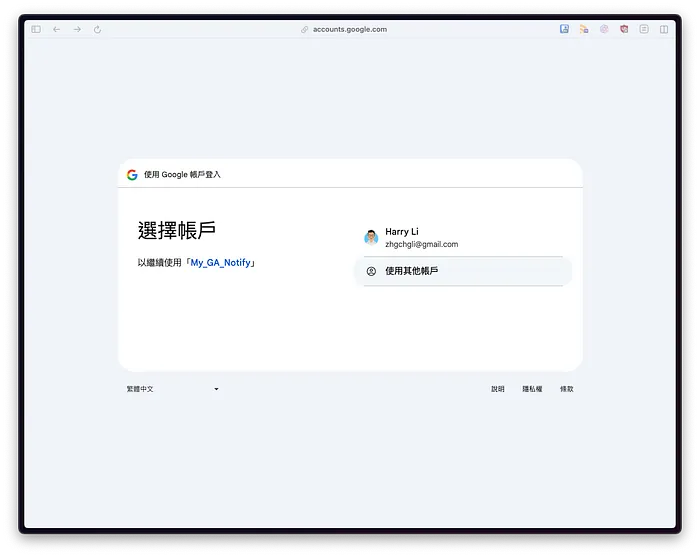
点击「审查权限」
选择要执行的身份帐户,通常等于当前 Google Apps Script 帐户
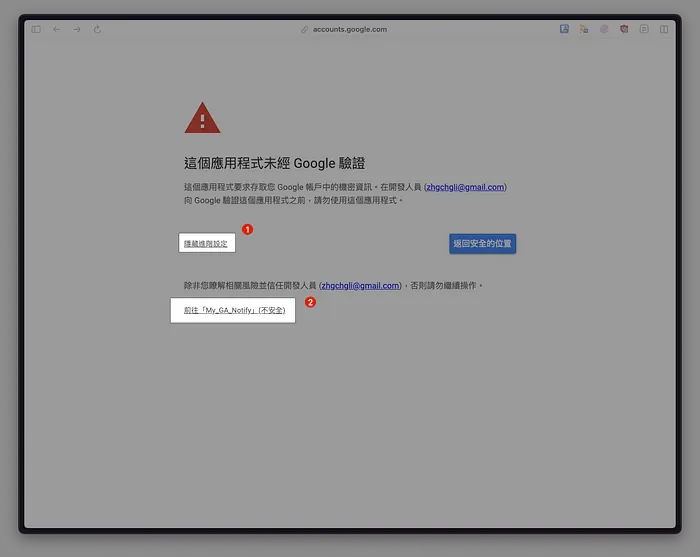

选择「进阶」展开 -> 点击「前往 XXX」 这是我们自己写给自己用的应用程式,不需经过 Google 验证。
点击「允许」
以上画面不一定会出现,没有可忽略。
允许之后再点「侦错」或「执行」就能执行程式:
如果出现错误:
1
2
3
4
5
6
7
Exception: Request failed for https://firebaseappdistribution.googleapis.com returned code 403. Truncated server response: {
  "error": {
    "code": 403,
    "message": "Request had insufficient authentication scopes.",
    "status": "PERMISSION_DENIED",
    "details":... (use muteHttpExceptions option to examine full response)
...
或
1
Exception: Specified permissions are not sufficient to call UrlFetchApp.fetch. Required permissions: https://www.googleapis.com/auth/script.external_request
请确认 appsscript.json 的 oauthScopes 中包含以下两个描述设定(参考步骤 2):
1
2
3
4
"oauthScopes": [
    "https://www.googleapis.com/auth/script.external_request",
    "https://www.googleapis.com/auth/cloud-platform"
  ]
如果出现错误:
1
2
3
4
Exception: Request failed for https://firebaseappdistribution.googleapis.com returned code 401. Truncated server response: {
  "error": {
    "code": 401,
    "message": "Request had invalid authentication credentials. Expected OAuth 2 access token, login cookie or othe... (use muteHttpExceptions option to examine full response)
代表尚未设定绑定的 GCP 专案 (参考步骤 1. ) 或是该 GCP 专案尚未启用欲使用的 Google APIs 或是当前帐号无该 GCP / Google APIs 使用权限或无该 Firebase App 权限,请检查设定。
如果出现错误:
1
Exception: Request failed for https://firebaseappdistribution.googleapis.com returned code 404. Truncated server response:
或
1
2
3
4
5
6
7
Exception: Request failed for https://firebaseappdistribution.googleapis.com returned code 400. Truncated server response: {
  "error": {
    "code": 400,
    "message": "Request contains an invalid argument.",
    "status": "INVALID_ARGUMENT"
  }
}
请确认 Google APIs 请求路径是否正确。
串接成功🎉🎉🎉
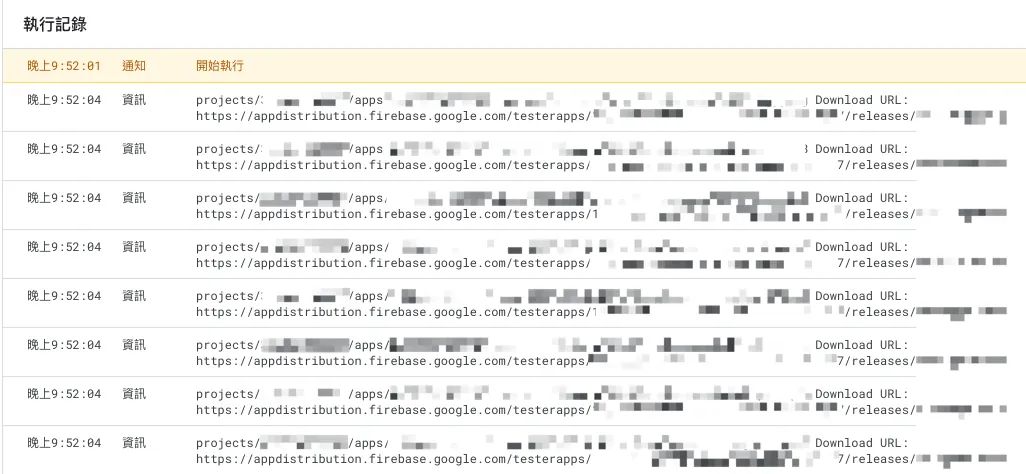
可以看到短短不到 10 行程式码就能无痛串接 Google APIs,真的非常方;有兴趣的朋友可以看一下相较之下, 自己实作 Google APIs 串接时身份验证权杖交换的程式步骤,非常繁琐。
下一步:
搭配之前的文章「 使用 Google Apps Script Web App 表单串接 Github Action CI/CD 工作 」串上 CI/CD 工作项目,将 Firebase App Distribution 下载连结也呈现在 Web App 上方便同仁直接在上面下载。
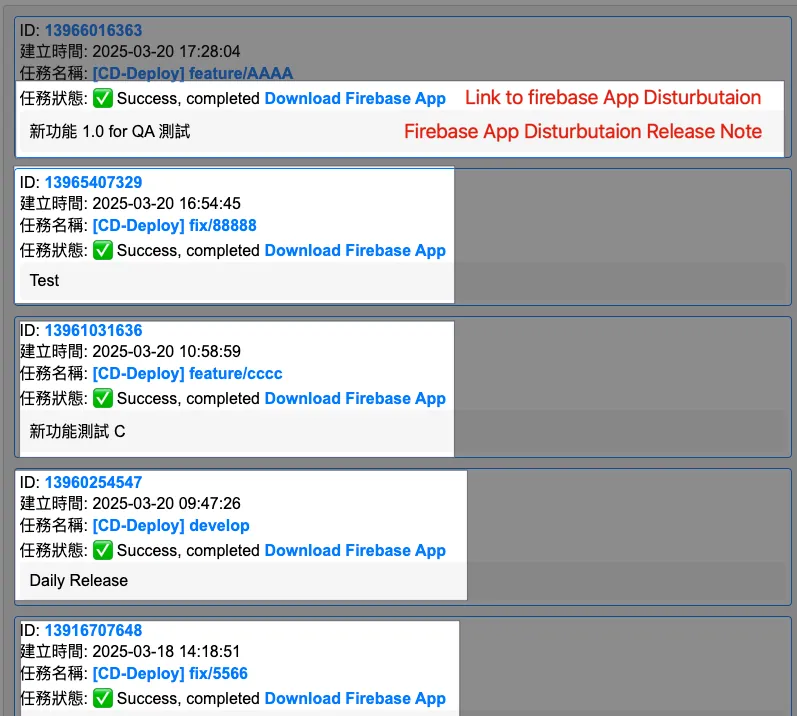
Demo Result
其他 Google APIs 也能以此类推串接。
2025/07 Update:
此功能已整合到实际打包工具使用,可参考最新文章案例:「 CI/CD 实战指南(四):使用 Google Apps Script Web App 串接 GitHub Actions 建置免费易用的打包工具平台 」
有任何问题及指教欢迎 与我联络 。

本文首次发表于 Medium (点击查看原始版本),由 ZMediumToMarkdown 提供自动转换与同步技术。