iOS Reverse Engineering|Jailbreak, IPA Extraction, UI Injection & Decompilation Techniques
Explore the step-by-step process of iOS reverse engineering, from jailbreak and IPA extraction to UI analysis, injection, and decompilation, empowering developers to understand app internals and enhance security insights.
点击这里查看本文章简体中文版本。
點擊這裡查看本文章正體中文版本。
This post was translated with AI assistance — let me know if anything sounds off!
Table of Contents
First Experience with iOS Reverse Engineering
The Exploration Process from Jailbreaking, Extracting IPA Files and Cracking to UI Analysis, Injection, and Decompilation
About Security
The only security-related topic I have covered before is « Using Man-in-the-Middle Attack to Sniff Transmission Data »; building on that, suppose we encrypt data before transmission and decrypt it inside the app upon receipt to prevent man-in-the-middle sniffing. Is it still possible for the data to be stolen?
The answer is definitely yes! Even if it hasn’t been tested; there is no unbreakable system in the world, only the issue of time cost. When the time and effort required to break it exceed the benefits gained, it can be considered secure!
How?
Having come this far, how else can it be broken? This is the topic I want to document in this article — “Reverse Engineering” — cracking open your app to study how you do encryption and decryption. I have always been somewhat clueless in this field, only having attended two major talks at iPlayground 2019, roughly understanding the principles and implementation. Recently, I had the chance to try it out and want to share it with everyone!
Against the Current, What Can It Do?
Check APP UI Layout and Structure
Access APP resource directories such as .assets/.plist/icon…
Tamper with App Features and Repackage (e.g., Remove Ads)
Decompile to infer the original code and obtain business logic information
Dump .h header files / keychain contents
Environment Setup
macOS Version: 10.15.3 Catalina
iOS Version: iPhone 6 (iOS 12.4.4 / Jailbroken) Required
Cydia: Open SSH
Jailbreak Section
Any iOS or iPhone version can be used, as long as the device can be jailbroken. It is recommended to use an old phone or a development device to avoid unnecessary risks. You can refer to Mr. Mad’s Jailbreak Guide based on your phone and iOS version. If needed, you may have to downgrade iOS (check signing status) before jailbreaking.
I used my old iPhone 6 for testing. It was already updated to iOS 12.4.5, but jailbreak attempts on 12.4.5 kept failing. Fortunately, I downgraded to 12.4.4 first and then successfully jailbroke it using checkra1n!
The steps are few and not difficult; they just require some waiting time!
An experience of my own mistake: After downloading the older IPSW file, connect the iPhone to your Mac and open Finder (since macOS 10.15, there is no iTunes). On the left under Locations, select your iPhone. When the iPhone info screen appears, hold the “Option” key and then click “Restore iPhone” to bring up the IPSW file selection window. Choose the older IPSW file you just downloaded to complete the downgrade.
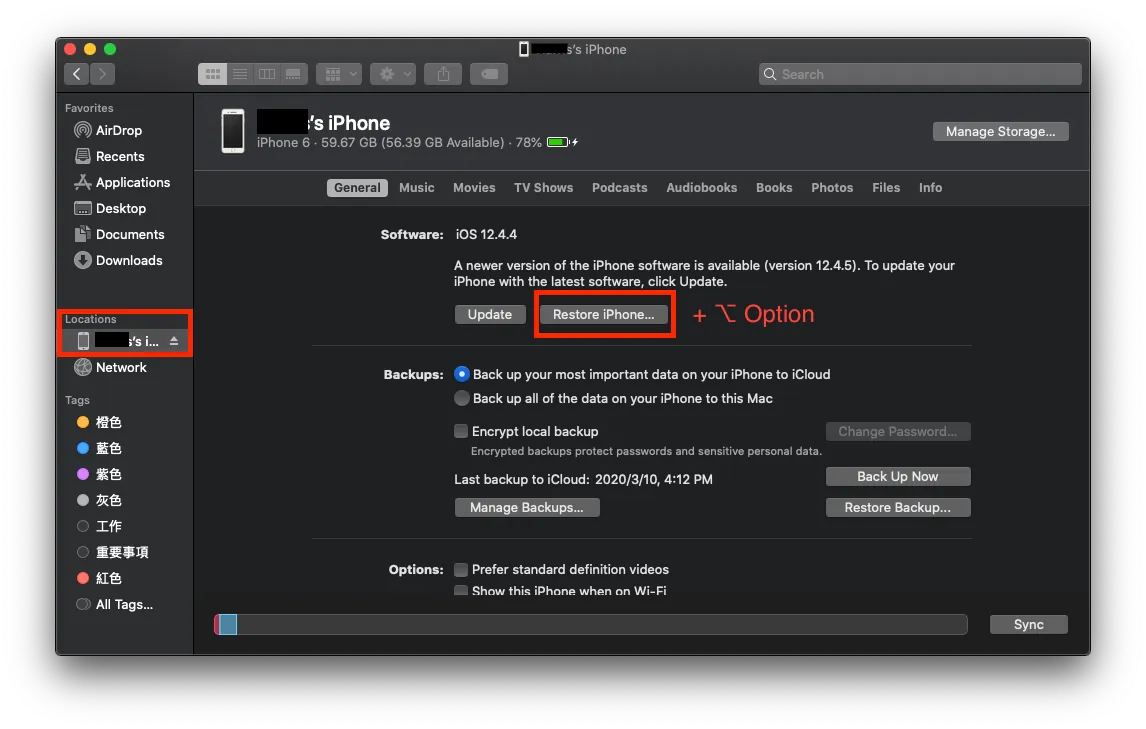
I originally foolishly pressed Restore iPhone… it would only waste time reinstalling the latest version again….
Using the lookin Tool to Inspect Others’ App UI Layouts
Let’s start with a fun appetizer: using tools with a jailbroken phone to see how other people’s apps are laid out.
Viewing tools: First is the long-established Reveal (more features, paid around $60 with trial available), second is the free open-source tool lookin made by Tencent QMUI Team; here we use lookin as a demonstration, Reveal is quite similar.
No jailbreak needed. This tool is mainly for use in projects under development to check debug layouts (replacing Xcode’s basic inspector). It can also be used in regular development!
Only when you need to view other people’s apps do you need a jailbroken phone.
If you want to view your own projects…
You can choose to install using CocoaPods, Breakpoint Insertion (simulator only), Manually Import Framework into Project, or Manual Setup.
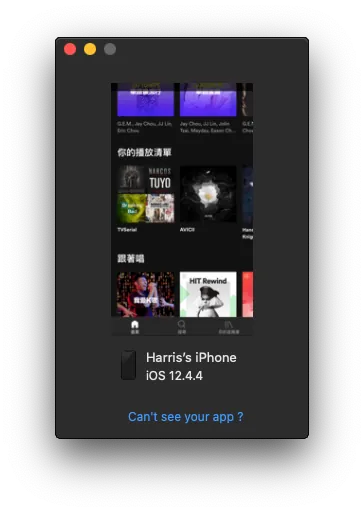
After building and running the project, you can select the APP screen on the Lookin tool -> view the layout structure.
If You Want to See Someone Else’s APP…
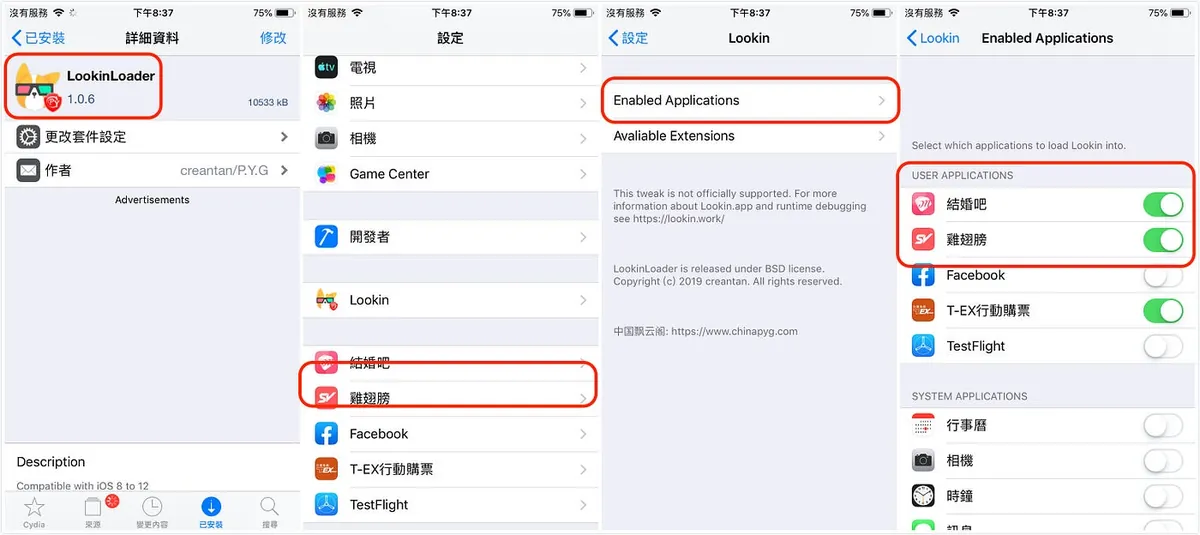
Step 1. On a jailbroken phone, open Cydia -> search for LookinLoader -> Install -> go back to the phone Settings -> Lookin -> Enabled Applications -> Enable the apps you want to monitor.
Step 2. Use a cable to connect your phone to the Mac -> open the app you want to view -> return to the computer, select the app screen in the Lookin tool -> you can then view the layout structure.
Lookin Check Layout Structure
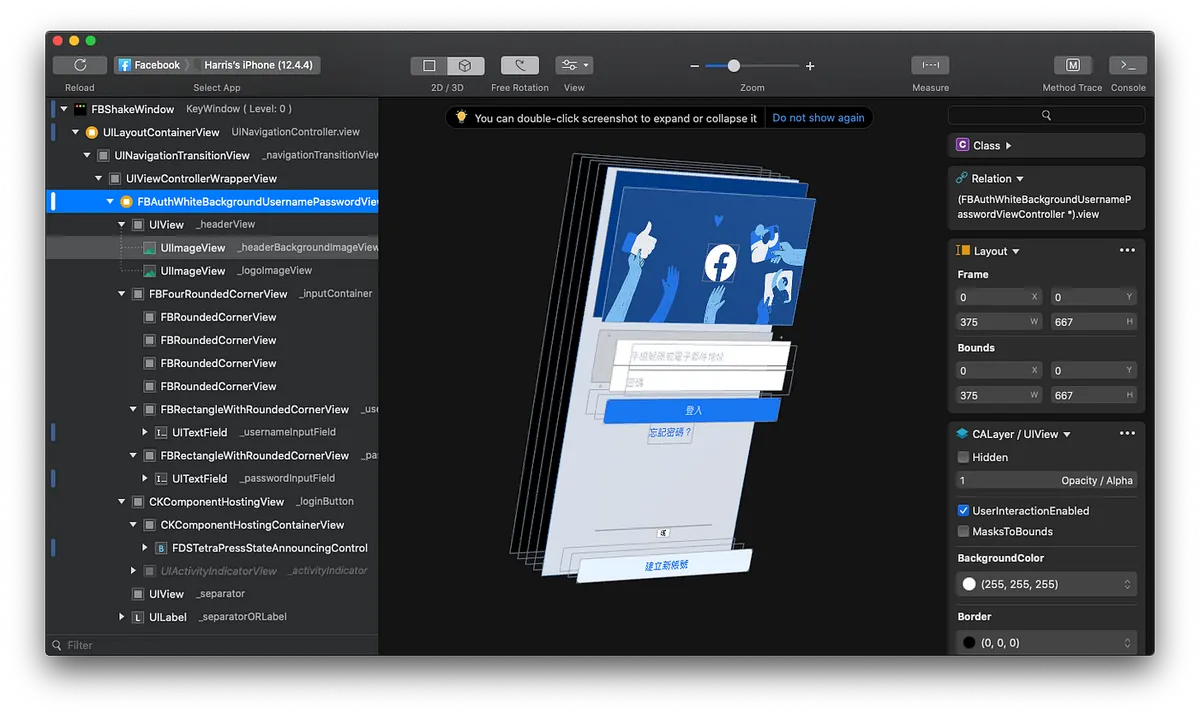
Facebook Login Screen Layout Structure
You can view the hierarchy in the left sidebar and dynamically modify the selected object in the right sidebar.
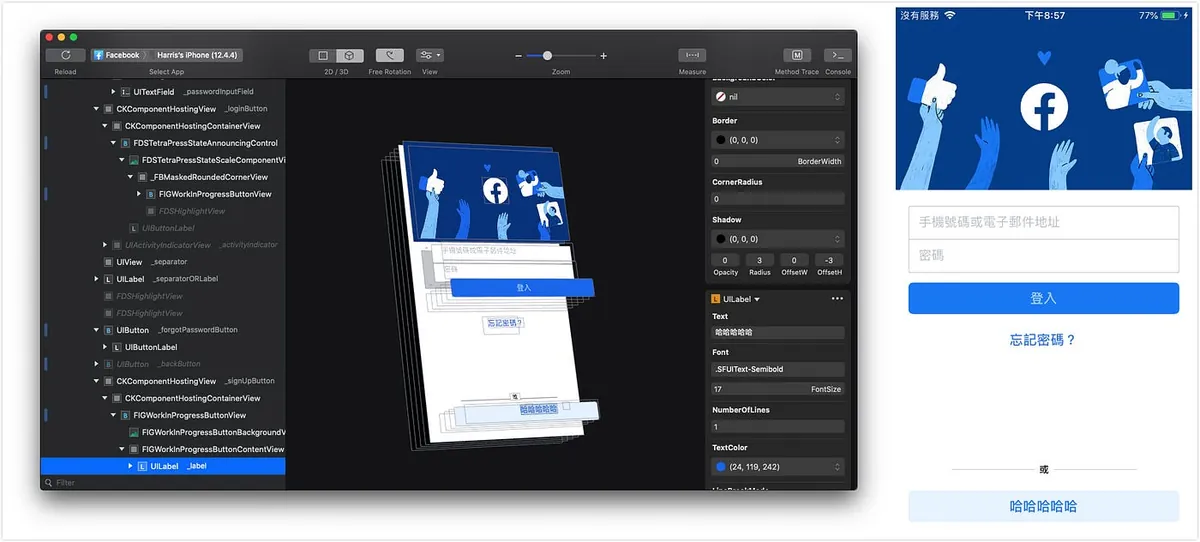
The original “Create New Account” has been changed to “Haha”.
Modifications to objects will also be displayed in real-time on the mobile app, as shown above.
Just like the “F12” developer tools in a web browser, all changes only affect the View and do not impact the actual data; it is mainly used for debugging. Of course, you can also use it to change values, take screenshots, and prank your friends XD
Use Reveal to Inspect APP UI Layout Structure
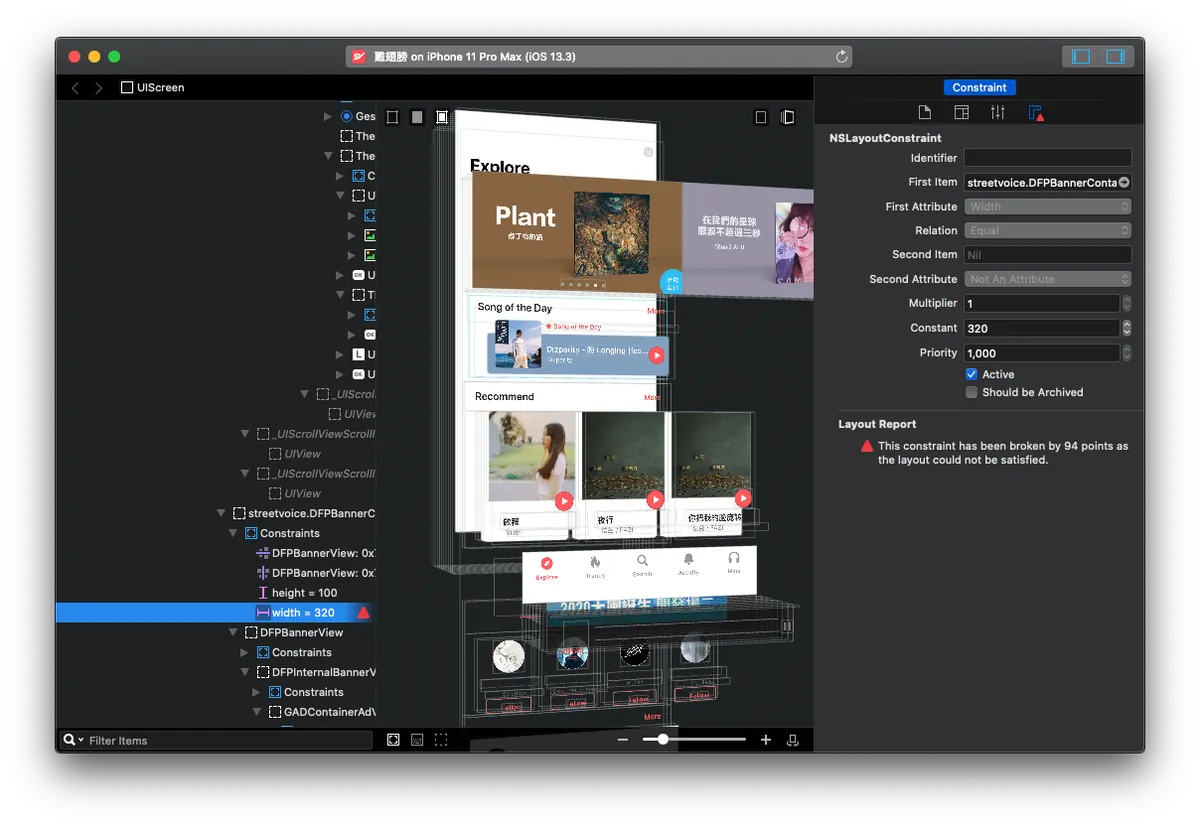
Although Reveal requires a paid subscription, I personally prefer it; it provides more detailed structure display, and the right info panel is almost identical to the XCode development environment. You can make real-time adjustments as needed, and it also alerts you to Constraint Errors, which is very helpful for UI layout fixes!
These two tools are very helpful for daily development of your own APP!
After understanding the process environment and key points, let’s get to the main topic!
The following steps require a jailbroken phone
Extracting APP .ipa File & Cracking
All apps installed from the App Store have their .ipa files protected by FairPlay DRM, commonly known as shell protection. Removing this protection is called “cracking.” Therefore, simply extracting the .ipa from the App Store is meaningless and unusable.
*Another tool, APP Configurator 2, can only extract protected files. Since it is not very useful, I won’t elaborate further. Those interested in using this tool can click here to see the tutorial.
Extracting the original .ipa file after cracking using tools + jailbroken phone:
Regarding the tools, I initially used Clutch, but no matter how I tried, it showed FAILED. After checking the project’s issues, I found many people had the same problem. It seems this tool no longer works on iOS ≥ 12. There is also a classic tool called dumpdecrypted, but I haven’t looked into it.
Here, we use the Python tool frida-ios-dump for dynamic unpacking, which is very convenient to use!
First, let’s prepare the environment on the Mac:
Mac comes with Python 2.7 pre-installed. This tool supports both Python 2.X and 3.X, so there is no need to install Python separately. However, I use Python 3.X for my operations. If you encounter issues with Python 2.X, consider installing and using Python 3!
Install pip (Python package manager)
Install frida using pip:
sudo pip install frida --upgrade --ignore-installed six(python 2.X)
sudo pip3 install frida --upgrade --ignore-installed six(python 3.X)Type
frida-psin the Terminal. If no error message appears, the installation was successful!Clone the AloneMonkey/frida-ios-dump project
Open the dump.py file in a text editor within the project.
Confirm if the SSH connection settings are correct (no special changes needed by default)
User = ‘root’
Password = ‘alpine’
Host = ‘localhost’
Port = 2222
Environment on a Jailbroken Phone:
Install Open SSH: Cydia → Search → Open SSH → Install
Install Frida source: Cydia → Sources → Top right “Edit” → Top left “Add” → https://build.frida.re
Install Frida: Cydia → Search → Frida → Install the tool matching your phone’s processor version (e.g., I have an iPhone 6 A11, so I installed
Frida for pre-A12 devices)
After setting up the environment, start working:
Connect the phone to the computer using a USB cable
Open a Terminal on your Mac and enter
iproxy 2222 22to start the server.Ensure the phone/computer is on the same network (e.g., connected to the same WiFi)
Open another Terminal and enter ssh root@127.0.0.1, then enter the SSH password (default is
alpine)
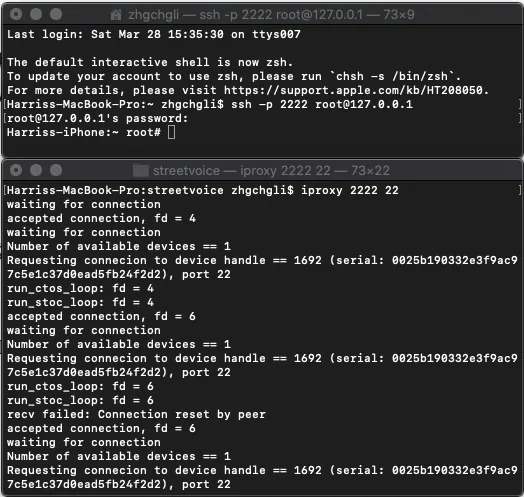
- Open another Terminal to run shell commands, and cd into the cloned /frida-ios-dump directory.
Enter dump.py -l to list the installed/running apps on the phone.
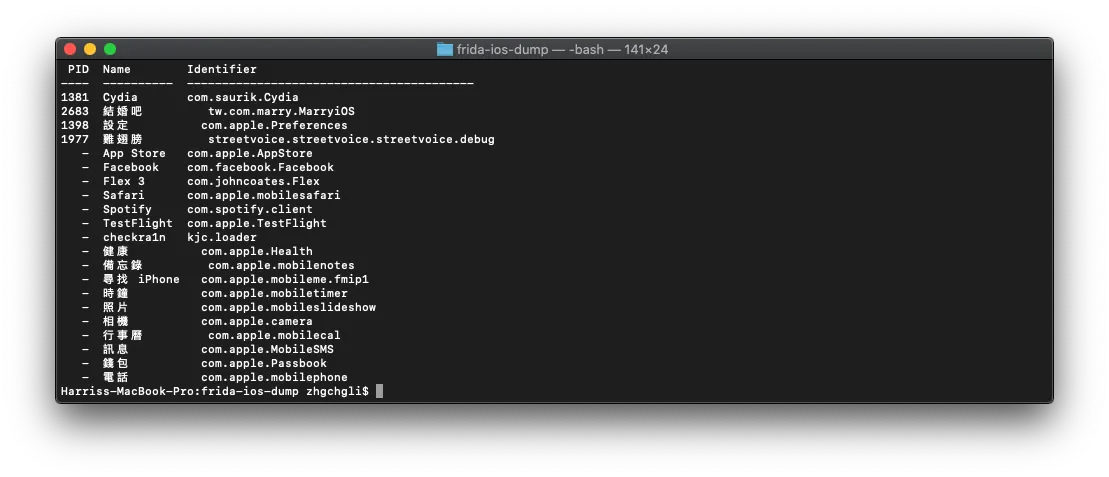
- Find the APP name / Bundle ID to be cracked and exported, then enter:
dump.py APP_NAME_or_BundleID -o output_path/output_filename.ipa
Here, you must specify the output path/filename because the default output path is /opt/dump/frida-ios-dump/. Since we don’t want to move it to /opt/dump, specifying the output path avoids permission errors.
- After a successful output, you can obtain the cracked .ipa file!

The phone must be unlocked to use the tool.
If connection errors occur, such as “reset by peer,” try unplugging and reconnecting the USB cable or restarting iproxy.
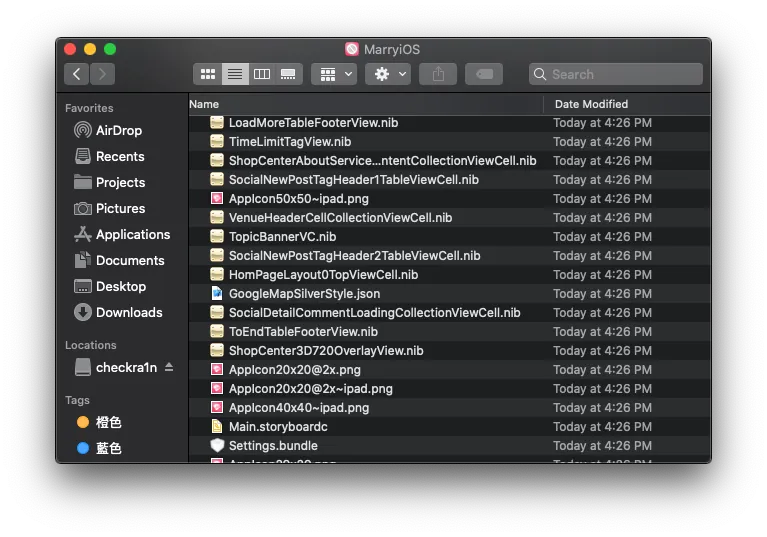
- Rename the .ipa file directly to .zip, then right-click to extract the archive
/Payload/APP_NAME.app will appear
With the original APP file, we can…
1. Extract the APP’s resource directory
Right-click on APP_NAME.app → “Show Package Contents” to view the app’s resource directory
2. class-dump Extract APP .h Header File Information
Using the class-dump tool to export all APP (including Framework) .h header file information (Objective-C only; not valid for Swift projects)
nygard/class-dump I tried this great tool but kept failing; in the end, I succeeded only by using the modified class-dump tool from AloneMonkey / MonkeyDev toolset.
Download MonkeyDev/bin/class-dump tool directly from here
Open Terminal and run directly:
./class-dump -H APP_PATH/APP_NAME.app -o EXPORT_TARGET_PATH
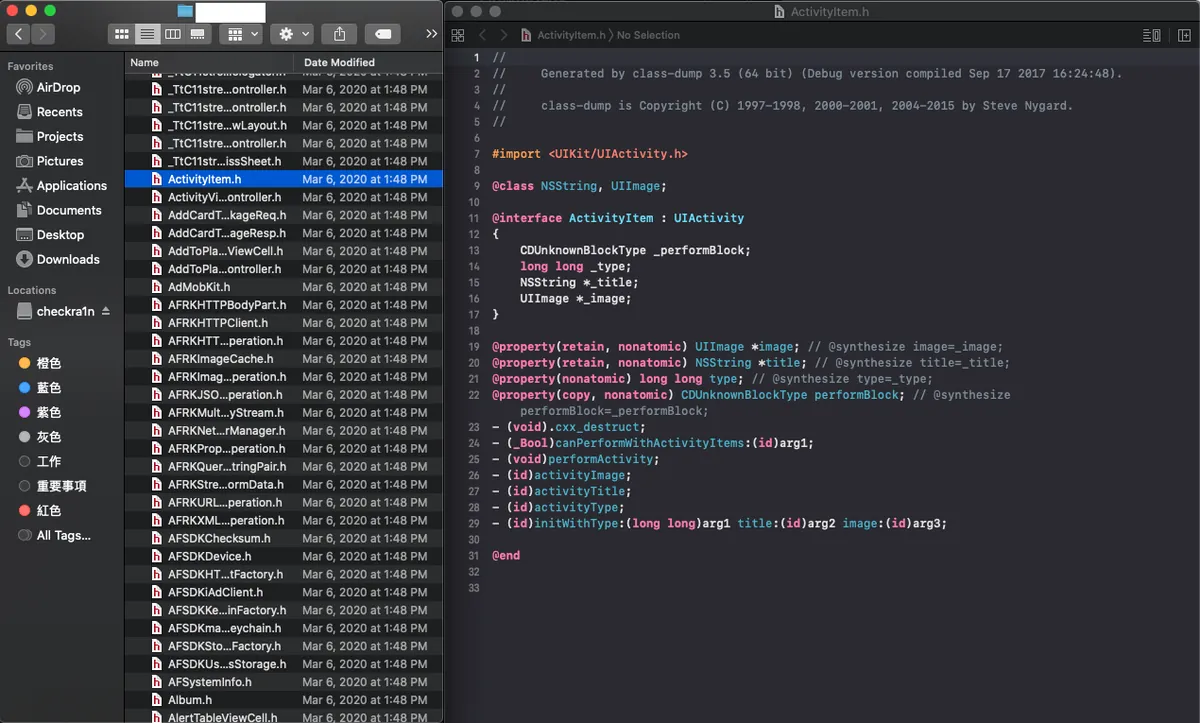
After a successful dump, you can obtain the entire app’s .h information.
4. The Final and Most Difficult Step — Performing Decompilation
You can use the decompilation tools IDA and Hopper for analysis. Both are paid tools, but Hopper offers a free trial (30 minutes per session).
We can directly drag the obtained APPName.app file into Hopper to start the analysis.
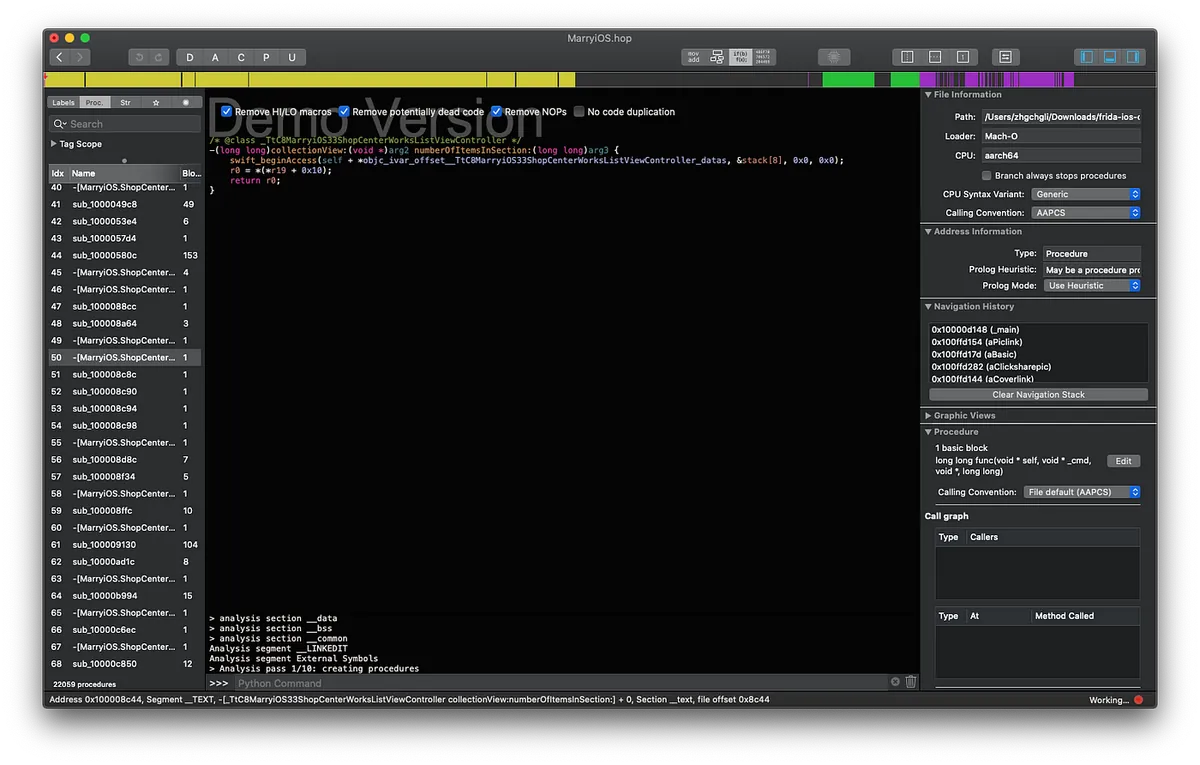
However, I stopped here because from this point on, it requires studying machine code, analyzing class-dump results to infer methods, and so on; it demands very advanced skills!
After bypassing decompilation, you can modify the operation yourself and repackage it into a new APP.

Image taken from One Piece
Other Tools for Reverse Engineering
1. Use MITM Proxy Free Tool to Sniff API Network Request Information
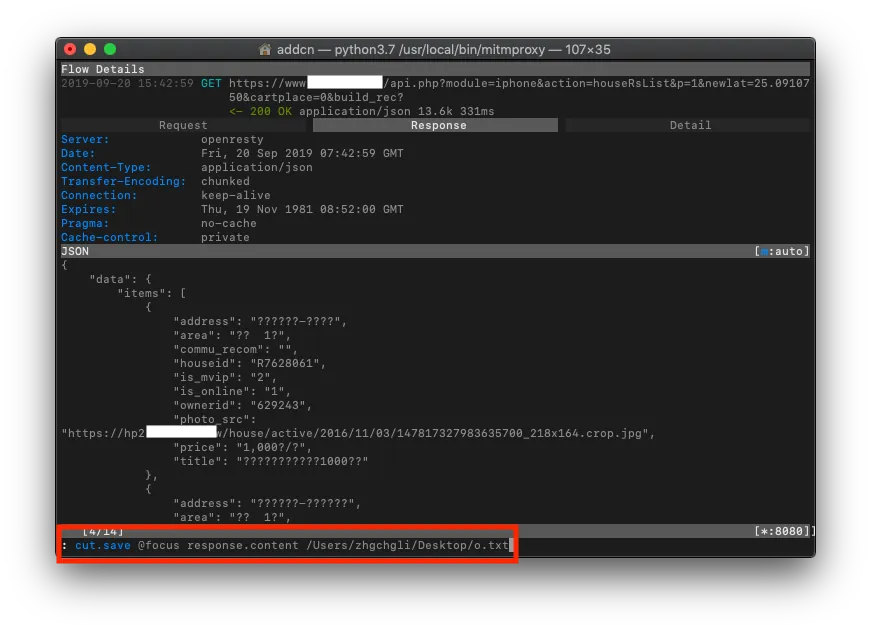
»The app uses HTTPS for transmission, but data was still stolen.
2.Cycript (Used with Jailbroken Devices) Dynamic Analysis/Injection Tool:
Open “Cydia” on a jailbroken phone -> Search for “Cycript” -> “Install”
Open a Terminal on your computer and use Open SSH to connect to your phone:
ssh root@phoneIP(default password isalpine)Open the target APP (APP remains in the foreground)
In Terminal, enter
ps -e \| grep APP Bundle IDto find the running APP Process IDInject the tool into a running app using
cycript -p Process ID
You can use Objective-C/Javascript for debugging control.
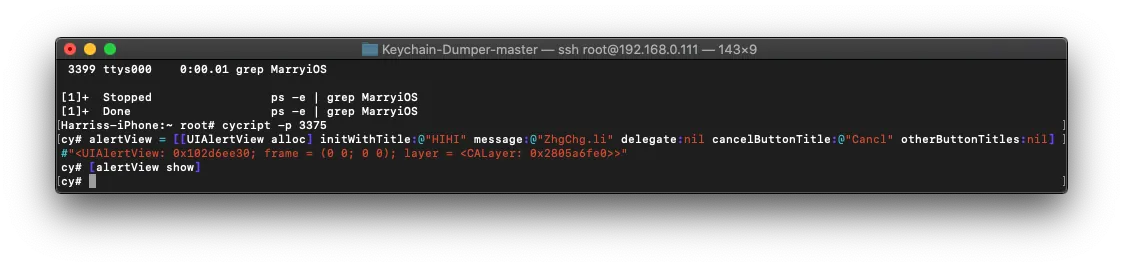
For Example:
1
2
cy# alert = [[UIAlertView alloc] initWithTitle:@"HIHI" message:@"ZhgChg.li" delegate:nil cancelButtonTitle:@"Cancel" otherButtonTitles:nil]
cy# [alert show]
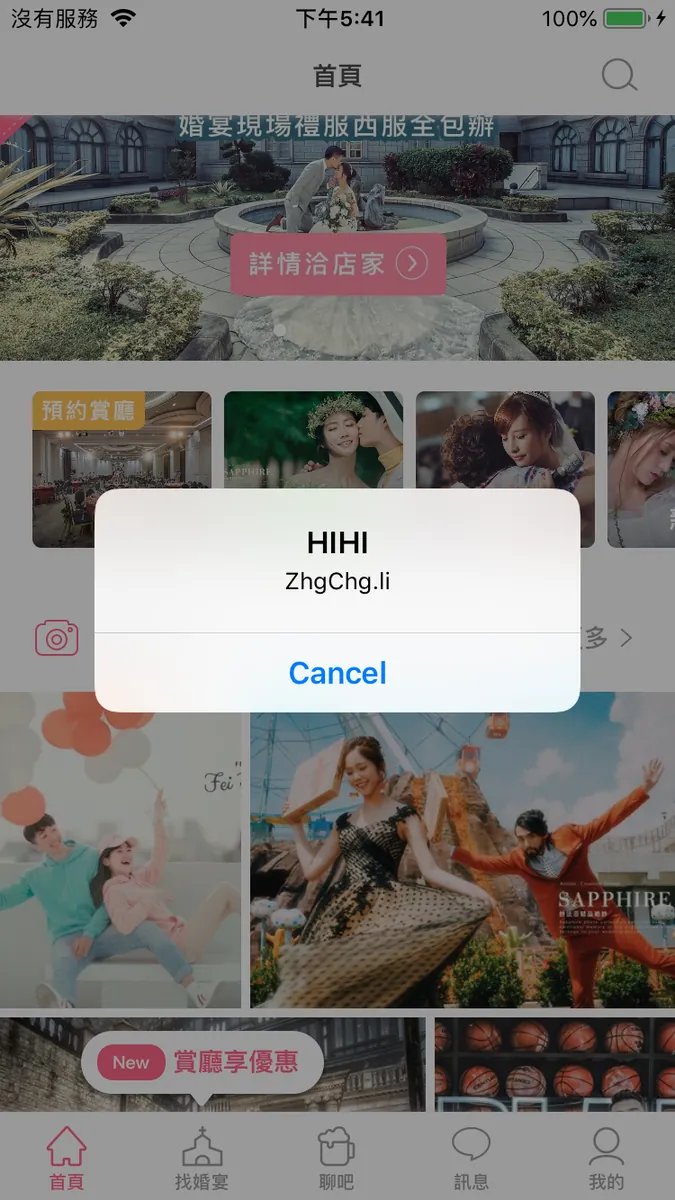
Inject a UIAlertViewController…
chose( ) : Get target
UIApp.keyWindow.recursiveDescription().toString() : Displays the view hierarchy structure information
new Instance (memory address): Get object
exit(0) : Exit
For detailed instructions, please refer to this article.
3. Lookin / Reveal UI layout inspection tools
As mentioned before, recommending it again; it’s very useful for daily development in your own projects. I suggest purchasing and using Reveal.
4. MonkeyDev Integration Tool, allows dynamic injection to modify an app and repackage it into a new app
5. ptoomey3 / Keychain-Dumper , Export KeyChain Contents
For detailed instructions, please refer to this article, but I couldn’t get it to work. According to the project issues, it seems to have stopped working on iOS ≥ 12.
Summary
This field is a huge challenge and requires a solid technical foundation to master; this article only briefly “experienced” what reverse engineering feels like, so please forgive any shortcomings! For academic research only, do not engage in malicious activities; personally, I found the entire process and tools quite interesting and gained a better understanding of APP security!
If you have any questions or feedback, feel free to contact me.

This post was originally published on Medium (View original post), and automatically converted and synced by ZMediumToMarkdown.