
使用 Google Apps Script Web App 表單串接 Github Action CI/CD 工作
Github Action Workflow 表單優化與整合其他工作流程工具(Jira, Asana, Slack..)提升開發效率。

左:原始的 Github Action Workflow Form / 右: 最終成果 (GAS Web App Form)
2025/07 Update:
此功能已整合到實際打包工具使用,可參考最新文章案例:「 CI/CD 實戰指南(四):使用 Google Apps Script Web App 串接 GitHub Actions 建置免費易用的打包工具平台 」
背景
之前的團隊使用 Github Action & Self-hosted Github Runner + Slack 搭建整套 CI/CD 服務;整體效果不錯,對於 App 開發者來說建置與維護相對容易,只需照著官方文件提供的 YAML 參數完成設定就會自動觸發、機器方面也可以輕易的使用自己的機器當成 Runner 使用,服務本身都是由 Github 維護,我們不需在意版本升級等問題並且 Runner 是反向跟 Github 要任務下來做,不需要特別開對外網路開口。
等於同時享受到類似 Bitrise 的 GUI YAML 建置方式又有像 Jenkins 那樣使用自架機器的彈性跟較低的建置成本,但不用像 Jenkins 那樣需要花時間維護服務本身。
未來有時間再寫一篇完整的 App CI/CD x Github Action 搭建過程。
問題:Github Action CI/CD GUI Form
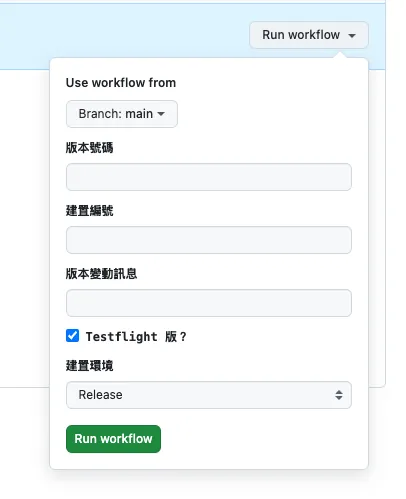
Github Action GUI Form
在 App 開發中,在 CD 觸發打包測試版、正式版或送審時通常會需要提供一些外部參數或是依照需求選擇環境、分支,才會開始執行工作。
不同於 Jenkins 是自建服務,有完整的 Web GUI;Github Action 沒有,唯一的 Web GUI Form 是在 Actions 中點擊 Run workflow 可以自訂一個簡易的表單供使用者輸入外部參數,然後觸發 CI/CD 工作流程。
通常會使用這個 CD 打包的使用者,不一定是 App 開發者本身、也不一定擁有這個專案的權限;例如 QA 需要打包指定版本、PM/Backend 需要打包某個開發中版本進行測試;Github Action Form 需要有該專案的權限才能使用,但使用者不要說能不能有專案權限、甚至是不一定有工程背景。
而且我們無法在這邊做動態表單或資料驗證。
因此我們需要另外拉一個 GUI 服務給其他使用者操作使用。
自建 Slack App 解決
之前團隊是有熱愛做自動化的同仁自己用 Kotlin+Ktor 搭建了一個完整的 Slack App 網路服務,串接 Slack 訊息、表單、指令…等功能,接收、轉發 CD 打包請求,觸發 Github Action 執行操作並將結果串回 Slack。
目前沒有開發資源跟之前一樣使用 Kotlin+Ktor 建置服務
自己寫 Web/iOS/macOS App 工具
目前團隊原本是使用 Jenkins 有基礎的 Web 可以給其他使用者登入使用、另外還有自行開發了一個 App 串接 Jenkins 封裝一些參數讓非工程背景的使用者更方便使用。
不過遷移到 Github Action 之後這整套就廢棄了。
❌ Private Github Pages
應該有機會直接建置 Github Pages 來當 CI/CD Web GUI,但是目前只有 Github Enterprise 可以設定 Github Pages 存取權限,其他方案就算是 Private Repo 也會是公開的;無安全性可言。
❌ Slack App,但使用 Google Apps Script 建置
一開始想說依照之前團隊的經驗使用 Slack App 做為 CI/CD GUI Form 服務,但是目前沒有資源跟之前一樣使用 Kotlin+Ktor 建置服務;所以想說先使用 Function as a Service 服務快速嘗試建置。
Function as a Service 有很多種, Cloud Functions 的自由度比較高,但由於組織 IT 限制,無法隨意新增 Public Cloud Functions 並且有收費問題;因此還是回到我們的老朋友 — Google Apps Script。
之前寫過好幾篇關於 Google Apps Script 做自動化的文章,有興趣的朋友可以參考:
2. 「 簡單 3 步驟 — 打造免費 GA4 自動數據通知機器人 」
3. 「 Crashlytics + Google Analytics 自動查詢 App Crash-Free Users Rate 」
總而言之,Google Apps Script 是 Google 另一個 Function as a Service 服務,主要特色是免費跟與 Google 服務之間可以快速整合;但是限制也較多,例如只能用它的語言、執行時間不能超過 6 分鐘、有執行次數上限、不支援多執行緒…等等,細節可以參考 我之前的文章 。
結論是不可行,原因是:
- Function as a Service 冷啟動問題 。 服務一段時間沒呼叫會進入睡眠,再次呼叫要花較長時間啟動(3~≥ 5 秒); Slack App 對於 API 響應時間非常嚴格,服務需要在 3 秒內回應否則視為失敗 ,Slack 這邊就會直接噴錯誤、事件監聽也會被認為丟失,導致重複發送。
- Google Apps Script doGet, doPost 方法無法取得 Headers。 這會導致無法走 官方的安全驗證 、無法關閉 Slack Retry 。
- Google Apps Script 單執行緒問題。 如果要串接其他服務響應時間都會超過 3 秒,直接被 Slack 判定為失敗。
有勉強使用 Slack 訊息、Block Kit、Form 串接完整個流程,但是太容易觸發上述問題,後來直接放棄。
如果要做這套還是要走自己起伺服器、服務,不要走 Function as a Service!!
❌ Slack Workflow Form
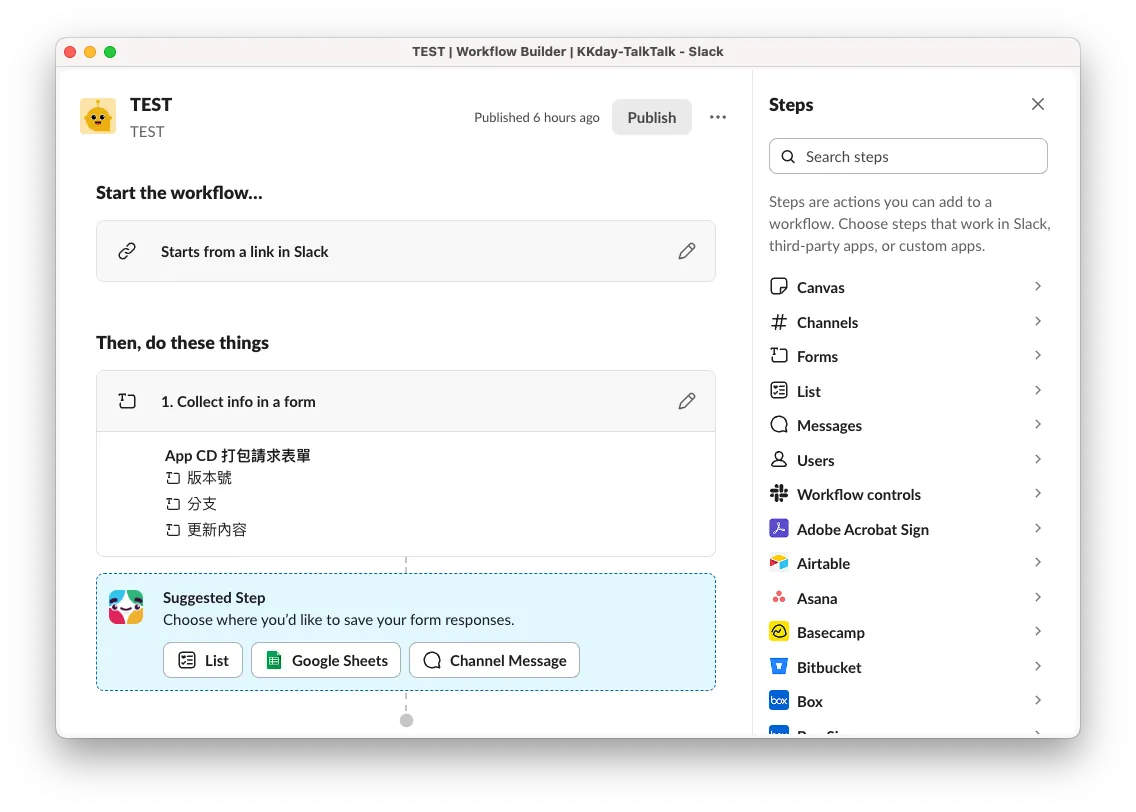
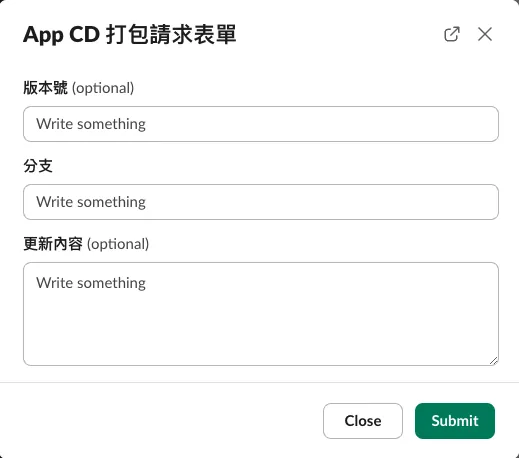
Slack Workflow Form (❌ 無法客制化)
另外也嘗試過 Slack 內建的自動化功能 Workflow Form,不過他無法做到動態表單內容 (e.g. 撈分支讓使用者選),唯一能客製化的只有後續送資料的步驟。
✅ Google Apps Script Web App GUI Form 表單
山不轉路轉,轉念一想好像也不用糾結在一定要用 Slack 整合上,用 Slack 整合是最好的方案,因為是直接整進既有的團隊協作工具,不需要發散額外去學新工具;但是迫於資源限制,我們只能退而求其次找其他穩定又好用的方法。
回頭想到 Google Apps Script 本身就能部署成 Web App,可以在 Web doGet 時回應 GUI Form 表單,送出表單後觸發後續的 Github 串接處理。
最終成果 🎉

工作流程
我們使用 Google Apps Script Web App 建置 CI/CD 表單,直接綁定 Google Workspace 帳號,設定只有組織內的使用者可以存取;自動獲取當前登入的使用者信箱、使用 Github Repo 共用帳號(或借用某個有權限的帳號)的 Personal Access Token 打 Github API 獲得分支列表,送出後同樣打 API 觸發 Github Action 開始執行 CI/CD 工作。
另外,我們可以用使用者的信箱透過 Slack App 去打 Slack API,取得該使用者的 Slack ID,再透過 Slack App 傳送訊息,通知 CI/CD 任務執行情況。
也可以再與其他工具、開發流程進行整合,例如先從 Asana, Jira 取得工單,選擇後再透過 Github API 查找分支、觸發 Github Action,最後再透過 Slack 通知給使用者。
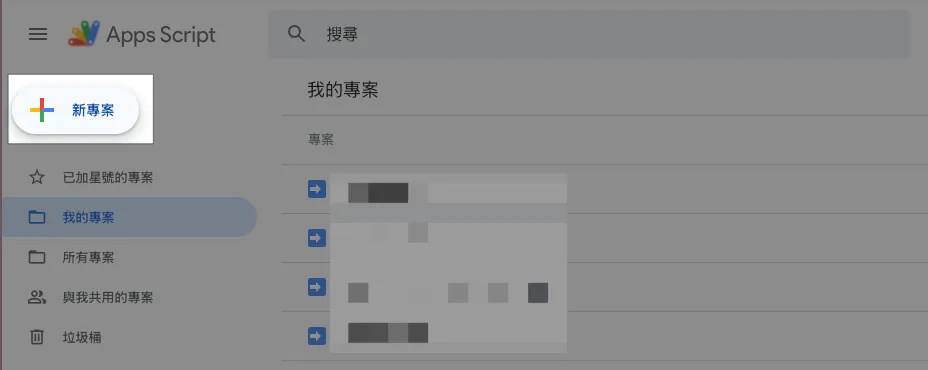
Step 1. 建立 Google Apps Script Web App Form
前往 > Google Apps Script ,新增專案。
Step 2. 建立表單內容、GAS 程式
太久沒有寫 HTML,CSS 也懶得自己設計樣式,直接請 ChatGPT 產一個有一點設計的 HTML 表單範本。
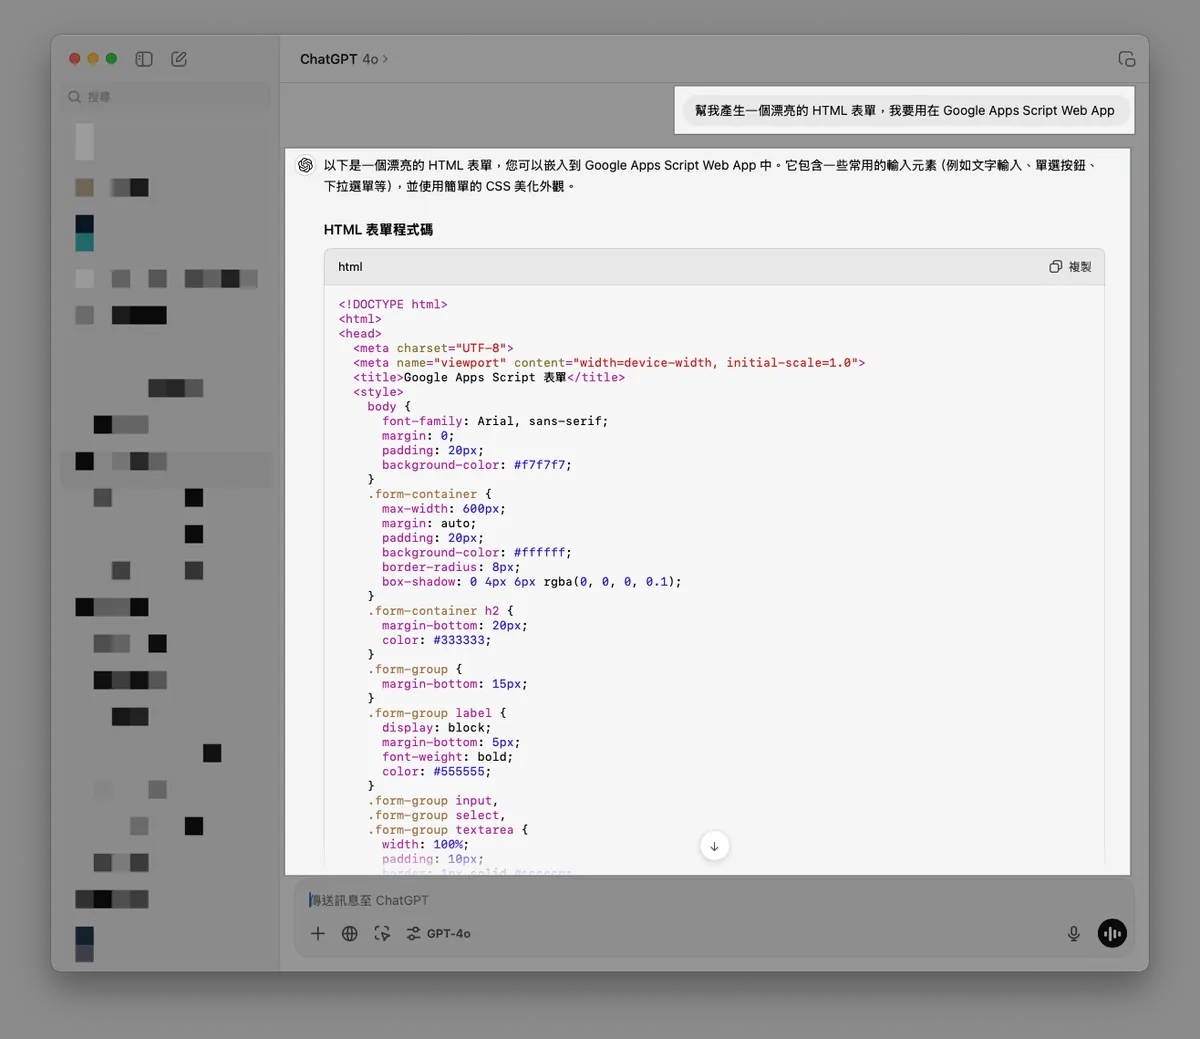
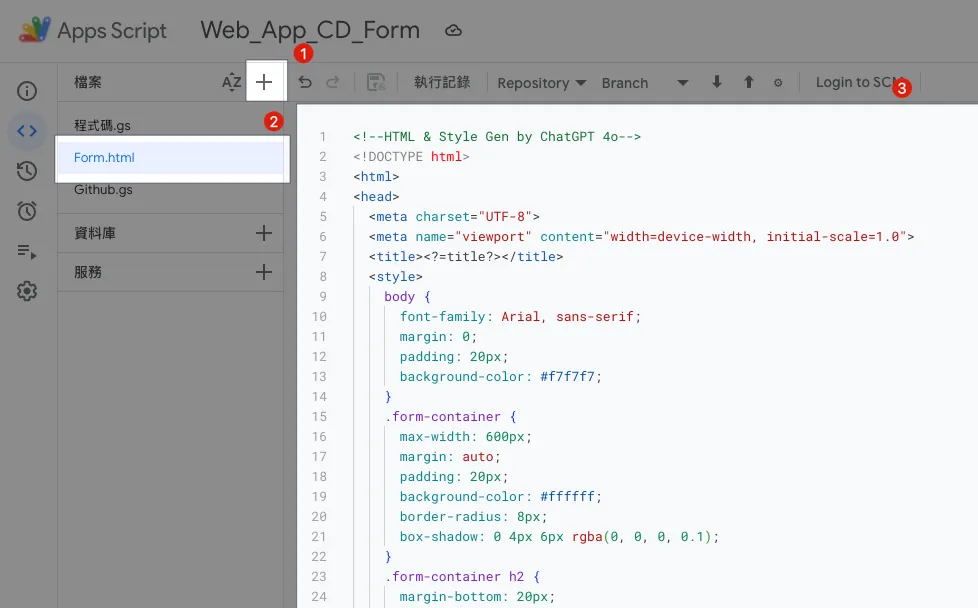
在 GAS 左方檔案列表點「+」新增檔案,輸入檔案名稱「 Form.html 」並把 GPT 產的 HTML 表單範本內容貼上。
Form.html:
<!--HTML & Style Gen by ChatGPT 4o-->
<!DOCTYPE html>
<html>
<head>
  <meta charset="UTF-8">
  <meta name="viewport" content="width=device-width, initial-scale=1.0">
  <title><?=title?></title>
  <style>
    body {
      font-family: Arial, sans-serif;
      margin: 0;
      padding: 20px;
      background-color: #f7f7f7;
    }
    .form-container {
      max-width: 600px;
      margin: auto;
      padding: 20px;
      background-color: #ffffff;
      border-radius: 8px;
      box-shadow: 0 4px 6px rgba(0, 0, 0, 0.1);
    }
    .form-container h2 {
      margin-bottom: 20px;
      color: #333333;
    }
    .form-group {
      margin-bottom: 15px;
    }
    .form-group label {
      display: block;
      margin-bottom: 5px;
      font-weight: bold;
      color: #555555;
    }
    .form-group input,
    .form-group select,
    .form-group textarea {
      width: 95%;
      padding: 10px;
      border: 1px solid #cccccc;
      border-radius: 4px;
      font-size: 16px;
    }
    .form-group input[type="radio"] {
      width: auto;
      margin-right: 10px;
    }
    .form-group .radio-label {
      display: inline-block;
      margin-right: 20px;
    }
    .form-group button {
      background-color: #4CAF50;
      color: white;
      padding: 10px 20px;
      border: none;
      border-radius: 4px;
      cursor: pointer;
      font-size: 16px;
    }
    .form-group button:hover {
      background-color: #45a049;
    }
    .message {
      margin-top: 20px;
      padding: 15px;
      border-radius: 5px;
      font-size: 1em;
      text-align: center;
    }
    .message.success {
      background-color: #d4edda;
      color: #155724;
      border: 1px solid #c3e6cb;
    }
    .message.error {
      background-color: #f8d7da;
      color: #721c24;
      border: 1px solid #f5c6cb;
    }
    .hidden {
      display: none;
    }
  </style>
</head>
<body>
  <div class="form-container">
    <h2><?=title?></h2>
    <form id="myForm">
      <div id="message-block" class="hidden"></div>
      <div class="form-group">
        <label for="email">電子郵件:</label>
        <input type="email" value="<?=email?>" readonly/>
      </div>
      <div class="form-group">
        <label for="buildNumber">版本號:</label>
        <input type="number" value="<?=buildNumber?>"/>
      </div>
      <div class="form-group">
        <label for="branch">Review 中的 PR:</label>
        <select id="branch" name="branch">
          <option>請選擇</option>
          <? pullRequests.forEach(pullRequest => { ?>
            <option value="<?=pullRequest.head.ref?>">[<?=pullRequest.state?>] <?=pullRequest.title?></option>
          <? }); ?>
        </select>
      </div>
      <div class="form-group">
        <label for="message">更新內容:</label>
        <textarea id="message" name="message" rows="4" placeholder="請輸入您的訊息"></textarea>
      </div>
      <div class="form-group">
        <button type="submit">送出</button>
      </div>
    </form>
  </div>
  <script>
    function displayMessage(ok, message) {
      const messageBlock = document.getElementById('message-block');
      messageBlock.className = ok ? 'message success' : 'message error';
      messageBlock.innerHTML = message;
      messageBlock.classList.remove('hidden');
    }

    document.getElementById("myForm").addEventListener("submit", function(e) {
      e.preventDefault();
      const formData = new FormData(this);
      const formObject = Object.fromEntries(formData);
      google.script.run.withSuccessHandler((response) => {
        displayMessage(response.ok, response.message);
      }).processForm(formObject);
    });
  </script>
</body>
</html>
表單內容可依照需求自行調整。
程式碼.gs:
function doGet(e) {
  // 對應到左方檔案 Form.html
  const htmlTemplate = HtmlService.createTemplateFromFile('Form');

  const email = Session.getActiveUser().getEmail();
  // 取得使用者信箱,只限 執行身份:存取網頁程式的使用者 設定有效

  const title = "App CD 打包請求表單";

  const buildNumber = genBuildNumber();

  htmlTemplate.email = email;
  htmlTemplate.title = title;
  htmlTemplate.pullRequests = []; // 下一步在串接 Github...
  htmlTemplate.buildNumber = buildNumber;

  const html = htmlTemplate.evaluate();
  html.setTitle(title);
  //html.setWidth(600) // 設定頁面寬度

  return html
}

function processForm(object) {
  return {"ok": true, "message": "請求送出成功!"};
}

function genBuildNumber() {
  const now = new Date();
  const formattedDate = Utilities.formatDate(now, "Asia/Taipei", "yyyyMMddHHmmss");
  const milliseconds = now.getMilliseconds().toString().padStart(3, '0'); // 確保毫秒是 3 位數
  return `${formattedDate}${milliseconds}`;
}
這一步,我們先把表單 GUI 完成,下一步再來串接 Github API 拿到 PR 分支列表。
Step 2. 部署 Google Apps Script Web App Form
我們先把剛剛的內容部署一次,查看結果。
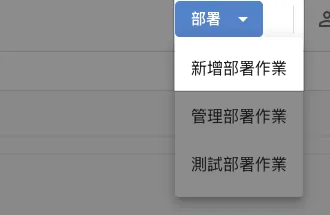
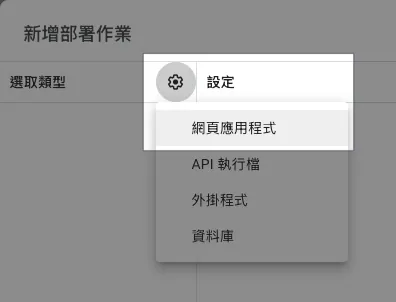
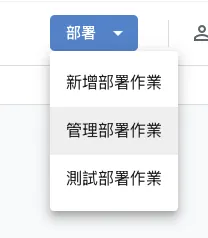
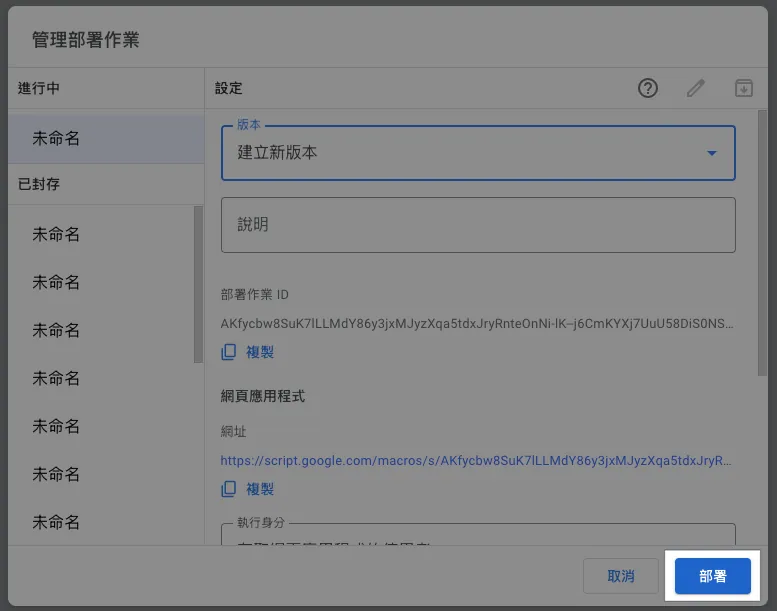
在 GAS 右上角選擇「部署」-> 「新增部署作業」->「網頁應用程式」:
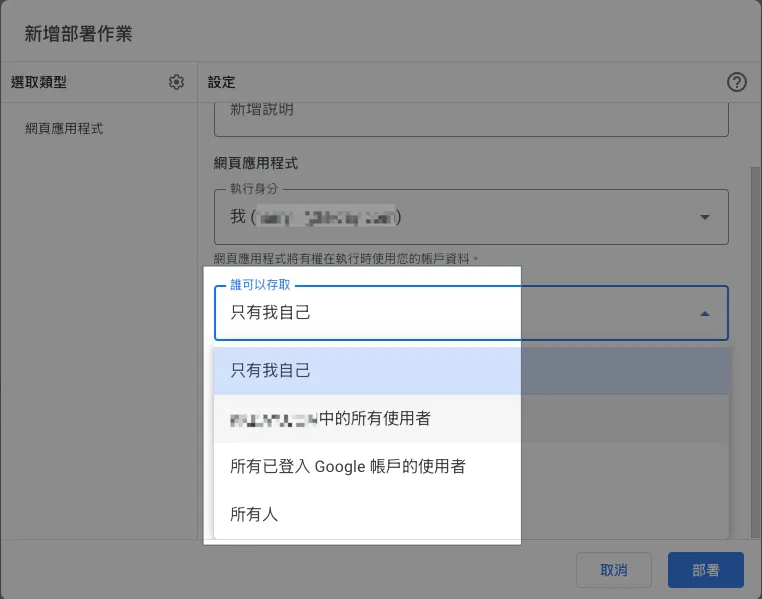
執行身份跟誰可以存取分別可以設置成:
執行身份:
- 我
統一都用你的帳號身分執行腳本。 - 存取網頁程式的使用者
會以當前登入的 Google 帳號使用者身份執行腳本。
誰可以存取:
- 只有我自己
- XXX 同個組織中的所有使用者
只有同組織+已登入的 Google 帳號使用者可以存取。 - 所有已登入 Google 帳號的使用者
已登入的 Google 帳號使用者都可以存取。 - 所有人
不需要登入 Google 帳號、所有人都可以公開存取。
我們選擇「誰可以存取:XXX 同個組織中的所有使用者」+「執行身份:存取網頁程式的使用者」就能 自動限制只有組織帳號的人可以使用 ,並且用他自己的身份執行!
是一個很方便權限控管的功能!
選完點擊右下「部署」。
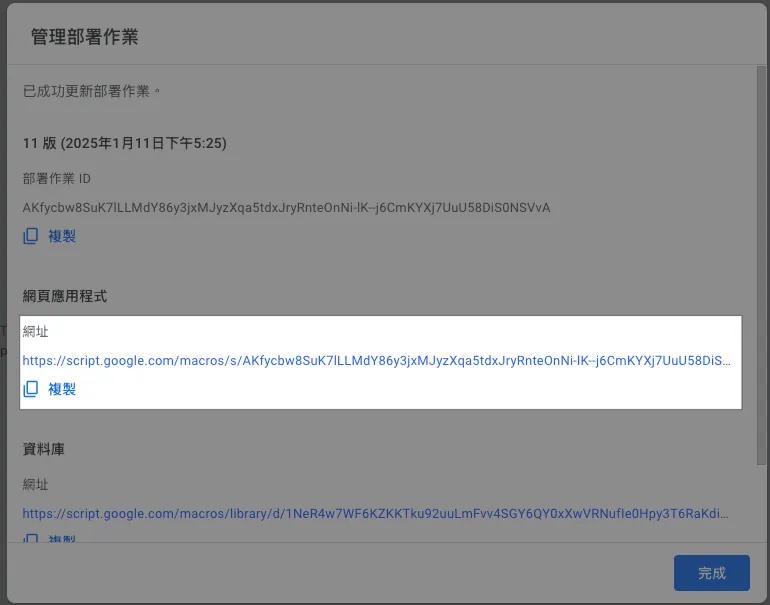
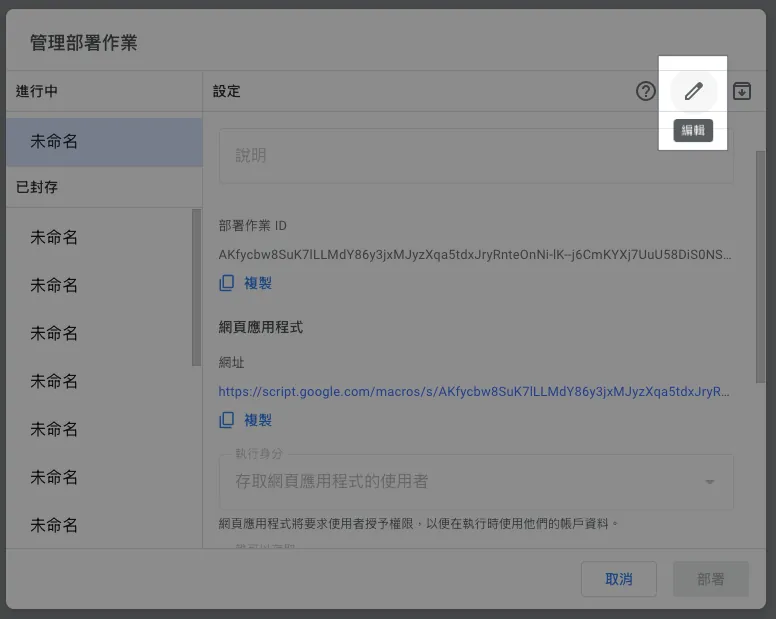
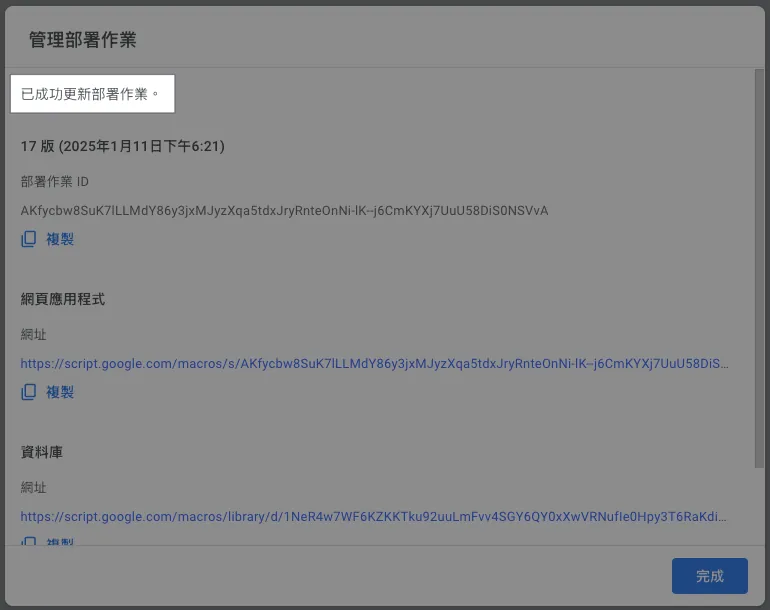
網頁應用程式中的網址,就是 Web App 存取網址。
https://script.google.com/macros/s/AKfycbw8SuK7lLLMdY86y3jxMJyzXqa5tdxJryRnteOnNi-lK--j6CmKYXj7UuU58DiS0NSVvA/exec
網址很長很醜,但是沒辦法,只能自己找短網址工具縮短一下。
點網址打開頁面查看效果:
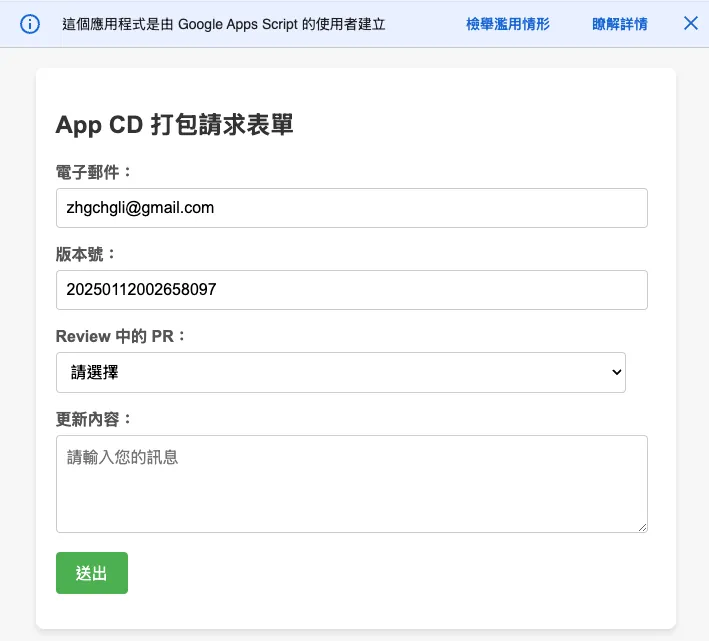
這邊要多提兩個 GAS 限制:
- GAS Web App 上方警告提示,預設無法隱藏
- GAS Web App 是用 IFrame 把我們的頁面嵌在裡面,因此很難做到 100% RWD 效果
只能使用
.setWidth()調整視窗寬度
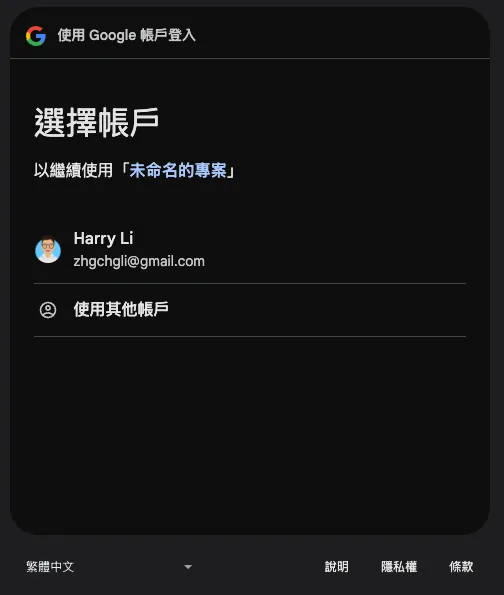
Google Apps Script 授權警告
第一次使用 、點擊「偵錯」或「執行」可能會出下以下授權警告:
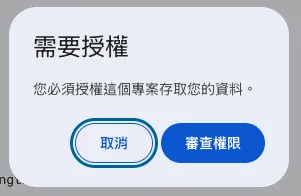
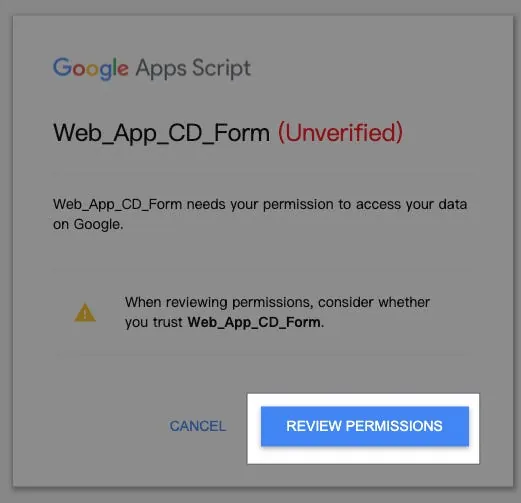
選擇想要執行的身份帳號,如果有出現「這個應用程式未經 Google 驗證」則點擊「進階」->「前往 XXX (不安全)」,選擇「允許」:
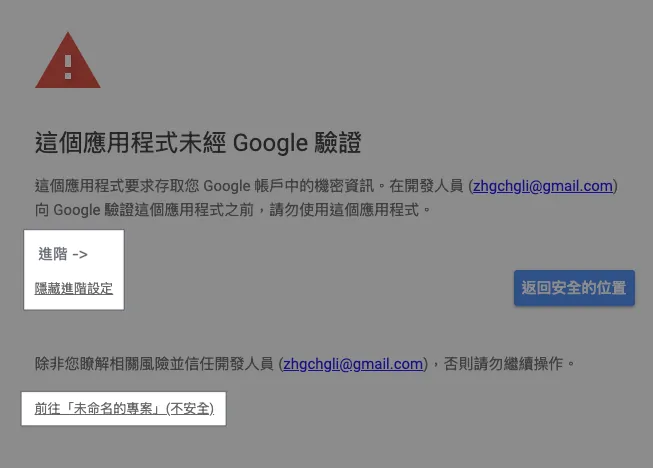
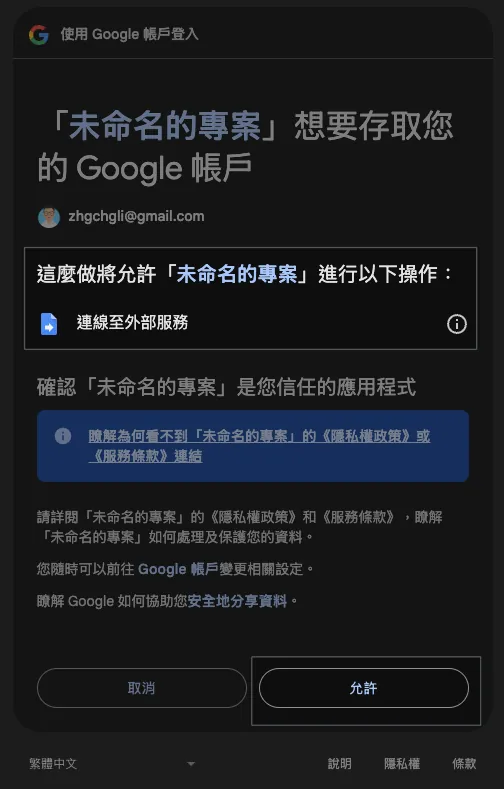
如果 GAS 程式權限有變動(例如:多加存取 Google Sheet…etc)才會需要再重新授權,不然點過一次就不會再出現。
如遇到:已封鎖存取權「XXX」未完成 Google 驗證程序, 可參考我最新文章的 GCP 設定。
Step 3. 串接 Github API 取得 PR 分支列表
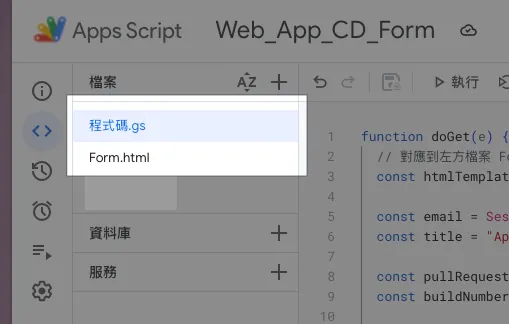
我們新增一個 Github.gs 程式檔案存放 Github API 相關邏輯。
Github.gs:
// SECRET
const githubPersonalAccessToken = ""
// 使用你的 Github 帳號或組織共用的 Github 帳號創建 PAT
// https://docs.github.com/en/authentication/keeping-your-account-and-data-secure/managing-your-personal-access-tokens

// 方式 1: Restful API 存取
function githubAPI(method, path, payload = null) {
  try {
    const url = "https://api.github.com"+path;
    var options = {
      method: method,
      headers: {
        "Accept": "application/vnd.github+json",
        "Authorization": `Bearer ${githubPersonalAccessToken}`,
        "X-GitHub-Api-Version": "2022-11-28"
      }
    };

    if (method.toLowerCase().trim() == "post") {
      options.payload = JSON.stringify(payload);
    }

    const response = UrlFetchApp.fetch(url, options);
    const data = JSON.parse(response.getContentText());
    return data;
  } catch (error) {
    throw error;
  }
}

// 方式 2: GraphQL 存取
// Github API 部分更細的查詢功能只有 GraphQL API 有提供
// https://docs.github.com/en/graphql
function githubGraphQL(query, variables) {
  const url = "https://api.github.com/graphql";
  const payload = {
    query: query,
    variables: variables
  };

  const options = {
    method: "post",
    contentType: "application/json",
    headers: {
      "Accept": "application/vnd.github+json",
      "Authorization": `Bearer ${githubPersonalAccessToken}`,
      "X-GitHub-Api-Version": "2022-11-28"
    },
    payload: JSON.stringify(payload)
  };

  try {
    const response = UrlFetchApp.fetch(url, options);
    const data = JSON.parse(response.getContentText());
    return data;
  } catch (error) {
    throw error;
  }
}

// GraphQL Example:
// const query = `
//   query($owner: String!, $repo: String!) {
//     repository(owner: $owner, name: $repo) {
//       pullRequests(states: OPEN, first: 100, orderBy: { field: CREATED_AT, direction: DESC }) {
//         nodes {
//           title
//           url
//           number
//           createdAt
//           author {
//             login
//           }
//           headRefName
//           baseRefName
//           body
//         }
//         pageInfo {
//           hasNextPage
//           endCursor
//         }
//       }
//     }
//   }
// `;
// const variables = {
//   owner: "swiftlang",
//   repo: "swift"
// };
// const response = githubGraphQL(query, variables);
Github API 有兩種存取方式,一種是傳統的 Restful,另一種是更彈性的 GraphQL;本文以 Restful 為例。
程式碼.gs:
function doGet(e) {
// 對應到左方檔案 Form.html
const htmlTemplate = HtmlService.createTemplateFromFile('Form');
const email = Session.getActiveUser().getEmail();
// 取得使用者信箱,只限 執行身份:存取網頁程式的使用者 設定有效
const title = "App CD 打包請求表單";
const pullRequests = githubAPI("get", "/repos/swiftlang/swift/pulls");
// 以 https://github.com/swiftlang/swift/pulls 為例
const buildNumber = genBuildNumber();
htmlTemplate.email = email;
htmlTemplate.title = title;
htmlTemplate.pullRequests = pullRequests;
htmlTemplate.buildNumber = buildNumber;
const html = htmlTemplate.evaluate();
html.setTitle(title);
//html.setWidth(600) // 設定頁面寬度
return html
}
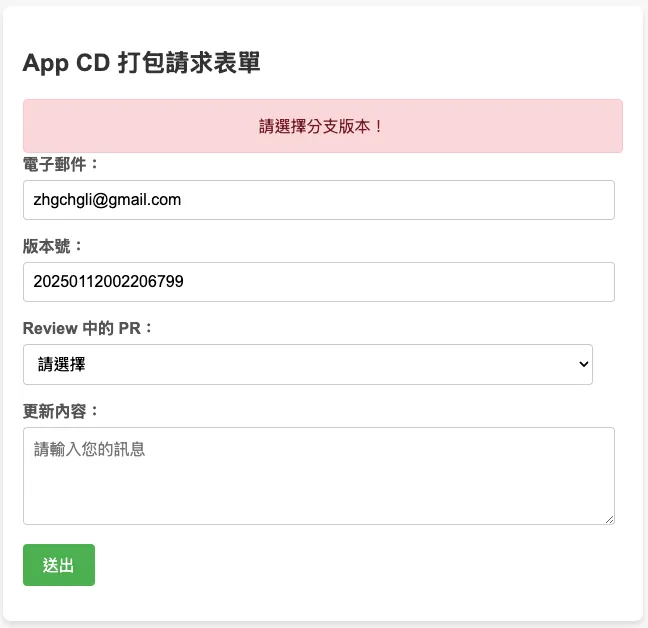
function processForm(object) {
if (object.buildNumber == "") {
return {"ok": false, "message": "請輸入版本號!"};
}
if (object.branch == "") {
return {"ok": false, "message": "請選擇分支版本!"};
}
// 帶上你要帶到 Github Action 的參數
const payload = {
ref: object.branch,
inputs: {
buildNumber: object.buildNumber
}
};
//
try {
const response = githubAPI("post", "/repos/zhgchgli0718/ios-project-for-github-action-ci-cd-demo/actions/workflows/CD-Job.yml/dispatches", payload);
// 以 https://github.com/zhgchgli0718/ios-project-for-github-action-ci-cd-demo/blob/main/.github/workflows/CD-Job.yml 為例
return {"ok": true, "message": `打包請求發送成功!<br/>對應分支:<strong>${object.branch}</strong><br/>版號:<strong>${object.buildNumber}</strong>`};
} catch (error) {
return {"ok": false, "message": "發生錯誤:"+error.message};
}
}
processForm 方法中處理表單回傳的內容,也可以多加上更多吃
GAS x Github API x Github Action
這邊多補充一下對應到的 Github Action。
CD-Job.yml:
# CD 打包工作

name: CD-Job

on:
  workflow_dispatch:
    inputs:
      buildNumber: # 對應 GAS payload.inpus.xxx
        description: '版本號碼'
        required: false
        type: string
      # ...More
      # Inputs 類型可參考官方文件:https://docs.github.com/en/actions/writing-workflows/workflow-syntax-for-github-actions#onworkflow_dispatchinputs

jobs:
  some-job:
    runs-on: ubuntu-latest
    steps:
      - name: Print Inputs
        run: |
          echo "Release Build Number: ${{ github.event.inputs.buildNumber }}"
Step 4. 重新部署 Google Apps Script Web App Form
⚠️請注意,GAS 程式碼的任何調整都需要重新部署,才會生效。⚠️
⚠️請注意,GAS 程式碼的任何調整都需要重新部署,才會生效。⚠️
⚠️請注意,GAS 程式碼的任何調整都需要重新部署,才會生效。⚠️
GAS 右上角選擇「部署」-> 選擇右上角「編輯」-> 版本選擇「建立新版本」
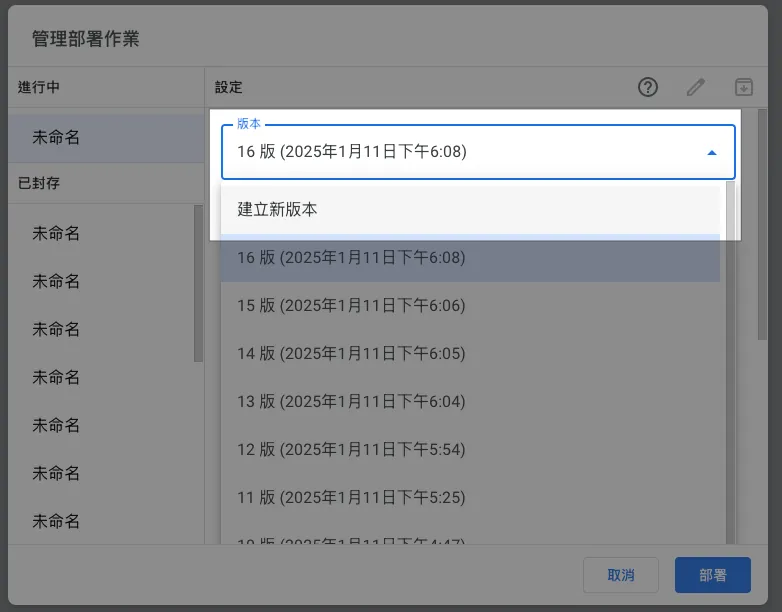
點擊「部署」-> 完成。
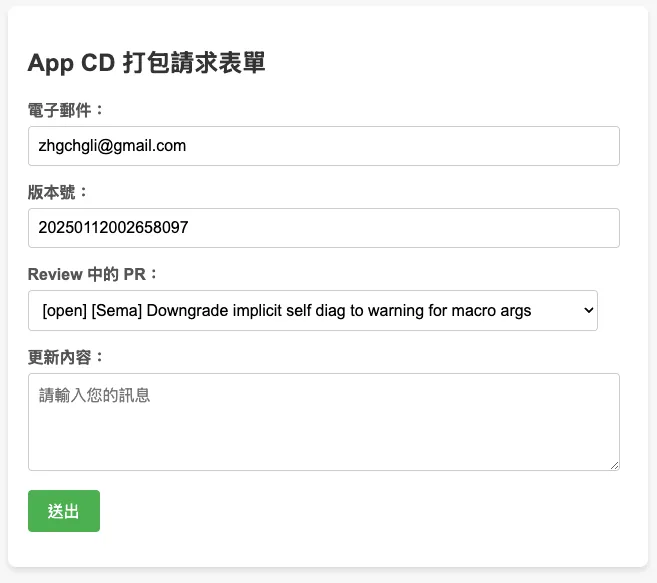
再回到網頁上重新整理,就能看到修改後的結果了:
⚠️請注意,GAS 程式碼的任何調整都需要重新部署,才會生效。⚠️
⚠️請注意,GAS 程式碼的任何調整都需要重新部署,才會生效。⚠️
⚠️請注意,GAS 程式碼的任何調整都需要重新部署,才會生效。⚠️
Done! 🎉🎉🎉
現在你可以在組織內分享這個連結給其他夥伴,他們可以直接使用這個網頁 GUI 執行 CI/CD 工作。
延伸 (1)— 用使用者的信箱查詢 Slack User ID & 發送、更新進度通知
前文有提到,我們希望及時通知使用者 CI/CD 執行狀況,我們可以使用使用者提供的信箱去查 Slack User ID。
Slack.gs:
const slackBotToken = ""
// https://medium.com/zrealm-robotic-process-automation/slack-chatgpt-integration-bd94cc88f9c9

function slackRequest(path, content) {
  const options = {
    method: "post",
    contentType: "application/json",
    headers: {
      Authorization: `Bearer ${slackBotToken}`, // Use the bot token for authorization,
      'X-Slack-No-Retry': 1
    },
    payload: JSON.stringify(content)
  };

  try {
    const response = UrlFetchApp.fetch("https://slack.com/api/"+path, options);
    const responseData = JSON.parse(response.getContentText());
    if (responseData.ok) {
      return responseData
    } else {
      throw new Error(`Slack: ${responseData.error}`);
    }
  } catch (error) {
    throw error;
  }
}

// 用信箱查詢 Slask UID
function getSlackUserId(email) {
  return slackRequest(`users.lookupByEmail?email=${encodeURIComponent(email)}`)?.user?.id;
}

// 發送訊息給目標 Slack UID (channelID)
function sendSlackMessage(channelId, ts = null, value)  {
  var content = {
    channel: channelId
  };

  if (ts != null) {
    content.thread_ts = ts;
  }

  if (typeof value === "string") {
    content.text = value;
  } else {
    content.blocks = value;
  }
  return slackRequest("chat.postMessage", content);
}

// 更新發送的訊息內容
function updateSlackMessage(channelId, ts = null, value)  {
  var content = {
    channel: channelId
  };

  if (ts != null) {
    content.ts = ts;
  }

  if (typeof value === "string") {
    content.text = value;
  } else {
    content.blocks = value;
  }
  return slackRequest("chat.update", content);
}
Slack API 使用請參考 官方文件 。
Githun Action YAML 可以使用這個 Action 持續更新訊息、發送 Slack 訊息:
# ...
on:
  workflow_dispatch:
    inputs:
      buildNumber: # 對應 GAS payload.inpus.xxx
        description: '版本號碼'
        required: false
        type: string
      # ...More
      SLACK_USER_ID:
        description: 'Slack User Id for receive action notification'
        type: string
      SLACK_CHANNEL_ID:
        description: 'Slack Channel Id for receive action notification'
        type: string
      SLACK_THREAD_TS:
        description: 'Slack message ts'
        type: string

jobs:
  # some jobs...

  if-deploy-failed-message:
    runs-on: ubuntu-latest
    if: failure()
      - name: update slack message
        uses: slackapi/[email protected]
        with:
            method: chat.update
            token: ${{ secrets.SLACK_BOT_TOKEN }}
            payload: |
              channel: ${{ github.event.inputs.SLACK_CHANNEL_ID }}
              ts: ${{ github.event.inputs.SLACK_THREAD_TS }}
              text: "❌ 打包任務失敗,請檢查執行狀況結果或稍後再試。\n<${{ github.server_url }}/${{ github.repository }}/actions/runs/${{ github.run_id }}|點此查看執行狀況> cc'ed <@${{ github.event.inputs.SLACK_USER_ID }}>"
效果:
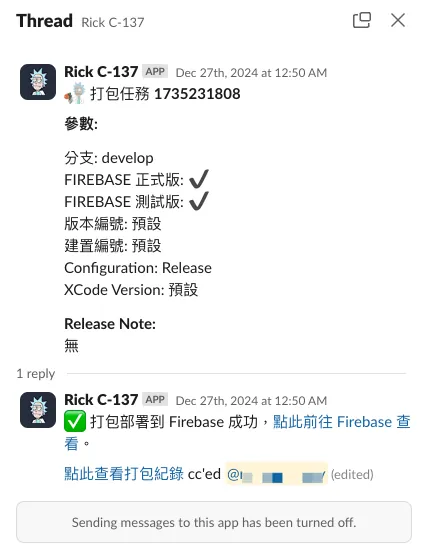
Slack App 串接細節可參考我之前的文章: Slack & ChatGPT Integration 。
延伸 (2) —查詢 Jira 工單
Jira.gs:
const jiraPersonalAccessToken = ""
// https://confluence.atlassian.com/enterprise/using-personal-access-tokens-1026032365.html

function getJiraTickets() {
  const url = `https://xxx.atlassian.net/rest/api/3/search`;

  // JQL query
  const jql = `project = XXX`;
  const queryParams = {
    jql: jql,
    maxResults: 50, // Adjust as needed
  };

  const options = {
    method: "get",
    headers: {
      Authorization: "Basic " + jiraPersonalAccessToken,
      "Content-Type": "application/json",
    },
    muteHttpExceptions: true,
  };

  const queryString = Object.keys(queryParams).map(key => `${encodeURIComponent(key)}=${encodeURIComponent(queryParams[key])}`).join("&");
  const response = UrlFetchApp.fetch(url + "?" + queryString + "&fields=", options);
  // could specify only return some fields

  if (response.getResponseCode() === 200) {
    const issues = JSON.parse(response.getContentText()).issues;
    return issues;
  } else {
    Logger.log(`Error: ${response.getResponseCode()} - ${response.getContentText()}`);
    throw new Error("Failed to fetch Jira issues.");
  }
}
其他 Jira API 使用請參考 官方文件 。
延伸 (3) — 查詢 Asana 工單
Asana.gs:
const asanaPersonalAccessToken = ""
// https://developers.asana.com/docs/personal-access-token

function asanaAPI(endpoint, method = "GET", data = null) {
    var options = {
      "method" : method,
      "contentType" : "application/json",
      "headers": {
          "Authorization":  "Bearer "+asanaPersonalAccessToken
      }
    };

    if (data != null) {
      options["payload"] = JSON.stringify({"data":data});
    }

    const url = "https://app.asana.com/api/1.0"+endpoint;
    const res = UrlFetchApp.fetch(url, options);
    const data = JSON.parse(res.getContentText());
    return data;
}

// 查找 tasks in project
// asanaAPI("/projects/PROJECT_ID/tasks");
其他 Asana API 使用請參考 官方文件 。
總結
自動化、工作及開發流程優化缺的永遠不是技術,而是想法;只要有想法我們都能找到適合的技術來實現,共勉之!
2025/07 Update:
此功能已整合到實際打包工具使用,可參考最新文章案例:「 CI/CD 實戰指南(四):使用 Google Apps Script Web App 串接 GitHub Actions 建置免費易用的打包工具平台 」

留言 · Comments