Laravel Homestead|快速建置开发环境与 phpMyAdmin 管理 MySQL 资料库
针对 Laravel 开发者,详细教学如何用 Homestead 搭配 phpMyAdmin 建立本地开发环境,解决资料库管理繁琐问题,提升开发效率并确保环境稳定运作。
Click here to view the English version of this article.
點擊這裡查看本文章正體中文版本。
基于 SEO 考量,本文标题与描述经 AI 调整,原始版本请参考内文。
文章目录
[重灌笔记1] -Laravel Homestead + phpMyAdmin 环境建置
从 0 到 1 建置 Laravel 开发环境并搭配 phpMyAdmin GUI 管理 MySql 资料库
{:target="_blank"}](/assets/87090f101b9a/1*9MZPkre9WoEpnu9-BCQNrw.webp)
最近把 Mac Reset 一遍,纪录一下重新还原 Laravel 开发环境的步骤。
环境需求
Vagrant :虚拟环境配置工具
VirtualBox :免费虚拟机软体,如果已有购买 Parallels 也可直接使 Parallels(但需要安装 plug-in )
下载、安装完这两个软体后,继续下一步设定。
VirtualBox 安装时会要求要重新开机还有要到「设定」->「安全性与隐私权」->「Allow VirtualBox」才能启用所有服务。
配置 Homestead 环境
1
2
3
4
git clone https://github.com/laravel/homestead.git ~/Homestead
cd ~/Homestead
git checkout release
bash init.sh
phpMyAdmin
phpMyAdmin 是一个以PHP为基础,以Web-Base方式架构在网站主机上的MySQL的资料库管理工具,让管理者可用Web介面管理MySQL资料库。借由此Web介面可以成为一个简易方式输入繁杂SQL语法的较佳途径,尤其要处理大量资料的汇入及汇出更为方便。 — Wiki
到 phpMyAdmin 官网下载最新版本回来。
解压缩 .zip -> 资料夹 -> 重新命名资料夹名称 -> 「phpMyAdmin」:
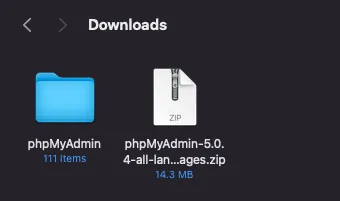
将 phpMyAdmin 资料夹移动到 ~/Homestead 资料夹中:

phpMyAdmin 设定
在 phpMyAdmin 资料夹中找到 config.sample.inc.php ,将其改名为 config.inc.php ,并使用编辑器打开,修改成以下设定:
1
2
3
4
5
6
7
8
9
10
11
12
13
14
15
16
17
18
19
20
21
22
23
24
25
26
27
28
29
30
31
32
33
34
35
36
37
38
39
40
41
42
43
44
45
46
47
48
49
50
51
52
53
54
55
56
57
58
59
60
61
62
63
64
65
66
67
68
69
70
71
72
73
74
75
76
77
78
79
80
81
82
83
84
85
86
87
88
89
90
91
92
93
94
95
96
97
98
99
100
101
102
103
104
105
106
107
108
109
110
111
112
113
114
115
116
117
118
119
120
121
122
123
124
125
126
127
128
129
130
131
132
133
134
135
136
137
138
139
140
141
142
143
144
145
146
147
148
149
150
151
152
153
154
155
156
157
<?php
/* vim: set expandtab sw=4 ts=4 sts=4: */
/**
 * phpMyAdmin sample configuration, you can use it as base for
 * manual configuration. For easier setup you can use setup/
 *
 * All directives are explained in documentation in the doc/ folder
 * or at <https://docs.phpmyadmin.net/>.
 *
 * @package PhpMyAdmin
 */
declare(strict_types=1);

/**
 * This is needed for cookie based authentication to encrypt password in
 * cookie. Needs to be 32 chars long.
 */
$cfg['blowfish_secret'] = ''; /* YOU MUST FILL IN THIS FOR COOKIE AUTH! */

/**
 * Servers configuration
 */
$i = 0;

/**
 * First server
 */
$i++;
/* Authentication type */
$cfg['Servers'][$i]['auth_type'] = 'config';
/* Server parameters */
$cfg['Servers'][$i]['host'] = 'localhost';
$cfg['Servers'][$i]['user'] = 'homestead';
$cfg['Servers'][$i]['password'] = 'secret';
$cfg['Servers'][$i]['compress'] = false;
$cfg['Servers'][$i]['AllowNoPassword'] = false;

/**
 * phpMyAdmin configuration storage settings.
 */

/* User used to manipulate with storage */
// $cfg['Servers'][$i]['controlhost'] = '';
// $cfg['Servers'][$i]['controlport'] = '';
// $cfg['Servers'][$i]['controluser'] = 'pma';
// $cfg['Servers'][$i]['controlpass'] = 'pmapass';

/* Storage database and tables */
// $cfg['Servers'][$i]['pmadb'] = 'phpmyadmin';
// $cfg['Servers'][$i]['bookmarktable'] = 'pma__bookmark';
// $cfg['Servers'][$i]['relation'] = 'pma__relation';
// $cfg['Servers'][$i]['table_info'] = 'pma__table_info';
// $cfg['Servers'][$i]['table_coords'] = 'pma__table_coords';
// $cfg['Servers'][$i]['pdf_pages'] = 'pma__pdf_pages';
// $cfg['Servers'][$i]['column_info'] = 'pma__column_info';
// $cfg['Servers'][$i]['history'] = 'pma__history';
// $cfg['Servers'][$i]['table_uiprefs'] = 'pma__table_uiprefs';
// $cfg['Servers'][$i]['tracking'] = 'pma__tracking';
// $cfg['Servers'][$i]['userconfig'] = 'pma__userconfig';
// $cfg['Servers'][$i]['recent'] = 'pma__recent';
// $cfg['Servers'][$i]['favorite'] = 'pma__favorite';
// $cfg['Servers'][$i]['users'] = 'pma__users';
// $cfg['Servers'][$i]['usergroups'] = 'pma__usergroups';
// $cfg['Servers'][$i]['navigationhiding'] = 'pma__navigationhiding';
// $cfg['Servers'][$i]['savedsearches'] = 'pma__savedsearches';
// $cfg['Servers'][$i]['central_columns'] = 'pma__central_columns';
// $cfg['Servers'][$i]['designer_settings'] = 'pma__designer_settings';
// $cfg['Servers'][$i]['export_templates'] = 'pma__export_templates';

/**
 * End of servers configuration
 */

/**
 * Directories for saving/loading files from server
 */
$cfg['UploadDir'] = '';
$cfg['SaveDir'] = '';

/**
 * Whether to display icons or text or both icons and text in table row
 * action segment. Value can be either of 'icons', 'text' or 'both'.
 * default = 'both'
 */
//$cfg['RowActionType'] = 'icons';

/**
 * Defines whether a user should be displayed a "show all (records)"
 * button in browse mode or not.
 * default = false
 */
//$cfg['ShowAll'] = true;

/**
 * Number of rows displayed when browsing a result set. If the result
 * set contains more rows, "Previous" and "Next".
 * Possible values: 25, 50, 100, 250, 500
 * default = 25
 */
//$cfg['MaxRows'] = 50;

/**
 * Disallow editing of binary fields
 * valid values are:
 *   false    allow editing
 *   'blob'   allow editing except for BLOB fields
 *   'noblob' disallow editing except for BLOB fields
 *   'all'    disallow editing
 * default = 'blob'
 */
//$cfg['ProtectBinary'] = false;

/**
 * Default language to use, if not browser-defined or user-defined
 * (you find all languages in the locale folder)
 * uncomment the desired line:
 * default = 'en'
 */
//$cfg['DefaultLang'] = 'en';
//$cfg['DefaultLang'] = 'de';

/**
 * How many columns should be used for table display of a database?
 * (a value larger than 1 results in some information being hidden)
 * default = 1
 */
//$cfg['PropertiesNumColumns'] = 2;

/**
 * Set to true if you want DB-based query history.If false, this utilizes
 * JS-routines to display query history (lost by window close)
 *
 * This requires configuration storage enabled, see above.
 * default = false
 */
//$cfg['QueryHistoryDB'] = true;

/**
 * When using DB-based query history, how many entries should be kept?
 * default = 25
 */
//$cfg['QueryHistoryMax'] = 100;

/**
 * Whether or not to query the user before sending the error report to
 * the phpMyAdmin team when a JavaScript error occurs
 *
 * Available options
 * ('ask' \\| 'always' \\| 'never')
 * default = 'ask'
 */
//$cfg['SendErrorReports'] = 'always';

/**
 * You can find more configuration options in the documentation
 * in the doc/ folder or at <https://docs.phpmyadmin.net/>.
 */
主要是新增修改这三项设定:
1
2
$cfg['Servers'][$i]['auth_type'] = 'config';
$cfg['Servers'][$i]['user'] = 'homestead';
homestead 预设 mysql 帐号密码
homestead/secret。
配置 Homestead 设定
用编辑器打开 ~/Homestead/Homestead.yaml 设定档。
1
2
3
4
5
6
7
8
9
10
11
12
13
14
15
16
17
18
19
20
21
22
23
24
25
26
27
28
29
30
31
32
33
34
35
36
37
38
39
40
41
42
43
---
ip: "192.168.10.10"
memory: 2048
cpus: 2
provider: virtualbox

authorize: ~/.ssh/id_rsa.pub

keys:
    - ~/.ssh/id_rsa

folders:
    - map: ~/Projects/Web
      to: /home/vagrant/code
    - map: ~/Homestead/phpMyAdmin
      to: /home/vagrant/phpMyAdmin

sites:
    - map: phpMyAdmin.test
      to: /home/vagrant/phpMyAdmin

databases:
    - homestead

features:
    - mysql: false
    - mariadb: false
    - postgresql: false
    - ohmyzsh: false
    - webdriver: false

#services:
#    - enabled:
#        - "postgresql@12-main"
#    - disabled:
#        - "postgresql@11-main"

# ports:
#     - send: 50000
#       to: 5000
#     - send: 7777
#       to: 777
#       protocol: udp
IP: 预设是192.168.10.10可改可不provider:预设是virtualbox,如果用 Parallels 才需要改folders:新增- map: ~/Homestead/phpMyAdmin to: /home/vagrant/phpMyAdmin
sites:新增- map: phpMyAdmin.test to: /home/vagrant/phpMyAdmin
如果已经有 Laravel 专案也可以一并在此新增,例如我专案都放在 ~/Projects/Web 下,所以我也先把目录映射加上去。
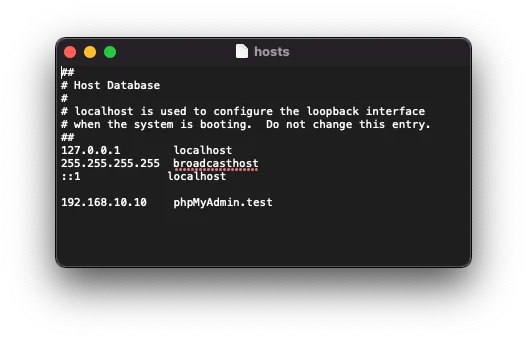
sites 是设定本机虚拟网域与目录映射,我们还需要修改本地 Hosts 档增网域虚拟机映射:
使用 Finder -> Go -> /etc/hosts ,找到 hosts 档案;复制到桌面(因无法直接修改)
网域名称可随意自订,反正只有自己本机可以 Access。
打开复制出来的 Hosts 档案,增加 sites 纪录:
1
<homestead IP 位置> <网域名称>
修改好之后储存,然后再剪下贴回 /etc/hosts ,覆盖掉即可。
安装&启动 Homestead Virtual Machine
1
2
cd ~/Homestead
vagrant up --provision
⚠️请注意 ,如果没加
--provision则设定档不会更新,输入网址会出现no input file specified错误。
第一次启动,需要下载 Homestead 环境包,需要较长的时间。
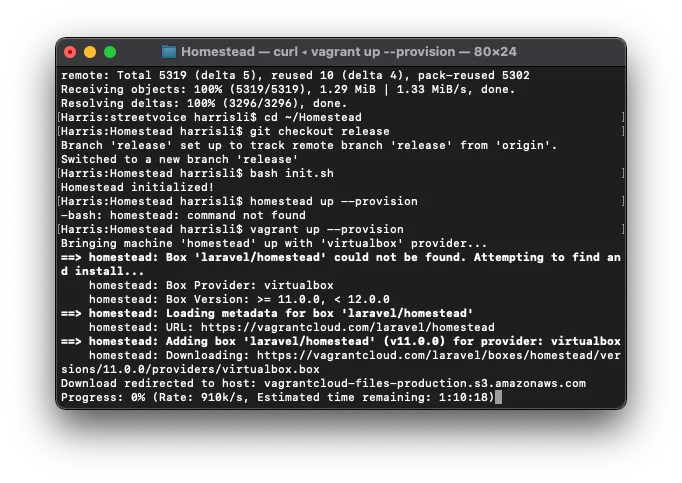
如果没有出现特别的错误即表示启动成功,可以下:
1
vagrant ssh
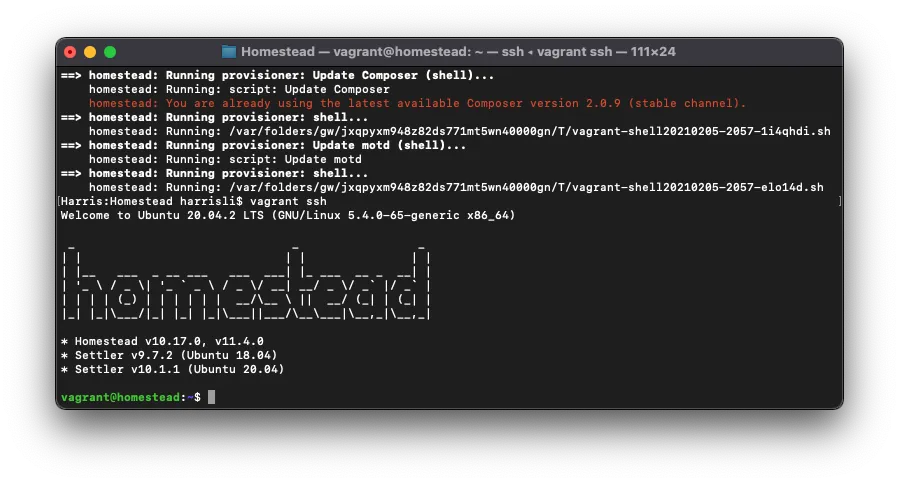
ssh 进入虚拟机。
检查 phpMyAdmin 是否正确连线
前往 http://phpmyadmin.test/ 检查是否正常开启。
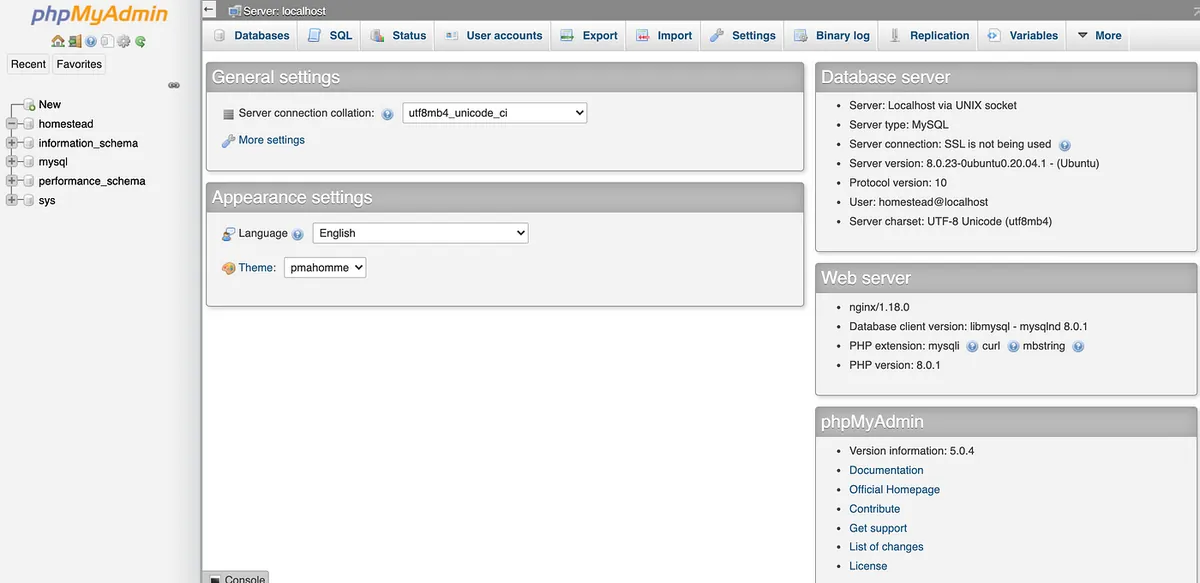
成功!我们遇到要操作资料库的地方,直接进来这边修改即可。
新建 Laravel 专案
如果你有已存在的专案,到这一步已经可以从浏览器在本地运行了,如果没有,这边补充一下新建 Laravel 专案的方式。
1
2
~/Homestead
vagrant ssh
vagrant ssh 进 VM,然后 cd 到 code 目录:
1
cd ./code
下 laravel new 专案名称,建立 Laravel 专案:(以 blog 为例)
1
laravel new blog
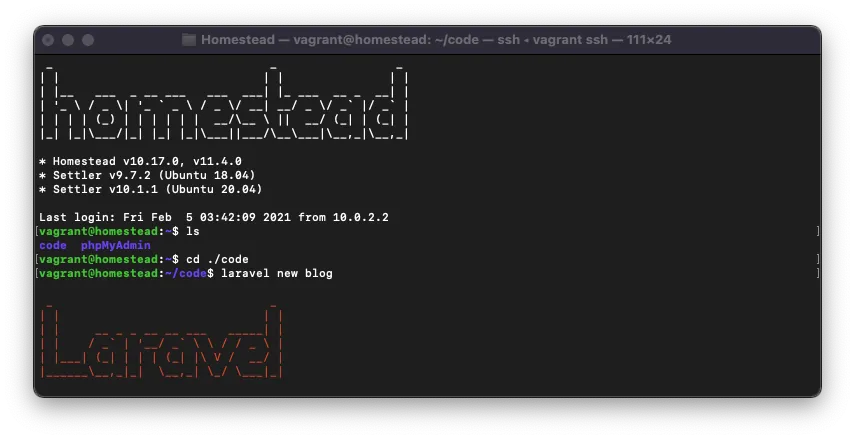
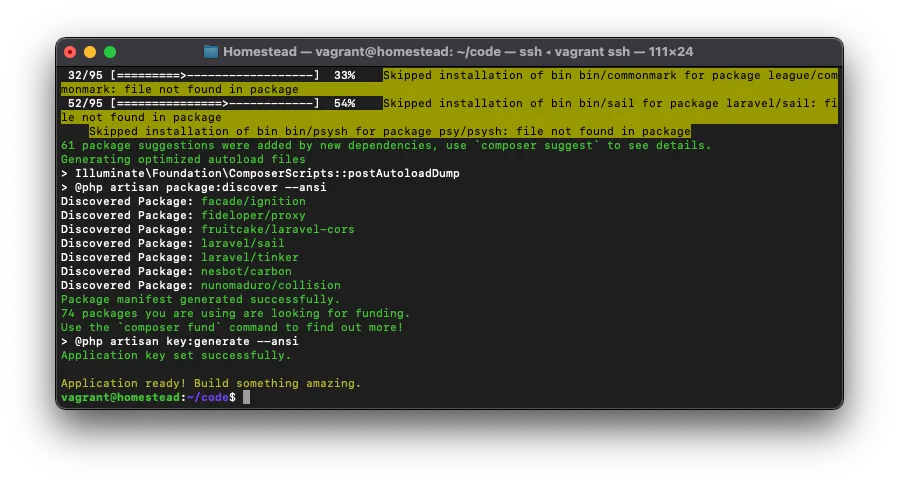
blog 专案建立成功!
再来我们要将专案设定本机器存取测试网域:
回头打开编辑 ~/Homestead/Homestead.yaml 设定档。
在 sites 中新增一笔纪录:
1
2
3
sites:
  - map: myblog.test
  to: /home/vagrant/code/blog/public
记得 hosts 也要加上对应纪录:
1
192.168.10.10.   myblog.test
最后重启 homestead:
1
vagrant reload --provision
在浏览器输入 http://myblog.test 测试是否正确建立&运行:
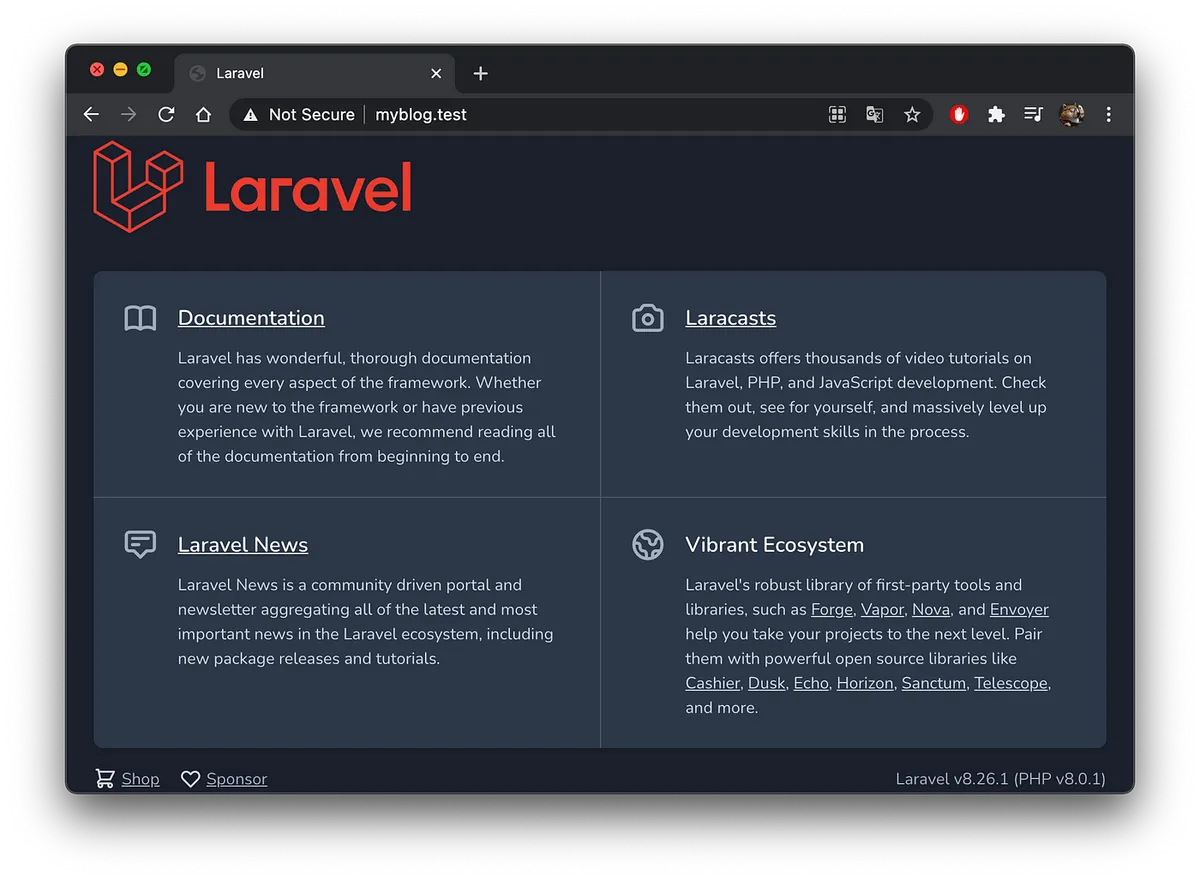
完成!
补充 — Mac 安装 Composer
虽然已经有用 Homestead 可以不需要另外装 Composer,但考虑到有的 PHP 专案并不一定使用 Laravel 所以还是要在本机上安装 Composer。

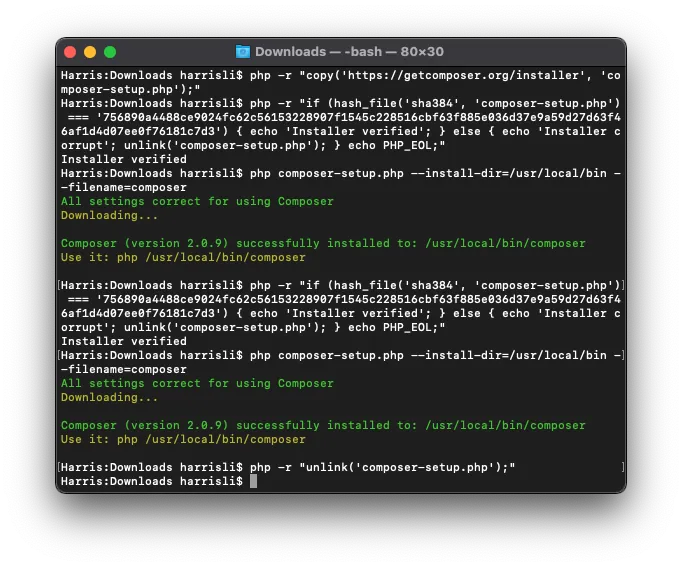
复制下载区段的指令,将 php composer-setup.php 替换为:
1
php composer-setup.php - install-dir=/usr/local/bin - filename=composer
Composer v2.0.9 范例:
1
2
3
4
php -r "copy('https://getcomposer.org/installer', 'composer-setup.php');"
php -r "if (hash_file('sha384', 'composer-setup.php') === '756890a4488ce9024fc62c56153228907f1545c228516cbf63f885e036d37e9a59d27d63f46af1d4d07ee0f76181c7d3') { echo 'Installer verified'; } else { echo 'Installer corrupt'; unlink('composer-setup.php'); } echo PHP_EOL;"
php composer-setup.php --install-dir=/usr/local/bin --filename=composer
php -r "unlink('composer-setup.php');"
并依序在 terminal 输入指令。
⚠️请注意 ,不要直接复制使用以上范例,因为随著 Composer 版本更新 hash check 码也会跟著变。
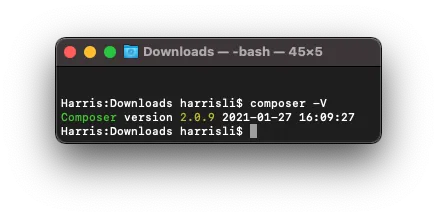
输入 composer -V 确认版本&安装成功!
参考资料
有任何问题及指教欢迎 与我联络 。

本文首次发表于 Medium (点击查看原始版本),由 ZMediumToMarkdown 提供自动转换与同步技术。