[简体中文] Medium to Jekyll 安装设定教学
Medium to Jekyll 安装设定教学

[简体中文] Medium to Jekyll 安装设定教学
Start!
1. 前往 Template Repo -> medium-to-jekyll-starter.github.io
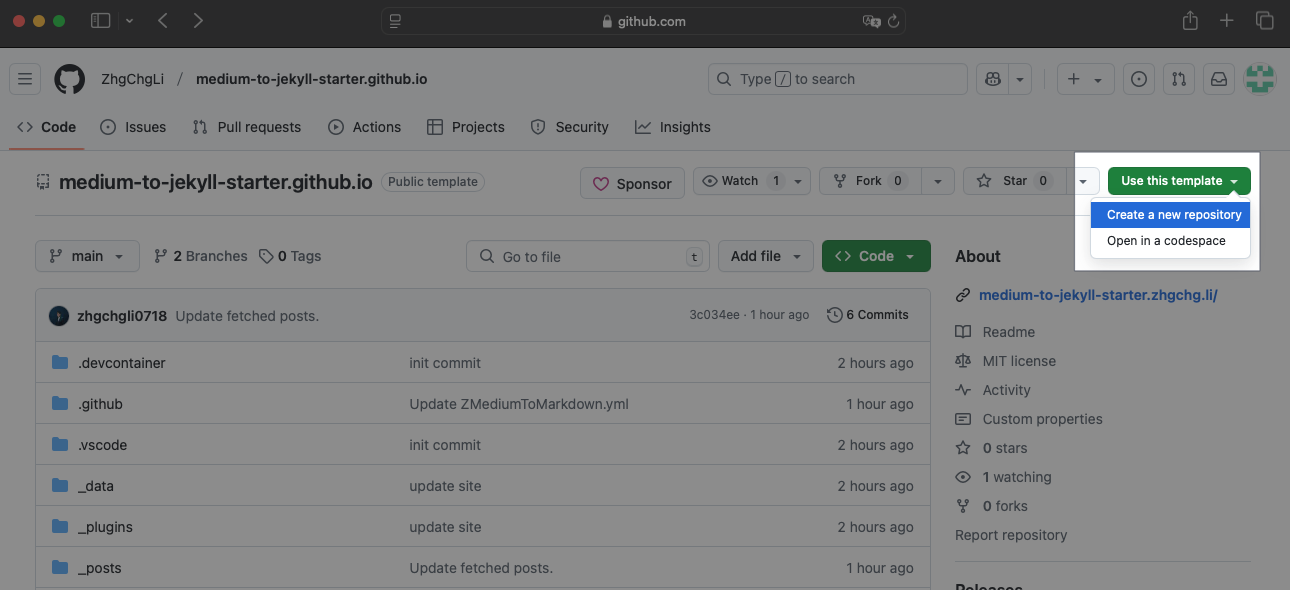
点击右上角「Use this template」->「Create a new repository」
2. Create a new repository

- Repository name: 通常为
帐号或组织名称.github.io,必须以*.github.io为结尾。 - 必须为
PublicRepo 才能使用 Github Pages
调整 GitHub Actions 执行权限

- 建立后,由于 GitHub 的安全性设定,您需要前往储存库设定中启用 GitHub Actions 的执行权限。
3. Create gh-pages branch if needed

- 在 Repo 主页点击「
main」分支选单,输入「gh-pages」,若无则选择「Create branchgh-pagesfrommain」 - 若
gh-pages分支已存在、或建立时出现「Sorry, that branch already exists.」则可跳过此步骤
4. Enable Github Pages,前往 Settings -> Pages -> Build and deployment
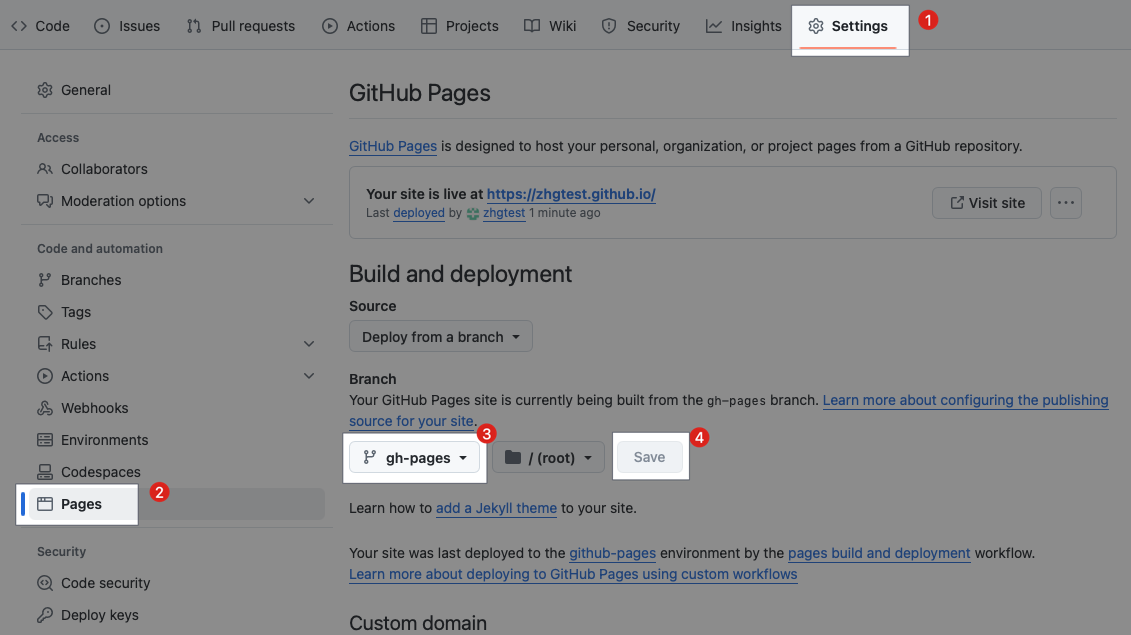
- 选择「
gh-pages」分支,点击「Save」储存设定
执行首次部署
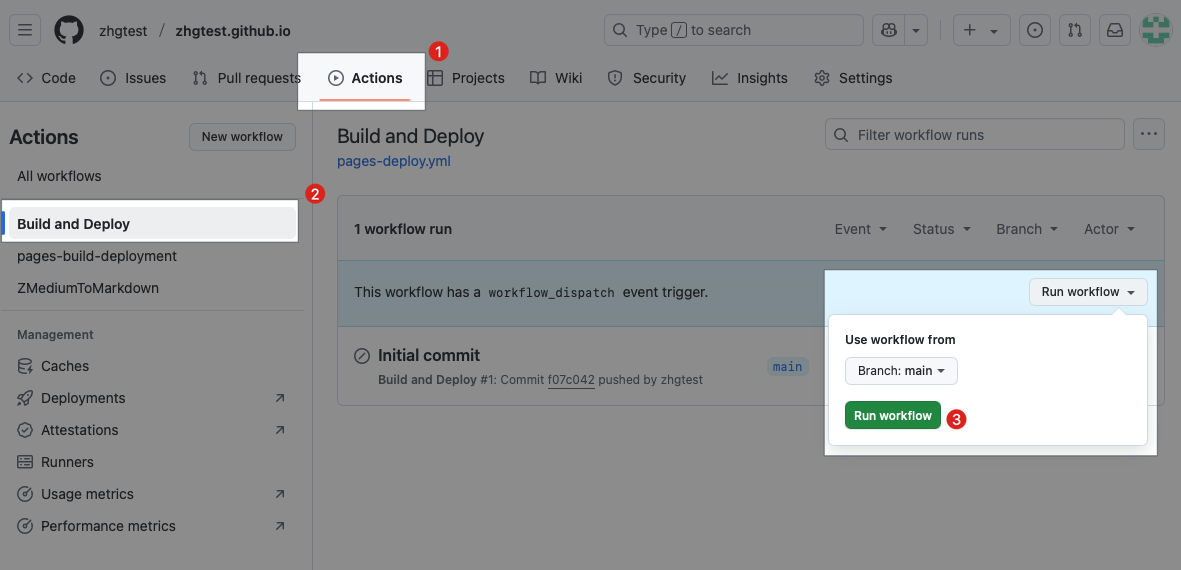
- Repo -> 「Actions」->「Build and Deploy」->「Run workflow」->「Branch: main, Run workflow」
5. 等待所有部署工作完成
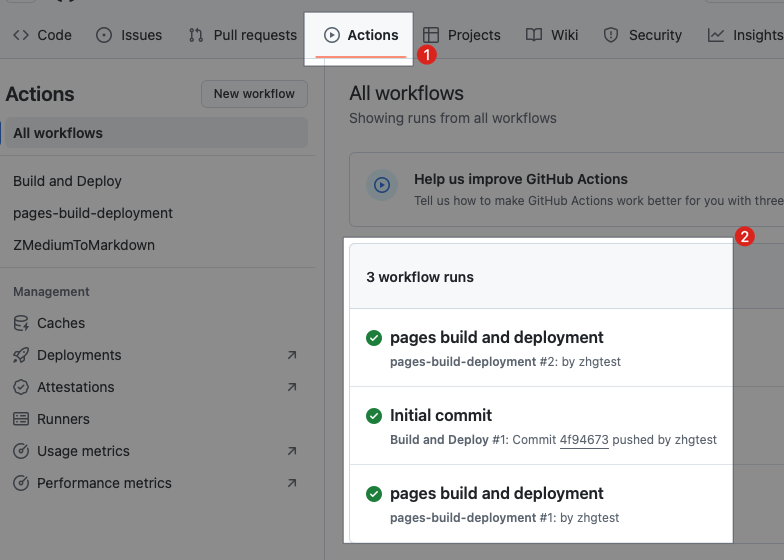
- 🟢 pages build and deployment
- 🟢 Build and Deploy
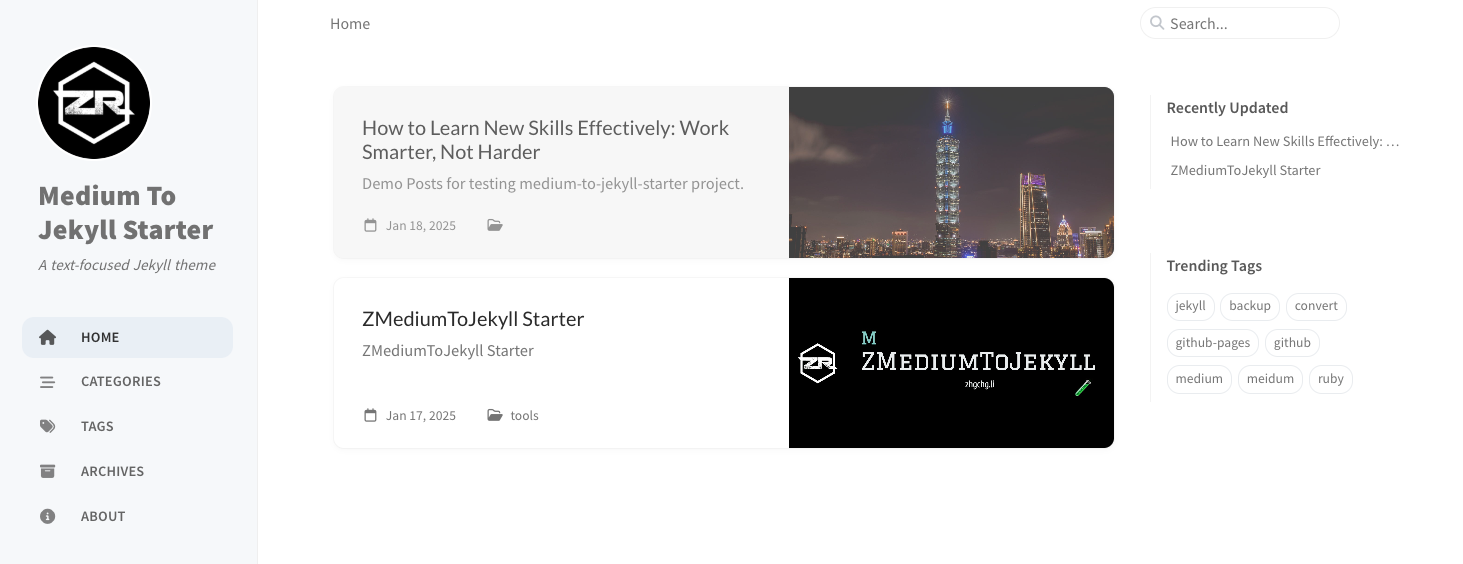
6. 前往网站查看结果
https://
帐号或组织名称.github.io
Troubleshooting
如果页面只显示:
1
--- layout: home # Index page ---
代表 Github Pages 设定错误或还在部署中、或是之前的页面 Cache,请使用强制刷新货无痕浏览器重新打开一次网页。
首次部署成功!🎉🎉🎉请继续设定成同步您的 Medium 帐号。
Github Repo (Github Actions) 设定
1. 前往所属 Github Repo 的 Github Actions 页面 -> 点击「ZMediumToMarkdown」-> 点击「ZMediumToMarkdown.yml」
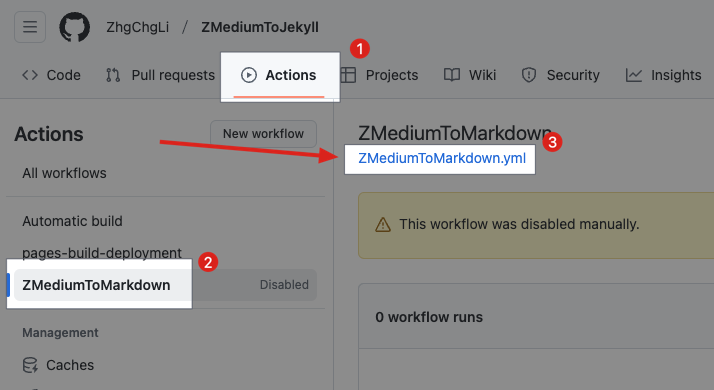
https://github.com/{ORG}/{REPO_NAME}/blob/main/.github/workflows/ZMediumToMarkdown.yml
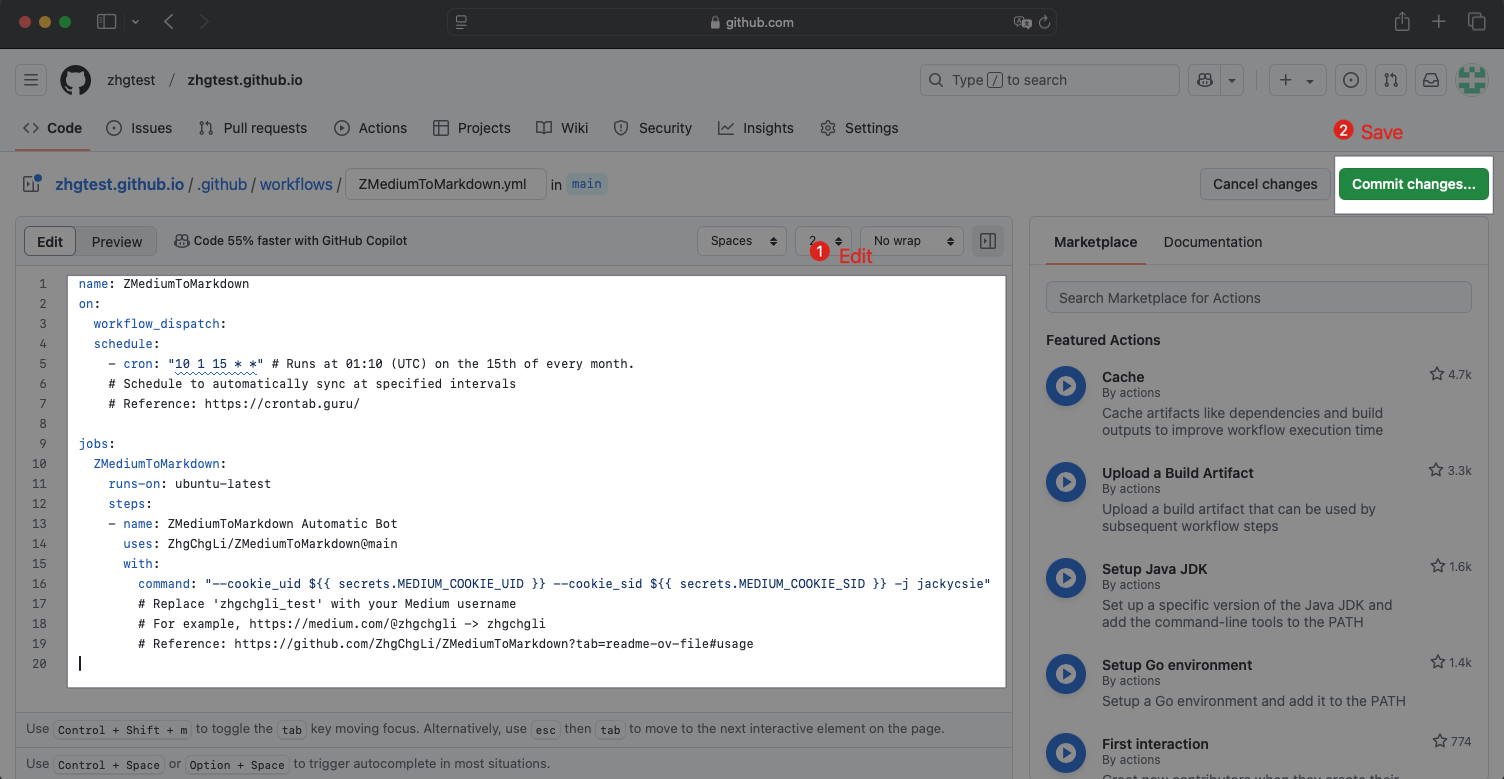
2. 点击右方编辑按钮

3. 设定 Medium 文章自动同步参数
1
2
3
4
5
6
7
8
9
10
11
12
13
14
15
16
17
18
19
name: ZMediumToMarkdown
on:
workflow_dispatch:
schedule:
- cron: "10 1 15 * *"# Runs at 01:10(UTC), everyday.
# 设定排程多久自动同步一次
# ref: https://crontab.guru/

jobs:
ZMediumToMarkdown:
runs-on: ubuntu-latest
steps:
- name: ZMediumToMarkdown Automatic Bot
uses: ZhgChgLi/ZMediumToMarkdown@main
with:
command: "--cookie_uid ${{ secrets.MEDIUM_COOKIE_UID }} --cookie_sid ${{ secrets.MEDIUM_COOKIE_SID }} -j zhgchgli_test"
# zhgchgli_test 替换成你的 Meidum 使用者
# 例如 https://medium.com/@zhgchgli -> zhgchgli
# ref: https://github.com/ZhgChgLi/ZMediumToMarkdown?tab=readme-ov-file#usage
提供有存取权限的 Medium 帐号 Cookies。
- 若您有在 Paywall 的文章则必须提供
- 若发现 Medium 文章同步不完整 (缺漏文章),代表同步时被 Medium 防火墙阻挡,也必须提供
取得 Meidum 帐号 Cookies MEDIUM_COOKIE_UID & MEDIUM_COOKIE_SID 步骤:

- 登入拥有存取权限的 Medium 帐号,进入 Medium 后台
- 在空白处点击右键
- 选择「Inspect」
- 出现 Developer Console 后选择「Application」
- 选择「Cookies」->「https://medium.com」
- 往下滚动找到「
sid」「uid」 - 点两下复制这两个栏位的值
将 Meidum 帐号 Cookies 安全存放在 Github Repo Secrets
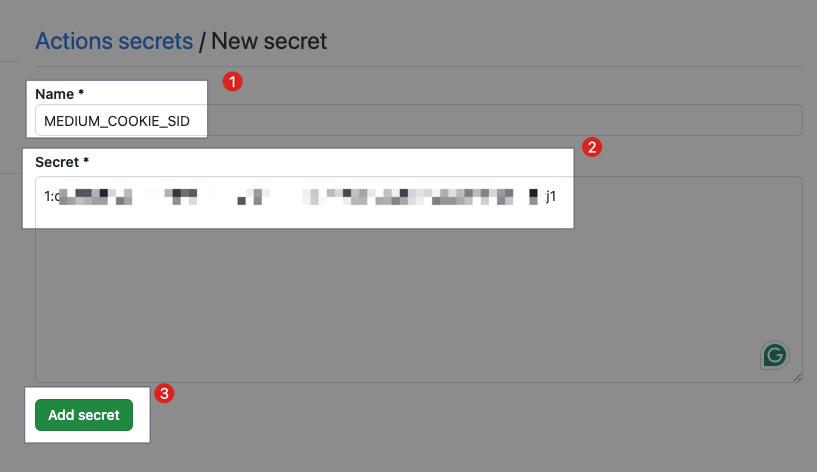
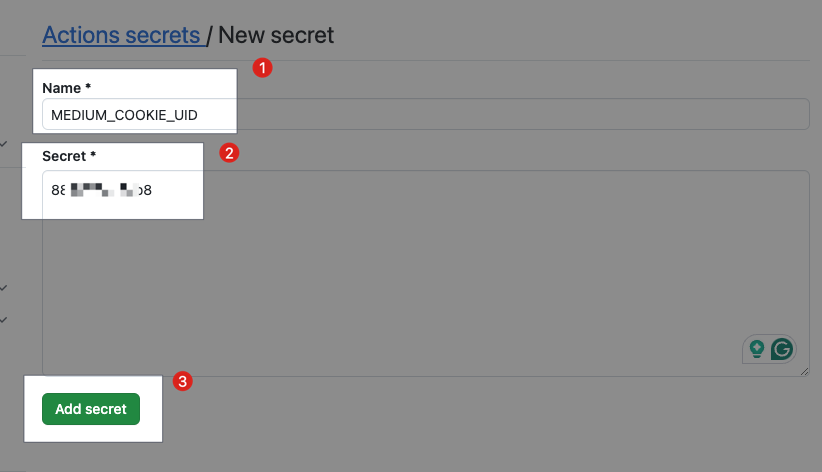
1. 前往 Github Repo Settings -> Secrets and variables -> Actions -> New repository secret
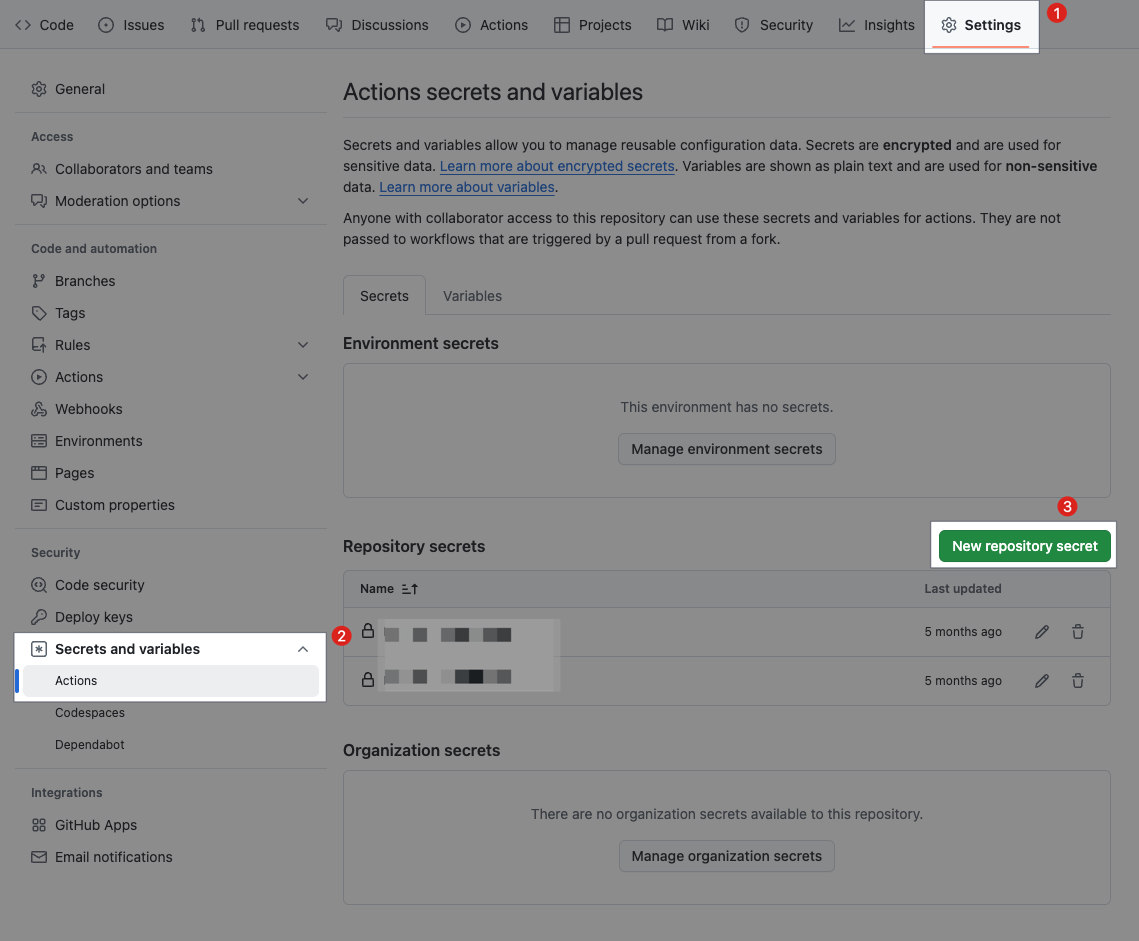
https://github.com/{ORG}/{REPO_NAME}/settings/secrets/actions/new
2. New secret - MEDIUM_COOKIE_SID
完成
帐号无特别登出或遇到问题,Cookies 不会失效。
如果在同步中出现以下讯息并且同步的文章不完整:
1
This post is behind Medium's paywall. You must provide valid Medium Member login cookies to download the full post.
代表 Cookies 已失效,请重新照上述步骤重新设定。
4. 首次手动同步,Repo -> Github Actions -> 点击「ZMediumToMarkdown」-> 点击「Enable workflow」
初次执行,我们可以自己手动同步一次检查设定是否正确。 
5. 等待同步文章与网站部署工作完成
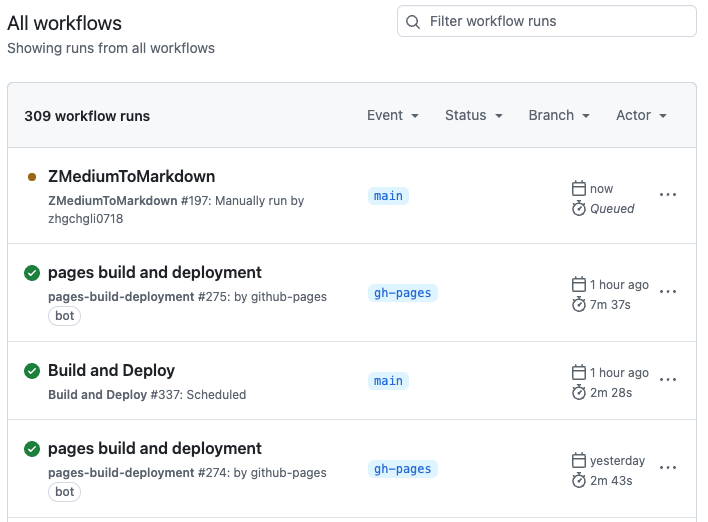
等待以下三个 Actions 工作执行完成并且没有错误:
- 🟢 ZMediumToMarkdown
- 🟢 pages build and deployment
- 🟢 Build and Deploy
6. 重整网页查看结果,Enjoy!
⚠️ 请注意!所有档案变更都会触发:
- 🟢 pages build and deployment
- 🟢 Build and Deploy
需等待以上两个部署工作完成,网站更改才会生效。
Jekyll 网站设定
网站基本设定
-./_config.yml
请务必调整 其中的 url: 改成您的 Github Pages 网址以及其他网站资料设定。
- 分享功能设定:
./_data/share.yml - 定义文章作者资讯:
./_data/authors.yml
左侧 Sidebar 设定
-./tabs
- 底部连结按钮:
./_data/contact.yml
网站底部及其他文字内容设定
-./locales/{Lang}.yml default is /locales/en.yml
本地测试
- 确定你的环境有安装并使用 Ruby >= 3.1 版本 2.
cd ./3.bundle install4.bundle exec jekyll s - Go to http://127.0.0.1:4000/ 查看结果
- Press
Ctrl-cto stop.
*网站基本设定档案有调整需要重新执行才会生效。

16 Total Views
This post is licensed under CC BY 4.0 by the author.