iOS UITextView Image Wrapping Editor (Swift)
Text
ℹ️ℹ️ℹ️ The following content is translated by OpenAI.
Click here to view the original Chinese version. | 點此查看本文中文版
iOS UITextView Image Wrapping Editor (Swift)
Practical Approach
Target Features:
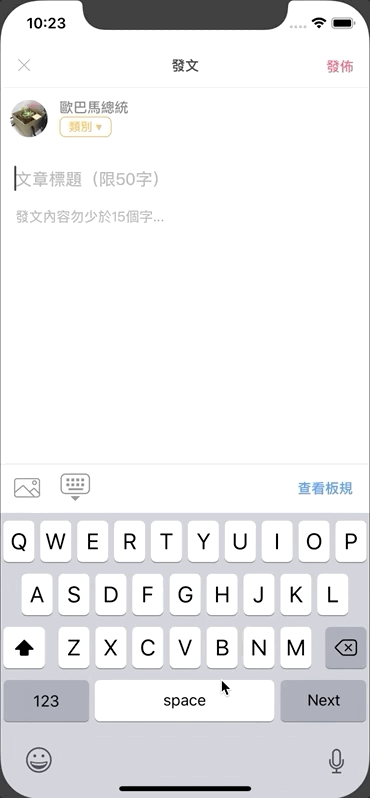
The app includes a discussion forum where users can publish articles. The article publishing interface needs to support text input, the insertion of multiple images, and image wrapping within the text.
Functional Requirements:
- Support for multi-line text input
- Ability to insert images inline
- Support for uploading multiple images
- Option to easily remove inserted images
- Handling of image upload success/failure
- Ability to convert input content into a transmittable format, e.g., BBCode
Here’s a preview of the final product:
(/assets/e37d66ea1146/1*Sh0XaryqYnqVGV0wJ_dDHA.gif)
Getting Started:
Chapter One
What? You say Chapter One? Isn’t it just a matter of using UITextView to create an editor? Why do we need to divide it into “chapters”? Yes, that was my initial reaction too, until I started working on it and realized things were not that simple. I struggled for two weeks, scouring various resources both domestically and internationally before finally finding a solution. Let me share my journey…
If you want to know the final solution directly, feel free to skip to the last chapter (scroll down, down, down).
In the Beginning
Naturally, I started with the UITextView component for the text editor. I noticed that the attributedText property of UITextView supports NSTextAttachment, which allows for image attachments to create the image wrapping effect. The code is quite simple:
1
2
3
let imageAttachment = NSTextAttachment()
imageAttachment.image = UIImage(named: "example")
self.contentTextView.attributedText = NSAttributedString(attachment: imageAttachment)
At first, I was quite pleased, thinking it was simple and convenient. But the real challenges were just beginning:
- Images need to be selectable from local storage and uploaded: This was straightforward. I used the TLPhotoPicker library (which supports multi-image selection, customization, camera switching, and Live Photos). The approach was to convert the selected
PHAssetinto aUIImage, assign it toimageAttachment.image, and upload the image to the server in the background. - Image upload should provide feedback and allow for interactive actions (click to view the original image, click X to delete): I couldn’t implement this feature as I couldn’t find a way to achieve it with
NSTextAttachment. However, it was still possible to delete images (by pressing the “Back” key on the keyboard after the image), so we moved on… - Original image files were too large, causing slow uploads, slow insertions, and performance issues: I resized images before insertion and upload using Kingfisher’s
resizeTo. - Images should be inserted at the cursor’s current position: This required modifying the original code as follows:
1
2
3
4
let range = self.contentTextView.selectedRange.location ?? NSRange(location: 0, length: 0)
let combination = NSMutableAttributedString(attributedString: self.contentTextView.attributedText) // Get current content
combination.insert(NSAttributedString(attachment: imageAttachment), at: range)
self.contentTextView.attributedText = combination // Write back
- Handling image upload failures: I created a separate class to extend the original
NSTextAttachmentto add a property for storing an identifier.
1
2
3
class UploadImageNSTextAttachment: NSTextAttachment {
   var uuid: String?
}
When uploading an image, I modified it to:
1
2
3
let id = UUID().uuidString
let attachment = UploadImageNSTextAttachment()
attachment.uuid = id
With the ability to identify the corresponding NSTextAttachment, we could search through attributedText for attachments that failed to upload and replace them with an error image or remove them entirely:
1
2
3
4
5
6
7
8
9
10
11
12
13
14
if let content = self.contentTextView.attributedText {
    content.enumerateAttributes(in: NSMakeRange(0, content.length), options: []) { (object, range, stop) in
        if object.keys.contains(NSAttributedString.Key.attachment) {
            if let attachment = object[NSAttributedString.Key.attachment] as? UploadImageNSTextAttachment, attachment.uuid == "targetID" {
                attachment.bounds = CGRect(x: 0, y: 0, width: 30, height: 30)
                attachment.image = UIImage(named: "IconError")
                let combination = NSMutableAttributedString(attributedString: content)
                combination.replaceCharacters(in: range, with: NSAttributedString(attachment: attachment))
                // To remove directly, use deleteCharacters(in: range)
                self.contentTextView.attributedText = combination
            }
        }
    }
}
After overcoming the above issues, the code roughly looked like this:
1
2
3
4
5
6
7
8
9
10
11
12
13
14
15
16
17
18
19
20
21
22
23
24
25
26
27
28
29
30
31
32
33
34
35
36
37
38
39
40
41
42
43
44
45
46
47
48
49
50
51
52
53
54
55
56
57
58
59
60
61
62
63
64
65
66
67
68
69
70
71
72
73
74
75
76
class UploadImageNSTextAttachment: NSTextAttachment {
    var uuid: String?
}
func dismissPhotoPicker(withTLPHAssets: [TLPHAsset]) {
    // TLPhotoPicker image selection callback

    let range = self.contentTextView.selectedRange.location ?? NSRange(location: 0, length: 0)
    // Get cursor position, or start from the beginning

    guard withTLPHAssets.count > 0 else {
        return
    }

    DispatchQueue.global().async {
        // Process in the background
        let orderWithTLPHAssets = withTLPHAssets.sorted(by: { $0.selectedOrder > $1.selectedOrder })
        orderWithTLPHAssets.forEach { (obj) in
            if var image = obj.fullResolutionImage {

                let id = UUID().uuidString

                var maxWidth: CGFloat = 1500
                var size = image.size
                if size.width > maxWidth {
                    size.width = maxWidth
                    size.height = (maxWidth / image.size.width) * size.height
                }
                image = image.resizeTo(scaledToSize: size)
                // Resize image

                let attachment = UploadImageNSTextAttachment()
                attachment.bounds = CGRect(x: 0, y: 0, width: size.width, height: size.height)
                attachment.uuid = id

                DispatchQueue.main.async {
                    // Switch back to the main thread to update UI and insert image
                    let combination = NSMutableAttributedString(attributedString: self.contentTextView.attributedText)
                    attachments.forEach({ (attachment) in
                        combination.insert(NSAttributedString(string: "\n"), at: range)
                        combination.insert(NSAttributedString(attachment: attachment), at: range)
                        combination.insert(NSAttributedString(string: "\n"), at: range)
                    })
                    self.contentTextView.attributedText = combination

                }

                // Upload image to server
                // Alamofire post or....
                // POST image
                // if failed {
                    if let content = self.contentTextView.attributedText {
                        content.enumerateAttributes(in: NSMakeRange(0, content.length), options: []) { (object, range, stop) in

                            if object.keys.contains(NSAttributedString.Key.attachment) {
                                if let attachment = object[NSAttributedString.Key.attachment] as? UploadImageNSTextAttachment, attachment.uuid == obj.key {

                                    // REPLACE:
                                    attachment.bounds = CGRect(x: 0, y: 0, width: 30, height: 30)
                                    attachment.image = // ERROR Image
                                    let combination = NSMutableAttributedString(attributedString: content)
                                    combination.replaceCharacters(in: range, with: NSAttributedString(attachment: attachment))
                                    // OR DELETE:
                                    // combination.deleteCharacters(in: range)

                                    self.contentTextView.attributedText = combination
                                }
                            }
                        }
                    }
                //}
                //

            }
        }
    }
}
At this point, most issues were resolved, but what had troubled me for two weeks?
The answer: “Memory” issues.

iPhone 6 can’t handle it!
With the above approach, inserting more than five images would cause UITextView to lag; eventually, the app would crash due to memory overload.
P.S. I tried various compression and storage methods, but the results were still the same.
I suspect the reason is that UITextView does not reuse NSTextAttachment for images; all inserted images are loaded into memory and not released. Therefore, unless you’re inserting small images like emojis 😅, it’s not feasible to use it for image wrapping.
Chapter Two
After discovering the “hard limit” of memory, I continued searching online for solutions and found the following alternatives:
- Use a WebView to embed an HTML file (
<div contentEditable="true"></div>) and handle interactions with JavaScript. - Combine UITableView with UITextView to enable reuse.
- Extend UITextView based on TextKit 🏆.
The first option of embedding an HTML file in a WebView was not considered due to performance and user experience concerns. Interested readers can search GitHub for related solutions (e.g., RichTextDemo).
The second option of combining UITableView with UITextView:
I implemented about 70% of this approach, where each line is a cell, with two types of cells: one for UITextView and one for UIImageView, alternating between images and text. The content must be stored in an array to avoid loss during reuse.
While this approach effectively solved the memory issue through reuse, I ultimately abandoned it due to difficulties in controlling two features: pressing Return at the end of a line to create a new line and jump to that line and pressing Back at the beginning of a line to jump to the previous line (if the current line is empty, it should delete that line). These aspects proved to be quite challenging.
Interested readers can refer to: MMRichTextEdit.
Final Chapter
Having spent a significant amount of time on this, the development timeline was severely delayed. The final solution I arrived at was to use TextKit.
Here are two articles I found for those interested in further research:
However, there is a certain learning curve, and for a beginner like me, it was too difficult. Moreover, time was running out, so I aimlessly searched GitHub for alternative solutions.
Eventually, I found XLYTextKitExtension, which can be directly integrated into the code.
✔ It allows NSTextAttachment to support custom UIView, enabling any interactive operations.
✔ NSTextAttachment can be reused without overwhelming memory.
The implementation is quite similar to Chapter One, except that instead of using NSTextAttachment, we now use XLYTextAttachment.
For the UITextView you want to use:
1
contentTextView.setUseXLYLayoutManager()
Tip 1: Change the insertion of NSTextAttachment to:
1
2
3
4
5
6
7
8
9
let combine = NSMutableAttributedString(attributedString: NSAttributedString(string: ""))
let imageView = UIView() // your custom view
let imageAttachment = XLYTextAttachment { () -> UIView in
    return imageView
}
imageAttachment.id = id
imageAttachment.bounds = CGRect(x: 0, y: 0, width: size.width, height: size.height)
combine.append(NSAttributedString(attachment: imageAttachment))
self.contentTextView.textStorage.insert(combine, at: range)
Tip 2: Change the search for NSTextAttachment to:
1
2
3
4
5
self.contentTextView.textStorage.enumerateAttribute(NSAttributedString.Key.attachment, in: NSRange(location: 0, length: self.contentTextView.textStorage.length), options: []) { (value, range, stop) in
    if let attachment = value as? XLYTextAttachment {
        // attachment.id
    }
}
Tip 3: Change the deletion of NSTextAttachment items to:
1
self.contentTextView.textStorage.deleteCharacters(in: range)
Tip 4: Get the current content length:
1
self.contentTextView.textStorage.length
Tip 5: Refresh the bounds size of the attachment.
The main reason is for user experience; when inserting images, I first place a loading image, and the inserted image is replaced after being compressed in the background. I need to update the TextAttachment bounds to the resized size:
1
self.contentTextView.textStorage.addAttributes([:], range: range)
(Adding an empty attribute to trigger a refresh).
Tip 6: Convert input content into a transmittable format.
Use Tip 2 to search through all input content and extract the IDs of the found attachments, combining them into a format like [[ID]] for transmission.
Tip 7: Content replacement:
1
self.contentTextView.textStorage.replaceCharacters(in: range, with: NSAttributedString(attachment: newImageAttachment))
Tip 8: Use regular expressions to match the range of the content:
1
2
3
4
5
6
7
8
9
10
11
12
13
14
let pattern = "(\\[\\[image_id=){1}([0-9]+){1}(\\]\\]){1}"
let textStorage = self.contentTextView.textStorage

if let regex = try? NSRegularExpression(pattern: pattern, options: .caseInsensitive) {
    while true {
        let range = NSRange(location: 0, length: textStorage.length)
        if let match = regex.matches(in: textStorage.string, options: .withTransparentBounds, range: range).first {
            let matchString = textStorage.attributedSubstring(from: match.range)
            // FOUND!
        } else {
            break
        }
    }
}
Note: If you want to search and replace items, you need to use a while loop; otherwise, when there are multiple search results, finding and replacing the first one will cause the range of subsequent search results to be incorrect, leading to a crash.
Conclusion
I have successfully completed the product using this method, and it is now online without any issues encountered so far. I’ll take some time to further explore the underlying principles!
This article is more of a personal reflection on problem-solving rather than a tutorial. If you’re working on similar functionality, I hope you find it helpful. Feel free to reach out if you have any questions or feedback.
The official first post on Medium
Further Reading
- ZMarkupParser: A Tool for Converting HTML Strings to NSAttributedString
- The Challenges of Building a Custom HTML Parser
If you have any questions or feedback, please contact me.
This article was first published on Medium ➡️ Click Here
Automatically converted and synchronized using ZMediumToMarkdown and Medium-to-jekyll-starter.
