Universal Links iOS 开发攻略|设定技巧与本地测试环境搭建
掌握 iOS Universal Links 设定与更新机制,解决 Apple CDN 快取延迟问题,并透过本地 nginx + ngrok 环境快速模拟测试,提升多域名与复杂路径匹配准确度,确保 APP 与网站无缝串接体验。
Click here to view the English version of this article.
點擊這裡查看本文章正體中文版本。
基于 SEO 考量,本文标题与描述经 AI 调整,原始版本请参考内文。
文章目录
Universal Links 新鲜事
iOS 13, iOS 14 Universal Links 新鲜事&建立本地测试环境
{:target="_blank"}](/assets/12c5026da33d/1*HYAd1aal5Et1A-Qzs6VAtQ.webp)
Photo by NASA
前言
对于一个有网站又有 APP 的服务, Universal Links 的功能对于使用者体验来说无比的重要,能达到 Web 与 APP 之间的无缝接轨;但一直以来都只有简单设置,没有太多的著墨;前阵子刚好又遇到花了点时间研究了一下,把一些有趣的事记录下来。
常见考量
经手过的服务,对于实作 Universal Links 的考量都是 APP 上并没有实作完整的网站功能,Universal Links 认的是域名,只要域名匹配到就会开启 APP;关于这个问题可以下 NOT 排除 APP 上没有相应功能的网址,若网站服务网址很极端,那干脆新建一个 subdomain 用来做 Universal Links。
apple-app-site-association 何时更新?
iOS < 14,APP 在第一次安装、更新时会去询问 Universal Links 网站的 apple-app-site-association。
iOS ≥ 14 ,则是由 Apple CDN 做快取定期更新 Universal Links 网站的 apple-app-site-association;APP 在第一次安装、更新时会去跟 Apple CDN 拿取;但这边就会有个问题,Apple CDN 的 apple-app-site-association 可能还是旧的。
关于 Apple CDN 的更新机制,查了一下文件,没有提到;查了下 讨论 ,官方也只回应「会定期更新」细节之后会发布在文件…但至今依然还没看到。
我自己觉得应该最慢 48 小时,就会更新吧。。。所以下次有更改到 apple-app-site-association 的话建议在 APP 上架更新前几天就先改好 apple-app-site-association 上线。
apple-app-site-association Apple CDN 确认:
1
2
Headers: HOST=app-site-association.cdn-apple.com
GET https://app-site-association.cdn-apple.com/a/v1/你的网域
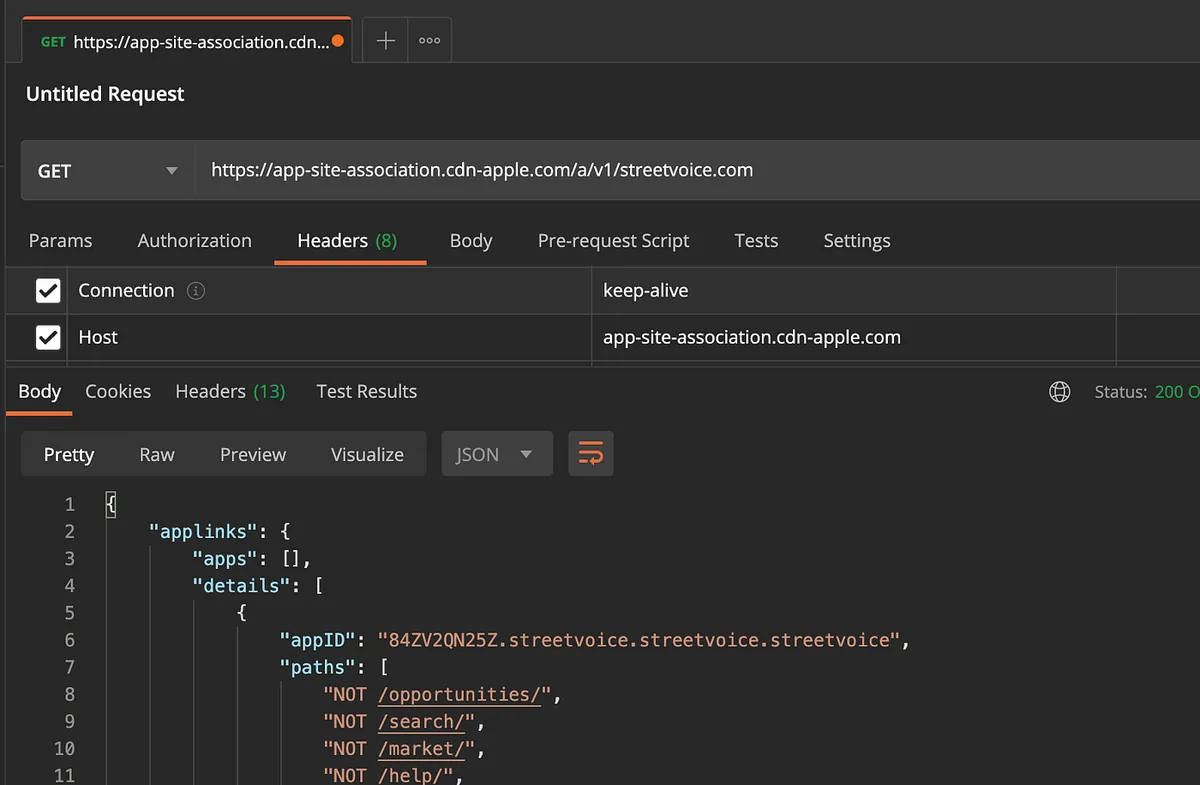
可以取得当前 Apple CDN 上的版本长怎样。(记得加上 Request Header Host=https://app-site-association.cdn-apple.com/ )
iOS ≥ 14 Debug
因前述的 CDN 问题,那我们在开发阶段该如何 debug 呢?
还好这部分苹果有给解决方法,不然没办法即时更新真的要吐血了;我们只需要再 applinks:domain.com 加上 ?mode=developer 即可,另外还有 managed(for 企业内部 APP) , or developer+managed 模式可设定。

加上 mode=developer 后,APP 在模拟器上每次 Build & Run 时都会直接跟网站拿最新的 app-site-association 来用。
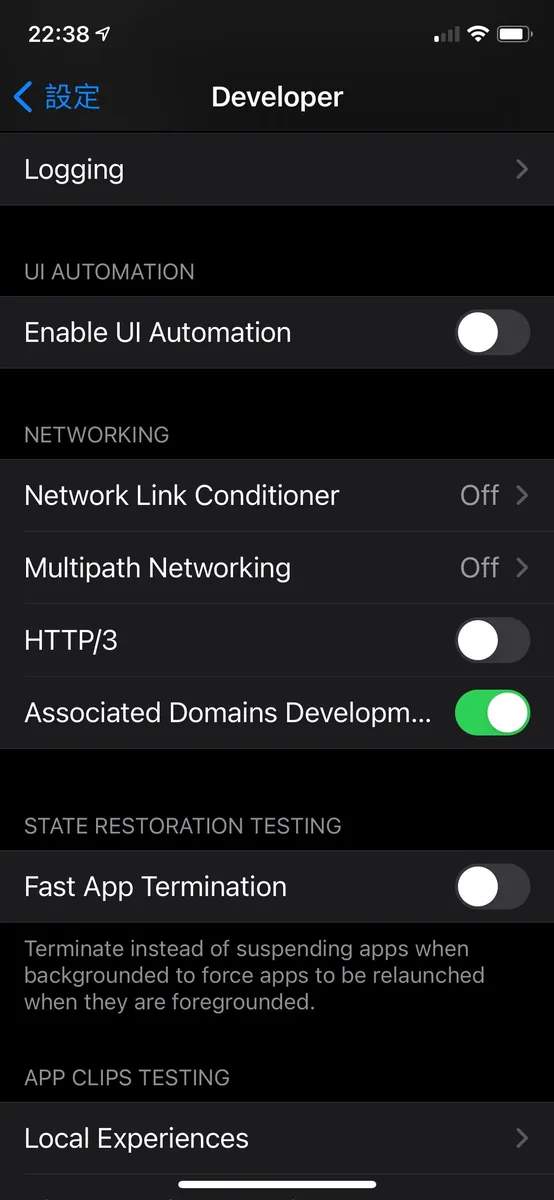
如果要 Build & Run 在实机则要先去「设定」->「开发者」-> 打开「Associated Domains Development」选项即可。
⚠️ 这边有个坑 ,app-site-association 可以放在网站根目录或是
./.well-known目录下;但在 mode=developer 下他只会问./.well-known/app-site-association,害我以为怎么没效。
开发测试
如果是 iOS <14 记得有更改过 app-site-association 的话要删掉再重 Build & Run APP 才会去抓最新的回来,iOS ≥ 14 请参考前述方法加上 mode=developer。
app-site-association 内容的修改,好一点的话可以自行修改伺服器上的档;但对于有时候碰不到伺服器端的我们来说,如果要做 universal links 的测试会非常的麻烦,要不停的麻烦后端同事帮忙,变成要很确定 app-site-association 内容后一次上线,一直改来改去会把同事逼疯。
在本地建一个模拟环境
为了解决上述问题,我们可以在本地起一个小服务。
首先在 mac 上安装 nginx:
1
brew install nginx
如果没安装过 brew 可先安装:
1
/bin/bash -c "$(curl -fsSL https://raw.githubusercontent.com/Homebrew/install/HEAD/install.sh)"
安装完 nginx 后,前往 /usr/local/etc/nginx/ 打开编辑 nginx.conf 档案:
1
2
3
4
5
6
7
8
9
10
11
...略
server {
        listen       8080;
        server_name  localhost;
#charset koi8-r;
#access_log  logs/host.access.log  main;
location / {
            root   /Users/zhgchgli/Documents;
            index  index.html index.htm;
        }
...略
大概在第 44 行的位置将 location / 里的 root 换成你想要的目录位置(这边以 Documents 为例)。
listen on 8080 port ,如果没有冲突则不需要修改。
储存修改完后,下指令启动 nginx:
1
nginx
若要停止时,则下:
1
nginx -s stop
停止。
如果有更改 nginx.conf 记得要下:
1
nginx -s reload
重新启用服务。
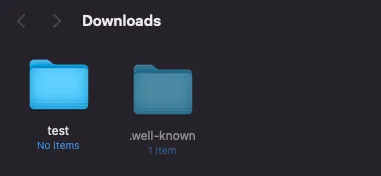
建立一个 ./.well-known 目录在刚设定的 root 目录内,并将 apple-app-site-association 档案放到 ./.well-known 内。
⚠️
.well-known建立后若消失,请注意 Mac 要打开「显示隐藏资料夹」功能:
在 terminal 下:
1
defaults write com.apple.finder AppleShowAllFiles TRUE
再下 killall finder 重启所有 finder,即可。
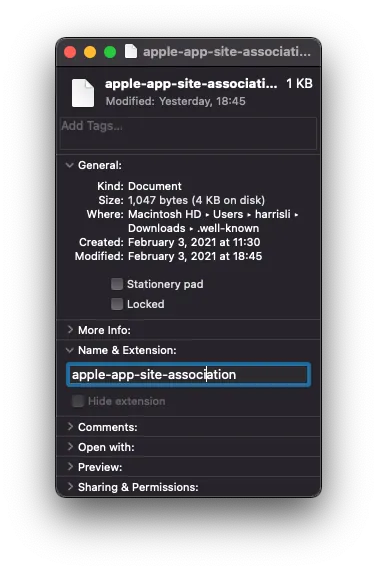
⚠️
apple-app-site-association看起来没有副档名,但实际还是有 .json 副档名:
在档案上按右键 -> 「取得资讯 Get Info」->「Name & Extension」-> 检查有无副档名&同时可取消勾选「隐藏档案类型 Hide extension」
没问题后,打开浏览器测试以下连结是否正常下载 apple-app-site-association:
1
http://localhost:8080/.well-known/apple-app-site-association
如果能正常下载代表本地环境模拟成功!
如果出现 404/403 错误则请检查 root 目录是否正确、目录/档案是否有放入、apple-app-site-association 是否不小心带了副档名( .json)。
注册&下载 Ngrok
{:target="_blank"}](/assets/12c5026da33d/1*Shk9u59HgRRSiMw0wt899Q.webp)
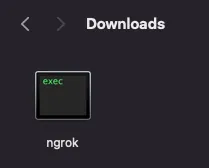
解压缩出 ngrok 执行档
{:target="_blank"} 执行 Config 设定](/assets/12c5026da33d/1*fnEUyJMtVhUGurU5vX5K6A.webp)
进入 Dashboard 页面 执行 Config 设定
1
./ngrok authtoken 你的TOKEN
设定好之后,下:
1
./ngrok http 8080
因我们的 nginx 在 8080 port。
启动服务。
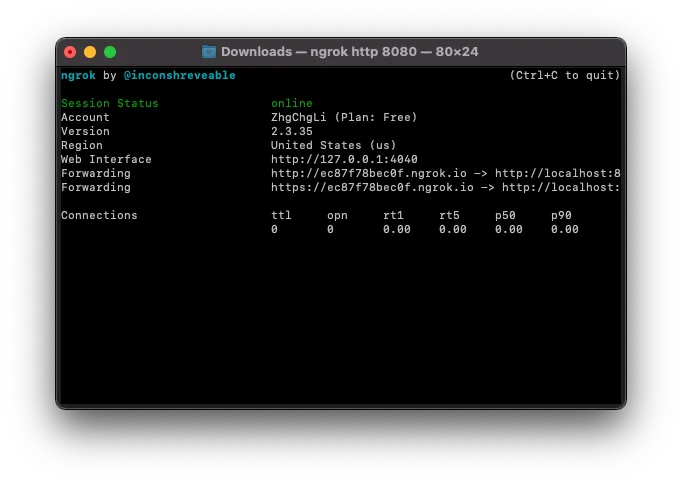
这时候我们会看到一个服务启动状态视窗,可以从 Forwarding 中取的此次分配到的公开网址。
⚠️ 每次启动分配到的网址都会变,所以仅能作为开发测试使用。
这边以此次分配到的网址
https://ec87f78bec0f.ngrok.io/为例
回到浏览器改输入 https://ec87f78bec0f.ngrok.io/.well-known/apple-app-site-association 看看能不能正常下载浏览 apple-app-site-association 档案,如果没问题则可继续下一步。
将 ngrok 分配到的网址输入到 Associated Domains applinks: 设定中。

记得带上 ?mode=developer 方便我们测试。
重新 Build & Run APP:
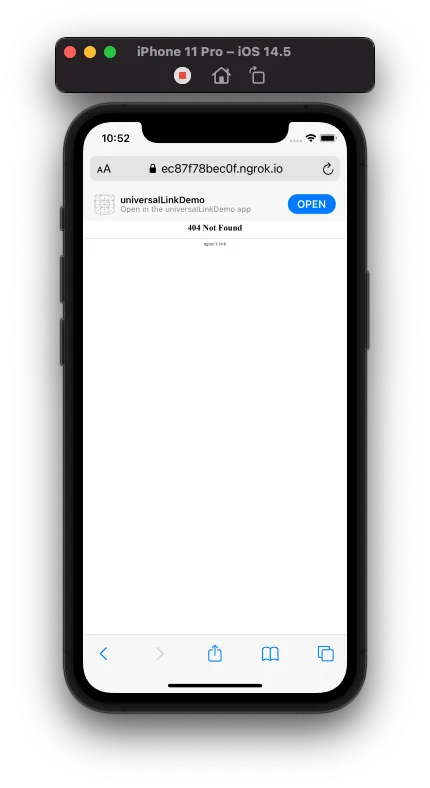
打开浏览器输入相应的 Universal Links 测试网址(EX: https://ec87f78bec0f.ngrok.io/buy/123 )查看效果。
页面出现 404 不要理他,因为我们实际没有那一页;我们只是要测 iOS 对网址匹配的功能符不符合我们预期;如果上方有出现 「Open」代表匹配成功,另外也可以测 NOT 反向的状况。
点击「Open」后开启 APP -> 测试成功!
开发阶段都测试 OK 后,将确认修改过之后的 apple-app-site-association 档案再交给后端上传到伺服器就能确保万无一失啰~
最后记得将 Associated Domains applinks: 改为正试机网址。
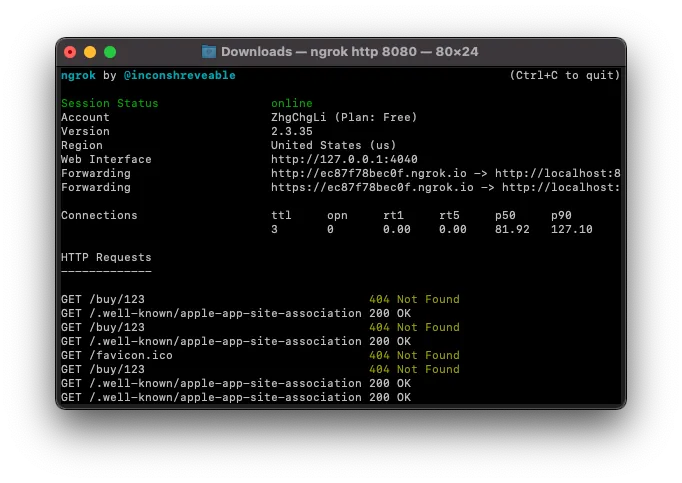
另外我们也可以从 ngrok 运行状态视窗中看到每次 APP Build & Run 有没有跟我们要 apple-app-site-association 档案:
Applinks 设定内容
iOS < 13 之前:
设定档较简单,只有以下内容可设定:
1
2
3
4
5
6
7
8
9
10
11
12
13
14
{
  "applinks": {
      "apps": [],
      "details": [
           {
             "appID" : "TeamID.BundleID",
             "paths": [
               "NOT /help/",
               "*"
             ]
           }
       ]
   }
}
将 TeamID.BundleId 换成你的专案设定 (ex: TeamID = ABCD , BundleID = li.zhgchg.demoapp => ABCD.li.zhgchg.demoapp )。
如果有多个 appID 则要重复加入多组。
paths 部分则为匹配规则,能支援以下几种语法:
*:匹配 0~多个字元,ex:/home/*(home/alan…)?:匹配 1 个字元,ex:201?(2010~2019)?*:匹配 1 个~多个字元,ex:/?*(/test、/home. . )NOT:反向排除,ex:NOT /help(any url but /help)
更多玩法组合可自己依照实际情况决定,更多资讯可参考 官方文件 。
- 请注意,他不是 Regex,不支援任何 Regex 写法。
- 旧版不支援 Query (?name=123)、Anchor ( #title)。
- 中文网址须先转成 ASCII 后才能放在 paths 中 (所有url 字元均要是 ASCII)。
iOS ≥ 13 之后:
强化了设定档内容的功能,多增加支援 Query/Anchor、字符集、编码处理。
1
2
3
4
5
6
7
8
9
10
11
12
13
14
15
16
17
18
19
20
21
22
23
24
25
26
27
28
"applinks": {
  "details": [
    {
      "appIDs": [ "TeamID.BundleID" ],
      "components": [
        {
          "#": "no_universal_links",
          "exclude": true,
          "comment": "Matches any URL whose fragment equals no_universal_links and instructs the system not to open it as a universal link"
        },
        {
          "/": "/buy/*",
          "comment": "Matches any URL whose path starts with /buy/"
        },
        {
          "/": "/help/website/*",
          "exclude": true,
          "comment": "Matches any URL whose path starts with /help/website/ and instructs the system not to open it as a universal link"
        },
        {
          "/": "/help/*",
          "?": { "articleNumber": "????" },
          "comment": "Matches any URL whose path starts with /help/ and that has a query item with name 'articleNumber' and a value of exactly 4 characters"
        }
      ]
    }
  ]
}
转贴自官方文件,可以看到格式有所改变。
appIDs 为阵列,可放入多组 appID,这样就不用像以前一样只能整个区块重复输入。
WWDC 有提到与旧版兼容, 当 iOS ≥ 13 有读到新的格式就会忽略旧的 paths 。
匹配规则改放在 components 中;支援 3 种类型:
/: URL?:Query,ex: ?name=123&place=tw#:Anchor,ex: #title
并且可以搭配使用,假设今天 /user/?id=100#detail 才需要跳到 APP 则可写成:
1
2
3
4
5
{
  "/": "/user/*",
  "?": { "id": "*" },
  "#": "detail"
}
其中匹配语法同原本语法,也是支援 * ? ?* 。
新增 comment 注解栏位,可输入注解方便辨识。(但请注意这是公开的,别人也看得到)
反向排除则改为指定 exclude: true 。
新增 caseSensitive 指定功能,可指定匹配规则是否对大小写敏感, 预设:true ,有这需求的话可以少写许多规则。
新增 percentEncoded 前面说到的,旧版需要先将网址转为 ASCII 放到 paths 中(如果是中文字会变得很丑无法辨识);这个参数就是是否要帮我们自动 encode, 预设是 true 。 假设是中文网址就能直接放入了(ex: /客服中心 )。
详细官方文件可 参考此 。
预设字符集:
这算是这次更新蛮重要的功能之一,新增支援字符集。
系统帮我们定义好的字符集:
$(alpha):A-Z 和 a-z$(upper):A-Z$(lower):a-z$(alnum):A-Z 和 a-z 和 0–9$(digit):0–9$(xdigit):十六进制字符,0–9 和 a,b,c,d,e,f,A,B,C,D,E,F$(region):ISO 地区编码 isoRegionCodes ,Ex: TW$(lang):ISO 语言编码 isoLanguageCodes ,Ex: zh
假设我们的网址有多语系,我想要支援 Universal links 时,可以这样设定:
1
2
3
"components": [
     { "/" : "/$(lang)-$(region)/$(food)/home" }
]
这样不管是 /zh-TW/home 、 /en-US/home 都能支援,非常方便,不用自己写一整排规则!
自订字符集:
除了预设字符集之外,我们也能自订字符集,增加设定档复用、可读性。
在 applinks 中加入 substitutionVariables 即可:
1
2
3
4
5
6
7
8
9
10
11
12
13
{
  "applinks": {
    "substitutionVariables": {
      "food": [ "burrito", "pizza", "sushi", "samosa" ]
    },
    "details": [{
      "appIDs": [ ... ],
      "components": [
        { "/" : "/$(food)/" }
      ]
    }]
  }
}
范例中自订了一个 food 字符集,并在后续 components 中使用。
以上范例可匹配 /burrito , /pizza , /sushi , /samosa 。
细节可参考 此篇 官方文件。
没有灵感?
如果对设定档内容没有灵感,可偷偷参考其他网站福的内容,只要在服务网站首页网址加上 /app-site-association 或 /.well-known/app-site-association 即可读取他们的设定。
例如: https://www.netflix.com/apple-app-site-association
补充
在有使用 SceneDelegate 的情况下,open universal link 的进入点是在SceneDelegate 中:
1
func scene(_ scene: UIScene, continue userActivity: NSUserActivity)
而非 AppDelegate 的:
1
func application(_ application: UIApplication, continue userActivity: NSUserActivity, restorationHandler: @escaping ([UIUserActivityRestoring]?) -> Void) -> Bool
延伸阅读
参考资料
有任何问题及指教欢迎 与我联络 。

本文首次发表于 Medium (点击查看原始版本),由 ZMediumToMarkdown 提供自动转换与同步技术。