Create Fake Transparent iPhone Wallpapers Easily|iMovie Green Screen Editing Tips
iPhone users struggling with static wallpapers can create fake transparent backgrounds using iMovie's green screen feature, enhancing visual appeal without complex tools.
点击这里查看本文章简体中文版本。
點擊這裡查看本文章正體中文版本。
This post was translated with AI assistance — let me know if anything sounds off!
Table of Contents
Easily Create a “Fake” Transparent Perspective Wallpaper on iPhone
Using iMovie’s Green Screen Feature to Composite Videos
Anyway, I’m Free
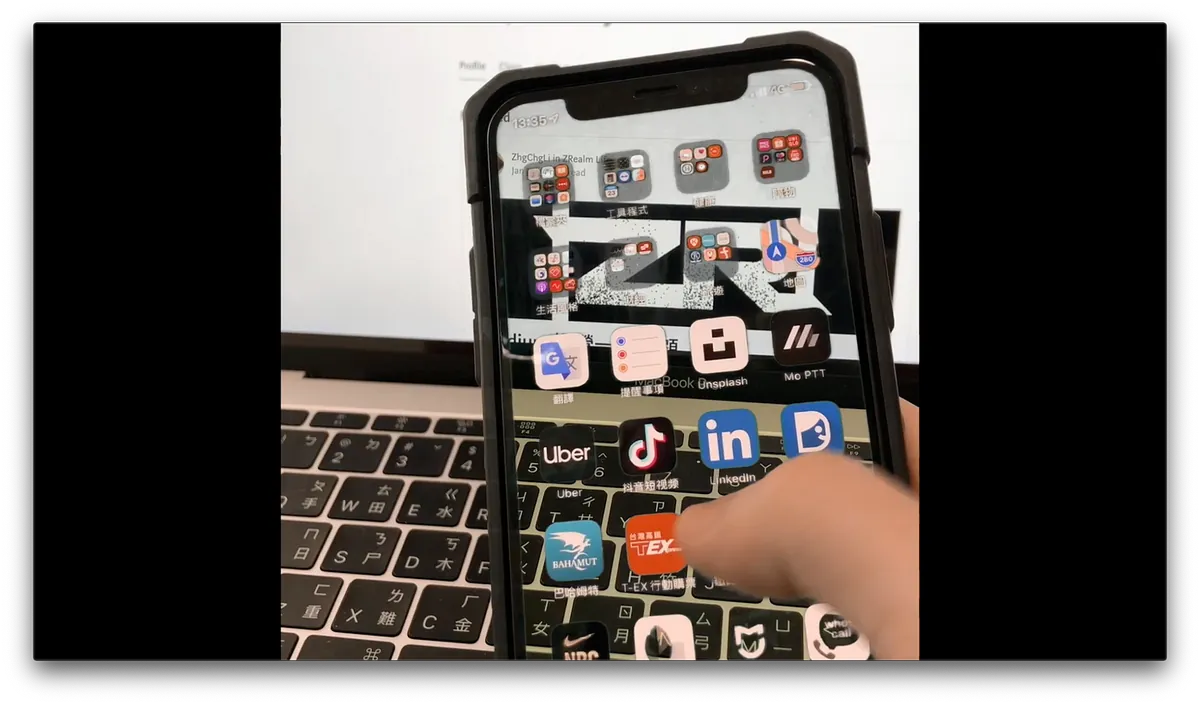
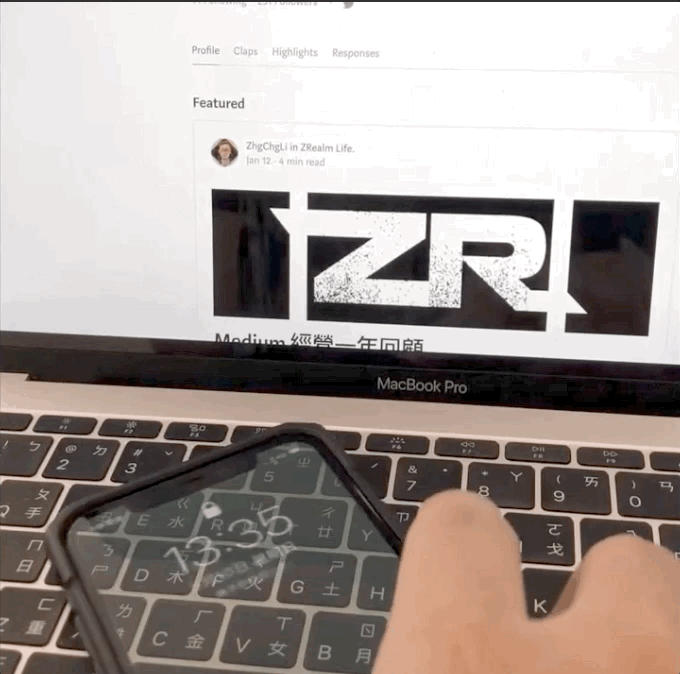
Recently, while mindlessly relaxing, I came across a very common wallpaper app ad that showcased a transparent wallpaper with a see-through effect, which was quite eye-catching; but obviously, it’s impossible. Even with a rear camera live view, the angles can’t match that perfectly!
{:target="_blank"}](/assets/2e4429f410d6/1*ld3iXPtwH_pqTLADZcnSNg.webp)
Final Result
Let’s Be Smart Youngsters!
Although I knew it was a special effect, I thought it would be very complicated; surprisingly, the built-in iMovie app on the iPhone allows you to create it with just a few simple taps.
Only need:
An iPhone (to use iMovie directly) and a phone for filming
A phone or camera responsible for shooting
Phone stand or water bottle… or any item that can support a phone
iMovie APP (Free Download)
Green Background (Green Screen)
{:target="_blank"}](/assets/2e4429f410d6/1*nsCFd5nwtAIYr0qc8QlzUg.webp)
You can directly download this image or get it from the web
These 5 items are all you need to create a perspective effect!
Specific Process:
Set up the phone responsible for filming
Directly record a clean video (without the phone appearing in the frame)
Set the phone background to a green screen before filming.
Shoot another video demonstrating how to use the phone on camera.
Open iMovie APP to merge
Completed
Start
1. Set up your phone and find the right shooting angle
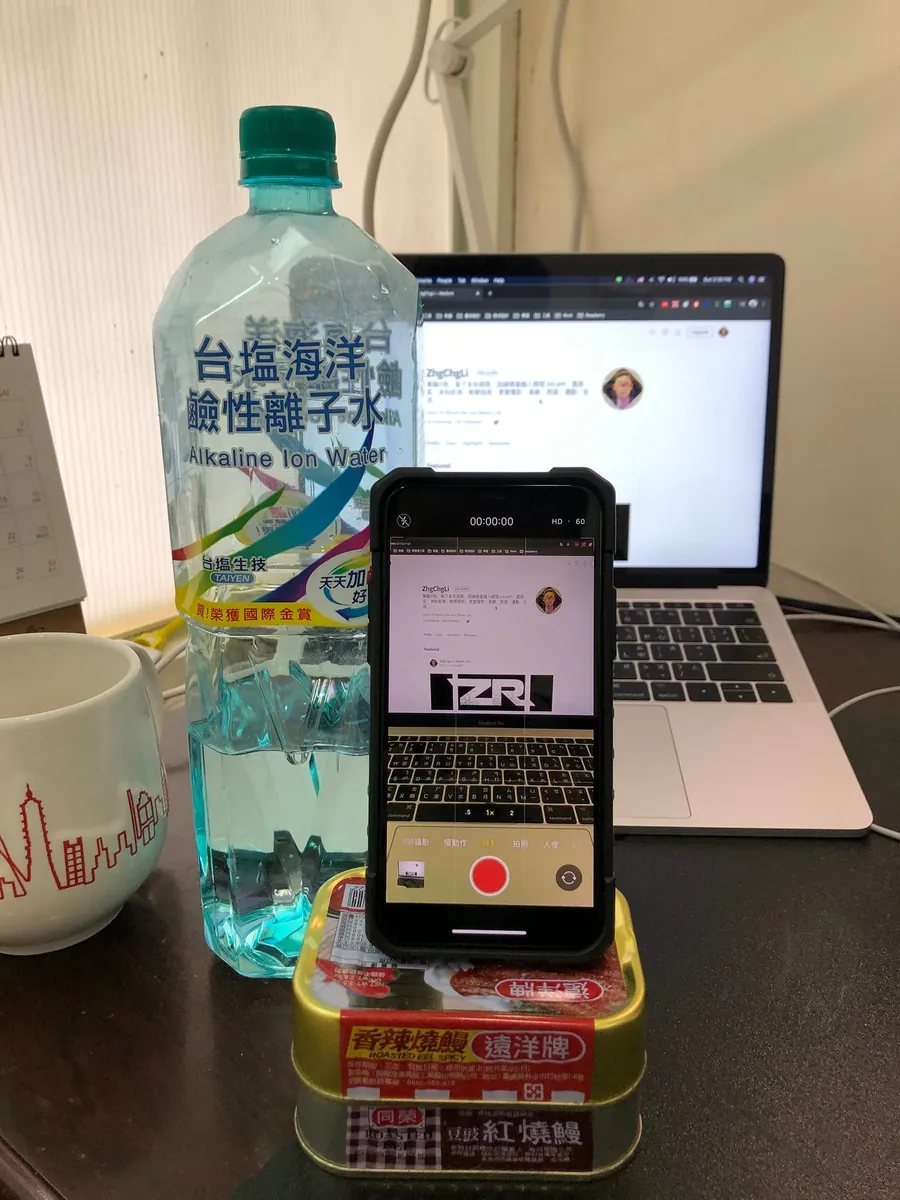
I used two cans of eel and a bottle of mineral water as a phone stand (of course, a proper phone stand is better!)
The purpose of using a phone holder for filming is to ensure both videos have the same angle. Otherwise, the frames would shift, making the result less appealing. Holding the phone by hand cannot guarantee 100% identical viewpoints in both videos.
2. Shoot a clean video segment
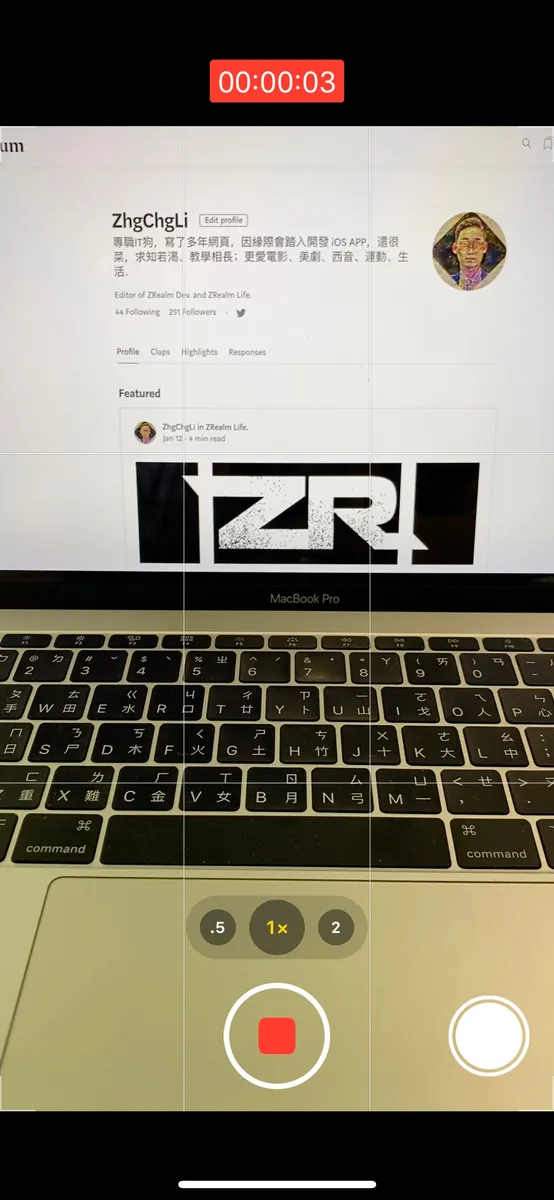
The video should be as long as needed; shoot only as long as the clean footage requires.
3. Set the wallpaper of the phone in the shot to a green background
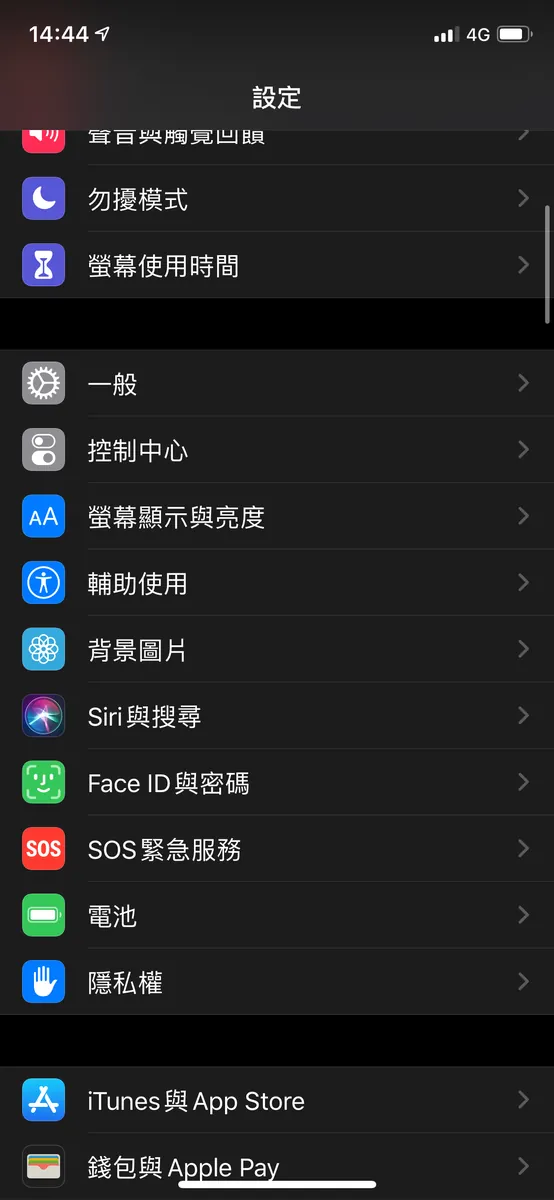
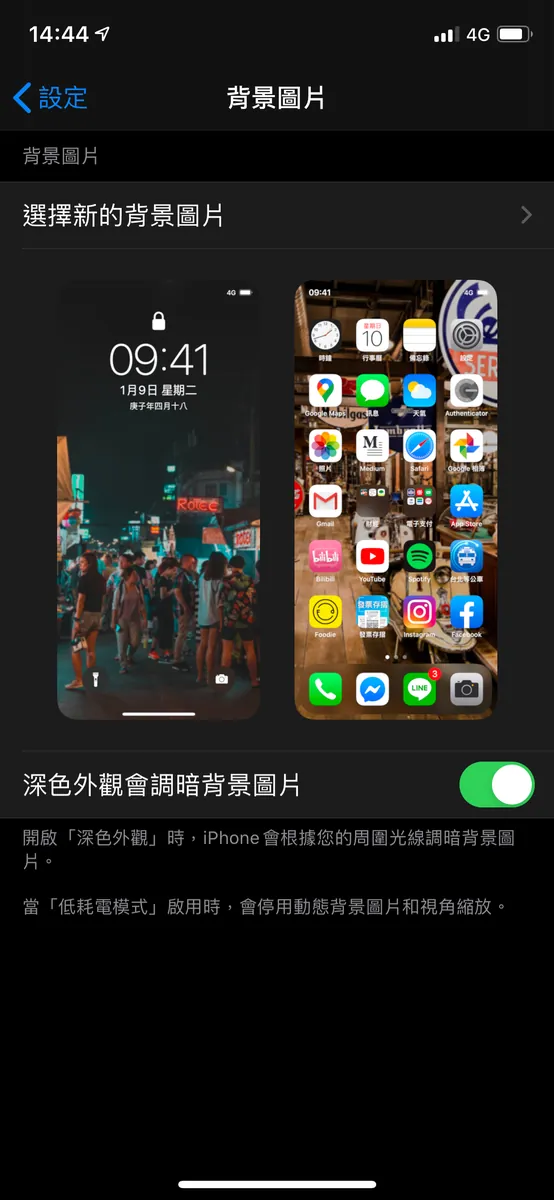
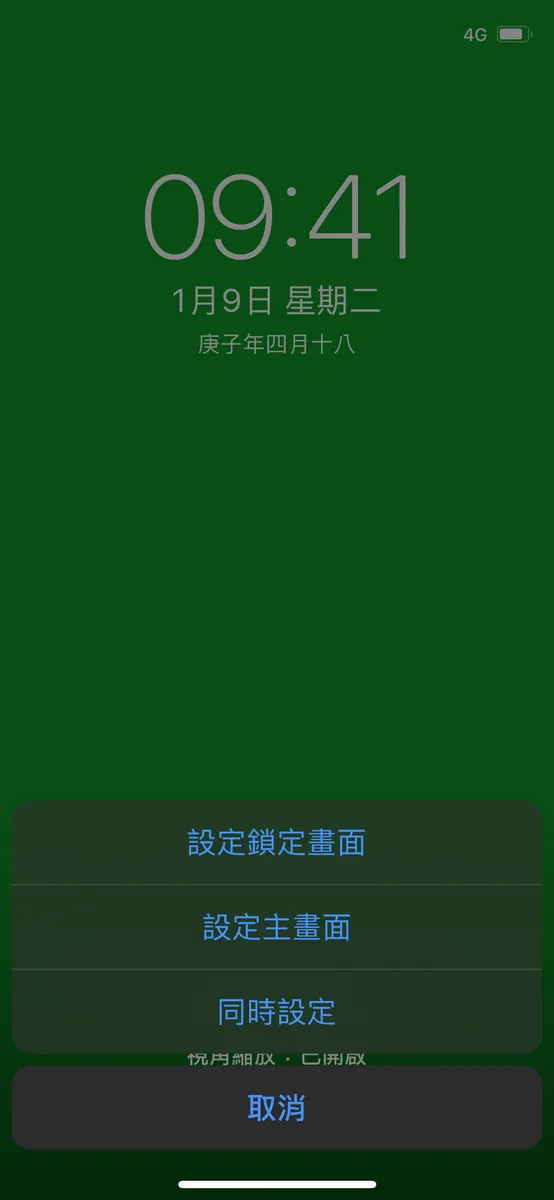
“Settings” -> “Background Image” -> “Select the downloaded green background” -> “Set for both”
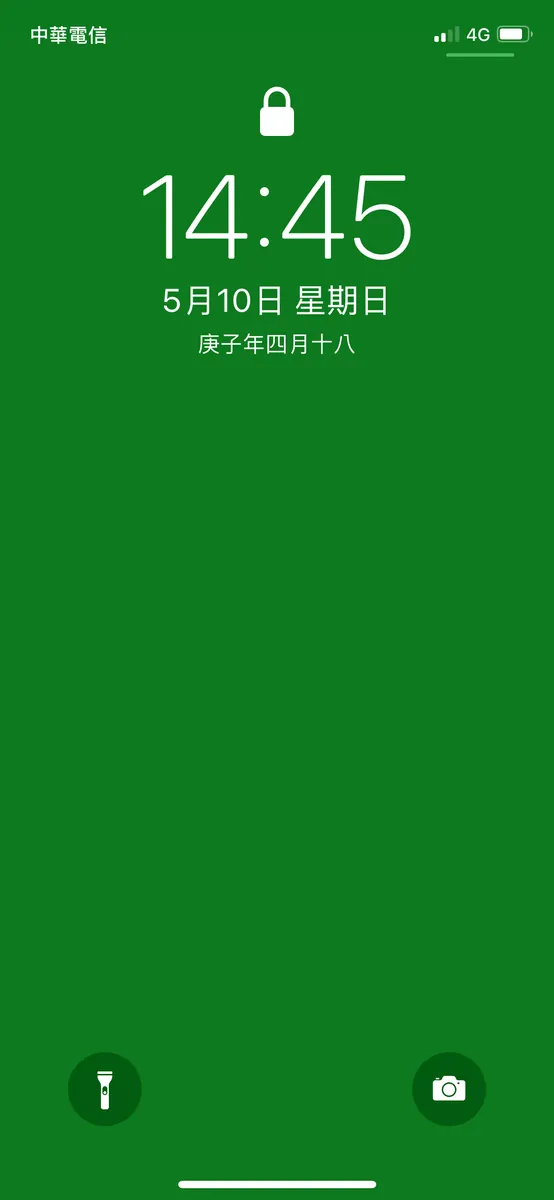
Completed diagram
4. Record a video demonstrating how to use the phone in the frame
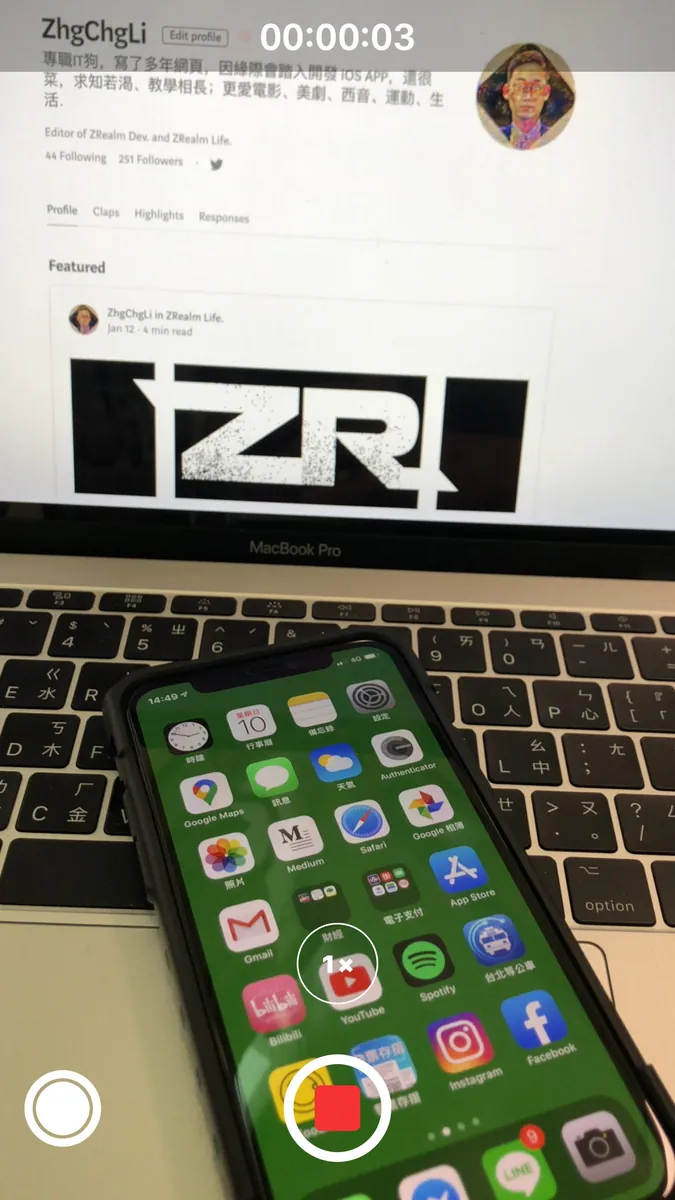
Video length same as 2. Clean video; it’s okay if it’s longer, can trim later.
5. Open the iMovie App to Create a Project
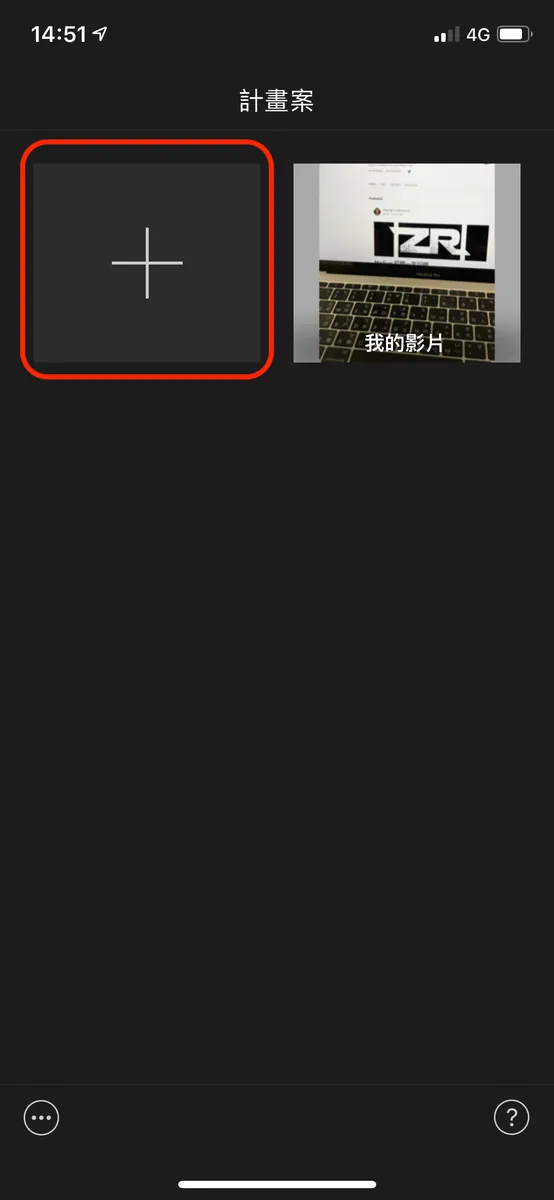
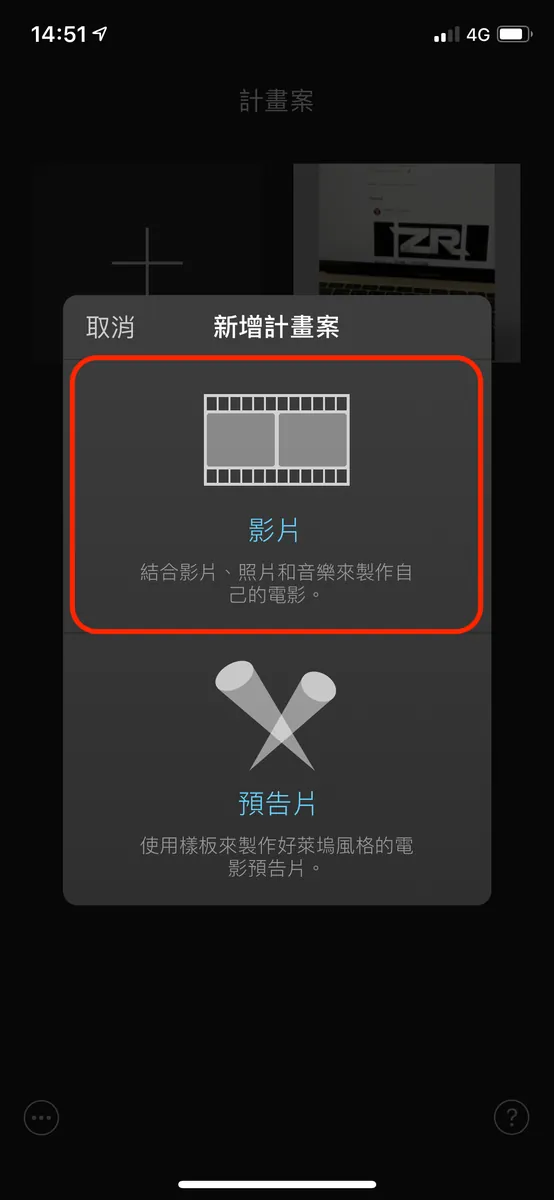
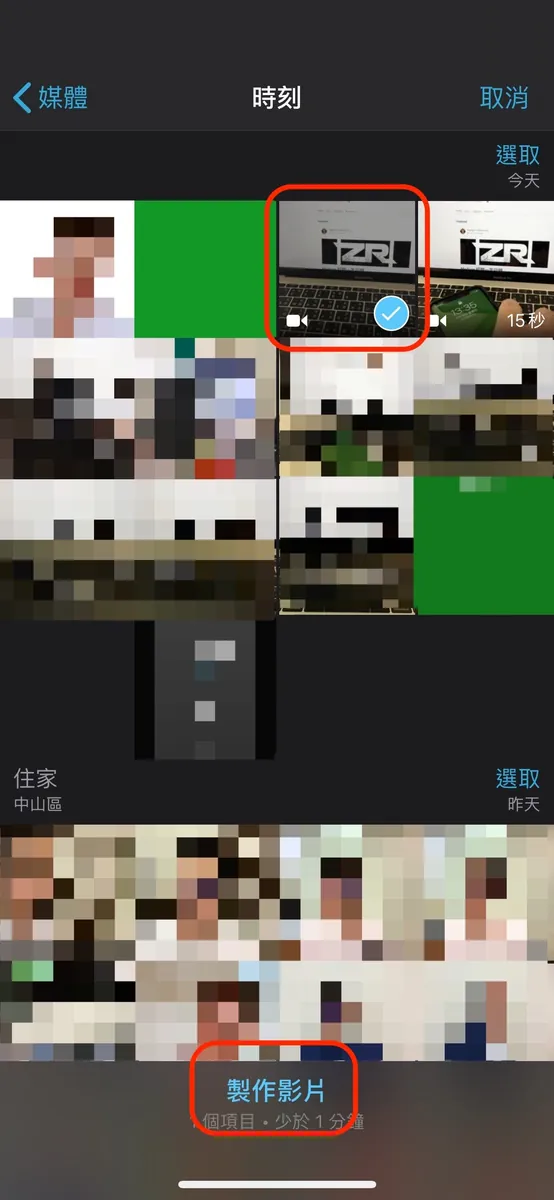
「+」->「Video」-> Select 「Clean Video」->「Create Video」
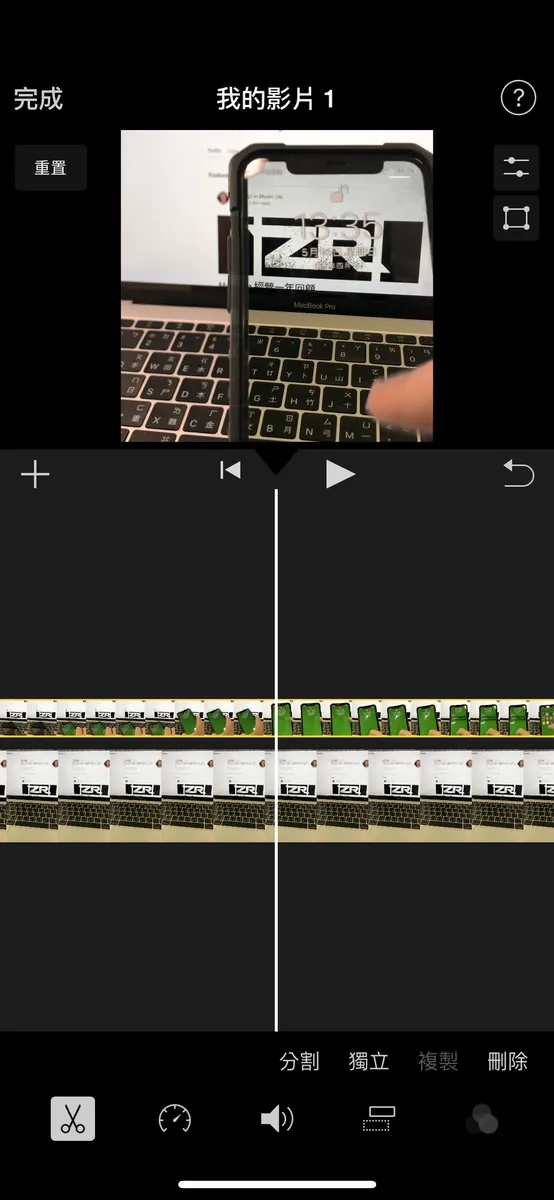
Insert a clean video into the project.
6. Move Playback Position to the Beginning
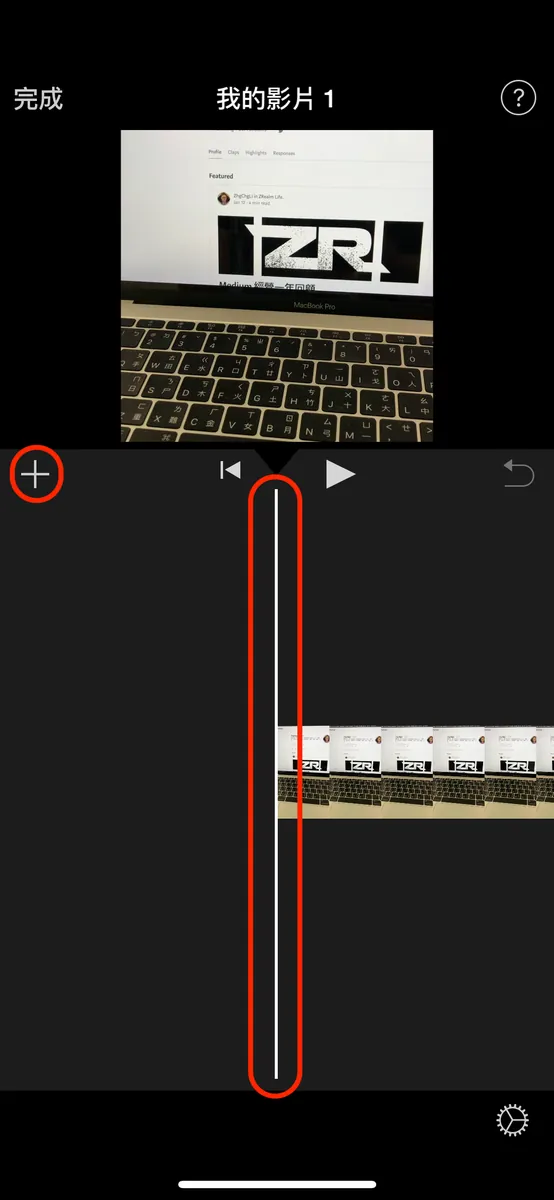
If you do not move the clean video playback position to the beginning, an error “Move the playhead away from the end to add an overlay” will occur when inserting the green screen video later.
7. Insert On-Screen Mobile Operation Video
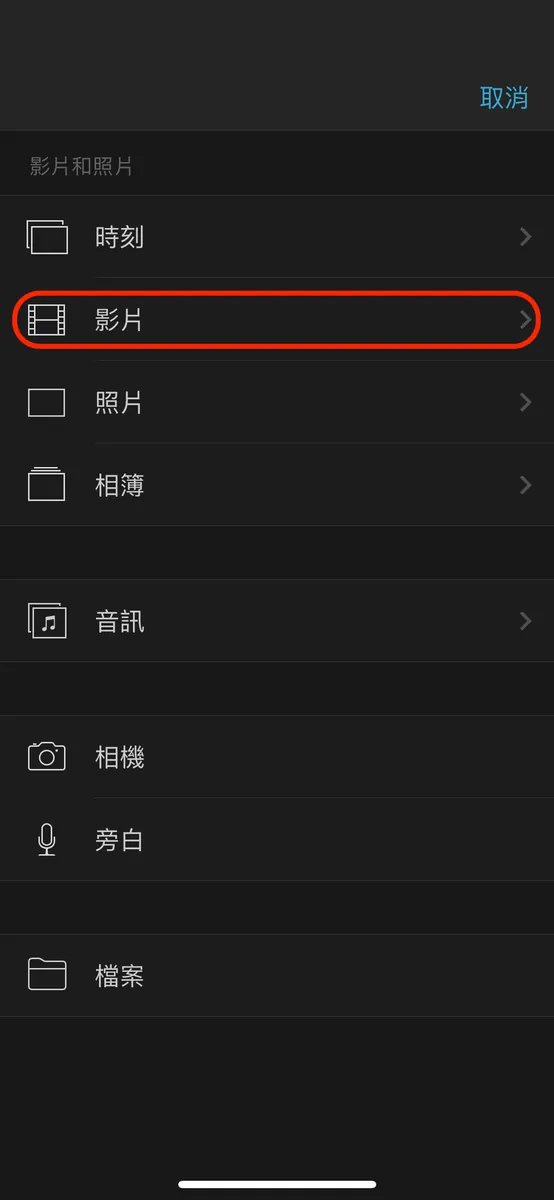
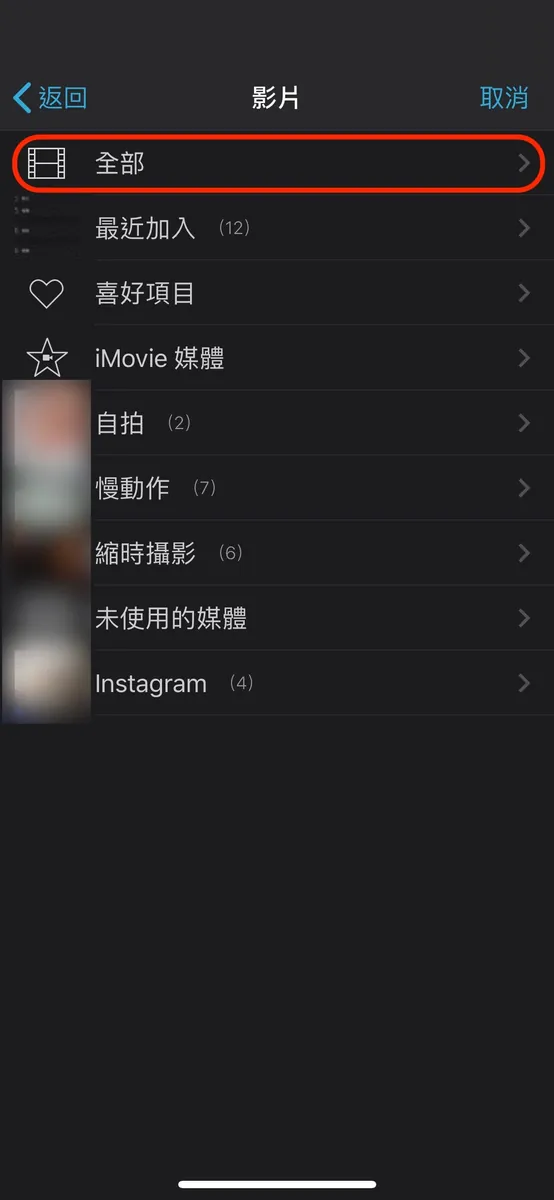
Click the top right “+” -> “Videos” -> “All”
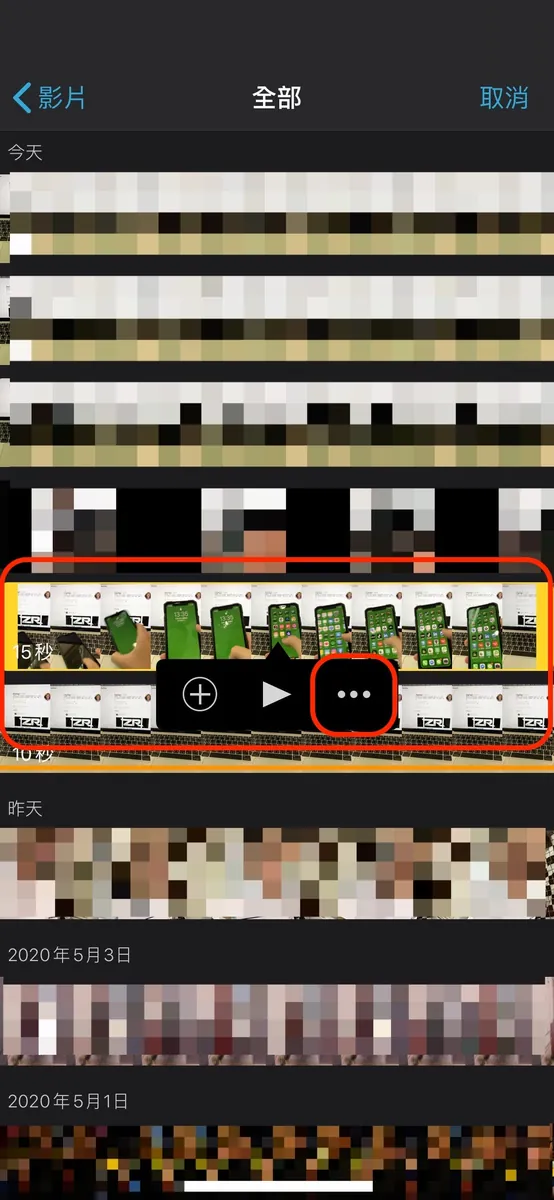
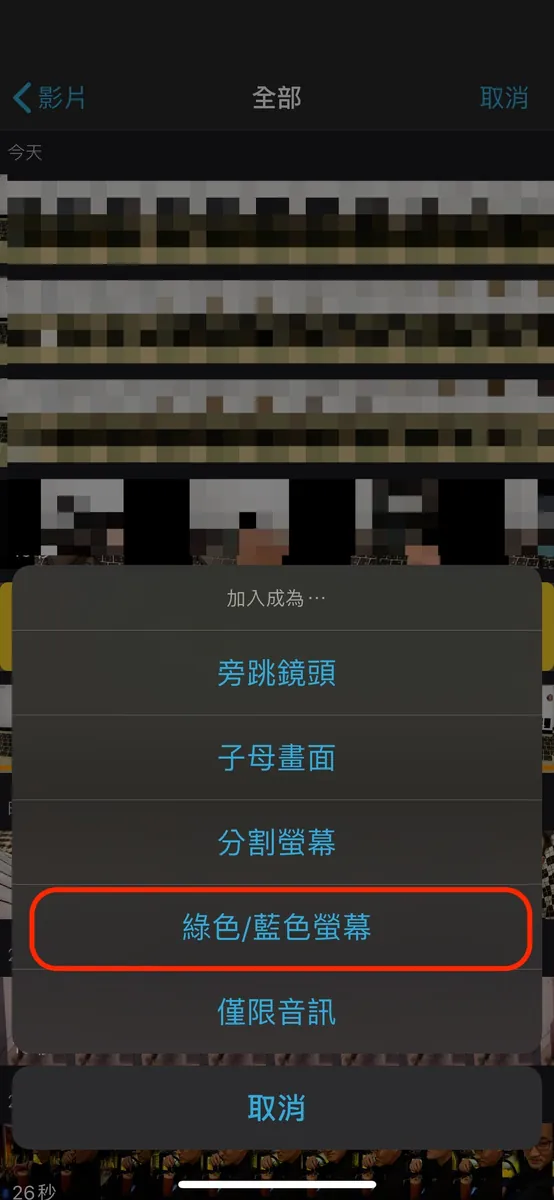
Select “Footage with On-Screen Actions” -> “…” -> “Green/Blue Screen” (commonly known as chroma key)
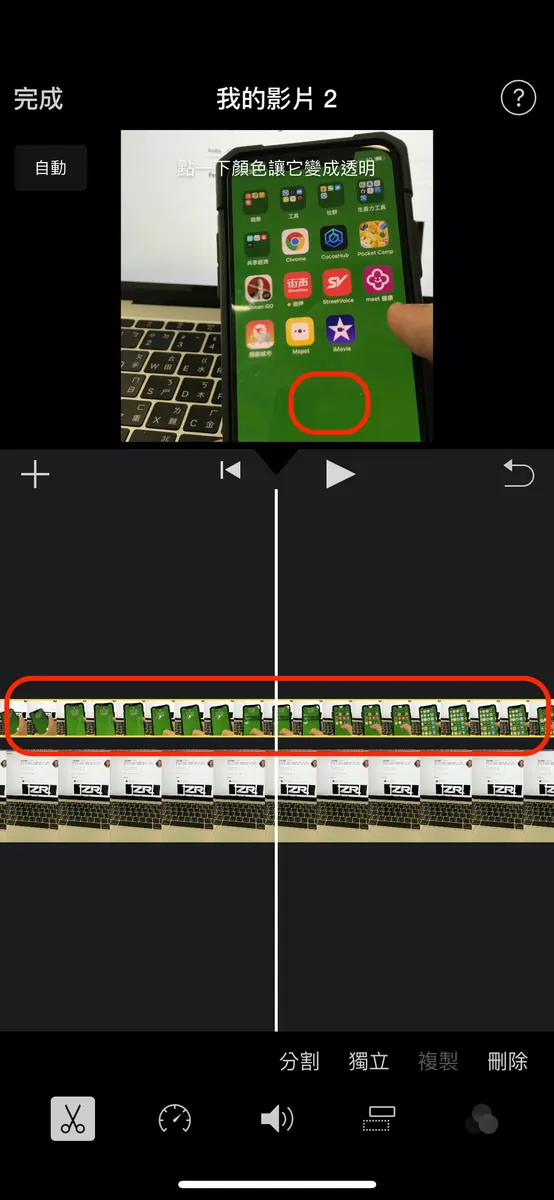
Click the top “In-frame Operation Video” -> “Scroll to the frame with the green background” -> Click the “green area” -> Complete perspective transparency
8. Synthesis Complete! Export the Video
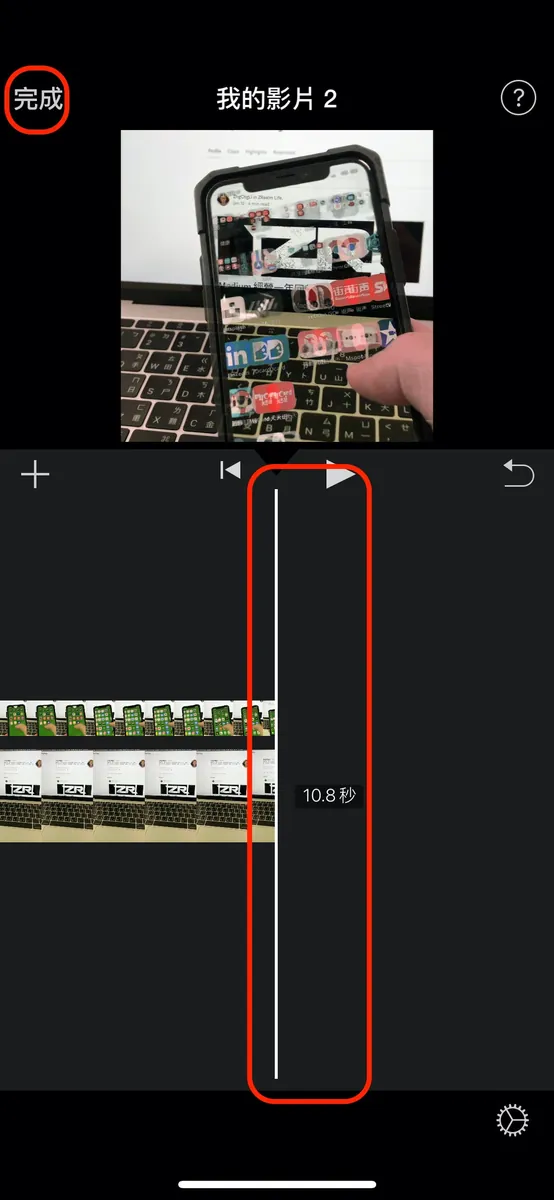
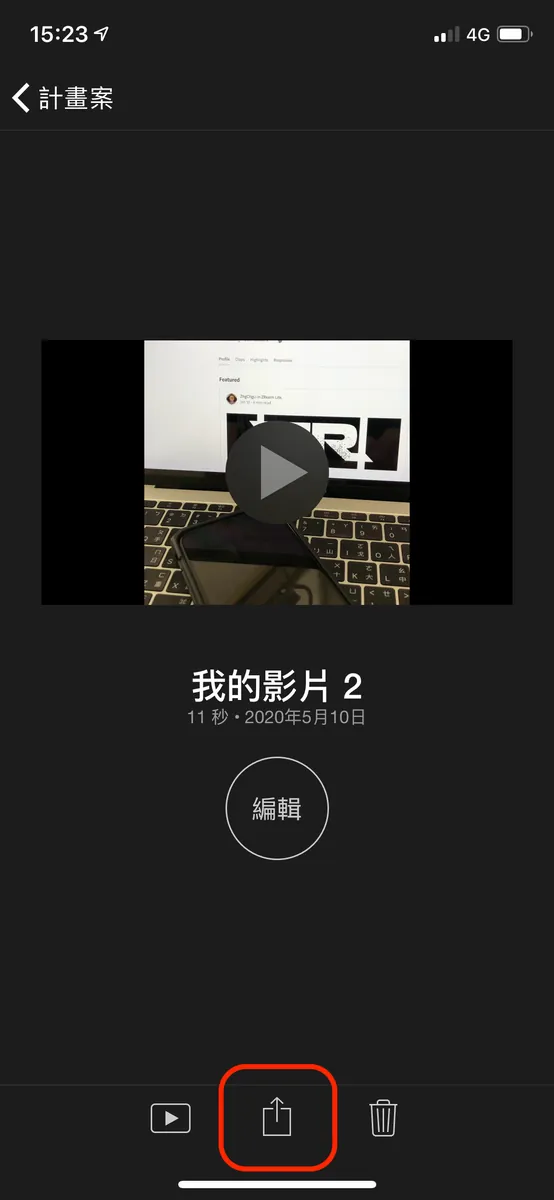
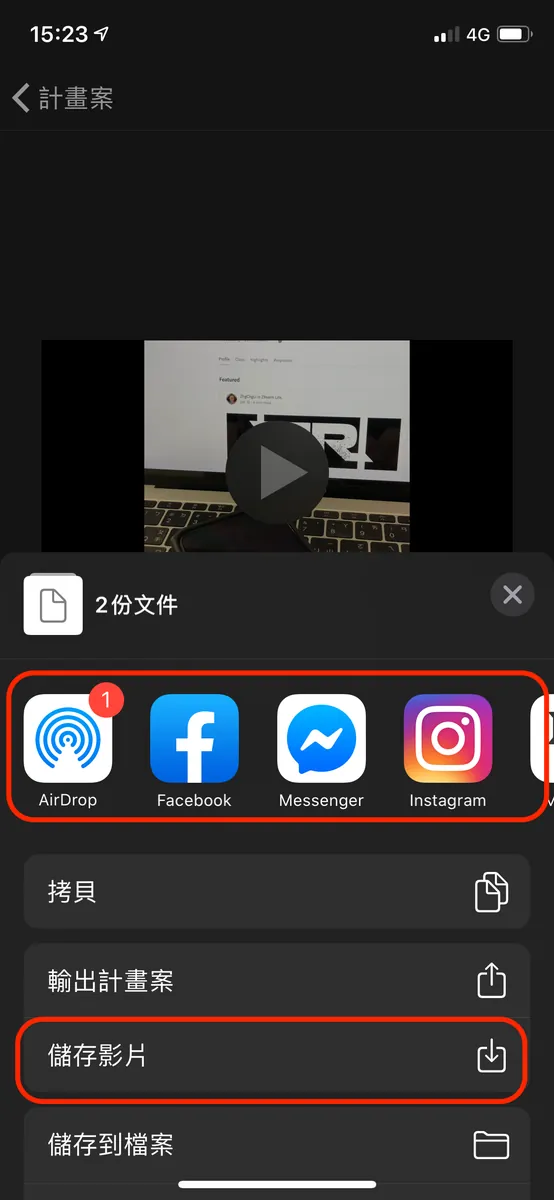
Confirm both videos end at the same time, click the top left “Done” -> “Share” at the bottom -> select the export target -> complete the export.
9. Completion
Tips
You can first hide apps with green icons, such as Line and Messages, to prevent revealing the trick (since the cutout is based on green).
You can use a blue background with blue cropping; other colors are also acceptable (but green/blue works best).
There are more ways to play with the same principle, waiting for you to discover!
Conclusion
just for fun… I didn’t expect iMovie to be so powerful!
Further Reading
If you have any questions or feedback, feel free to contact me.

This post was originally published on Medium (View original post), and automatically converted and synced by ZMediumToMarkdown.