iOS 擴大按鈕點擊範圍
重寫 pointInside 擴大感應區域
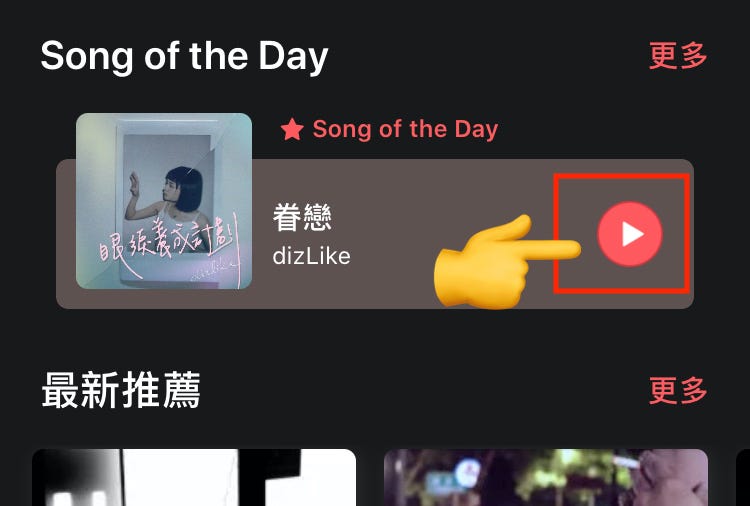
日常開發上經常遇到版面照著設計 UI 排好之後,畫面美美的,但是實際操作上按鈕的感應範圍太小,不容易準確點擊;尤其對手指粗的人極不友善。
完成範例圖
Before…
關於這個問題當初沒特別深入研究,直接暴力蓋一個範圍更大的透明 UIButton 在原按鈕上,並使用這個透明的按鈕響應事件,做起來非常麻煩、元件一多也不好控制。
後來改用排版的方式解決,按鈕在排版時設定上下左右都對齊0 (或更低),再控制 imageEdgeInsets 、 titleEdgeInsets 、 contentEdgeInsets 這三個內距參數,將 Icon/按鈕標題 推到 UI 設計的正確位置;但這個做法比較適合使用 Storyboard/xib 的專案,因為可以直接在 Interface Builder 去推排版;另外一個是設計出的 Icon 最好要是沒有劉間距的,不然會不好對位置,有時候可能就卡在那個 0.5 的距離,怎麼調都不對齊。
After…
正所謂見多識廣,最近接觸到新專案之後又學到了一小招;就是可以在 UIButton 的 pointInside 中加大事件響應範圍,預設是 UIButton 的 Bounds,我們可以在裡面延伸 Bounds 的大小使按鈕的可點擊區域更大!
經過以上思路…我們可以:
1
2
3
4
5
6
7
8
9
10
11
12
class MyButton: UIButton {
    var touchEdgeInsets:UIEdgeInsets?
    override open func point(inside point: CGPoint, with event: UIEvent?) -> Bool {
        var frame = self.bounds

        if let touchEdgeInsets = self.touchEdgeInsets {
            frame = frame.inset(by: touchEdgeInsets)
        }

        return frame.contains(point);
    }
}
自訂一個 UIButton ,增加 touchEdgeInsets 這個 public property 存放要擴張的範圍 方便我們使用;接著複寫 pointInside 方法,實作上述的想法。
使用:
1
2
3
4
5
6
7
8
9
10
11
12
13
import UIKit

class MusicViewController: UIViewController {

    @IBOutlet weak var playerButton: MyButton!

    override func viewDidLoad() {
        super.viewDidLoad()

        playerButton.touchEdgeInsets = UIEdgeInsets(top: -10, left: -10, bottom: -10, right: -10)
    }

}
播放按鈕/藍色為原始點擊區域/紅色為擴大後的點擊範圍
使用時只需記得要將 Button 的 Class 指定為我們自訂的 MyButton,然後就能透過設定 touchEdgeInsets 針對個別 Button 擴大點擊範圍!
️⚠️⚠️⚠️⚠️️️️⚠️️️️
使用 Storyboard/xib 時記得設
Custom Class為 MyButton
⚠️⚠️⚠️⚠️⚠️
touchEdgeInsets以(0,0)自身為中心向外,所以上下左右的距離要用 負數 來延伸。
看起來不錯…但是:
對於每個 UIButton 都要置換成自訂的 MyButton 其實挺繁瑣的也增加程式的複雜性、甚至在大型專案中可能會有衝突。
對於這種我們認為應該所有 UIButton 天生都應該要具有的功能,如果可以,我們希望能直接 Extension 擴充原本的 UIButton :
1
2
3
4
5
6
7
8
9
10
11
12
13
14
15
16
17
18
19
20
21
22
23
24
25
private var buttonTouchEdgeInsets: UIEdgeInsets?

extension UIButton {
    var touchEdgeInsets:UIEdgeInsets? {
        get {
            return objc_getAssociatedObject(self, &buttonTouchEdgeInsets) as? UIEdgeInsets
        }

        set {
            objc_setAssociatedObject(self,
                &buttonTouchEdgeInsets, newValue,
                .OBJC_ASSOCIATION_RETAIN_NONATOMIC)
        }
    }

    override open func point(inside point: CGPoint, with event: UIEvent?) -> Bool {
        var frame = self.bounds

        if let touchEdgeInsets = self.touchEdgeInsets {
            frame = frame.inset(by: touchEdgeInsets)
        }

        return frame.contains(point);
    }
}
使用上如前述使用範例。
因 Extension 不能包含 Property 否則會報編譯錯誤「Extensions must not contain stored properties」,這邊參考了 使用 Property 配合 Associated Object 將外部變數 buttonTouchEdgeInsets 關聯到我們的 Extension 上,就能如 Property 日常使用。(詳細原理請參考 貓大的文章 )
UIImageView (UITapGestureRecognizer) 呢?
針對圖片點擊、我們自己在 View 上加的 Tap 手勢; ㄧ樣能透過複寫 UIImageView 的 pointInside 達到同樣的效果。
完成!經過不斷的改進,在解決這個議題上更簡潔方便了不少!
參考資料:
附記
去年同一時間想開個小分類「 顧小事成大事 」紀錄一下日常開發瑣碎的小事,但這些小事默默累積又能成大事增加整個 APP 的不管是體驗或是程式方面;結果 拖了一年 才又增加了一篇文章 <( _ _ )>,小事真的很容易忘了記錄啊!
有任何問題及指教歡迎 與我聯絡 。
===
View the English version of this article here.
本文首次發表於 Medium ➡️ 前往查看


