
Automating Backup of Medium Articles to Github Pages (Jekyll)
Personal Medium Article Backup Mirror Site Setup, Maintenance, Upgrading, and Customization Records
Preface
Running Medium for six years now, the total number of articles surpassed 100 last year. As time goes by and the number of articles grows, I worry that Medium might suddenly shut down or my account may have issues, causing all my work to be lost. Some articles are less valuable, which is fine, but many record technical frameworks and problem-solving approaches at the time. I often revisit my previous articles to review knowledge. In recent years, I also started documenting travel stories abroad, which are memories and perform well in traffic. Losing these contents would mean they can never be rewritten.
Develop Your Own Backup Tool
I usually write articles directly on the Medium platform without my own backup. Therefore, during the 2022 Lunar New Year, I spent time developing a tool to download Medium articles and convert them into Markdown files (including article images, embedded code blocks, and other content) — ZMediumToMarkdown :
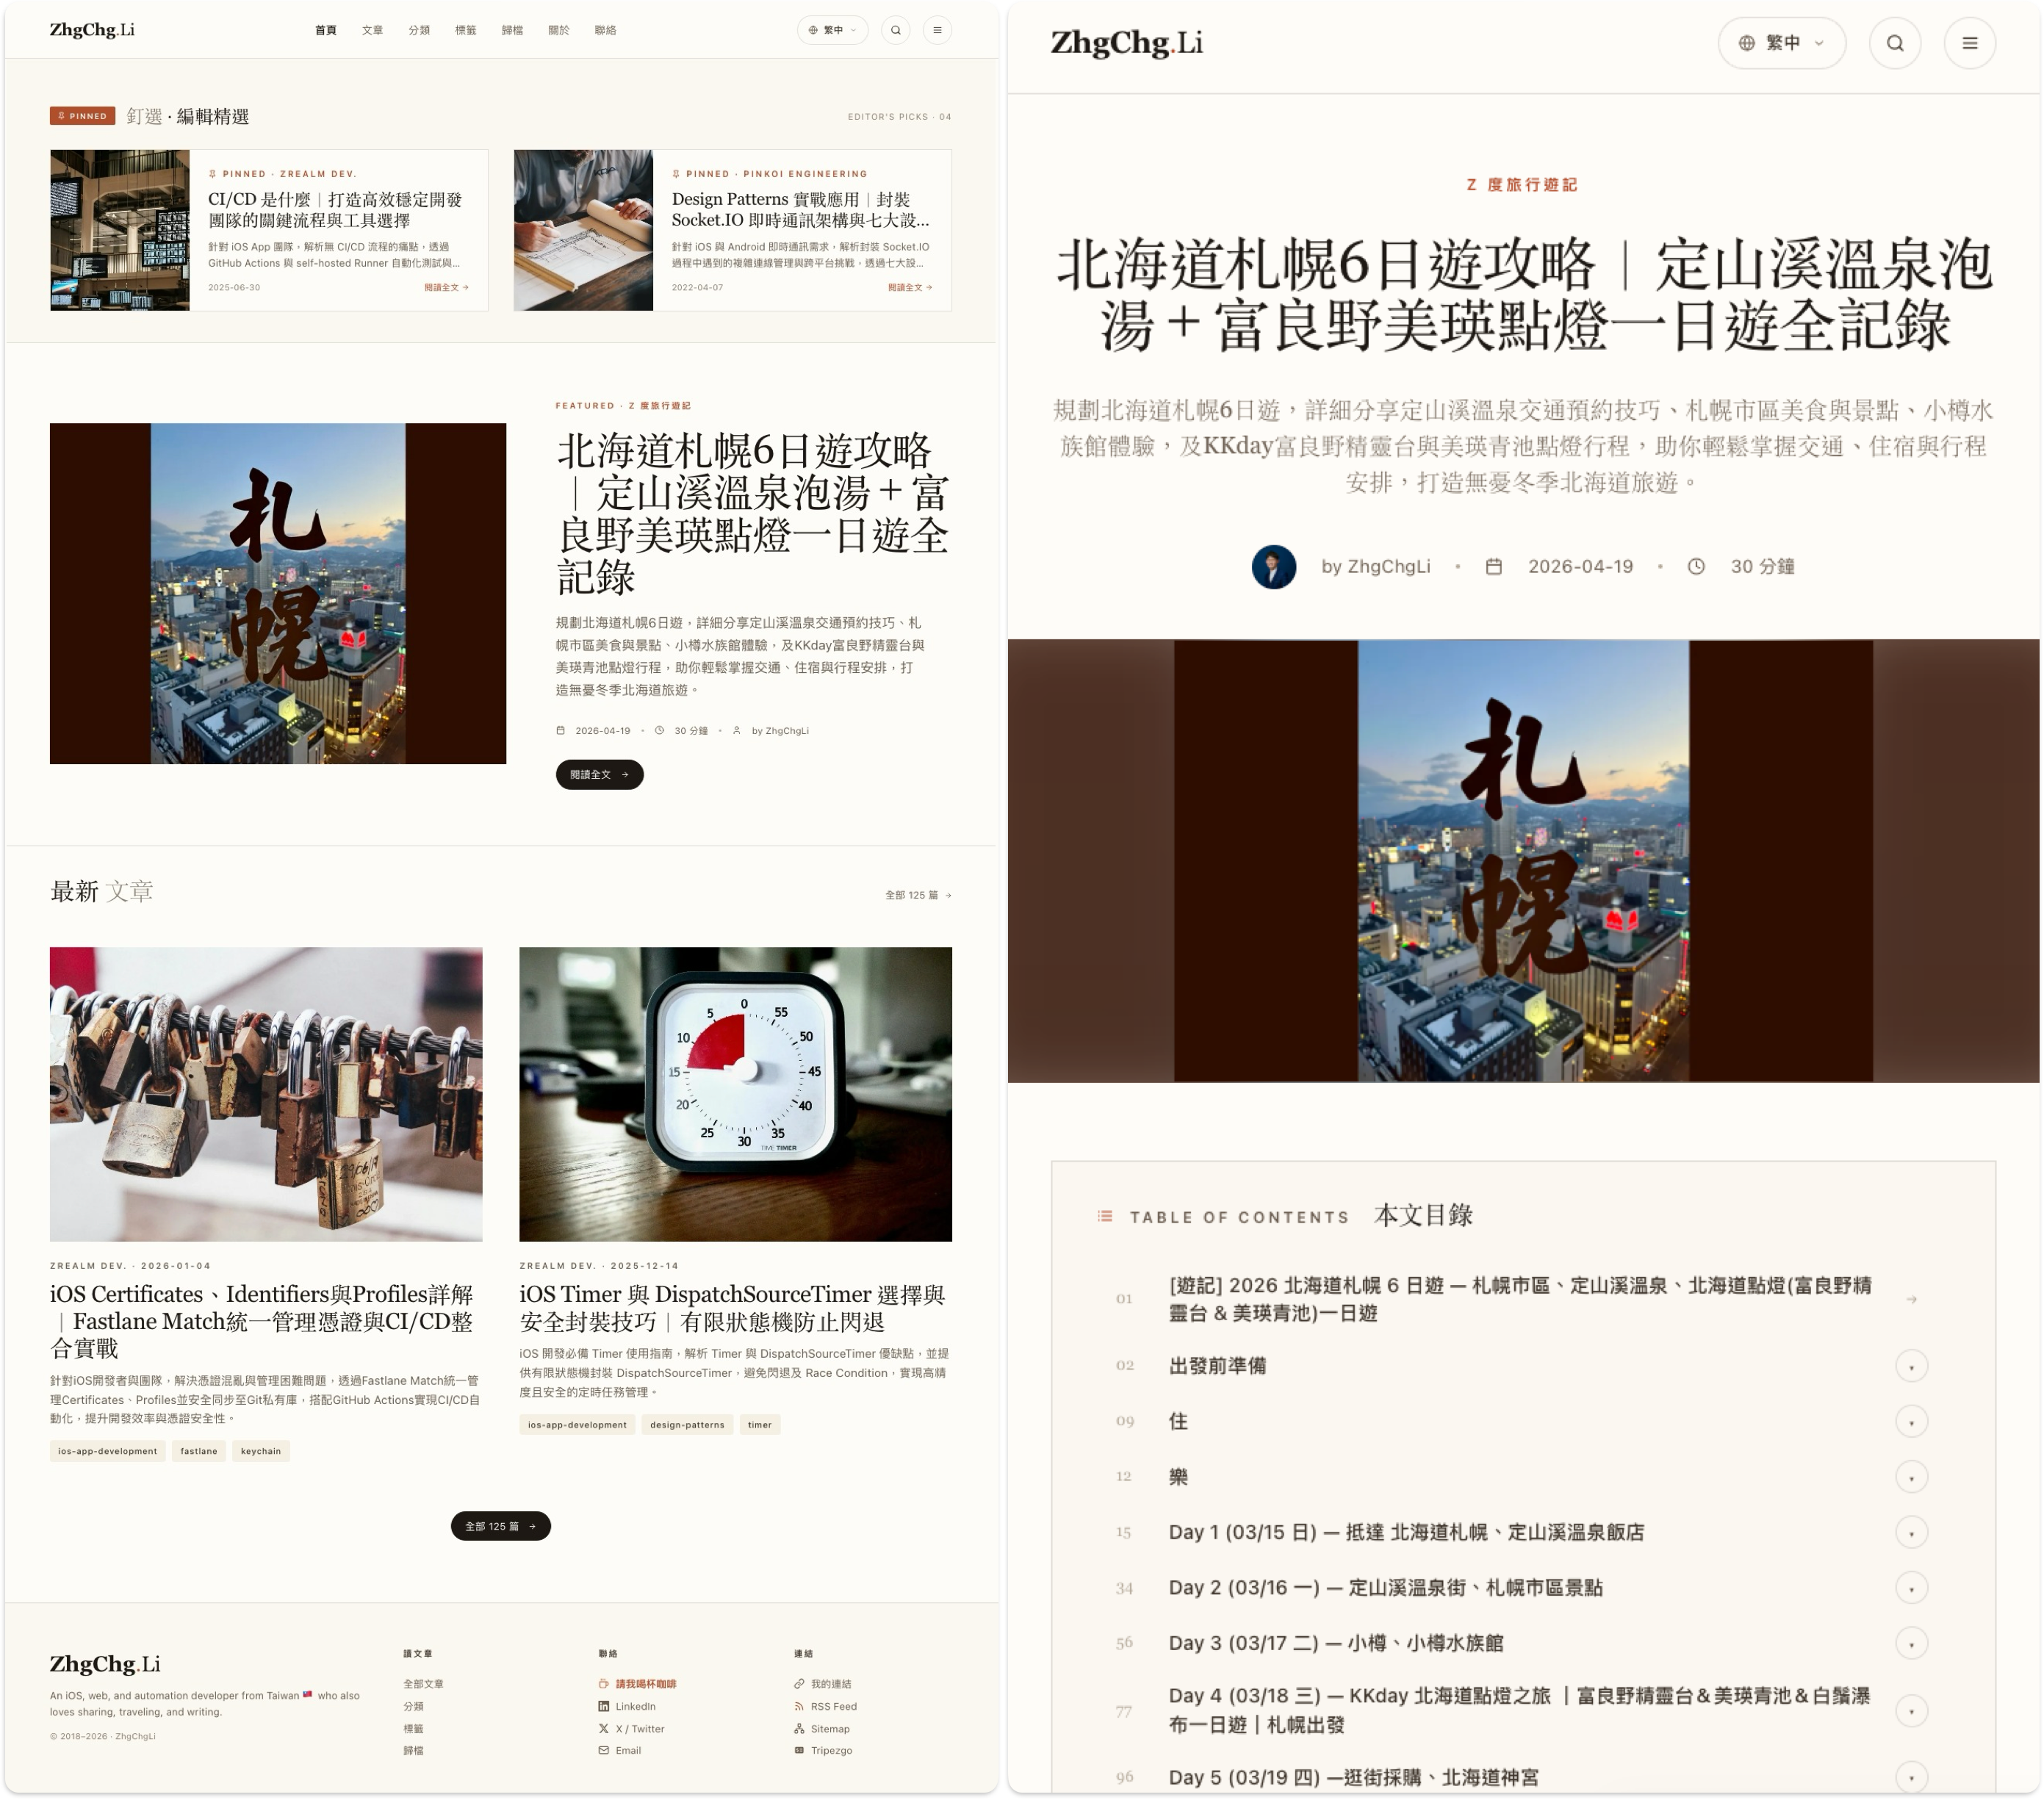
Extend the use of this tool by deploying the downloaded Markdown as a static backup mirror website on Github Pages using Jekyll (Chirpy Theme) — https://zhgchg.li/
At that time, I integrated the entire setup into a Github Template Repo for friends with the same needs to quickly deploy and use — ZMediumToJekyll. Since then (2022), I have not updated the version or settings of Jekyll (Chirpy Theme); ZMediumToMarkdown is still maintained, and any formatting parsing errors found are promptly fixed. It is currently stable.
At that time, the Jekyll (Chirpy Theme) version used was v5.x, which had no major issues and included all necessary features (e.g., sticky posts, categories, tags, cover images, comments…). The only problem was frequent scrolling issues where the page would sometimes not scroll, but after a few swipes, it worked again. This was a flaw in the user experience. Attempts to upgrade to v6.x still had the issue, and reporting it to the developers received no response. Additionally, upgrading brought more conflicts with each version, so the idea of upgrading was eventually abandoned altogether.
Recently, I decided to solve issues with Jekyll (Chirpy Theme), upgrade its version, and conveniently optimize the quick deployment tool ZMediumToJekyll.
New! medium-to-jekyll-starter 🎉🎉
medium-to-jekyll-starter.github.io
I integrated the latest version v7.x of Jekyll (Chirpy Theme) with my ZMediumToMarkdown Medium article download and conversion tool into a new — medium-to-jekyll-starter.github.io Github Template Repo.
You can directly use this template Repo to quickly set up your own Medium mirror content backup site. Set it up once for permanent, continuous automatic backups, deployed completely free on Github Pages.
For a step-by-step setup guide, please refer to this article: https://zhgchg.li/posts/medium-to-jekyll/
Results
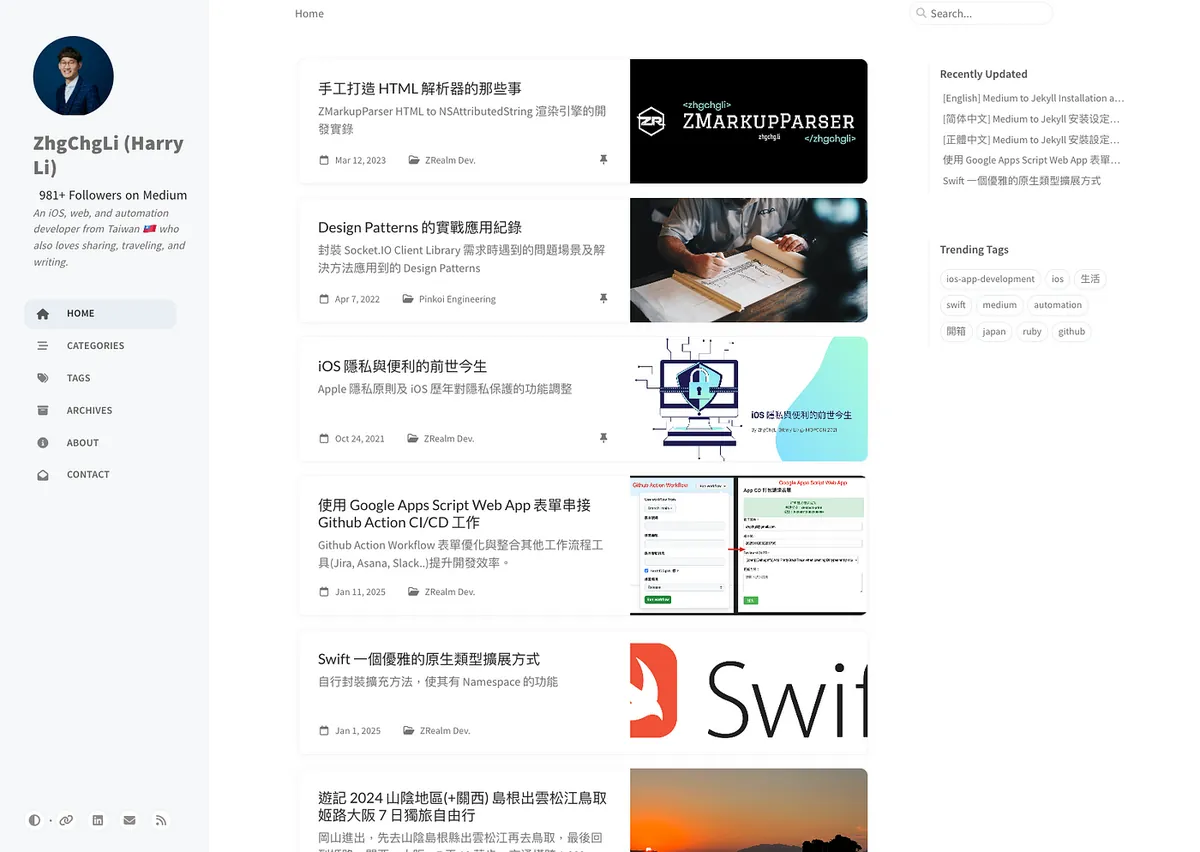
All the above articles are **automatically downloaded from my Medium, converted into Markdown format, and re-uploaded.**
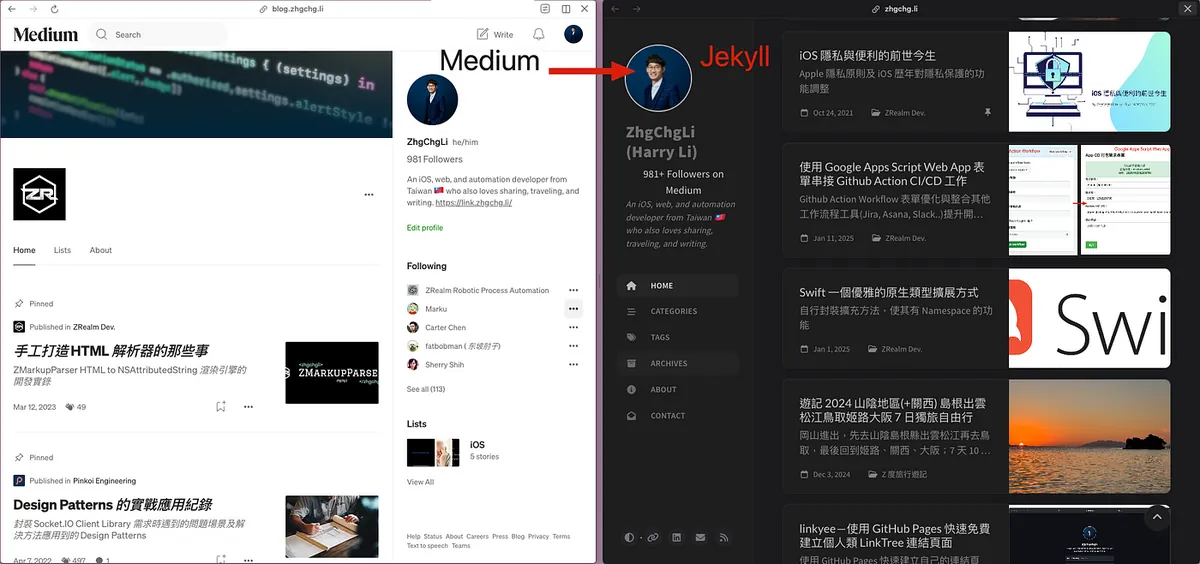
Attached is a sample conversion of a random article for comparison:
Original content on Medium / Converted result on personal website
After the upgrade, the scrolling freeze issue no longer occurs. This upgrade also added customized dynamic content (displaying Medium follower count).
Some Technical Notes
Jekyll (Chirpy Theme) The deployment setup on Github Pages mainly refers directly to the official Start Repo:
Last month, I also used this project’s method to create a new open-source project — Linkyee, an open-source Link Tree personal link page.

Jekyll Customization Method (1) — Override HTML
Jekyll is a powerful Ruby static site generator. Jekyll (Chirpy Theme) is just a theme based on Jekyll. Compared to other themes, the Chirpy Theme offers the best quality, user experience, and comprehensive features.
Jekyll pages are inheritable. We can add files with the same page names as Jekyll in ./_layouts. When generating the site, the engine will use your custom page content to replace the original.
For example, if I want to add a line of text at the end of each article page, I first copy the original article page file (post.html) and place it in the ./_layouts directory:
![]()
Open post.html with an editor, add text or customization in the appropriate place, and redeploy the website to see the customized results.

You can also create a ./_include directory to store some shared page content files:
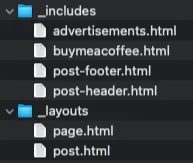
Then in post.html, we can directly use {% include buymeacoffee.html %} to include the HTML content of that file for reuse.
The advantage of rewriting the HTML layout file is full customization, allowing complete freedom to adjust page content and layout as desired; the downside is that during upgrades, conflicts or unexpected issues may arise, requiring a review of the customized content.
Jekyll Customization Method (2) — Plugin
The second method is to use the Hook method in Plugin to inject custom content during Jekyll’s static content generation phase.
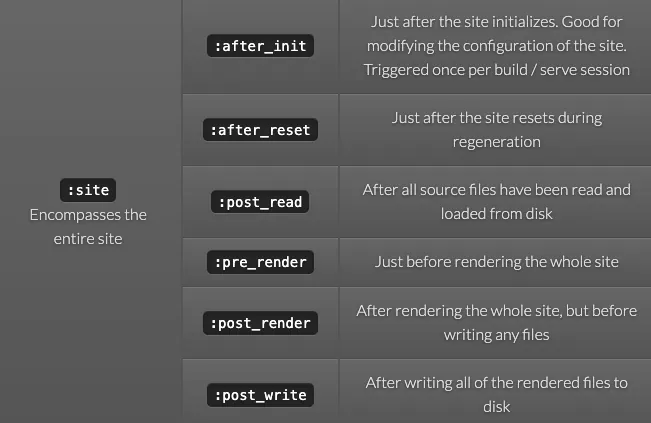
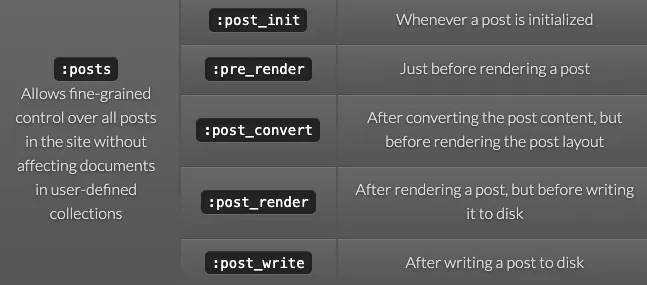
[Built-in Hook Owners and Events
Hook events](https://jekyllrb.com/docs/plugins/hooks/#built-in-hook-owners-and-events){:target=”_blank”} are many. Here, I only include the ones I used: site:pre_render and post:pre_render.
Adding a new method is also simple; just add a Ruby file in the ./_plugins directory.

posts-lastmod-hook.rb is a plugin that originally exists
I want a few “pseudo” dynamic content features. The first is to display the Medium follower count under the profile and show the page’s last updated time at the bottom.

Created a zhgchgli-customize.rb under ./_plugins:
#!/usr/bin/env ruby
#
require 'net/http'
require 'nokogiri'
require 'uri'
require 'date'


def load_medium_followers(url, limit = 10)
  return 0 if limit.zero?

  uri = URI(url)
  response = Net::HTTP.get_response(uri)
  case response
  when Net::HTTPSuccess then
      document = Nokogiri::HTML(response.body)

      follower_count_element = document.at('span.pw-follower-count > a')
      follower_count = follower_count_element&.text&.split(' ')&.first

      return follower_count \|\| 0
  when Net::HTTPRedirection then
    location = response['location']
    return load_medium_followers(location, limit - 1)
  else
      return 0
  end
end

$medium_url = "https://medium.com/@zhgchgli"
# could also define in _config.yml and retrieve in Jekyll::Hooks.register :site, :pre_render do \|site\| site.config

$medium_followers = load_medium_followers($medium_url)

$medium_followers = 1000 if $medium_followers == 0
$medium_followers = $medium_followers.to_s.reverse.scan(/\d{1,3}/).join(',').reverse


Jekyll::Hooks.register :site, :pre_render do \|site\|

  tagline = site.config['tagline']

  followMe = <<-HTML
  <a href="#{$medium_url}" target="_blank" style="display: block;text-align: center;font-style: normal;/* text-decoration: underline; */font-size: 1.2em;color: var(--heading-color);">#{$medium_followers}+ Followers on Medium</a>
  HTML

  site.config['tagline'] = "#{followMe}";
  site.config['tagline'] += tagline;

  meta_data = site.data.dig('locales', 'en', 'meta');
  # only implementation in en, could implement to all langs.

  if meta_data
    gmt_plus_8 = Time.now.getlocal("+08:00")
    formatted_time = gmt_plus_8.strftime("%Y-%m-%d %H:%M:%S")
    site.data['locales']['en']['meta'] += "<br/>Last updated: #{formatted_time} +08:00"
  end
end
-
The principle is to register a Hook before the website renders, adding HTML that displays the Medium follower count to the
taglinesection under the profile introduction in the config. -
The Medium follower count will be fetched to get the latest number each time it runs.
-
The logic for the last updated time at the page bottom is similar: just add the last updated time string to locales->en->meta when generating the website.
-
Supplement: Before generating the Hook article, you can get the Markdown; after generating the Hook article, you can get the generated HTML.
After saving, you can first test the result locally with bundle exec jekyll s:
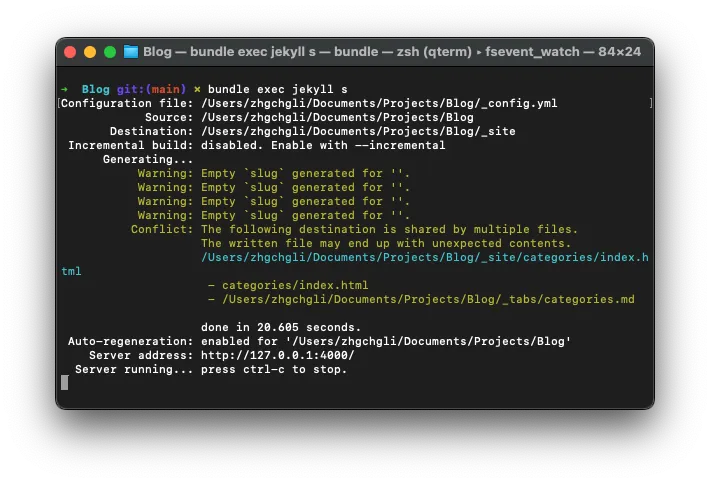
Open 127.0.0.1:4000 in a browser to see the result.
Finally, add a scheduled action on the Github Pages Repo to automatically regenerate the website, and it’s done:
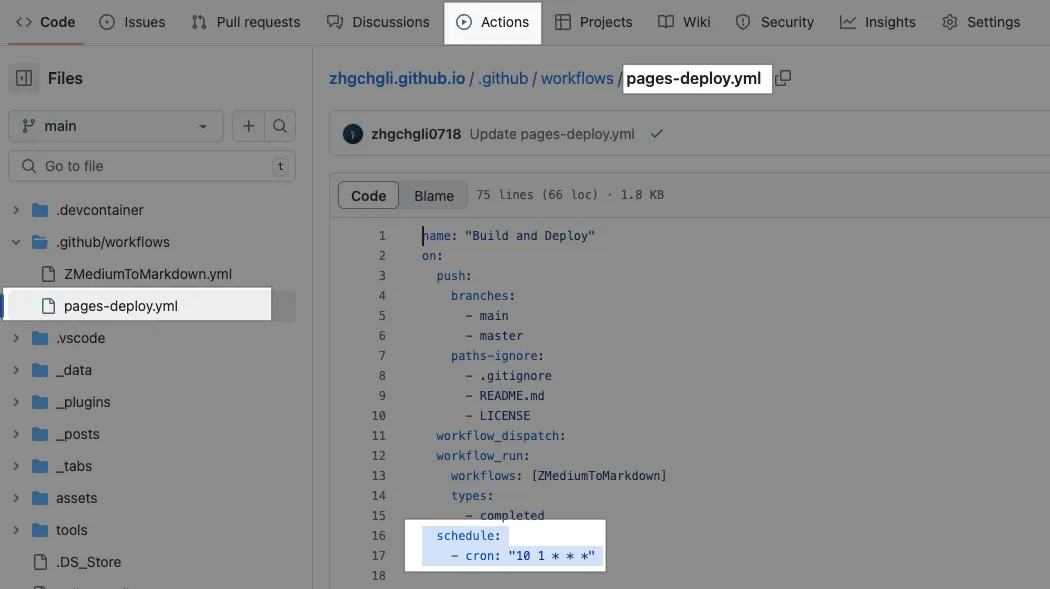
In the Jekyll (Chirpy Theme) repo project, find the Actions and locate pages-deploy.yml. Add the following under on::
  schedule:
    - cron: "10 1 * * *" # Automatically runs once daily at 01:10 UTC, https://crontab.guru
The advantage of plugins is that they enable dynamic content (scheduled content updates) without affecting the website structure or causing conflicts during upgrades; the downside is that the content and display positions that can be adjusted are limited.
Jekyll (Chirpy Theme) Deployment Issues on Github Pages After v7.x
Besides the website structure changes, the deployment script in v.7.x has also changed; the original deploy.sh script was removed, and the deployment now uses GitHub Actions steps directly:
# build:
# ...
      - name: Upload site artifact
        uses: actions/upload-pages-artifact@v3
        with:
          path: "_site${{ steps.pages.outputs.base_path }}"

  deploy:
    environment:
      name: github-pages
      url: ${{ steps.deployment.outputs.page_url }}
    runs-on: ubuntu-latest
    needs: build
    steps:
      - name: Deploy to GitHub Pages
        id: deployment
        uses: actions/deploy-pages@v4
But I encountered problems during the deployment process:
Uploaded artifact size of 1737778940 bytes exceeds the allowed size of 1 GB Because my website content is too large, the Upload Artifact failed; however, the previous deployment script worked, so I had to revert to the original deploy.sh plus comment out this section above.
Test Site Steps Fail During Github Pages Deployment
Jekyll (Chirpy Theme) deployment includes a step to test the site by checking if the webpage content is correct, such as verifying links and ensuring no missing HTML tags.
# build:
# ...
      - name: Test site
        run: \|
          bundle exec htmlproofer _site \
            --disable-external \
            --no-enforce-https \
            --ignore-empty-alt \
            --ignore-urls "/^http:\/\/127.0.0.1/,/^http:\/\/0.0.0.0/,/^http:\/\/localhost/"
I added --no-enforce-https and --ignore-empty-alt to skip checks for https and HTML tags without alt attributes. Ignoring these two allows the check to pass (since I can’t change the content for now).
The official documentation for the htmlproofer CLI commands does not mention this. After searching for a long time, I finally found the rules in a comment on an issue:
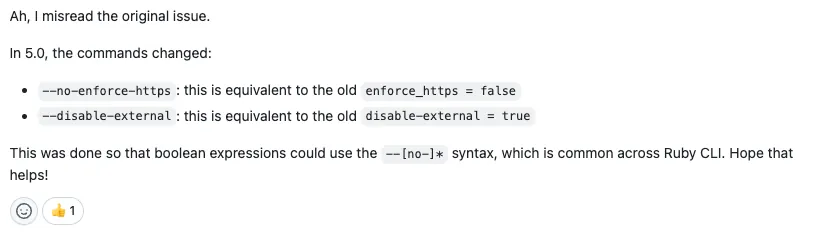
https://github.com/gjtorikian/html-proofer/issues/727#issuecomment-1334430268


Comments