iOS Cross-Platform Account Integration|Enhance Login Experience Beyond Sign in with Apple
iOS users struggle with fragmented logins; unify passwords across platforms to simplify access, boost security, and streamline authentication for a seamless experience better than Sign in with Apple.
点击这里查看本文章简体中文版本。
點擊這裡查看本文章正體中文版本。
This post was translated with AI assistance — let me know if anything sounds off!
Table of Contents
iOS Cross-Platform Account and Password Integration to Enhance Login Experience
Other Features Worth Adding Besides Sign in with Apple
{:target="_blank"}](/assets/948ed34efa09/1*QRYrbCDXcDmUU9fK66YgAA.webp)
Photo by Dan Nelson
Features
The most common issue in services with both a website and an app is that users who have registered and saved their passwords on the website are forced to re-enter their credentials when opening the app after installation. This feature automatically fills the existing account and password stored on the phone into the app linked to the website, speeding up the login process.
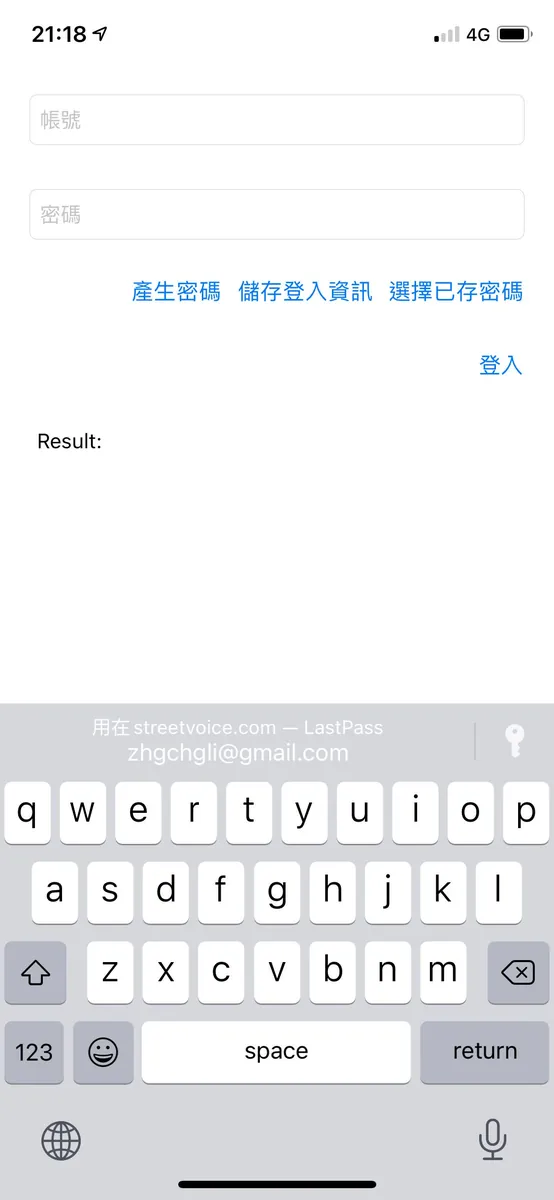
Result Image

No fuss, here is the final effect image; at first glance, you might think it’s the iOS ≥ 11 Password AutoFill feature. But please look closely—the keyboard does not pop up, and I clicked the “Select Saved Password” button to bring up the account and password selection window.
Since Password AutoFill was mentioned, let me tease a bit first by introducing Password AutoFill and how to set it up!
Password AutoFill
Support: iOS ≥ 11
Now that it’s already iOS 14, this feature is very common and nothing special; on the app’s login page for account and password, when the keyboard pops up for input, you can quickly select the website version’s account and password, and after selecting, it will automatically fill in for a fast login!
So how do the APP and Web recognize each other?
Associated Domains! We specify Associated Domains in the APP and upload the apple-app-site-association file on the website, allowing both sides to recognize each other.
1. In the project settings under “Signing & Capabilities” -> top left “+ Capabilities” -> “Associated Domains”
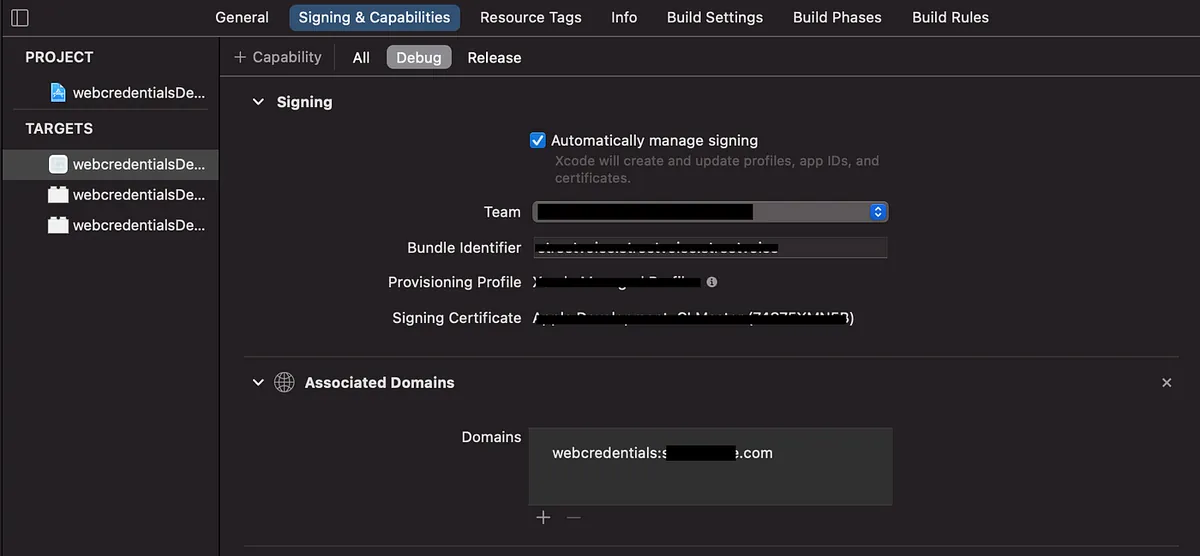
Add webcredentials:yourwebsite.com (e.g., webcredentials:google.com).
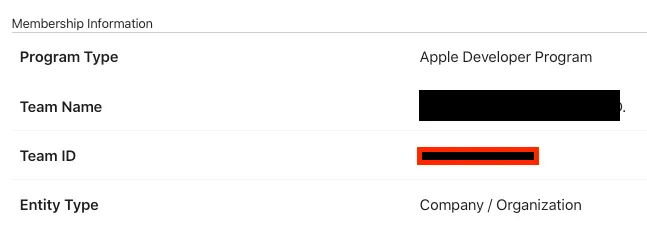
2. Log in to the Apple Developer Console
Record the Team ID in the Membership tab.
3. Go to “Certificates, Identifiers & Profiles” -> “Identifiers” -> find your project -> enable the “Associated Domains” feature
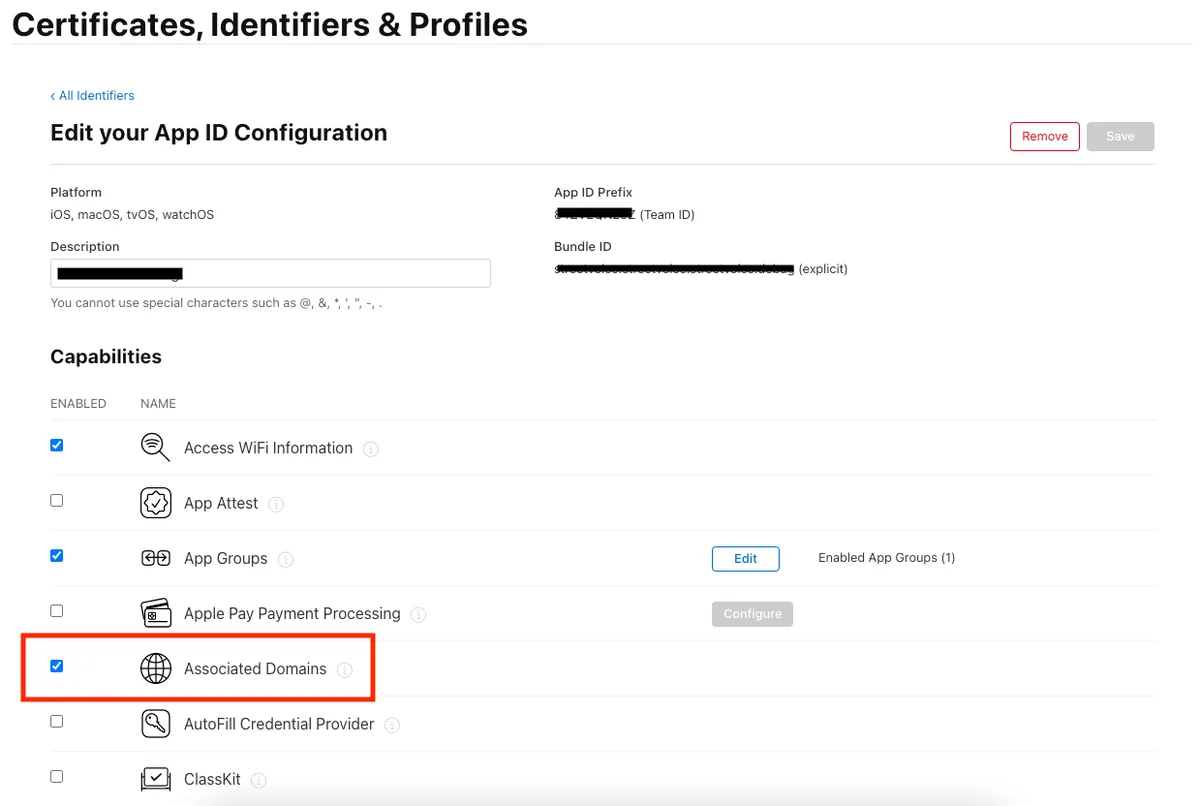
App Setup Complete!
4. Web Website Settings
Create a file named “apple-app-site-association” (no extension), edit it with a text editor, and enter the following content:
1
2
3
4
5
6
7
{
  "webcredentials": {
    "apps": [
      "TeamID.BundleId"
    ]
  }
}
Replace TeamID.BundleId with your project settings (e.g., TeamID = ABCD, BundleID = li.zhgchg.demoapp => ABCD.li.zhgchg.demoapp)
Upload this file to the website’s root directory or /.well-known directory. If your webcredentials site domain is set to google.com, then the file must be accessible at google.com/apple-app-site-association or google.com/.well-known/apple-app-site-association.
Supplement: Subdomains
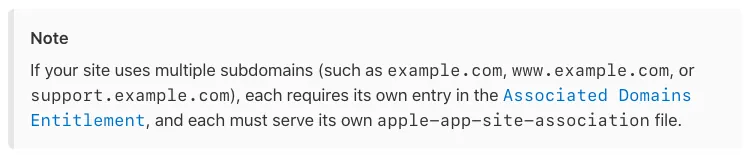
Excerpt from the official documentation: if they are subdomains, they must all be listed in Associated Domains.
Web setup completed!
Supplement: applinks
Here, it was found that if a universal link applinks is set, adding the webcredentials part is not necessary for it to work; however, let’s follow the documentation to avoid potential issues in the future.
Back to the program
For the code part, we only need to set the TextField to:
1
2
usernameTextField.textContentType = .username
passwordTextField.textContentType = .password
If you are newly registered, the password confirmation field can use:
1
repeatPasswordTextField.textContentType = .newPassword
At this point, after rebuilding and running the app, saved password options for the same website will appear above the keyboard when entering the account.
Done!
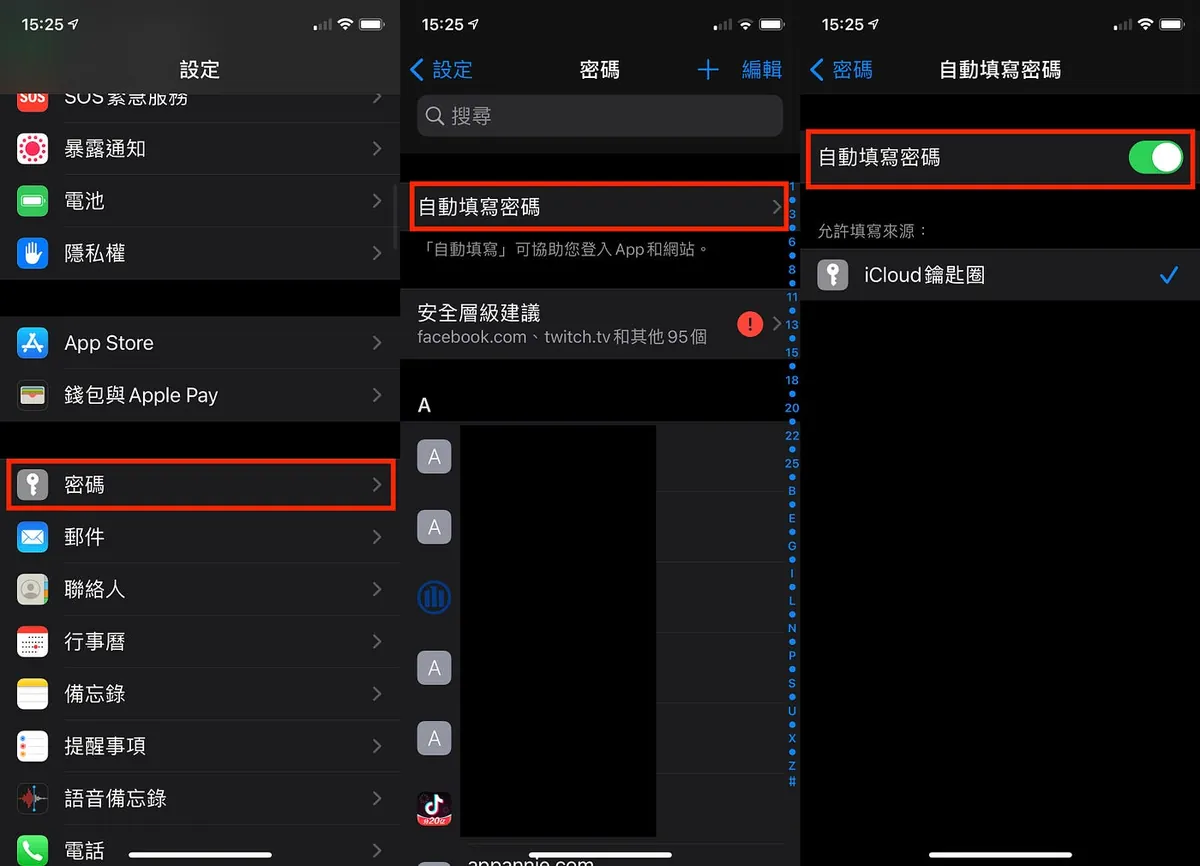
Not appearing?
The autofill password feature might be turned off (it is off by default in the simulator). Please go to “Settings” -> “Passwords” -> “Autofill Passwords” -> turn on “Autofill Passwords”.
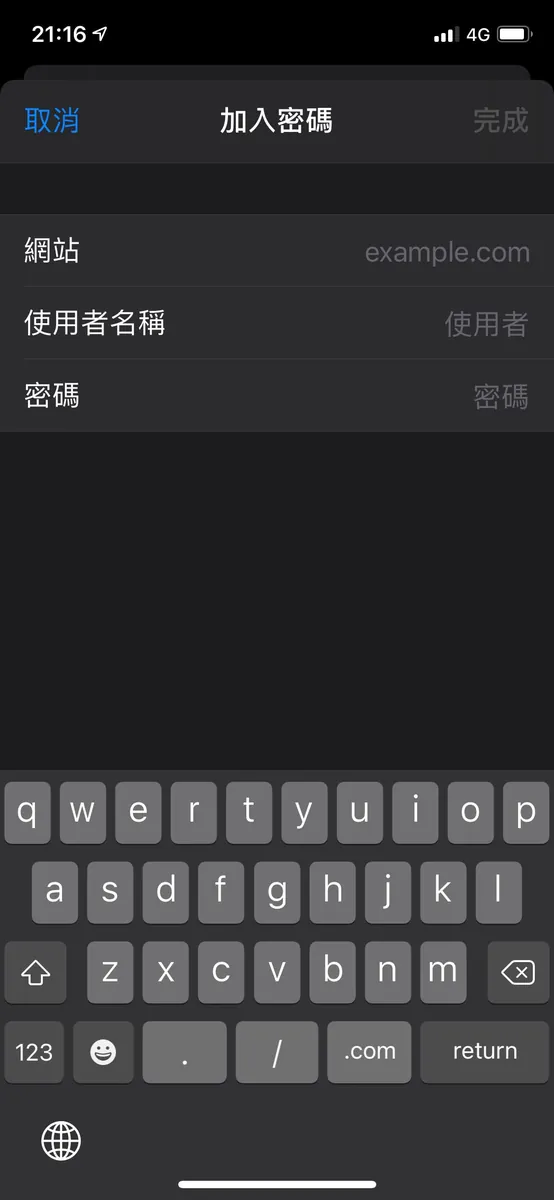
Or if the site has no existing password, you can also go to “Settings” -> “Passwords” -> top right corner “+” -> Add new.
Getting Started
After introducing the appetizer, Password AutoFill, let’s move on to the main topic of this article: how to achieve the effect shown in the image.
Shared Web Credentials
Starting from iOS 8.0, although few apps used it before, this API could be used to integrate website usernames and passwords for users to quickly select even before Password AutoFill was introduced.
Shared Web Credentials can not only read usernames and passwords but also add new credentials, modify existing ones, and delete them.
Settings
⚠️ You still need to set up Associated Domains, just like the previously mentioned Password AutoFill settings.
So it can be said that this is an enhanced version of the Password AutoFill feature!!
Because you need to set up the environment required for Password AutoFill before using this “advanced” feature.
Read
Reading using the SecRequestSharedWebCredential method:
1
2
3
4
5
6
7
8
9
10
11
12
13
14
15
16
17
18
19
20
21
22
SecRequestSharedWebCredential(nil, nil) { (credentials, error) in
  guard error == nil else {
    DispatchQueue.main.async {
      //alert error
    }
    return
  }

  guard CFArrayGetCount(credentials) > 0,
    let dict = unsafeBitCast(CFArrayGetValueAtIndex(credentials, 0), to: CFDictionary.self) as? Dictionary<String, String>,
    let account = dict[kSecAttrAccount as String],
    let password = dict[kSecSharedPassword as String] else {
      DispatchQueue.main.async {
        //alert error
      }
      return
    }

    DispatchQueue.main.async {
      //fill account,password to textfield
    }
}
SecRequestSharedWebCredential(fqdn, account, completionHandler)
fqdn If there are multiple
webcredentialsdomains, you can specify one or use null to specify none.account Specifies the account to query; use null to specify none

Rendered image. (You may notice it differs from the initial rendered image)
⚠️ This reading method has been marked Deprecated since iOS 14!
⚠️ This reading method has been marked Deprecated since iOS 14!
⚠️ This reading method has been marked Deprecated since iOS 14!
"Use ASAuthorizationController to create an ASAuthorizationPasswordRequest (AuthenticationServices framework)"
This method only applies to iOS 8 ~ iOS 14. For iOS 13 and later, you can use the same Sign in with Apple API — AuthenticationServices.
AuthenticationServices Reading Method
Support iOS ≥ 13
1
2
3
4
5
6
7
8
9
10
11
12
13
14
15
16
17
18
19
20
21
22
23
24
25
26
import AuthenticationServices

class ViewController: UIViewController {
  override func viewDidLoad() {
      super.viewDidLoad()
      //...
      let request: ASAuthorizationPasswordRequest = ASAuthorizationPasswordProvider().createRequest()
      let controller = ASAuthorizationController(authorizationRequests: [request])
      controller.delegate = self
      controller.performRequests()
      //...
  }
}

extension ViewController: ASAuthorizationControllerDelegate {
    func authorizationController(controller: ASAuthorizationController, didCompleteWithAuthorization authorization: ASAuthorization) {

        if let credential = authorization.credential as? ASPasswordCredential {
          // fill credential.user, credential.password to textfield
        }
        // else if as? ASAuthorizationAppleIDCredential... sign in with apple
    }
    func authorizationController(controller: ASAuthorizationController, didCompleteWithError error: Error) {
        // alert error
    }
}
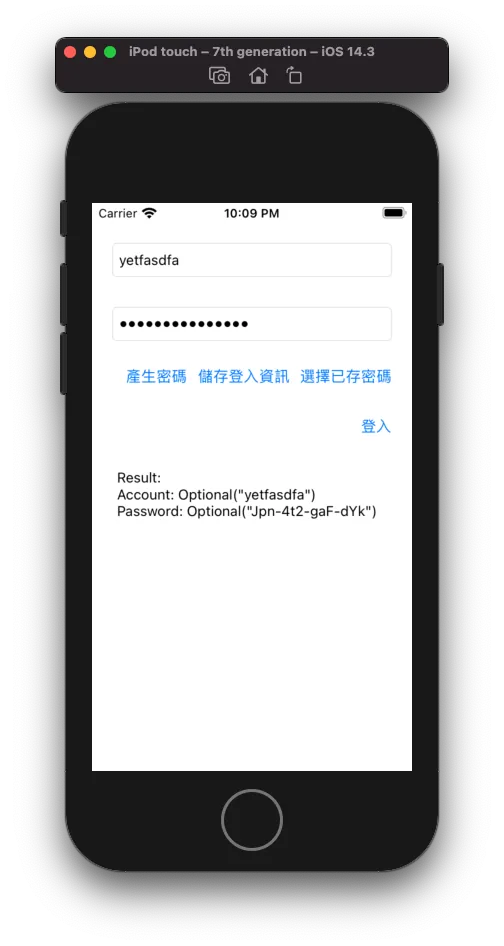
The mockup shows that the new approach integrates better with Sign in with Apple in both the process and display.
⚠️ This sign-in cannot replace Sign in with Apple (they are two different things).
Write account and password to “Password”
Only the reading part is deprecated; adding, deleting, and editing still work as before.
Additions, deletions, and edits are performed using SecAddSharedWebCredential.
1
2
3
4
5
6
7
8
9
SecAddSharedWebCredential(domain as CFString, account as CFString, password as CFString?) { (error) in
  DispatchQueue.main.async {
    guard error == nil else {
      // show error alert
      return
    }
    // show success alert
  }
}
SecAddSharedWebCredential(fqdn, account, password, completionHandler)
fqdn can be freely assigned to any domain to be stored and does not have to be in
webcredentialsaccount specifies the account to add, modify, or delete
To delete data, set password to
nil.Processing logic:
- account exists & password provided = update password
- account exists & password is nil = remove account and password from domain
- account does not exist & password provided = add account and password to domain
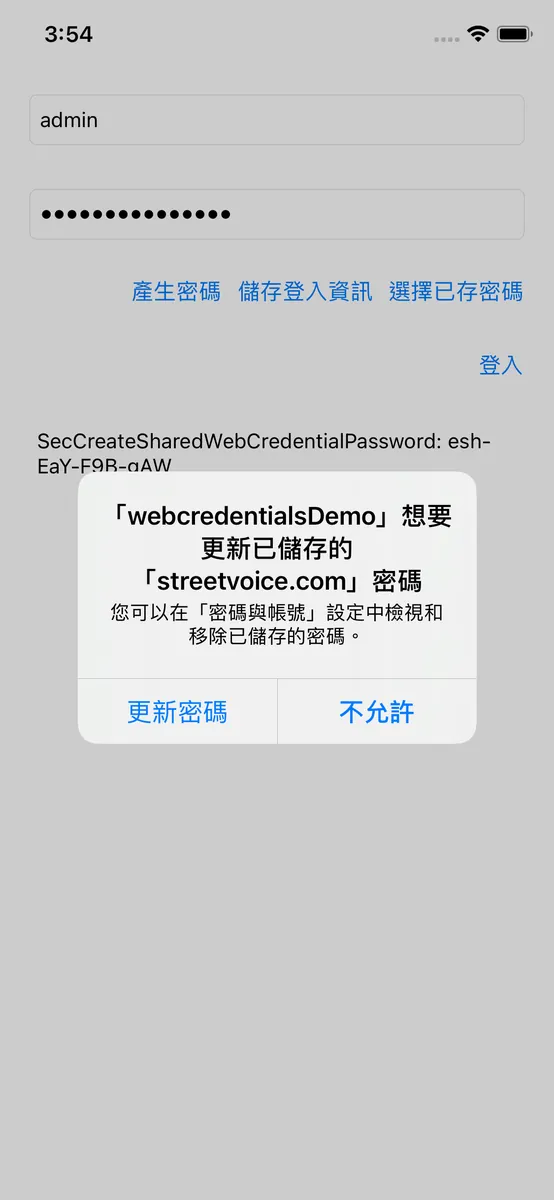
⚠️ It also does not allow secret background modifications. Every time a change is made, a prompt will notify the user, and the user must click “Update Password” to confirm the change.
Password Generator
The last small feature, a password generator.
Use SecCreateSharedWebCredentialPassword() to perform the operation.
1
let password = SecCreateSharedWebCredentialPassword() as String? ?? ""

The generated password consists of uppercase and lowercase letters, numbers, and uses “-“ as a separator (e.g., Jpn-4t2-gaF-dYk).
Complete Test Project Download
Minor Drawbacks
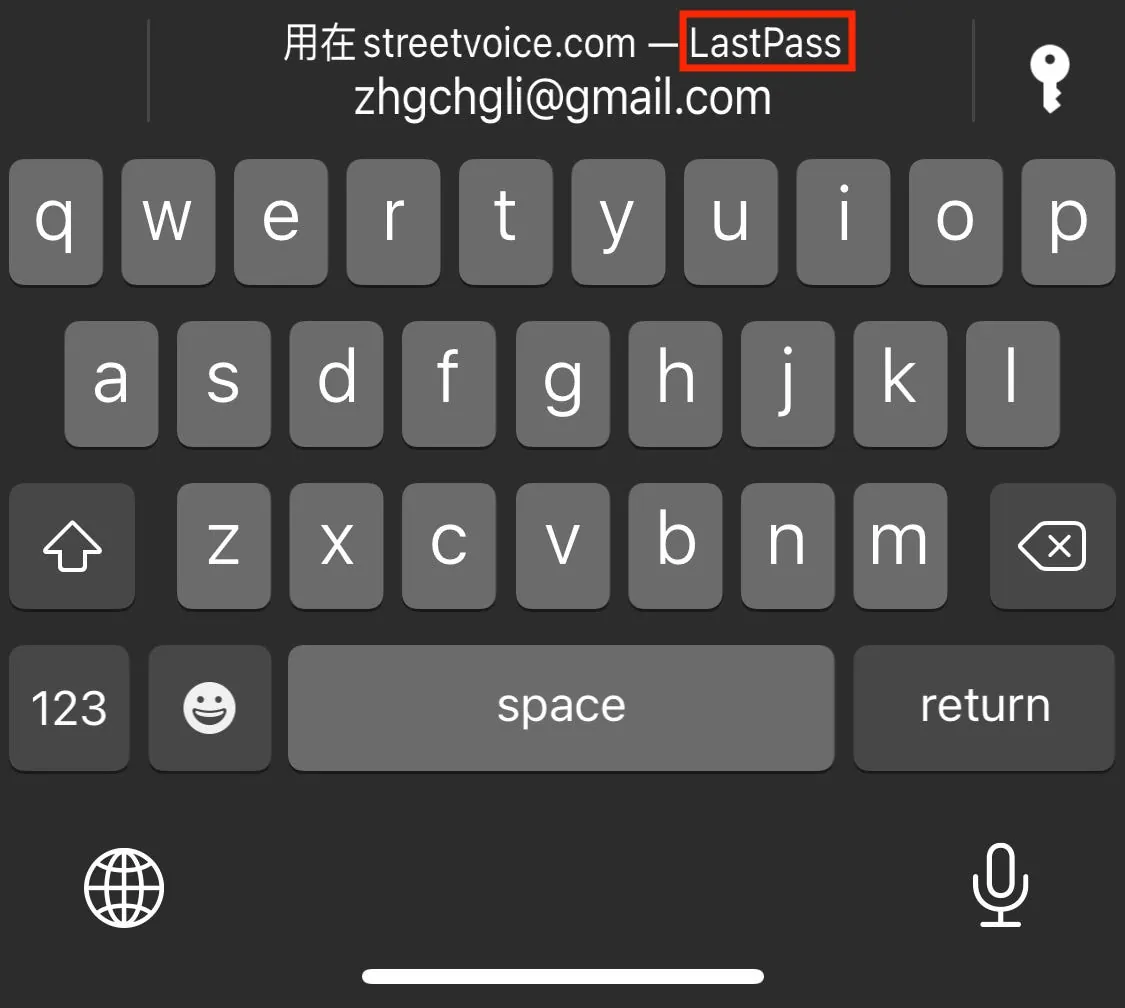
If you use third-party password managers (e.g., 1Password, LastPass), you might notice that while the keyboard’s Password AutoFill supports display and input, they do not appear in AuthenticationServices or SecRequestSharedWebCredential. It is unclear if this requirement can be met.
End
Thank you all for reading, and thanks to saiday and StreetVoice for letting me know about this feature XD.
XCode ≥ 12.5 simulators now support screen recording with the handy option to save as GIF!
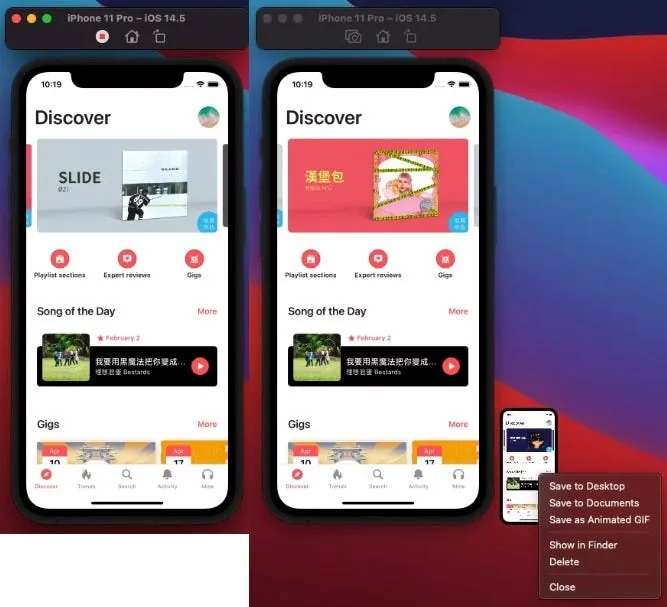
Press “Command” + “R” on the simulator to start recording. Click the red dot to stop recording; then right-click the preview thumbnail that slides out from the bottom right corner -> “Save as Animated GIF” to save it as a GIF and paste it directly into the article!
If you have any questions or feedback, feel free to contact me.

This post was originally published on Medium (View original post), and automatically converted and synced by ZMediumToMarkdown.