
Github Pages Custom Domain Tutorial
Use your domain to replace the original github.io URL
About Github Pages
Github Pages is a free static site hosting service provided by Github. All Github Free accounts can use it directly for Public Repos. For Private Repos, you need to upgrade your Github account with a paid plan.
Limitations
-
Only static file resources can be hosted: HTML, CSS, JavaScript, font files, image files, PDFs, audio files, text files, and so on.
-
The website (Repo) size must not exceed: 1 GB
This is likely a soft limit, as my Github Pages Jekyll Repo is already nearly 5 GB. -
Maximum deployment time: 10 minutes
-
Maximum deployments per hour: 10 times (soft limit)
-
Monthly Bandwidth Limit: 100 GB (soft limit)
-
Too many requests may result in an HTTP 429 response.
⭐️⭐️⭐️If you only want to learn about Github Pages custom domain setup, please keep reading below.
Github Pages Tutorial: Build a Personal Website with ChatGPT Even Without Coding Skills
The following example is for programming beginners who do not know Git.
1. Register and Log in to Github: https://github.com/
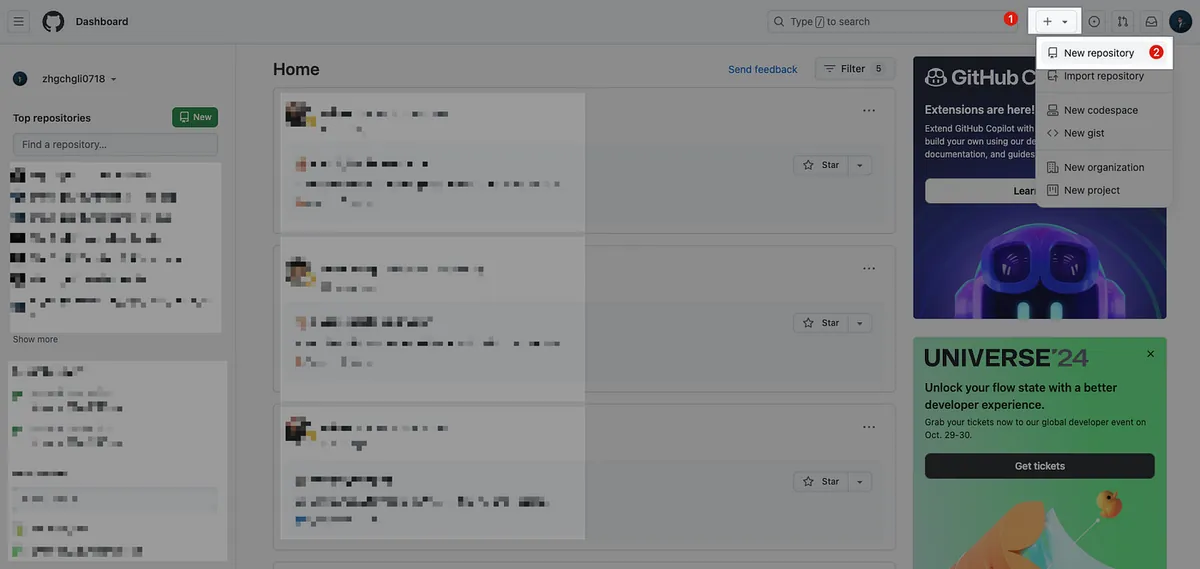
- After logging into Github, click the “+” icon at the top right corner and select “New repository”.
2. Enter Repo Name and Settings
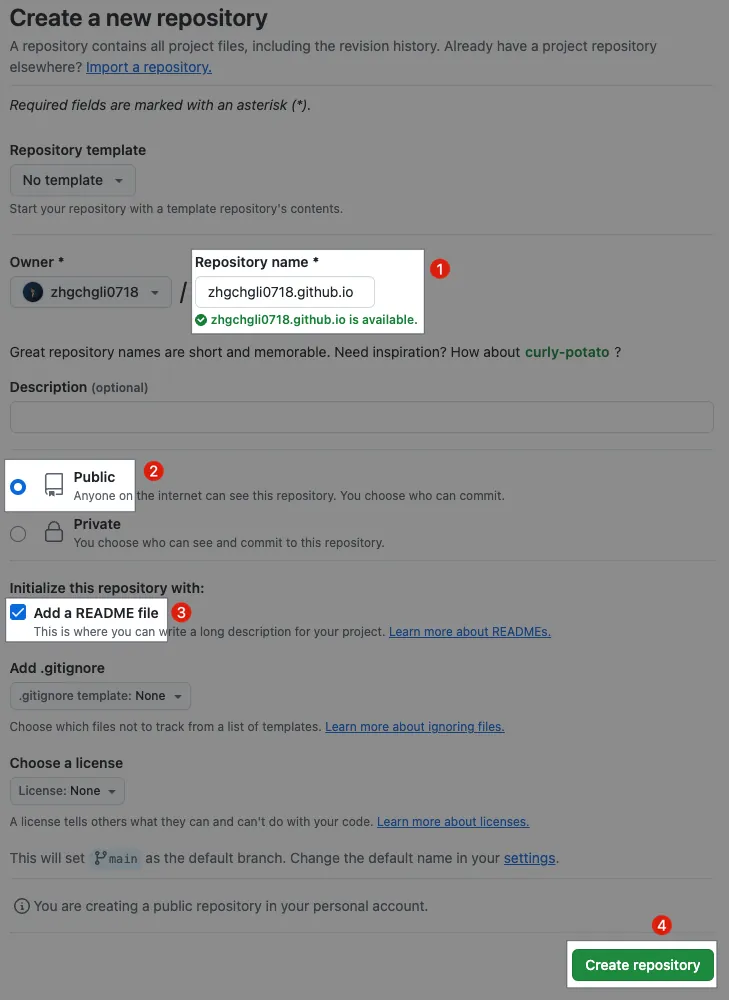
-
Repository name:
your-username.github.io -
Public: Public project
-
Add a README file: Convenient for directly adding files using Github Web after setup
-
Create repository
For the Repository name, each account or organization can only create one main Github Pages repo named your-username.github.io. Other repos deployed on Github Pages will have URLs like your-username.github.io/RepositoryName, for example:
-
your-username/your-username.github.ioRepo ->your-username.github.io -
your-username/mywebdemoRepo ->your-username.github.io/mywebdemo
If it is not the main Github Pages repo named your-username.github.io, you need to go to Settings and configure Pages to enable GitHub Pages:
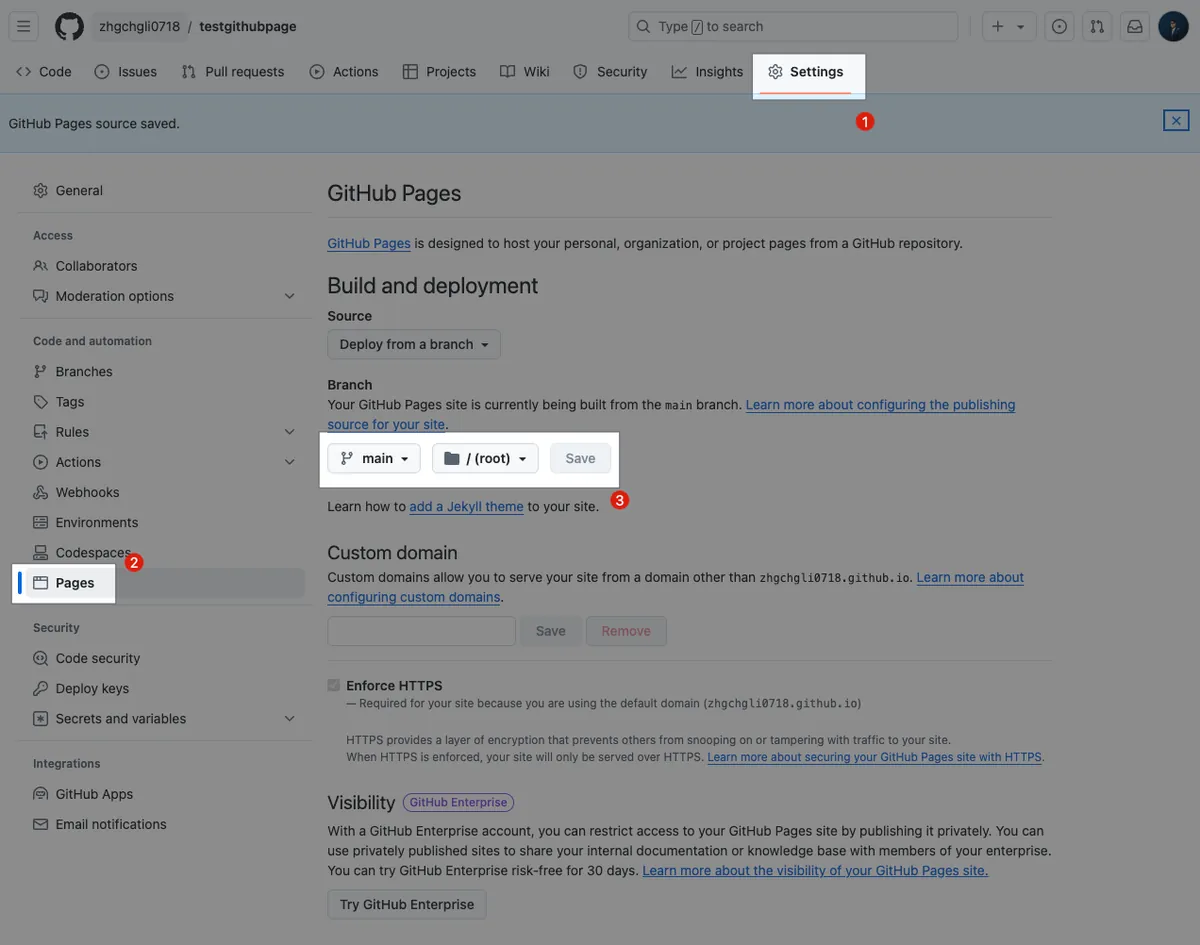
For example, my Repo zhgchgli0718/testgithubpage also wants to have a Github Pages site.
-
Settings -> Pages -> Branch -> select
main/root-> Save -
Completed
3. Create Your Homepage .html File
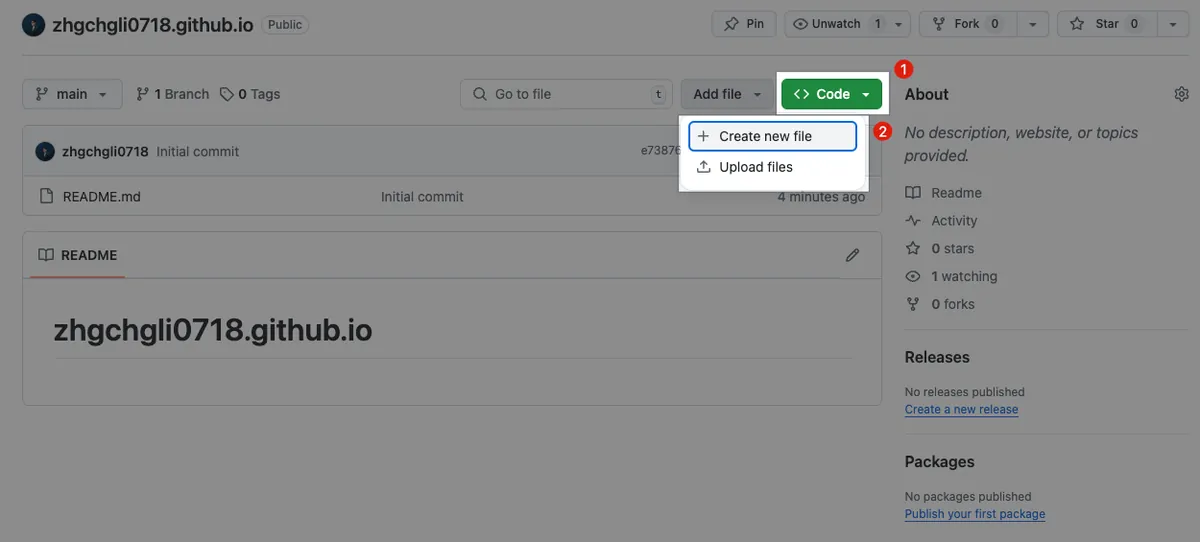
-
Click the green “Code” button at the top right of the Repo homepage
-
Select “+ Create new file”
4. Use ChatGPT to Help Generate Your .html Page Files
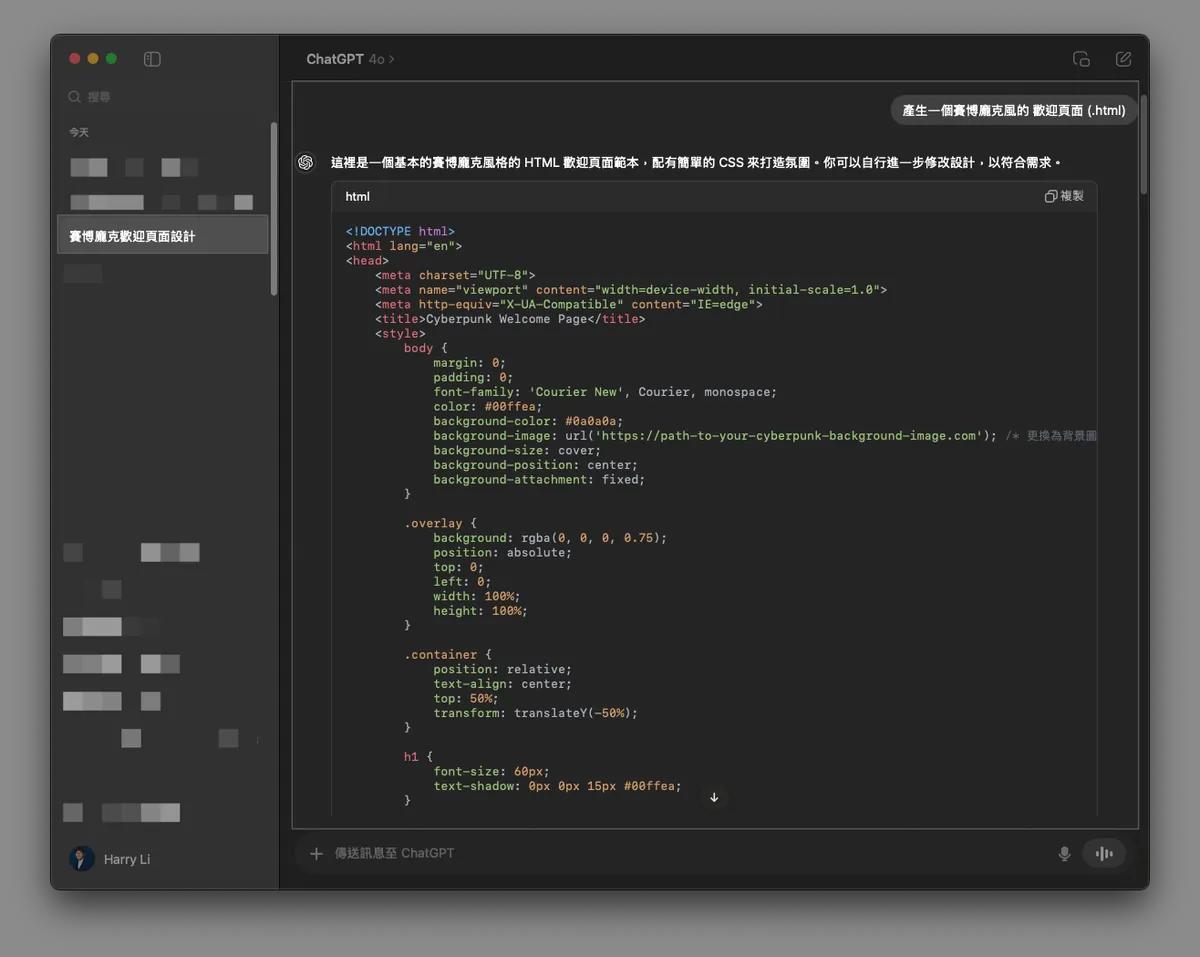
- Here is the simplest prompt:
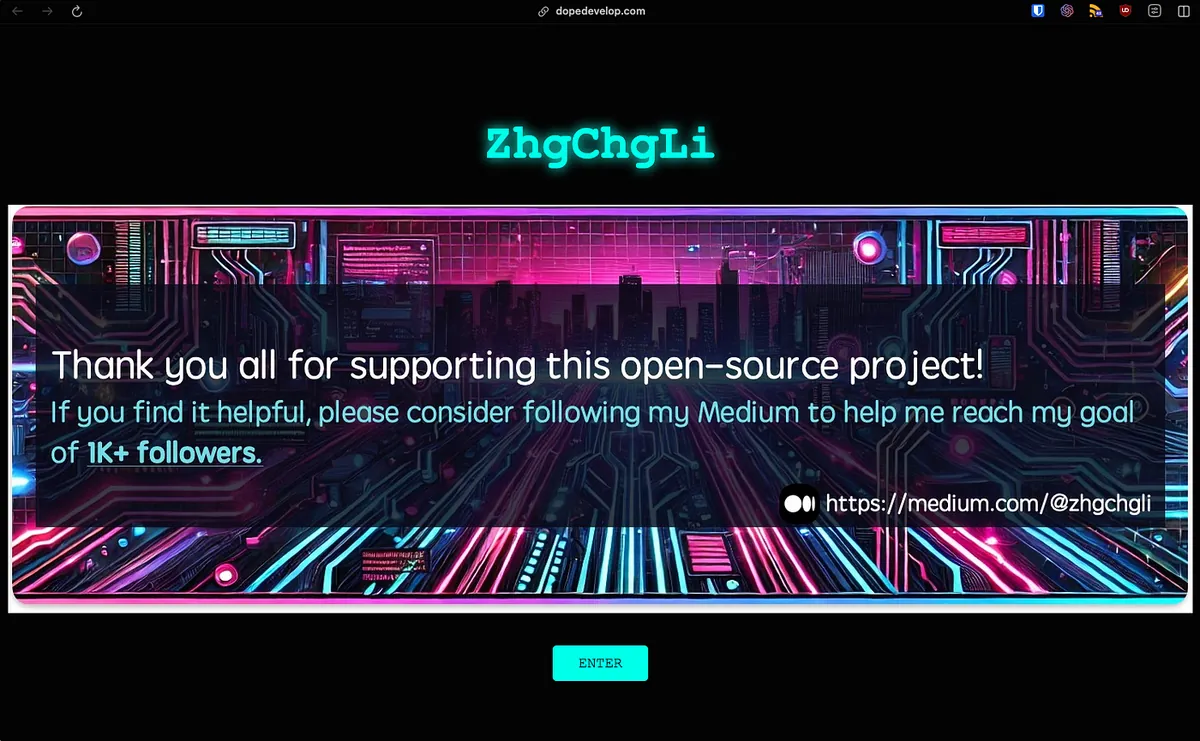
Generate a cyberpunk-style welcome page (.html)
5. Paste the .html back into the Github Repo File
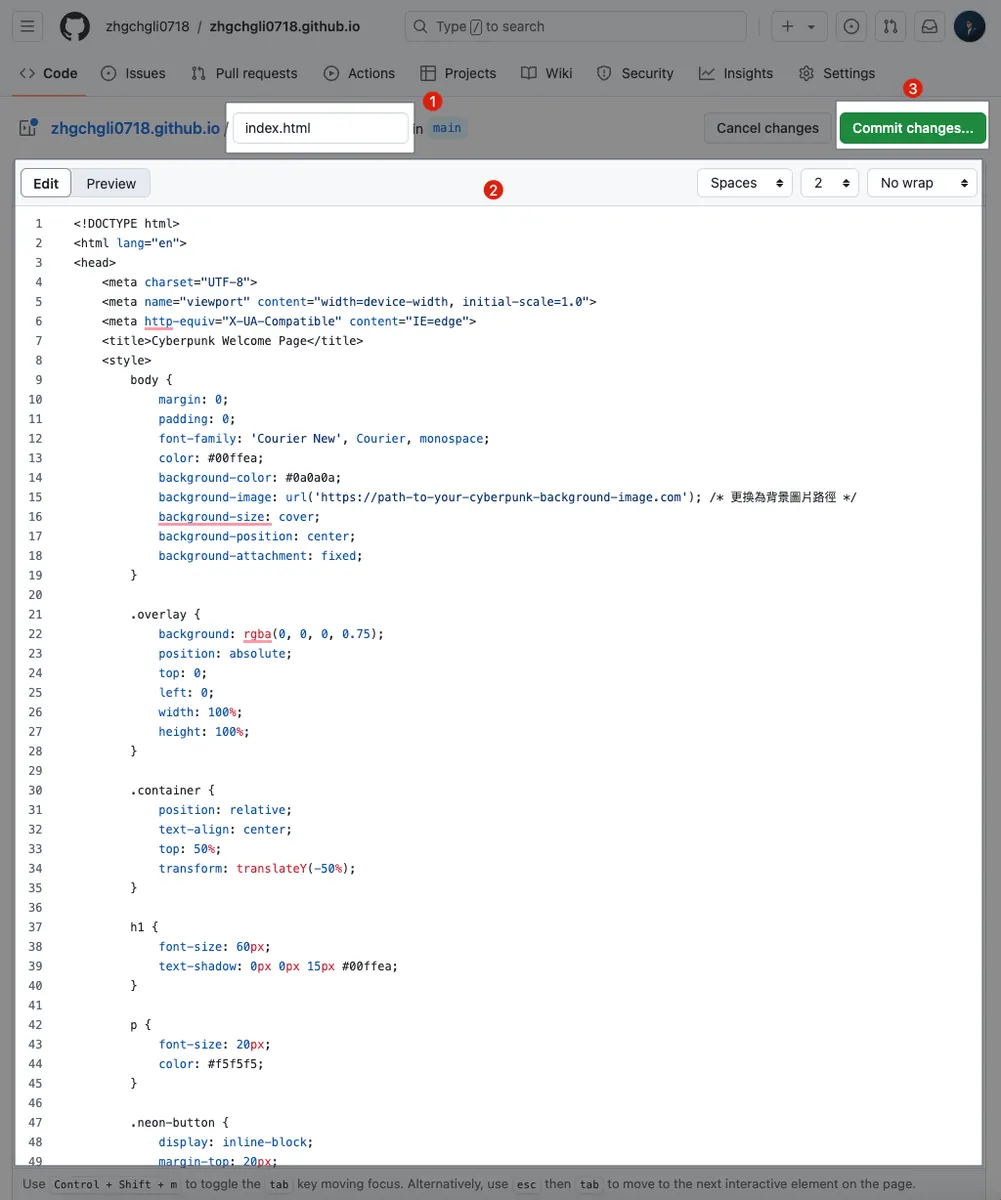
-
File name: Enter
index.html -
Edit: Paste the .html content generated by ChatGPT. You can use ChatGPT to modify the HTML as you wish or edit the HTML content directly here.
-
Click the “Commit changes…” button at the top right corner
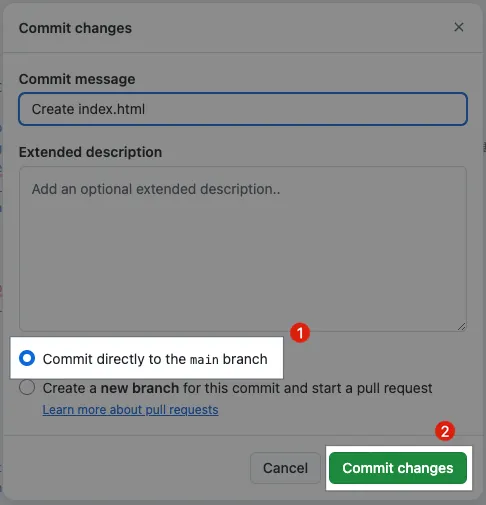
- Choose “Commit directly to the main branch”
—
Upload resource files (e.g., images):
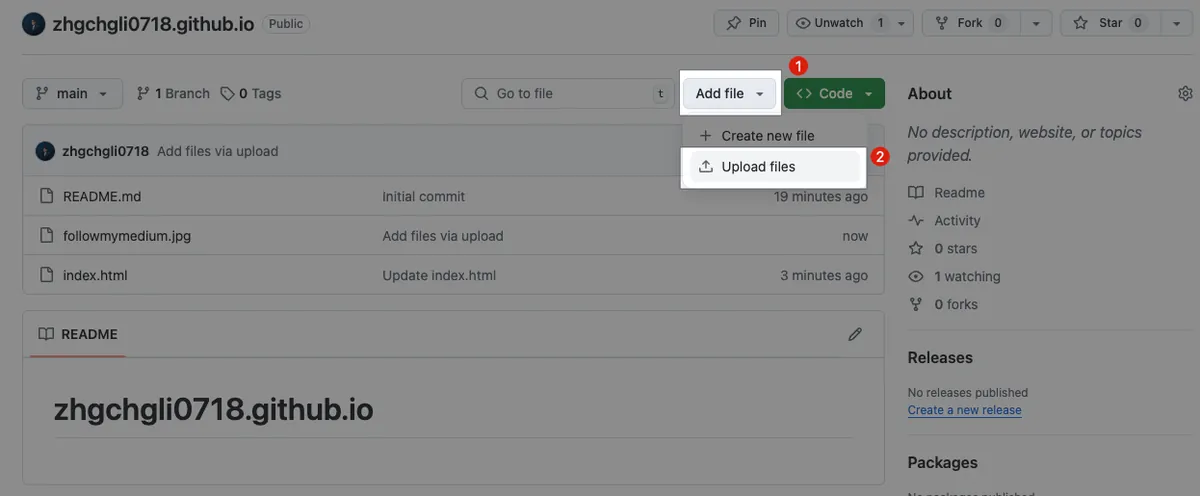
- Similarly, click “Add file” and select “Upload files”
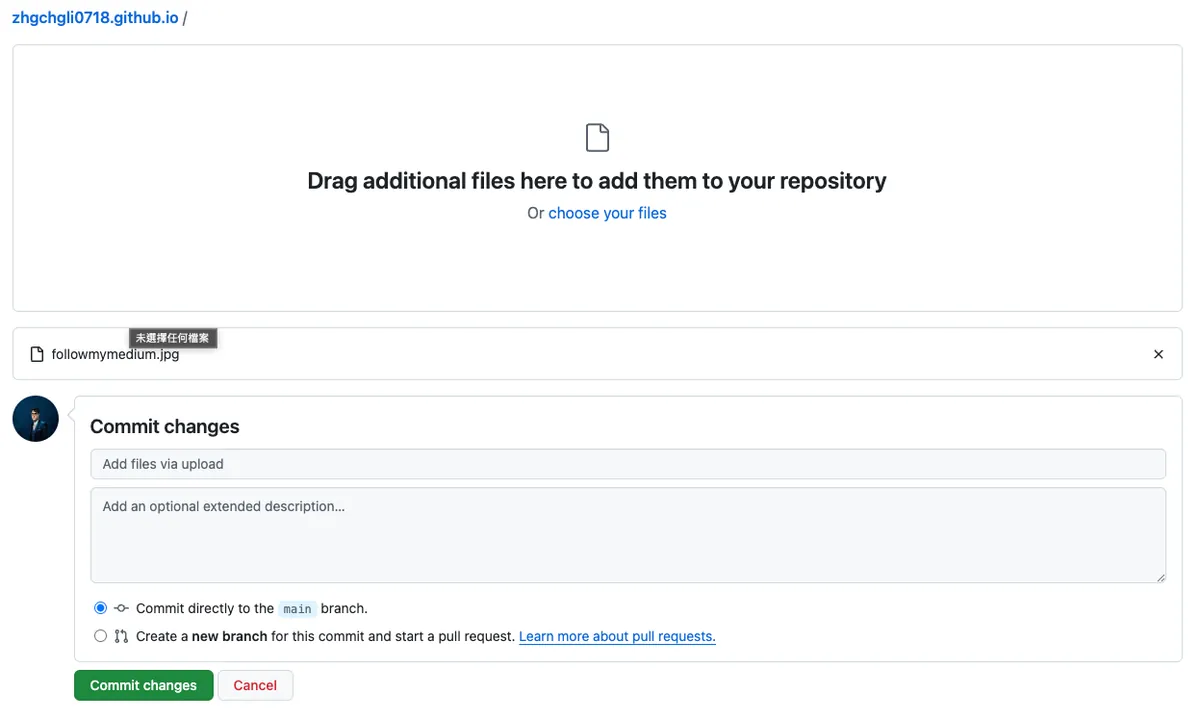
-
Drag or select files and wait for the upload to complete
-
Click “Commit changes”
-
Completed
6. Wait for Deployment
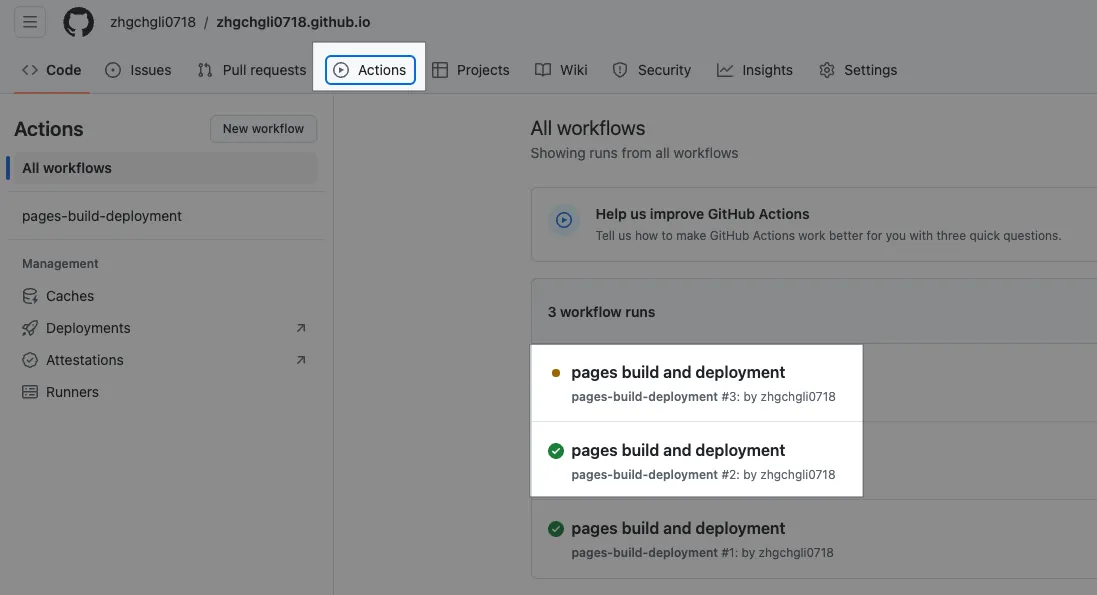
As mentioned earlier, Github Pages requires deployment; simply saving the file won’t make it appear. You can click on the “Actions” tab at the top of the Repo to check the deployment progress. When the orange dot 🟠 turns into a green checkmark ✅, it means the deployment is complete.
7. Check the Result
https://zhgchgli0718.github.io/
- Go to:
https://your-username.github.ioto see the result
Github Pages Custom Domain Tutorial
Next is the main point of this article: Github Pages custom domains. As mentioned earlier, by default, we can only use your-username.github.io as the main domain for your static website; for other repos, you can only access them via /path and cannot create a second *.github.io.
But the great thing about Github Pages is that it offers a custom domain feature.
⭐️⭐️⭐️ The purchased domain can also be used with: Medium Custom Domain feature.
For example, my domain:
1. https://zhgchg.li -> Used for Github Pages Jekyll Blog
2. https://blog.zhgchg.li -> Used on my Medium page
1. Purchase & Obtain a Domain by Namecheap (A well-established domain provider)
First, go to the Namecheap homepage and search for your preferred domain name:

Search results obtained:
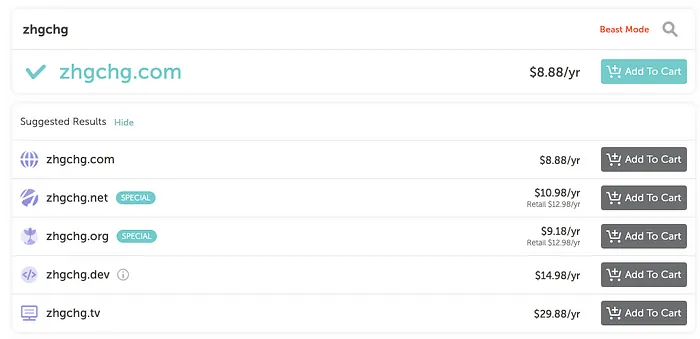
The button on the right showing “Add To Cart” means the domain is still available and can be added to the cart for purchase.
If the button on the right shows “Make offer” or “Taken,” it means the domain has already been registered. Please choose a different extension or try another domain name:

After adding to the cart, click the “Checkout” button below.

Go to the order confirmation page:
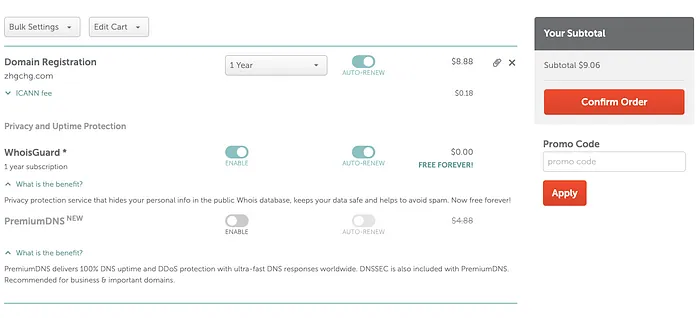
-
Domain Registration: Here you can choose
AUTO-RENEWfor automatic yearly renewal, or select the number of years to purchase at once. -
WhoisGuard: Since domain information is publicly accessible to anyone (registration date, expiration date, registrant, contact details), this feature replaces your personal registrant and contact info with Namecheap’s information. This helps prevent spam messages.
(Some domain extensions may charge for this service; if it’s free, you should use it!)
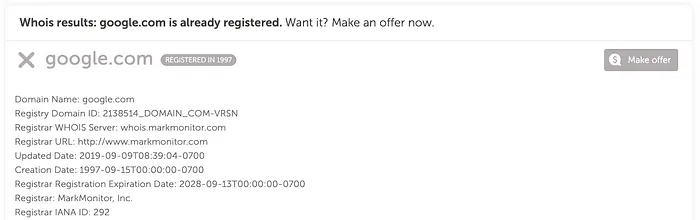
Here are some whois information results for google.com, which can be checked here.
- PremiumDNS: We know a domain name is like an address plate, meaning it helps locate the site; this feature offers a more stable and secure “location finding” service. I think it’s unnecessary unless it’s a high-traffic e-commerce site where no errors are allowed.
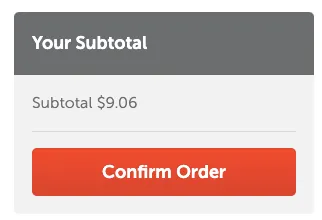
After entering the credit card information, click “Confirm Order”
You have successfully completed the purchase!
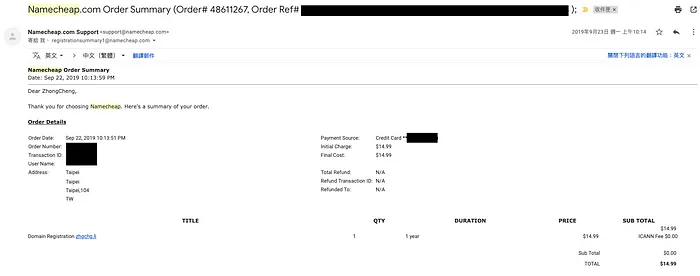
You will receive an order confirmation email.
2. Domain Setup by Namecheap
Go to Account -> Dashboard:
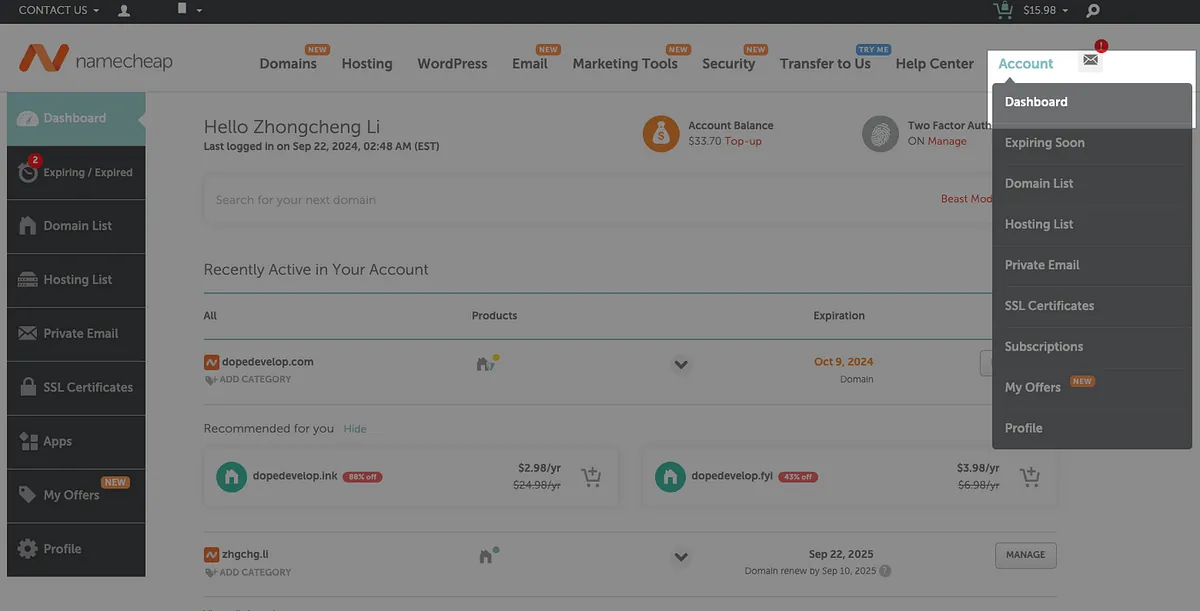
Find the domain you want to set -> click “Manage” on the right:

Confirm Domain -> NAMESERVERS -> Select “Namecheap BasicDNS”:
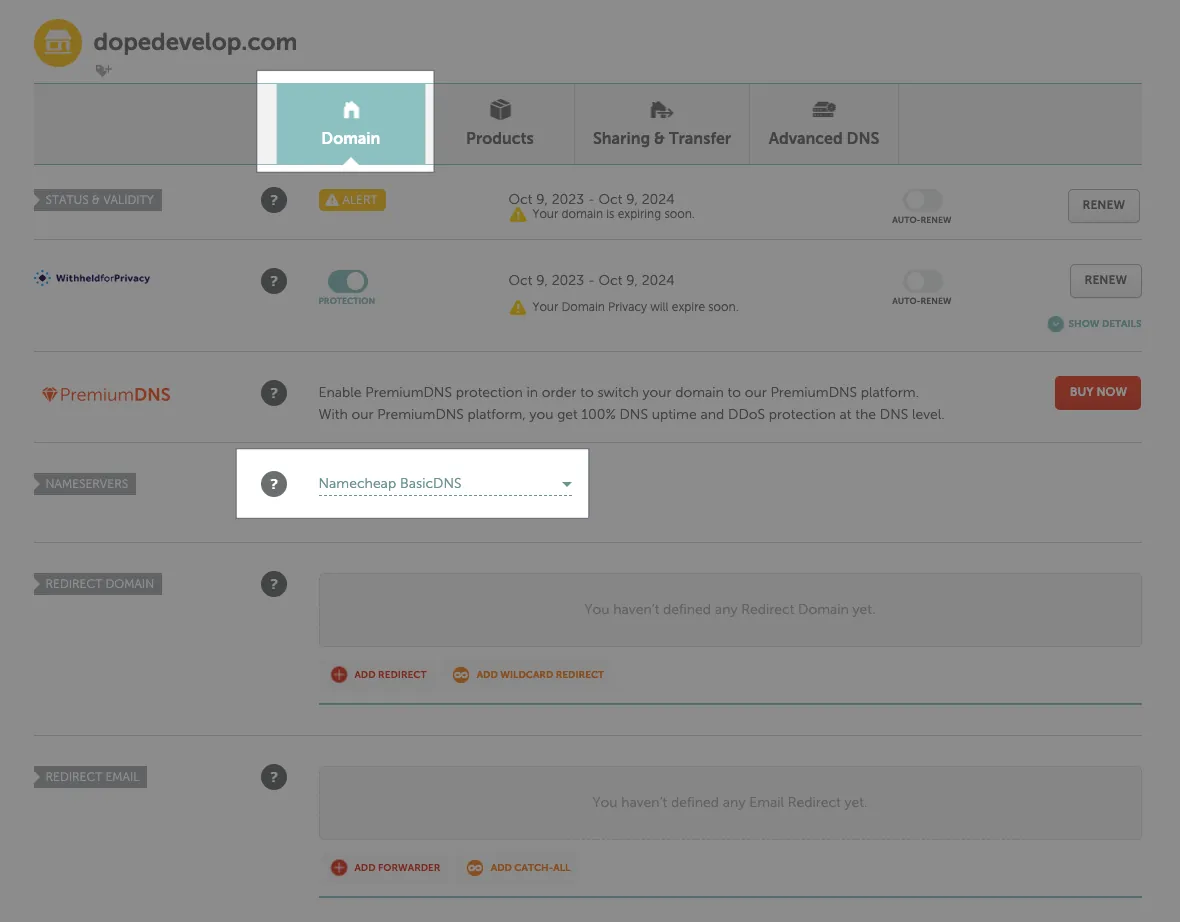
Switch to “Advanced DNS” -> Add A Record:
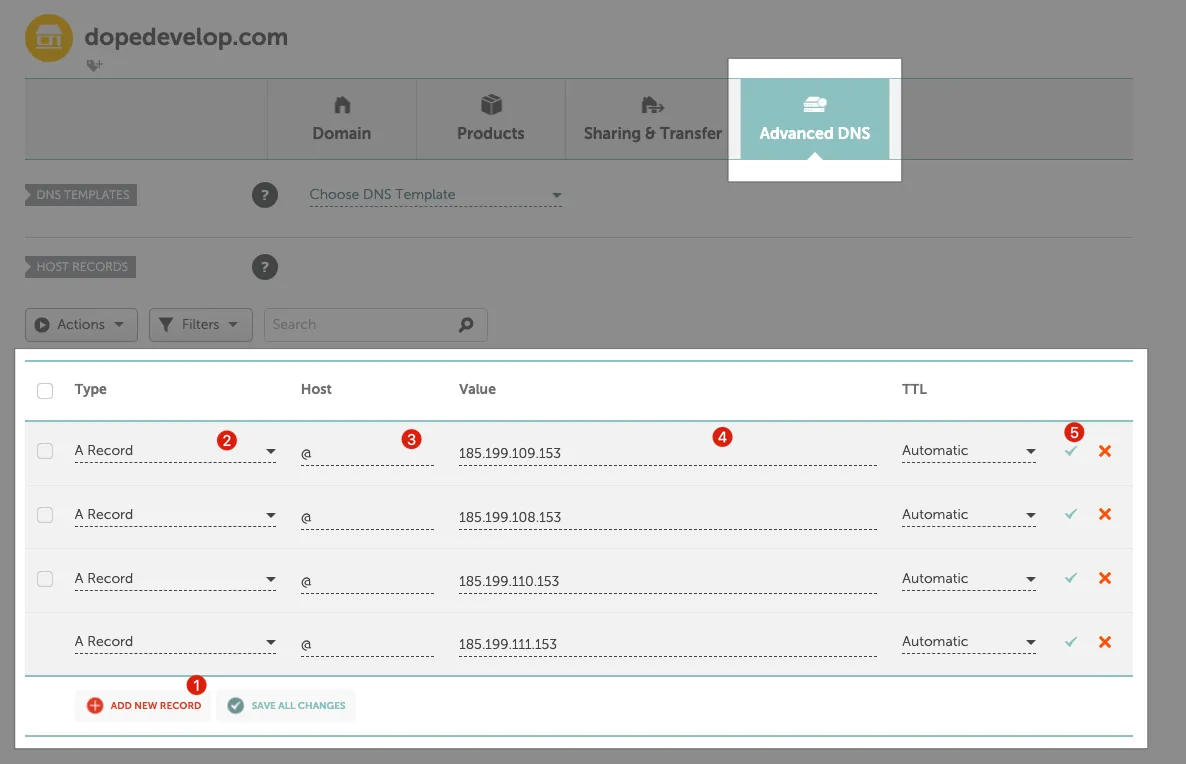
-
Click “ADD NEW RECORD”
-
Select “A Record”
-
Enter “
@” in Host -
Enter values in order:
185.199.108.153
185.199.109.153
185.199.110.153
185.199.111.153
Four records.
-
Click “✔️” to save the settings after each input.
-
Completed.
3. Add a CNAME Record to the Github Pages Repo you want to set:
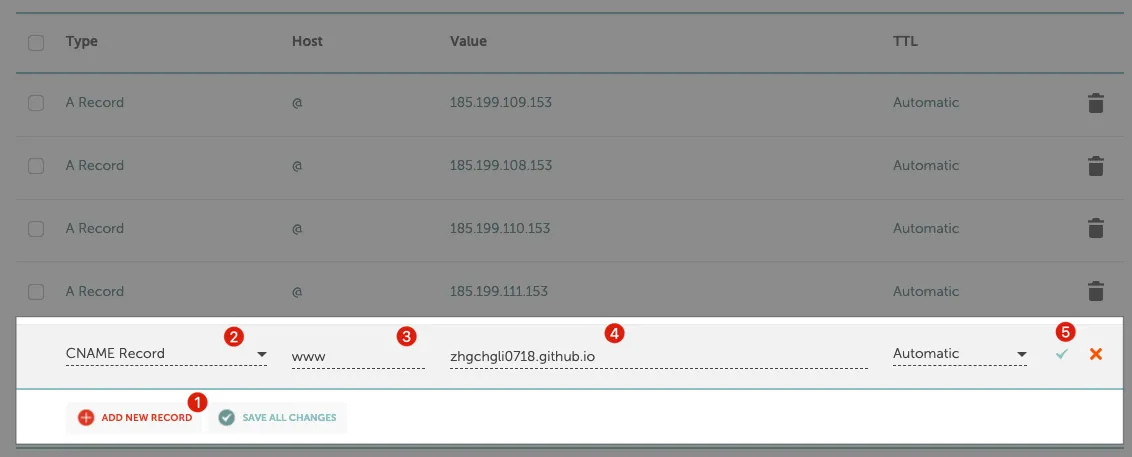
-
Click “ADD NEW RECORD”
-
Select “CNAME Record”
-
Enter the host, which is your desired subdomain. For a primary domain, enter
www. -
Value input:
your-username.github.io
4. Return to Github Repo Settings
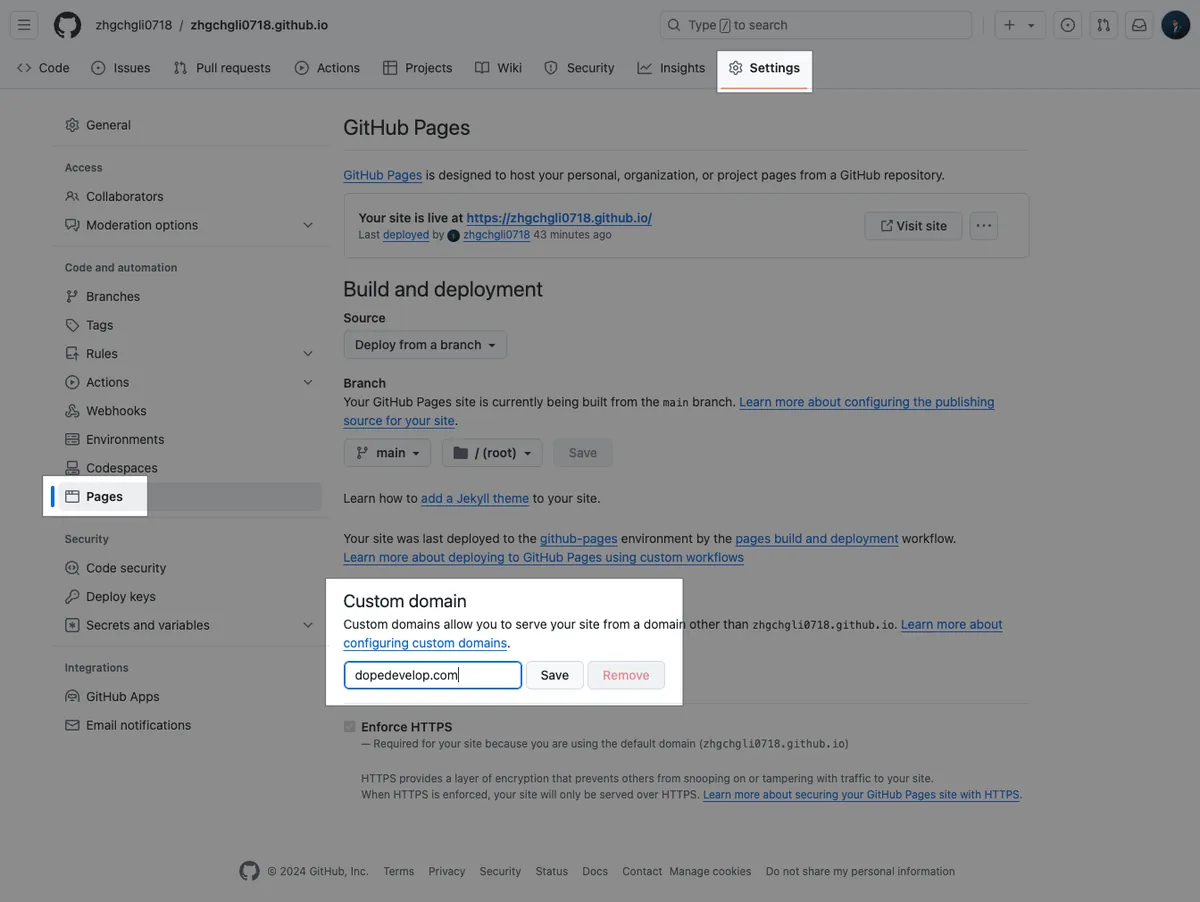
-
Github Repo -> Settings -> Pages
-
Custom domain: Enter
your domain(if it starts withwww., you can omit it) -
Click Save

- You can check the option to enforce HTTPS to improve access security.
Waiting for DNS Check…
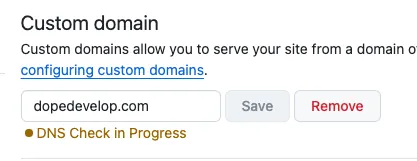
Usually confirmed within five minutes, but due to DNS mechanisms, it may take up to 72 hours for the settings to take effect. If you are sure the steps are correct but keep failing to confirm, try again after a few days.
Setup Successful!
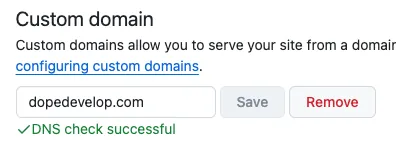
Go to your domain verification results:
Success! 🎉🎉🎉 Now we no longer need to use the old https://your-username.github.io to access your Github Pages. You can directly visit https://your-domain!
Other Repos’ Github Pages can also be accessed via
https://your-domain/Repo-name.
Other Articles
Medium Custom Domain

Seamless Migration from Medium to Github Pages


Comments