
從 iOS 9 到 iOS 12 推播通知權限狀態處理(Swift)
適配 iOS 9 ~ iOS 12 處理通知權限狀態及要求權限的解決方案
做什麼?
接續前一篇「 什麼?iOS 12 不需使用者授權就能傳送推播通知(Swift) 」提到的推播權限取得流程優化,經過上一篇Murmur部分寫的優化之後又遇到了新的需求:
- 使用者若關閉通知功能,我們能在特定功能頁面提示他去設定開啟
- 跳轉至設定頁後,若有打開/關閉通知的操作,回到APP要能跟著更改狀態
- 沒詢問過推播權限時詢問權限,有詢問過但是不允許則跳提示,有詢問過又是允許則能繼續操作
- iOS 9 ~ iOS 12 都要支援
1~3 都還好,使用 iOS 10 之後的Framework UserNotifications 差不多都能妥善的解決,麻煩的是第4項 要能支援 iOS 9,iOS 9要使用 registerUserNotificationSettings 舊的方式處理起來並不容易;就讓我們一步一步做起吧!
思路及架構:
首先宣告一個全域的 notificationStatus物件 儲存通知權限狀態 並在需要處理的頁面加上屬性監聽(這邊我使用 Observable 做屬性變化的訂閱、可自行找適合的KVO或用Rx、ReactiveCocoa)
並在 appDelegate 中 didFinishLaunchingWithOptions (APP初始打開時)、applicationDidBecomeActive (從背景狀態回復時)、didRegisterUserNotificationSettings (≤iOS 9 的推播詢問處理) 這些方法中處理檢查推播通知權限狀態並更改 notificationStatus 的值 需要做處理的頁面就會觸發並作相對應的處理(EX: 跳出通知被關閉提示)
1. 首先宣告全域 notificationStatus 物件
enum NotificationStatusType {
     case authorized
     case denied
     case notDetermined
}
var notificationStatus: Observable<NotificationStatusType?> = Observable(nil)
notificationStatus/NotificationStatusType 的四種狀態分別對應:
- nil = 物件初始化…檢測中…
- notDetermined = 未詢問過使用者要不要接收通知
- authorized = 已詢問過使用者要不要接收通知且按「允許」
- denied = 已詢問過使用者要不要接收通知且按「不允許」
2. 構建檢測通知權限狀態的方法:
func checkNotificationPermissionStatus() {
    if #available(iOS 10.0, *) {
        UNUserNotificationCenter.current().getNotificationSettings { (settings) in
            DispatchQueue.main.async {
                //注意!要切回主執行緒
                if settings.authorizationStatus == .authorized {
                    //允許
                    notificationStatus.value = NotificationStatusType.authorized
                } else if settings.authorizationStatus == .denied {
                    //不允許
                    notificationStatus.value = NotificationStatusType.denied
                } else {
                    //沒問過
                    notificationStatus.value = NotificationStatusType.notDetermined
                }
            }
        }
    } else {
        if UIApplication.shared.currentUserNotificationSettings?.types == []  {
            if let iOS9NotificationIsDetermined = UserDefaults.standard.object(forKey: "iOS9NotificationIsDetermined") as? Bool,iOS9NotificationIsDetermined == true {
                //沒問過
                notificationStatus.value = NotificationStatusType.notDetermined
            } else {
                //不允許
                notificationStatus.value = NotificationStatusType.denied
            }
        } else {
            //允許
            notificationStatus.value = NotificationStatusType.authorized
        }
    }
}
以上還沒結束! 眼尖的朋友應該在≤ iOS 9的判斷之中發現”iOS9NotificationIsDetermined”這個自訂的UserDefaults,那它是用來幹嘛的呢?
主因是≤iOS 9的檢測推播權限方法只能用獲取目前的權限有哪些作為判斷,若為空則代表無權限,但在沒詢問過權限的情況下也是會是空白;這時候麻煩就來了,使用者究竟是沒問過還是問過按不允許?
這邊我使用了一個自訂的UserDefaults iOS9NotificationIsDetermined作為判斷開關,並在appDelegate的didRegisterUserNotificationSettings中加入:
//appdelegate.swift:
func application(_ application: UIApplication, didRegister notificationSettings: UIUserNotificationSettings) {
    //iOS 9(含)以下,跳出詢問要不要允許通知的視窗後,按下允許或不允許都會觸發這個方法
    UserDefaults.standard.set("iOS9NotificationIsDetermined", true)
    checkNotificationPermissionStatus()
}
通知權限狀態的物件、檢測的方法都構建好後,appDelegate裡我們還要再加上…
//appdelegate.swift
func application(_ application: UIApplication, didFinishLaunchingWithOptions launchOptions: [UIApplicationLaunchOptionsKey: Any]?) -> Bool {
  checkNotificationPermissionStatus()
  return true
}
func applicationDidBecomeActive(_ application: UIApplication) {
  checkNotificationPermissionStatus()
}
APP初始跟從背景返回都要再檢測一次推播狀態如何
以上就是檢測的部分,再來我們來看如果是未詢問該怎麼處理要求通知權限
3. 要求通知權限:
func requestNotificationPermission() {
    if #available(iOS 10.0, *) {
        let permissiones:UNAuthorizationOptions = [.badge, .alert, .sound]
        UNUserNotificationCenter.current().requestAuthorization(options: permissiones) { (granted, error) in
            DispatchQueue.main.async {
                checkNotificationPermissionStatus()
            }
        }
    } else {
        application.registerUserNotificationSettings(UIUserNotificationSettings(types: [.alert, .badge, .sound], categories: nil))
        //前面appdelegate.swift的didRegisterUserNotificationSettings會處理後續callback
    }
}
檢測跟要求都處理完囉,我們來看看如何應用
4. 應用(靜態)
if notificationStatus.value == NotificationStatusType.authorized {
//OK!
} else if notificationStatus.value == NotificationStatusType.denied {
//不允許
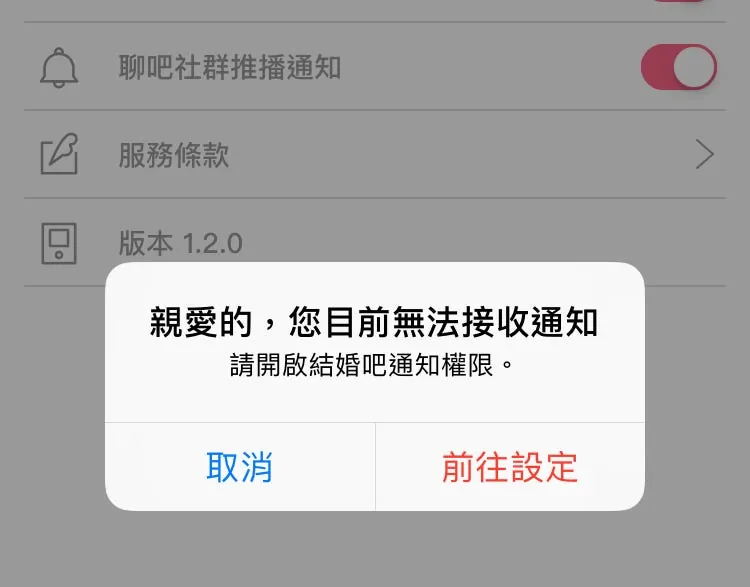
//這邊範例是跳出UIAlertController提示並點擊後可跳轉至設定頁面
let alertController = UIAlertController(
title: "親愛的,您目前無法接收通知",
message: "請開啟結婚吧通知權限。",
preferredStyle: .alert)
let settingAction = UIAlertAction(
title: "前往設定",
style: .destructive,
handler: {
(action: UIAlertAction!) -> Void in
if let bundleID = Bundle.main.bundleIdentifier,let url = URL(string:UIApplicationOpenSettingsURLString + bundleID) {
UIApplication.shared.openURL(url)
}
})
let okAction = UIAlertAction(
title: "取消",
style: .default,
handler: {
(action: UIAlertAction!) -> Void in
//well....
})
alertController.addAction(okAction)
alertController.addAction(settingAction)
self.present(alertController, animated: true) {
}
} else if notificationStatus.value == NotificationStatusType.notDetermined {
//未詢問
requestNotificationPermission()
}
請注意!!跳到APP的「設定」頁時請勿使用
UIApplication.shared.openURL(URL(string:”App-Prefs:root=\(bundleID)”))
方式跳轉, 會被退審! 會被退審! 會被退審! (親身經歷)
這是Private API
5. 應用(動態)
動態變更狀態的部分,因為notificationStatus物件我們使用是Observable,我們可以在要時時監測狀態的viewDidLoad中加入監聽處理:
override func viewDidLoad() {
   super.viewDidLoad()
   notificationStatus.afterChange += { oldStatus,newStatus in
      if newStatus == NotificationStatusType.authorized {
       //print("❤️謝謝你打開通知")
      } else if newStatus == NotificationStatusType.denied {
       //print("😭嗚嗚")
      }
   }
}
以上只是範例Code,實際應用、觸發可再自行調校
*notificationStatus 使用 Observable 請注意記憶體控制,該釋放時要能釋放(防止記憶體洩漏)、不該釋放時需持有(避免監聽失效)
最後附上完整Demo成品:
*由於我們的專案支援範圍是iOS 9 ~ iOS12,iOS 8未進行任何測試不確定支援程度

留言 · Comments