提升使用者體驗,現在就為您的 iOS APP 加上 3D TOUCH 功能(Swift)
iOS 3D TOUCH 應用
[Deprecated]提升使用者體驗,現在就為您的 iOS APP 加上 3D TOUCH 功能(Swift)
iOS 3D TOUCH 應用
[Deprecated] 2020/06/14
iPhone 11 以上版本已取消 3D Touch 功能;改用 Haptic Touch 取代,實作方式也有所不同。
前陣子在專案開發閒暇之時,探索了許多 iOS 的有趣功能: CoreML 、 Vision 、 Notification Service Extension 、Notification Content Extension、Today Extension、Core Spotlight、Share Extension、SiriKit (部分已整理成文章、其他項目敬請期待🤣)
其中還有今日的主角: 3D Touch功能
這個早在 iOS 9/iPhone 7之後 就開始支援的功能,直到我自己從iPhone 6換到iPhone 8 後才體會到它的好用之處!
3D Touch能在APP中實做兩個項目,如下:
1. Preview ViewController 預覽功能 — 結婚吧APP
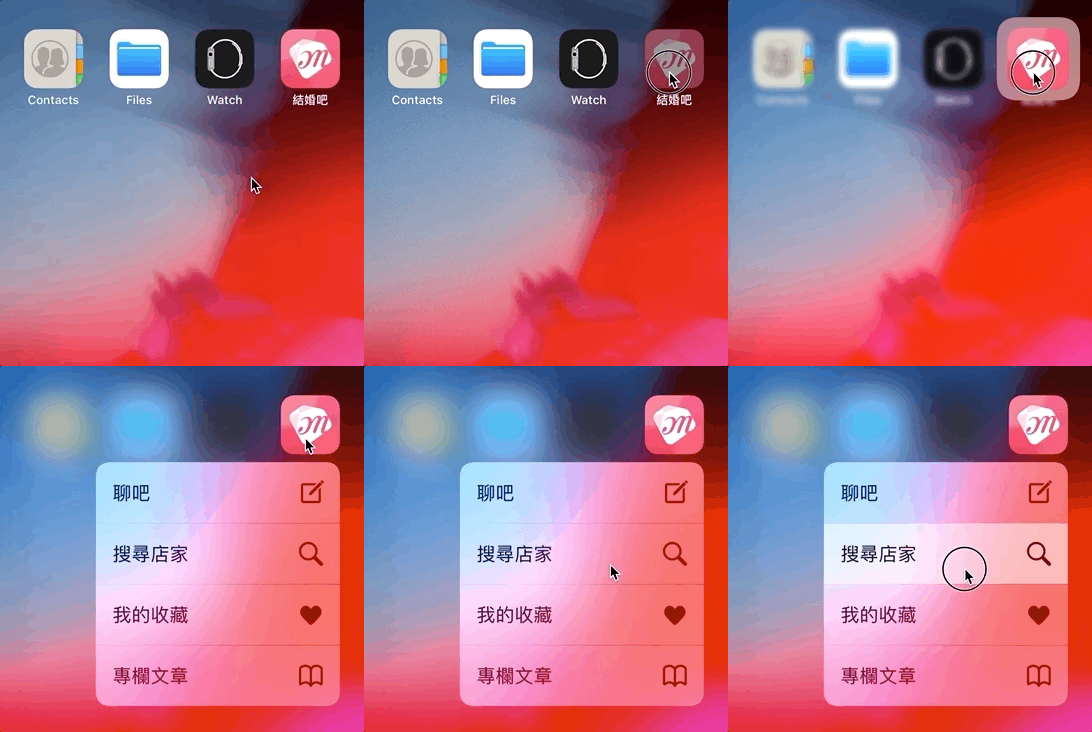
2. 3D Touch Shortcut APP 捷徑啟動功能
其中第一項是應用最廣且效果最好的 (Facebook:動態消息內容預覽、Line:偷看訊息),第二項 APP 捷徑啟動 目前看數據是鮮少人使用所以放最後在講。
1. Preview ViewController 預覽功能:
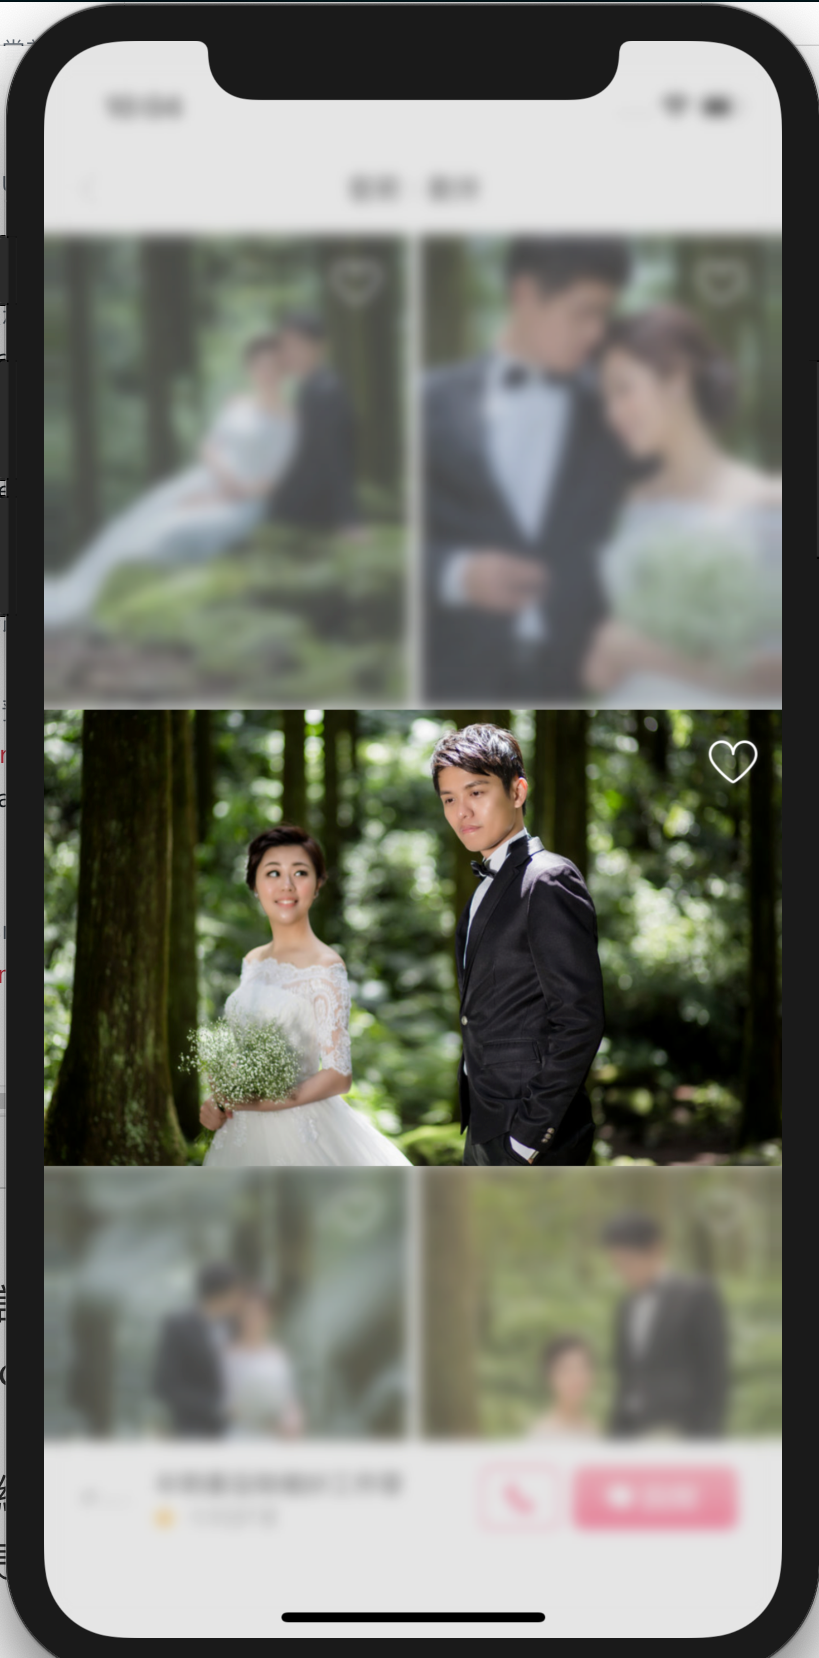
功能展示如上圖1所示,ViewController 預覽功能支援
- 3D Touch重壓時背景虛化
- 3D Touch重壓住時跳出ViewController預覽視窗
- 3D Touch重壓住時跳出ViewController預覽視窗,往上滑可在下方加入選項選單
- 3D Touch重壓放開返回視窗
- 3D Touch重壓後再用力進入目標ViewController
這裡將分 A:列表視窗 、 B:目標視窗 個別列出要實作的程式碼:
由於在 B中 沒有方式能判斷當前是預覽還是真的進入此視窗,所以我們先建立一個Protocol傳遞值,用來判斷
1
2
3
protocol UIViewControllerPreviewable {
    var is3DTouchPreview:Bool {get set}
}
這樣我們就能在 B中 做以下判斷:
1
2
3
4
5
6
7
8
9
10
class BViewController:UIViewController, UIViewControllerPreviewable {
     var is3DTouchPreview:Bool = false
     override func viewDidLoad() {
     super.viewDidLoad()
     if is3DTouchPreview {
       //若為預覽視窗時...例如:變全螢幕、隱藏工具列
     } else {
       //完整模式時照正常顯示
   }
}
A:列表視窗,可以是 UITableView 或 UICollectionView:
1
2
3
4
5
6
7
8
9
10
11
12
13
14
15
16
17
18
19
20
21
22
23
24
25
26
27
28
29
30
31
32
33
34
35
36
37
38
39
40
41
42
43
44
45
46
47
48
49
50
class AViewController:UIViewController {
    //註冊能3D Touch 的 View
    override func traitCollectionDidChange(_ previousTraitCollection: UITraitCollection?) {
        super.traitCollectionDidChange(previousTraitCollection)
        if traitCollection.forceTouchCapability == .available {
            //TableView:
            registerForPreviewing(with: self, sourceView: self.TableView)
            //CollectionView:
            registerForPreviewing(with: self, sourceView: self.CollectionView)
        }
    }
}
extension AViewController: UIViewControllerPreviewingDelegate {
    //3D Touch放開後,要做的處理
    func previewingContext(_ previewingContext: UIViewControllerPreviewing, commit viewControllerToCommit: UIViewController) {

        //現在要直接跳轉的該頁面了,所以將ViewController的預覽模式參數取消:
        if var viewControllerToCommit = viewControllerToCommit as? UIViewControllerPreviewable {
            viewControllerToCommit.is3DTouchPreview = false
        }
        self.navigationController?.pushViewController(viewControllerToCommit, animated: true)
    }

    //控制3D Touch的Cell位置,欲顯示的ViewController
    func previewingContext(_ previewingContext: UIViewControllerPreviewing, viewControllerForLocation location: CGPoint) -> UIViewController? {

        //取得當前點的indexPath/cell實體
        //TableView:
        guard let indexPath = TableView.indexPathForRow(at: location),let cell = TableView.cellForRow(at: indexPath) else { return nil }
        //CollectionView:
        guard let indexPath = CollectionView.indexPathForItem(at: location),let cell = CollectionView.cellForItem(at: indexPath) else { return nil }

        //欲顯示的ViewController
        let targetViewController = UIStoryboard(name: "StoryboardName", bundle: nil).instantiateViewController(withIdentifier: "ViewControllerIdentifier")

        //背景虛化時保留區域(一般為點擊位置),附圖1
        previewingContext.sourceRect = cell.frame

        //3D Touch視窗大小,預設為自適應,不需更改
        //要修改請用:targetViewController.preferredContentSize = CGSize(width: 0.0, height: 0.0)

        //告知預覽的ViewController目前為預覽模式:
        if var targetViewController = targetViewController as? UIViewControllerPreviewable {
            targetViewController.is3DTouchPreview = true
        }

        //回傳nil則無任何作用
        return nil
    }
}
請注意!其中的註冊能3D Touch 的 View 這塊要放在 traitCollectionDidChange 之中而非 “viewDidLoad” ( 請參考此篇內容 )
關於要加放在哪裡這塊我踩了許多雷,網路有些資料寫viewDidLoad、有的寫在cellforItem中,但這兩個地方都會出現偶爾失效或部分cell失效的問題。
附圖1 背景虛化保留區示意圖
如果您需要上滑後在下方加入選項選單請在 B 之中加入,是B 是B 是B哦!
1
2
3
4
5
6
override var previewActionItems: [UIPreviewActionItem] {
  let profileAction = UIPreviewAction(title: "查看商家資訊", style: .default) { (action, viewController) -> Void in
    //點擊後的操作
  }
  return [profileAction]
}
回傳空陣列表示不使用此功能。
完成!
2. APP 捷徑啟動
第一步
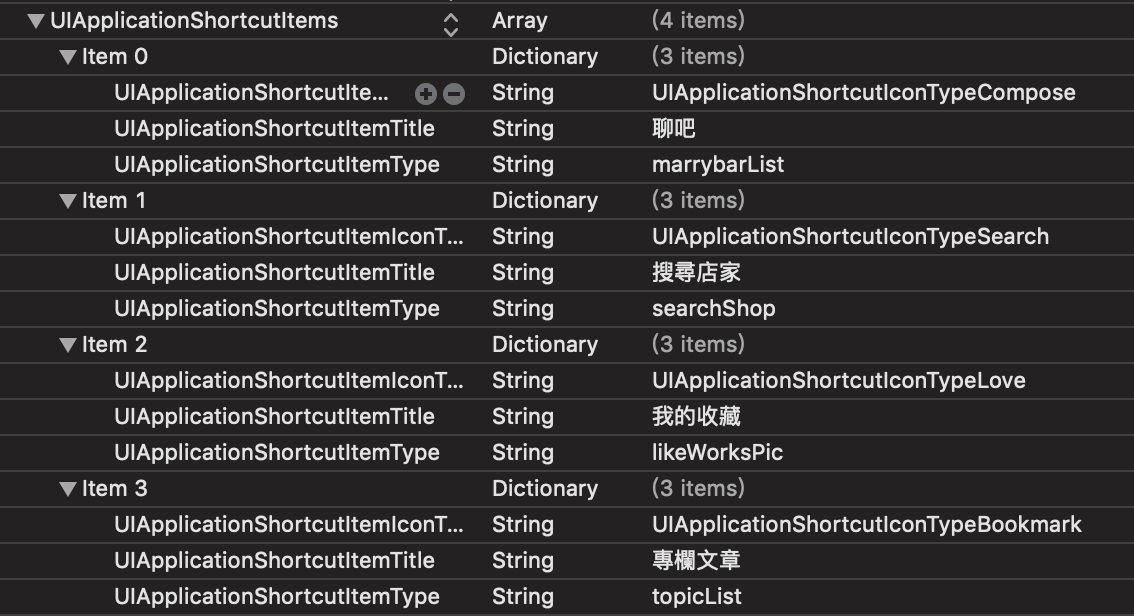
在 info.plist 中加入 UIApplicationShortcutItems 參數,類型 Array
並在其中新增選單項目(Dictionary),其中Key-Value的設定對應如下:
- [必填] UIApplicationShortcutItemType : 識別字串,在AppDelegate中做判斷使用
- [必填] UIApplicationShortcutItemTitle : 選項標題
- UIApplicationShortcutItemSubtitle : 選項子標題
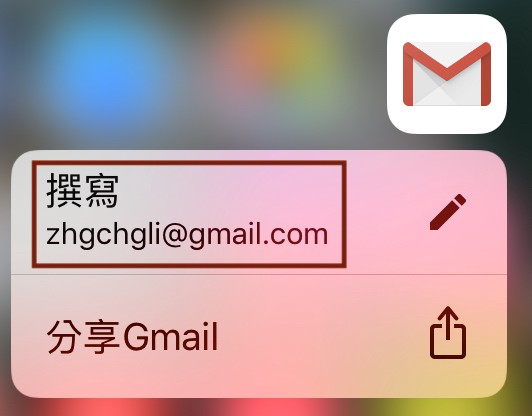
- UIApplicationShortcutItemIconType : 使用系統圖標
參考自 此篇文章
- UIApplicationShortcutItemIconFile : 使用自定義圖標(size:35x35,單色),與UIApplicationShortcutItemIconType擇ㄧ使用
- UIApplicationShortcutItemUserInfo : 更多附加資訊EX: [id:1]
我的設定如上圖
第二步
在AppDelegate中新增處理的 Function
1
2
3
4
5
6
7
8
9
10
11
12
13
14
15
16
17
func application(_ application: UIApplication, performActionFor shortcutItem: UIApplicationShortcutItem, completionHandler: @escaping (Bool) -> Void) {
    var info = shortcutItem.userInfo

    switch shortcutItem.type {
    case "searchShop":
      //
    case "topicList":
      //
    case "likeWorksPic":
      //
    case "marrybarList":
      //
    default:
        break
    }
    completionHandler(true)
}
完成!
結語
在APP中加入 3D Touch的功能並不難,對使用者來說也會覺得很貼心❤;可以搭配設計操作增加使用者體驗;但目前就只有上述兩個功能可做在加上iPhone 6s以下/iPad/iPhone XR都不支援3D Touch所以實際能做的功能又更少了,只能以輔助、增加體驗為主。
p.s.
如果你測的夠細會發現以上效果,在CollectionView滑動中圖有部分已經滑出畫面這時按壓就會出現以上情況😅
有任何問題及指教歡迎 與我聯絡 。
本文首次發表於 Medium ➡️ 前往查看
由 ZMediumToMarkdown 與 Medium-to-jekyll-starter 提供自動轉換與同步技術。
{:target="_blank"}](/assets/1ca246e27273/1*Nl6uz_dA2h13g7PtqSi6aw.gif)

{:target="_blank"}](/assets/1ca246e27273/1*S3dbMWNnTvhdt-NlxAQ2Tw.png)
