
iOS 跨平台帳號密碼整合,加強登入體驗
除 Sign in with Apple 也值得加入的功能
{:target="_blank"}](/assets/948ed34efa09/1*QRYrbCDXcDmUU9fK66YgAA.jpeg)
Photo by Dan Nelson
功能
在同時有網站又有 APP 的服務中最常遇到的問題就是使用者在網站登入註冊過,且有記憶密碼;但被引導安裝 APP 後,打開登入要從頭輸入帳號密碼非常不方便;此功能就是能將已存在在手機的帳號密碼自動帶入到與網站關聯的 APP 之中,加速使用者登入流程。
效果圖
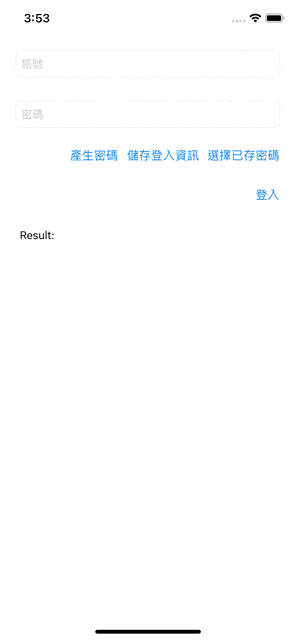
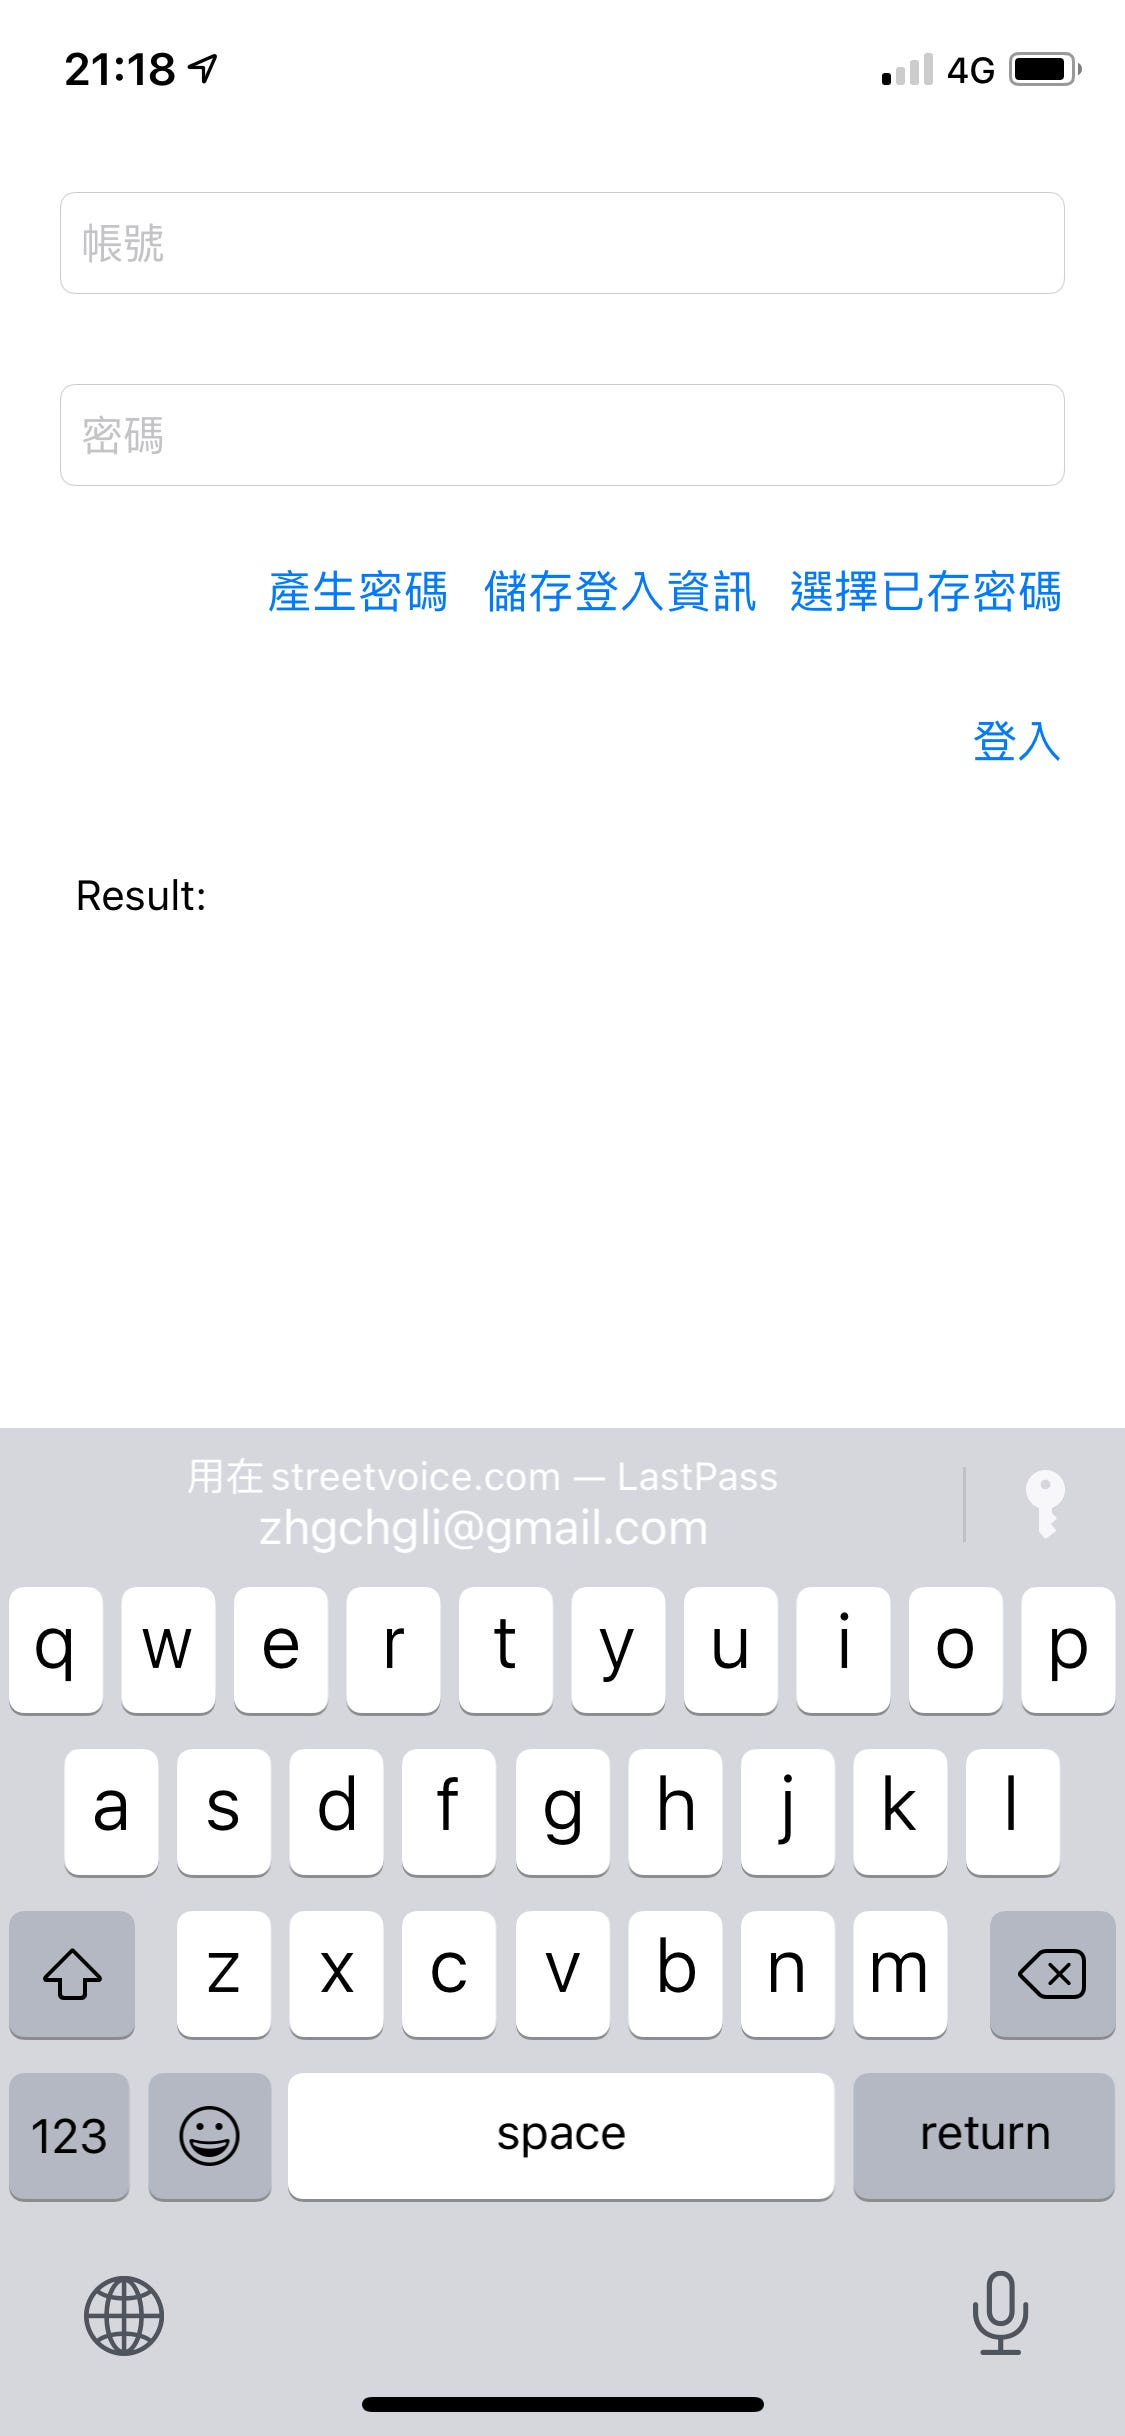
不囉唆,先上完成效果圖;第一眼看到可能會以為是 iOS ≥ 11 Password AutoFill 功能;不過請您仔細看,鍵盤並沒有跳出來,而且我是點擊「選擇已存密碼」按鈕才跳出帳號密碼選擇視窗的。
既然提到了 Password AutoFill 那就先讓我賣個關子,先介紹 Password AutoFill 和如何設置吧!
Password AutoFill
支援度:iOS ≥ 11
到如今已經 iOS 14 了,這個功能已經非常常見沒什麼特別的;在 APP 中的帳號密碼登入頁,叫出鍵盤輸入時可以快速選擇網站版服務的帳號密碼,選擇後就能自動帶入,快速登入!
那麼 APP 與 Web 之間是如何相認的呢?
Associated Domains!我們在 APP 中指定 Associated Domains 並在網站上上傳 apple-app-site-association 檔案,兩邊就能相認。
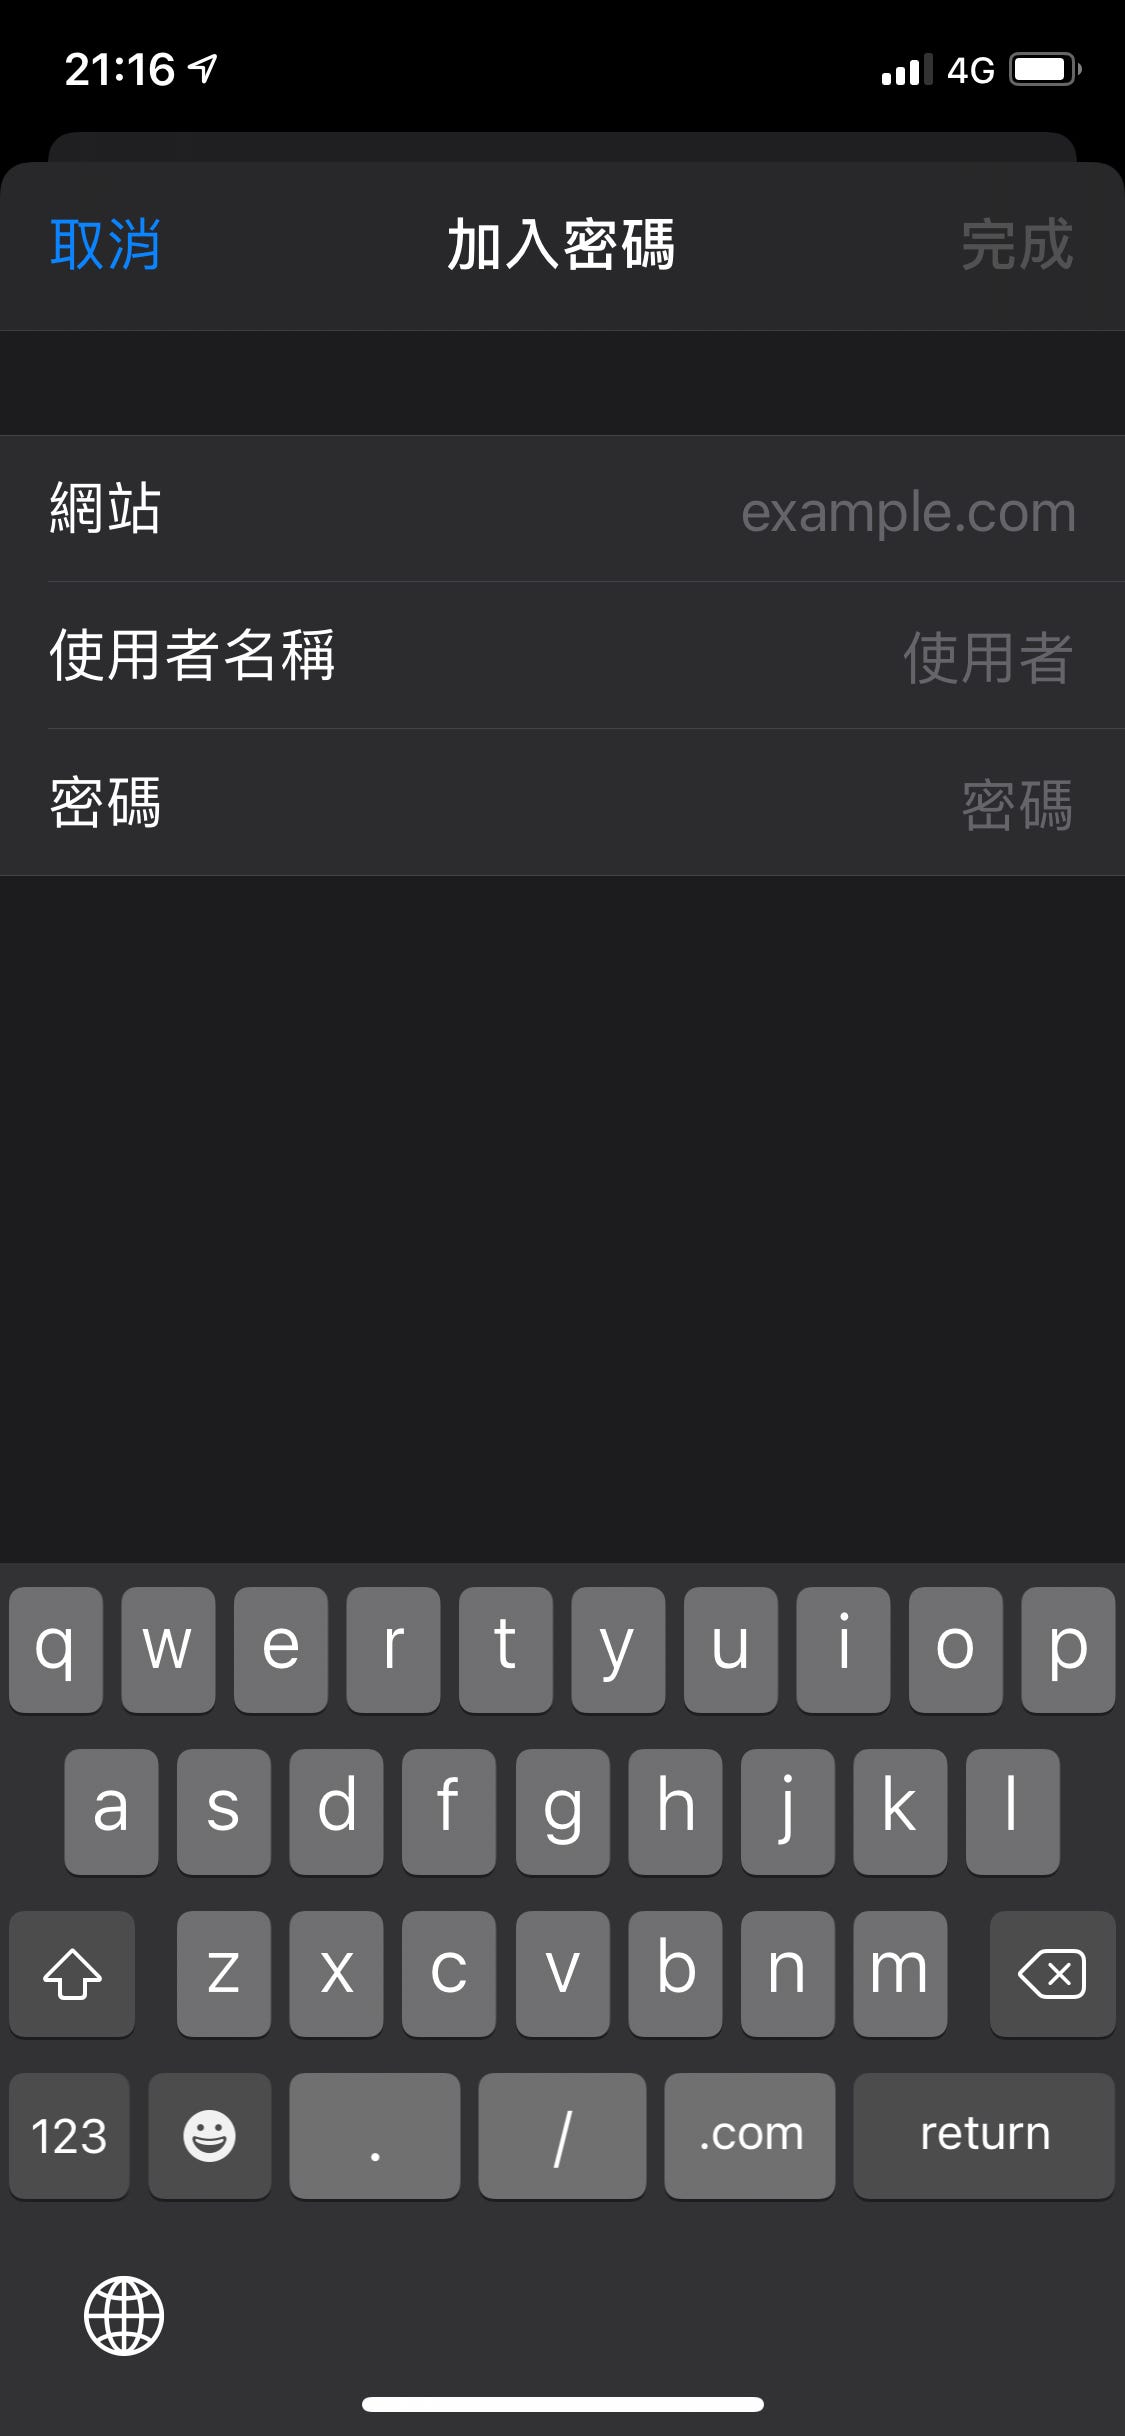
1.在專案設定中的「Signing & Capabilities」-> 左上「+ Capabilities」->「Associated Domains」
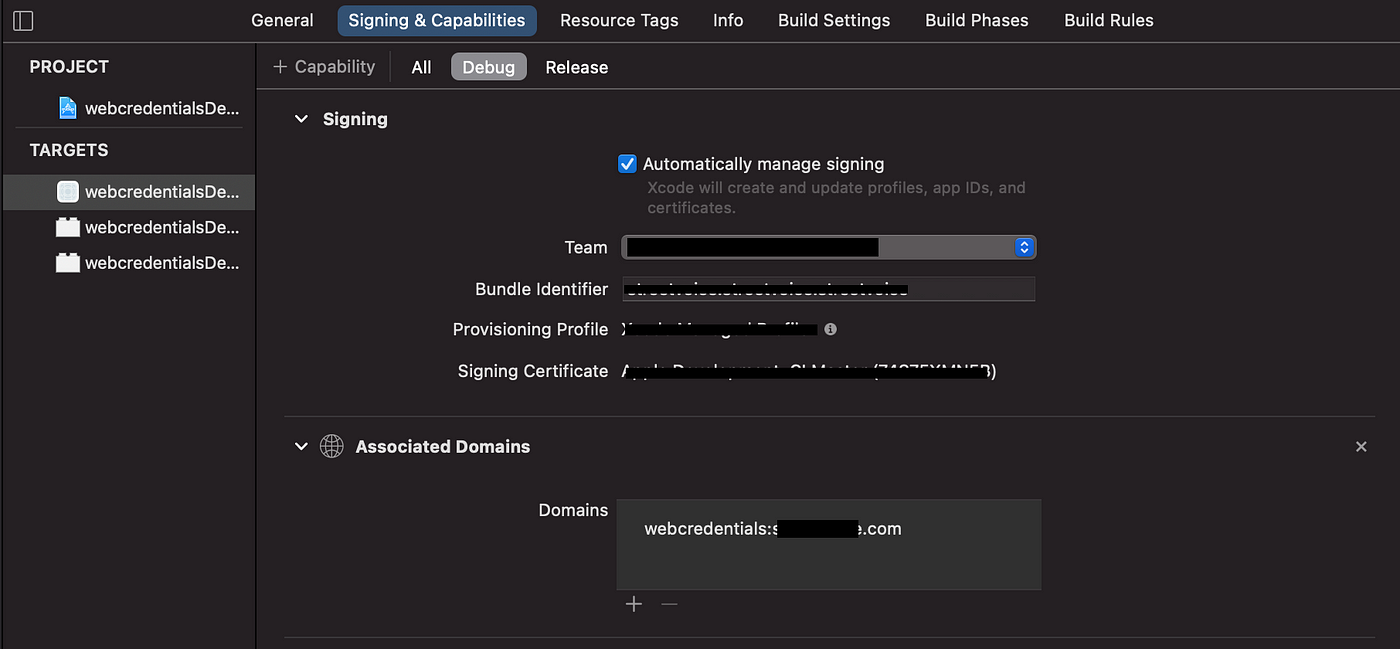
新增 webcredentials:你的網站域名 (ex: webcredentials:google.com )。
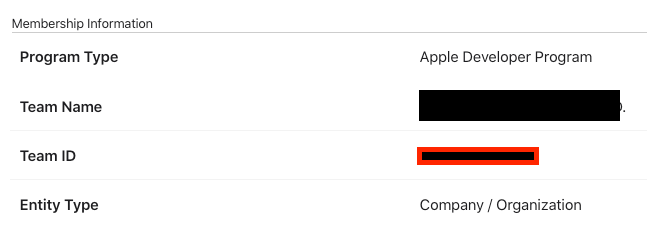
2.進入 蘋果開發者後台
在「 Membership 」Tab 地方記錄下「 Team ID 」
3.進入「Certificates, Identifiers & Profiles」->「Identifiers」-> 找到你的專案 -> 打開「Associated Domains」功能
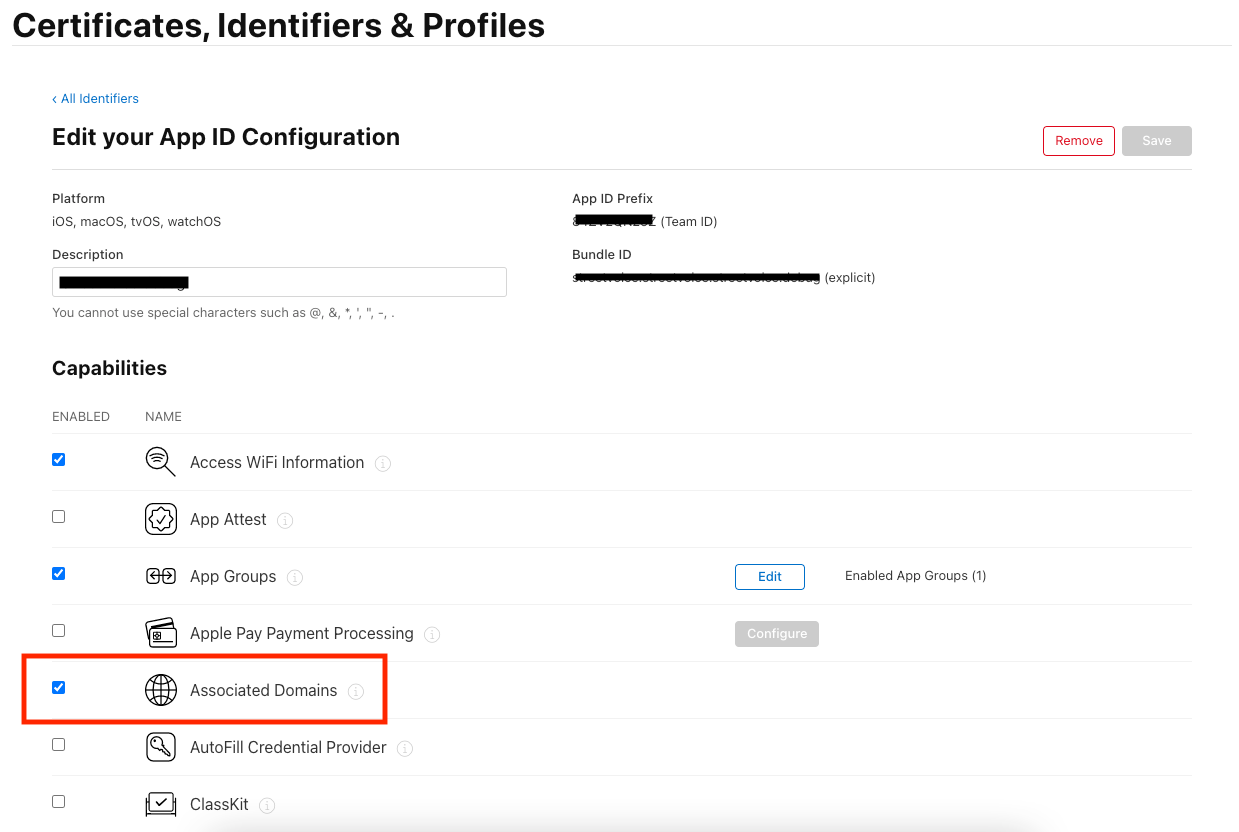
APP 端設定完成!
4.Web網站端設定
建立一個名為「 apple-app-site-association 」的檔案(無副檔名),使用文字編輯器編輯,並輸入以下內容:
1
2
3
4
5
6
7
{
  "webcredentials": {
    "apps": [
      "TeamID.BundleId"
    ]
  }
}
將 TeamID.BundleId 換成你的專案設定 (ex: TeamID = ABCD , BundleID = li.zhgchg.demoapp => ABCD.li.zhgchg.demoapp )
將此檔案上傳到網站 根目錄 或 /.well-known 目錄下,假設你的 webcredentials 網站域名 是設 google.com 則此檔案就要是 google.com/apple-app-site-association 或 google.com/.well-know/apple-app-site-association 有辦法存取到的。
補充:Subdomains
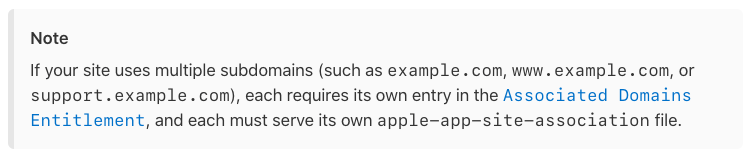
摘錄官方文件,如果是 subdomains 則都須列在 Associated Domains 之中。
Web 端設定完成!
補充:applinks
這邊有發現如果有設過 universal link applinks ,其實不用再多加 webcredentials 部分也能有效果;但我們還是照文件來吧,難保之後不會有其他問題。
回到程式
Code 部分,我們只需要將 TextField 設為 :
1
2
usernameTextField.textContentType = .username
passwordTextField.textContentType = .password
如果是新註冊,密碼確認欄位可使用:
1
repeatPasswordTextField.textContentType = .newPassword
這時候再重 Build & Run APP 後,在輸入帳號時鍵盤上方就會出現同個網站下已存密碼的選項了。
完成!
沒出現?
可能是沒打開自動填寫密碼功能(模擬器預設是關閉),請到「設定」->「密碼」->「自動填寫密碼」->打開「自動填寫密碼」。
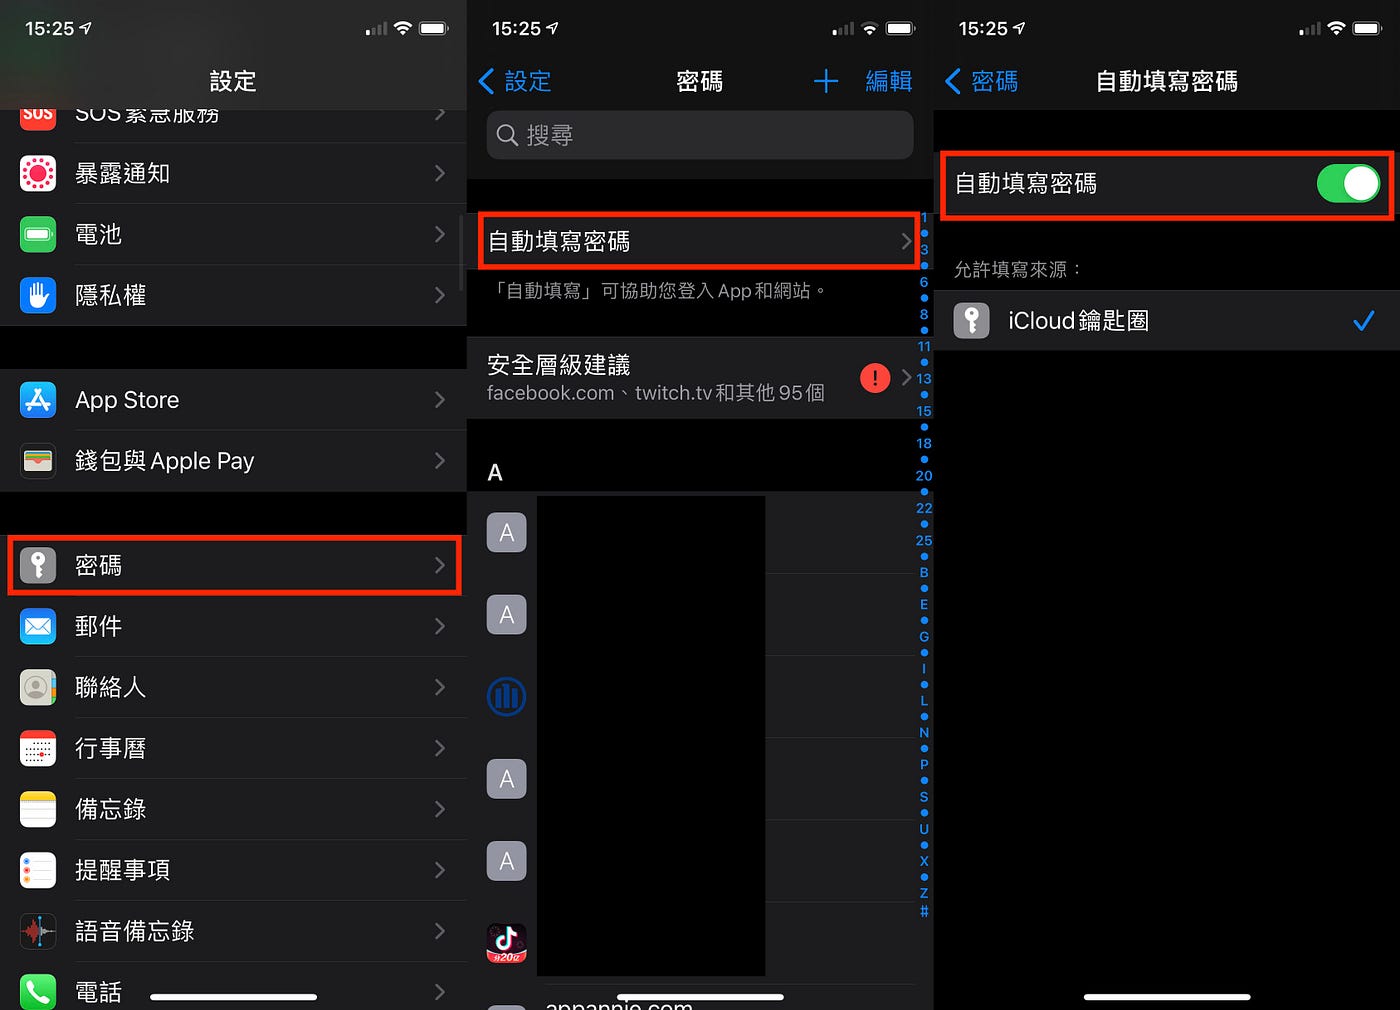
抑或是該網站沒有已存在的密碼,一樣可在「設定」->「密碼」-> 右上角「+ 新增」-> 新增。
進入主題
前菜 Password AutoFill 介紹完之後,再來進入本篇主題;如何達到效果圖中的效果呢。
Shared Web Credentials
始於 iOS 8.0 只是之前很少看到 APP 使用,早在 Password AutoFill 出來之前其實就能使用此 API 整合網站帳號密碼讓使用者快速選擇。
Shared Web Credentials 除了能讀取帳號密碼,還能新增帳號密碼、對已存的帳號密碼進行修改、刪除。
設定
⚠️ 設定部分一樣要設好 Associated Domains,同前述 Password AutoFill 設定。
所以可以說是 Password AutoFill 功能的加強版!!
因為一樣要先設好 Password AutoFill 需要的環境才能使用此「進階」功能。
讀取
讀取使用 SecRequestSharedWebCredential 方法進行操作:
1
2
3
4
5
6
7
8
9
10
11
12
13
14
15
16
17
18
19
20
21
22
SecRequestSharedWebCredential(nil, nil) { (credentials, error) in
  guard error == nil else {
    DispatchQueue.main.async {
      //alert error
    }
    return
  }

  guard CFArrayGetCount(credentials) > 0,
    let dict = unsafeBitCast(CFArrayGetValueAtIndex(credentials, 0), to: CFDictionary.self) as? Dictionary<String, String>,
    let account = dict[kSecAttrAccount as String],
    let password = dict[kSecSharedPassword as String] else {
      DispatchQueue.main.async {
        //alert error
      }
      return
    }

    DispatchQueue.main.async {
      //fill account,password to textfield
    }
}
SecRequestSharedWebCredential(fqdn, account, completionHandler)
- fqdn 如果有多個
webcredentialsdomain 可以指定某一個,或使用 null 不指定 - account 指定要查某一個帳號,使用 null 不指定
效果圖。(你可能有發現跟開始的效果圖不一樣)
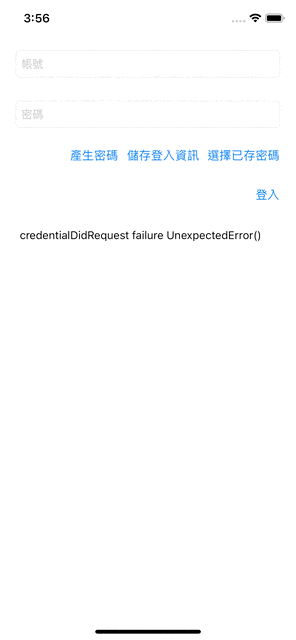
⚠️ 因為此讀取方法已在 iOS 14 被標示 Deprecated!
⚠️ 因為此讀取方法已在 iOS 14 被標示 Deprecated!
⚠️ 因為此讀取方法已在 iOS 14 被標示 Deprecated!
"Use ASAuthorizationController to make an ASAuthorizationPasswordRequest (AuthenticationServices framework)"
此方法僅適用 iOS 8 ~ iOS 14,iOS 13 之後可改用同 Sign in with Apple 的 API — 「 AuthenticationServices 」
AuthenticationServices 讀取方式
支援度 iOS ≥ 13
1
2
3
4
5
6
7
8
9
10
11
12
13
14
15
16
17
18
19
20
21
22
23
24
25
26
import AuthenticationServices

class ViewController: UIViewController {
  override func viewDidLoad() {
      super.viewDidLoad()
      //...
      let request: ASAuthorizationPasswordRequest = ASAuthorizationPasswordProvider().createRequest()
      let controller = ASAuthorizationController(authorizationRequests: [request])
      controller.delegate = self
      controller.performRequests()
      //...
  }
}

extension ViewController: ASAuthorizationControllerDelegate {
    func authorizationController(controller: ASAuthorizationController, didCompleteWithAuthorization authorization: ASAuthorization) {

        if let credential = authorization.credential as? ASPasswordCredential {
          // fill credential.user, credential.password to textfield
        }
        // else if as? ASAuthorizationAppleIDCredential... sign in with apple
    }
    func authorizationController(controller: ASAuthorizationController, didCompleteWithError error: Error) {
        // alert error
    }
}
效果圖,可以看到新的做法在流程上、顯示上都能跟 Sign in with Apple 整合得更好。
⚠️ 此登入無法取代 Sign in with Apple(兩個是不同東西)。
寫入帳號密碼到「密碼」
被 Deprecated 的只有讀取的部分,新增、刪除、編輯的部分都還是照舊能用。
新增、刪除、編輯的部分使用 SecAddSharedWebCredential 進行操作。
1
2
3
4
5
6
7
8
9
SecAddSharedWebCredential(domain as CFString, account as CFString, password as CFString?) { (error) in
  DispatchQueue.main.async {
    guard error == nil else {
      // alert error
      return
    }
    // alert success
  }
}
SecAddSharedWebCredential(fqdn, account, password, completionHandler)
- fqdn 可隨意指定要存入的 domain 不一定要在
webcredentials中 - account 指定要新增、修改、刪除的帳號
- 如果要刪除資料則將 password 帶入
nil - 處理邏輯: - account 存在&有帶入 password = 修改 password - account 存在&password 帶入 nil = 從 domain 刪除 account, password - account 不存在&有帶入 password = 新增 account, password 到 domain
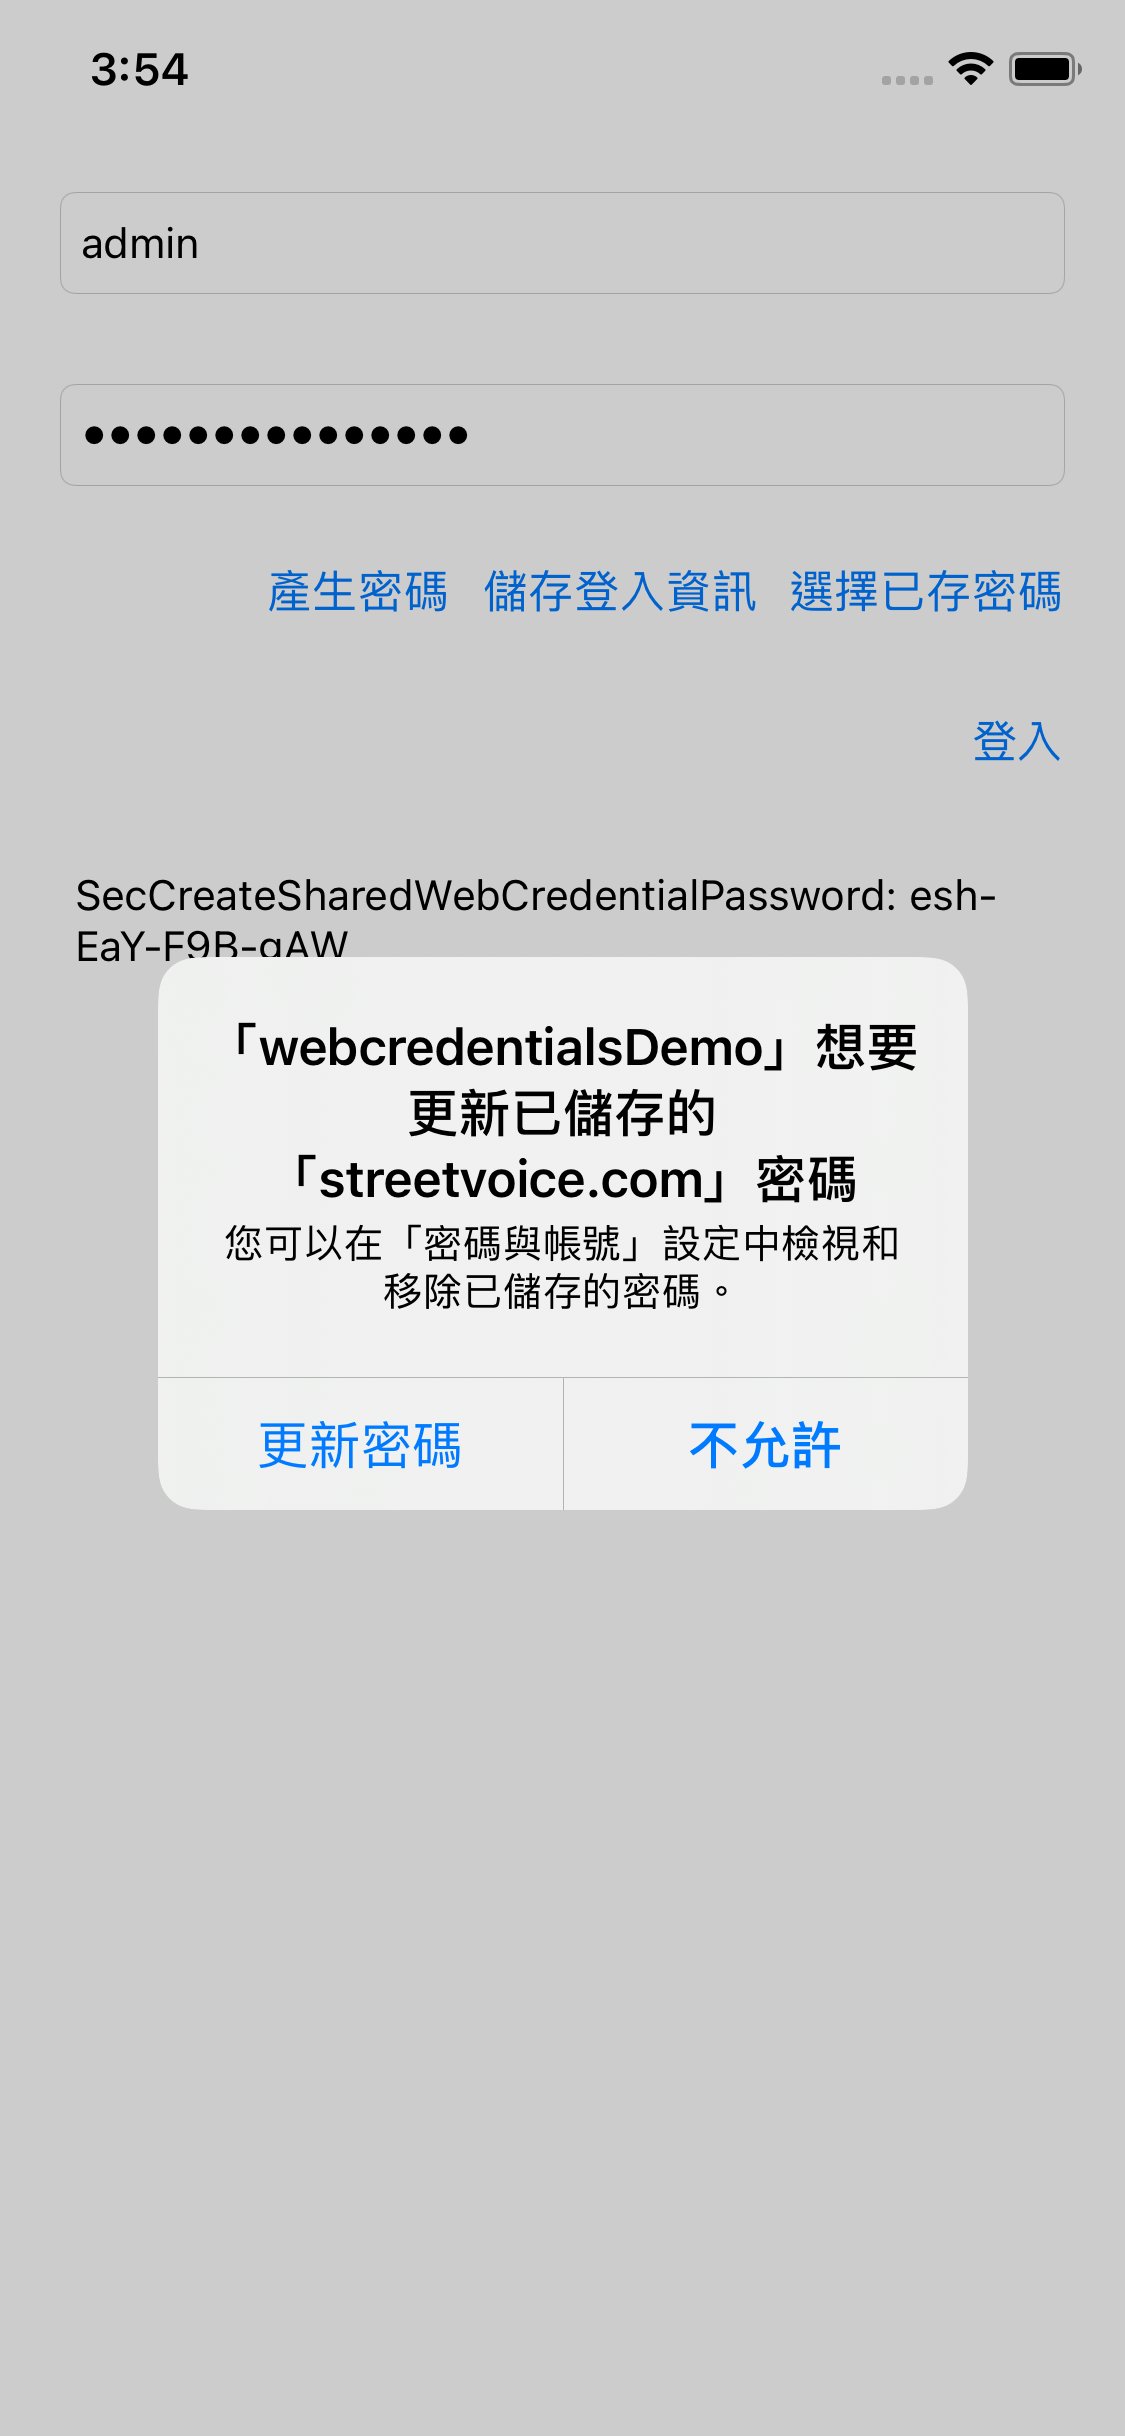
⚠️ 另外也不是能讓你在背景偷修改的,每次修改都會跳出提示框提示使用者,使用者按「更新密碼」才會真的修改資料。
密碼產生器
最後一個小功能,密碼產生器。
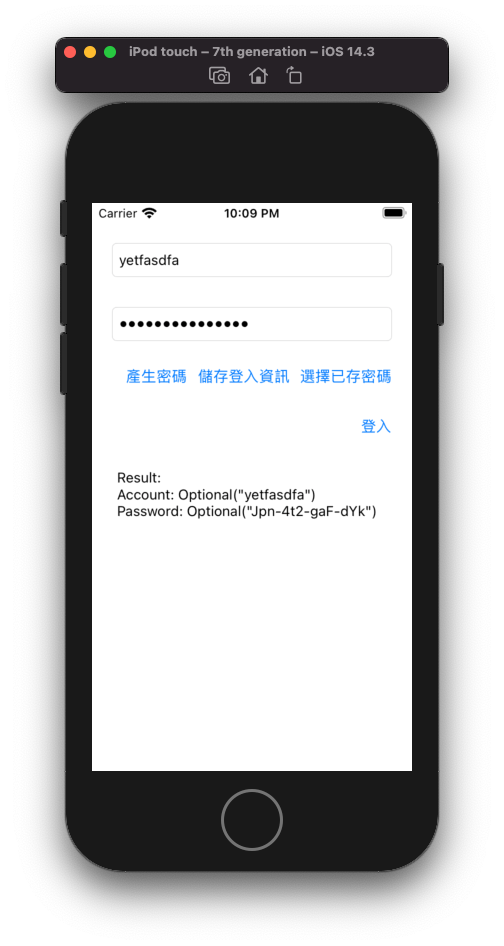
使用 SecCreateSharedWebCredentialPassword() 進行操作。
1
let password = SecCreateSharedWebCredentialPassword() as String? ?? ""

產生器產生出來的 Password 由英文大小寫及數字並使用「-」組成 (ex: Jpn-4t2-gaF-dYk)。
完整測試專案下載
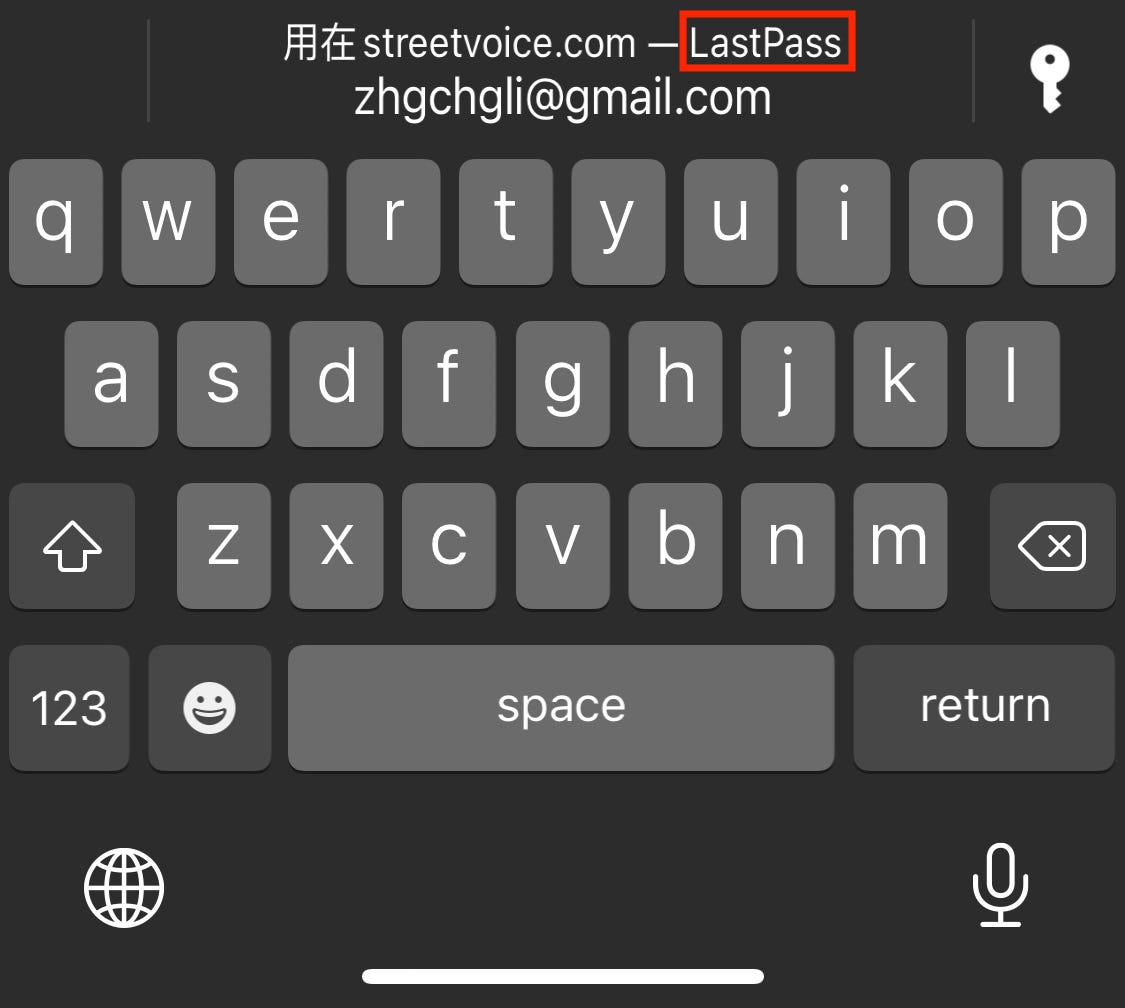
美中不足
如果有使用第三方密碼管理工具(EX: onepass、lastpass)的朋友可能會發現,如果是鍵盤的 Password AutoFill 能支援顯示&輸入,但是在 AuthenticationServices 或 SecRequestSharedWebCredential 當中都沒有顯示出來;不確定有沒有辦法達成這個需求。
結束
感謝大家閱讀,也感謝 saiday 、街聲讓我知道有這個功能 XD。
還有 XCode ≥ 12.5 模擬器新增錄影,並支援儲存成 GIF 功能太好用啦!
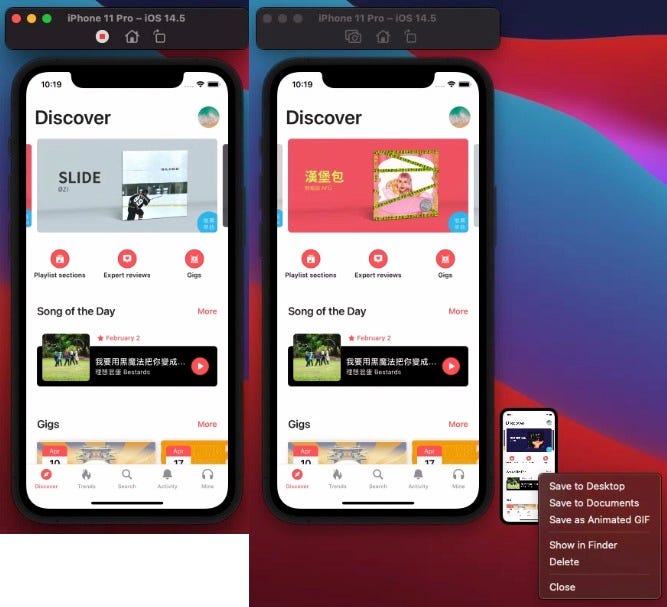
在模擬器上按「Command」+「R」開始錄影,按一下紅點停止錄影;在右下角滑出的預覽圖上按「右鍵」->「Save as Animated GIF」即可存成 GIF 然後直接貼到文章內!
有任何問題及指教歡迎 與我聯絡 。
===
View the English version of this article here.
本文首次發表於 Medium ➡️ 前往查看