
Vision Introduction — Automatic Face Detection and Cropping for App Avatar Upload (Swift)
Practical Application of Vision
[2024/08/13 Update]
- Please refer to the new article and new API: 「 iOS Vision framework x WWDC 24 Discover Swift enhancements in the Vision framework Session 」
Without further ado, here is a finished product image:

Before Optimization V.S After Optimization — 結婚吧APP
Recently, iOS 12 was released with an update, introducing the new CoreML machine learning framework. It caught my attention, and I found it quite interesting, so I started thinking about where it could be applied in our current product.
CoreML Preview Article Now Published: Automatically Predict Article Categories Using Machine Learning, Including Training the Model Yourself
CoreML provides interfaces for training and integrating machine learning models for text and images into apps. My original idea was to use CoreML for face recognition to solve the issue of heads or faces being cut off in cropped images within the app. As shown in the left image above, if the face appears near the edge, scaling and cropping can easily cause the face to be incomplete.
After some online research, I realized my knowledge was limited. This feature was already released in iOS 11: the “Vision” framework, which supports text detection, face detection, image matching, QR code detection, object tracking, and more.
Here we use the face detection feature, optimized as shown in the image on the right; it locates the face and crops the image centered on it.
Let’s get started:
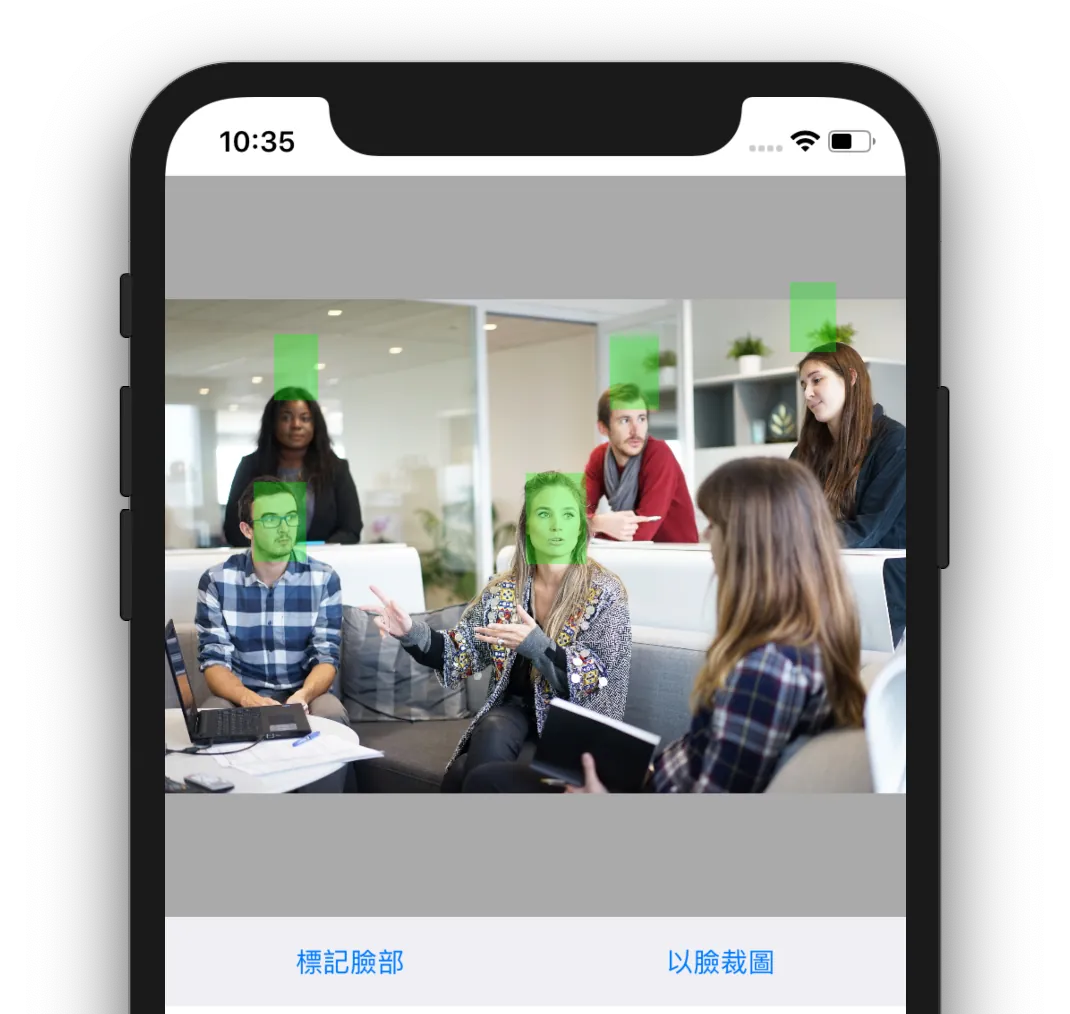
First, let’s create a function that can mark face positions to get a basic understanding of how to use Vision.

Demo APP
As shown in the completed image above, it can mark the location of faces in the photo.
p.s Only the “face” can be marked; the entire head including hair is not allowed 😅
This code is mainly divided into two parts. The first part addresses the issue of blank spaces when the original image size is scaled to fit into the ImageView. Simply put, we want the ImageView to match the Image’s size exactly. If we insert the image directly, the layout will shift as shown below.
You might think of simply changing the ContentMode to fill, fit, or redraw, but this will cause distortion or parts of the image to be cut off.
let ratio = UIScreen.main.bounds.size.width
// Here, UIImageView is set with zero left and right alignment and an aspect ratio of 1:1

let sourceImage = UIImage(named: "Demo2")?.kf.resize(to: CGSize(width: ratio, height: CGFloat.leastNonzeroMagnitude), for: .aspectFill)
// Use KingFisher's image resizing feature, width as the base, height flexible

imageView.contentMode = .redraw
// Set contentMode to redraw to fill

imageView.image = sourceImage
// Assign the image

imageViewConstraints.constant = (ratio - (sourceImage?.size.height ?? 0))
imageView.layoutIfNeeded()
imageView.sizeToFit()
// Adjust imageView constraints here, see full example at the end
This completes the processing for the image.
The cropping part uses Kingfisher to assist us, but you can replace it with other libraries or custom methods
Part Two: Getting Straight to the Code
if #available(iOS 11.0, *) {
    // Supported only from iOS 11 onwards
    let completionHandle: VNRequestCompletionHandler = { request, error in
        if let faceObservations = request.results as? [VNFaceObservation] {
            // Detected faces

            DispatchQueue.main.async {
                // Update UIView on the main thread
                let size = self.imageView.frame.size

                faceObservations.forEach({ (faceObservation) in
                    // Coordinate system conversion
                    let translate = CGAffineTransform.identity.scaledBy(x: size.width, y: size.height)
                    let transform = CGAffineTransform(scaleX: 1, y: -1).translatedBy(x: 0, y: -size.height)
                    let transRect =  faceObservation.boundingBox.applying(translate).applying(transform)

                    let markerView = UIView(frame: transRect)
                    markerView.backgroundColor = UIColor.init(red: 0/255, green: 255/255, blue: 0/255, alpha: 0.3)
                    self.imageView.addSubview(markerView)
                })
            }
        } else {
            print("No faces detected")
        }
    }

    // Detection request
    let baseRequest = VNDetectFaceRectanglesRequest(completionHandler: completionHandle)
    let faceHandle = VNImageRequestHandler(ciImage: ciImage, options: [:])
    DispatchQueue.global().async {
        // Detection takes time, so run on a background thread to avoid UI blocking
        do{
            try faceHandle.perform([baseRequest])
        }catch{
            print("Throws: \(error)")
        }
    }

} else {
    //
    print("Not supported")
}
The main point to note is the coordinate system conversion; the detected results are in the original coordinates of the Image. We need to convert them to the actual coordinates within the enclosing ImageView to use them correctly.
Next, let’s move on to the main part — cropping the profile picture according to the face position accurately
let ratio = UIScreen.main.bounds.size.width
// Here, UIImageView is set to align left and right at 0, with an aspect ratio of 1:1. See the full example at the end.

let sourceImage = UIImage(named: "Demo")

imageView.contentMode = .scaleAspectFill
// Use scaleAspectFill mode to fill

imageView.image = sourceImage
// Directly assign the original image, we will manipulate it later

if let image = sourceImage, #available(iOS 11.0, *), let ciImage = CIImage(image: image) {
    let completionHandle: VNRequestCompletionHandler = { request, error in
        if request.results?.count == 1, let faceObservation = request.results?.first as? VNFaceObservation {
            // One face detected
            let size = CGSize(width: ratio, height: ratio)

            let translate = CGAffineTransform.identity.scaledBy(x: size.width, y: size.height)
            let transform = CGAffineTransform(scaleX: 1, y: -1).translatedBy(x: 0, y: -size.height)
            let finalRect = faceObservation.boundingBox.applying(translate).applying(transform)

            let center = CGPoint(x: (finalRect.origin.x + finalRect.width/2 - size.width/2), y: (finalRect.origin.y + finalRect.height/2 - size.height/2))
            // Calculate the center point of the face area

            let newImage = image.kf.resize(to: size, for: .aspectFill).kf.crop(to: size, anchorOn: center)
            // Crop the image based on the center point

            DispatchQueue.main.async {
                // Update UIView on the main thread
                self.imageView.image = newImage
            }
        } else {
            print("Detected multiple faces or no face detected")
        }
    }
    let baseRequest = VNDetectFaceRectanglesRequest(completionHandler: completionHandle)
    let faceHandle = VNImageRequestHandler(ciImage: ciImage, options: [:])
    DispatchQueue.global().async {
        do {
            try faceHandle.perform([baseRequest])
        } catch {
            print("Throws: \(error)")
        }
    }
} else {
    print("Not supported")
}
The principle is similar to marking the face position. The difference is that the avatar has a fixed size (e.g., 300x300), so we skip the first part where the Image needs to fit the ImageView.
Another difference is that we need to calculate the center point of the face area and use this center point as the basis for cropping the image.
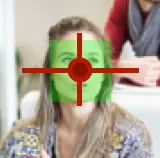
The red dot marks the center point of the face area
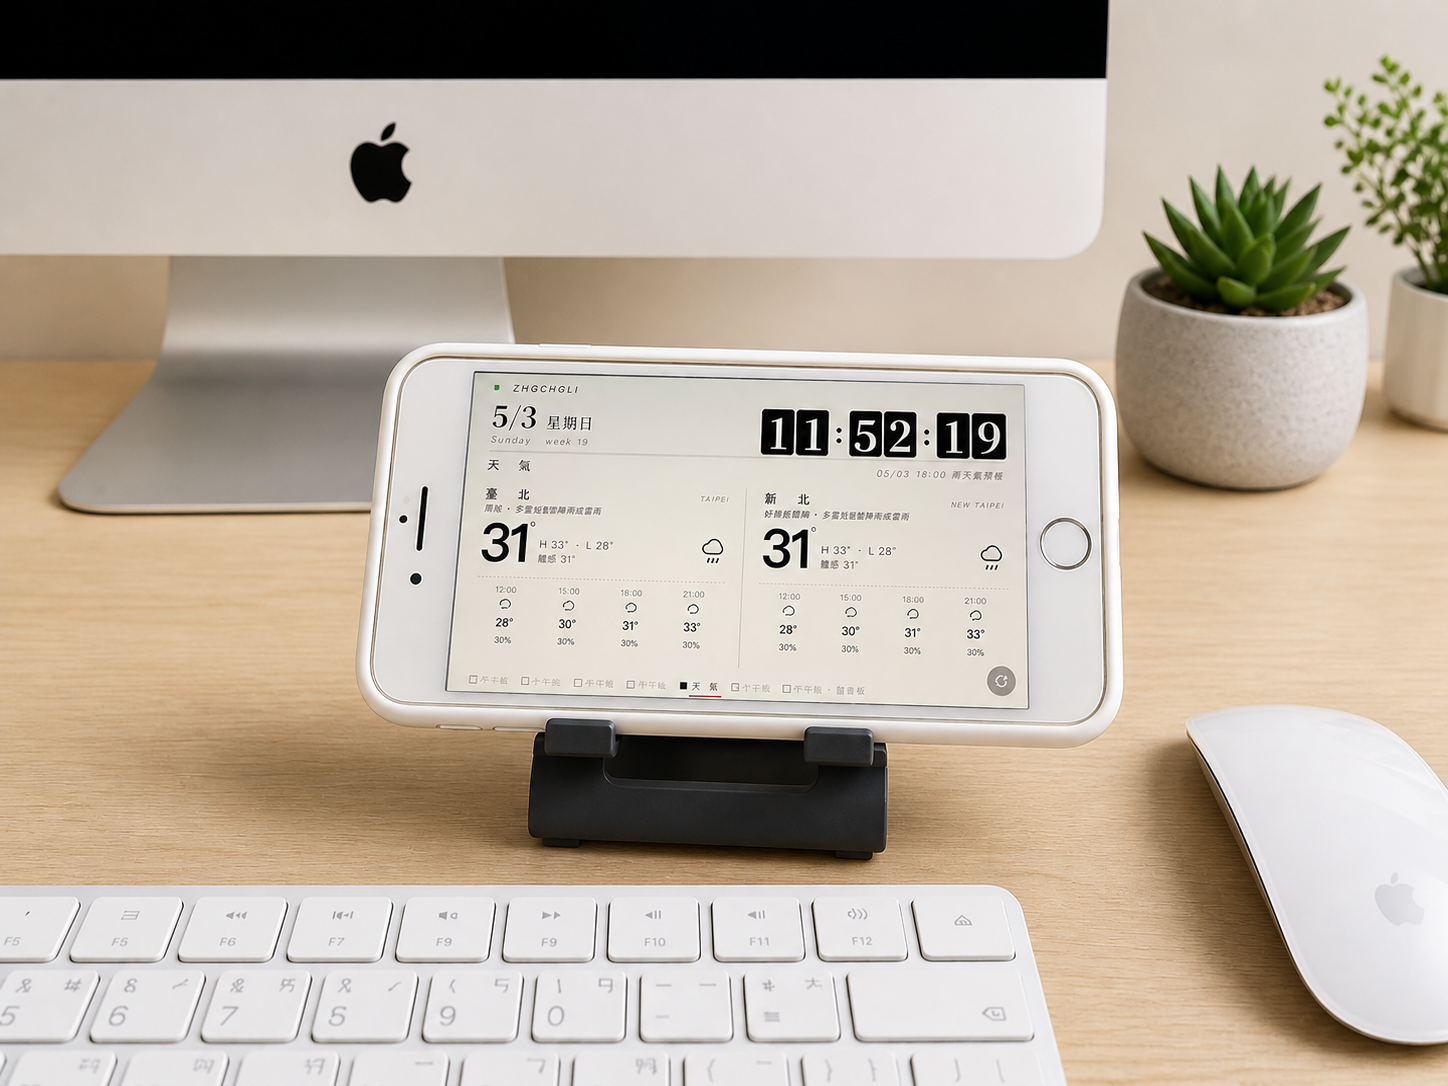
Final result image:

The moment just before panning is the original image position
Complete APP Example:
The code has been uploaded to Github: Click here

Comments